• Home
  • About

julia chews the fat

julia chews the fat

Category Archives: The Basics

Getting to Cake

14 Thursday May 2015

Posted by julia chews the fat in Breakfast & Brunch, Cooking For Your Peeps, Sweet Tooth, The Basics, Vegetarian

≈ Leave a comment

Blueberry-lined cake tin

I’ve fixated on these photos and this blank page for longer than I’m proud to admit. It’s been an uncomfortable dance – coming back to the page at least a half dozen times, starting, stopping, flipping sentences, deleting whole paragraphs, trying the whole thing over from scratch. At one point, I even poured myself a glass of bourbon, thinking that if nothing else was helping, it might. (It didn’t. I got heartburn instead). At that point, I started wishing I had a typewriter – not because I thought it would solve my writing issues, but because I fantasized about ripping the page from the machine’s roller, crumpling it into a ball, and tossing it unceremoniously into the trash can, along with my frustrations. A bit of visceral, paper-crunching therapy would be nice right now. Somehow, pressing down aggressively on the backspace button isn’t half as satisfying. But, this is real life, not a smoky film noir, so I’ll have to content myself with the sticky backspace button on my I’m-old-and-I-almost-died-but-haha-I’m-not-dead-yet-so-you’re-still-stuck-with-me-you-cheap-bastard! laptop. My only solace is knowing that we’re this much closer to getting to cake. Just a few more words and we’re there…

In the simplest of terms, what I’d like to tell you about this cake is this:

1) It’s drop-dead delicious
2) It’s absurdly easy to make
3) Everyone who tastes it, without fault, will ask for seconds (or thirds, depending)

I think these three points form a pretty solid endorsement, especially when it comes to baked sweets, which often get a bad rap for being fussy. It’s a fail-proof, fool-proof dessert, capable of making anybody’s palate swoon. The batter bakes up fluffy and light, and the blueberries become nice and syrupy, crowning the top in a smooth, indigo-tinged layer. You’ll be grateful to know about this cake the moment you get invited to a last-minute dinner party, or picnic, or office gathering, and you’re asked to bring the dessert!! when really you were hoping they’d ask you to bring the wine and cheese. It’s a cake that comes together really quickly and without much mess, whether you’re a dessert-making novice or a baking pro who’s just feeling a little lazy that day. Once you lay that beautiful thing in front of your dining companions, the pieces will glide effortlessly, one by one, off the serving plate until all that’s left are a smattering of crumbs, blue-tinged lips and happy bellies.

—–

Quick note on the recipe: I’m still using frozen blueberries right now, since we’re not in blueberry season in Quebec yet, but the recipe works with either – fresh or frozen. It’s entirely up to you.

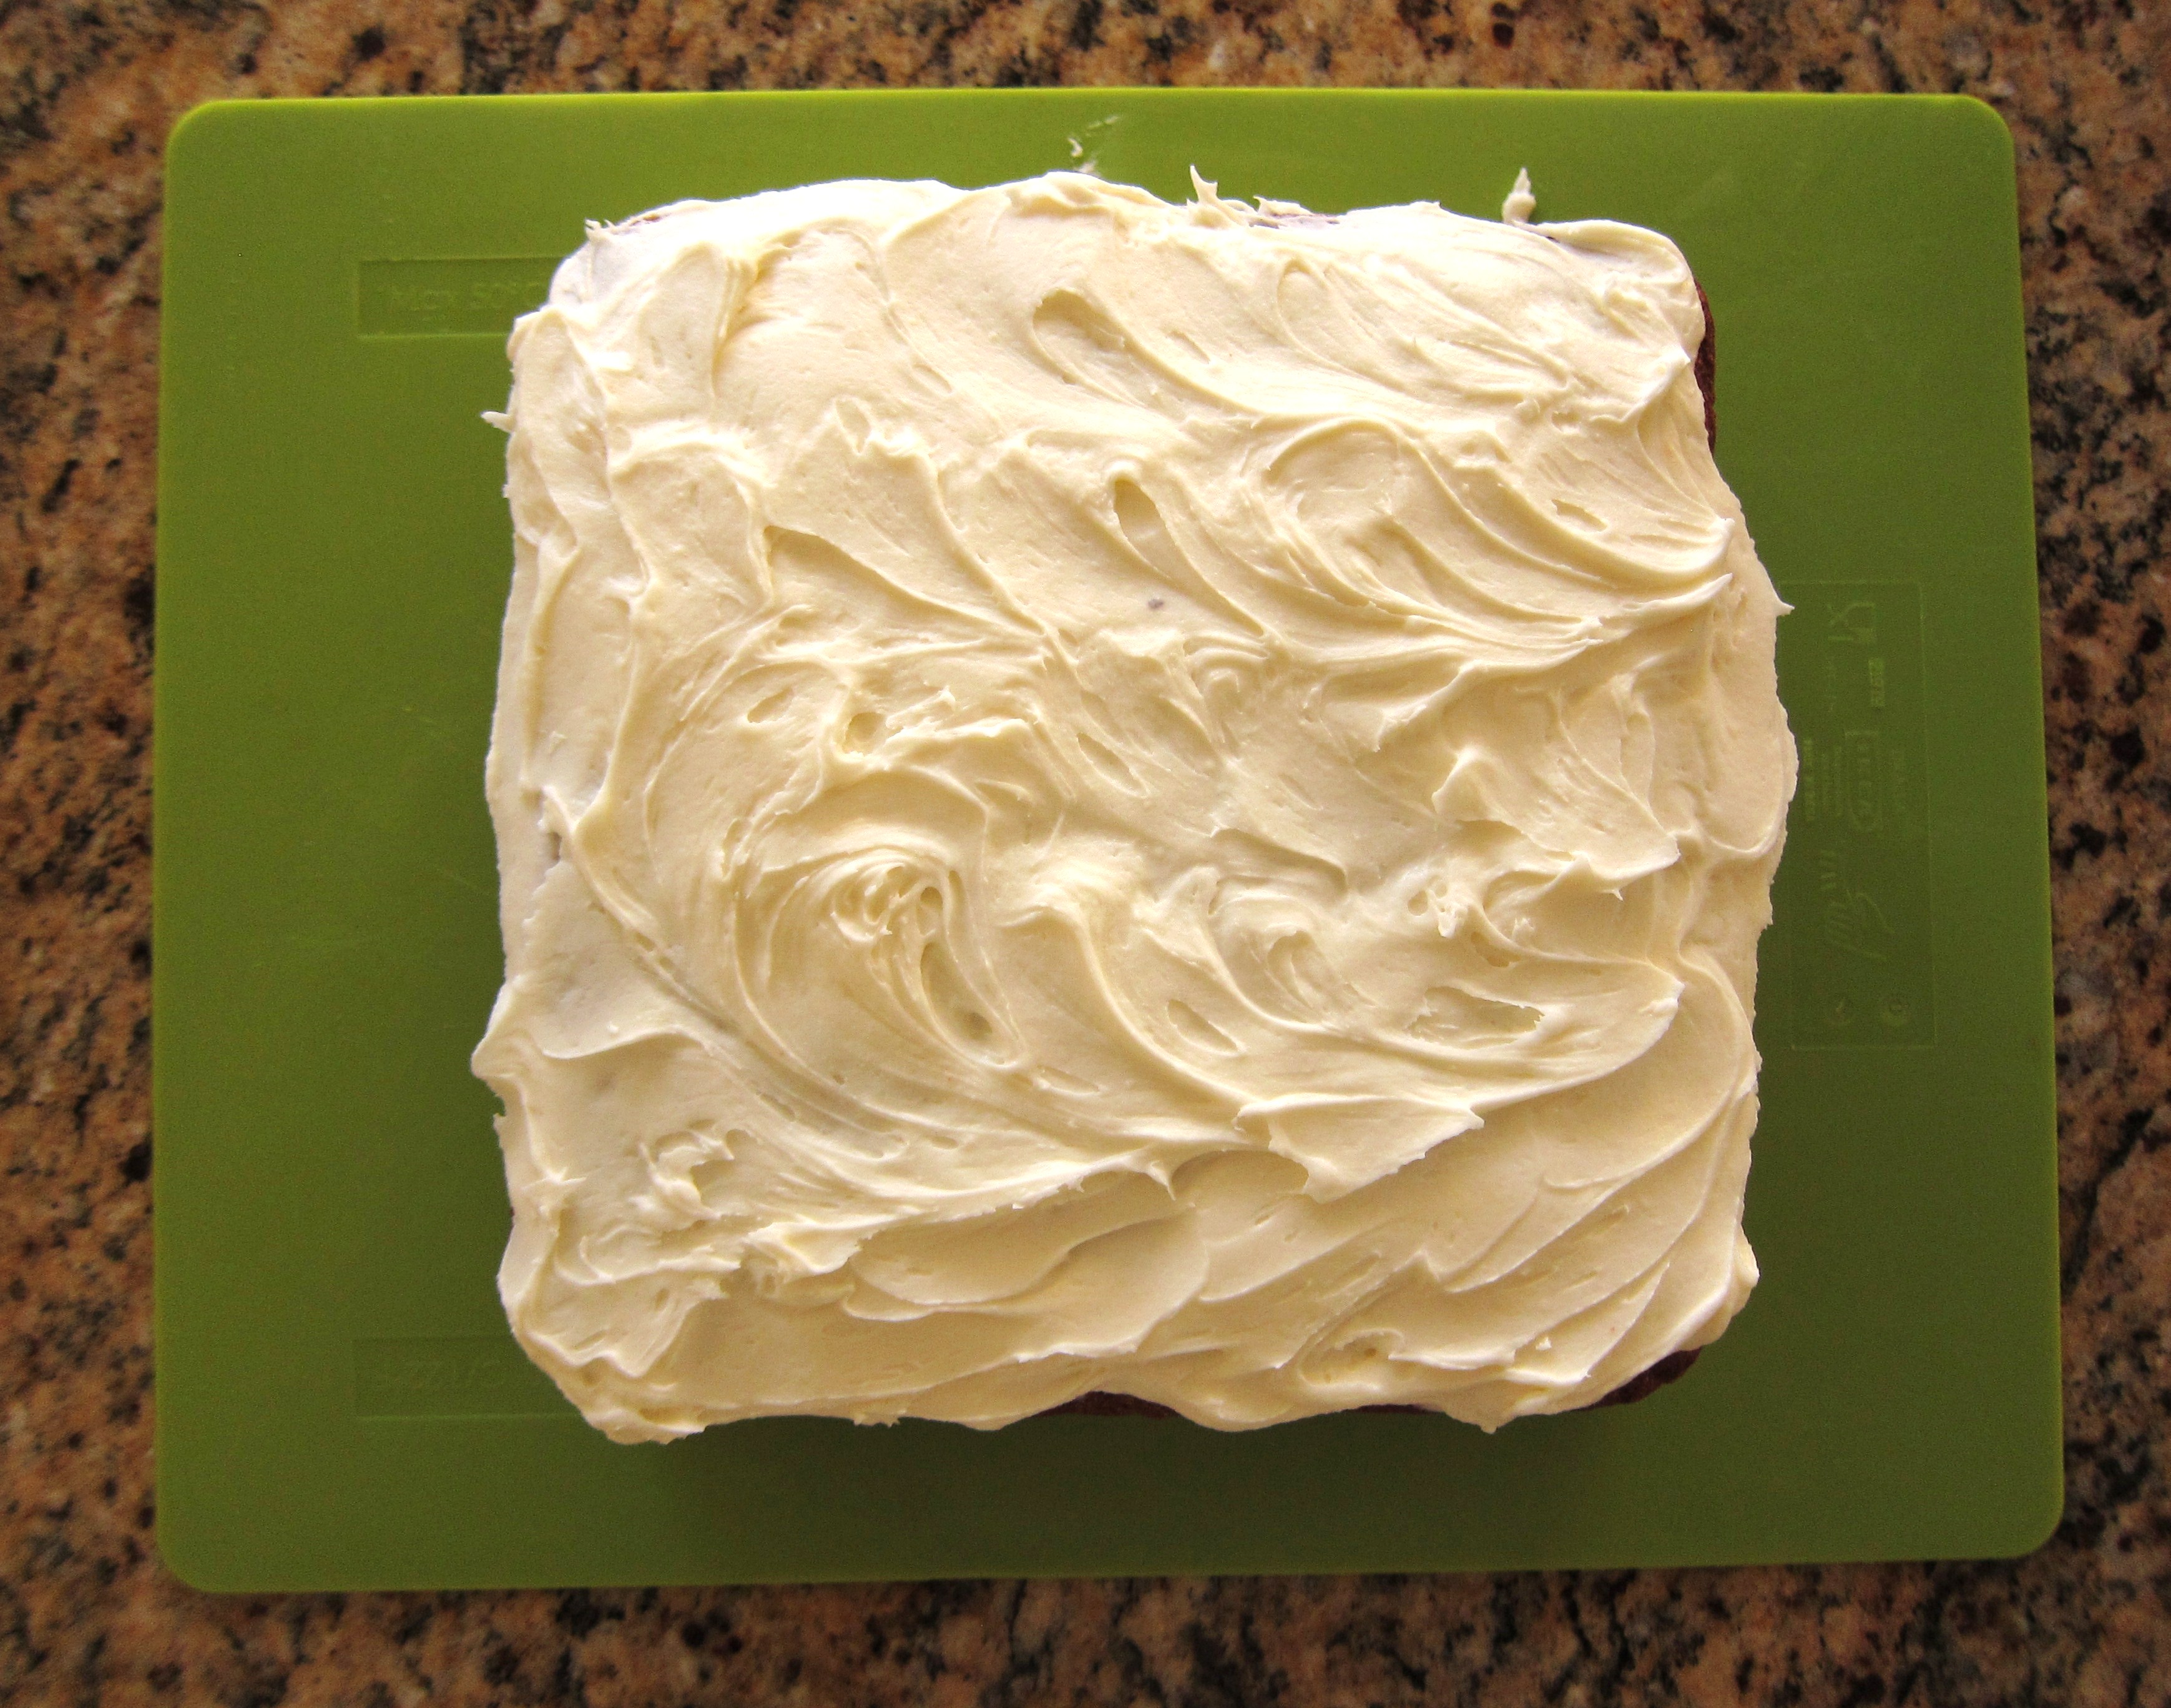
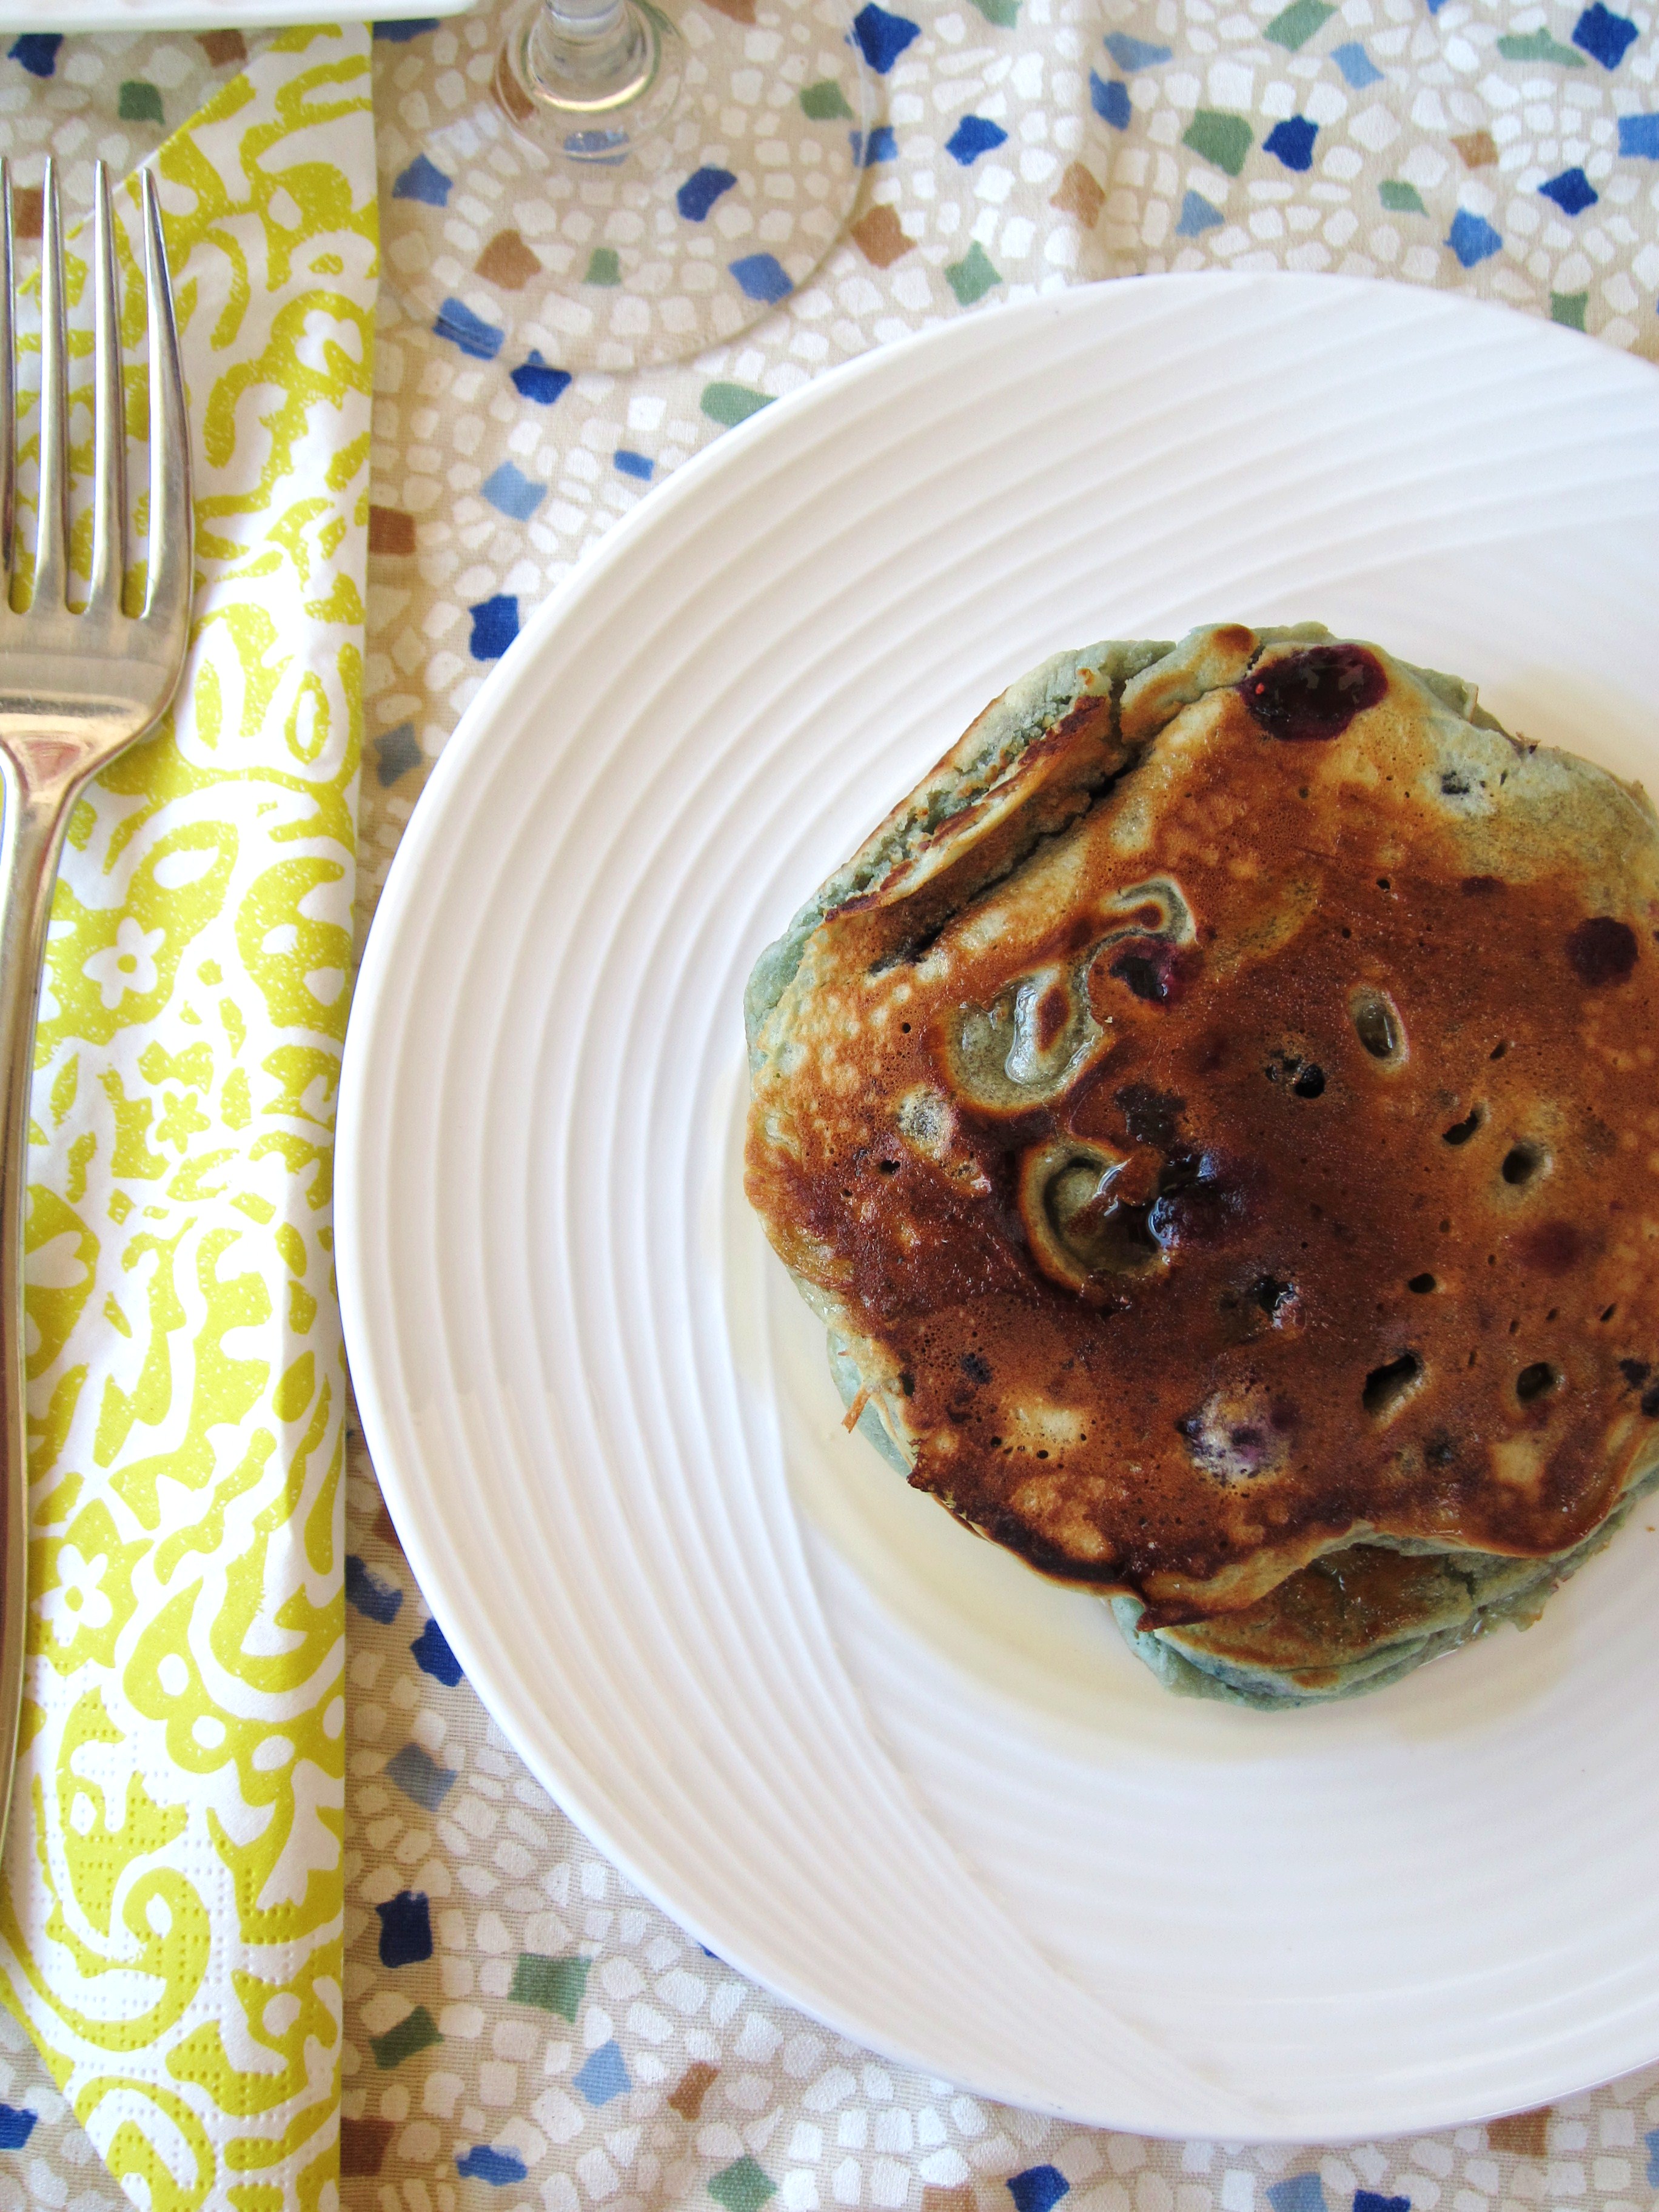
Quick note on the pictures: for the final result, you’ll have to use your imagination – the cake got flipped, berry-side up, onto a serving plate much later in the day and the camera wasn’t nearby. Which is ok, because darting for the camera might have ruined the moment. To give you an idea, it will more or less look like this. When you flip the cake, remember to be bold – lay a serving plate on top of the pan, keep one hand on the plate and one hand on the bottom of the cake pan, and flip, confidently and swiftly, in one go. If you’re worried about the berries sticking to the bottom of the pan, don’t fret – the butter at the bottom of the pan will ensure that the cake slips out of the pan without incident.

Now go forth and make cake!

Blueberry Upside Down Cake – adapted from Canadian Living Magazine

  • ¼ cup melted butter
  • ½ cup brown sugar
  • 2 cups blueberries (fresh or frozen)
  • 1 Tbsp lemon juice
  • ½ cup butter
  • ¾ cup granulated sugar
  • 1 egg
  • 1 tsp vanilla
  • 1 ⅓ cups all-purpose flour
  • 2 tsp baking powder
  • ¼ tsp salt
  • 1 tsp cinnamon (optional)
  • ¾ cup milk

1) Preheat the oven to 350°F.

2) In 9-inch square cake pan, combine melted butter and brown sugar; spread evenly on bottom. Spread blueberries evenly over top. Sprinkle with lemon juice.

3) Cream butter; gradually add sugar, beating until light. Beat in egg and vanilla. Sift or mix together flour, baking powder, salt and cinnamon if using. Add dry ingredients alternately with milk to creamed mixture.

4) Spread batter evenly over blueberry layer.

5) Bake in preheated oven for 45 to 50 minutes or until toothpick inserted in centre comes out clean. Let cool 10 minutes in pan, then turn out on to large flat plate.

Spreading the batter

Batter spread

Batter - detail

Baked cake

Baked cake - detail

Share this:

  • Tweet
  • Share on Tumblr
Like Loading...

The Real Deal

26 Sunday Apr 2015

Posted by julia chews the fat in Cooking For Your Peeps, Lunch & Dinner, The Basics

≈ 2 Comments

In the early days of university when I was dating my first boyfriend (three cheers for the late-bloomer!), we used to have our date nights at this bring-your-own wine joint called Eduardo’s. The place was – and by all accounts, still is – a frumpy little hole-in-the-wall on Duluth street, outfitted with the usual harbingers of bad Italian dining: red and white checkered tablecloths, droopy pothos plants, and a menu longer than your arm, with few dishes that would ever come close to anything from terra madre Italia (“Camberelli alla Créole” and “Surf n’ Turf alla Eduardo” are two classic gems apparently still on offer). In our defence, though, we were students without much in terms of disposable income, and the BYOB aspect guaranteed a cheap, loopy night out.

We also didn’t know a whole lot about food outside of our usual repertoire. At nineteen, I only knew how to make a half-dozen of dishes without a recipe: chicken cutlets in mustard sauce, microwave rice pilaf, tomato sauce, blueberry pancakes, minestrone, and the Moosewood Cookbook‘s banana bread, which I’d only learnt by heart after my boyfriend fell hard for its butter and espresso-laden crumb. It wasn’t a bad list of back-pocket recipes for an undergrad student, but it was still fairly limited. And the Italian food I grew up with – thanks to by mom’s side of the family – usually revolved around tomatoes, polenta, or hearty vegetable soups enriched with beans or lentils. In other words, nutritious, sustaining, paesano food from the Abrusso region. Dishes of the northern persuasion, from places like Lombardy and Emillia-Romagna, which tend to favour butter, eggs, cured meats, and abundant quantities of Parmigiano-Reggiano, were still very novel to me.

Which brings me to carbonara.

For better or for worse, I discovered carbonara (or, more accurately, its bastardised second-cousin) in that dingy dining room at Eduardo’s, sitting across from my college boyfriend, contentedly drinking 8$ table wine. It may not have been the ideal venue to have my first go at a venerated Italian classic, but as soon as I tucked into that hot mess of bacon, cream, egg and noodles, I knew I was in trouble. That dish – as far removed from the original recipe as it may have been – slayed me. In the way that a cheap grilled cheese or a good hot dog can still slay me.

—–

Little did I know, the stuff that I’d happily twirled onto my fork all those years wasn’t carbonara. At least not in the traditional sense. And when I look back on it, Eduardo’s version was nothing more than a mound of cloying, overcooked, cream-laden spaghetti littered with nubs of cheap bacon, masquerading as “spaghetti alla carbonara”. It would be enough to throw any self-respecting food purist into a total fit.

Real carbonara would only come to my attention about five years later, in an issue of Gourmet magazine. By this point, my budding interest in food and cooking meant that I was starting to pay attention to the details. I became more aware of the differences between authentic recipes and their imposters. As for carbonara, Gourmet taught me the basics, notably that the original Roman version doesn’t have one drop of cream in it (which, it turns out, is a purely Anglo-American flourish). True Roman carbonara is actually quite simpler – cured pork jowl (guanciale) is diced and then rendered in a hot pan; some eggs are whisked together with sheep’s milk cheese (pecorino), a generous amount of black pepper, and a little of the cooking water from the spaghetti. The whole lot is then tossed into freshly cooked, al dente spaghetti. The final result is a loose mess of noodles slicked in a rich, flavourful sauce dotted with crispy, salty pork belly.

It’s simplicity at its best. The kind of food that makes you happy to be alive.

I hope you think so too.

Carbonara ingredients

Spaghetti alla Carbonara – serves 4

Note 1: since guanciale if often hard to find, you can substitute it with mild pancetta (just don’t tell any Roman purists). If using pancetta, add a couple of teaspoons of olive oil to the pan before rendering it – pancetta has less fat than guanciale, so you’ll need the oil to get things going.

Note 2: In a dish this pared-down, the quality of your ingredients is crucial. Make sure to use good eggs, the best guanciale or pancetta you can find, and real pecorino or Parmigiano-Reggiano (No knock-offs! No Kraft parmesan! Don’t piss off the carbonara gods!). Freshly ground pepper is a must too. It’s also worth mentioning that this dish is one of the few that doesn’t reheat well the next day, as the eggs tend to curdle when they come into contact with too much heat. It’s definitely a dish best eaten straight away (which, I suspect, won’t be a problem).

Note 3: Given that the eggs are undercooked in this recipe, most sources would recommend that you avoid serving it to children or anyone with a compromised immune system. (apparently, if you use good-quality, fresh eggs, the risk of salmonella-poisoning is lower than in commercial eggs, which are produced in confined environments where bacteria can spread more easily among chickens.)

Ingredients:

  • 4oz. medium-sliced pancetta (or ideally guanciale), cut into 1⁄2″ pieces
  • 1¾ cups finely grated pecorino cheese (or Parmigiano-Reggiano)
  • 1 egg, plus 3 yolks
  • freshly cracked black pepper
  • sea salt
  • 1 lb. spaghetti

Eggs

Directions

1) Start by bringing a large pot of water to boil (for the pasta). Salt the water once it comes to the boil (about 1-1 1/2 Tbsp) (I eyeball it, but just remember that the guanciale is salty).

2) Whisk together the egg (1) and yolks (3). Stir in 1½ cups of the cheese and mix to combine; add a generous amount of freshly ground black pepper (about 2 tsp). Set aside.

3) Heat a medium skillet or cast-iron pan over medium heat (add oil if using pancetta). Add guanciale (or pancetta) and cook, stirring occasionally, until lightly browned (about 6–8 minutes).

4) Meanwhile, cook the pasta until al dente. Reserve 3⁄4 cup water; drain pasta and transfer to the pan with the cooked guanciale (or pancetta). Toss, then and it off the heat.

Eggs and cheese

5) In a slow, steady stream*, add the 3/4 cup of pasta water to the egg/cheese mixture. Add to the pasta and toss to coat (the residual heat from the pasta will lightly “cook” the egg, without scrambling it).  Transfer to a serving platter and season with salt and some more freshly ground black pepper; sprinkle with the remaining cheese and serve straight away.

*if you add the hot cooking water too quickly to the egg mixture, it will curdle. The slow, steady stream allows you to “temper” the egg mixture, ensuring that your sauce comes together smoothly. In other words, you want to avoid too much heat too quickly, or else you’ll end up with scrambled eggs.

Carbonara.

Share this:

  • Tweet
  • Share on Tumblr
Like Loading...

A Soup Lost in Translation

08 Wednesday Apr 2015

Posted by julia chews the fat in Cooking with Nonna, Lunch & Dinner, The Basics

≈ 10 Comments

In a recent phone conversation with my mother:

Me: Hi. What’re you up to?

Mom: Grandma and I are making cazzorelli.

Me (long pause): Wait, what? Cazzorelli? As in, cazzo?

Mom: Yeah, I guess so. That’s what grandma calls them. Hold on, let me ask her. Sono chiamati cazzorelli, no? (comes back to the receiver) Yeah, grandma says that’s it.

Me: That’s crazy. How come I’ve never heard of these? What are they?

Mom: They’re just these little polenta dumplings that you cook into a soup. They’re nothing special.

Me: Nothing special? Mom, please. THEY’RE CALLED CAZZORELLI. They’re special. Why are they called that?

Mom: I don’t know. They’re Abruzzese. I guess it’s because the dough is cut into little pieces…and so the idea is they look like…little penises? (long pause) You’ll have to ask grandma.

If you know my family, you’ll understand that this is a pretty typical conversation – about food, about dialect, about the where-what-how of my grandmother’s recipes. While Nonna holds a relatively small repertoire of recipes, each have their own backstory. Some are direct imports from her tiny village in Abruzzo, others are improvised dishes pulled together from the resources they found when they first moved to Canada. Some of them are vestiges of wartime food rationing, while others are decadent offerings served up on big platters at weddings, baptisms and religious holidays. Every single one of them – from the soft lemon cookies with the crackled tops, to the peas fried in onion and rosemary – has a story, an anecdote, a memory attached.

Up until this conversation with my mom, I thought I knew all of Nonna’s recipes. But for some reason, “cazzorelli” were never part of the rotation of dishes I grew up with. The crudeness of the name, and the casual way that mom and grandma threw around the word, were an open invitation for follow-up questions. So, you’re telling me that people just go around Abruzzo saying, “Today I’m making little penis soup?” What if you make it for your in-laws? Do you still call it the same thing? Am I the only one that thinks this is hilarious?

I felt like I’d hit the dialect jackpot.

That is, until a few days ago, when I discovered that they’re not actually called “cazzorelli”. No. It turns out they’re called “cazzarielli”. Perhaps even worse, this (subtle! So, so subtle!) orthographic error was exposed, not by Nonna, but by a standard Google search. So technically, this dish isn’t called “little penis” soup. At best, it’s called “little pieces” soup.

Trust me. I’m just as disappointed as you are.

This kind of mix-up is par for the course in dialect-speaking. Entire syllables get lobbed off; vowels at the end of one word melt into the next. Genders get jumbled. And, inevitably, bits of the message get lost in translation. This soup (the one I began to call by a name that didn’t exist) is the perfect example of how dialect speaking – based almost entirely on phonetics – has a sticky habit of transforming words and their meaning. Food customs also travel an imperfect road, which is why it shouldn’t come as a surprise that there are pieces missing by the time they get to us. But I like to think that all that shifting and travelling allows them to gather substance for new stories and, ultimately, new memories. Like the name of this soup. Cazzarielli will always be cazzorelli to me, because that small phonetic flub is something I will always look back on with a big, stupid grin on my face when I think of that conversation with my mom. It’s one of the few things that’s worth being wrong about.

—–

And now, a few notes on this soup itself:

Like any good Italian peasant food, this soup fulfills three basic tenets – it’s inexpensive, easy, and satisfying. Small polenta “gnocchi” are cooked in a thick broth made up of water, potato, Brussels sprouts, fried garlic, and some chili flakes, all of it simmered with a slab of well-marbled pancetta. I imagine this was the kind of food they’d feed soldiers, or farmers, or the pregnant women who tended the fields in their third trimester (yes, yes they did). It’s robust, no-frills fare. And it certainly doesn’t win any points in the looks department. But what it lacks in aesthetics it more than makes up for in flavour. It’s rich, garlicky and full of pleasantly chewy bits of polenta, potato and cabbage. In other words, pure comfort in a bowl.

Grab a spoon and tuck in.

ingredients

For the dough:

  • 1 ½ cups dry polenta (grade 400, extra fine)
  • 1 cup flour
  • 1 ¾ cups hot (just boiled) water

For the soup:

  • 4-5 cloves garlic, halved lengthwise
  • 2-3 yellow, waxy potatoes (like Yukon Gold)
  • 1/4 cup olive oil
  • 1 tsp chili flakes
  • 1 small slab of pancetta (about 2 oz)
  • 2 cups Brussels sprouts (or the equivalent in Savoy cabbage)
  • 7-8 cups cold water

Directions:

1) Start by making the dough: pour the polenta into a large mixing bowl and slowly whisk in the hot water until the dough comes together. Then work the dough lightly with your hands to form a loose ball. Sprinkle with flour and set aside.


2) Start making the soup: heat the olive oil in a large soup pot; fry the the halved garlic cloves with the chili flakes until garlic is golden brown. Add the Brussels sprouts, pancetta and potatoes; stir to combine and allow to cook for 1 minute. Add seven cups of water and reduce the heat to medium-low.

prep - cazzarielli pancetta Brussels sprouts potatoes

3) While the soup simmers, make the cazzarielli: cut 1″ pieces of the dough and roll lengthwise into “snakes” on a floured surface. Cut the long pieces of dough (“snakes”) into small 1/4″ pieces. Place on a parchment or towel-lined baking sheet and sprinkle with flour to avoid sticking.

4) When the cazzarielli are all made, lift them in batched in your hands to allow excess flour to “sift” through your fingers and add to the soup pot. Allow to cook about 15 minutes, or until they are tender. You may need to adjust the amount of water if the soup gets to thick (helloooo starch!). We like our soup to be somewhere between a minestrone and a chowder in terms of thickness and texture. Serve hot.

rolling dough dough "snakes" cutting the dough cutting the dough laying out the cazzarielli flouring out the cazzarielli prepared cazzarielli serving cazzarielli soup

Share this:

  • Tweet
  • Share on Tumblr
Like Loading...

Boeuf Bourguignon

23 Monday Mar 2015

Posted by julia chews the fat in Lunch & Dinner, The Basics

≈ 1 Comment

Like a lot of North American home cooks in the 1970s, my mother’s introduction to French cooking came from two of the world’s most prolific food icons: Julia Child and Jacques Pépin. She turned to Jacques and Julia for instruction and technique, but I suspect she was also drawn to their remarkable approachability – the former, with his warm smile and smooth French accent, and the latter, with her eccentric wit and contagious laugh, made them the antidote to pretentious French cuisine. As a pair, they were a force of nature. And from them both, my mom – along with half of North America – learned how to cook all things savoury and sweet, à la française.

As her French cooking skills evolved through the 80s and 90s, it became commonplace to find mom hovering over the stove, dousing chicken thighs with wine for coq au vin or caramelising onions in a slurry of butter for soupe à l’oignon without batting an eye. After years of following Jacques and Julia on PBS, these recipes had now become her own. She didn’t need to follow a list of ingredients, or look to her TV hosts for guidance. She could practically make these recipes blindfolded. She still can.

These years also coincided with our family’s acquisition of a Rival Crock-Pot, a clunky beast of a machine that occupied a large corner of our kitchen counter for the better part of our childhood. In the fall and winter, my brother and I would come home from school, to the smell of heady aromatics and braised meat. After having had a whole day to meld together, the contents of the Crock-Pot filled the whole house with a deep, rich scent that made us happy to be home and out of our snowpants.

On days like these, when it’s -20 with the windchill, I think most of us are keen for slow-cooked, full-bodied dishes that we can ladle into a bowl and eat slowly, until we’re warmed through after being outdoors. One of my favourites is boeuf bourguignon, that rich, Burgundian stew made with beef stock, mushrooms and red wine. Our mom used to serve it on a bed of buttered egg noodles, which is still the way I like it best, even if I lose points for authenticity. But the stew can be eaten on it’s own, or – in classic French style – with a piece of crusty bread, to sop up all those intensely-flavoured juices.

Régalez-vous x

Classic Boeuf Bourguignon (makes about 6 servings) – lightly adapted from Saveur and Julia Child’s Mastering the Art of French Cooking, Vol.1

      • 5 whole black peppercorns
      • 1 bay leaf
      • 1 sprig parsley
      • 1 sprig thyme
      • cheesecloth and cotton string, for tying herbs
      • 4 lb. beef chuck, cut into 2” pieces, best quality you can afford
      • 1 (750-ml) bottle Burgundy or Chianti
      • 6 oz. bacon, sliced into ¼” thick batons
      • 5 tbsp. olive oil
      • sea salt and freshly ground black pepper, to taste
      • 4 cloves garlic, roughly chopped
      • 2 medium carrots, cut crosswise into 1” pieces
      • ⅓ cup flour
      • 2 cups beef stock (if you have time to make homemade, see recipe here
      • 3 tbsp. unsalted butter
      • 1 lb. white button mushrooms, quartered
      • 12 pearl onions, peeled (or: 2 medium yellow onions, peeled and chopped)
      • crusty bread or cooked egg-noodles (like pappardelle), for serving

Note: in this recipe, the meat marinates overnight, so make sure to plan ahead.

Ingredients bourguignon

Directions:

1) Place peppercorns, bay leaf, parsley, and thyme on a piece of cheesecloth; tie into a tight package and transfer to a large bowl. Add beef and wine; cover and chill overnight.

Bouquet garni - bourguignon

Meat - bourguignon

2) The next day, remove beef from marinade with tongs, allowing the marinade to drip back into the bowl. Pat the beef completely dry using paper towels and set aside. Reserve marinade and the herb package.

3) Heat half the oil in a large Dutch oven over medium-high heat; add bacon and cook, stirring occasionally, until slightly crisp (about 8 minutes). Using a slotted spoon, transfer bacon to a bowl and set aside.

4) Season beef with salt and pepper and working in batches, cook, turning as needed, until browned (6–8 minutes). Using a slotted spoon, transfer beef to bowl with bacon and set aside. Add garlic and carrots; cook until garlic is soft (about 2 minutes). Stir in flour; cook for 3 minutes. Add reserved marinade, beef, bacon, herb package, and the stock; bring to a boil. Reduce heat to medium-low; cook, covered, until meat is very tender, about 2 hours.

5) Heat remaining oil and the butter in a 12” skillet over medium heat. Add onions; cook until golden and tender, 4 minutes. Add mushrooms and cook until golden, 7 minutes more. Stir onions and mushrooms into beef stew. Serve with crusty bread or over cooked egg-noodles.

Note: boeuf bourguignon freezes really well; if you find yourself with leftovers, just allow it to cool and then transfer it to freezer-proof containers.

Boeuf bourguignon

Share this:

  • Tweet
  • Share on Tumblr
Like Loading...

A Cake for Non-Bakers

13 Friday Feb 2015

Posted by julia chews the fat in Cooking For Your Peeps, Sweet Tooth, The Basics

≈ Leave a comment

Sometimes there’s the assumption that, because you know how to cook, it naturally follows that you know how to bake; that for the food-obsessed home cook, the realm of savoury and sweet are completely interchangeable. Allow me to put that assumption to bed. Cooking and baking are two different beasts – not mutually exclusive, but not close bedfellows either. Slipping a pot roast in the oven is not the same as, say, slipping a pan of brioche dough into the oven. Not at ALL the same. While I’m a decent home cook, I wouldn’t go as far to call myself a baker. I’ve certainly baked things before – lots of things – but I’ve never really done it with the same confident ease that flows through the veins of seasoned bakers. There are people who whip around the kitchen like they were born with a whisk in one hand and a battered spatula in the other. These people are forces of nature.

In contrast, baking for me usually involves a lot of lip-biting, heavy sighing, cursing and finger-crossing. I’ve had my fair share of lumpy, jiggly, over-baked, under-baked, quivering specimens come out of the oven, which means that each time I step into the kitchen to bake something new, there’s a little bit of PTSD that creeps in. I gnaw at my cuticles. I get cold sweats. I pray a little harder to the gods of sugar and spice and everything nice. Sometimes things work out (almond meringues, whipped to perfection!), sometimes they don’t (cherry clafouti that looks and tastes like punishment!). It’s a game of baking Russian roulette, really. Except that when things start to go downhill (why isn’t the cream setting? why are there nubs in the frosting? why is the centre still uncooked, but the bottom nearly burnt?), I remember that, in my case, there are several bullets in the barrel…not just one.

Strangely, these failures haven’t stopped me trying to be a better baker. They’ve actually had the opposite effect – I still bookmark the sweets sections of my cookbooks and turn baking magazines into fringed monsters with Post-Its; I continue to fatten up my Pinterest board with baking ideas that may or may not materialise (I’m looking at you, cannelés…). It’s a habit that’s equal parts romanticism, masochism and obstinance, but it’s part of a larger goal of not letting fear dictate what I make (or don’t make) in the kitchen, even if it means burning a few things in the process.

That said…

I do have a pretty bad Valentine’s Day track record. So this year I’ve decided to cool it with the overly-complicated, thematic baked goods. Instead, I’m proposing something for the non-bakers in all of us. Something easy and ultra-delicious that can be thrown together quicker than you can say Thank god I didn’t burn another batch of stupid, flipping cupcakes.

May I present your new favourite back-pocket recipe, for:

CARROT CAKE WITH CREAM CHEESE FROSTING

You’ve had a version of this cake before, I’m sure. But the one I’ve got here is 100% foolproof, straight from the ever-dependable, Canadian Living Test Kitchen. It’s been one of my mom’s go-to cake recipes for years and it’s always perfect. It isn’t French pâtisserie; it doesn’t require chilling or resting or parbaking or leavening or whipping egg whites into stiff peaks. In other words, it’s a very forgiving cake. Which is a good thing when you’re not preternaturally skilled in the baking department. I’m certain your Valentine will appreciate the gesture. (Especially because it means they won’t have to eat another batch of punishment cupcakes.)

Happy Love Day to all of you. x

—–

A note on decorating: as it turns out, my cake-decorating skills are about as limited as my baking skills, which explains why the final result looks a little like a confederate flag from a usurped Dutch republic. But, no matter. The important thing is that your cake is delicious. You’re not Martha Stewart and this isn’t a beauty contest. So if your candied orange rosettes look more like something off a cheap sushi platter, it’s no big deal. Own it. Because you did, after all, make a wicked cake. Rosettes or no rosettes.

iced cake

Carrot Cake with Cream Cheese Frosting and Candied Carrots – cake and icing from Canadian Living/candied carrots from Ricardo Cuisine Makes two (2) 8-inch square cakes (can be layered, or served separately) – serves 12-14

Ingredients

  • 2 cups all-purpose flour
  • 2 tsp baking powder
  • 2 tsp cinnamon
  • 1 tsp baking soda
  • 3/4 tsp salt
  • 1/2 tsp nutmeg
  • 3/4 cup granulated sugar
  • 3/4 cup packed brown sugar
  • 3 eggs
  • 3/4 cup vegetable oil
  • 1 tsp vanilla
  • 2 cups grated carrots
  • 1 cup drained crushed canned pineapple
  • 1/2 cup chopped pecans

Icing:

  • 1 (8 oz) package cream cheese, softened
  • 1/4 cup butter, softened
  • 1/2 tsp vanilla
  • 1 cup icing sugar

Directions:

1) Grease and flour two 8″ square cake pans ; set aside.

2) In large bowl, whisk together flour, baking powder, cinnamon, baking soda, salt and nutmeg.

3) In separate bowl, beat together granulated and brown sugars, eggs, oil and vanilla until smooth; pour over flour mixture and stir just until moistened. Stir in carrots, pineapple and pecans. Spread in prepared pan.

4) Bake in centre of 350°F oven for 40 minutes or until cake tester inserted in centre comes out clean. Let cool in pan on rack. (Make-ahead: Cover with plastic wrap and store at room temperature for up to 2 days.)

Icing: In bowl, beat cream cheese with butter until smooth. Beat in vanilla. Beat in icing sugar, one-third at a time, until smooth. Spread over top of cake. (Make-ahead: Cover loosely and refrigerate for up to I day.)

Candied carrots (optional):

  • 1/2 cup (125 ml) orange juice
  • 1/2 cup (125 ml) sugar
  • 2 small, thick carrots, thinly sliced lengthwise (on a mandolin or with a vegetable peeler)

In a saucepan, bring the orange juice and sugar to a boil. Add the sliced carrots. Simmer until tender and translucent, about 8 minutes depending on thickness. Let cool completely. Drain. Arrange on cake as desired. candied carrots icing cake -1 icing cake - 2 icing cake - 3 cake layers cake slice

Share this:

  • Tweet
  • Share on Tumblr
Like Loading...

Ramen mania

03 Tuesday Feb 2015

Posted by julia chews the fat in Lunch & Dinner, Soups, The Basics

≈ 5 Comments

“30 cloves of peeled garlic”

Those words alone should have been enough to dissuade me. Or any normal human being. But instead I found myself on the subway Sunday morning, heading to my friend Michael’s, with a backpack reeking of pork braised in thirty – yes, thirty – cloves of garlic, along with a small army of mason jars filled with stock and chicken schmaltz.

So why travel 40 minutes from home with a backpack stuffed with unidentifiable, pungent edibles that, under different circumstances, would’ve gotten me swiftly escorted to airport security? Ramen, baby. That’s why.

I’ve had ramen on the brain for a few weeks now, and it turns out I’m not the only one: Lucky Peach recently compiled a Guide to the Regional Ramen of Japan. Grub Street and Rachel Khoo both featured stories on the topic last week. And just a few days ago, NOWNESS re-posted its short film, “The Eight Chapters of Ramen“, about NYC ramen chef-extraordinaire, Ivan Orkin. It’s a topic that’s been part of the zeitgeist for a couple of years now, but I get the sense that this year, 2015, will be ramen mania, full steam ahead. Consider yourselves warned.

In theory, I’m really into the idea of ramen – the salty broth, packed to the gills with umami; the melt-in-your-mouth pork belly; the slippery noodles and soft-boiled egg; the chopped scallions and squishy shiitake. The obnoxious part about food trends is that they prove you can have too much of good thing. At some point, they become so pervasive that you start to wish they’d never caught on. (Remember last year’s fetishisation of grilled cheese? The countless photos of triple-decker grilled cheese sandwiches oozing all over everyone’s social media stream? The specialty grilled cheese shops that started popping up everywhere, like a rash you couldn’t get rid of? Mac-n-cheese grilled cheese! Poutine grilled cheese! Bacon-double-cheeseburger grilled cheese. Scary, scary times.)

I think it’s fair to say that in North America, ramen is still walking that fine line between novelty and ubiquity, two extremes that often lead us down the disappointing path of sub-par food. I’ve never been to Japan, but I can tell you that some pretty ho-hum – not to mention obscenely-priced – bowls of ramen have crossed my lips in this town, with blah-tasting broth, missing pork, or a missing egg, or some other delicious thing missing that you then have to order on the side, at an extra cost. Gah! Why??

So at some point I figured, why not make my own ramen? Heck, then I could have the egg AND the pork AND all the other bits. The only problem was that I’d never actually made ramen before, and it seemed like a pretty long, laborious, intimidating process (it’s actually not so bad, but more on that later). For a first attempt, I needed to recruit someone else – a partner in crime, a compadre, a guardian angel – to bolster my confidence and see me through to the end.

Enter Michael – the man who whips up daunting recipes from the Momofuku cookbook like it’s nobody’s business, and who knows exactly where to get hard-to-find Asian cooking loot, like bonito dashi granules and togarashi. He didn’t even flinch when I suggested (with a string of exclamation marks) that we make a 5-part recipe that included 30 peeled cloves of garlic (p.s that’s just for the pork, friends), plus homemade garlic oil and homemade fried garlic powder. Most people would look at me cock-eyed if I’d proposed the same feat to them. You want to make WHAT? You’re going to PEEL all those cloves? Are you out of your mind? But not Michael. That’s one of the reasons I like him. Not only does he get that level of insanity, he actually partakes in it.

—–

The recipe we used – appropriately named “The Vampire Slayer Ramen-Express” comes from Mandy Lee’s site, Lady and Pups. She lays everything out, step-by-step, with pretty photos and her signature dry wit. For the full recipe, click here.

Now, before you get going on this one…some words of advice:

  • make components ahead – don’t try to make all of the ramen components in one day. Doing that will want to run from the kitchen and jump off a bridge. Pick a quiet day at home to make the stock (which you can then keep in the fridge or freeze). In this case, I made the stock and braised pork on the Saturday to serve on the Sunday. It was a breeze cause there was no rush – just me, the stock, the pork and a few back-to-back episodes of Broadchurch. On his side of things, my compadre made the garlic oil, garlic powder and soft-boiled eggs ahead of time, so once we got together, all that was left to do was boil the noodles, rewarm the (already soft-boiled) eggs in their shell, heat up the pork, and add the soy milk to the stock before putting it on the stove to simmer.
  • don’t worry about making noodles from scratch – we sure as hell didn’t. The dried ones (not instant!) from the Asian grocery worked out perfectly.
  • simplify your stock – you’re trying to achieve an opaque broth that is neutral-tasting (don’t go sticking a bay leaf in there, friends). Mandy Lee even suggests not adding salt, which is sound advice seeing that it allows you to adjust the seasonings according to whatever recipe you’re making with the leftover stock.
  • don’t skip the pork bones in the stock – just don’t
  • keep an eye on that braised pork – make sure that the braising liquid doesn’t dry up; baste it/turn it from time to time during the cooking process and add more liquids if necessary. I wasn’t paying attention and my braising liquid dried up in the last 20 minutes in the oven, resulting in shrivelled (albeit, tasty) shiitakes and pork that was a little less moist than it should’ve been.
  • if you can’t find a hunk of prosciutto – any dry-cured ham will do for the stock. In this case, my butcher suggested some cured (and cubed) Bayonne ham, and it worked out great.

Now go forth and make ramen, you crazy fools!

ramen prep

stock components

stock after first boil

pork + prep

so many garlics

braising the pork

ramen assembly

sliced pork

ramen noodlesbowls of ramen

bowl of ramen

bowl of ramen + Sapporo

Share this:

  • Tweet
  • Share on Tumblr
Like Loading...

End-of-days Bolognese

17 Saturday Jan 2015

Posted by julia chews the fat in Lunch & Dinner, The Basics

≈ Leave a comment

A little while ago, I made a promise to myself. Not a resolution, per se, but a promise. I vowed to make the bleakest, most inhospitable months of the year – January, February and March – slightly more bearable by turning my freezer into a well-organised cache of provisions. It sounds very end-of-days, I know. But from where I’m sitting, the weather feels very end-of-days right now. My nostril hairs froze while waiting for the bus to the dentist the other day; if I don’t wear tights under my pants on my commute to work, I lose sensation in my thighs; I drag a space heater around my apartment, moving from kitchen to living room to bedroom, and, on the most frigid of nights, you can sometimes find me nestled up to a hot-water bottle.

It’s unsexy, it’s exhausting, it’s an exercise in endurance and patience, not to mention mental fortitude. This is winter in Quebec. Bienvenue, les amis.

winter in Qc winter gear

Even when you’ve lived through winters like this your whole life, you never quite get used to them (in other words, you never quite get accustomed to the sensation of frozen nostril hairs) (speaking of unsexy). However, you do become a little more saavy, a little more wise, in prepping for the deep freeze. For one, you buy boots. Good boots, with a polar bear on the logo and a guarantee that says “Waterproof, -40°”. You outfit your bed with flannel sheets (the best purchase of the year, hands down). You run errands strategically – mentally plotting out your excursions in advance to minimize the amount of time spent outdoors. You layer your clothing; you pack extra socks; you do things your younger self never thought you’d do. Like wearing those aforementioned tights, under your pants. Or wrapping your head in a hefty piece of cloth that you can barely breathe through, making you not only look like a terrifying urban yeti, but also severely impairing both your peripheral vision and your hearing when navigating those busy city streets.

Making it alive through winter comes with a well-earned sense of accomplishment, as my fellow Quebecers can attest (We didn’t slip on any ice! We didn’t fracture any limbs! We didn’t lose any exposed skin to frostbite! We made it! High five!). This explains why you’ll find us lounging on beer patios as early as mid-March, when the first few warm rays of sunshine pierce through. It’s still cold; we’re still in winter parkas. But we’re that eager for the faintest glow of warmth after winter’s put us through the wringer.

—–

I’ve come to realise that a large part of surviving the deep freeze is, ironically, using your freezer to its fullest potential. Making large batches of food ahead, then freezing them into smaller portions is one of those winter-savvy moves that your older, wizened self has come to appreciate. Which is why you don’t think twice about holing yourself up in the kitchen for a whole weekend, to cook and bake, bag and freeze. Let the rest of them skate around awkwardly in their stilettos on their way to the club this Saturday night. You, my friend, have got a hot date with the Dutch oven.

The foods you choose to make are entirely up to you. There’s no real magical equation. This time around, I tried a couple of new recipes that I thought would freeze well – a curried red lentil stew with coconut, and a fennel-leek soup with turmeric – but I also stuck to a couple of classic, rib-sticking recipes, like coq au vin, brisket chili, and ragù bolognese. Foods that are familiar, comforting, and that fill the house with the heady, wintery aromatics of butter, onion, red wine and bay leaf. Perfect for those nights when you shuffle home from work, snotty, zonked and cold.

Stay warm, be well, and eat well. x

Ragù Bolognese (makes 4-6 servings) – adapted from Bon Appétit and La Cucina Italiana

*Note on the recipe: this is a reconstructed version of a classic bolognese. You’ll note that there’s no tomato (just a little tomato paste), which might seem weird if you’re used to adding it. But trust me on this one. Bolognese made in modo tradizionale is beyond compare.

    • 1 Tbsp. olive oil
    • a knob of butter
    • 2 cloves garlic, finely chopped
    • 2 medium onions, finely chopped
    • 2 celery stalks, finely chopped (about 1 cup)
    • 2 carrots, peeled, finely chopped (about 3/4 cup)
    • 2 oz. thinly sliced pancetta, finely chopped (use unsmoked, mild pancetta)
    • 6 oz. ground beef
    • 6 oz. ground veal
    • 3 cups beef stock, divided
    • 3 Tbsp. tomato paste
    • 1 cup whole milk
    • 1/2cup dry red wine
    • 1 bay leaf
    • salt and freshly ground black pepper

To serve: swirl warm sauce into cooked egg noodles, fresh or dried (such as pappardelle, tagliatelle or fettuccine) and top with grated parmigiano reggiano bolognese prep

Directions

1) Heat oil and the knob of butter in a large heavy pot over medium-high heat. Add onions, celery, carrots, and garlic. Sauté until soft, but not browned (about 8 minutes).

2) Add the pancetta and allow it to fry a minute or so before adding the beef and veal. Sauté, breaking up with the back of a spoon, until browned (about 15 minutes). Add wine and boil 1 minute, stirring often and scraping up browned bits. Add 2 1/2 cups stock, tomato paste and the bay leaf; stir to blend. Reduce heat to very low and gently simmer, stirring occasionally, until flavours meld, 1 1/2 hours. Season with salt and pepper.

3) Bring milk to a simmer in a small saucepan; gradually add to sauce. Cover sauce with lid slightly ajar and simmer over low heat, stirring occasionally, until milk is absorbed (about 40 minutes). Adding more stock by the ladleful to thin if needed.

Notes:
If you’re freezing the ragù: Allow it to cool completely, then transfer it to freezer-proof containers.
If you’re not freezing the ragù: Allow it to cool completely, cover and keep chilled until ready to use (I use Mason jars). Can be kept for up to 2 days in the fridge.

pasta bolognese with cheese

Share this:

  • Tweet
  • Share on Tumblr
Like Loading...

Brisket Chili of the Gods

01 Monday Dec 2014

Posted by julia chews the fat in Cooking For Your Peeps, Lunch & Dinner, The Basics

≈ 3 Comments

Is there something that you’ve made over and over again, only to one day realise that there was a far superior version hanging out there, waiting on the sidelines to be discovered? Allow me to introduce you to brisket chili, friends – the chili recipe to end all chili recipes.

I think it’s safe to say that most of us north of the Mexican border think of chili con carne as a simmered concoction of minced beef, red kidney beans, tomatoes, some veg (usually onion, carrot, celery, bell pepper), Mexican chili powder (which isn’t really Mexican at all), topped with sour cream and grated cheddar. Now, I want you to rid all of that from your mind. Throw it away. You don’t need it anymore. You don’t need chili with little nubs of overcooked minced meat bobbing around in a non-descript bath of tomatoey vegetables. Because now you have brisket chili – lovely, smoky, spicy, silky brisket chili – and by Jove, there is no turning back.

Beef brisket

Brisket Chili (serves 6) – adapted from Jamie Oliver

Note: the chili needs to simmer for a good 4-4.5 hours, so make sure to plan accordingly.

  • 1.5 kg best-quality beef brisket
  • 250g grams cooked Romano beans (or 1 x 19oz can)
  • 1 large cinnamon stick
  • 1 Tbsp ground cumin
  • 1 Tbsp smoked paprika
  • 1 heaped Tbsp dried oregano
  • 2 fresh bay leaves
  • 2 red peppers
  • 2 yellow peppers
  • 1 x 28oz can chopped tomatoes
  • about 1/2 L beef stock
  • 2-3 red chipotle chiles in adobo, chopped
  • 1-2 chile peppers (jalapeño or habañero), de-seeded and chopped
  • 2 red onions, finely sliced
  • 1 Tbsp tomato paste
  • coarse salt and black pepper
  • olive oil
  • Red wine vinegar
  • ½ bunch coriander, chopped
  • Soft tortillas, Greek-style yoghurt, avocado* and/or green salad, to serve

*you can also make a quick guacamole to serve on top, by mashing up a couple of ripe avocados, and adding some finely grated red onion, the juice of a lime and some chopped coriander, along with a pinch of salt. **the chili freezes really well, so don’t bother cutting down the recipe if you’re less than 6 people. Make a whole batch and freeze the rest.

Directions:

Place the beef on a board and score one side. Combine the cumin, paprika and oregano and rub into the cuts in the beef. Season well with coarse salt and black pepper, drizzle over a little olive oil and brown the brisket well in a large pot or Dutch oven over a high heat.

021 Brisket with spicesOnce the outside is browned, remove the brisket from the pot and set aside. There should still be some residual oils at the bottom of the pot, which you’ll use to sautée the onion, etc, so keep it. But discard any bits of seasoning that looks like it’ll burn if cooked further (I use a slotted spoon to fish them out).

Reduce the heat to medium high and add the onion and garlic, sautéeing them in the leftover pan fats until translucent. Place the bay leaves, cinnamon stick, red and yellow peppers, tomatoes, beef stock, beans and tomato paste into the pot and bring to the boil. Then add the chiles and the brisket to the pot; cover and leave to simmer for 4–4½ hours.

Gently pull the beef apart using 2 forks. Remove the bay leaves and cinnamon stick; add a little vinegar to brighten up the flavour, add the coriander and adjust the seasoning. Serve with avocado (or guacamole), tortillas, yoghurt and/or a green salad.

Brisket chili Brisket chili with avocado

Share this:

  • Tweet
  • Share on Tumblr
Like Loading...

Humble Bones

20 Monday Oct 2014

Posted by julia chews the fat in Lunch & Dinner, The Basics

≈ 2 Comments

They sat there in the baking pan, as naked as they came – a geometrical mass of bone and flesh; a macabre still life in white and pink, waiting to be transformed.

It may not be obvious at first glance, but what rests in that pan is the beginning of something beautiful. It marks the first step of a slow transformation – an alchemy, really – that starts with an ingredient so basic, understated, stripped down, that you can barely believe it will become much of anything at all.

002

Bones. They are the very definition of unpretentious, no-frills food and a cornerstone of cooking traditions the world over. As mundane as they seem, they are the key to making the richest, most flavourful stock, used in everything from French onion soup to Vietnamese pho to Japanese tonkotsu. While traditions vary, the method is essentially the same across the board: roast, season, simmer. In this version of beef stock, the bones are roasted bare in a hot oven, then some aromatics are added and the pan returns to the oven until the whole lot is dark & caramelised. It all then goes into a stockpot, is covered with water and left to simmer for an afternoon.

That’s. It.

What emerges is a densely-coloured, heady, mineral-rich broth, ready to cure what ails you.

Next time you visit the butcher, ask for a few bones to be added to your order. They might even give them to you for free (one of the many perks of being on a first-name basis with your butcher). With that, you’ll have the makings of a delicious, fortifying stock to warm you through the colder months ahead.

Basic Beef Stock (makes about 4 cups) – adapted from Bon Appétit

  • 5 pounds veal and/or beef marrow bones*
  • 4 peeled carrots
  • 4 celery stalks
  • 2 halved peeled onions
  • 1 halved head of garlic
  • ½ bunch flat-leaf parsley
  • 4 sprigs thyme
  • 2 bay leaves
  • ¼ teaspoon black peppercorns
  • cold water

Optional: to achieve a darker colour, you can brush the bones with a bit of tomato paste right before putting them in the oven to roast.

(If you’re asking yourself what the heck is the difference between broth and stock?, you’re not alone. I didn’t really know the answer until I stumbled upon this run-down by Nourished Kitchen, which, in addition to explaining the difference between the two, discusses bone broth, a close cousin of stock, but requiring a longer, 24-hour simmer.)

Directions

Preheat oven to 450°. Roast marrow bones (have your butcher saw them into pieces) in a roasting pan, turning occasionally, until browned, about 30 minutes. Chop carrots and celery into large, 3” pieces; add to pan along with onions and garlic. Roast, turning occasionally, until vegetables are brown, 25–30 minutes.

roasted bones

024Transfer to a large stockpot; add cold water to cover. Pour off fat from pan, add ½ cup water, and stir, scraping up browned bits; add liquid to pot along with parsley, thyme, bay leaves, and black peppercorns. Bring to a boil, reduce heat, and simmer 4 hours, occasionally skimming foam and fat from surface and adding water as needed.

Strain. Let cool and then transfer to a glass bowl or Mason jars. Cover and chill for up to 3 days. Use as a base for soups, stews, sauces and gravies.

Note 1: Once the stock has been chilled, any remaining fat will have risen to the top and solidified, forming a protective layer against bacteria while the stock is in the refrigerator. If you plan to freeze the stock, simply remove and discard the fat and pour the liquid into a freezer-proof container. Frozen stock will keep for about 3-4 months.

Note 2: there are different schools of thought about salting stock. Some sources will say to salt the bones before roasting, or once everything’s covered in water. Other sources will recommend not salting the stock at all, due to the fact that the stock’s natural salinity will increase as it reduces. In this case, you can add the unsalted stock to any soup, stew or sauce and adjust the saltiness accordingly.

027

Share this:

  • Tweet
  • Share on Tumblr
Like Loading...

Learning from Scratch

21 Sunday Sep 2014

Posted by julia chews the fat in Breakfast & Brunch, Cooking For Your Peeps, The Basics, Vegetarian

≈ 2 Comments

Like most kids, my brother and I spent our childhood and pre-teen years pleading for junk food. Fruit Roll-Ups, instant noodles, soda, Corn Pops – we wanted ALL of it. My mother, bearing the brunt of these junk food solicitations (“But everyone at school has them! Come onnnnnnn.”), was often the one who had to give the hard-line “no”. Despite all the begging and pleading (and possibly crying?), she stuck to her guns, filling the cart with items that were far removed from the world of high fructose corn syrup and red dye no.5.

Today, I’m thankful for her resolve. I didn’t know it at the time, but my mom was trying to instill in us the importance of eating well, and more specifically, eating well at home. Apart from the occasional night out or birthday party at the local St-Hubert BBQ (chicken fingers! fries! bright pink dipping sauce!) or Pizza Hut (stuffed-crust Hawaiian! all-you-can-eat ice cream bar!), dinner, lunch and breakfast in our house was largely homemade. It was never something that, as a kid, I considered a luxury; it was just the way things were (plus, I still had my eye on those Fruit Roll-Ups). But as an adult, I look back on that time and realise how inconceivably lucky we were. Boeuf bourgignon, whole roast chicken, roast beef with Yorkshire puddings; hand-rolled perogis, homemade pasta, spanakopita, pilafs, patates dauphinoises; minestrone, split pea, tortellini and French onion soups; coffee cakes, bundt cakes, layered birthday cakes and strudel; sticky baked beans, omelettes, tea biscuits and blueberry pancakes on the weekend. This is just a glimpse of the dozens of different dishes mom has made for us and others over the years. And while all this was considered everyday food in her mind, it goes without saying that we ate like kings.

It shouldn’t be a surprise then to learn that my mom was the one who first introduced me to cooking. She taught me how to make a quick cheat’s buttermilk and wrap fresh herbs in cheescloth to make a bouquet garni. She’s shown me how to stuff and truss a turkey, wrangle a pot roast, whip meringue into stiff peaks, blanch and “shock” vegetables and throw together a killer pancake batter from scratch in two minutes flat. She introduced me to the terms deglaze, dredge, al dente, mirepoix, roux, bain-marie and taught me that the secret to perfect Christmas stuffing is found in a Simon and Garfunkel song. You can still catch her humming it, off-key, while she’s rummaging through the spice rack at Christmastime.

Mom’s always been at ease in the kitchen, whipping around from stovetop to fridge to pantry and back again in a blur of focused energy. She’s been fundamental to my culinary education and, when I call her in the middle of a kitchen meltdown, is still keen to answer my questions about oven temperature, butter conversions, baking alternatives and expiry dates. All the while, she’s encouraged me to be bold in the kitchen and to improvise when a recipe goes awry right before the guests arrive. Most importantly though, she’s shown me how food can be an expression of love, something that becomes so much more when it’s shared.

—–

Another thing my mother has tried to instill in us is the importance of birthdays – to take the time to celebrate them, preferably with a bottle of bubbly or, failing that, a dry martini. And food. There has to be food.

Today I want to take a moment to wish my mum a very happy birthday. We’re never quite sure how you manage to do it all, but thank you for all of it.

Love you with all my heart.

Me & mumMom’s Blueberry Pancakes – makes approx. 10-12

In our house, pancakes were never from a box, but always made from scratch and served with real maple syrup – from a tree, not from Aunt Jemima.

recipepancake prep

1 1/3 cups flour
1 tsp salt
3 tsp baking powder
3 Tbsp sugar
3 Tbsp vegetable oil
1/2 tsp vanilla
1 egg
1 1/4 cup milk
1/3 cup fresh (or frozen) blueberries

Directions

Set a pan on medium heat.

Mix dry ingredients and add the blueberries, tossing them to coat. In a separate bowl, beat the egg; add oil, vanilla and milk to the egg. Make a well in the dry ingredients and slowly add the egg-milk mixture. Stir quickly until the ingredients are just mixed and the batter is still lumpy.

Once the pan is hot, add a lump of butter. When the butter starts to bubble, add ladlefuls of batter to the pan. Cook until little bubbles start to form on the top, then flip.

Note: You can keep the pancakes in a low oven to keep them warm while the others cook.

Blueberry Pancakes Blueberry Pancakes Blueberry Pancakes

Share this:

  • Tweet
  • Share on Tumblr
Like Loading...
← Older posts
Newer posts →

Facebook

Facebook

Instagram

No Instagram images were found.

Recent Posts

  • Layers and Rows
  • Finding Buoyancy
  • February
  • Wednesday
  • Cross My Heart, Miso

Archives

  • May 2017
  • April 2017
  • February 2017
  • December 2016
  • November 2016
  • September 2016
  • August 2016
  • July 2016
  • June 2016
  • May 2016
  • April 2016
  • March 2016
  • February 2016
  • January 2016
  • December 2015
  • November 2015
  • October 2015
  • September 2015
  • August 2015
  • July 2015
  • June 2015
  • May 2015
  • April 2015
  • March 2015
  • February 2015
  • January 2015
  • December 2014
  • November 2014
  • October 2014
  • September 2014
  • August 2014
  • July 2014
  • June 2014
  • May 2014
  • April 2014
  • March 2014
  • February 2014
  • January 2014
  • December 2013
  • October 2013
  • September 2013
  • August 2013
  • July 2013
  • June 2013
  • May 2013
  • April 2013
  • March 2013
  • February 2013
  • January 2013
  • December 2012
  • November 2012
  • October 2012
  • September 2012
  • August 2012
  • July 2012
  • June 2012
  • May 2012
  • April 2012
  • March 2012
  • February 2012

Categories

  • Beverage
  • Breakfast & Brunch
  • Condiments
  • Cooking For Your Peeps
  • Cooking Solo
  • Cooking with Nonna
  • Food Away From Home
  • Food Writing
  • Holidays
  • Intro
  • Lunch & Dinner
  • Snacking
  • Soups
  • Sweet Tooth
  • The Basics
  • Vegetarian

Enter your email address to follow this blog and receive notifications of new posts by email.

Join 82 other subscribers

Blog at WordPress.com.

  • Subscribe Subscribed
    • julia chews the fat
    • Join 82 other subscribers
    • Already have a WordPress.com account? Log in now.
    • julia chews the fat
    • Subscribe Subscribed
    • Sign up
    • Log in
    • Report this content
    • View site in Reader
    • Manage subscriptions
    • Collapse this bar
 

Loading Comments...
 

    %d