• Home
  • About

julia chews the fat

julia chews the fat

Category Archives: Soups

Cross My Heart, Miso

12 Saturday Nov 2016

Posted by julia chews the fat in Breakfast & Brunch, Cooking For Your Peeps, Lunch & Dinner, Snacking, Soups, Sweet Tooth, Vegetarian

≈ 11 Comments

I am the kind of person that will buy a tub of miso, then leave it in the refrigerator door for an interminable length of time, under the naïve assumption that it will (eventually) find its way into a recipe. If you’re like me, you know that this moment rarely, if ever, comes. You also know that it leaves you with bad feelings when you do a deep clean of the fridge and realise it’s been there for a small eternity, opened, but with only one spoonful scooped out from the top. You ask yourself the following questions: Is it still good? How do I know it’s still good? Do I need to throw it out? Then concede to the following affirmations: Online message boards about expiration dates cannot be trusted. I’m going to need to throw this out. I am a horrible human being for throwing this out.

It’s a vicious cycle.

I’m not quite sure what happens in the ark of purchasing the miso, bringing it home, then, months later, scraping it into the bin. It’s confounding. Not to mention a heinous act of food waste. (especially considering that miso paste could probably out-live you and me and I’ve just been overly cautious about its perishability). And so, I’ve decided that from this day forward, I will never throw out another container of miso. Cross my heart and hope to die.

I come to you today with proof of my penance – two recipes made recently with the stash of miso paste in my fridge, both having helped put a considerable dent in my supply, all while broadening my miso repertoire (did you know you can use it in savoury and sweet dishes? And not just in miso soup?). I feel that this is the beginning of a new relationship.

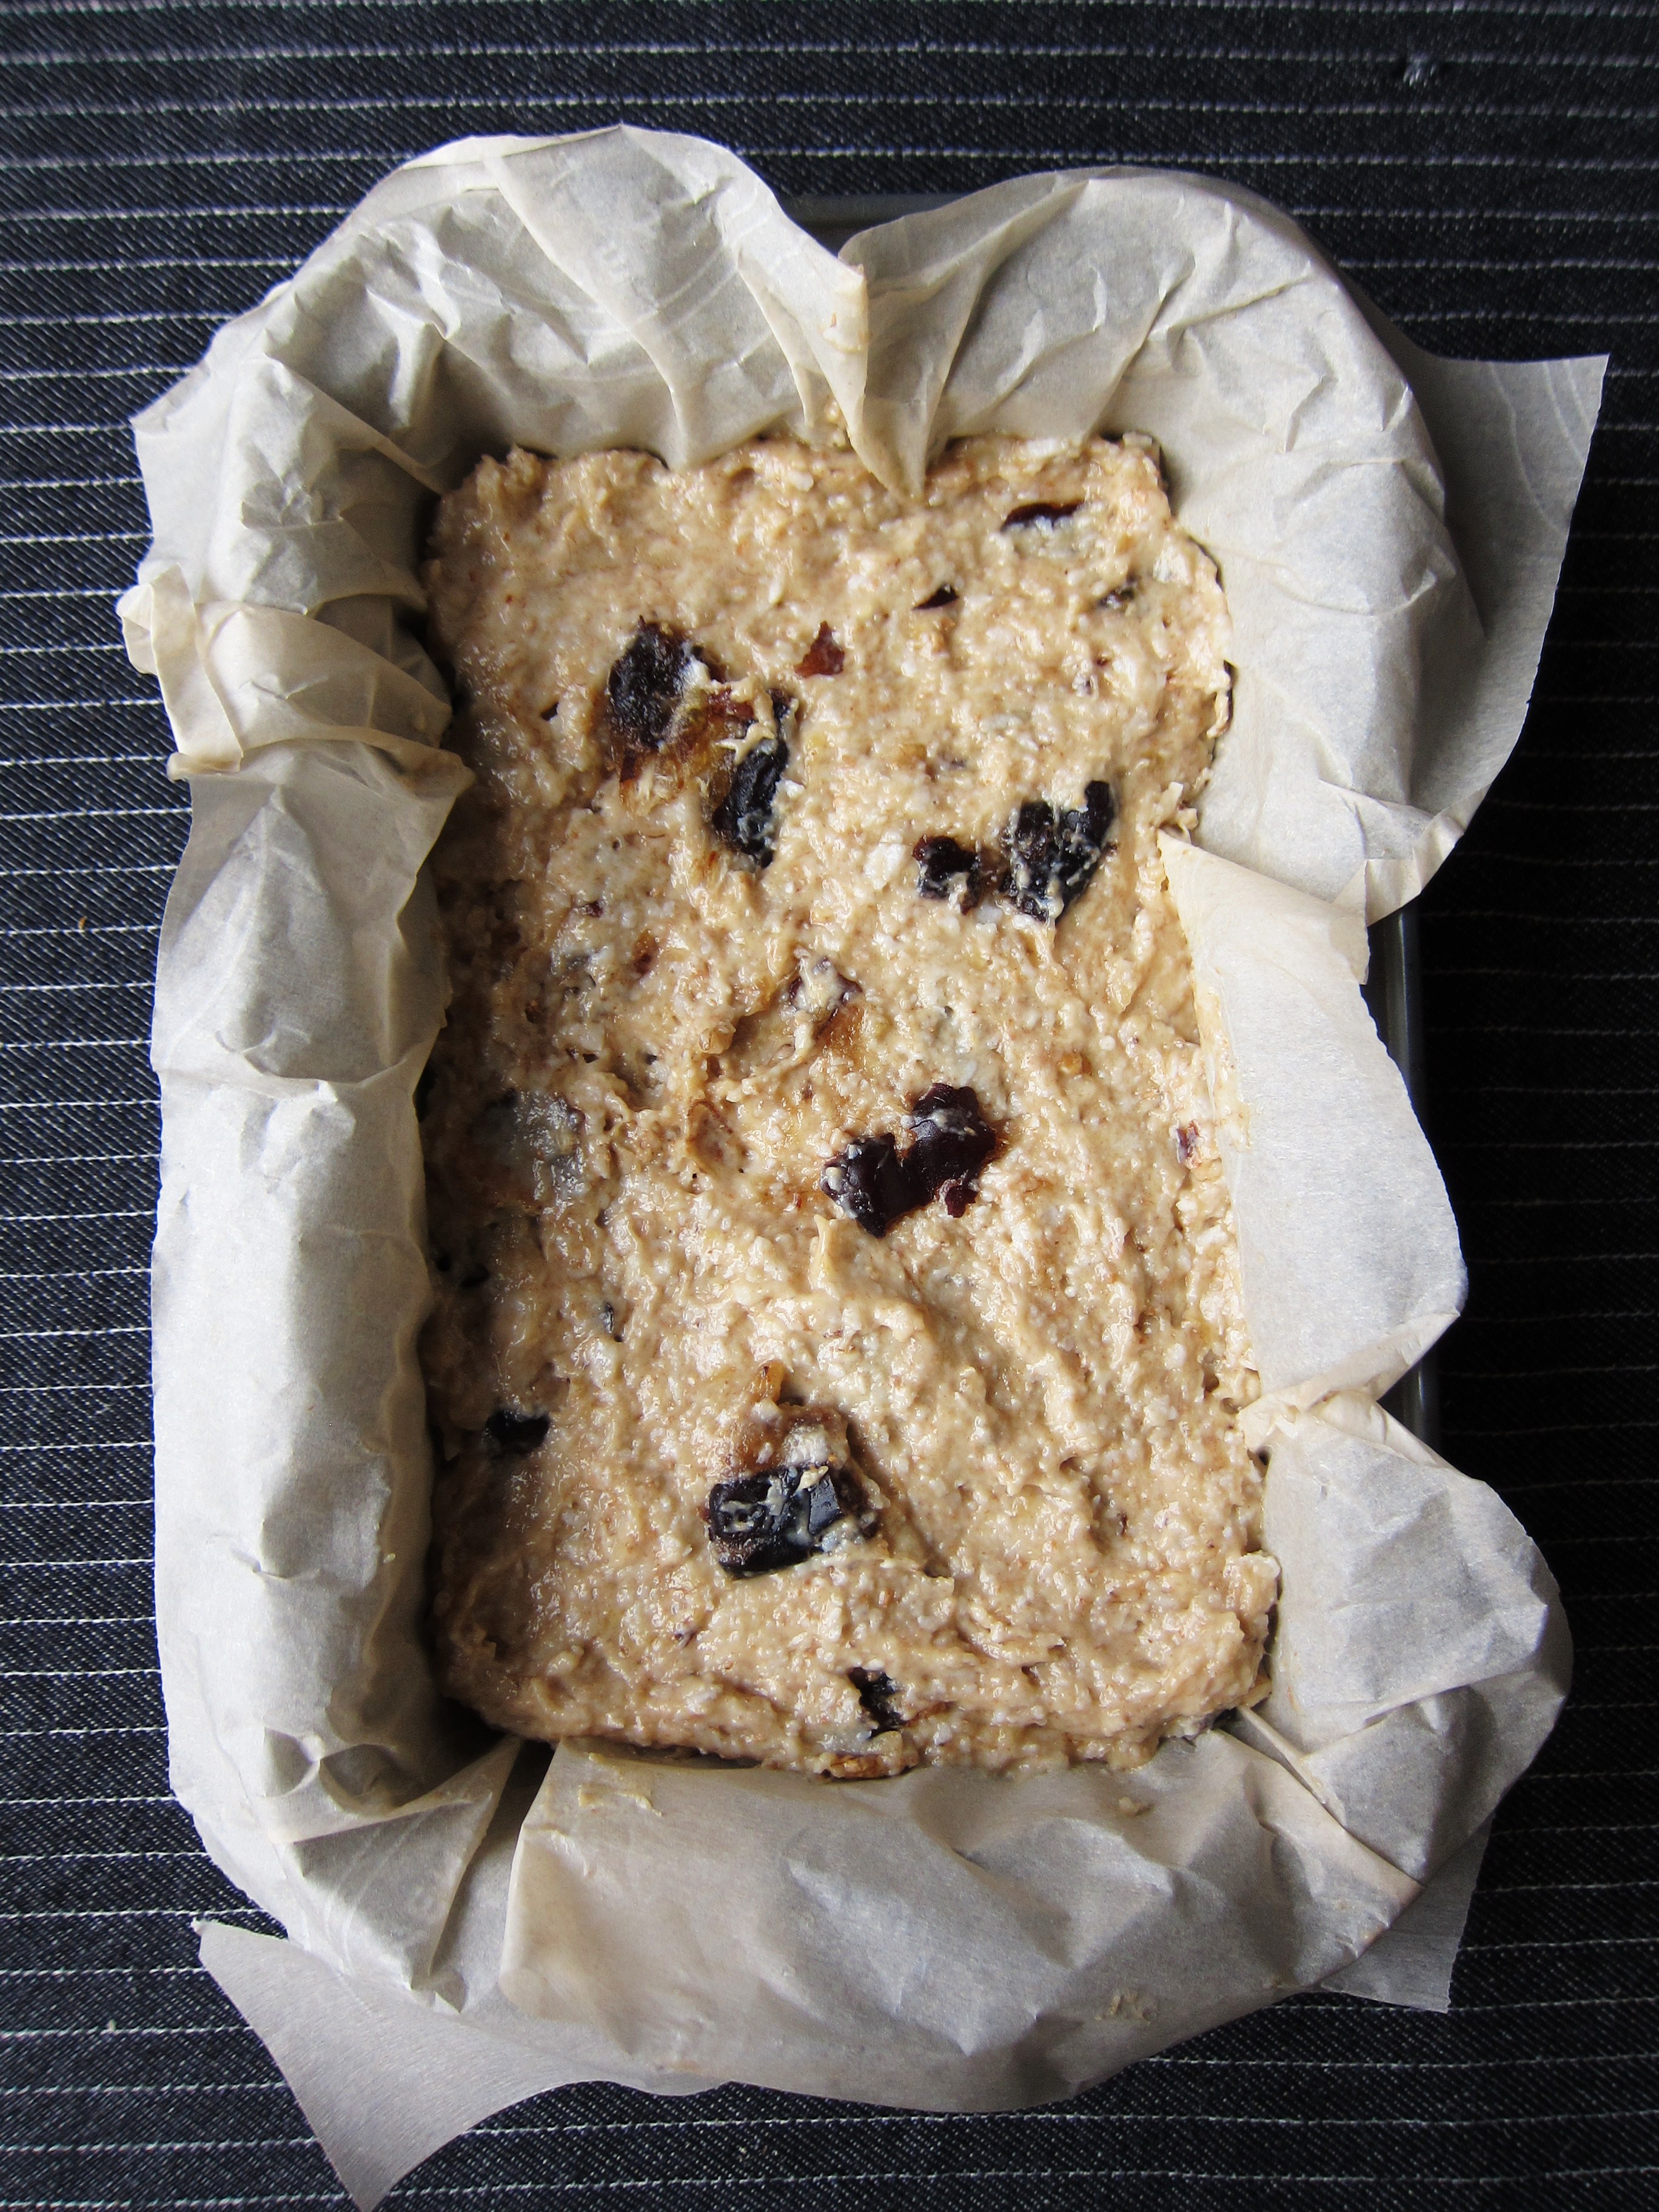
One is a carrot soup with ginger, spiced with coriander and curry. The miso works nicely in the background, adding a bit of depth to a soup that might otherwise be ho-hum. The other is a recipe for banana bread (or cake, depending on your sensibilities), where the saltiness of the miso balances out the sweetness of the banana. I brought a loaf to my friends Marko and Marilou as part of a care package the week after their daughter was born and received a text from them the next day saying they’d polished it off, the last couple of slices served up for breakfast, toasted and slathered in butter.

I hope you’ll do the same x

Miso banana bread // © julia chews the fat

Miso Banana Bread – from Amelia Morris of Bon Appetempt

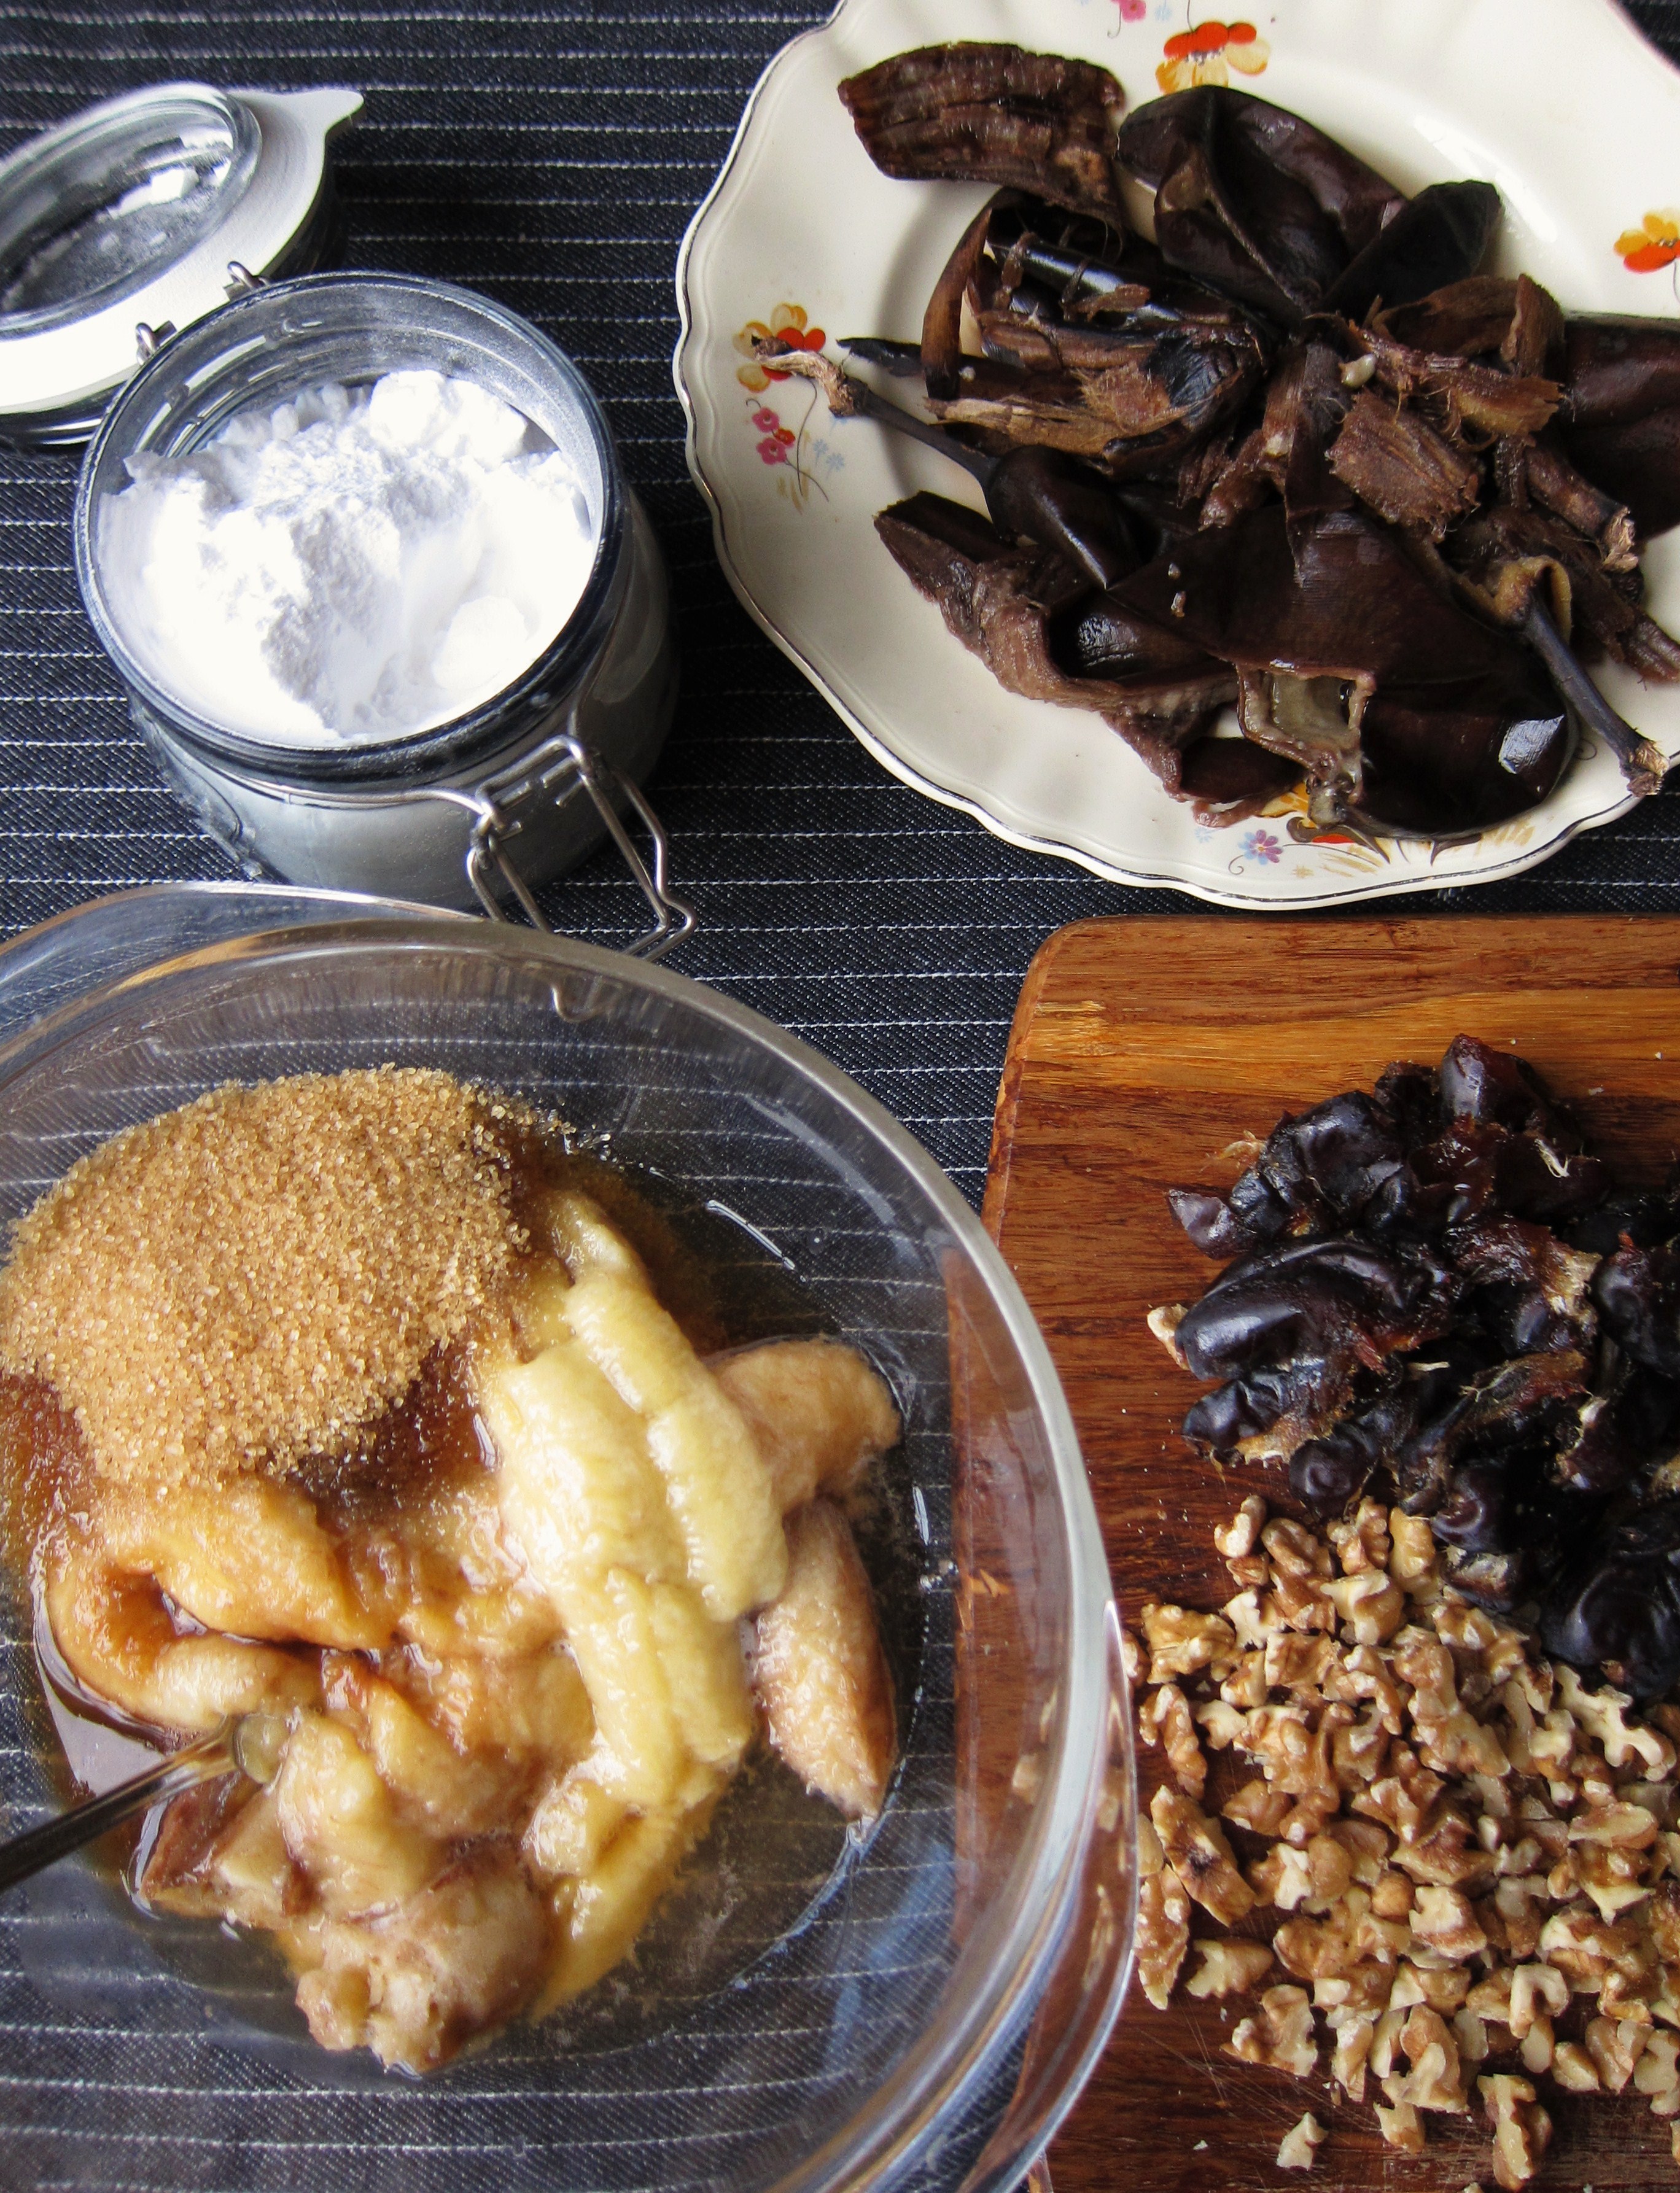
  • 5 medium overripe bananas
  • 1 cup all-purpose flour*
  • ½cup whole-wheat flour
  • ¼ cup of ground flax seeds
  • 1 teaspoon baking soda
  • ½ teaspoon baking powder
  • ¼ teaspoon salt
  • 1 stick unsalted butter, softened
  • 1 cup sugar
  • ¼ cup white (or yellow) miso
  • ½ whole-milk plain yogurt
  • 2 large eggs

*If you prefer, you can replace the whole-wheat flour and ground flax seeds with all-purpose flour (so 1¾ cups of all-purpose flour total)

Directions

1) Preheat oven to 350°F. Butter a loaf pan, dust with a light coating of flour and set aside.

2) Mash 4 of the bananas in a bowl. Set aside

3) Mix all the dry ingredients (except the sugar) in a separate bowl. Set aside.

4) In the bowl of a stand mixer (or, simply, another bowl). Combine the softened butter, miso. Beat until light and fluffy (about 5 mins). Add the sugar and beat until combined. Add the yogurt, then one egg at a time, beating between additions. Beat in mashed bananas. Then mix in the dry ingredients until just combined.

5) Transfer batter to prepared loaf pan. Slice remaining banana lengthwise and place on top of the batter. Bake for about 45 minutes (or until a skewer inserted in the centre comes out clean). Let cool on a baking rack for 20-30 minutes before serving.

Miso banana bread // © julia chews the fat

—–

Miso Carrot Soup – adapted from Wholehearted Eats

Serves 4-6

  • 1 yellow onion, chopped
  • 3 garlic cloves, chopped
  • 1 Tbsp. olive oil
  • 8 large carrots, peeled and chopped (about 5 cups)
  • 1 Tbsp curry powder (optional)
  • ½ tsp. dried coriander
  • 2-inch piece of ginger, peeled and minced
  • 6-7 cups stock, vegetable or chicken
  • 3 Tbsp. white miso paste
  • 1 tsp. tamari
  • garnishes: lemon wedges, cilantro, sesame seeds

Carrot Miso Soup // © julia chews the fat

Directions

1) Heat a medium pot to low and add the oil and onion. Sweat the onion until soft, translucent and golden. Add the garlic, dried coriander, curry (if using) and the minced ginger. Sauté for a couple of minutes until fragrant, stirring occasionally. Add the chopped carrots and sauté cook for few more minutes.

2) Next add 5 cups of the stock and bring the mixture to a simmer. Once it begins to simmer, cover with lid slightly ajar, and let it cook until the carrots and onions are very tender (about 3o minutes).

3) Take the soup off the heat and puree it in a blender or hand blender, until smooth. Bring the remaining 1-2 cups stock (if you like a thicker or thinner soup) to a boil, take it off the heat, and stir in the miso and tamari until combined. Add this mixture to the soup and stir to combine. To serve, add a squeeze of lemon, some sesame seeds and fresh cilantro.

Carrot Miso Soup // © julia chews the fat

Share this:

  • Tweet
  • Share on Tumblr

Like this:

Like Loading...

Pistou Soup

12 Friday Aug 2016

Posted by julia chews the fat in Lunch & Dinner, Soups, The Basics, Vegetarian

≈ 8 Comments

I realise that writing about soup in the dead-heat of summer might be a controversial choice. Very few of us think about craddling a big, hot bowl of anything when the cicadas are screaching outside and we’re still daydreaming about popsciles and swimming pools and cool, tile floors. But there is one soup that deserves our attention right now and not a moment later – and that, dear friends, is soupe au pistou.

Pistou soup is really a blank canvas for whatever is seasonably available. In the summer months, when market produce is abundant, you can more or less throw in whatever looks most attractive to you – zucchini, beans, chard, fresh peas. This is a handy back-pocket dish for people like me, who often browse the market without a list and end up adopting too many vegetables (because they all looked good and they all needed a home). Like ripe tomato salads and fragrant berry pies, this soup is an honest expression of summer, whose crowning glory (the pistou) is made with what might arguably one of the best endowments of June, July and August – sweet basil.

As you’ll see in the recipe below, French pistou is nearly identical to Italian pesto, the only difference being that the French variation doesn’t contain pine nuts. You can think of them as fraternal twins – both use generous amounts of fresh, leafy basil and parmesan cheese, pounded into a fragrant paste with a little olive oil and salt; both are delicious tossed into pasta, slathered onto fish, or swirled into vegetable soups like this one, which, I think, is one of the best ways to tip your hat to summer.

Go forth and harness the bounty.

IMG_2518

Pistou Soup – lightly adapted from David Lebovitz
Makes about 5 quarts of soup

Note: In a perfect world, you’re making this soup with dried beans that have been soaked overnight and cooked. But if you haven’t done this step, just use canned and don’t mention it to the purists.

  • 1 cup (200g) dried canelli beans (or canned)
  • 2 bay leaves
  • 3 tablespoons olive oil
  • 2 medium onions, peeled and diced (or: 3 leeks, cleaned and sliced)
  • 2 teaspoons chopped fresh thyme
  • 2 medium carrots carrots, peeled and diced
  • 1 medium zucchini, diced
  • 1/4 pound green beans, tips removed and cut crosswise into quarters
  • 2 leaves swiss chard, chopped (optional*)
  • a few leaves of raddichio, chopped (optional*)
  • a couple of green cabbage leaves, chopped (optional*)
  • 6 cloves of garlic, peeled and minced
  • 1 tablespoon sea salt, and freshly ground pepper, to taste
  • 1 cup  fresh, shelled fava beans  (or: fresh or frozen peas)
  • 1 cup dried pasta (any small variety will do, such as orzo, tubetti, or shells)

*optional because I tossed these only because I had them on hand.

For the pistou – makes 1 cup

  • 1 large clove of garlic, peeled
  • pinch of salt
  • 2 cups packed fresh basil leaves
  • 1/4 cup olive oil
  • 1 1/2 ounces parmesan, grated

Directions

If using dried beans:

  • Rinse and sort the beans. Soak the beans overnight covered in cold water.
  • The next day, drain the beans and put them in a large saucepan with the bay leaves and enough water to cover the beans with about 1 1/2 quarts (1.5l) of water. Cook the beans for about an hour, or until tender, adding more water if necessary to keep them immersed. Once cooked, remove the beans from the heat and set aside.

1) In a Dutch oven or large stockpot, heat the olive oil. Add the onions (or leeks) and cook, stirring occasionally, until soft and translucent.

2) Add the thyme, diced carrots, zucchini, green beans, cabbage (if using) garlic, and salt. Season with pepper, and cook, stirring occasionally, until the vegetables are cooked and fragrant (about 10 minutes). Add the cooked beans and their cooking liquid and bay leaves, then the peas and pasta, plus 2 quarts (2l) water. (if using canned beans, you’ll need to add about a 1/2 litre of water to make up for the cooking liquid). Bring the soup to a boil, and simmer a few minutes until the pasta is cooked. (if using the swiss chard and raddichio, you can toss them in a couple of minutes before the pasta is cooked.)

Note: If the soup is too thick, you can thin it with additional water, but make sure to adjust the seasoning too.

3) While the soup is cooking, make the pistou: pound the garlic to a paste in a mortar and pestle (or use a food processor) with a generous pinch of salt. Coarsely chop the basil leaves and pound them into the garlic until the mixture is relatively smooth. Drizzle in the olive oil slowly, while pounding, then pound in the cheese. Taste, and season with more salt if desired.

To serve: Remove the bay leaves. Ladle hot soup into bowls and add a generous spoonful of pistou to the centre. Serve with extra pistou on the side.

IMG_2525IMG_2529IMG_2534

Share this:

  • Tweet
  • Share on Tumblr

Like this:

Like Loading...

A Complicated Love

11 Wednesday May 2016

Posted by julia chews the fat in Lunch & Dinner, Soups, The Basics, Vegetarian

≈ 5 Comments

When I was younger, I wasn’t much of a picky eater, but tomatoes – either in their raw form or cooked – proved problematic for a good portion of my childhood. The woman who ran our daycare, Sandra, used to make us a lunch of Campbell’s tomato soup and Kraft-singles grilled cheese, about once a week. It probably goes without saying that the grilled cheese was gobbled up with ease; the soup, however, was another story. I can still remember the tart, salty, faintly metallic canned-tomato flavour that would coat the back of my throat with every reluctant spoonful. That tomato soup was the bane of my five-year-old existence; it was like punishment in a bowl.

Then there was that trip to Italy, to visit family – when I was seven and my brother was five – and neither of us would eat pasta with tomato sauce; only with burro (butter). This was incomprehensible to our Italian relatives, who’d shake their heads, and with furrowed brow, ask, “Ma, non ti piace i pomodori?” (Don’t you like tomatoes?). Their question breathed equal parts bewilderment and despair, but would quickly melt into capitulation with a shrug of the shoulders, when they’d swirl a spoonful of butter into our pasta, as requested. To the dismay of our relatives, we spent that entire trip avoiding pomodori in every way, shape and form.

Fortunately, I’ve since mended by ways with tomatoes; they’re often in the recipes I make at home – from sugo di pomodoro, to lentil soup, to foccacia, to tomato salad. That said, I’d be lying if I said that our relationship was an uncomplicated one. Raw tomatoes are the ones that still, on occasion, send a shiver down my spine. We can blame both latent childhood sensibilities and the Canadian climate for that one: I grew up in a place where, for a good six months of the year, tomatoes were (and still are) flown in from exotic destinations, arriving in a grainy, hard, tasteless state, then flaunted in their raw form – in big, rough chunks – tossed into a plain green salad, or Greek-style, swimming alongside cucumber and slivers of red onion. Unless those tomatoes are vine-ripened under the hot, summer sun and served within a few miles of where they were grown, tasting like the rich, sweetly acidic fruit that they should be, they usually aren’t coming anywhere near my lips. Otherwise, it’s just a waste, because I will, without fail, pick around them.

To this day – most likely stemming from Sandra’s Campbell’s soup days – I also don’t have a particular affinity for tomato soup. That said (and since the criteria by which my brain accepts and rejects tomatoes is still a total enigma) there is one notable exception – and that is for the Moroccan soup harira, a tomato-based blend made with chickpeas, lentils and a handful of spices. It’s traditionally served during Ramadan as a nutrient-rich dish to break the daily fast, but I’m told that it’s served in different regions of Morocco, all year round. I first had harira at my friend Sophie’s house, when her husband, Hicham, cooked us dinner one night, a few short weeks after he’d come to Canada. We had it as a starter to lamb tagine with dates. A CD of gnawa music played in the background. We drank wine. He tried to teach me a few expressions in Arabic, though I only remember the words for ‘hello’, ‘no’, ‘look’ and ‘enough’. But the harira – I’ll always remember the harira: silky and tangy and heady with spices. It was the one tomato soup that broke the rules to my aversion. And for that – and to Hicham – I am forever grateful.

—–

A note on the recipe: Most recipes incorporate meat (beef, lamb or chicken), broken up vermicelli noodles or rice, as well as a roux (called tadouira) of water and flour at the end of cooking to thicken it up a bit. The recipe below doesn’t have any of these things, but it’s a close approximation to Hicham’s harira, which is always filled with warm spices and creamy chickpeas, which he cooks from dried (not canned).

It’s a simple soup – but well-rounded, sustaining and comforting. Hope you like it.

Vegetarian Harira Soup

Makes 4-6 servings

Harira_prep

Ingredients

  • 100g lentils, rinsed and picked through
  • 150g cooked chickpeas
  • 2 Tbsp olive oil
  • 1 large onion, finely chopped
  • 2 cloves garlic, pressed
  • 3 Tbsp tomato paste
  • handful fresh parsley, chopped
  • 400g ripe tomatoes, smashed
  • 700ml vegetable stock
  • salt and pepper, to season

Spices:

  • 2 tsp ground cumin
  • 1 tsp turmeric
  • 1 tsp ginger powder
  • 1/2 tsp cinnamon
  • 1/4 tsp ground cloves
  • 1/4 tsp cayenne

To serve:

  • lemon
  • pita bread
  • fresh cilantro, chopped

Note: only add the salt at the end, otherwise the lentils won’t cook through.

Directions

1) Heat the olive oil in a large saucepan or Dutch oven. Sauté the onion until browned. Add the garlic, spices, tomato paste and sauté for about 1 minute. Add the parsley, lentils, and smashed tomatoes (with their juices) and stir.

2) Stir in the vegetable stock and bring to a boil over high heat; reduce the heat to medium-low and simmer for 40 minutes. Add the cooked chickpeas and simmer for another 5 minutes, or until the lentils are cooked through. Season with salt and pepper.

3) Ladle into bowls and top with chopped cilantro, a little olive oil and a squeeze of lemon juice (the lemon is important – don’t skip it!). Serve with pita or flatbread.

Harira


Share this:

  • Tweet
  • Share on Tumblr

Like this:

Like Loading...

Care Package

27 Friday Nov 2015

Posted by julia chews the fat in Breakfast & Brunch, Cooking For Your Peeps, Lunch & Dinner, Soups, Sweet Tooth, Vegetarian

≈ 1 Comment

A friend of mine had a little boy just a over two weeks ago now – a beautiful little chicken of a baby, with soft cheeks, delicate fingers and the requisite new-baby smell. He is definitely a sight to behold, with his miniature yawns and peach-fuzz hair. Regardless of a few nicks from his sharp newborn nails – and a few surprise vibrations from his diaper – he charmed me through and through, in that way that babies are preternaturally good at, without even trying.

With the mini baby boom happening in my circle of friends right now, the one thing I’ve come to understand is just how precious the resources of time and energy are to new moms and dads. Squeezing in a shower or running an errand are rare opportunities that are seized with an acute sense appreciation, if not urgency. Other activities, namely, making a full meal, are easily relegated to the back-burner (sorry for the pun). I’ve heard that a banana and a box of crackers will suffice when you’ve been on four-hour sleep cycles – at best! – and have a little person who needs you in a way that no one else has before.

Knowing that my friend and her husband were busy acclimatising to their new unit of three (diapers, feedings, and all the rest of it), I thought I should come equipped with couple of homemade treats – things that could be frozen or eaten as-is, without any prep, aside from a quick re-heating. In fact, it’s also the kind of food any non-parent would want in the fridge or freezer on those frantically busy days when they don’t have one more ounce to give.

Parent or non-parent, this soup and this cake are my virtual gifts to you. Enjoy xx

Turkish Lentil Soup – makes 4-6 servings

Turkish Red Lentil Soup

  • 225 grams red lentils (approx 1 1/8 cups)
  • 1 medium onion, finely chopped
  • 1 stalk celery, finely chopped
  • 1 carrot, finely chopped
  • 3-4 cloves garlic, peeled and sliced in half lengthwise
  • 2 Tbsp tomato paste
  • 1-2 Tbsp extra virgin olive oil
  • 1.5 litres vegetable stock (plus 1-2 cups more, as needed)
  • 1 small piece ginger, grated
  • 2 tsp ground cumin
  • 2 tsp curry powder
  • 1-2 tsp paprika
  • 1 tsp mustard seeds
  • Fresh mint (or cilantro) and lemon to serve
  • Salt and pepper

Directions

1) Set the vegetable stock in a pot on medium heat to warm up.

2) Heat the olive oil in a large pot, and sauté the vegetables with the garlic cloves, for about 10 minutes. Add tomato paste, spices and grated ginger, and cook for a few more minutes. Add lentils, washed and drained, and cover with hot vegetable stock.

3) Bring to a boil, reduce heat and simmer with the lid on for about 30 or 40 minutes, until the lentils begin to fall apart. Add more stock if they look a bit dry (just remember it should be a soup-like consistency). Season with salt and pepper, to taste.

4) Set aside two or three ladles of soup, and puree the rest in a blender (optional).

5) Serve with chopped fresh mint (or cilantro) and lemon juice. Do not skip this – it’s what makes all the difference!

Turkish Red Lentil Soup

—–

Date-Walnut Banana Cake with Coconut
Lightly adapted from Lunch Lady’s Black Gold Banana Cake
Makes one 9x5x3″ loaf

  • 4 medium overripe bananas
  • 1 1/2 cups all-purpose flour (I used 1 cup white +1/2 cup whole-wheat)
  • 1 1/2 tsp baking powder
  • 1/2 tsp baking soda
  • pinch of salt
  • 1/2 cup raw caster sugar
  • 2/3 cup coconut oil, melted
  • 1 tsp pure vanilla extract
  • 1/2 cup Medjool dates, chopped
  • 1/4 cup walnuts, chopped
  • 1/4 cup unsweetened shredded coconut

Date-Walnut Banana Cake

Directions

1) Preheat the oven to 350˚F.
2) Place the overripe bananas into a mixing bowl and beat until puréed. Add the vanilla, coconut oil, and sugar, and beat again until combined.
3) Fold in the flour, raising agents, salt, and walnuts until thoroughly combined.
4) Fold in the chopped Medjool dates and shredded coconut; pour the batter into a loaf tin lined with parchment paper.
5) Bake for 45 mins to an hour, or until skewer comes out clean, cool on wire rack.

Date-Walnut Banana Cake

Date-Walnut Banana Cake

Date-Walnut Banana Cake

Date-Walnut Banana Cake

Share this:

  • Tweet
  • Share on Tumblr

Like this:

Like Loading...

Ramen mania

03 Tuesday Feb 2015

Posted by julia chews the fat in Lunch & Dinner, Soups, The Basics

≈ 5 Comments

“30 cloves of peeled garlic”

Those words alone should have been enough to dissuade me. Or any normal human being. But instead I found myself on the subway Sunday morning, heading to my friend Michael’s, with a backpack reeking of pork braised in thirty – yes, thirty – cloves of garlic, along with a small army of mason jars filled with stock and chicken schmaltz.

So why travel 40 minutes from home with a backpack stuffed with unidentifiable, pungent edibles that, under different circumstances, would’ve gotten me swiftly escorted to airport security? Ramen, baby. That’s why.

I’ve had ramen on the brain for a few weeks now, and it turns out I’m not the only one: Lucky Peach recently compiled a Guide to the Regional Ramen of Japan. Grub Street and Rachel Khoo both featured stories on the topic last week. And just a few days ago, NOWNESS re-posted its short film, “The Eight Chapters of Ramen“, about NYC ramen chef-extraordinaire, Ivan Orkin. It’s a topic that’s been part of the zeitgeist for a couple of years now, but I get the sense that this year, 2015, will be ramen mania, full steam ahead. Consider yourselves warned.

In theory, I’m really into the idea of ramen – the salty broth, packed to the gills with umami; the melt-in-your-mouth pork belly; the slippery noodles and soft-boiled egg; the chopped scallions and squishy shiitake. The obnoxious part about food trends is that they prove you can have too much of good thing. At some point, they become so pervasive that you start to wish they’d never caught on. (Remember last year’s fetishisation of grilled cheese? The countless photos of triple-decker grilled cheese sandwiches oozing all over everyone’s social media stream? The specialty grilled cheese shops that started popping up everywhere, like a rash you couldn’t get rid of? Mac-n-cheese grilled cheese! Poutine grilled cheese! Bacon-double-cheeseburger grilled cheese. Scary, scary times.)

I think it’s fair to say that in North America, ramen is still walking that fine line between novelty and ubiquity, two extremes that often lead us down the disappointing path of sub-par food. I’ve never been to Japan, but I can tell you that some pretty ho-hum – not to mention obscenely-priced – bowls of ramen have crossed my lips in this town, with blah-tasting broth, missing pork, or a missing egg, or some other delicious thing missing that you then have to order on the side, at an extra cost. Gah! Why??

So at some point I figured, why not make my own ramen? Heck, then I could have the egg AND the pork AND all the other bits. The only problem was that I’d never actually made ramen before, and it seemed like a pretty long, laborious, intimidating process (it’s actually not so bad, but more on that later). For a first attempt, I needed to recruit someone else – a partner in crime, a compadre, a guardian angel – to bolster my confidence and see me through to the end.

Enter Michael – the man who whips up daunting recipes from the Momofuku cookbook like it’s nobody’s business, and who knows exactly where to get hard-to-find Asian cooking loot, like bonito dashi granules and togarashi. He didn’t even flinch when I suggested (with a string of exclamation marks) that we make a 5-part recipe that included 30 peeled cloves of garlic (p.s that’s just for the pork, friends), plus homemade garlic oil and homemade fried garlic powder. Most people would look at me cock-eyed if I’d proposed the same feat to them. You want to make WHAT? You’re going to PEEL all those cloves? Are you out of your mind? But not Michael. That’s one of the reasons I like him. Not only does he get that level of insanity, he actually partakes in it.

—–

The recipe we used – appropriately named “The Vampire Slayer Ramen-Express” comes from Mandy Lee’s site, Lady and Pups. She lays everything out, step-by-step, with pretty photos and her signature dry wit. For the full recipe, click here.

Now, before you get going on this one…some words of advice:

  • make components ahead – don’t try to make all of the ramen components in one day. Doing that will want to run from the kitchen and jump off a bridge. Pick a quiet day at home to make the stock (which you can then keep in the fridge or freeze). In this case, I made the stock and braised pork on the Saturday to serve on the Sunday. It was a breeze cause there was no rush – just me, the stock, the pork and a few back-to-back episodes of Broadchurch. On his side of things, my compadre made the garlic oil, garlic powder and soft-boiled eggs ahead of time, so once we got together, all that was left to do was boil the noodles, rewarm the (already soft-boiled) eggs in their shell, heat up the pork, and add the soy milk to the stock before putting it on the stove to simmer.
  • don’t worry about making noodles from scratch – we sure as hell didn’t. The dried ones (not instant!) from the Asian grocery worked out perfectly.
  • simplify your stock – you’re trying to achieve an opaque broth that is neutral-tasting (don’t go sticking a bay leaf in there, friends). Mandy Lee even suggests not adding salt, which is sound advice seeing that it allows you to adjust the seasonings according to whatever recipe you’re making with the leftover stock.
  • don’t skip the pork bones in the stock – just don’t
  • keep an eye on that braised pork – make sure that the braising liquid doesn’t dry up; baste it/turn it from time to time during the cooking process and add more liquids if necessary. I wasn’t paying attention and my braising liquid dried up in the last 20 minutes in the oven, resulting in shrivelled (albeit, tasty) shiitakes and pork that was a little less moist than it should’ve been.
  • if you can’t find a hunk of prosciutto – any dry-cured ham will do for the stock. In this case, my butcher suggested some cured (and cubed) Bayonne ham, and it worked out great.

Now go forth and make ramen, you crazy fools!

ramen prep

stock components

stock after first boil

pork + prep

so many garlics

braising the pork

ramen assembly

sliced pork

ramen noodlesbowls of ramen

bowl of ramen

bowl of ramen + Sapporo

Share this:

  • Tweet
  • Share on Tumblr

Like this:

Like Loading...

A riot of pink

09 Tuesday Apr 2013

Posted by julia chews the fat in Lunch & Dinner, Soups, Vegetarian

≈ Leave a comment

If per chance, you plan on spending time with a group of 6-year-old girls (and, like me, do not have the experience of being a parent) know this:

1) Despite seeming level-headed and charming, they are complete maniacs. I don’t even feel bad about saying that. They’re mental. Especially when grouped together for an afternoon birthday party, with sustained access to sugar and chocolate. In their presence, you will bear witness to a level of shrieking that will be equal parts astounding and frightening. You will stand around with the only other adult in the room, wide-eyed and helpless, while drawing air circles with your index finger around your temple, silently mouthing the words “THIS IS FUCKING CRAZY”. Right from the start, your body will switch on to full alert, your heart will start racing and you will develop a slow, but sharp headache right between the eyes. You will seriously contemplate your ability to make it through the next three hours, possibly even the next three minutes.

…also, little girls:

2) Wear a TON of pink. They love it. They covet it. They want everything in it. They might’ve gone through a phase where they liked blue or yellow, and as they grow up, they’ll likely come to appreciate the whole spectrum of colours. But right now, their brain only acknowledges one colour: PINK. It’s a force to be reckoned with. Observe the evidence:

pink pink pink

Coincidently, these two observations found their way into the recipe below. Beets help lower your blood-pressure (to recover from little-girl-freak-outs) AND they have the magical property of turning bright magenta when blended with liquids. Ultimately, this soup will make everyone happy – the adults get to restablize, and the miniature raving lunatics get their pink soup. Win-win.

Warm beet and fennel soup (serves 4) – adapted from Bon Appétit

  • 2 Tbsp olive oil
  • 1 cup chopped onion
  • 1 cup chopped fennel bulb
  • 1 1/2 tsp fennel seeds
  • 2 large beets, peeled, cut into 1/2-inch cubes
  • 2 cups chicken broth (or vegetable stock)
  • 1 cup soup cream
  • additional sour cream for decorating (optional)
  • fennel fronds, for garnish (optional)

Beet and fennel soup

Directions:

Heat olive oil in large saucepan over medium heat. Add chopped onion, chopped fennel, and fennel seeds. Sauté until vegetables soften, about 5 minutes.

Add cubed beets and stir to coat. Add chicken broth and bring to boil. Cover; reduce heat to medium-low. Cook until beets are tender, 18 to 20 minutes.

Purée soup in batches in a blender (or with a hand blender). Return to the same saucepan season soup with salt and freshly ground black pepper. Add the sour cream* to the soup in the saucepan and rewarm gently. Ladle soup into bowls. Drizzle with additional sour cream and garnish with fennel fronds, if desired.

*If your sour cream is straight out of the fridge: place 1 cup sour cream in a bowl, then add one small ladleful of soup, stirring to combine. Repeat twice more until the sour cream is tempered – this will help avoid the curdling that can happen when cold dairy hits hot soup.

Share this:

  • Tweet
  • Share on Tumblr

Like this:

Like Loading...

Chicken broth, the magical elixir

03 Saturday Nov 2012

Posted by julia chews the fat in Soups, The Basics

≈ 10 Comments

A couple of weeks back, I babysat my friend’s kids. This request comes up from time to time and when it does, I’m quick to accept because, well, her daughters are two lovely little people that I like spending time with.

I mean, would you say “no” to these magnificent creatures?

That said, if you have kids, or know people who do, you are well-aware that children between the ages of two and five spend most of their waking hours at school or daycare sticking their fingers in other kids’ mouths, thus becoming spectacularly efficient germ incubators. The night I came over to babysit, the sick one (who will remain nameless) happened to sneeze in my face – not on my cheek, or my forehead. No. Instead, directly into my mouth. There was something rather unsettling about the perfect timing between that sneeze and that yawn. Something vaguely Darwinian and cruel. The germ incubator, for her part, thought it was quite hilarious.

That, dear friends, marked the beginning of a fourteen-day chest cold. And by the fourteenth day, everything began to feel dramatic: having to replace a burnt-out light bulb on the ceiling fixture. Taking public transit. Taking out the trash.

Expletives abounded.

To curb any further cold-induced swearing, I took on the standard routine of sleeping, drinking tea, gargling salt water, and consuming vast quantities of soup – ones made with heady, home-made chicken broth. More specifically, mom’s chicken broth – a simple elixir of chicken, root vegetables and herbs that simmers slowly on the stove top. It’s your reward for making your way through an entire box of tissues.

Next time you feel like the contents of a trash bag, make this broth (or even better, ask someone to make it for you), pour some in a bowl and sip it slowly – no spoon required.

Cold-curmudgeon pacified, guaranteed.

Mom’s Chicken Broth – makes about 2 litres

  • one whole chicken (organic, if possible)
  • 1 onion, halved (if you want a darker broth, keep the peel on)
  • 1 large carrot, roughly chopped
  • 1 celery stalk (leaves on, if possible), roughly chopped
  • a few springs of fresh thyme
  • a few springs of fresh parsley
  • 1 bay leaf
  • salt
  • cheesecloth
  • kitchen twine

(*I add one whole garlic clove, smashed – but don’t tell mom)

Place chicken in a large Dutch oven (i.e. a heavy-bottomed, two handle soup pot) and cover with cold water. Set the pot on medium-high heat.

While the water heats up, prepare the onion, garlic, carrot and celery; set aside. Make a bouquet garni by filling a piece of cheesecloth with the thyme, parsley and bay leaf and tying it with a piece of twine.

Bring water to a boil and periodically skim off the frothy bits with a wooden or slotted spoon – this will ensure that you get a clear broth.

When the frothing has subsided, reduce heat to medium-low, add some salt, the vegetables and the bouquet garni. Simmer for about 1 – 1½ hours, (the cooking time will obviously vary depending on the size of your chicken) until chicken is cooked. Remove it from the pot and reserve. Strain the broth into a large bowl through a fine sieve (or a fine sieve with some cheesecloth). If you choose, you can reserve the vegetables for another use.

Share this:

  • Tweet
  • Share on Tumblr

Like this:

Like Loading...

Back-to-it Minestrone

04 Wednesday Apr 2012

Posted by julia chews the fat in Lunch & Dinner, Soups, Vegetarian

≈ 3 Comments

Three weeks ago to the day, an orthopedic surgeon made three small incisions in my right shoulder to fix a recurring dislocation problem. Since then, there have been things that I’ve temporarily had to bid adieu to, including pantihose, chopsticks, bras, clothes-folding, bed-making, hair-styling, hugging people with both arms and sleeping in any other position than corpse-pose. It’s bewildering that I’ve managed to look remotely presentable this last little while – barring those first few days at the beginning when I looked like something you might find in the recesses of your couch cushions. Luckily, the people in my day-to-day didn’t seem to notice. That, or they’re magnificent liars. I can appreciate either.

Despite feeling like a gimpy three-legged dog over the last couple of weeks, it hasn’t been all bad. In fact, I’ve taught myself some pretty neat tricks, like putting on socks with one hand, applying liquid eye-liner like a lefty and resisting the urge to catch things when I drop them (anthropological note: watching passively as your most beloved piece of porcelain escapes your grip and shatters into a gazillion pieces on the floor is an interesting testament to the strength of human willpower). Equally interesting is the realisation that you will not be able to sweep said shards of porcelain into a dust pan in order to discard them. Human ingenuity dictates that a quick sweep with one’s sock to hide the evidence in the corner of the room will do the trick. That is, until your mother visits with food and casually asks if you need help “tidying up”.

Having relied almost exclusively on the care-packages of a lovingly doting mother and take-out sushi from down the street, the extent of my kitchen activity has involved reheating leftovers and pouring the contents of plastic containers onto plates, which, as you might have guessed, is as enchanting as it sounds.

I recognise that things could have been worse (on all sorts of accounts). But I missed my pots and pans and various kitchen implements. It felt like I hadn’t used them in so long that on any given day they might mobilize and walk out the front door, bereaved and weepy. But this past weekend I reached a recovery milestone: being able to wield a knife and chop things. Hallelujah.

Below, I bring to you the first real thing I’ve made in the last 3 weeks – from beginning to end – in my kitchen, WITH MY OWN TWO HANDS. I may not yet be able to shave my right armpit, but it looks like I can still make a mean minestrone – gimpy arm and all.

Minestrone (serves 4)

  • 1 small onion
  • 1/2 leek, finely chopped (white part only)
  • 2 cloves garlic, finely chopped
  • 1 carrot, diced
  • 1 celery stalk, diced
  • 1 stalk of swiss chard, finely chopped (spinach or kale could be used instead)
  • 1/2 cup white vermouth
  • 1 litre home-made chicken stock
  • 1/2 can crushed tomatoes (or better: 1/2 jar of Nonna’s tomatoes)
  • 1 can cannelli beans (or better: dried beans, soaked overnight & cooked)
  • 1/2 cup small pasta, preferably ditalini (“little thimbles”)
  • a few sprigs of parsley, chopped (fresh basil or thyme also work – just go easy on the thyme)
  • olive oil
  • salt to taste

Optional: fried garlic and pine nuts (to serve)

Directions

Prepare a dutch oven with some olive oil and set on the stove at medium-high. Once the oil starts to get warm, add the onions, leek and garlic sauté until translucent.

Add the carrot and cook for about 2 minutes. Then add the celery and swiss chard and cook for another minute. Pour in the vermouth and stir. Add the crushed tomatoes, parsley, broth and some salt. Give a good stir and reduce the heat to low.

Allow to simmer for about 10 minutes then add the beans and the pasta (cook until al dente). Feel free to add more broth or water if you think it looks too thick (note: you can extend the cooking time to let the flavours settle in a bit more – but don’t add the pasta until the end and be sure to start with more liquid).

Serve with fried garlic and pine nuts and a generous shaving of parmesan.

Share this:

  • Tweet
  • Share on Tumblr

Like this:

Like Loading...

Chinese tortellini

27 Tuesday Mar 2012

Posted by julia chews the fat in Lunch & Dinner, Soups

≈ 2 Comments

Venus and Jupiter walk into a bar…

There are a few popular legends surrounding the creation of tortellini – three to be exact. But my favourite by far is the one that involves a boozy encounter between Venus and Jupiter and a perverted inn-keeper. I’ll spare you the details, but it’s a fun jaunt through medieval lore via the Interweb. At the very least, it can be a fun story to share with the in-laws at dinner, especially if you sass-up the specifics. If you’re feeling shy, you can rely on this week’s space news to introduce the topic.

While I can’t confirm the true origins of tortellini, I can tell you this: it is not amongst my Nonna’s tried-and-true recipes. In fact, I had never come close to seeing homemade tortellini until I went to Bologna to visit family in 2001, when they were served to me in a soup. (Please note that I’ve just used the words “homemade”, “tortellini” and “Bologna” in the same sentence. Mm hm). The filling was made with two types of meat sourced from the family farm, fresh Parmigiano-Reggiano (Parma being just down the road and all) and herbs grown from the garden. The pasta was made in casa, hand-rolled by a Bolognese mamma; the broth was homemade too – with stock made from the farm’s chickens, no less.

Oh and this was just the starter.

Like any good romantic fling, this one stayed suspended in the pillowy nostalgia of a short-lived, cross-continental escapade. I was happy to look back on it fondly as a moment that could never be replicated, presumably explaining why I’d never attempted making tortellini in the confines of my apartment’s depressingly small kitchenette. There was definitely a fear of making sub-par specimens and, ultimately, popping the rose-coloured bubble of my Bolognese food fling.

There had always been, however, a little dumpling that my mom used to make – something that my Nonna refers to as “Chinese tortellini”. Basically, a gingery meat mixture tucked into a wonton wrapper, served in broth. This has nothing to do with the Bolognese version – god forbid we compare them. But laid out on a counter-top, looking a bit Georgia O’Keefe-y, they bare a striking resemblance to their Italian cousin, tortellini. The filling is Cantonese-inspired, yet it isn’t exactly the kind of wonton you’d find at Sunday’s Dim Sum. But they belong to neither country, resting somewhere in between two worlds, in a kind of Sinotalese grey area that can’t, and probably shouldn’t, be categorized.

Chinese tortellini (adapted from mom’s recipe) – Makes about 80 dumplings

  • 1 lb ground pork
  • 1 egg
  • 1/2 cup water chestnuts (drained)
  • 4 green onions
  • 1/2 teaspoon finely minced fresh ginger
  • 1 1/2 tablespoons light soy sauce
  • 1 teaspoon sesame oil
  • 1/4 cup of fresh cilantro

Directions

In a food processor, finely chop the water chestnuts, shallots, ginger and cilantro.  Add the ginger, soy sauce and sesame oil to blend.  Add the pork and egg. Pulse to incorporate the ingredients.

Place a teaspoon of the pork mixture on the center of each wonton wrapper, brushing some water along the edges. Fold dough to make a triangle. Press the edges to seal the filling inside the dough, being careful to eliminate air pockets. Gently criss-cross the two tip of the longest edge of the triangle to make a tortellini shape.

Place on cookie sheets and freeze. Transfer to freezer bags. When ready to use, cook for about 5 minutes in boiling water, drain, then transfer to hot broth and cook for a few more minutes until filling is cooked through. Add veggies and seasonings as you see fit.

This slideshow requires JavaScript.

Share this:

  • Tweet
  • Share on Tumblr

Like this:

Like Loading...

Facebook

Facebook

Instagram

No Instagram images were found.

Recent Posts

  • Layers and Rows
  • Finding Buoyancy
  • February
  • Wednesday
  • Cross My Heart, Miso

Archives

  • May 2017
  • April 2017
  • February 2017
  • December 2016
  • November 2016
  • September 2016
  • August 2016
  • July 2016
  • June 2016
  • May 2016
  • April 2016
  • March 2016
  • February 2016
  • January 2016
  • December 2015
  • November 2015
  • October 2015
  • September 2015
  • August 2015
  • July 2015
  • June 2015
  • May 2015
  • April 2015
  • March 2015
  • February 2015
  • January 2015
  • December 2014
  • November 2014
  • October 2014
  • September 2014
  • August 2014
  • July 2014
  • June 2014
  • May 2014
  • April 2014
  • March 2014
  • February 2014
  • January 2014
  • December 2013
  • October 2013
  • September 2013
  • August 2013
  • July 2013
  • June 2013
  • May 2013
  • April 2013
  • March 2013
  • February 2013
  • January 2013
  • December 2012
  • November 2012
  • October 2012
  • September 2012
  • August 2012
  • July 2012
  • June 2012
  • May 2012
  • April 2012
  • March 2012
  • February 2012

Categories

  • Beverage
  • Breakfast & Brunch
  • Condiments
  • Cooking For Your Peeps
  • Cooking Solo
  • Cooking with Nonna
  • Food Away From Home
  • Food Writing
  • Holidays
  • Intro
  • Lunch & Dinner
  • Snacking
  • Soups
  • Sweet Tooth
  • The Basics
  • Vegetarian

Enter your email address to follow this blog and receive notifications of new posts by email.

Join 80 other subscribers

Blog at WordPress.com.

  • Follow Following
    • julia chews the fat
    • Join 80 other followers
    • Already have a WordPress.com account? Log in now.
    • julia chews the fat
    • Customize
    • Follow Following
    • Sign up
    • Log in
    • Report this content
    • View site in Reader
    • Manage subscriptions
    • Collapse this bar
 

Loading Comments...
 

    %d bloggers like this: