• Home
  • About

julia chews the fat

julia chews the fat

Category Archives: Cooking For Your Peeps

Layers and Rows

11 Thursday May 2017

Posted by julia chews the fat in Cooking For Your Peeps, Lunch & Dinner

≈ 5 Comments

There is a green grocer near my apartment that goes by the name of Bob. Bob and I have a long, if disjointed, history. I first met him twelve years ago, when I was living with my college boyfriend in Mile-End, three streets over from his shop. In that year and a half, most of our groceries were done at Bob’s. Sometimes we’d order a samosa from the display counter on our way out, sharing bites on our walk home until all that was left were the oily remnants of a brown paper bag and grease-slicked fingers. If I did groceries on my own, it meant that I had the whole samosa to myself, which of course was even better.

When that relationship came to end, I moved to the opposite end of the city, only to return to the neighbourhood two years later, renting out a tiny 2 1/2 sandwiched between a used book store and a Greek restaurant on Parc Avenue, one short block away from Bob’s. He greeted my first visit back with a “Hey you – long time no see! How’ve you been?“, and we picked up where we left off, as though no time had passed.

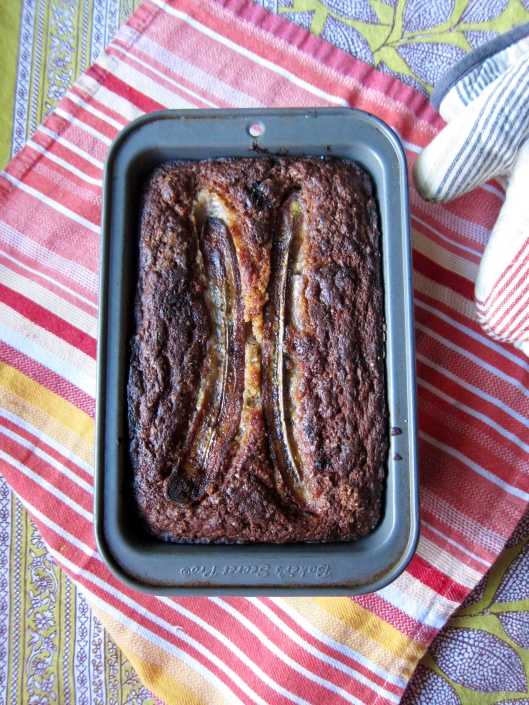
I’d pop into the shop on my way home from work to pick up bananas, or leafy greens, or some cheese with a container of olives, scooped from a briny vat at the back of the store. The cheese and olives were something I usually reserved for Fridays, when I could crack open a bottle of wine and make myself a little plate to eat cross-legged on the couch while I made plans for the night. It was a civilised touch to an apartment that had barely any natural light and where the living room-slash-kitchen could be crossed with one purposeful leap. The building also housed an Arcade Fire-wannabe band that liked to have late-night jam sessions (trombone included), and a sketchy pot-dealer who lived just below the rickety stairs of the fire escape, which happened to lead to my equally rickety bedroom window.

But it was the night the ceiling of the building’s entrance collapsed, sending chunks of gyprock to shatter (quite spectacularly) onto the marble floor below, that I decided it was finally time to move. Again.

118 copy

In what now seems like a strange, cyclical pattern, I came back to the neighbourhood after two years away, renting out the apartment I’m currently in – which, mercifully, has sturdy ceilings, well-groomed interiors, and good neighbours. Perhaps more importantly, it shares a three-block radius with Bob’s shop, whose proximity I now see as my reward for being a creature of habit, boomeranging back to the neighbourhood like a stubborn stray dog.

When Bob saw me come into the store after another prolonged absence, he smiled:

“Back again?”

“Yep, back again, Bob.”

“Nice to see you. How’ve you been?”

And we picked up where we left off, as though no time had passed.

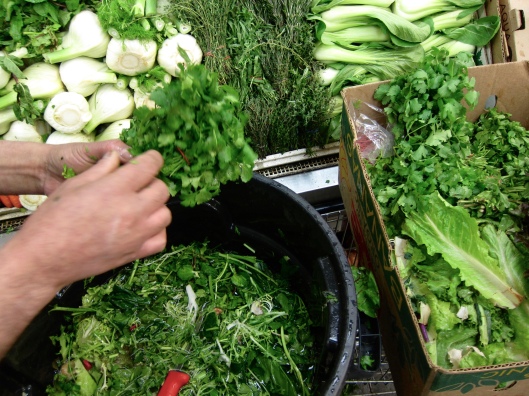
Aside from one expansion into the neighbouring building that opened up a second wing to the store, nothing much has changed; in the mornings you can still find Bob manning the cash, or more likely, at the back in the produce section, trimming herbs and stacking produce into Tetris-style layers and rows. There is no other shop I know that does this as expertly as him. Even after all these years, I still find it to be a beautiful feat of engineering.

Bob the green grocer // © julia chews the fatBob the green grocer // © julia chews the fatBob the green grocer // © julia chews the fat

When I pass through, we exchange hellos; he asks me how I’m doing, and I ask the same. Sometimes we trade ideas for recipes. If he notices a bruised fruit in my groceries, he’ll remove it and swap it for a better one. When I show interest in a new product, he’ll sometimes toss it in for free. And if I happen to be missing some change when he rings up the total, he tells me to pay him the next time.

None of these things are reserved specially for me – Bob is like this with all his clients, especially his regulars. He looks out for us, and makes us feel welcome, making him more than a purveyor of produce; he is a purveyor of community, a vital layer to this tight-knit, melting pot of a neighbourhood, where anglophones, francophones, Hasidic families, and hipsters walk through his door on the daily. His connection to his neighbours and patrons is a big part of the reason I keep coming back to his shop, twelve years after that first bite of samosa. When I get pulled back to the neighbourhood year after year, I’m glad to know Bob is there, at the centre of it all, keeping the pulse of the community beating.

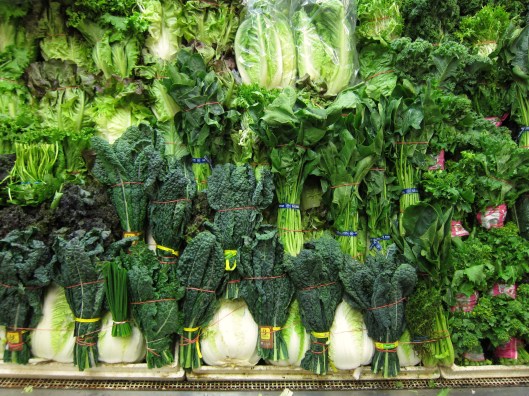
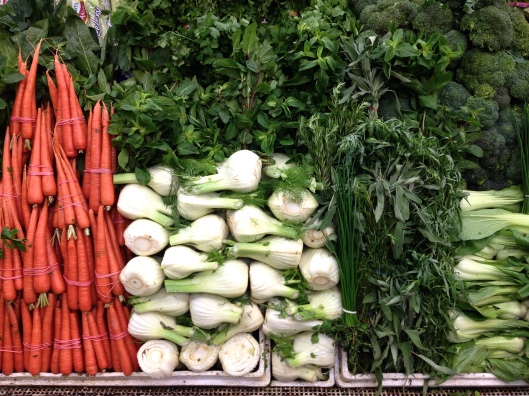
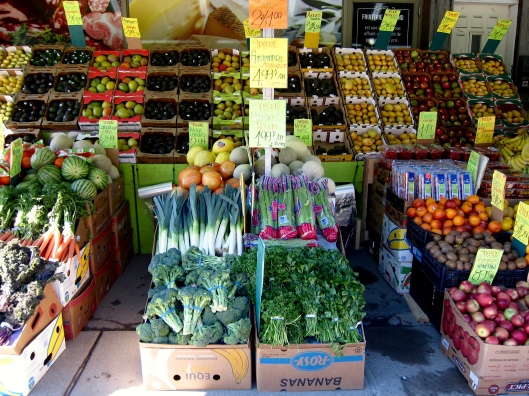
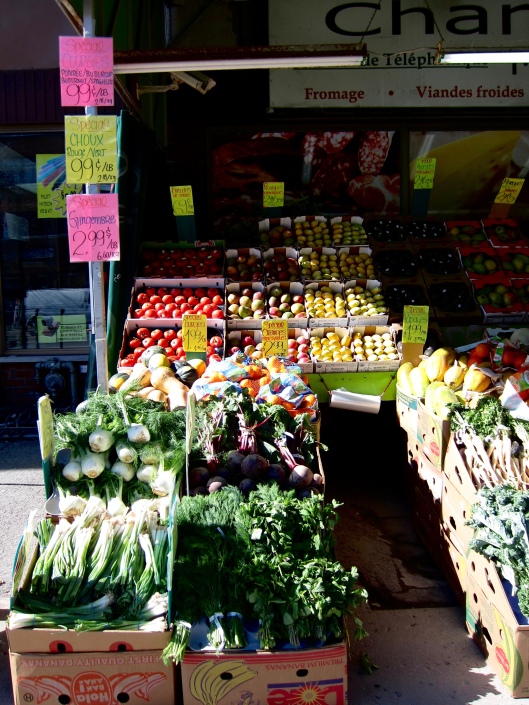
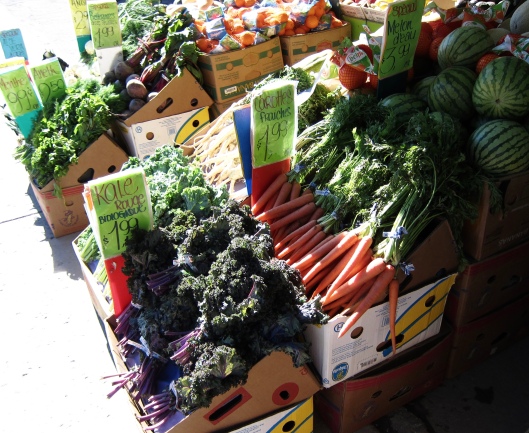
While the store is open seven days a week, and I come by to do my shopping all year-round, springtime is when Bob’s begins to blossom in earnest. Come April, the big green outdoor awning gets unfurled, stretching over stacks of produce – both local and imported. This week I’ve been stocking up on the more ephemeral, seasonal stuff from Quebec and Ontario, like his beautiful fava beans – buttery and toothsome – and his first batches of delicate, purple-tinged asparagus, that need nothing more than a quick steam to become sweet and tender. Next week I might stock up on fiddleheads, which have just started to make an appearance in his outside market space, along with green and yellow string beans that you can grab in fistfuls, right out of the box.

Bob the green grocer // © julia chews the fatBob the green grocer // © julia chews the fatBob the green grocer // © julia chews the fat

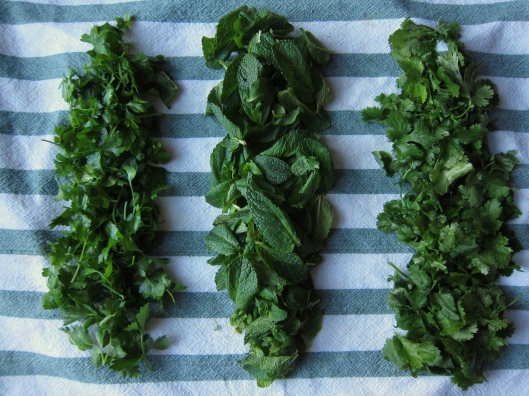
Bob’s fresh herbs are nice too, though sometimes I buy too much at once, and they start to wilt in the Mason-jar vases that I keep on the counter (don’t do this; clean your herbs, pat them dry and store in the fridge. They will last much, much longer).

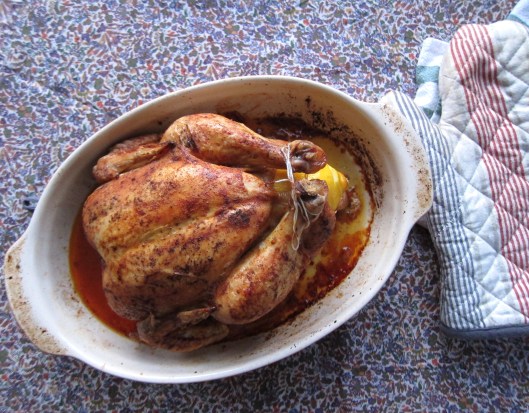
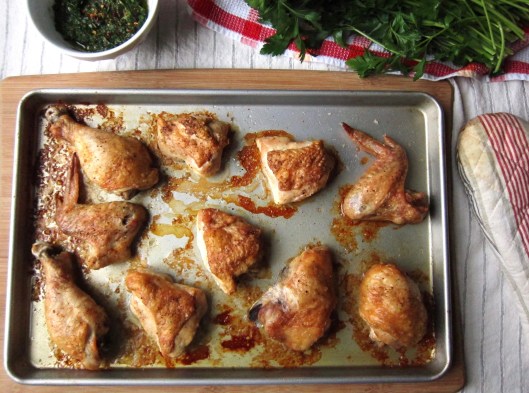
The recipe below is something I like to make with the mix of herbs I usually pick up at his shop, even the ones that end up a bit wilty on the countertop. It’s a simple sheet-pan chicken recipe where you blitz herbs, shallot, garlic, and red wine vinegar until you have a grassy paste that you spread over the chicken after it’s been roasted. There are a few chili flakes in there too, which adds a nice pinch, along with the vinegar that cuts the rich chicken schmaltz really nicely.

Next time I see Bob, I’m going to tell him about this recipe. Maybe he’ll trade it for one of his recipes, or at least tell me where he gets his samosas.

Bob’s shop:
Fruiterie Mile-End
5686 Av Du Parc (corner Bernard)
Montreal, Québec H2V 4H1
514-278-5576

Herbs // © julia chews the fat

Chicken Smothered in Herbs (Serves 4) – adapted from Alexandra’s Kitchen

Ingredients

  • 1 whole chicken (about 4 lbs), quartered and backbone removed, room temperature (keep the chicken pieces bone-in, skin-on)
  • 1 Tbsp olive oil
  • salt and freshly ground pepper
  • 2 Tbsp red wine vinegar
  • 1/2 cup packed parsley
  • 1/4 cup dill
  • 1/4 cup mint*
  • 2 cloves garlic, peeled
  • 1 shallot, peeled
  • 1/2 tsp red pepper flakes (or to taste)

Note: there’s no need to use these measurements as a steadfast rule. Any nice mixture of herbs will do (e.g. basil in the summertime).  I usually go easy on mint and dill as they tend to overpower, but the idea is to use any fresh herbs you have on hand, adjusting to taste.

Chicken Smothered in Herbs // © julia chews the fatChicken Smothered in Herbs // © julia chews the fat

Directions

1) An hour before baking, remove the chicken pieces from the fridge and let it rest on the rimmed sheet pan you will use to roast it on.

2) Preheat oven to 450°F. Pat chicken dry really well with paper towels, then rub with 1 Tbsp of the olive oil. Season liberally with salt and pepper, making sure to season the undersides too. Arrange chicken pieces skin-side up, and roast until golden, about 30 minutes.

3) Meanwhile, make the sauce: in a food processor, pulse the herbs with the garlic, shallot, red pepper flakes, and red wine vinegar until you get a sort of chunky paste. Season with salt.

4) When the chicken is almost finished roasting, and crispy on the outside, remove from oven and onto a plate. Scrape the pan juices and crispy bits into the food processor with the herb mixture. Whizz it up to combine, then return the chicken pieces to the roasting pan, spooning over some herb mixture on each piece. Put the chicken back in the oven for another 2-3 minutes to let the flavours meld. Remove the chicken from the oven and let rest on the pan for about 10 minutes before serving.

Chicken Smothered in Herbs // © julia chews the fat

Share this:

  • Tweet
  • Share on Tumblr

Like this:

Like Loading...

Wednesday

21 Wednesday Dec 2016

Posted by julia chews the fat in Cooking For Your Peeps, Lunch & Dinner

≈ 2 Comments

It isn’t always easy finding a way to write about a recipe. I have a stock pile of photos fermenting on my computer’s hard drive as we speak – dozens of things that I’ve wanted to share with you, but haven’t quite found the words to wrap around them.

Truthfully, I’m a little out of steam these days. That dreary arc of November to December saps my energy reserves in a way that I might never get used to, no matter how many winters I’ve lived this far above the equator. When mornings and late afternoons are the same shade of midnight, early winter has a way of siphoning your stamina in a steady, slow, undetectable kind of way. Like carbon monoxide poisoning. Except you’re still alive – just with a brain that feels like jelly, and eyes that hover half-mast, like Garfield’s.

On weeknights I find it hard to muster the energy to make dinner after a slushy, sloppy commute from the office, usually reaching for something that doesn’t require much thought or skill or focus: beans sautéed in onion and swiss chard, with toast; quinoa, a fried egg and some arugula; spaghetti carbonara, minus the bacon (that would be an extra step). In other words, meals that can be made practically blindfolded. The ones you want to have around when you’re tired and cranky and hungry, staring slack-jawed into the fridge on a dark, cold Wednesday night.

There’s one in particular that I’ve made on repeat over the last few weeks – an improvised version of something my friend Anne made a little while back when we got together for Friday night dinner. The ease of this meal is its superpower – no intensive chopping, sautéeing, or mucking about. All you do is: marinate some salmon filets in a slurry of soy sauce, brown sugar, and a few other things from your refrigerator door; bake slices of acorn squash with a sprinkle of salt and five spice (which will make the house smell like Christmas), then cook up a pot of brown rice while the fish is in the oven. It’s dead simple, but because you’ve got all those nice spices and saucy-things working their way into the fish, the squash, the rice, there isn’t a dull bite to be had.

Here’s to the winter solstice and to the longer (brighter!) days before us. x

Anne’s Soy Sauce Salmon with Brown Rice and Five-Spice Squash (with a few tweaks)
Serves 4

Soy Sauce Salmon // © julia chews the fat

FOR THE FISH:

  • 1 large salmon fillet (about 1.5-2 lbs. Makes good leftovers, if you don’t serve it all.)
  • 1/3 cup tamari (soy) sauce
  • 1/2 Tbsp brown sugar
  • 1 Tbsp rice wine vinegar
  • 1/2 Tbsp sesame oil
  • 1/2 tsp fish sauce (optional)

(Note: I don’t usually measure when making a marinade, so I suggest using this as a guide, but tasting and adjusting as you go)

FOR THE RICE:

  • 1 ½ cups brown, short-grain rice
  • salt
  • about 2 Tbsp toasted sesame seeds
  • shichimi togarashi (Japanese 7 spice) (optional)

FOR THE SQUASH:

  • 1 acorn squash
  • five-spice
  • salt
  • olive oil
  • raw pumpkin seeds (optional)
  • black sesame seeds (optional)

Soy Sauce Salmon // © julia chews the fat

Directions

Note: since the squash cooks at 400°F and the fish at 350°F, I like to cook the squash first, then reheat it during the last 5 minutes or so that the fish is in the oven. The steps below might seem like a lot, but it really isn’t a hassle. I promise. And after doing it once, you’ll be able to wing it without a recipe, adjusting things to your taste as you go along.

1) Start by marinating the fish – an hour or two before serving, mix together the soy sauce, brown sugar, rice vinegar, sesame oil and fish sauce in a bowl or measuring cup. Slice the salmon fillet into sections (about 3 inches wide) . Lay the salmon sections in a shallow baking dish and pour the marinade over top. Cover and allow to marinate in the fridge for 30 minutes to an hour, depending on how much time you have.

2) Prep the squash – while the fish marinates, cut the squash lengthwise (leaving the skin on). Scoop out the seeds and filaments. Slice each half of the squash into half-moons, about 1 inch thick. Place on a baking sheet and drizzle with the olive oil. Sprinkle the five spice and salt over top, then toss the squash slices with your hands to coat all sides.

3) Cook the rice like pasta (approx. 35 mins)– rince the rice until the water runs clear. Allow to drain. Fill a medium saucepan 3/4 full with cold water, adding about 1/2 tsp salt. Put on high heat, covered. When the water begins to boil, add the rice. Bring back to the boil, give it a stir, then reduce the heat to medium-low and allow to simmer (lid ajar) for about 35 minutes (or until rice is cooked, but retains a bite). Strain the water and return the rice to the pot, allowing it to rest, off the heat, covered.

4) Cook the squash (approx. 25 mins) – while the rice is cooking, remove the fish from the fridge. Preheat the oven to 400°F. When it reaches temp, slide in the baking sheet with your prepared squash. Cook for about 25 minutes until golden brown, turning the slices halfway through, adding a few pumpkin and sesame seeds during the last few minutes of cooking. Remove from oven and reduce the heat to 350°F.

5) Cook the fish (approx. 15 mins) – put the baking dish with the fish and its marinade in the preheated 350°F oven. Cook for about 15 minutes, or until the centre is still slightly undercooked. Remove from the oven, cover it, and slip the squash back in for 5-10 minutes to warm up. (at this point, your rice should already be drained and resting, covered and warm.)

6) Serve – add the toasted sesame seeds and a sprinkle of togarashi (if using) to the rice and stir to combine. Plate the rice with a piece of fish and some squash. Drizzle with warm marinade from the baking dish.

Soy Sauce Salmon // © julia chews the fat

Share this:

  • Tweet
  • Share on Tumblr

Like this:

Like Loading...

Cross My Heart, Miso

12 Saturday Nov 2016

Posted by julia chews the fat in Breakfast & Brunch, Cooking For Your Peeps, Lunch & Dinner, Snacking, Soups, Sweet Tooth, Vegetarian

≈ 11 Comments

I am the kind of person that will buy a tub of miso, then leave it in the refrigerator door for an interminable length of time, under the naïve assumption that it will (eventually) find its way into a recipe. If you’re like me, you know that this moment rarely, if ever, comes. You also know that it leaves you with bad feelings when you do a deep clean of the fridge and realise it’s been there for a small eternity, opened, but with only one spoonful scooped out from the top. You ask yourself the following questions: Is it still good? How do I know it’s still good? Do I need to throw it out? Then concede to the following affirmations: Online message boards about expiration dates cannot be trusted. I’m going to need to throw this out. I am a horrible human being for throwing this out.

It’s a vicious cycle.

I’m not quite sure what happens in the ark of purchasing the miso, bringing it home, then, months later, scraping it into the bin. It’s confounding. Not to mention a heinous act of food waste. (especially considering that miso paste could probably out-live you and me and I’ve just been overly cautious about its perishability). And so, I’ve decided that from this day forward, I will never throw out another container of miso. Cross my heart and hope to die.

I come to you today with proof of my penance – two recipes made recently with the stash of miso paste in my fridge, both having helped put a considerable dent in my supply, all while broadening my miso repertoire (did you know you can use it in savoury and sweet dishes? And not just in miso soup?). I feel that this is the beginning of a new relationship.

One is a carrot soup with ginger, spiced with coriander and curry. The miso works nicely in the background, adding a bit of depth to a soup that might otherwise be ho-hum. The other is a recipe for banana bread (or cake, depending on your sensibilities), where the saltiness of the miso balances out the sweetness of the banana. I brought a loaf to my friends Marko and Marilou as part of a care package the week after their daughter was born and received a text from them the next day saying they’d polished it off, the last couple of slices served up for breakfast, toasted and slathered in butter.

I hope you’ll do the same x

Miso banana bread // © julia chews the fat

Miso Banana Bread – from Amelia Morris of Bon Appetempt

  • 5 medium overripe bananas
  • 1 cup all-purpose flour*
  • ½cup whole-wheat flour
  • ¼ cup of ground flax seeds
  • 1 teaspoon baking soda
  • ½ teaspoon baking powder
  • ¼ teaspoon salt
  • 1 stick unsalted butter, softened
  • 1 cup sugar
  • ¼ cup white (or yellow) miso
  • ½ whole-milk plain yogurt
  • 2 large eggs

*If you prefer, you can replace the whole-wheat flour and ground flax seeds with all-purpose flour (so 1¾ cups of all-purpose flour total)

Directions

1) Preheat oven to 350°F. Butter a loaf pan, dust with a light coating of flour and set aside.

2) Mash 4 of the bananas in a bowl. Set aside

3) Mix all the dry ingredients (except the sugar) in a separate bowl. Set aside.

4) In the bowl of a stand mixer (or, simply, another bowl). Combine the softened butter, miso. Beat until light and fluffy (about 5 mins). Add the sugar and beat until combined. Add the yogurt, then one egg at a time, beating between additions. Beat in mashed bananas. Then mix in the dry ingredients until just combined.

5) Transfer batter to prepared loaf pan. Slice remaining banana lengthwise and place on top of the batter. Bake for about 45 minutes (or until a skewer inserted in the centre comes out clean). Let cool on a baking rack for 20-30 minutes before serving.

Miso banana bread // © julia chews the fat

—–

Miso Carrot Soup – adapted from Wholehearted Eats

Serves 4-6

  • 1 yellow onion, chopped
  • 3 garlic cloves, chopped
  • 1 Tbsp. olive oil
  • 8 large carrots, peeled and chopped (about 5 cups)
  • 1 Tbsp curry powder (optional)
  • ½ tsp. dried coriander
  • 2-inch piece of ginger, peeled and minced
  • 6-7 cups stock, vegetable or chicken
  • 3 Tbsp. white miso paste
  • 1 tsp. tamari
  • garnishes: lemon wedges, cilantro, sesame seeds

Carrot Miso Soup // © julia chews the fat

Directions

1) Heat a medium pot to low and add the oil and onion. Sweat the onion until soft, translucent and golden. Add the garlic, dried coriander, curry (if using) and the minced ginger. Sauté for a couple of minutes until fragrant, stirring occasionally. Add the chopped carrots and sauté cook for few more minutes.

2) Next add 5 cups of the stock and bring the mixture to a simmer. Once it begins to simmer, cover with lid slightly ajar, and let it cook until the carrots and onions are very tender (about 3o minutes).

3) Take the soup off the heat and puree it in a blender or hand blender, until smooth. Bring the remaining 1-2 cups stock (if you like a thicker or thinner soup) to a boil, take it off the heat, and stir in the miso and tamari until combined. Add this mixture to the soup and stir to combine. To serve, add a squeeze of lemon, some sesame seeds and fresh cilantro.

Carrot Miso Soup // © julia chews the fat

Share this:

  • Tweet
  • Share on Tumblr

Like this:

Like Loading...

Faking Fancy

31 Tuesday May 2016

Posted by julia chews the fat in Breakfast & Brunch, Cooking For Your Peeps, Lunch & Dinner, The Basics, Vegetarian

≈ 3 Comments

You’re having friends over for dinner and you want to make something nice. But it’s a work night, a Thursday, so you’re already a bit bagged, and a little unmotivated, thinking about the Jenga tower of dishes that will invariably pile up in the sink if you start making something quote-unquote fancy.

This is when you need to pull a rabbit (or two) out of your hat to successfully fake your way to a meal fit for dinner guests – a meal that will involve minimal amounts of messing around in the kitchen, but will look and taste a little more special than the everday.

There are, of course, different ways you can do this. For starters, if you’re committed to the idea of using the oven, you can choose recipes that compliment eachother’s cooking time and temperature; that way, you can cook a couple of things at the same time, and even bake dessert at the end, with that still-warm oven. The other advantage is that you can slide whatever you’re making into the oven, let it work its magic, and go back to the things you were doing beforehand, like the multi-tasking mavrick you are.

We all have different shortcuts in the kitchen, which is nice, because it means that we can learn from eachother’s acumen – that mental Roladex of tips and tricks we’ve stockpiled over the years. Below you’ll find a few of my own back-pocket recipes (the rabbits up my sleeve, if you will) for when I’m having people over, but don’t want to fuss. It’s a simple potato and roast chicken dinner that can be served with a green salad or some steamed vegetables. The potatoes can be slipped into the oven about 30-40 minutes after the chicken. The dessert is easy too – no need to wrangle dough or batter, just toss some sugared apples onto some prepared puff pastry and watch it pouf up in the oven after the potatoes and chicken have come out.

All of it gives you more time to be with your guests, which, let’s be honest, is the most important part.

FAKING FANCY TIP NO.1 – RE-VAMPING THE HUMBLE POTATO

Potatoes, simply prepared, often come in two forms – boiled, or diced and roasted. Both of these options have virtues of their own, but there’s another variation on the potato that should be on everyone’s radar, and that, dear people, is the smashed potato. I first learned about smashed potatoes during a period in the mid-2000s when I binge-watched Laura Calder‘s French Food at Home, before food blogging and celebrity chef-dom had exploded and you could actually rely on The Food Network for quality programming (wow, can you hear the octogenarian coming through? Don’t get her started on styrofoam food packaging). The Food Network aside, Laura Calder is known in her own right for her pared-down, no-nonsense – and très, très français – approach to food, where the most important elements are quality of ingredients and method, as opposed to flashy additions or lengthy processes. Her smashed potatoes (she calls them “squished” potatoes) are simplicity incarnate, but the nice thing is that they are just the slightest bit different than a boiled or a roasted potato, because they’re in fact BOTH: you take some nice, small, waxy potatoes, skin-on, and let them cook in boiling water until just tender. Then you drain them, set them on a work surface and gently press each one with whatever sturdy kitchen equipment you have on hand (I like using the bottom of a cast iron pan), dress them with olive oil, a sprinkle of salt (I add fresh rosemary too), then lay them on a baking sheet and toss them into a hot oven for 30-40 minutes, turning once halway though. The beauty of the smashed potato is that you get a tender interior and these lacy, crispy edges. They also look more interesting than a in-tact boiled potato, sort of more lived-in and wild. And they are a treat to eat.

SMASHED BABY POTATOES WITH ROSEMARY – from Laura Calder

  • 2 lb baby potatoes
  • olive oil
  • flaky salt (such as Maldon)
  • freshly ground pepper
  • a couple spring of fresh rosemary

1) Scrub the potatoes and cook, unpeeled, in boiling salted water until tender. Drain. When cool enough to touch, gently squish them flat with whatever kitchen tool you see fit. Don’t let them explode, just flatten until the edges break a bit, but they are still in one piece. Toss with some olive oil, the rosemary sprigs, and season with salt and pepper.

2) Heat the oven to 400°F. Spread the potatoes on a baking sheet and bake for about 30-40 minutes, or until crisp outside, turning once halfway through.

(*I didn’t get a chance to capture the finished result, so you’ll have to use your imagination – but they come out crackly, crispy, dark golden on the outside. A bit knarly, but beautiful.)

Smashed Potatoes with Rosemary

Smashed Potatoes with Rosemary

—–
FAKING FANCY TIP no.2 – ELEVATING ROAST CHICKEN

Let’s be honest, there’s nothing particularly spectacular about roast chicken in and of itself. But if done right, roast chicken can be one of the most delicious things you’ll put on the table, especially if you employ a good, healthy dose of butter. Here too, you have different options. Molly Wizenburg has a recipe for Thomas Keller’s roast chicken where you slather it with melted butter after it’s cooked and serve it with Dijon mustard (which, though I’ve never tried it, actually sounds pretty wicked). My usual fall-back is smearing butter under the skin, along the breastbone, before cooking. For added flavour, I like to use compound butter – in other words, softened, unsalted butter that you mix with herbs, or zest, or other seasonings. The butter “insulates” the breast meat (which tends to get dry) from the heat of the oven, while permeating it with rich flavour. You don’t want to be using butter like this everyday (you’d be well on your way to a heart attack), but for occasions that are out of the ordinary – say, having friends over on a Thursday night – it’s a lovely way to make roast chicken a little more frilly.

Roast Chicken with Butter

WHOLE ROASTED CHICKEN WITH HERBED BUTTER

Ingredients

        • 1 whole, 1.5 kg (3-3.5 lbs) good-quality chicken (I like to get mine here when I can)
        • 1 lemon, pierced all over
        • 3-4 cloves of garlic, smashed, skin-on
        • a handful of fresh herbs – thyme, rosemary, tarragon, etc. – chopped
        • about 3 oz. butter, softened
        • salt and freshly ground pepper
        • 1/4 tsp paprika (for colour; optional)
        • kitchen twine

Directions

1) Take your chicken out of the fridge about 30 minutes before it goes into the oven.

2) Preheat the oven to 400ºF. Mix the chopped herbs with the softened butter, season with salt and pepper and stir to combine; set aside. In a small dish, mix some salt, freshly ground pepper and the paprika (if using). Prepare two lengths of kitchen twine to wrap the legs and the thighs.

3) Set aside a roasting pan big enough for your chicken. Blot the outside of the chicken with paper towel (removing excess moisture will help ensure a crispy skin). Season the chicken with the prepared salt, pepper and paprika. With the cavity of the chicken facing you, gently run your fingers under the skin along the breastbone, separating the skin from the meat. Then, gently stuff portions of herbed butter under the skin, spreading it evenly over the breast meat. Put the garlic cloves and lemon in the cavity of the chicken.

4) Tie the legs together snugly (this prevents the bird from drying out). If the lower half of the chicken looks like it’s still pretty loose, I sometimes tie a second piece of twine around the top of the thighs. Place the chicken in the preheated oven and roast for an hour to an hour and fifteen minutes (see note below*), basting a couple of times during cooking. Once the chicken is cooked, remove from the oven and let rest for about 15 minutes before carving. Serve with the pan juices.

A note on cooking whole chicken: total cooking time will vary, depending on the actual size of your chicken, as well as the intensity of your oven. A good rule of thumb is to calculate 15 mins per pound at 400ºF, but I use a meat thermometer just to be sure – it should read 165ºF* when inserted into the thickest part of the thigh but not touching bone. (*A lot of thermometers and government sources will give 180ºF as the ideal internal tempertaure, but they are usually overly-cautious (resulting in over-cooked, dry meat). If you pull it out when it reaches 165ºF and then let it rest, covered, for about 10-15 minutes, you’ll be good to go. The juices should run clear, not pink, when you cut into it.)

—–

FAKING FANCY TIP no.3 – USING FROZEN PUFF PASTRY

When you’re having people over, it’s sometimes nice to have something sweet at the end of dinner, but making a cake or a pie or something along those lines can be more work than it’s worth – the careful combining, the chilling, the rolling, the aforementioned sink full of dishes. This is when frozen puff pastry becomes a trusty pal – once thawed, it’s at your service and ready to use. The best part is that the free-form styling of the outer edges means that you can very easily get away with calling it “rustic”. Adding a quick dusting of powdered sugar to your finished tart (or any dessert for that matter) will make it look like a snowy, Scandanavian dream. I highly recommend it.

Puff Pastry Apple Tart

Puff Pastry Apple Tart

SIMPLE APPLE TART

        • 1 sheet all-butter puff pastry* (about 450 g), thawed
        • 2-3 firm, medium apples (such as Empire or Gala) – cored, halved and thinly sliced
        • 1 Tbsp granulated sugar
        • 2 Tbsp brown sugar
        • 3 Tbsp butter, melted
        • 1 Tbsp rum
        • squeeze of lemon
        • 2 Tbsp powdered sugar, for dusting (optional)

*one of the luxuries of living in Montreal is that many of us are within a stone’s throw of a bakery, many of which sell prepared puff pastry. If you don’t have a bakery close-by, you should be able to find puff pastry in the frozen foods section of most grocery stores.)

Directions

1) Preheat the oven to 400ºF. Line a baking sheet with parchment paper or a Silpat. In a bowl, add a sqeeze of lemon juice to the apple slices, then add both sugars, the melted butter, the rum, and gently combine; set aside.

2) On a lightly floured surface, unfold the puff pastry sheet. Roll it out a little bit (to about 1/2 inch thick). You should have a long rectangle about as long as a standard baking sheet (I don’t measure). Roll about 1 inch of the edges inward to form a border (or, if you prefer, you can lightly score a border along the inside of the rectangle, as this video demonstrates). Poke the inner rectangle all over with a fork to prevent air bubbles from forming while baking.

3) Layer the apple slices, overlapping them slightly. Bake for 25 minutes, until crust is golden brown, then transfer the pan to a wire rack. Once cool, dust with powdered sugar, the transfer tart to a cutting board for serving. Pairs well with vanilla ice cream (obviously).

Puff Pastry Apple Tart

Share this:

  • Tweet
  • Share on Tumblr

Like this:

Like Loading...

A Bit of a Blur

17 Tuesday May 2016

Posted by julia chews the fat in Cooking For Your Peeps, Lunch & Dinner

≈ Leave a comment

There isn’t time for many words today – this post is going to be a bit of a blur – because in twelve minutes flat, I have to head out the door, hop on a Bixi, and get my sorry rump to yoga class (I like to at least pretend that I’m a fit, adult woman. Come to think of it, I also like to pretend that I’m an adult woman. As in, a grown-up; as in, a lady.)

Before I run down the stairs and start frantically biking until I’m out of breath, arriving at the studio like the wheezing, sweating, mess of a lady that I sometimes am, I wanted to quickly – very quickly! – share a recipe with you. (It seems that my top priority is making sure you are all well fed. We can discuss my poor judgment another time. Along with my poor use of punctuation/over-use of parentheses in this post.)

But right now – SPICED CHICKEN PATTIES IN LETTUCE CUPS! WITH DATE CONFIT! THEY’RE A REVELATION! MAKE THEM! (I don’t know why I’m using caps; these things practically sell themselves. Which I’m grateful for, because I should’ve already left the house.)

Eat well and be well, friends. Big love x

—–

Spiced Chicken Patties in Lettuce Cups, with Date Confit – adapted from Food Republic
Serves 4

Chicken Lettuce Cups

Ingredients

Patties

  • 1 1/2 pounds boneless, skinless chicken breast, cubed*
  • 4 garlic cloves, finely chopped
  • 1-inch piece fresh ginger root, peeled and grated
  • 2 tsp Ras el hanout
  • 1 tsp curry
  • 1/4 tsp cayenne (optional)
  • 3 Tbsp olive oil

*economical alternative: I prefer buying a whole, good-quality chicken and taking it apart myself – using the different pieces for diffrent recipes and freezing anything I don’t use.

To serve

  • 16 small hearts of lettuce leaves
  • 1/2 English cucumber, quartered lengthwise, seeded and diced
  • 1 small red onion, finely chopped
  • 1 handful cilantro leaves

Date confit

  • 15 fresh dates, pitted and halved
  • 1 Tbsp olive oil
  • 2 shallots, chopped
  • 1/2 tsp ground cinnamon
  • 1 Thai chili, finely chopped
  • 1 tsp light brown sugar
  • 2 Tbsp pomegranate molasses
  • Sea salt and freshly ground black pepper

Directions

For the date confit:
Put the dates in a bowl, cover with just-boiled water and leave for 20-30 minutes. Meanwhile, heat the olive oil in a skillet and fry the shallots on medium-low heat, covered, for 15-20 minutes until very soft.

Drain the dates and add them to the pan, squashing them with the back of a fork to break them down. Stir in 4 tablespoons water, the cinnamon, chili and cook for 5 minutes longer, or until it forms a thick jam consistency. Add more water if it is too thick. Stir in the pomegranate molasses and season to taste with salt and pepper. Spoon the confit into a serving bowl and leave to cool.

For the chicken patties:
Meanwhile, heat the oven to 100°F. Pulse the chicken in a food processor, then add the garlic, ginger and spices. Season with salt and pepper. Pulse again to combine. Form the chicken mixture into 16 equal balls, the size of golf balls. Flatten each one to make a little patty. (Note: you can freeze the uncooked patties on parchment paper, in one layer (I use a pizza tray), then transfer to freezer-proof container, with parchment between each patty to prevent sticking).

Heat two-thirds of the oil in a large, nonstick skillet over medium heat. Fry the patties, in batches (don’t overcrowd the pan) for 3 minutes on each side. Just before they finish cooking on each side. Drain on paper towels and keep warm in the low oven while you cook the remaining patties, adding more oil when necessary.

For serving:
Put a chicken patty on top of each lettuce leaf, scatter a little cucumber, red onion and cilantro over and top with a spoonful of the date confit. Serve warm or at room temperature.

Chicken Lettuce Cups

Share this:

  • Tweet
  • Share on Tumblr

Like this:

Like Loading...

Cast-Iron Love

30 Saturday Apr 2016

Posted by julia chews the fat in Cooking For Your Peeps, Lunch & Dinner, The Basics

≈ 2 Comments

I’ll never tire of that sight – that hot mess of slowly-braised meat, bright veg, and pillowy dumplings, mingling together in a heavy-bottomed pan. Like many gifts in one. It might be the extravagant use of meat (which we all know we should be eating less of), but this, to me, is luxury food. In perhaps its truest, most rewarding form.

It might seem late to be posting about braised anything one day shy of May, but the weatherman seems to think there are a few more crisp, cool days ahead of us – at least in these parts (I could swear I saw a snowflake yesterday) – and so I think there’s still some wiggle room for a few more dishes like these, the ones that require the slow, steady heat of the oven to attain their full potential.

These are the kind of dishes that make me feel gratified about rescuing that old, blaze-coloured Creuset from the family basement a few years ago, when no one wanted it, either for lack of space, or to prioritize lighter, less cumbersome cookware. Over the years, and before its hibernation in the basement, it had become a well-used and well-loved beast, bearing a hefty scar – a deep, cinereal gash right across the lid – from an earlier incident involving a sharp plunge to the tile floor, back in the house I grew up in. Some might have thrown the thing away, but Dad, the industrious Anglo-Saxon that he is, worked his magic with the sodering iron and sealed it back together, to create something of a Franken-Creuset.

IMG_1445

Bequeathed with what is now considered a family heirloom, I try to find ways to use it whenever I can, and as often as I can. And each time, I marvel at how it turns unglamorous cuts of meat into ravishingly beautiful braised dishes that you want to mop up with bread until there’s nothing left on the plate. I’ve learnt to appreciate my Creuset, its scar a tangible reminder to handle it with care. It rewards me in kind, every time.

—–

Braised Lamb with Dumplings and Date-Mint Chutney

Adapted from The Complete Irish Pub Cookbook and Joe Beef for Food 52
Serves 4

Braised Lamb with Dumplings and Date-Mint Chutney

For the Lamb

  • 2 lb (about 1 kg) lamb shoulder, bone-in*
  • Salt and pepper, to season
  • 3 Tbsp olive oil
  • 1 onion, quartered
  • 1 small leek, white + light green part cut into rings
  • 1 carrot, peeled and chopped into chunks
  • 3-4 small turnips, washed and quartered
  • 10 cloves garlic, smashed and skins removed
  • 10 sprigs thyme
  • 1 cup dry white wine
  • 1 1/2 cup beef stock (plus one cup to add at the end with the dumplings)
  • 1 cup frozen or very fresh shelled peas (to add at the end of cooking)

*depending on the size of your baking vessel, you can ask your butcher to cut the lamb shoulder in half.

For the Date-Mint Chutney

  • 1 cup pitted dates
  • 1/4 cup water
  • 1/4 cup cider vinegar
  • Pinch of cayenne pepper
  • 1/8 cup jarred horseradish
  • 2 Tbsp fresh mint
  • 1/2 Tsbp Worcestershire sauce

For the Herb Dumplings

  • 1 cup all-purpose flour
  • 1 tsp baking powder
  • 1/2 tsp salt
  • 1/4 tsp black pepper
  • 1 1/2 Tbsp finely chopped parsley
  • 1 1/2 Tbsp finely chopped fresh mint
  • 2 Tbsp unsalted butter
  • 1 egg
  • 2 Tbsp milk

Braised Lamb with Dumplings and Date-Mint Chutney

Braised Lamb with Dumplings and Date-Mint Chutney

Directions

1) Preheat the oven to 375° F. MAKE THE LAMB: Season the lamb on all sides with salt and pepper. Heat the oil in a large ovenproof sauté pan over high heat. Add the lamb and sear for 3 or 4 minutes on each side, or until you get a nice golden crust. Transfer to a plate.

2) Reduce the heat to medium, throw in the onion, leek, turnip, carrot, and garlic, and cook, stirring occasionally, for about 5 minutes, or until nicely browned. Add the thyme, nestle the lamb on top of the vegetables, and pour in the wine and the beef stock. Cover the pan, place in the oven, and braise for 4 hours, basting the lamb every 30 minutes or so with the pan juices. If the pan begins to dry out, add some water.

3) While the lamb is cooking, MAKE THE CHUTNEY: In a small pot, combine the dates and water, bring to a boil over high heat, and boil for about 10 minutes, or until soft. Reduce the heat to medium, add the vinegar, and cayenne, and stir well. Cook, stirring occasionally, for 10 minutes, or until the sugar is dissolved and the condiment has the consistency of jam. Remove from the heat, add the horseradish, mint, and Worcestershire sauce, and whisk until combined. Let cool before serving. (Leftover condiment can be stored in a tightly capped jar in the refrigerator for up to 1 month.)

4) MAKE THE DUMPLINGS (see instructions below)

5) About 20 minutes before the meat is ready, heat the remaining cup of stock in a saucepan; remove the lamb from the oven and arrange the dumplings around the meat, pouring over the hot stock; add the peas. Cover and return to the oven to cook about 15 minutes longer.

4) When the lamb is ready, transfer it to a warmed platter with the vegetables and dumplings. Serve the condimint on the side.

To make the dumplings

1) Heat a large saucepan of salted water. Sift flour, baking powder, and salt in a bowl. Mix in the black pepper and fresh herbs. Rub in the butter untill the mixture resembles coarse breadcrumbs. In a seperate bowl, beat together the egg and milk, then stir into the flour to make a soft, sticky dough.

2) With floured hands, divide the dough into 10-12 pieces and roll into balls. Once the water in the saucepan has reached a gentle boil, drop the dumplings, one by one, into the water; partially cover and cook for 10 minutes. Using a slotted spoon, gently remove the dumplings and set them in a colander to drain. Transfer to a plate and set aside.

Braised Lamb with Dumplings and Date-Mint Chutney

Braised Lamb with Dumplings and Date-Mint Chutney

Share this:

  • Tweet
  • Share on Tumblr

Like this:

Like Loading...

Method to the Madness

22 Friday Apr 2016

Posted by julia chews the fat in Cooking For Your Peeps, Lunch & Dinner

≈ Leave a comment

Today I bring to you a recipe from Mandy Lee’s site, Lady and Pups. It’s one of my favourite places to procrastinate on the Web, especially when I should be doing more constructive things, like organising my taxes or folding laundry or emailing the landlady. It’s easy to fall under the spell of Mandy’s moody photos and acerbic prose. Her recipes too – as they always sound absurdly good, in that no-holds-barred, debauched, lick-your-fingers-clean kind of way. Take a look at this recipe for hot rice noodles, or the one for this magnificent thing. Couldn’t you see yourself happily staining your face and all your clothes with either of those cradled in your hands?

Of course you can.

But, there is one caveat –

If you’ve ever followed a Mandy Lee recipe, you’ll know that they’re not for the weak. They’re not from the dinner-in-minutes-Rachel-Ray school of cooking; they are from the school of hard knocks.(this is, after all, the woman who convinced me – through those moody photos and that acerbic prose – to make ramen soup from scratch with 30 cloves of peeled garlic). This aggressive caveat isn’t meant to dissuade you; I’m just saying that if you’re looking for an easy, breezy, work-week meal that you can throw together right after the pants come off and the wide-stretch leggings go on, this one’s not for you. In fact, it’s the antithesis of that. Making a Mandy Lee recipe is a commitment. There is usually a long list of ingredients and and even longer list of instructions, generally with bits in FULL CAPS so that you don’t screw anything up.

I just want to be clear about that.

Are you still there?

Good. I’m glad! Because like any worthwhile, long-term commitment, Mandy’s recipes will always reward you in spades. Her recipes might look insane, spanning longer than most newspaper articles. But there is a method to her madness.

Breathe deep and just trust it.

A note on the recipe: below is Mandy’s Turmeric Butter Chicken Rice (with a few small tweaks from me). What’s brilliant about this recipe is that 1) she has you cook the rice in the oven with chicken broth and coconut milk, infusing every grain with luscious, rich flavours; and 2) she has you cook the chicken ABOVE the rice, balanced on a baking rack (I used a metal cookie-cooling rack) over the baking dish. This means that, as the chicken cooks, it’s precious juices and fat drip down into the rice, making it even more delicious. The process itself is a sight to behold – I spent a good minute or so watching the magic happen through the oven door, completely entranced.

A few more liner notes:

1- Mandy Lee has the chicken marinate between 2-6 hours, so keep that in mind time-wise (I didn’t do this, because I’m notoriously bad at following recipes and I missed that piece of instruction. (And it was a Tuesday night. After work. Hahahaha let’s find MORE reasons to make a long day longer!). All said, it worked out fine without marination, but I imagine it would be even better had I followed her advice.)

2- There are three major components here: Consider prepping the chicken and the coconut sauce in advance – the chicken will have time to marinate and the sauce can easily be reheated as soon as you’re ready to use it.

3- Since you’re dealing with raw chicken, it’s best to get all your ingredients and appliances ready before you begin. For instance, not having the skewers ready when you’re done wrangling a raw, buttery chicken is not a pleasant experience. I speak from experience. Have everything ready at your fingertips and I promise that things will go much more smoothly. (This might be another reason why prepping the chicken in advance might be worth it – getting that part out of the way is half the work.)

4 – I re-worked the instructions a little so that it (hopefully) is a little easier to follow.

Ok. Have at it.

Turmeric Butter Chicken Rice – lightly adapted from Mandy Lee’s recipe on Lady and Pups, inspired by Zak Pelaccio’s recipe in “Eat With Your Hands”

SPICY COCONUT SAUCE:

  • 1 ½ cup coconut milk (usually 1 can)
  • ½ lemongrass stalk, white part only
  • 2 small red chilis
  • 1 green onion
  • 1 tsp apple cider vinegar (I used this to replace the 2 tsp of yellow mustard in the original recipe, which happens to be the one condiment I never have on hand)
  • 2 tsp fish sauce
  • ¼ tsp freshly ground black pepper
  • 1 Tbsp (14 grams) unsalted butter
  • 2 Tbsp chopped fresh cilantro

TURMERIC BUTTER CHICKEN RICE:

  • 1 whole chicken (about 3 lbs)
  • 5 cloves garlic, smashed
  • 1 ½” ginger, cut into chunks
  • 3 small red chilis
  • 3 Tbsp fish sauce
  • 1 ½ tsp ground turmeric
  • ½ tsp ground coriander
  • ½ tsp freshly ground black pepper
  • 4 Tbsp (57 grams) unsalted butter
  • 2 cups jasmine rice
  • 1 ½ cup coconut milk (usually 1 can)
  • 1 ½ cup chicken stock
  • 2 stalks lemongrass, white part only, smashed and cut into segments
  • pinch of salt and black pepper to season

Mandy Lee's Turmeric Butter Chicken Rice

Directions

MAKE THE SPICY COCONUT SAUCE: In a food-processor, blend everything under “Spicy Coconut Sauce”, except for the butter and fresh cilantro, until puréed. Add the butter, then bring the mixture to a gentle boil, and cook for about 20 mins until reduced by 1/3. Take off the heat and add the fresh chopped cilantro. Set aside until needed.

MAKE THE TURMERIC BUTTER CHICKEN RICE:

Step 1 – prepping the chicken

1) Rinse and clean out the cavity of the chicken, then pat dry and set aside. In a food-processor, purée garlic, ginger, red chilis, fish sauce, ground turmeric, ground coriander and ground black pepper until smooth. Take out about 2 tbsp of this turmeric-mixture and set aside. Then add the butter to the rest of the mixture and run the processor again until evenly incorporated (this is your “turmeric butter”). Reserve 1 tbsp of the turmeric butter for cooking the rice.

Mandy Lee's Turmeric Butter Chicken Rice

2) With the remaining turmeric butter: Gently insert your hands in-between the flesh and skin of the chicken from the neck-opening at the top of the breasts, separating the two layers to make space for stuffing the turmeric butter. Work slowly and gently so you do not puncture the skin, and make sure you do it all the way to the back-thighs that are attached to the back-bone, evenly distributing under the skin of the whole chicken.

3) Place ½ of the smashed lemongrass stalk inside the cavity, then with toothpicks, sew/seal the skins around BOTH the opening of the cavity and the neck. Now, rub the reserved turmeric-mixture WITHOUT BUTTER, evenly over the whole chicken. Let marinate for anywhere from 2-6 hours.

Step 2 – prepping the rice/cooking the chicken and rice

4) Preheat the oven on 420F. Put the jasmine rice in a sieve, then rinse and gently swish under running water to remove excess starch. Drain well and set aside. In a large, shallow baking-dish (a shallow dish will allow the rice cook evenly), melt the reserved 1 tbsp of turmeric butter over medium-high heat, then cook the rice in it for about 3 mins. Add the coconut milk and chicken stock, then scatter the lemongrass on the top. Bring the liquid to a simmer and cook for 3 min without stirring.

5) Now, place a baking-rack over the baking-dish, and set the chicken on top, breast-side down first (this gives the thighs a head start and prevents the breasts from overcooking). Place the whole thing in the middle-rack of the oven and roast for 15 min, then gently turn the chicken over so the breast-side now faces up, and roast for another 30-35 min until the chicken is browned. Remove the baking-rack with the chicken on top, and let rest for 10 min. Leave the rice in the oven during this time so it can finish cooking.

Mandy Lee's Turmeric Butter Chicken Rice

Step 3 – serving the chicken and rice with the coconut sauce

6) Remove all the lemongrass from the rice. The best way to cut the chicken is with a scissors, and make sure that you do it right over the rice so it can catch all the precious juice/butter that comes out of the chicken. Remove the lemongrass from inside the cavity, then serve immediately with the spicy coconut sauce (reheated gently over low heat).

Mandy Lee's Turmeric Butter Chicken Rice

Share this:

  • Tweet
  • Share on Tumblr

Like this:

Like Loading...

One for the pot, one for the cook

07 Thursday Apr 2016

Posted by julia chews the fat in Cooking For Your Peeps, Lunch & Dinner

≈ 3 Comments

Cooking has been fairly perfunctory these days. I’ve lacked that that little kick, that jolt of inspiration I usually get when I see something new – a recipe, an article, a video – that makes me want to roll up my sleeves and get to it. This means that my stovetop has seen a a lot of greens and beans on rotation (roma beans with kale, lima beans with rapini, black eyed peas with spinach…you get the idea), in other words, a mix-and-match troupe of dishes so simple that you could make them even if you’d been lobotomized. I can stand there, mouth-breathing over a pan of frying shallots and beans, letting my mind drift off to wherever it may go, and have a (more or less) wholesome dinner ready within 4 and half minutes. They aren’t necessarily the most satisfying of meals (creatively, spiritually, aesthetically…), but hey – they do the job.

It’s easy to fall into a cooking funk when your overall motivation feels floppy, sluggish, unharnessed. It usually starts when you catch yourself buying the identical set of groceries week in and week out, before replicating the same dishes week in and week out. My fallbacks tend to be the aformentioned beans and greens, roast chicken and white fish, usually cod or halibut, that gets tossed in the oven with a layer of seasoned breadcrumbs I keep in the freezer, and a drizzle of olive oil. They are good back-pocket dishes, but ones that get a bit dull once they’ve been on heavy rotation.

To break the slump, I went looking for new ideas and managed to lock down the two recipes below after taking stock of what I had in the booze cabinet. The first is a fragrant, anise-clementine chicken recipe from Ottolenghi that is sticky, jammy, crispy and sweet, with a subtle twang of liquorice flavour from the Pernod; the second is a lemon-scented cod dish, studded with olives and poached in white wine, then topped with fresh parsley. Both are beautiful-looking and delicious and, while definitely an upgrade from beans and greens, they too could be made post-lobotomy if you had to. For each, you just stick everything in a pan, anoint with booze* and sling into the oven. Thankfully, the rest gets figured out on its own.

(*one for the pan, one for the cook.)

Clementine Pernod Chicken

Pernod-Clementine Chicken – adapted from Ottolenghi’s Jerusalem
Serves 4-6

Ingredients

    • 5 Tbsp Pernod (or Arak, or Ouzo)
    • 1/4 cup olive oil
    • 3 Tbsp freshly squeezed orange (or clementine) juice
    • 3 Tbsp freshly squeezed lemon juice
    • 2 Tbsp grainy mustard
    • 3 Tbsp light brown sugar or honey
    • 1 tsp sea salt
    • freshly ground pepper
    • 8 bone-in, skin-on chicken pieces (thighs and drumsticks)
    • 4 clementines (washed but unpeeled) sliced thin
    • a few sprigs of thyme
    • 3 medium onions (and/or fennel bulbs) cut lengthwise and then into quarters
    • 2 tsp fennel seeds

Clementine Pernod Chicken

Directions

1) In a large mixing bowl, whisk together Pernod, oil, orange and lemon juices, mustard, brown sugar and salt. Season with pepper, to taste.

2) Place chicken skin side up in large roasting pan with clementine slices, thyme sprigs, onion pieces (and/or fennel wedges) and fennel seeds. Pour sauce over top and gently toss everything together with your hands. (alternately, you can prep in advance and marinate: place chicken with clementine slices, thyme sprigs, onion/fennel wedges, and fennel seeds in a large mixing bowl or ziplock bag. Turn several times to coat. Marinate chicken for several hours or overnight.)

3) Preheat oven to 475°F. After 30 minutes, turn the oven down to 400ºF and continue roasting until the skin is brown and crisp, about 20 to 25 minutes longer. Remove pan from the oven.

4) Transfer chicken and clementines and onion pieces with juices to a serving platter. Let rest 5 to 10 minutes before serving. Pairs well with a crisp salad and a knob of bread to soak up the juices.

Clementine Pernod Chicken

—–

Slow-Baked Cod with Lemon, Olives and White Wine – adapted from Real Simple
Serves 4

Ingredients

  • 2 lb cod fillets (or halibut)
  • ¾ cup dry white wine
  • ½ cup Kalamata olives
  • zest from 1 lemon, cut into strips
  • 1 Tbsp olive oil
  • salt and pepper, to season
  • ¼ tsp red pepper flakes
  • ¼ cup fresh flat-leaf parsley, chopped

Directions

Heat oven to 400° F.

Place the fish in a small roasting pan. Add the wine – it should reach about halfway up the sides of the fish. Scatter the olives and lemon zest around the fish. Drizzle with the oil and season with salt, pepper, and red pepper flakes.

Roast until the fish is cooked through and flakes easily with a fork, about 15-20 minutes. Remove from oven and sprinkle with the parsley. Divide the fish among individual plates and spoon the olives and wine sauce over the top.

Cod with Lemon and OlivesCod with Lemon and OlivesCod with Lemon and Olives

Share this:

  • Tweet
  • Share on Tumblr

Like this:

Like Loading...

Easy Cooking – Pulses

09 Wednesday Mar 2016

Posted by julia chews the fat in Cooking For Your Peeps, Lunch & Dinner, The Basics, Vegetarian

≈ 3 Comments

I come to you today with an extension to the previous post on “easy cooking” to talk about pulses. Yes, pulses – not the ones that emanate from the heart, but rather the kind that make up that sub-set of legumes* (pronounced ley-gooms by most anglophones) which includes beans, lentils and dried peas.

(*Language note: the original French word légume(s) – pronounced ley-gyume in both the plural and singular – is used by francophones to describe vegetables. Lentils, peas, etc. are known as légumineuses.)

It’s perhaps not the sexiest of subjects, but a worthwhile one. Not only has the UN declared 2016 The International Year of the Pulses but, ever since Ottolenghi‘s books hit the mainstream and sustainable eating has nearly become a water cooler topic, the humble bean, lentil and chickpea have become de rigeur in the food world. Thankfully, they’re delicious as they are hip, and since pulses have a long history with food cultures across each continent, the recipe repertoire is vast and versatile.

I’ve slid pulses under the banner of “easy cooking”, simply because once you’ve made a few batches, it’s easy to incorporate them into different meals for the week, without too much trouble. On any given Sunday, when the kitchen becomes my workhorse, at least three of the four burners of the stove are on, cooking beans and chickpeas. I’ll soak them under cold water the night before so that they’re plump and rehydrated the next day. Then they just have to cook – usually anywhere from 30-60 minutes, depending. Beans aren’t fussy. You bring them to a boil, lower the heat, let them bubble away on low until the timer goes off. No need to hover over the stove; you can more or less ignore them and tend to other things (Skyping, reading, lip-synching…) while they cook. Lentils are the same, except they don’t need soaking and are ready in even less time (20 minutes or so).

It goes without saying that you can use always canned beans and chickpeas in your recipes (there’s a supply stationed in my cupboard right now) (because none of us are 19th-century homesteaders that make everything from scratch, all the time), but if you have a little time, cooking beans from dried is a nice alternative – they retain a nice al dente bite and their flavour is a lot more neutral/natural than the canned versions.

If you’re new to cooking pulses, here are some practical tips to keep in mind:

BEANS:

  • most require pre-soaking before cooking; however certain beans, such as mung or adzuki, and split peas don’t require pre-soaking
  • they will not cook properly if you add salt to the boiling water (reserve salt and add when they’re almost done cooking, if using)
  • when cooking, add enough water to cover them by about an inch, bring to gentle boil, then leave the lid on but slightly ajar.
  • cooking time can range between 30-60 minutes, depending on the type of bean (see more info in the links below)

LENTILS:

  • do not require pre-soaking before cooking
  • need to be picked over and rinsed before cooking
  • will not cook properly if you add salt to the boiling water (reserve salt and add when they’re almost done cooking, if using)
  • cooking ratio: 2 parts water, 1 part lentils 
  • red lentils are not the same as green, brown of Puy lentils; they cook faster and become softer (read: mushier) than other lentils. Two of my favourite recipes for red lentils are for Turkish red lentil soup and coconut dhal.

CHICKPEAS:

  • require pre-soaking before cooking
  • should be rinsed after soaking
  • will not cook properly if you add salt to the boiling water (reserve salt and add when they’re almost done cooking, if using)
  • when cooking, add enough water to cover them by about an inch, bring to gentle boil, then leave the lid on but slightly ajar
  • take about 1 hour to cook

For more information, visit these sites:

  • Pulse Canada
  • USA Dry Pea and Lentil Council
  • Taste
  • The Kitchn: beans, lentils
  • Miss Vickie – varieties + soaking (careful: cooking times re for pressure cookers)

Combinations: during the week, I like having a variety of cooked lentils, beans and grains (quinoa, farro, brown rice) in separate containers in the fridge. That way, they’re ready to be thrown into soups, stews, salads, pasta, etc.

Freezing: whatever won’t get used up in the next couple of days can be packed and frozen. Lay the cooked beans flat in one layer (e.g. on a baking sheet), allow them to freeze, then transfer to freezer bags or containers before putting them back in the freezer. The pre-freezing in one layer will prevent them from sticking together (same goes for dumplings, meatballs, etc.)

Quantities: if you’re going to spend the time cooking beans, go all the way. The idea isn’t to make portions large enough to survive the apocalype (in other words, no more than you can consume within the next few weeks) (freezer burn is a real thing), but make enough to have a small stockpile in the fridge/freezer of the different pulses that you like. That way, you’ll only have to set aside that time to cook beans about once a month/month and a half.

Below are some of my favorite recipes that use pulses – one with brown lentils, one with mung beans, and the last with chickpeas. They might even become your new back-pocket recipes.

—–

Classic Lentil Soup – makes 6 servings; freezes well

Note: this recipe does not require any pre-planning (soaking/cooking). The lentils cook in the soup.

Classic Lentil Soup

Ingredients

  • 300 grams dried brown lentils
  • 3 tablespoons olive oil
  • 1 celery stick (about 1 cup), finely chopped (reserve some celery leaves for garnish)
  • 1 medium carrot (about one cup), finely chopped
  • 1 large yellow onion (about 1 ½ cups, finely chopped)
  • 2-3 garlic cloves, peel removed and smashed
  • 14 ounces diced tomatoes in juice
  • 2 bay leaves
  • 6 cups water or vegetable broth
  • Salt to taste
  • Optional: olive oil and sherry vinegar for serving

Directions

1) Rinse and pick through the lentils (sometimes you can find tiny stones); set aside to drain.

2) Put a large casserole or soup pot on medium heat and add the 3 Tbsp olive oil. Once the oil is hot, but not smoking, add the onion, celery, carrot, and garlic and cook until soft and the onion is beginning to turn golden-brown, about 10 minutes. Add the bay leaves and cook for an additional 2 minutes. Then add the tomatoes with their juice, stir and cook for about 2 to 3 minutes.

3) Add the lentils and cover with the water (or broth). Cover and cook about 30-45 minutes over low-medium heat until the lentils are tender (check from time to time to see if you need to add a bit more water/broth). When they’re almost done cooking, add salt to taste.

4) Add salt to taste; serve with a drizzle of olive oil, a splash of sherry vinegar and some of the reserved celery leaves. When reheating any leftovers, add some water to loosen the lentils.

Classic Lentil Soup

Classic Lentil Soup

—–

Mung Bean and Carrot Salad with Feta – lightly adapted from Yotam Ottolenghi
Serves 4

Note: this recipe does not require any pre-soaking. Mung beans are ready to be cooked from dry.

Mung Bean and Carrot Salad

Ingredients

  • 140g dried green mung beans
  • 60ml olive oil, plus extra for drizzling
  • 1 tsp cumin seeds
  • 1 tsp caraway seeds
  • 1 tsp fennel seeds
  • 2 tbsp white wine vinegar
  • 2 garlic cloves, peeled and crushed
  • ½ tsp dried chilli flakes
  • 1 tsp salt
  • 3 large carrots, peeled and cut into 1cm batons
  • ½ tsp honey
  • small handful of fresh coriander, chopped
  • grated zest of 1 lemon
  • 140g feta, crumbled

Mung Beans

Directions

1) Bring a medium saucepan of water to a boil, add the beans and simmer for 20 minutes, until they are cooked but still retain a bite. Drain, shake well and transfer to a large bowl.

2) About three minutes before the beans are done, heat two tablespoons of oil in a small frying pan and add the seeds. Cook on medium heat, stirring often, until they start to pop – about three minutes – then pour, hot oil and all, over the beans, along with the vinegar, garlic, chilli and half a teaspoon of salt.

3) While the beans are cooking, lay the carrots in a pan large enough for them to form a shallow layer on the bottom. Pour over anough water to nearly submerge them, plus two tablespoons of oil and half a teaspoon each of honey and salt. Bring to a boil and keep on a high heat for eight minutes, by which time the water should have evaporated and the carrots become slightly caramelised but still crunchy. Drain some liquid, if needed.

4) Add the carrots to the bean bowl, along with the fresh coriander, and stir gently. Transfer to a shallow serving bowl, sprinkle over lemon zest, dot with feta and drizzle with olive oil.

Mung Bean and Carrot Salad

Mung Bean and Carrot Salad

—–

Spiced Eggplant with Chickpeas and Yogurt – adapted from Molly Wizenberg
Serves 6; freezes well

  • 3 large eggplants (about 3 ½ lb)
  • 2 Tbsp. olive oil
  • 1 tsp. cumin seeds
  • 1 medium yellow onion, finely chopped
  • 1 small jalapeño, seeded (or not) and finely chopped
  • 2 garlic cloves, finely chopped
  • 1 ½ Tbsp. minced fresh ginger
  • ¼ tsp. red pepper flakes
  • 3 medium tomatoes, finely chopped
  • ½ tsp. paprika
  • 1½ tsp curry powder
  • 1 cup cooked chickpeas (or canned)
  • ¾ cup chopped cilantro
  • ½ cup whole-milk plain yogurt
  • Salt, to taste
  • Garam masala, for serving

Directions

1) Preheat the oven to 450° F. Put the eggplants on a rimmed baking sheet, and pierce them all over with a knife. Bake for about 40-45 minutes, or until the skins are blackened and the flesh feels very soft when pressed. Let cool slightly, then slice them open lengthwise and, using a spoon, scrape the flesh from the skin into a large bowl. Mash the flesh coarsely and set aside (this part can be done a day ahead and refrigerated).

2) Heat the oil over medium-high heat in a large skillet. Add the cumin seeds and cook until they begin to sizzle and pop, about 10 seconds. Add the onion, and cook, stirring occasionally, until it is soft and beginning to brown, about 8-10 minutes. Add the jalapeño, garlic, ginger, red pepper flakes, paprika, curry powder and cook, stirring constantly, for 2 minutes. Add the tomatoes, and stir well. Cook until all the liquid has evaporated, about 10 minutes.

3) Add the eggplant, stir to combine, and cook over low heat for 10 minutes. Add the cooked chickpeas, and warm through. Reduce the heat to low, and stir in the cilantro, half of the yogurt, and salt.

Serve hot or warm, with remaining yogurt and sprinkled with garam masala. Partners well with basmati rice or naan bread.

(just so you know – this photo was taken in bad lighting, under a tungsten bulb; in real life, the colour is deeper richer, and less pink.)

Spiced Eggplant with Chickpeas and Yogurt

Share this:

  • Tweet
  • Share on Tumblr

Like this:

Like Loading...

Party Patties

01 Tuesday Mar 2016

Posted by julia chews the fat in Cooking For Your Peeps, Cooking Solo, Lunch & Dinner, Snacking, Vegetarian

≈ 4 Comments

It feels strange to be writing a post about sandwiches, considering that I’m not what you’d call a “sandwich enthusiast”. Sandwiches are fine and all, but for me they usually function as a perfunctory filler – the thing I pick up at an airport before a flight, or at the work cafeteria when I’ve forgotten my lunch and the hot meal du jour looks dodgy. I don’t know about you, but it’s hard for me to get exited about ham on rye or a floppy veggie wrap. Sandwiches have just never been my jam.

That said, I’m a big advocate of the falafel sandwich. In fact, I don’t think I’ve ever come across a falafel sandwich I didn’t like, even the cheap ones I used to inhale during my undergrad days (usually between classes or after late-night drinking excursions), that we’d buy from the dingy Lebanese take-out places around the downtown campus. The best ones had a crunchy exterior that gave way to a soft, crumbling chickpea interior. The ones slathered in garlicky tahini sauce, fresh parsley, bright pink pickled turnip, and wrapped in soft flatbread. Compared to what else was on offer around school – 99¢ pizza, McDonald’s, dubious-looking panini at the Coffee Depot – these falafel sandwiches were often a student’s best option for a cheap, quick, tasty bite.

Since then, and after a few attempts of my own, I’ve come to realize that while falafels are great take-out food, they can be tricky to make well at home. I suspect that it’s because the best ones are made with a deep-fryer (surprise, surprise…) and since I don’t actually have a deep fryer – which, for my overall health, not to mention exposed extremities, is probably a good thing – it means that I don’t ever really find myself trying to make falafel from scratch. Instead, I usually end up picking up one from that well-loved vegan spot in my neighbourhood, because it’s good and close-by and they can have that thing ordered, dressed and wrapped up in five minutes flat. But since I’m not made of money and can’t take on the role of La Panthère verte’s most valuable patron, I’ve been looking for alternatives I can make at home – where my pocketbook can stay clear from any cash registers and 8$ organic sandwiches.

In scouring the Internet for ways to use up the zucchini that were starting to wither away in the crisper drawer, I came across this recipe from Martha Stewart, which reminded me a little of falafel sandwiches (because of the chickpeas and the pita), but looked more home-kitchen friendly. (in truth, my eagerness to try the recipe may be chalked up to the fact that I mistakenly read it as “Zucchini Party Sandwiches” and my curiosity got the best of me. They weren’t in fact “party” sandwiches, but patty sandwiches – though, since making them, I would have no qualms calling them “party” sandwiches, given how colourful and flavourful they are.) (like a party in your mouth, har har…).

They’re something of a cross between a zucchini latke and a falafel – more toothsome than the former, less complicated than the latter. I tweaked Martha’s recipe slightly, using canola oil to fry them in (because, again – unlike Martha – I’m not made of money) and incorporating some curry powder, cayenne and a small amount of olive oil to the mixture for some added oumf. I highly recommend that you do the same, as the flavours mingle really well together; like people do, when the party goes from good to dancing-on-the-tables (!) great.

Have a good week, everybody x

Curried Zucchini-Chickpea Patty Sandwiches

Curried Zucchini-Chickpea Pa(r)tty Sandwiches – adapted from Martha Stewart
Serves 8 (a half-pita each)

Ingredients

  • 1 15.5-oz can chickpeas, drained and rinsed
  • 1 cup plain breadcrumbs (I used panko)
  • 1 medium zucchini, grated
  • 1 small red onion, grated
  • 1 egg, beaten
  • 1 Tbsp curry powder
  • ¼ tsp cayenne
  • 1 teaspoon coarse salt
  • freshly ground black pepper to taste
  • 1 Tbsp olive oil – for flavour
  • ¼ cup canola oil (or sunflower oil) – for frying

To serve:

  • 4 whole-wheat pitas, halved
  • 1 cup Greek yogurt
  • 1 cup fresh mint leaves
  • ½ cucumber, thinly sliced
  • A handful of lettuce leaves, and/or arugula and/or radicchio

Directions

1) Mash chickpeas in a bowl until more or less smooth (with a few nubs left in-tact). Stir in breadcrumbs, grated zucchini, onion, egg, curry, cayenne, salt and pepper. Form into eight 4-by-1/2-inch patties and set aside.

2) Put a pan on medium-high heat and warm the canola oil until hot, but not smoking. Fry the patties until golden and crisp, about 2 to 3 minutes per side.

3) Meanwhile, warm the halved pitas in the toaster on in a dry pan, just to warm through.

4) Stuff the pita halves with the cooked patties, some cucumber, lettuce, mint and yogurt.

Curried Zucchini-Chickpea Patty Sandwiches

Curried Zucchini-Chickpea Patty Sandwiches

Share this:

  • Tweet
  • Share on Tumblr

Like this:

Like Loading...
← Older posts

Facebook

Facebook

Instagram

No Instagram images were found.

Recent Posts

  • Layers and Rows
  • Finding Buoyancy
  • February
  • Wednesday
  • Cross My Heart, Miso

Archives

  • May 2017
  • April 2017
  • February 2017
  • December 2016
  • November 2016
  • September 2016
  • August 2016
  • July 2016
  • June 2016
  • May 2016
  • April 2016
  • March 2016
  • February 2016
  • January 2016
  • December 2015
  • November 2015
  • October 2015
  • September 2015
  • August 2015
  • July 2015
  • June 2015
  • May 2015
  • April 2015
  • March 2015
  • February 2015
  • January 2015
  • December 2014
  • November 2014
  • October 2014
  • September 2014
  • August 2014
  • July 2014
  • June 2014
  • May 2014
  • April 2014
  • March 2014
  • February 2014
  • January 2014
  • December 2013
  • October 2013
  • September 2013
  • August 2013
  • July 2013
  • June 2013
  • May 2013
  • April 2013
  • March 2013
  • February 2013
  • January 2013
  • December 2012
  • November 2012
  • October 2012
  • September 2012
  • August 2012
  • July 2012
  • June 2012
  • May 2012
  • April 2012
  • March 2012
  • February 2012

Categories

  • Beverage
  • Breakfast & Brunch
  • Condiments
  • Cooking For Your Peeps
  • Cooking Solo
  • Cooking with Nonna
  • Food Away From Home
  • Food Writing
  • Holidays
  • Intro
  • Lunch & Dinner
  • Snacking
  • Soups
  • Sweet Tooth
  • The Basics
  • Vegetarian

Enter your email address to follow this blog and receive notifications of new posts by email.

Join 80 other subscribers

Blog at WordPress.com.

  • Follow Following
    • julia chews the fat
    • Join 80 other followers
    • Already have a WordPress.com account? Log in now.
    • julia chews the fat
    • Customize
    • Follow Following
    • Sign up
    • Log in
    • Report this content
    • View site in Reader
    • Manage subscriptions
    • Collapse this bar
 

Loading Comments...
 

    %d bloggers like this: