• Home
  • About

julia chews the fat

julia chews the fat

Category Archives: Cooking For Your Peeps

Boyfriend’s General Tao

30 Saturday Jan 2016

Posted by julia chews the fat in Cooking For Your Peeps, Lunch & Dinner, The Basics

≈ 2 Comments

General Tao Chicken

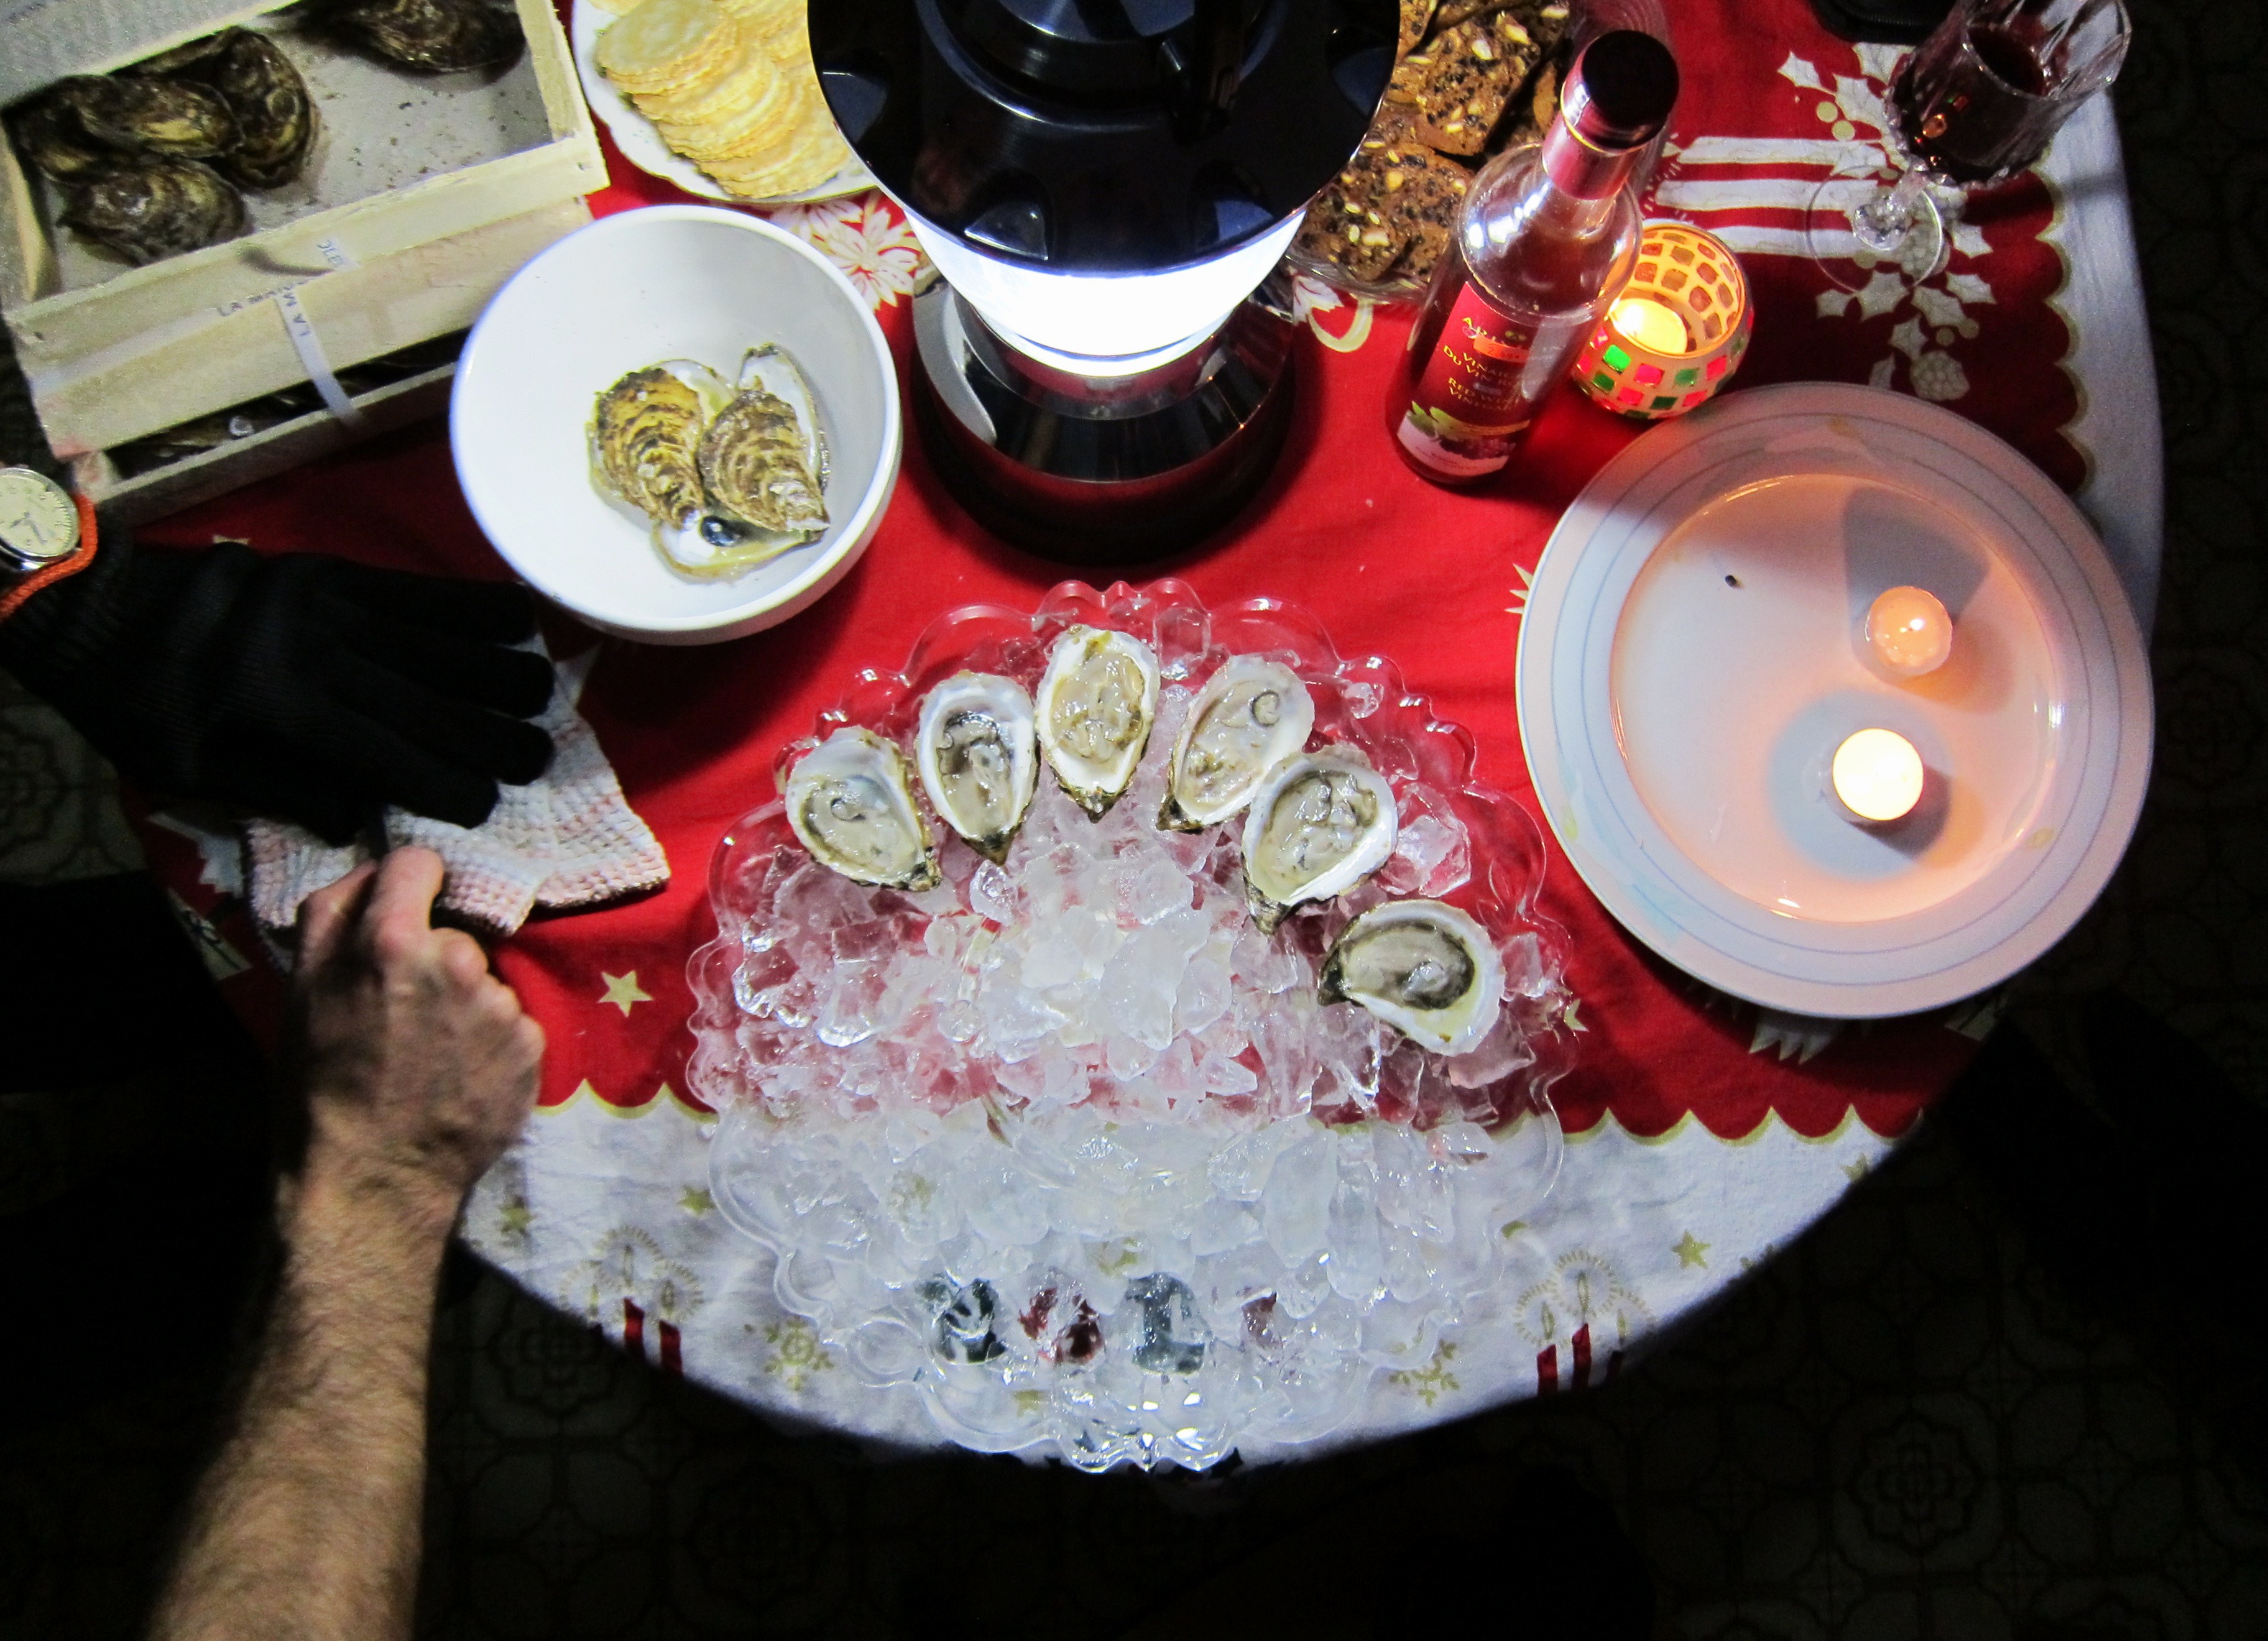
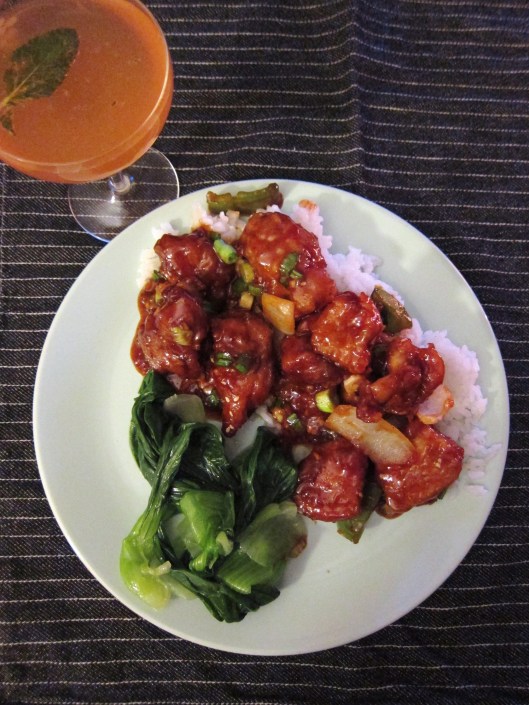
What you see in this (badly-lit, somewhat blurry) photo is the pinkish glow from the Netflix “Fireplace For Your Home” radiating from the TV, in the company of a very boozy El Presidente cocktail and a plate of homemade General Tao that my man made for us on New Year’s Eve, while Aretha‘s Ten Years of Gold and the “Best of Neil Diamond” took turns on the LP player. Thankfully, what you don’t see in this photo is the oblong coffee stain that has taken up permanent residence on our living room rug, as well as my woeful attempt to sing along to Red Red Wine, swaying back and forth, like moms do when they listen to Gordon Lightfoot, or Percy Sledge’s When a Man Loves a Woman, with their eyes closed, thinking back to the days of their high school dances.

Mom-jeans, here I come.

Obviously, this wasn’t the kind of blow-out NYE party that you see in movies, or in digital newsfeeds. There wasn’t any glittery confetti or streamers, party hats or noise makers; nor were there five dozen people crammed into a sweaty apartment, wailing the midnight countdown at the top of their lungs, while someone was being sick on the balcony.

But we did have prosecco. And there was some dressing up – I found a pair of dark suede heels and that black jumpsuit with the sheer neckline that I’d been saving. For good measure, I did my nails in something that goes by the name “Champagne Dream” and excavated my MAC lipstick called “Diva”. It was New Year’s after all. Party of two, notwithstanding.

We didn’t have anything planned except dinner – which we agreed should be something special. Or, at the very least, a step up from the Christmas leftovers we’d been stretching for a week. We thought about doing a roast, or cornish hens, but neither of those stuck. Then, my man suggested that he make General Tao Chicken from scratch (ding ding ding – we have a winner!). I was pleased in knowing that I would soon have a plate of that glossy, sticky, sweet concoction happily balanced on my knees, all without the effort of actually cooking, or ordering a disappointing hunk of lukewarm take-out, clad in its Styrofoam shell.

I can’t claim to know much about General Tao chicken. Is it Tao? Or Tso? Does it really have Chinese roots? Hunanese roots? Was it invented in Taiwan? Or New York? None of the above? I can only tell you that the sauce from this version comes to you courtesy of the 100% non-Chinese, Québécois-caucasian cooking personality, Ricardo Larrivée, with some adaptations from my 100% non-Chinese, Ontarian-caucasian boyfriend.

I can also tell you that it’s the Chinese-Canadian delicacy of your dreams. It’s exactly like the General Tao you order can off the menu at your local Szechuan restaurant, except better; since you’re choosing the chicken, the final result is worlds apart from the sub-par meat on offer for $7.95 at the local take-out place.

While I’m usually not a huge fan of making fried food at home (the trouble, the injury, the mess…), this is one of the few dishes involving frying whose homemade version is better than any other ones I’ve had in restaurants. Plus, it’s not like I was making it. He was. My job was to sip my cocktail, gaze at our (fake) fireplace and serenade him with Neil Diamond sing-alongs from the couch.

♫  Red, red wiiiiine… ♫

General Tao Chicken – sauce adapted from Ricardo Cuisine; batter from Food Retro; made with love by the boyfriend
Serves 4

Ingredients

Sauce + main ingredients:

  • 6 Tbsp soy sauce
  • 6 Tbsp chicken broth (or water)
  • 6 Tbsp rice vinegar
  • 2 Tbsp fresh ginger, finely chopped
  • 4 cloves garlic, finely chopped
  • 4 tsp cornstarch
  • 2 tsp paprika
  • 2 tsp sambal oelek
  • 1 tsp toasted sesame oil
  • 1 cup sugar
  • 3 Tbsp water
  • 2 lbs skinless and boneless chicken thighs, cut into large cubes
  • one green pepper, de-seeded and cut into thick slices (halved, then cut in three)
  • 1 Tbsp canola oil (to sauté the pepper)

Batter:

  • 1/2 cup all purpose flour
  • 1/2 cup cornstarch
  • 1 tsp baking soda
  • 1 tsp baking powder
  • 1/2 tsp salt
  • 1/4 tsp black pepper
  • 1 tsp white sugar
  • 1/2 cup + 2.5 Tbsp water

For Frying:

  • 1 litre canola oil
  • deep, heavy-bottomed pot (Dutch oven or wok)
  • frying/candy thermometer
  • paper towels

To serve:

  • 2 green onions, thinly sliced
  • cooked white rice (see note below)
  • steamed greens (bok choy, broccoli)

—–

Directions

1) Make soy mixture: in a small bowl, combine soy sauce, broth, vinegar, ginger, garlic, cornstarch, paprika, sambal oelek and sesame oil. Set aside.

2) Make the sauce: in a small saucepan, combine sugar and water. Bring to a boil and simmer until mixture is slightly caramelized, about 5 minutes. Add soy mixture. Bring to a boil, whisking constantly. Keep sauce aside, off the heat.

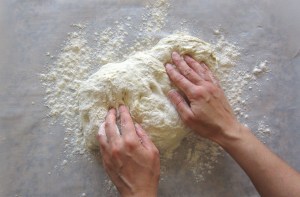
3) Make the batter: In a bowl, season chicken pieces with salt and pepper. In a separate bowl, mix all the batter ingredients in a medium size bowl.  Add the cubed chicken and toss to coat.

4) Fry the chicken: Heat your cooking oil to a temperature of 37oF (use a frying/candy thermometer). Drop battered meat into the hot oil a few pieces at a time and fry in batches for 4-5 minutes, or until a deep golden brown and cooked through, making sure to always have about 3/4-inch of oil to fry the chicken (add oil as necessary). Break up pieces that stick together as soon as possible (chopsticks work well for this).  Drain on paper towels. Repeat with remaining chicken. Discard oil.

Note: try to drop the meat into the oil one piece at a time, taking care not to overcrowd the pan.  If all the meat is tossed in at once, they could stick together, cook improperly, or the batter could become very greasy, as the temperature of the cooking oil would drop.

5) Pull everything together: warm 1 tablespoon of canola oil on medium heat. When the oil is hot, add the peppers and soften for about 3 minutes. Set aside on a plate. In the same skillet, heat the sauce. Then add the chicken and toss well to coat. Sprinkle with green onions and serve with white rice and steamed greens.

Note from boyfriend on rice:  THIS was the rice.  White.  And I rinsed like crazy.  Like Crazy. Until water runs clear.  It’s super important.

Share this:

  • Tweet
  • Share on Tumblr

Like this:

Like Loading...

100th

04 Monday Jan 2016

Posted by julia chews the fat in Cooking For Your Peeps, Food Away From Home, Lunch & Dinner, The Basics

≈ 10 Comments

We began the New Year by discovering a smattering of mold, a constellation of green and black across a metre of bubbled paint, on our living room wall, right behind the couch.

Yey, a new year! A fresh start! With some health-compromising fungus! Cool!

I’m trying not to see it as a bad omen, a bad start to the year; trying not to think about the fact that this nagging cough from my cold has hung on longer than usual; trying not to think about the cost of a dehumidifier in the days after the financial haemorrhage that is Christmas; trying not to be annoyed that our landlady’s solution to the humidity is to Pfft, just turn up the heat!, which only makes things worse by turning our place into a sauna any time we cook, hang laundry and shower within the same 48 hours (partly because our apartment wasn’t outfitted with a bathroom fan, nor a kitchen fan.)

But I’m trying – really hard – not to think about any of that, right after my man bleaches down the wall and sets up the rotating space heater, and I recount the time someone I knew had to be operated on because he had fungus growing under his cheeks, in his sinus cavity. La la la.

To distract myself, I’m writing this post, which WordPress tells me is my 100th. They even sent me a notification with an image of a miniature trophy and an exclamation mark. So I guess that means we should celebrate? You, me and this 100th batch of words? Let’s forget about fungus. Let’s instead turn our attention to tacos. Because in an ideal world, I think most celebrations would start with tacos. Don’t you?

I’ve actually been hanging onto this recipe for a few weeks now, from early December, when we had a bunch of people over for a two-cake, Planter’s punch, tacos-with-all-the-fixings-fiesta for my man’s birthday. It seemed fitting seeing that at the same time last year, we were in Tulum, beach combing, laying under palm trees, speaking broken (very broken) Spanish, and eating our weight in tacos.

We were partial to one thatch-roofed taqueria/bar right off the beach called La Eufemia; what they offered was straightforward, cheap, and more authentic than the Italian and Asian-fusion stuff the guys down the road were shilling. So it became a bit of a daily ritual – 2 Coronas and three or four tacos each, then a walk on the beach, or along the tiki torch-lined road. Simple, but perfect.

Tulum

TulumTulum

The fish tacos (pictured above) might have been La Eufemia‘s crowning glory, but their al pastor were pretty great too – pork shoulder rubbed in a mix of chiles, then slowly grilled until tender, served on tortillas with chopped onion, pineapple, and cilantro. We wanted to re-create something at home along the same lines, but without a grill or rotisserie, char-grilling the meat didn’t seem feasible. The other option was to slice the meat, then grill it, but seemed like a sure-fire way to dry it out. So instead, we left the pork shoulder intact, marinated it overnight (in the traditional al pastor spices), slow-cooked it, then once it was out of the oven, pulled the whole thing apart with two forks, and served it with fresh cilantro, onion and the pineapple it had been cooked with. The whole thing was smoky and sweet, tender and caramelised. We had leftovers for the better part of the week, but we didn’t complain because each time we put one together, it was like a little party, a fiesta, a miniature escape…

(…like the one this blog post gave me from that fuzzy, fungal surprise we found behind the couch. Thanks for bearing with me. Now you will be rewarded with tacos.)

Slow-Cooked Pork Tacos – marinade from Food & Wine
Serves 8

Notes:
1- this recipe easily doubles if you’re cooking for a crowd
2- the pork needs to marinate overnight, so plan accordingly

011

Ingredients

  • 1 tablespoon vegetable oil, plus more for brushing
  • 3 garlic cloves
  • 1 teaspoon dried oregano
  • 1/2 teaspoon ground cumin
  • 1/2 teaspoon pepper
  • 1/4 teaspoon ground cloves
  • 4 fresh guajillo chiles—stemmed, seeded and cut into 2-inch pieces
  • 1/3 cup pineapple juice
  • 1/4 cup white vinegar
  • 2 tablespoons chipotle in adobo, chopped (original recipe calls for achiote paste, but I wasn’t able to find any)
  • Sea salt
  • 2 pounds boneless, whole pork shoulder
  • 1/2 medium pineapple, peeled and sliced 1/2 inch thick
  • 1 medium red onion, sliced crosswise 1/2 inch thick
  • Warm corn tortillas, chopped cilantro, thinly sliced red onion, lime wedges for serving*

*Other (possibly inauthentic al pastor toppings): queso (or feta), shredded red cabbage, quick-pickled radishes, chipotle powder

DIRECTIONS

1) Preheat the oven to 325°F

2) In a medium saucepan, heat the 1 tablespoon of oil. Add the garlic and cook over moderately high heat, turning occasionally, until lightly browned, about 1 minute. Stir in the oregano, cumin, pepper and cloves and cook until fragrant, about 1 minute. Add the chiles and cook, stirring, until blistered in spots, about 30 seconds. Add the pineapple juice, vinegar and achiote paste and bring to a boil. Remove from the heat and let stand for 5 minutes.

3) Transfer the chile mixture to a blender and purée until smooth. Season with salt. Scrape the marinade into a large, sturdy plastic bag. Add the pork and turn to coat. Set the bag in a small baking dish and refrigerate overnight.

4) Preheat a grill pan. Brush the pineapple and onion with oil. Grill over medium-high heat, turning once, until lightly charred and softened, 3 to 5 minutes. Transfer to a roasting pan.

5) Remove the pork from the marinade. In the same pan used for the pineapple, grill the whole pork shoulder over medium-high heat until browned on all sides. Transfer to the roasting pan, nestling it among the pineapple and onion wedges. Pour remaining marinade from bag on top. Cover loosely with foil and bake in the preheated oven for approximately 3 hours (let the pork cook undisturbed for 2 hours, then begin checking it every half hour. The pork is done when it is fork-tender, in other words, when it easily falls apart.)

6) Shred pork with two forks; season with salt. Serve with warm corn tortillas, chopped cilantro, sliced red onion and lime wedges (and/or any other toppings of your choice).

Tacos al Pastor

Tacos al Pastor

Tacos al Pastor

Share this:

  • Tweet
  • Share on Tumblr

Like this:

Like Loading...

Real Christmas

01 Friday Jan 2016

Posted by julia chews the fat in Cooking For Your Peeps, Holidays, Snacking, Sweet Tooth, The Basics

≈ 3 Comments

“I can’t believe it’s already over.” – Mom, on the drive home after Christmas dinner

This holiday is charged with so much expectation, emotion and excitement that when it’s over and done – after only a few short days of feasting, hugging and imbibing – it’s hard to believe it ever really happened. Christmas sometimes feels like one big blur of flour and sugar, sloppy two-cheeked kisses, chest colds, Burl Ives, and glitter (bits of which we’ll be finding in our apartment til March.)

The funny thing is, despite the rushing around, the prep, the chaos, the outbursts, the kitchen meltdowns, the set-up, the clean-up, the mountains of dishes, I can’t imagine having it any other way. It’s bacchanal, it’s over-the-top, it’s insane. But it’s Christmas. Not the idyllic, gilded Christmases of the glossy magazines, or of Martha Stewart, or of people we come across on the Internet with seemingly perfect lives. It’s real. It’s messy. It’s exhausting. It’s emotional. But in between the messy bits comes lots of love and togetherness, laughter and gratitude. When we lost power on Christmas Eve – right before the seven-fish dinner was ready for the oven – we managed to pretend we weren’t worried, ignoring the three dozen shrimp quietly defrosting on the counter, opting instead to drink bubbly and eat crackers, while my (ever-optimistic, buoyant) brother shucked oysters by lamplight.

Things certainly could have been worse.

Oysters

When the power came back on, about an hour later, everyone cheered and kissed and toasted. It was like the final scene in It’s a Wonderful Life. Dinner was back on schedule, the wine flowed freely, and soon enough, the twelve of us gathered around the table for a feast fit for kings.
Christmas Eve Dinner

Once the last fork was laid down and the plates were cleared, Nonna pulled out her reading glasses, mom plated cookies and After Eights and we played Tombola, calling out the numbers in English, Italian, German, and French, so that everyone around the table could put their chips on the right spot. It didn’t feel good beating Grandma at Tombola three times in a row (it just instigated a fit of guilt-ridden, nervous laughter), but it did help me forget about my chest cold, as did learning – on Christmas Eve, no less – that the number 11 in German is both spelled and pronounced “elf”.

Tombola

Family time aside, the thing I relished most this Christmas – the thing that ended up being the most restorative part of this whole holiday – was the baking. Not because the results were particularly successful (deflated meringues, chewy crackers, and lacklustre cioffe were among the flops), but because I had the chance to do most of it on my own – quietly and leisurely, in crumpled pyjamas. With the year winding down, I came to realise just how much that time on my own – especially in the kitchen – has been (was, is)  a subtle luxury. When I used to hear food people say that baking was “meditative”, I’d roll my eyes, thinking Ugh, how cheesy… But it turns out they were right. When you bake on your own, it’s just you, the dough, and nothing else. The rest of it – the distractions and concerns, decisions and regrets – can stay suspended for awhile.

Somewhere between batches of madeleines and biscotti, shortbread cut-outs and these ginger cookies, I found that respite from an unquiet mind can come from nothing more than a little butter, sugar, flour and a rolling pin.

Who knew.

Here’s to making room for doing more of the things we love in the coming year. Wishing you all a bright and welcoming 2016 and looking forward to having you here again soon xx

—–

Orange Spice Madeleines – adapted from Port and Fin
Makes 16

Orange Spice Madeleines

Ingredients

  • 2 large eggs, beaten
  • ⅔ cup sugar
  • 1 cup + 1 Tbsp all-purpose flour
  • ½ cup + 1 Tbsp unsalted butter
  • ¼ tsp salt
  • 1 tsp pure vanilla extract
  • 1 large navel orange, zest
  • 1 tsp ground cinnamon
  • 1 tsp ground cloves
  • ¼ tsp ground cardamom

Directions

1) Melt the butter in a saucepan until it comes lightly browned and has a nutty fragrance (careful not to over-brown it – butter tends to burn rather easily). Set aside to cool slightly.

2) In a medium bowl, mix one cup of the flour, sugar, cinnamon, cloves and cardamom and set aside.

3) In a separate bowl, whisk the two eggs with the vanilla and salt until the eggs are frothy.

4) Add the wet ingredients to the dry ingredients and, with a spatula, stir until just combined. Take care not to over-stir.

5) Add the cooled melted butter and the orange zest and stir. It may take a minute for the butter to blend into the mixture. Again, take extra care not to over-mix.

6) Cover the bowl and place in the refrigerator to rest at least one hour and up to overnight.

7) Prepare a madeleine tin by brushing the moulds with the extra tablespoon of butter and lightly dusting them with flour, tapping off any excess. Place the pans in the freezer for at least an hour.

8) Preheat the oven to 350°F. Remove the batter from the refrigerator and the pan from the freezer. Fill each mould with approximately one tablespoon of batter.

9) Bake the madeleines for 10-15 minutes until the edges are browning and the middle is puffed up slightly. Using your forefinger, press lightly on the center hump – the madeleines are finished baking when they spring back at your touch. Remove the madeleines from the oven and let cool for 2 minutes. Then gently loosen the madeleines from their moulds and arrange onto a cooling rack. Dust with icing sugar (optional) and serve.

Orange Spice Madeleines

Orange Spice Madeleines

—–

Hazelnut Biscotti with Orange Zest – from Canadian Living’s Christmas
Makes about 24

Hazelnut Biscotti

Ingredients

  • 1 3/4 cups all-purpose flour
  • 2 tsp baking powder
  • 3/4 cup whole hazelnuts, skin-on, toasted* 
  • 2 eggs
  • 3/4 cup granulated sugar
  • 1/3 cup butter, melted
  • 2 tsp pure vanilla extract
  • 1 1/2 tsp grated orange rind
  • 1 egg white, lightly beaten
  • 1/4 cup dark chocolate, melted, for drizzling (optional)

*to toast hazelnuts, simply lay them out on a baking sheet and bake at 300°F for about 6-8 minutes, or until fragrant.

Directions

1) To measure flour accurately, lightly spoon flour into dry measure, without tapping, until cup is heaping; level off with blunt edge of knife. In large bowl, combine flour, baking powder and toasted hazelnuts.

2) In a separate bowl, whisk together eggs, sugar, butter, vanilla, almond extract and grated orange rind; stir into flour mixture until soft sticky dough forms. Transfer to lightly floured surface; form into smooth ball.

Hazelnut Biscotti

3) Divide dough in half, roll each into 12-inch long log. Transfer to ungreased baking sheet.

4) Brush tops with egg white; bake in 350°F oven for 20 minutes.

5) Remove from oven and let cool on pan on rack for 5 minutes. Transfer each log to cutting board; cut diagonally into 3/4-inch thick slices.

6) Stand cookies upright on baking sheet; bake for 20 to 25 minutes longer or until golden. Transfer to rack and let cool.

7) If you choose to add a drizzle of chocolate to your biscotti: wait until they’ve cooled; then collect a teaspoon of the melted chocolate in a teaspoon and sway it back and forth over the biscotti. Allow the chocolate to set at room temperature before storing.

Note: Biscotti can be stored in airtight container for up to 2 weeks.

Hazelnut Biscotti
Hazelnut Biscotti
Hazelnut Biscotti
Hazelnut Biscotti
Hazelnut Biscotti
Hazelnut Biscotti

—–

Hazelnut Shortbread – adapted from Bakers Royale
Makes about 40 cookies


Ingredients

  • 2 1/2 cups all-purpose flour
  • 1/2 tsp salt
  • 1 cup granulated sugar
  • 12 Tbsp unsalted butter, slightly softened
  • 1 large egg yolk
  • 2 tsp. pure vanilla extract
  • 1 1/2 cups toasted hazelnut, coarsely chopped
  • 1 cup coarse sugar
  • 8 oz. dark chocolate (for dipping)

Directions

To prepare and refrigerate the dough:

1) Sift flour and salt into a bowl; set aside. With a hand beater, cream the butter on medium-low speed until smooth, about 1-2 minutes. Add in the sugar and beat until light and fluffy, about 2 minutes.

2) Add in the egg and vanilla, beat until blended. Reduce the mixer speed low and in the dry ingredients in three additions. Turn off the beater and fold in the nuts with a wooden spoon or spatula.

3) Portion the dough in half and shape each half into 15x3x1 inch rectangular logs. Press coarse sugar into each side. Cover with plastic wrap and push both ends with your hand toward the centre to tighten the dough. Chill prepared dough for at least 3 hours.

When ready to bake:

4) Heat oven to 350 degrees F. Line a baking sheet with parchment paper. Remove chilled dough and slice cookies to ½ inch thickness. Place each cookie 1 inch apart on a parchment-lined baking sheet.

5) Bake until cookies are lightly browned, about 18-20 minutes. Transfer cookies to a wire rack to cool completely.

6) Melt chocolate on the stove-top by making a bain-marie; stir occasionally. Dip one corner of cookie into melted chocolate and place on parchment paper to set. (you can also sprinkle a bit of flaked salt over the chocolate before it sets.) Serve or store in an airtight container for up to one week.

Hazelnut ShortbreadHazelnut ShortbreadHazelnut ShortbreadHazelnut Shortbread

—–

Toasted Almond Meringues – from mom’s repertoire

Makes about 40

But first, a few notes on meringue…

Theoretically, meringue is supposed to be simple – whip egg whites into soft peaks, add sugar, whip into stiff peaks, bake. But in practice, there are a few key things to keep in mind: 1) if the weather is humid, your egg whites might not rise enough, causing the meringue to deflate and become chewy. 2) It’s important that the equipment you’re using be extremely clean (bowl, beaters). Any trace of grease or fat (say, from a stray egg yolk that makes it into the bowl) can compromise the results. 3) Overbeating can also be a problem, causing the meringue to become more like taffy in consistency. (If you’re looking for more tips, Martha’s actually got some good ones here .)

This time around, my meringues deflated when they were pulled from the oven (see final photo below), on account of the fact that I made them on an unseasonably balmy/humid day and probably overbeat them. To see what these meringues should actually look like, you can find some photos here from my mom’s archive.

To all you meringue newbies – I hope none of this scares you off making meringue. With practice, you start to get a sense of its quirks and soon you’ll be able to whip some up with your eyes closed. At that point you’ll discover that pulling a perfect batch of meringues from the oven can be obscenely satisfying…

Toasted Almond Meringues

Ingredients

  • 2 egg whites (or 1/4 cup thawed eggs whites)
  • 1/4 teaspoon cream of tartar
  • 1/2 cup brown sugar
  • 1 tsp vanilla
  • 1/2 tsp almond extract
  • 1 cup sliced almonds, toasted*

*to toast the sliced almonds, simply lay them out on a baking sheet and bake at 300°F for about 4-5 minutes, or until golden.

Directions

Preheat the oven to 300º F .

In a bowl, beat egg whites with the cream of tartar until soft peaks start to form. Gradually add the the brown sugar until stiff peaks form. Fold in the vanilla, almond extract and sliced almonds.

Spoon teaspoonfuls onto a cookie tray which has been lined with parchment paper. Bake in a 300º F oven for 30 minutes. Remove from baking sheet and allow to cool on a metal rack.

Note: these meringues will appear a little more “toasted” than regular meringue – that’s ok. It’s because it calls for brown sugar instead of white.

Toasted Almond Meringues

Share this:

  • Tweet
  • Share on Tumblr

Like this:

Like Loading...

Sugo di pomodoro

15 Tuesday Dec 2015

Posted by julia chews the fat in Cooking For Your Peeps, Cooking with Nonna, Lunch & Dinner, The Basics, Vegetarian

≈ 1 Comment

In the kitchen, there aren’t many things for which grandma, Nonna, has any steadfast rules. Tomato sauce, however, is one noteworthy exception. Here is an abridged, translated version of a recent conversation we had over the phone:

“Nonna, I made your sauce yesterday. Era buonissimo.”
“Did you put in the leek? And a bit of carrot? And celery?”
“Sì. Of course. Certo.”
“But not too much of each?”
“No, not too much of each.”
“And the butter? Il burro. Did you remember to put it in?”
“Yes, Nonna.”
“Ok, hai fatto bene. Brava. Good girl.”

I’ve made Nonna’s tomato sauce a hundred times over. Maybe even more, considering it was one of the very first things I learned to cook. Like all her recipes, the ones that I’ve been able to replicate with ease are like badges, tangible mementos of a culinary heritage – hers, mine, ours. It turns out that when you have Italian roots – even if it only makes up half of you – tomato sauce isn’t really just tomato sauce. It’s a birthright. You have to take special care to preserve it; to share it, but to safeguard it too.

Variations of sugo di pomodoro differ across Italy and across families – some might add aromatics, like basil; others sometimes add salt or a bit of sugar. It’s one of those great backbone recipes that’s slightly different from household to household. I think the key to Nonna’s recipe is poco poco, or “just a little bit”. You want just a little bit of leek, of onion, of carrot, of celery. These ingredients make up your base, your sofrito (or mirepoix in French); if you go overboard with any of them, the flavour won’t be balanced. That said, trust your judgement and your tastebuds – if you feel it needs more or less of anything, adjust it. As simple as it may be, this recipe gets better with practice. Keep making it, over and over, until you love it and think Nonna would too.

Nonna’s Tomato Sauce (sugo di pomodoro della Nonna)

Tomato Sauce

Ingredients

  • 1 medium onion, chopped (about 1/2 cup)
  • 1 small carrot, chopped (about 1/4 cup)
  • 1 small celery stalk, chopped (about 1/4 cup)
  • 1/2 small leek (white part only), chopped (about 1/3 cup)
  • 2 cloves of garlic, minced
  • 1 heaped Tbsp tomato paste
  • 800ml-1 L* canned or jarred tomatoes (preferably San Marzano)
  • olive oil (about 1/4 cup)
  • a knob of butter

*a large standard can of tomatoes is usually 796ml; we use homemade jarred tomatoes, each Mason jar containing 1L.

Notes! 

  1. Unlike a lot of recipes out there, Nonna doesn’t add salt, sugar, pepper, chili flakes or aromatics to her tomato sauce. This isn’t bolognese, so no meat either.
  2. You might have leftover chopped vegetables (i.e one small carrot be a little more that 1/4 cup); you can freeze any leftovers for stock or double the recipe.
  3. The sauce will be more flavourful if you allow it to simmer for an hour or so. (Grandpa used to start his sauce at about 10am to serve at lunchtime, but he was hardcore about sauce-making.)
  4. You can also use this sauce to cook meatballs the old-fashioned way; see recipe here.

Tomato Sauce

Directions

1) Heat olive oil and butter in a large saucepan or Dutch oven, on medium-high heat. Once the oil is hot (but not smoking), add the onion and sauté until softened. Reduce the heat to medium. Add the garlic and sauté for another minute. Then add the leek, carrot, celery and sauté together until everything is softened and the onion and garlic are golden to golden-brown. Add the tomato paste and sauté for another minute or so.

2) Add the tomatoes and stir to combine; reduce the heat to medium-low and allow to simmer, half-covered, for 30 minutes to an hour (depending on how much time you have). Remember to stir occasionally.

3) Remove sauce from the heat; blitz with a hand-blender until smooth, or leave as-is if you prefer a more rustic sauce. Serve on pasta, gnocchi, polenta, or pizza with a good sprinkling of parmesan. Alternately, you can freeze the sauce for up to 4 months.

Tomato Sauce

Tomato Sauce


Share this:

  • Tweet
  • Share on Tumblr

Like this:

Like Loading...

Care Package

27 Friday Nov 2015

Posted by julia chews the fat in Breakfast & Brunch, Cooking For Your Peeps, Lunch & Dinner, Soups, Sweet Tooth, Vegetarian

≈ 1 Comment

A friend of mine had a little boy just a over two weeks ago now – a beautiful little chicken of a baby, with soft cheeks, delicate fingers and the requisite new-baby smell. He is definitely a sight to behold, with his miniature yawns and peach-fuzz hair. Regardless of a few nicks from his sharp newborn nails – and a few surprise vibrations from his diaper – he charmed me through and through, in that way that babies are preternaturally good at, without even trying.

With the mini baby boom happening in my circle of friends right now, the one thing I’ve come to understand is just how precious the resources of time and energy are to new moms and dads. Squeezing in a shower or running an errand are rare opportunities that are seized with an acute sense appreciation, if not urgency. Other activities, namely, making a full meal, are easily relegated to the back-burner (sorry for the pun). I’ve heard that a banana and a box of crackers will suffice when you’ve been on four-hour sleep cycles – at best! – and have a little person who needs you in a way that no one else has before.

Knowing that my friend and her husband were busy acclimatising to their new unit of three (diapers, feedings, and all the rest of it), I thought I should come equipped with couple of homemade treats – things that could be frozen or eaten as-is, without any prep, aside from a quick re-heating. In fact, it’s also the kind of food any non-parent would want in the fridge or freezer on those frantically busy days when they don’t have one more ounce to give.

Parent or non-parent, this soup and this cake are my virtual gifts to you. Enjoy xx

Turkish Lentil Soup – makes 4-6 servings

Turkish Red Lentil Soup

  • 225 grams red lentils (approx 1 1/8 cups)
  • 1 medium onion, finely chopped
  • 1 stalk celery, finely chopped
  • 1 carrot, finely chopped
  • 3-4 cloves garlic, peeled and sliced in half lengthwise
  • 2 Tbsp tomato paste
  • 1-2 Tbsp extra virgin olive oil
  • 1.5 litres vegetable stock (plus 1-2 cups more, as needed)
  • 1 small piece ginger, grated
  • 2 tsp ground cumin
  • 2 tsp curry powder
  • 1-2 tsp paprika
  • 1 tsp mustard seeds
  • Fresh mint (or cilantro) and lemon to serve
  • Salt and pepper

Directions

1) Set the vegetable stock in a pot on medium heat to warm up.

2) Heat the olive oil in a large pot, and sauté the vegetables with the garlic cloves, for about 10 minutes. Add tomato paste, spices and grated ginger, and cook for a few more minutes. Add lentils, washed and drained, and cover with hot vegetable stock.

3) Bring to a boil, reduce heat and simmer with the lid on for about 30 or 40 minutes, until the lentils begin to fall apart. Add more stock if they look a bit dry (just remember it should be a soup-like consistency). Season with salt and pepper, to taste.

4) Set aside two or three ladles of soup, and puree the rest in a blender (optional).

5) Serve with chopped fresh mint (or cilantro) and lemon juice. Do not skip this – it’s what makes all the difference!

Turkish Red Lentil Soup

—–

Date-Walnut Banana Cake with Coconut
Lightly adapted from Lunch Lady’s Black Gold Banana Cake
Makes one 9x5x3″ loaf

  • 4 medium overripe bananas
  • 1 1/2 cups all-purpose flour (I used 1 cup white +1/2 cup whole-wheat)
  • 1 1/2 tsp baking powder
  • 1/2 tsp baking soda
  • pinch of salt
  • 1/2 cup raw caster sugar
  • 2/3 cup coconut oil, melted
  • 1 tsp pure vanilla extract
  • 1/2 cup Medjool dates, chopped
  • 1/4 cup walnuts, chopped
  • 1/4 cup unsweetened shredded coconut

Date-Walnut Banana Cake

Directions

1) Preheat the oven to 350˚F.
2) Place the overripe bananas into a mixing bowl and beat until puréed. Add the vanilla, coconut oil, and sugar, and beat again until combined.
3) Fold in the flour, raising agents, salt, and walnuts until thoroughly combined.
4) Fold in the chopped Medjool dates and shredded coconut; pour the batter into a loaf tin lined with parchment paper.
5) Bake for 45 mins to an hour, or until skewer comes out clean, cool on wire rack.

Date-Walnut Banana Cake

Date-Walnut Banana Cake

Date-Walnut Banana Cake

Date-Walnut Banana Cake

Share this:

  • Tweet
  • Share on Tumblr

Like this:

Like Loading...

The Merits of Normalcy and Apple Pie

30 Friday Oct 2015

Posted by julia chews the fat in Cooking For Your Peeps, Sweet Tooth, The Basics

≈ 5 Comments

Many moons ago – twenty three years-worth to be exact – I spent a summer at ballet camp. It wasn’t your regular, run-of-the-mill summer camp, though. This one required an audition, in a big theatre, with throngs of people, and a long line of evaluators holding clipboards. This definitely wasn’t sleepover camp, à la Wet Hot American Summer.

I was ten at the time, and it was my dance teacher, Miranda, who had first suggested it. The National Ballet of Canada is coming to Montreal for summer camp auditions. Is that something you’d like to try? It was a conversation she had with my parents and I in her sunny office facing the studio, where Guy, the in-house pianist, made the room resonate with Chopin. I really think you’d have a chance of getting in. You should go! She’d known me since I was three and knew how much I loved dancing. I’d practically grown up at her studio, spending Saturdays and after-school hours spinning around on point, or clicking across the floor in character shoes. It was the place where I’d memorised dozens of choreographies; where I’d learned how to fondue, pas-de-chat, arabesque, and spin round and round on one spot without getting dizzy.

My memory of what followed that conversation in Miranda’s office isn’t crystal clear; I just remember saying “yes” to the proposal, having a geeky photo of myself taken in the local newspaper, and going to the audition, where dozens of chignoned girls milled around with numbers pinned to the front and back of their leotards. The room crackled with excitement; girls giggled and practised their pirouettes. A few others stood nervously, gnawing at their cuticles. After each round, the judges deliberated for an little while, trading notes, glances, murmurs. After some time, I was called back to the table to be told, with bright, toothy smiles, Congratulations! We would like to invite you to our summer camp at The National Ballet School!

I’d never seen strangers so ecstatic for me.

A few weeks later, our family unit of four packed into the Corolla and made the six-hour trip to Toronto, so they could help me get settled in. I shared a dorm room with a girl named Jocelyn – an effervescent, bright kid from BC who had big, blue, friendly eyes. Hi! I’m Jocelyn! Welcome to our room! We became instant friends – the kind you make when you’re in new, unfamiliar territory and you mutually decide that you’re going to stick together like glue. As far as ephemeral camp-friendships go, Jocelyn was maybe the closest thing I had to a best friend. She shared her sour candies with me, along with my quiet uneasiness about Ms. Yovanovitch, the frostiest of all our teachers, who always wore black and didn’t seem very fond of children. It wasn’t long before we gave her a secret nickname – one that rhymed easily with Yovanovitch and was, well…more accurate.

Without even knowing it, Jocelyn made being there seem normal, like the whole thing was no big deal. We worked hard and did as we were told, but when class was over, we didn’t think much about our successes or failures in the studio. Other girls did extra work in the hallways after class, practising choreographies or perfecting their form; some cried at night, worried they weren’t talented enough, or that the teachers didn’t like them. Jocelyn and I had more important preoccupations, like trying to find secret (haunted?) rooms in the school’s hidden corners, or practising party tricks, like reaching our chin with our tongue, in an attempt to mimic the tall gangly girl in the grade above us who could do it with great finesse. (She also happened to be able to stretch both her legs behind her head and walk around on her hands, but that surpassed our (very limited) acrobatic talents.)

As a ten year-old who had always danced for fun, I learned very quickly that camp at The National Ballet is work. You’re there to be disciplined, focused, engaged; your main tasks are to listen, learn, and practice practice practice. Even if you’re not a professional yet, you’re there to be – and behave like – a capital B Ballerina. Yes, it’s exciting and yes there’s downtime, but ultimately you’re there to put in a full day of dancing and to push your body as far as it will go. And in that sense, your body isn’t really your own, but rather an extension of the work. Your feet get bloody and blistered; you wrap them in gauze and tape, then stuff the ends of your point shoes with wads of cotton to cushion the blow. Your limbs and midriff are poked and squeezed and stretched by your instructors – Tight tight tight! Tuck in your belly! Lower your ribs! Head up! Not too far up! Looong necks! Point those toes! Point point point! Hands! Light hands! All of it is done with smiles and good doses of encouragement – Good good good! Beeeautiful! Yes! Comme ça! Oui! – but at times the constant instruction could be dizzying. Miranda might have been a rigorous teacher (she was, in fact, a former National Ballet dancer), but at her studio, dancing was still ultimately about having a good time; about movement and expression. There were no clipboards, no evaluations, no physiotherapists telling us we had abnormalities to “fix”. Prior to ballet camp, I’d never been told that my back had an irregular curvature, or that the arches of my feet weren’t, well, arched enough; I’d never had to stick my feet into stretching devices or undergo back-straightening exercises in a physiotherapy clinic.

This was all weird, new stuff to me; it created a new awareness of my body – both in terms of its potential and its limitations. Since our bodies were under the microscope every single day, it was preoccupation that was palpable, inside the studio, as well as outside of it. During breaks or in the evenings when we’d be getting ready for bed, girls talked about their bellies, their legs, their arms. They compared themselves to others constantly. There were rumours that a couple of the older girls threw up. Before ballet camp, I’d never heard of binging or purging or abstaining from food. And while no one really talked about it explicitly, it was clear that food was treated as fuel or, more nefariously, as an evil temptation. We met with a nutritionist every week who noted our food consumption on her hand-held chart. What did you eat this morning before class? And after class? My mom seems to recall that this was to prevent eating disorders (which in all fairness, it probably was), but I remember thinking it was weird that someone was asking me what I’d had for breakfast. (I never told them that I sometimes complemented my breakfast with a handful of Sour Patch Kids. I pat my ten-year-old self on the back for that one.)

Luckily, none of this had any lasting detrimental effects, due to the fact that I was a pretty naïve kid (as far as I was concerned, I was at summer camp. For FUN!), and that I had incredibly supportive, level-headed parents who were the exact opposite of stage parents – they encouraged my interest in dance, but never made it feel like an obligation, or like my life depended on it. And for those reasons, I don’t have bad or traumatic memories of my time at The National Ballet. Overall, I remember it as an exciting time that was full of new, interesting, fun things. It’s frankly only when I look at it through the lens of an adult that things seem a bit less romantic.

—–

This adult lens was in full focus last month, as I sat in a dark corner of the parterre at Place des arts, watching The National Ballet of Canada perform a highly-anticipated three-part show. It was an incredible performance – the dancers glided and spun across the stage with effortless power and grace – but I was distracted; my mind kept drifting to what-if thoughts. What if I had stayed? What if I’d said “yes” instead of “no when they invited me back? It was an odd thing to consider. I couldn’t fathom how different my life would have been. In that moment, the bodies that moved across the stage seemed surreal – the men looked like Greek sculptures, the women like tall, slender cranes. They looked like other-worldly beings – ones that live, eat and breathe very different things than I do.

From ballet to bodies to diet, I started to think about how staying with the National Ballet (for however long it would have lasted…maybe until puberty?) would have undoubtedly affected my relationship with food. I thought about how my interest in food would have diverged considerably; how I would probably hesitate before eating a piece of cake or a slice of cheese, after doing a mental cost-benefit analysis of the caloric intake.

When I think back to that time, that brief summer when my body wasn’t really my own, it makes me that much more appreciative of the place I find myself in now. It’s a place where I don’t have to worry about my body determining my success; where I don’t have to push my feet into stretching devices or tell a nutritionist what I had for breakfast. It’s a place where I can still dance for fun and where I can make an apple pie for my family and enjoy it with them, without thinking twice.

Amen to that.

Classic Apple Pie

Classic Apple-Pie with Lattice Crust – crust adapted from Laura Calder; filling adapted from Apt 2B

For the Crust

  • 2 ¼ cups flour
  • ½ tsp salt
  • 2 Tbsp sugar
  • 1 cup butter, cut into pieces
  • ‎ ⅓ cup ice-cold water

Put the flour, salt and sugar in the bowl of a food processor; then add the pieces of butter. Pulse until you reach a coarse crumb texture. Keep pulsing while slowly adding the cold water through the feed tube until the dough starts to come together (if you don’t have a food processor, you can also do this with your hands.)

Turn out the dough onto a floured work space and work it gently until it comes together, being careful not to overwork it. Flatten into two equal-sized discs and refrigerate for about 20 minutes.

For the Filling

  • 4-5 large apples (about 3 lbs) – I like Cortland, Spartan or Honeycrisp
  • zest and juice of one lemon
  • zest and juice of half of an orange
  • 1/2 cup sugar
  • 1/4 cup all-purpose flour
  • 1/8 teaspoon allspice
  • 1/8 teaspoon freshly grated nutmeg
  • 1/2 teaspoon cinnamon
  • 1 tsp vanilla extract
  • 1Tbsp bourbon
  • 1/2 teaspoon salt
  • 2 tablespoons butter

Peel the apples and cut them into 1/2” chunks. Place the apples in a large bowl then add lemon and orange juices and zests, stir gently to combine. Add the rest of the filling ingredients (except the butter) and stir gently to combine.

For the Topping

  • 1 egg, beaten
  • a few teaspoons of coarse sugar (like turbinado or light demerara)

Directions

Preheat oven to 400ºF

1) Remove one piece of the dough from the fridge. On a lightly floured surface, roll it out into a 12” circle 1/4” thick and place it into a 9 or 10 inch pie pan. Place in the fridge while you prepare the rest of the pie.

Classic Apple Pie

Classic Apple Pie

Classic Apple Pie

2) Fill the prepared pie shell with the apple mixture, dot with the 2 tablespoons butter. Remove the second crust from the fridge, roll it out to the same size as the pie dish and cut into long strips (between 1 ½-2”). Criss-cross them in a lattice-top pattern (Bon Appétit has a great little video here), trim the edges so there is about ½” of overhang, then crimp the edges.

Classic Apple Pie

3) If the crust seems soft or warm, slide the whole pie into the fridge or freezer for about 15 mins before you bake it. When you are ready to bake brush the top of the pie with a beaten egg and sprinkle with a good dose of coarse sugar.

Classic Apple Pie

4) Put the pie on a baking sheet to catch any drips and bake for 15 minutes on the lowest rack of your oven, then lower the oven temp to 350º and bake for 40-50 minutes or until the crust is deep golden brown and the apple juices bubble.

Classic Apple Pie

Share this:

  • Tweet
  • Share on Tumblr

Like this:

Like Loading...

Breaking Bread

31 Sunday May 2015

Posted by julia chews the fat in Breakfast & Brunch, Cooking For Your Peeps, Lunch & Dinner, Snacking, The Basics, Vegetarian

≈ 5 Comments

Homemade bread.

I’m a wimp when it’s come to those two words. As much as I like cooking, I’ve carefully avoided breadmaking for years, mostly for fear that it’s a labour-intensive process requiring special types of flour, fancy fresh yeast, elaborate kneading and expensive pieces of machinery, like electric bread makers and large mixers with paddle attachments. And that would just be to get the starter dough going. After that, there’d the issue of rising: Does it have to rise in a low heat oven? What if I don’t have a bread-proof setting on my oven? What if I kill the yeast? How will I know if I’ve killed the yeast? And so on and so forth.

Despite all this, I somehow own three cookbooks on bread – including Bernard Clayton’s New Complete Book of Breads, Soups and Stews, a hefty tome that has sat on the shelf undisturbed, for four whole winters now. I have an entire Pinterest board dedicated to bread, a place where I’ve been quietly stockpiling all sorts of recipes for leavened dough – from densely-flavoured sourdough to crackly baguette to Japanese milk toast – none of which I’ve actually made. But, despite my trepidation, I’m clearly interested in bread – the traditions, the techniques, the delicate alchemy that allows a sticky mass to transform into something crispy and chewy and ethereally light, all at once. It’s a magical beast. The unicorn of food. I’ve just been too timid to get close to it.

Then one day, out of nowhere, I decided to just effing do it already. It happened when I was making lunch with my mom over a long weekend this May:

Me: So, what if I made bread today?
Mom: Yeah, sure. If you want something easy, you should try that no-knead one Mark Bitterman did for the New York Times.
Me: You mean Mark Bittman?
Mom: Yeah, yeah…him. Anyways, it’s so easy. Seriously. There’s a video too. (she finds me the video online). Here, watch it. It’s all there. It’s super simple, you’ll see.

This isn’t the first time I’ve heard of this no-knead recipe. My mom’s been a big proponent of it for years. It’s a version of the old European clay-pot method, modernised by baker Jim Lahey, of Sullivan Street Bakery in Manhattan, and then popularised by Mark Bittman when he did a piece on it for The New York Times. In the video, Lahey walks us through his recipe, step by step, starting with the introductory promise that it’s so incredibly easy, “even a six year-old” (“or a four-year old!”) can make it.

With that bold endorsement in mind, I figured that if any recipe was going to help me cross the threshold into breadmaking, this would be it. The simplicity of Lahey’s recipe is what ultimately sold me. You don’t need to muck around with special bread flour or proofing or extraneous kneading, nor do you need an expensive mixer or a professional oven. All you need is –

flour
yeast
salt
water
your two hands

That, and a screaming-hot cast-iron Dutch oven. The cast-iron is an important part of the alchemy in this bread recipe, creating just the right amount of steam to get an airy interior and a crisp exterior. The idea is you set the pot in a 500ºF oven until it reaches temp, then toss in your dough (cover on for a bit, then cover off) and bake on high heat until the bread becomes crackly and lightly caramelised on the outside. Cast-iron pots retain heat extremely well, mimicking the qualities of a stone oven and a steam-injected oven at the same time. So, whether you’re a six year-old, or a four year-old (or even a monkey), the cast-iron pot will help your first attempt at bread look like this:

baked miche

It’s seriously one of the easiest things you’ll ever make. And when you’re cracking into that first piece of freshly baked bread, straight from your oven, you’ll be so happy you made a go of it.

Happy baking, friendlies x

—–

Notes on the recipe:

  • the dough needs at least 12 hours for the first rise, then another 2 hours for the second rise. Start the night before and let it rise overnight. The longer you let the dough rise (min. 12 hours, max 24 hours), the more flavourful it will become.
  • when my mom discovered this recipe, she quickly starting making her own adaptations, one of which resulted in a drop-dead gorgeous focaccia recipe. All you need to is add a bit of olive oil to the dough and stretch it out on a pizza pan for baking. (I’ve included her recipe for a cherry tomato version below). If you decide to make both the bread and the focaccia, just double the dough recipe.

Note on Dutch ovens: if you don’t already have one, it’s an insanely useful kitchen tool have. They’re especially practical in the winter – to make soups, stews, curries – but are a must-have for this bread recipe. If you’re worried about the financial commitment, remember that you don’t need to buy the top-of-the-line models (the ones that can go for upwards of $350 a pop); I got a Lagostina version on sale at Canadian Tire for $90 and it works like a charm. They usually come with a 10 or 25-year (and sometimes, lifetime) guarantee, so they’re in it for the long haul. Just make sure that you get one with a 500ºF-resistant metal knob on the cover so that you can make your bread (the ones that come with a hard plastic knob are no bueno).

Jim Lahey’s No-knead Bread – makes one white miche

Ingredients

  • 3 cups all-purpose flour
  • ¼ tsp dry yeast (like Fleischmann’s)
  • 1 ½ tsp salt
  • 1 ½ cup water

Crucial kitchen tool: cast-iron Dutch oven

DIRECTIONS

STEP 1 – RISING

1) In a mixing bowl combine the flour, yeast and salt and blend with a whisk.

2) Pour in 1 1/2 cup of water and mix with a wooden spoon. Scrape any excess flour from the bottom and sides of the bowl, making sure the ingredients are well incorporated and form into a ball. The dough will have a stringy texture.

3) Place a piece of plastic wrap on the bowl to avoid the dough from drying out. Allow to rise in a warm dry, and draft free place for at least 12 hours and up to 24 hours. (I left mine at room-temperature on the counter-top overnight.)


STEP 2 – FOLDING & SECOND RISING

1) Dust a large piece of parchment paper, measuring about 24 inches with flour to prevent the dough from sticking during its second rising. Scrape the risen dough onto the floured parchment paper.

2) Sprinkle some flour on the dough and on your hand to prevent sticking. Lightly pat down the dough with your hands to form a piece measuring approximately 10 x 10 inches.

3) Fold one side to the centre; then fold the other side to meet the edge of the first side, like a book (see images below). Take the top edge and fold to the centre; take the bottom edge and fold to meet the top edge.

4) Turn the dough and place the folded side of the dough on the parchment paper and dust with flour to prevent sticking. Loosely wrap the dough in the parchment paper and place on a baking sheet. Cover with a tea towel. Transfer to a warm and dry place and allow to rise a second time (2 hours).


STEP 3 – BAKING

1) Place the cast iron Dutch oven with its cover, on the second rack from the bottom of the oven. Preheat the oven to 500ºF.  Dust the smooth side of the risen dough with flour to prevent it from sticking to the bottom while baking.

2) Once the oven reaches the required temperature.  Remove the pot from the oven and take the cover off. Place the dough, folded side up into the pot and cover. Bake for 30 minutes at 500ºF.

3) Remove the cover, reduce the heat to 450º F and bake for an additional 15-30 minutes until the crust becomes golden brown. To check if the bread is cooked, remove the loaf from the pot and tap the bottom with a knife – if it sounds hollow, the bread should be done. Cool on a baking rack.

baked miche

baked miche - detail

baked miche

baked miche

baked miche - section

—–

Tomato Focaccia

Mom’s Cherry Tomato Focaccia – makes one 12″ pie

  • 2 cups cherry tomatoes, cut in half
  • 1 garlic clove, finely minced
  • 1 Tbsp dried oregano
  • 3 Tbsp extra virgin olive oil (plus a little more for the topping)
  • 2 Tbsp grated Parmigiano Reggiano
  • 1/4 cup sliced bocconcini or cubed mozzarella
  • salt flakes and freshly ground pepper (to taste)

1) Follow the directions for bread in the recipe above, adding 3 Tbsp of olive oil to the dough when you add the water.

2) After the first rise (see directions above), transfer the dough to a greased and floured 12″ pizza tray. Dust the dough lightly with flour, and with your hands spread out to the edges of the pizza pan. Place in a draft-free place to allow to rise a second time (2 hours).


3) While the dough is rising, prepare the topping by adding the prepared tomatoes in a bowl and toss with a drizzle of olive oil, the Parmigiano Reggiano, bocconcini (or mozzarella), minced garlic, and oregano. Season with salt and pepper.

Tomato Focaccia

4) Once the dough has risen a second time (after 2 hours), preheat the oven to 500º F. Spread the tomato mixture gently over the focaccia dough and bake at 500º F for 15-20 minutes.

Tomato Focaccia

Tomato Focaccia - detail

Tomato Focaccia

Tomato Focaccia - detail

Share this:

  • Tweet
  • Share on Tumblr

Like this:

Like Loading...

Getting to Cake

14 Thursday May 2015

Posted by julia chews the fat in Breakfast & Brunch, Cooking For Your Peeps, Sweet Tooth, The Basics, Vegetarian

≈ Leave a comment

Blueberry-lined cake tin

I’ve fixated on these photos and this blank page for longer than I’m proud to admit. It’s been an uncomfortable dance – coming back to the page at least a half dozen times, starting, stopping, flipping sentences, deleting whole paragraphs, trying the whole thing over from scratch. At one point, I even poured myself a glass of bourbon, thinking that if nothing else was helping, it might. (It didn’t. I got heartburn instead). At that point, I started wishing I had a typewriter – not because I thought it would solve my writing issues, but because I fantasized about ripping the page from the machine’s roller, crumpling it into a ball, and tossing it unceremoniously into the trash can, along with my frustrations. A bit of visceral, paper-crunching therapy would be nice right now. Somehow, pressing down aggressively on the backspace button isn’t half as satisfying. But, this is real life, not a smoky film noir, so I’ll have to content myself with the sticky backspace button on my I’m-old-and-I-almost-died-but-haha-I’m-not-dead-yet-so-you’re-still-stuck-with-me-you-cheap-bastard! laptop. My only solace is knowing that we’re this much closer to getting to cake. Just a few more words and we’re there…

In the simplest of terms, what I’d like to tell you about this cake is this:

1) It’s drop-dead delicious
2) It’s absurdly easy to make
3) Everyone who tastes it, without fault, will ask for seconds (or thirds, depending)

I think these three points form a pretty solid endorsement, especially when it comes to baked sweets, which often get a bad rap for being fussy. It’s a fail-proof, fool-proof dessert, capable of making anybody’s palate swoon. The batter bakes up fluffy and light, and the blueberries become nice and syrupy, crowning the top in a smooth, indigo-tinged layer. You’ll be grateful to know about this cake the moment you get invited to a last-minute dinner party, or picnic, or office gathering, and you’re asked to bring the dessert!! when really you were hoping they’d ask you to bring the wine and cheese. It’s a cake that comes together really quickly and without much mess, whether you’re a dessert-making novice or a baking pro who’s just feeling a little lazy that day. Once you lay that beautiful thing in front of your dining companions, the pieces will glide effortlessly, one by one, off the serving plate until all that’s left are a smattering of crumbs, blue-tinged lips and happy bellies.

—–

Quick note on the recipe: I’m still using frozen blueberries right now, since we’re not in blueberry season in Quebec yet, but the recipe works with either – fresh or frozen. It’s entirely up to you.

Quick note on the pictures: for the final result, you’ll have to use your imagination – the cake got flipped, berry-side up, onto a serving plate much later in the day and the camera wasn’t nearby. Which is ok, because darting for the camera might have ruined the moment. To give you an idea, it will more or less look like this. When you flip the cake, remember to be bold – lay a serving plate on top of the pan, keep one hand on the plate and one hand on the bottom of the cake pan, and flip, confidently and swiftly, in one go. If you’re worried about the berries sticking to the bottom of the pan, don’t fret – the butter at the bottom of the pan will ensure that the cake slips out of the pan without incident.

Now go forth and make cake!

Blueberry Upside Down Cake – adapted from Canadian Living Magazine

  • ¼ cup melted butter
  • ½ cup brown sugar
  • 2 cups blueberries (fresh or frozen)
  • 1 Tbsp lemon juice
  • ½ cup butter
  • ¾ cup granulated sugar
  • 1 egg
  • 1 tsp vanilla
  • 1 ⅓ cups all-purpose flour
  • 2 tsp baking powder
  • ¼ tsp salt
  • 1 tsp cinnamon (optional)
  • ¾ cup milk

1) Preheat the oven to 350°F.

2) In 9-inch square cake pan, combine melted butter and brown sugar; spread evenly on bottom. Spread blueberries evenly over top. Sprinkle with lemon juice.

3) Cream butter; gradually add sugar, beating until light. Beat in egg and vanilla. Sift or mix together flour, baking powder, salt and cinnamon if using. Add dry ingredients alternately with milk to creamed mixture.

4) Spread batter evenly over blueberry layer.

5) Bake in preheated oven for 45 to 50 minutes or until toothpick inserted in centre comes out clean. Let cool 10 minutes in pan, then turn out on to large flat plate.

Spreading the batter

Batter spread

Batter - detail

Baked cake

Baked cake - detail

Share this:

  • Tweet
  • Share on Tumblr

Like this:

Like Loading...

The Real Deal

26 Sunday Apr 2015

Posted by julia chews the fat in Cooking For Your Peeps, Lunch & Dinner, The Basics

≈ 2 Comments

In the early days of university when I was dating my first boyfriend (three cheers for the late-bloomer!), we used to have our date nights at this bring-your-own wine joint called Eduardo’s. The place was – and by all accounts, still is – a frumpy little hole-in-the-wall on Duluth street, outfitted with the usual harbingers of bad Italian dining: red and white checkered tablecloths, droopy pothos plants, and a menu longer than your arm, with few dishes that would ever come close to anything from terra madre Italia (“Camberelli alla Créole” and “Surf n’ Turf alla Eduardo” are two classic gems apparently still on offer). In our defence, though, we were students without much in terms of disposable income, and the BYOB aspect guaranteed a cheap, loopy night out.

We also didn’t know a whole lot about food outside of our usual repertoire. At nineteen, I only knew how to make a half-dozen of dishes without a recipe: chicken cutlets in mustard sauce, microwave rice pilaf, tomato sauce, blueberry pancakes, minestrone, and the Moosewood Cookbook‘s banana bread, which I’d only learnt by heart after my boyfriend fell hard for its butter and espresso-laden crumb. It wasn’t a bad list of back-pocket recipes for an undergrad student, but it was still fairly limited. And the Italian food I grew up with – thanks to by mom’s side of the family – usually revolved around tomatoes, polenta, or hearty vegetable soups enriched with beans or lentils. In other words, nutritious, sustaining, paesano food from the Abrusso region. Dishes of the northern persuasion, from places like Lombardy and Emillia-Romagna, which tend to favour butter, eggs, cured meats, and abundant quantities of Parmigiano-Reggiano, were still very novel to me.

Which brings me to carbonara.

For better or for worse, I discovered carbonara (or, more accurately, its bastardised second-cousin) in that dingy dining room at Eduardo’s, sitting across from my college boyfriend, contentedly drinking 8$ table wine. It may not have been the ideal venue to have my first go at a venerated Italian classic, but as soon as I tucked into that hot mess of bacon, cream, egg and noodles, I knew I was in trouble. That dish – as far removed from the original recipe as it may have been – slayed me. In the way that a cheap grilled cheese or a good hot dog can still slay me.

—–

Little did I know, the stuff that I’d happily twirled onto my fork all those years wasn’t carbonara. At least not in the traditional sense. And when I look back on it, Eduardo’s version was nothing more than a mound of cloying, overcooked, cream-laden spaghetti littered with nubs of cheap bacon, masquerading as “spaghetti alla carbonara”. It would be enough to throw any self-respecting food purist into a total fit.

Real carbonara would only come to my attention about five years later, in an issue of Gourmet magazine. By this point, my budding interest in food and cooking meant that I was starting to pay attention to the details. I became more aware of the differences between authentic recipes and their imposters. As for carbonara, Gourmet taught me the basics, notably that the original Roman version doesn’t have one drop of cream in it (which, it turns out, is a purely Anglo-American flourish). True Roman carbonara is actually quite simpler – cured pork jowl (guanciale) is diced and then rendered in a hot pan; some eggs are whisked together with sheep’s milk cheese (pecorino), a generous amount of black pepper, and a little of the cooking water from the spaghetti. The whole lot is then tossed into freshly cooked, al dente spaghetti. The final result is a loose mess of noodles slicked in a rich, flavourful sauce dotted with crispy, salty pork belly.

It’s simplicity at its best. The kind of food that makes you happy to be alive.

I hope you think so too.

Carbonara ingredients

Spaghetti alla Carbonara – serves 4

Note 1: since guanciale if often hard to find, you can substitute it with mild pancetta (just don’t tell any Roman purists). If using pancetta, add a couple of teaspoons of olive oil to the pan before rendering it – pancetta has less fat than guanciale, so you’ll need the oil to get things going.

Note 2: In a dish this pared-down, the quality of your ingredients is crucial. Make sure to use good eggs, the best guanciale or pancetta you can find, and real pecorino or Parmigiano-Reggiano (No knock-offs! No Kraft parmesan! Don’t piss off the carbonara gods!). Freshly ground pepper is a must too. It’s also worth mentioning that this dish is one of the few that doesn’t reheat well the next day, as the eggs tend to curdle when they come into contact with too much heat. It’s definitely a dish best eaten straight away (which, I suspect, won’t be a problem).

Note 3: Given that the eggs are undercooked in this recipe, most sources would recommend that you avoid serving it to children or anyone with a compromised immune system. (apparently, if you use good-quality, fresh eggs, the risk of salmonella-poisoning is lower than in commercial eggs, which are produced in confined environments where bacteria can spread more easily among chickens.)

Ingredients:

  • 4oz. medium-sliced pancetta (or ideally guanciale), cut into 1⁄2″ pieces
  • 1¾ cups finely grated pecorino cheese (or Parmigiano-Reggiano)
  • 1 egg, plus 3 yolks
  • freshly cracked black pepper
  • sea salt
  • 1 lb. spaghetti

Eggs

Directions

1) Start by bringing a large pot of water to boil (for the pasta). Salt the water once it comes to the boil (about 1-1 1/2 Tbsp) (I eyeball it, but just remember that the guanciale is salty).

2) Whisk together the egg (1) and yolks (3). Stir in 1½ cups of the cheese and mix to combine; add a generous amount of freshly ground black pepper (about 2 tsp). Set aside.

3) Heat a medium skillet or cast-iron pan over medium heat (add oil if using pancetta). Add guanciale (or pancetta) and cook, stirring occasionally, until lightly browned (about 6–8 minutes).

4) Meanwhile, cook the pasta until al dente. Reserve 3⁄4 cup water; drain pasta and transfer to the pan with the cooked guanciale (or pancetta). Toss, then and it off the heat.

Eggs and cheese

5) In a slow, steady stream*, add the 3/4 cup of pasta water to the egg/cheese mixture. Add to the pasta and toss to coat (the residual heat from the pasta will lightly “cook” the egg, without scrambling it).  Transfer to a serving platter and season with salt and some more freshly ground black pepper; sprinkle with the remaining cheese and serve straight away.

*if you add the hot cooking water too quickly to the egg mixture, it will curdle. The slow, steady stream allows you to “temper” the egg mixture, ensuring that your sauce comes together smoothly. In other words, you want to avoid too much heat too quickly, or else you’ll end up with scrambled eggs.

Carbonara.

Share this:

  • Tweet
  • Share on Tumblr

Like this:

Like Loading...

A Cake for Non-Bakers

13 Friday Feb 2015

Posted by julia chews the fat in Cooking For Your Peeps, Sweet Tooth, The Basics

≈ Leave a comment

Sometimes there’s the assumption that, because you know how to cook, it naturally follows that you know how to bake; that for the food-obsessed home cook, the realm of savoury and sweet are completely interchangeable. Allow me to put that assumption to bed. Cooking and baking are two different beasts – not mutually exclusive, but not close bedfellows either. Slipping a pot roast in the oven is not the same as, say, slipping a pan of brioche dough into the oven. Not at ALL the same. While I’m a decent home cook, I wouldn’t go as far to call myself a baker. I’ve certainly baked things before – lots of things – but I’ve never really done it with the same confident ease that flows through the veins of seasoned bakers. There are people who whip around the kitchen like they were born with a whisk in one hand and a battered spatula in the other. These people are forces of nature.

In contrast, baking for me usually involves a lot of lip-biting, heavy sighing, cursing and finger-crossing. I’ve had my fair share of lumpy, jiggly, over-baked, under-baked, quivering specimens come out of the oven, which means that each time I step into the kitchen to bake something new, there’s a little bit of PTSD that creeps in. I gnaw at my cuticles. I get cold sweats. I pray a little harder to the gods of sugar and spice and everything nice. Sometimes things work out (almond meringues, whipped to perfection!), sometimes they don’t (cherry clafouti that looks and tastes like punishment!). It’s a game of baking Russian roulette, really. Except that when things start to go downhill (why isn’t the cream setting? why are there nubs in the frosting? why is the centre still uncooked, but the bottom nearly burnt?), I remember that, in my case, there are several bullets in the barrel…not just one.

Strangely, these failures haven’t stopped me trying to be a better baker. They’ve actually had the opposite effect – I still bookmark the sweets sections of my cookbooks and turn baking magazines into fringed monsters with Post-Its; I continue to fatten up my Pinterest board with baking ideas that may or may not materialise (I’m looking at you, cannelés…). It’s a habit that’s equal parts romanticism, masochism and obstinance, but it’s part of a larger goal of not letting fear dictate what I make (or don’t make) in the kitchen, even if it means burning a few things in the process.

That said…

I do have a pretty bad Valentine’s Day track record. So this year I’ve decided to cool it with the overly-complicated, thematic baked goods. Instead, I’m proposing something for the non-bakers in all of us. Something easy and ultra-delicious that can be thrown together quicker than you can say Thank god I didn’t burn another batch of stupid, flipping cupcakes.

May I present your new favourite back-pocket recipe, for:

CARROT CAKE WITH CREAM CHEESE FROSTING

You’ve had a version of this cake before, I’m sure. But the one I’ve got here is 100% foolproof, straight from the ever-dependable, Canadian Living Test Kitchen. It’s been one of my mom’s go-to cake recipes for years and it’s always perfect. It isn’t French pâtisserie; it doesn’t require chilling or resting or parbaking or leavening or whipping egg whites into stiff peaks. In other words, it’s a very forgiving cake. Which is a good thing when you’re not preternaturally skilled in the baking department. I’m certain your Valentine will appreciate the gesture. (Especially because it means they won’t have to eat another batch of punishment cupcakes.)

Happy Love Day to all of you. x

—–

A note on decorating: as it turns out, my cake-decorating skills are about as limited as my baking skills, which explains why the final result looks a little like a confederate flag from a usurped Dutch republic. But, no matter. The important thing is that your cake is delicious. You’re not Martha Stewart and this isn’t a beauty contest. So if your candied orange rosettes look more like something off a cheap sushi platter, it’s no big deal. Own it. Because you did, after all, make a wicked cake. Rosettes or no rosettes.

iced cake

Carrot Cake with Cream Cheese Frosting and Candied Carrots – cake and icing from Canadian Living/candied carrots from Ricardo Cuisine Makes two (2) 8-inch square cakes (can be layered, or served separately) – serves 12-14

Ingredients

  • 2 cups all-purpose flour
  • 2 tsp baking powder
  • 2 tsp cinnamon
  • 1 tsp baking soda
  • 3/4 tsp salt
  • 1/2 tsp nutmeg
  • 3/4 cup granulated sugar
  • 3/4 cup packed brown sugar
  • 3 eggs
  • 3/4 cup vegetable oil
  • 1 tsp vanilla
  • 2 cups grated carrots
  • 1 cup drained crushed canned pineapple
  • 1/2 cup chopped pecans

Icing:

  • 1 (8 oz) package cream cheese, softened
  • 1/4 cup butter, softened
  • 1/2 tsp vanilla
  • 1 cup icing sugar

Directions:

1) Grease and flour two 8″ square cake pans ; set aside.

2) In large bowl, whisk together flour, baking powder, cinnamon, baking soda, salt and nutmeg.

3) In separate bowl, beat together granulated and brown sugars, eggs, oil and vanilla until smooth; pour over flour mixture and stir just until moistened. Stir in carrots, pineapple and pecans. Spread in prepared pan.

4) Bake in centre of 350°F oven for 40 minutes or until cake tester inserted in centre comes out clean. Let cool in pan on rack. (Make-ahead: Cover with plastic wrap and store at room temperature for up to 2 days.)

Icing: In bowl, beat cream cheese with butter until smooth. Beat in vanilla. Beat in icing sugar, one-third at a time, until smooth. Spread over top of cake. (Make-ahead: Cover loosely and refrigerate for up to I day.)

Candied carrots (optional):

  • 1/2 cup (125 ml) orange juice
  • 1/2 cup (125 ml) sugar
  • 2 small, thick carrots, thinly sliced lengthwise (on a mandolin or with a vegetable peeler)

In a saucepan, bring the orange juice and sugar to a boil. Add the sliced carrots. Simmer until tender and translucent, about 8 minutes depending on thickness. Let cool completely. Drain. Arrange on cake as desired. candied carrots icing cake -1 icing cake - 2 icing cake - 3 cake layers cake slice

Share this:

  • Tweet
  • Share on Tumblr

Like this:

Like Loading...
← Older posts
Newer posts →

Facebook

Facebook

Instagram

No Instagram images were found.

Recent Posts

  • Layers and Rows
  • Finding Buoyancy
  • February
  • Wednesday
  • Cross My Heart, Miso

Archives

  • May 2017
  • April 2017
  • February 2017
  • December 2016
  • November 2016
  • September 2016
  • August 2016
  • July 2016
  • June 2016
  • May 2016
  • April 2016
  • March 2016
  • February 2016
  • January 2016
  • December 2015
  • November 2015
  • October 2015
  • September 2015
  • August 2015
  • July 2015
  • June 2015
  • May 2015
  • April 2015
  • March 2015
  • February 2015
  • January 2015
  • December 2014
  • November 2014
  • October 2014
  • September 2014
  • August 2014
  • July 2014
  • June 2014
  • May 2014
  • April 2014
  • March 2014
  • February 2014
  • January 2014
  • December 2013
  • October 2013
  • September 2013
  • August 2013
  • July 2013
  • June 2013
  • May 2013
  • April 2013
  • March 2013
  • February 2013
  • January 2013
  • December 2012
  • November 2012
  • October 2012
  • September 2012
  • August 2012
  • July 2012
  • June 2012
  • May 2012
  • April 2012
  • March 2012
  • February 2012

Categories

  • Beverage
  • Breakfast & Brunch
  • Condiments
  • Cooking For Your Peeps
  • Cooking Solo
  • Cooking with Nonna
  • Food Away From Home
  • Food Writing
  • Holidays
  • Intro
  • Lunch & Dinner
  • Snacking
  • Soups
  • Sweet Tooth
  • The Basics
  • Vegetarian

Enter your email address to follow this blog and receive notifications of new posts by email.

Join 80 other followers

Blog at WordPress.com.

Cancel

 
Loading Comments...
Comment
    ×
    %d bloggers like this: