• Home
  • About

julia chews the fat

julia chews the fat

Monthly Archives: February 2014

Fire Cider, Humble Healer

19 Wednesday Feb 2014

Posted by julia chews the fat in Condiments, The Basics, Vegetarian

≈ 3 Comments

The other day, when the weatherman said it’d be -25°C with the wind chill and that we’d be graced with (more!) snow, I felt my lips curve into a child-like pout, uttering a defeated, “But, nooo…” as I stared into my closet, shivering in my nightgown, trying to decide which sweater was still up for the task.

Welcome to winter in Quebec.

If the snow and sleet and wind packed up and left tomorrow, I’m sure we would all let out a communal sigh of relief. In getting through the last vestiges of winter, we are are bagged, fed up, cranky and infirm. Almost everyone I know right now is hosting some wonderful microbial visitor – this season alone, my personal tally has included two sinus-colds, one big chest-cold, one bout of laryngitis, one digestive-related ailment, one 36-hour flu, and two sprained necks.

Sexiest winter EVER.

For one reason or another, my system’s been under siege since December. Right around when one thing would end, another would begin. After making my way through dozens of lemon-ginger infusions, spoonfuls of honey and doses of Buckley’s syrup (not to mention a few lacklustre dates with Mr.Neti Pot and Mr.Humidifier), it seemed a different tactic was in order. Then I remembered hearing about a traditional folk elixir by the name of Fire Cider – a potent, pungent concoction used by herbalists to ward off the evil spirits of winter (rhinovirus, norovirus, bronchiolitis, and all their friends).

Essentially, it’s a witches’ brew of sweet and savoury elements all jammed into one jar. At once peppery, astringent, funky and sweet, the first taste will be intense and astonishing, but once you’ve got a spoonful racing down your throat, you’ll feel recharged and pumped and ready to get back on the bandwagon.

(or at least ready to slip on that sweater and brace the cold again)

Fire Cider – adapted from herbalist Rosemary Gladstar’s recipe (check out the cute video here!)

Makes about 1 pint
Fire Cider ingredients

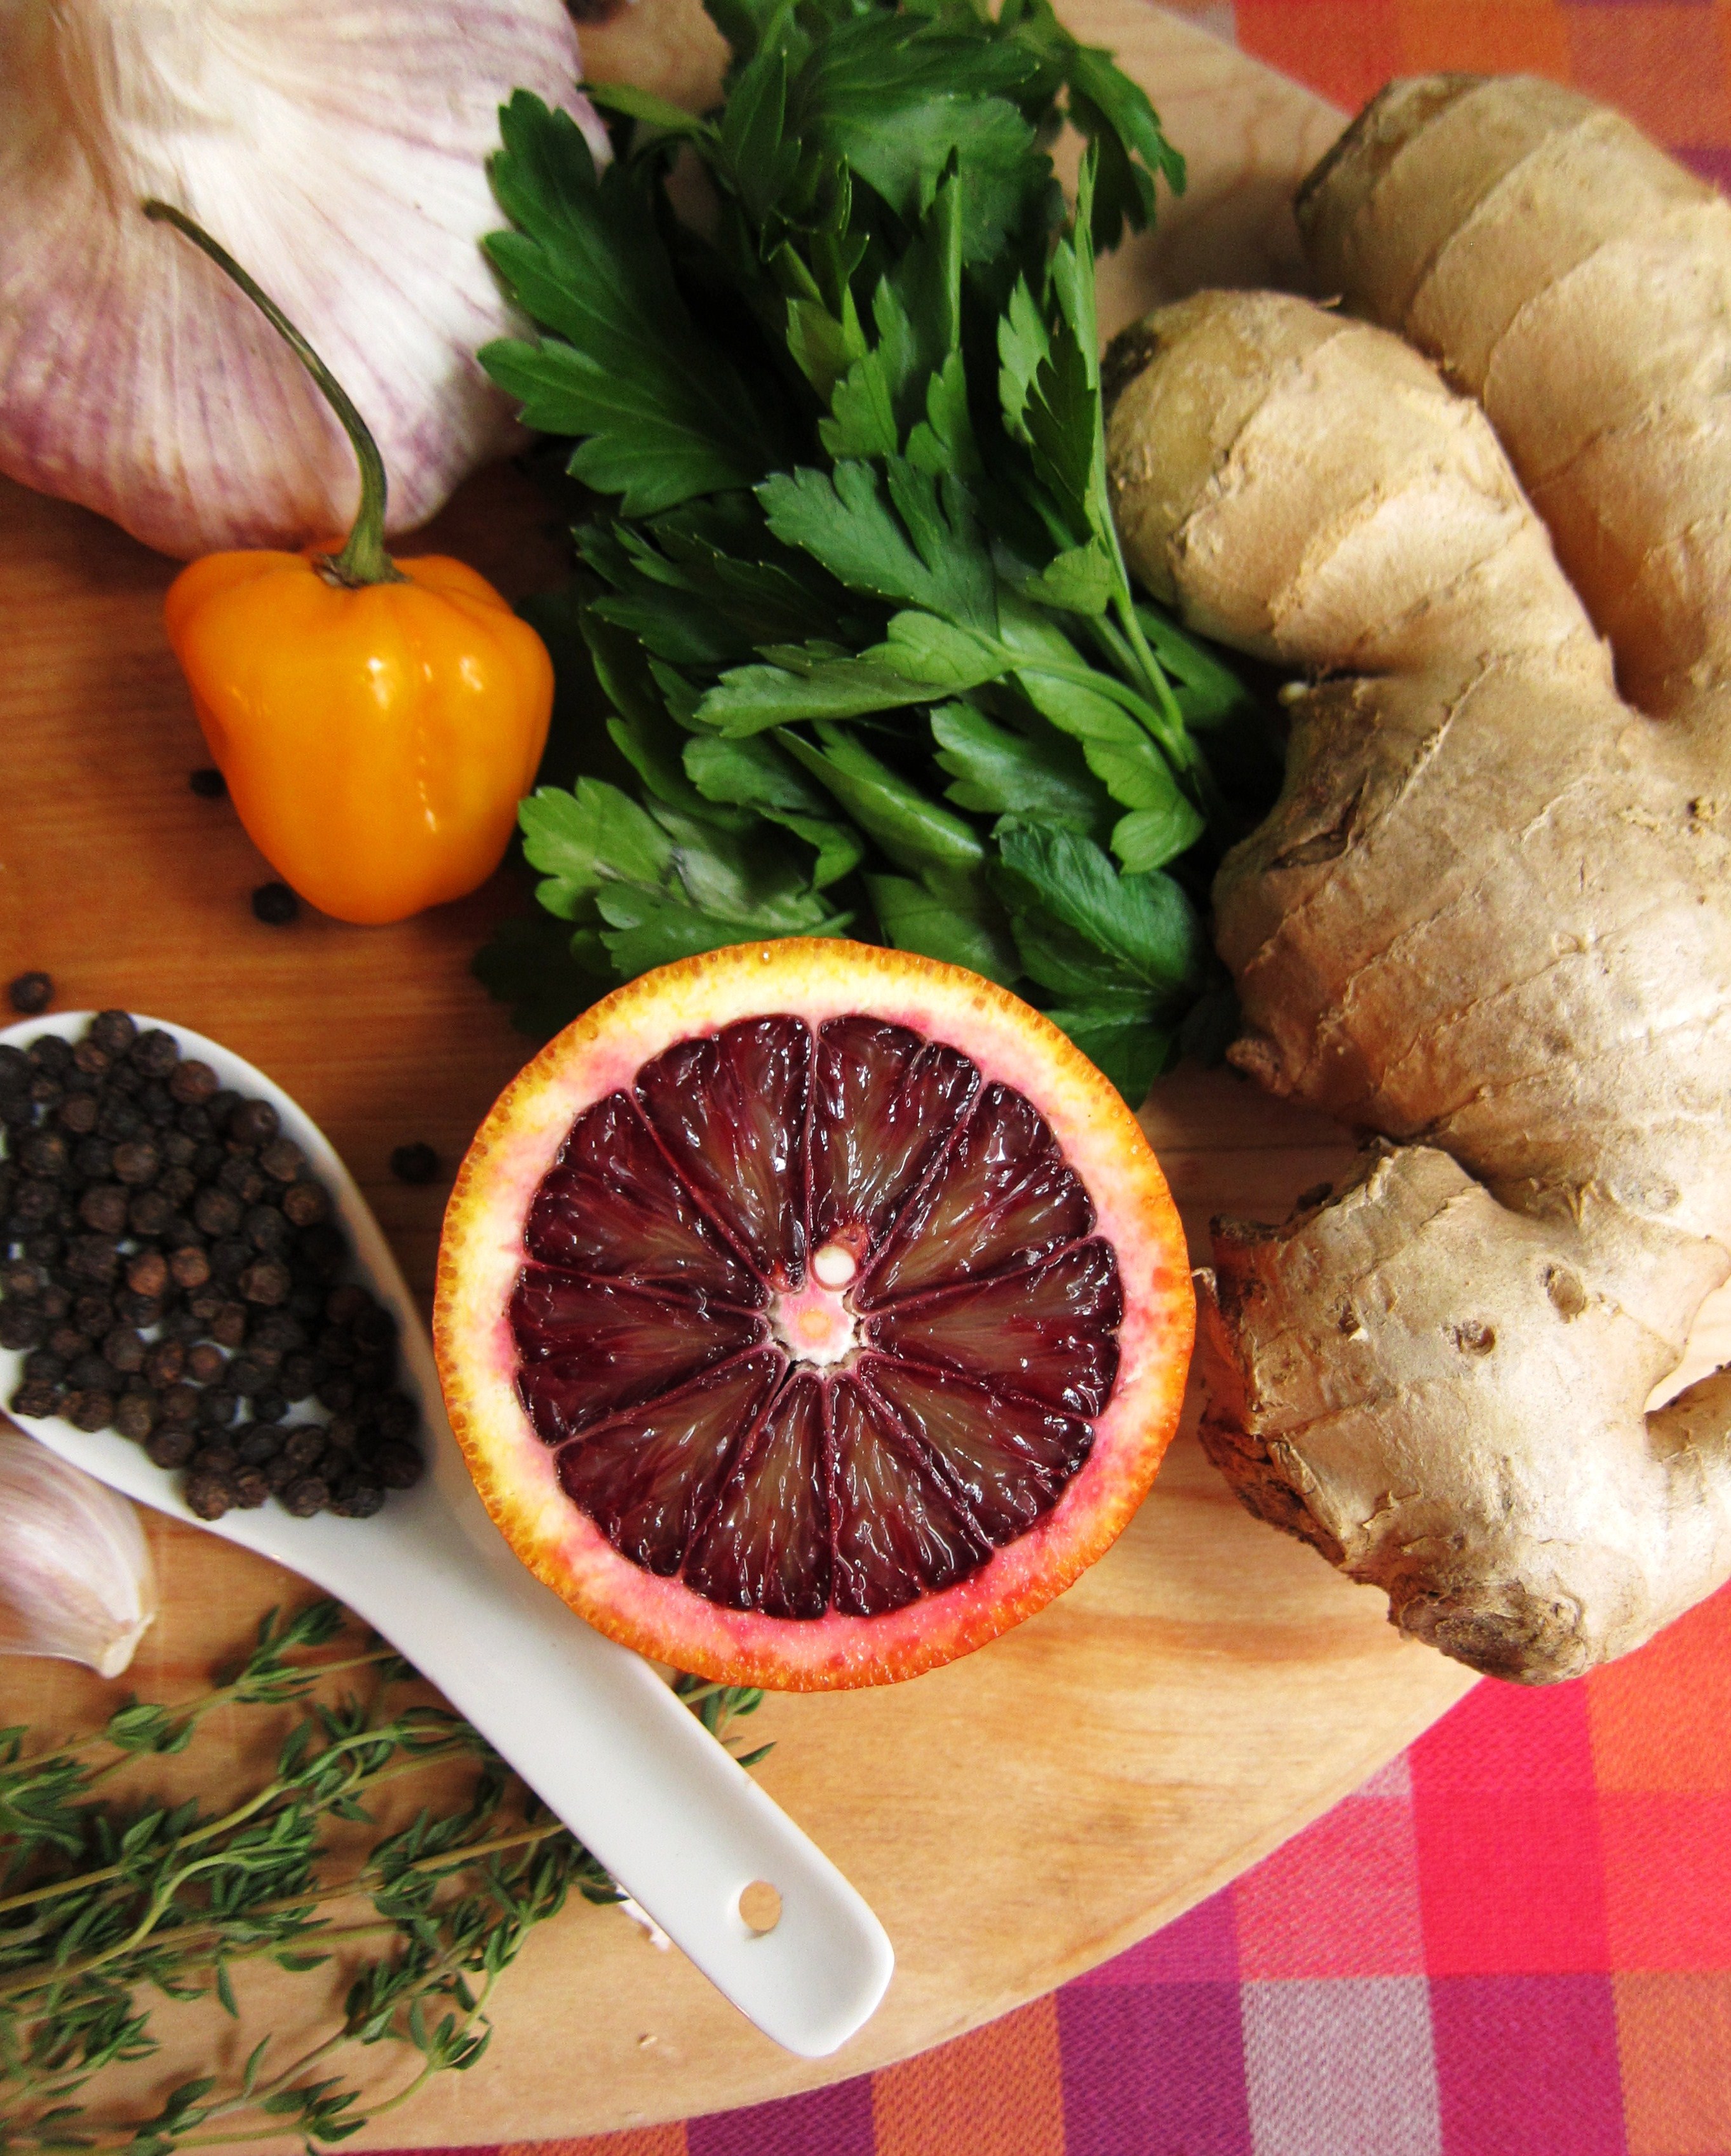
  • 1/2 cup peeled and diced garlic
  • 1/2 cup peeled and diced onion
  • 1/4 cup peeled and diced ginger
  • 1/4 cup peeled and diced turmeric
  • 1 habanero chile, split in half
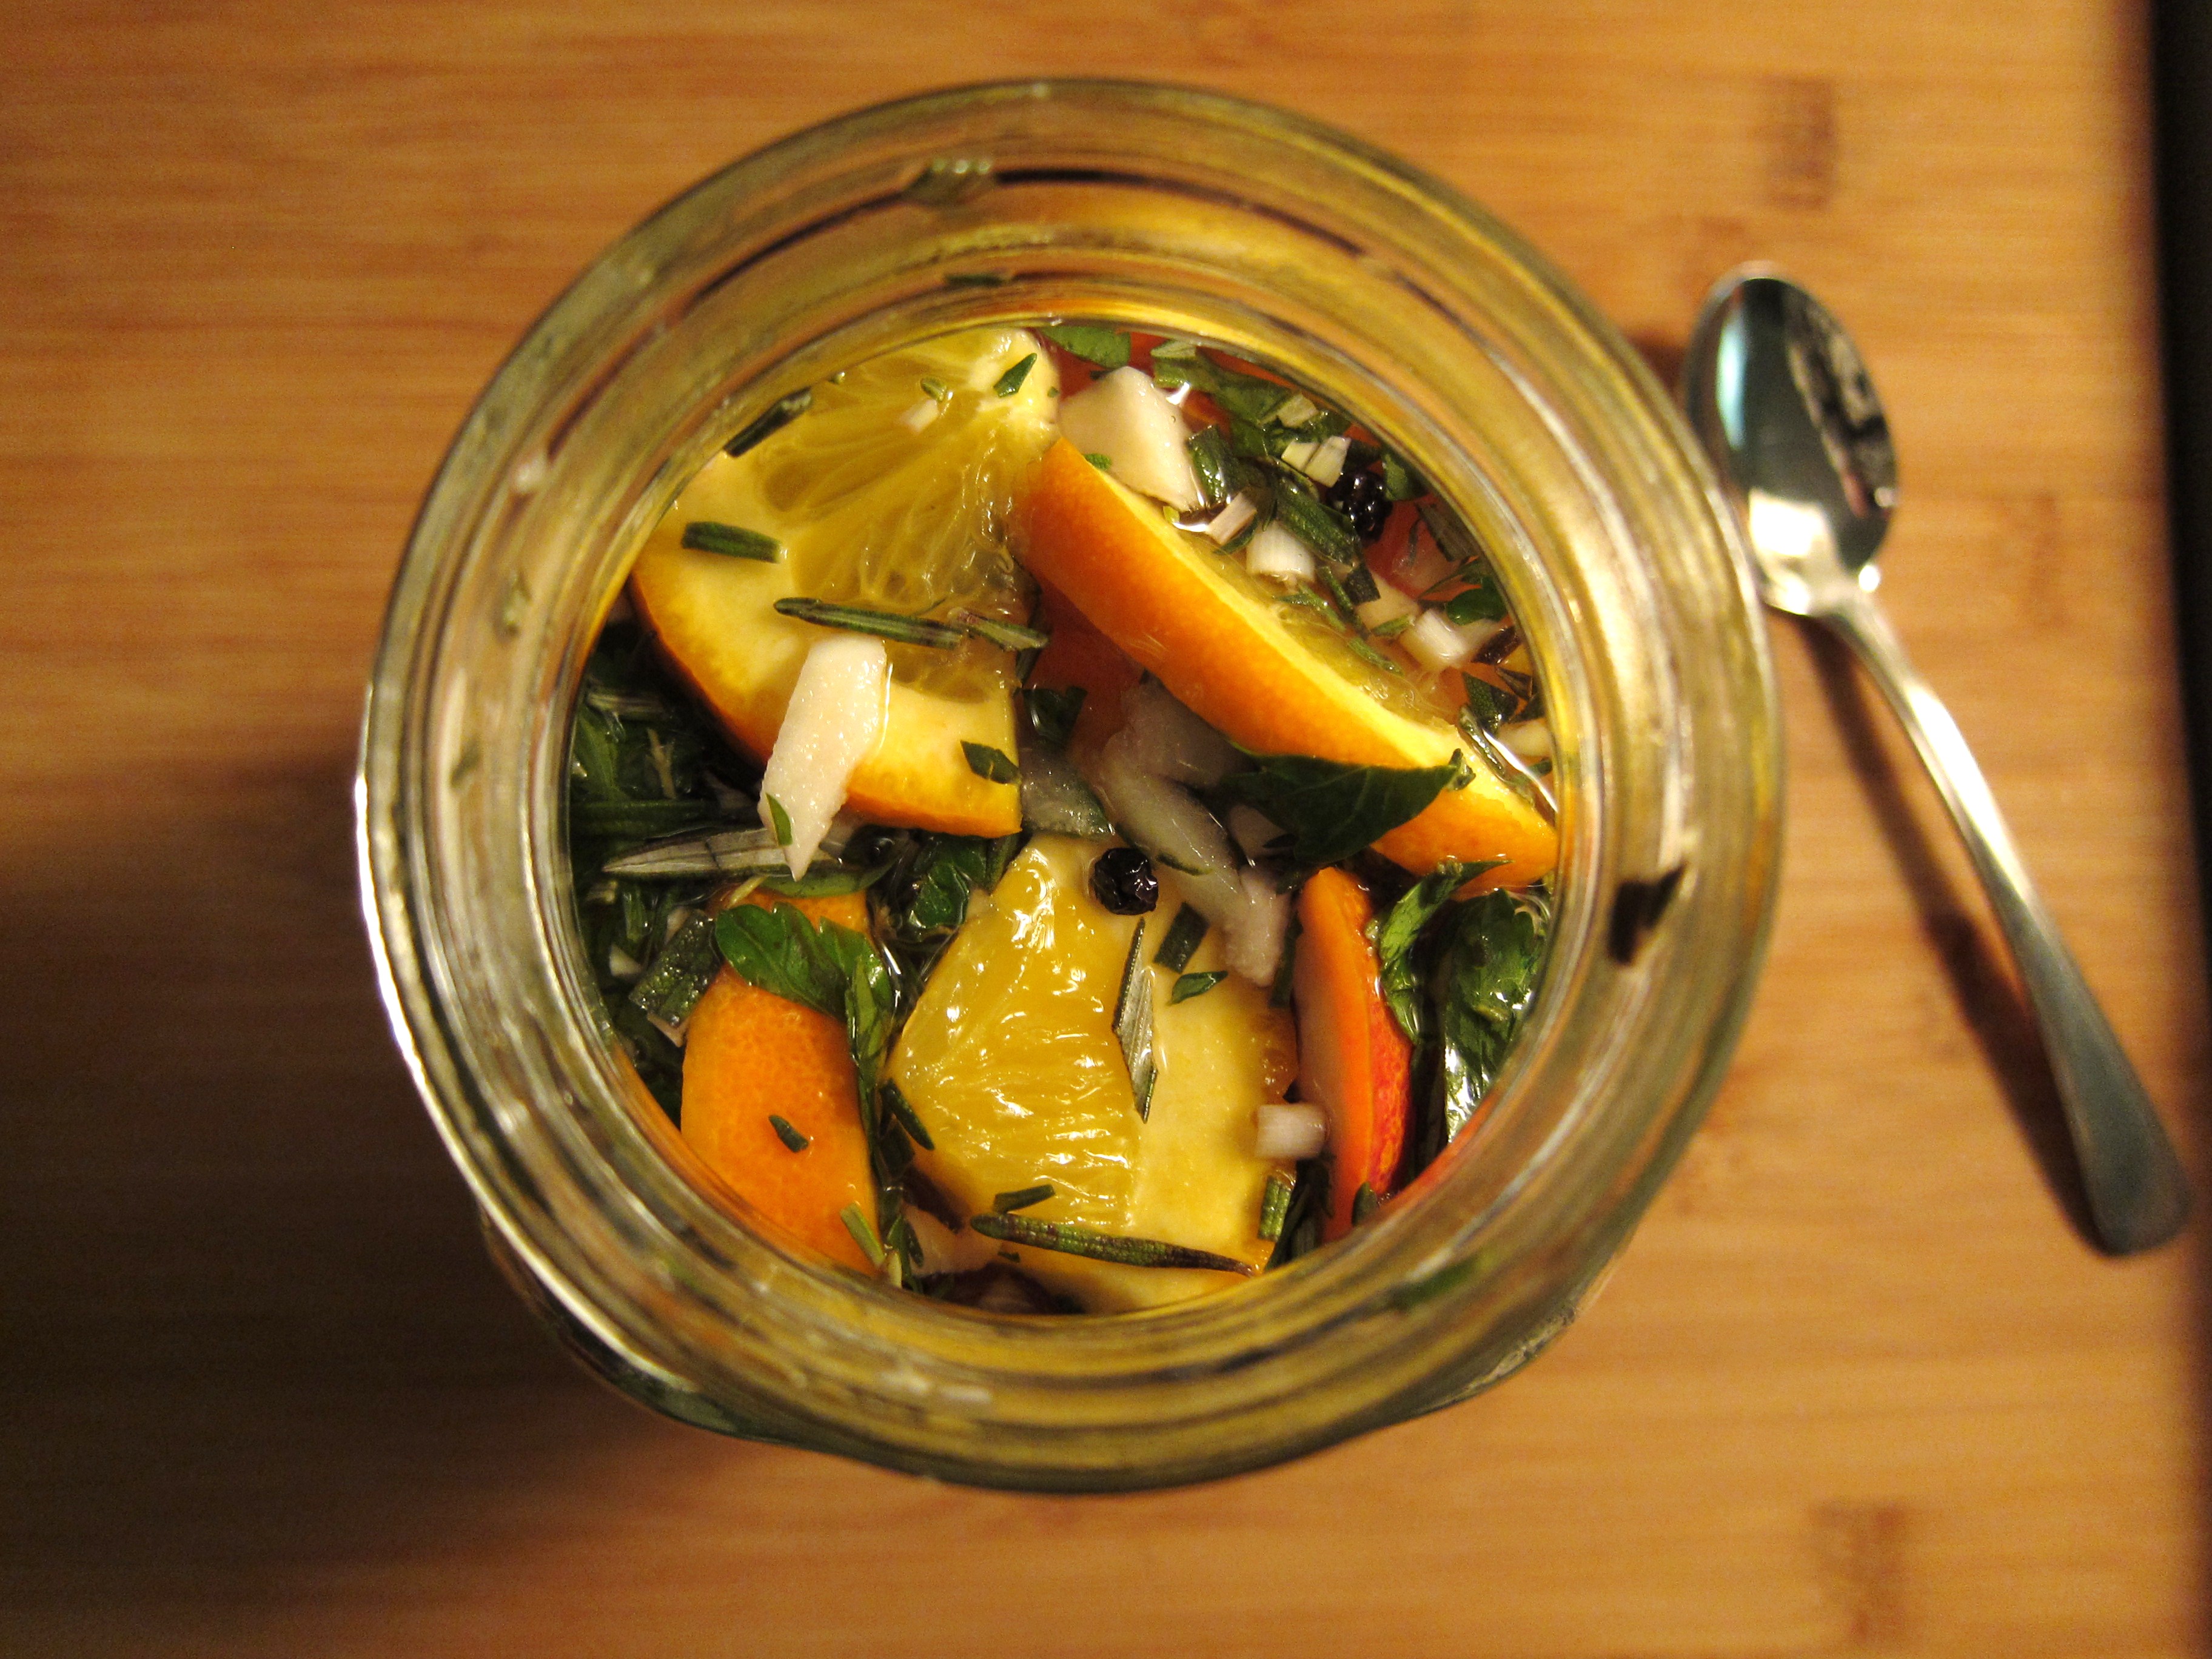
  • 1 orange (or blood orange), quartered and thinly sliced crosswise
  • 1/2 lemon, quartered and thinly sliced crosswise
  • 1/2 cup chopped parsley
  • 2 tablespoons chopped rosemary
  • 2 tablespoons chopped thyme
  • 1 teaspoon black peppercorns
  • 2 to 3 cups apple cider vinegar (at least 5% acidity)
  • 1/4 cup honey, or more to taste

Place all of the vegetables, fruits, herbs, and spices in a clean 1-quart jar. Fill the jar with vinegar, covering all the ingredients and making sure there are no air bubbles. Cap the jar. If using a metal lid, place a piece of parchment or wax paper between the jar and the lid to prevent corrosion from the vinegar. Shake well.

Let the jar sit for 3 weeks, shaking daily.

Strain the vinegar into a clean jar. Add more honey to taste. Refrigerate and use within 6 months.

Fire Cider

*Note: if you have a bold palate, you can take the cider straight up (1-2 tablespoons at the first sign of a cold, repeating every 3-4 hours until symptoms subside; alternately, some take it throughout the winter season as a preventative). If it turns out that this elixir is too intense for you to knock back straight, here are some nifty ways you can incorporate it into your edibles.

  • Use in place of vinegar in salad dressings, condiments and marinades
  • Drizzle on steamed vegetables or sautéed greens
  • Add to soups and chilis
  • Add a couple dashes in your next Bloody Mary

Share this:

  • Tweet
  • Share on Tumblr

Like this:

Like Loading...

Red Velvet Valentine

11 Tuesday Feb 2014

Posted by julia chews the fat in Cooking For Your Peeps, Holidays, Sweet Tooth, Vegetarian

≈ 2 Comments

Valentine’s is those days on the calendar when it’s socially acceptable to be a loopy, romantic nutbar; the one day of the year when you can crank up the cheeseball dial and no one will fault you for it. You can send love notes, litter your desk with bowls of cinnamon-candy hearts and promise your office mates bright red, fluffy cupcakes with hand-whipped frosting…

…or so you thought.

I was so excited to make these cupcakes. Excited about trying the old technique of using beets make the batter electric pink. Excited about using a pastry bag to add an artful slick of cream cheese frosting on top. Excited about the beautiful Swedish paper cups that I’d found months prior and that I’d purposely saved for this day (yes, yes I did). But most of all, I was excited about finally redeeming myself since the last Valentine’s cupcake failure.

Expectations were high, people. Valentine-in-a-bow-tie high.

Despite my well-laid plan (I was rested! I had plenty of time! I had prepped all the ingredients!), lady fortune had a different one in store – one involving me forgetting to add the butter, then having to scrape the batter out of the pretty paper cups and back into the bowl…only to remove from the oven, 18 minutes later, twelve flat, dense cylinders in greasy-bottomed paper cups. The icing flipped me the bird too, as it initially resisted its extrusion from the pastry bag, then shifted in consistency to seep out in a nondescript, gooey mass.

While the icing improved after a bit of chilling in the fridge, there was no saving the cake. Dense, chewy, beety (undercooked?), they hovered somewhere between expired vegan health cake and a 4th grade science experiment. These were not lovely, fluffy, cherubs-singing-from-the-heavens cupcakes. These were fists-shaking-at-the-heavens cupcakes. These were “I hate you” cupcakes.

As it so happens, this was also the day my friend Matthew was showing me how to use a DSLR. And thank GOD for that, because without him, I’m not sure I could’ve made these things look half as edible. With his keen eye, he managed to help me make these cupcakes look delicious and elegant and lovely – everything they most definitely were not.

Here’s to faking it! Happy Valentine’s xx

4 cupcakes

cupcake with bite

cupcake with bite - detail

(IF YOU DARE, HERE’S THE RECIPE)

All Natural Red Velvet Cupcakes (makes approx 12) – adapted from this recipe

3/4 cup beet purée (directions follow)
1 tablespoon freshly squeezed lemon juice
1 1/2 teaspoons rice vinegar
1 cup sugar
1 stick butter (8 tablespoons), at room temperature
3/4 teaspoon pure vanilla extract
3/4 teaspoon kosher salt
3/4 teaspoon baking powder
1 1/4 cups unbleached all-purpose flour (not bleached flour)
2 eggs
1/2 cup buttermilk
1 tablespoon natural cocoa powder (not Dutch Process, or dark cocoa powder)

Beet purée: 2 medium beets, or 1 large beet, scrubbed and rinsed

Fill a saucepan with water, add the beets and bring to a boil. Allow the beets to cook until very tender (approx. 30 mins).

When beets are cooled completely, peel, and cut into large chunks. Place in a food processor fitted with the steel blade. Process for 2 minutes, or until extremely smooth. Empty the food processor of the beet purée. Measure out 3/4 cup and set aside (save any extra purée for another use).

Preheat oven to 350ºF. In a large bowl, sift the dry ingredients. In a separate bowl, cream the butter and sugar, then add the eggs, vanilla, buttermilk, vinegar and lemon juice. Beat or whisk until combined. Add the beet purée. Mix some more until the mixture is uniform.

Line a standard muffin tin with paper cupcake liners. Scoop mixture evenly into cupcake liners.

Bake for 18 minutes, or until the cupcakes in the center spring back up when touched. Remove cupcakes from the pan and place on a wire rack to cool completely.

Cream Cheese Frosting

1 8oz package cream cheese, at room temperature
1 stick (8 tablespoons) unsalted butter, at room temperature
2 cups confectioner’s (powdered) sugar
1-2 tablespoons heavy cream
1/2 teaspoon pure vanilla extract

Beat all ingredients together with an electric mixer until smooth and fluffy. Frost cooled cupcakes.

Share this:

  • Tweet
  • Share on Tumblr

Like this:

Like Loading...

Facebook

Facebook

Instagram

No Instagram images were found.

Recent Posts

  • Layers and Rows
  • Finding Buoyancy
  • February
  • Wednesday
  • Cross My Heart, Miso

Archives

  • May 2017
  • April 2017
  • February 2017
  • December 2016
  • November 2016
  • September 2016
  • August 2016
  • July 2016
  • June 2016
  • May 2016
  • April 2016
  • March 2016
  • February 2016
  • January 2016
  • December 2015
  • November 2015
  • October 2015
  • September 2015
  • August 2015
  • July 2015
  • June 2015
  • May 2015
  • April 2015
  • March 2015
  • February 2015
  • January 2015
  • December 2014
  • November 2014
  • October 2014
  • September 2014
  • August 2014
  • July 2014
  • June 2014
  • May 2014
  • April 2014
  • March 2014
  • February 2014
  • January 2014
  • December 2013
  • October 2013
  • September 2013
  • August 2013
  • July 2013
  • June 2013
  • May 2013
  • April 2013
  • March 2013
  • February 2013
  • January 2013
  • December 2012
  • November 2012
  • October 2012
  • September 2012
  • August 2012
  • July 2012
  • June 2012
  • May 2012
  • April 2012
  • March 2012
  • February 2012

Categories

  • Beverage
  • Breakfast & Brunch
  • Condiments
  • Cooking For Your Peeps
  • Cooking Solo
  • Cooking with Nonna
  • Food Away From Home
  • Food Writing
  • Holidays
  • Intro
  • Lunch & Dinner
  • Snacking
  • Soups
  • Sweet Tooth
  • The Basics
  • Vegetarian

Enter your email address to follow this blog and receive notifications of new posts by email.

Join 80 other subscribers

Blog at WordPress.com.

  • Follow Following
    • julia chews the fat
    • Join 80 other followers
    • Already have a WordPress.com account? Log in now.
    • julia chews the fat
    • Customize
    • Follow Following
    • Sign up
    • Log in
    • Report this content
    • View site in Reader
    • Manage subscriptions
    • Collapse this bar
 

Loading Comments...
 

    %d bloggers like this: