• Home
  • About

julia chews the fat

julia chews the fat

Category Archives: Snacking

Cross My Heart, Miso

12 Saturday Nov 2016

Posted by julia chews the fat in Breakfast & Brunch, Cooking For Your Peeps, Lunch & Dinner, Snacking, Soups, Sweet Tooth, Vegetarian

≈ 11 Comments

I am the kind of person that will buy a tub of miso, then leave it in the refrigerator door for an interminable length of time, under the naïve assumption that it will (eventually) find its way into a recipe. If you’re like me, you know that this moment rarely, if ever, comes. You also know that it leaves you with bad feelings when you do a deep clean of the fridge and realise it’s been there for a small eternity, opened, but with only one spoonful scooped out from the top. You ask yourself the following questions: Is it still good? How do I know it’s still good? Do I need to throw it out? Then concede to the following affirmations: Online message boards about expiration dates cannot be trusted. I’m going to need to throw this out. I am a horrible human being for throwing this out.

It’s a vicious cycle.

I’m not quite sure what happens in the ark of purchasing the miso, bringing it home, then, months later, scraping it into the bin. It’s confounding. Not to mention a heinous act of food waste. (especially considering that miso paste could probably out-live you and me and I’ve just been overly cautious about its perishability). And so, I’ve decided that from this day forward, I will never throw out another container of miso. Cross my heart and hope to die.

I come to you today with proof of my penance – two recipes made recently with the stash of miso paste in my fridge, both having helped put a considerable dent in my supply, all while broadening my miso repertoire (did you know you can use it in savoury and sweet dishes? And not just in miso soup?). I feel that this is the beginning of a new relationship.

One is a carrot soup with ginger, spiced with coriander and curry. The miso works nicely in the background, adding a bit of depth to a soup that might otherwise be ho-hum. The other is a recipe for banana bread (or cake, depending on your sensibilities), where the saltiness of the miso balances out the sweetness of the banana. I brought a loaf to my friends Marko and Marilou as part of a care package the week after their daughter was born and received a text from them the next day saying they’d polished it off, the last couple of slices served up for breakfast, toasted and slathered in butter.

I hope you’ll do the same x

Miso banana bread // © julia chews the fat

Miso Banana Bread – from Amelia Morris of Bon Appetempt

  • 5 medium overripe bananas
  • 1 cup all-purpose flour*
  • ½cup whole-wheat flour
  • ¼ cup of ground flax seeds
  • 1 teaspoon baking soda
  • ½ teaspoon baking powder
  • ¼ teaspoon salt
  • 1 stick unsalted butter, softened
  • 1 cup sugar
  • ¼ cup white (or yellow) miso
  • ½ whole-milk plain yogurt
  • 2 large eggs

*If you prefer, you can replace the whole-wheat flour and ground flax seeds with all-purpose flour (so 1¾ cups of all-purpose flour total)

Directions

1) Preheat oven to 350°F. Butter a loaf pan, dust with a light coating of flour and set aside.

2) Mash 4 of the bananas in a bowl. Set aside

3) Mix all the dry ingredients (except the sugar) in a separate bowl. Set aside.

4) In the bowl of a stand mixer (or, simply, another bowl). Combine the softened butter, miso. Beat until light and fluffy (about 5 mins). Add the sugar and beat until combined. Add the yogurt, then one egg at a time, beating between additions. Beat in mashed bananas. Then mix in the dry ingredients until just combined.

5) Transfer batter to prepared loaf pan. Slice remaining banana lengthwise and place on top of the batter. Bake for about 45 minutes (or until a skewer inserted in the centre comes out clean). Let cool on a baking rack for 20-30 minutes before serving.

Miso banana bread // © julia chews the fat

—–

Miso Carrot Soup – adapted from Wholehearted Eats

Serves 4-6

  • 1 yellow onion, chopped
  • 3 garlic cloves, chopped
  • 1 Tbsp. olive oil
  • 8 large carrots, peeled and chopped (about 5 cups)
  • 1 Tbsp curry powder (optional)
  • ½ tsp. dried coriander
  • 2-inch piece of ginger, peeled and minced
  • 6-7 cups stock, vegetable or chicken
  • 3 Tbsp. white miso paste
  • 1 tsp. tamari
  • garnishes: lemon wedges, cilantro, sesame seeds

Carrot Miso Soup // © julia chews the fat

Directions

1) Heat a medium pot to low and add the oil and onion. Sweat the onion until soft, translucent and golden. Add the garlic, dried coriander, curry (if using) and the minced ginger. Sauté for a couple of minutes until fragrant, stirring occasionally. Add the chopped carrots and sauté cook for few more minutes.

2) Next add 5 cups of the stock and bring the mixture to a simmer. Once it begins to simmer, cover with lid slightly ajar, and let it cook until the carrots and onions are very tender (about 3o minutes).

3) Take the soup off the heat and puree it in a blender or hand blender, until smooth. Bring the remaining 1-2 cups stock (if you like a thicker or thinner soup) to a boil, take it off the heat, and stir in the miso and tamari until combined. Add this mixture to the soup and stir to combine. To serve, add a squeeze of lemon, some sesame seeds and fresh cilantro.

Carrot Miso Soup // © julia chews the fat

Share this:

  • Tweet
  • Share on Tumblr

Like this:

Like Loading...

Snack-Time Salvation

02 Monday May 2016

Posted by julia chews the fat in Snacking, Sweet Tooth, Vegetarian

≈ 2 Comments

A little while ago, I started buying Bounty bars from the second-floor vending machine at work. It might have been a relatively infrequent excursion, but as any office worker knows, when you sit in front of a computer for several hours on end, you start to crave bad stuff – usually something with high-fructose corn syrup and palm oil – around 3pm. And when you don’t have access to something healthy and sustaining, you sometimes end up scouring your desk drawer for pocket change to plunk into an old vending machine for something that will satisfy your primal brain.

In my case (and to make matters worse), I also had an accomplice. My friend and office mate – we’ll protect her identity by calling her “M” – also loved Bounty bars and, like me, was really good at reducing her dissonance. We agreed that splitting a candy bar between us wasn’t as bad as eating the whole thing by ourselves, and if we didn’t read the spooky list of ingredients and enjoyed it alongside a cup of herbal tea, it didn’t seem like such an unsensible thing to do.

But then “M” went on an eight-month work transfer out of town, and I was still getting Bountry bars out of the machine. One a month became two, then three, then I realised that it had become an almost-weekly habit. No bueno.

The obvious solution was to come equipped to work with snacks. Good snacks. Snacks that would make my mom and your mom proud that they had raised well-adjusted, responsible adults. That’s when I came across a recipe, from French food writer Clotilde Dusoulier, for homemade energy bars. A mixture of dates, nuts, cinnamon and cocoa, they’re sweet and chocolately, and filled with things that aren’t palm oil or high-fructose corn syrup (they’re actually filled with vitamin A, fibre, iron, calcium, antioxidants, and potassium. Thank you, dates!).  I rolled mine in shredded coconut for the “Bounty bar effect”, but if you don’t have any in the pantry, they’re swell without it too.

Here’s to better snacking in front of our computers. Have a good week, everyone x

Date-Coconut Energy Bites

Date-Coconut Energy Bites – adapted from Chocolate and Zucchini

    • 50 grams date paste*, diced
    • 100 grams mixed, unsalted nuts (Brazil nuts, pistachios, almonds, hazelnuts…)
    • 2 green cardamom pods, seeds only
    • 100 grams Medjool or fresh dates (about 4), pitted
    • 3 Tbsp unsweetened cocoa powder
    • 1/2 tsp ground cinnamon
    • 1 Tbsp cacao nibs
    • 1/4 cup unsweetened, shredded coconut (for rolling)
    • a good pinch salt

*Date paste can be found at natural foods stores, or in North African or Middle Eastern shops. It comes as a solid block, so if it seems dry and hard, cut it into slices and soak for an hour in a little cold water to soften. Drain well before using (save the date water – you can freeze it too – to use in smoothies).

Directions

1) In a food processor, combine the diced date paste, nuts, and cardamom, and process in short pulses until the nuts are chopped to small bits and blended with the paste. Add the rest of the ingredients and process in short pulses until the mixture comes together.

2) Pour the shredded coconut into a plate; scoop a teaspoon of the date-nut into your hands and form into balls between your palms. Then roll them in the shredded coconut.

3) Lay the date-coconut balls in a airtight container, with parchment paper between each layer to prevent sticking. Transfer to the fridge to set for a few hours or preferably overnight. They will keep in the refrigerator, covered, for about a week.

Date-Coconut Energy Bites

Share this:

  • Tweet
  • Share on Tumblr

Like this:

Like Loading...

Muffin PSA

18 Friday Mar 2016

Posted by julia chews the fat in Breakfast & Brunch, Snacking, Sweet Tooth, Vegetarian

≈ 4 Comments

I’ve long held the belief that muffins are more or less just cake disguised as breakfast food. Most muffins I’ve come across in bakeries and cafés have an ultra-sweet crumb, studded with the usual flecks of fruit and nut, but more often than not, chocolate too (in different variations of the same theme – chocolate/banana, double chocolate and chocolate chip are the first ones to come to mind). The most confusing kinds have things like “cheesecake” centres, or grainy strusel toppings that are ninety-nine percent sugar. In a lot of ways, muffins have become the antithesis of sensible eating. Because if something like this can be called a muffin, clearly we’ve derailed somewhere along the way.

When I think of the ideal breakfast muffin – the Platonic ideal – it has to have a bit of brawn, something nutritious that will sustain me for the better part of the morning when paired with whatever fruit is in the fruit bowl.  The Platonic Muffin incorporates a type of flour that has some substance, some oumf (whole wheat, for instance) and a few octogenarian-approved ingredients like oat bran and dried fruit. The crumb shouldn’t be too sweet, and while nuts are welcome, chocolate and candy are not invited to the party. In other words, I want the kind of muffin that will lift me in the morning, when my eyes are half-mast in front of the computer, and the synapses in my brain aren’t yet at full throttle; I want it to give me a boost and make me feel productive; I want a muffin I can rely on.

Flipping through my cookbooks a few weekends ago, I came across Sara Forte’s Multigrain Muffin – a simple, but sturdy-looking thing that combines carrot, dates and buttermilk into the batter (ding ding ding!), along with different types of flour (ding ding ding!). Her cookbook, The Sprouted Kitchen: A Tastier Take on Whole Foods, is what I would call a book of healthy recipes – for the better part vegetarian, some raw, and (as laid out explicity in the title) all containing whole, unprocessed ingredients. Now, while I can get behind all of that, I sometimes have concerns about baked goods being labelled “healthy”, because it often means they taste like cardboard and have a mouthfeel akin to dry soil. But thankfully, this isn’t the case with these muffins- the use of different flours results in a balanced texture, the carrots and dates add sweetness without it tasting saccharine, and the buttermilk makes the whole thing moist and melt-in-your-mouth. It’s the kind of breakfast food that pushes all the right buttons.

This post isn’t sponsored by Sara or her cookbook; it’s just that since these muffins have been on heavy rotation at our house over the last little while, I felt it was my duty – as keeper of this blog – to share them with you instead of keeping them all to myself.

You can see this as a muffin PSA, from your local food nerd.

I hope you’ll give them a whirl.

Multigrain Carrot-Date Muffins

Multigrain Buttermilk Muffins with Carrot and Dates
Adapted from The Sprouted Kitchen: A Tastier Take on Whole Foods
Makes 12 muffins

  • 1 cup buttermilk*
  • 1/4 cup unsalted butter, melted and slightly cooled
  • 1 egg
  • 1 teaspoon vanilla extract
  • 1/4 cup finely chopped, pitted Medjool (or fresh) dates
  • 1 1/2 cups loosely packed grated carrots**
  • 3/4 cup whole wheat flour
  • 1/3 cup unbleached all-purpose flour
  • 3/4 cup oat bran
  • 1/2 cup almond meal
  • 1/2 cup muscovado sugar (I used raw sugar)
  • 1 teaspoon baking powder
  • 1 teaspoon baking soda
  • 1 teaspoon ground cinnamon
  • 1/4 teaspoon ground ginger
  • 1/2 teaspoon salt

* to make 1 cup of buttermilk, simply pour whole milk almost to one cup, topping up with about 1/2 Tbsp white vinegar. Let sit for a minute (it will curdle a bit), then it’s ready to be used in your baking.

**use the smaller holes of your box grater for this; the carrot will blend better into the batter.

Multigrain Carrot-Date Muffins

Directions

Preheat oven to 350F.

In a large bowl whisk together the first four ingredients. Add the dates and carrots and stir until combined. In another mixing bowl whisk together the remaining ingredients. Add the carrot-date mixture into the dry and stir until combined. Let the batter sit for 5 minutes to poof up a bit.

Line muffin pan with baking papers. Fill the papers 3/4 way up with batter. Bake for 20 minutes or until toothpick inserted in the center comes out clean.

Remove the pan from the oven and transfer muffins to a cooling rack. Can be stored for 3-4 days in an airtight container.

Multigrain Carrot-Date Muffins


Share this:

  • Tweet
  • Share on Tumblr

Like this:

Like Loading...

Party Patties

01 Tuesday Mar 2016

Posted by julia chews the fat in Cooking For Your Peeps, Cooking Solo, Lunch & Dinner, Snacking, Vegetarian

≈ 4 Comments

It feels strange to be writing a post about sandwiches, considering that I’m not what you’d call a “sandwich enthusiast”. Sandwiches are fine and all, but for me they usually function as a perfunctory filler – the thing I pick up at an airport before a flight, or at the work cafeteria when I’ve forgotten my lunch and the hot meal du jour looks dodgy. I don’t know about you, but it’s hard for me to get exited about ham on rye or a floppy veggie wrap. Sandwiches have just never been my jam.

That said, I’m a big advocate of the falafel sandwich. In fact, I don’t think I’ve ever come across a falafel sandwich I didn’t like, even the cheap ones I used to inhale during my undergrad days (usually between classes or after late-night drinking excursions), that we’d buy from the dingy Lebanese take-out places around the downtown campus. The best ones had a crunchy exterior that gave way to a soft, crumbling chickpea interior. The ones slathered in garlicky tahini sauce, fresh parsley, bright pink pickled turnip, and wrapped in soft flatbread. Compared to what else was on offer around school – 99¢ pizza, McDonald’s, dubious-looking panini at the Coffee Depot – these falafel sandwiches were often a student’s best option for a cheap, quick, tasty bite.

Since then, and after a few attempts of my own, I’ve come to realize that while falafels are great take-out food, they can be tricky to make well at home. I suspect that it’s because the best ones are made with a deep-fryer (surprise, surprise…) and since I don’t actually have a deep fryer – which, for my overall health, not to mention exposed extremities, is probably a good thing – it means that I don’t ever really find myself trying to make falafel from scratch. Instead, I usually end up picking up one from that well-loved vegan spot in my neighbourhood, because it’s good and close-by and they can have that thing ordered, dressed and wrapped up in five minutes flat. But since I’m not made of money and can’t take on the role of La Panthère verte’s most valuable patron, I’ve been looking for alternatives I can make at home – where my pocketbook can stay clear from any cash registers and 8$ organic sandwiches.

In scouring the Internet for ways to use up the zucchini that were starting to wither away in the crisper drawer, I came across this recipe from Martha Stewart, which reminded me a little of falafel sandwiches (because of the chickpeas and the pita), but looked more home-kitchen friendly. (in truth, my eagerness to try the recipe may be chalked up to the fact that I mistakenly read it as “Zucchini Party Sandwiches” and my curiosity got the best of me. They weren’t in fact “party” sandwiches, but patty sandwiches – though, since making them, I would have no qualms calling them “party” sandwiches, given how colourful and flavourful they are.) (like a party in your mouth, har har…).

They’re something of a cross between a zucchini latke and a falafel – more toothsome than the former, less complicated than the latter. I tweaked Martha’s recipe slightly, using canola oil to fry them in (because, again – unlike Martha – I’m not made of money) and incorporating some curry powder, cayenne and a small amount of olive oil to the mixture for some added oumf. I highly recommend that you do the same, as the flavours mingle really well together; like people do, when the party goes from good to dancing-on-the-tables (!) great.

Have a good week, everybody x

Curried Zucchini-Chickpea Patty Sandwiches

Curried Zucchini-Chickpea Pa(r)tty Sandwiches – adapted from Martha Stewart
Serves 8 (a half-pita each)

Ingredients

  • 1 15.5-oz can chickpeas, drained and rinsed
  • 1 cup plain breadcrumbs (I used panko)
  • 1 medium zucchini, grated
  • 1 small red onion, grated
  • 1 egg, beaten
  • 1 Tbsp curry powder
  • ¼ tsp cayenne
  • 1 teaspoon coarse salt
  • freshly ground black pepper to taste
  • 1 Tbsp olive oil – for flavour
  • ¼ cup canola oil (or sunflower oil) – for frying

To serve:

  • 4 whole-wheat pitas, halved
  • 1 cup Greek yogurt
  • 1 cup fresh mint leaves
  • ½ cucumber, thinly sliced
  • A handful of lettuce leaves, and/or arugula and/or radicchio

Directions

1) Mash chickpeas in a bowl until more or less smooth (with a few nubs left in-tact). Stir in breadcrumbs, grated zucchini, onion, egg, curry, cayenne, salt and pepper. Form into eight 4-by-1/2-inch patties and set aside.

2) Put a pan on medium-high heat and warm the canola oil until hot, but not smoking. Fry the patties until golden and crisp, about 2 to 3 minutes per side.

3) Meanwhile, warm the halved pitas in the toaster on in a dry pan, just to warm through.

4) Stuff the pita halves with the cooked patties, some cucumber, lettuce, mint and yogurt.

Curried Zucchini-Chickpea Patty Sandwiches

Curried Zucchini-Chickpea Patty Sandwiches

Share this:

  • Tweet
  • Share on Tumblr

Like this:

Like Loading...

One-Bowl Wonder

21 Sunday Feb 2016

Posted by julia chews the fat in Snacking, Sweet Tooth, The Basics

≈ 7 Comments

I have been dutifully plugging away at a post about “the myth of easy cooking” in the twenty minutes each morning before work, from the time I stumble out of bed (or tumble, depending) to the time I finish my coffee. But for some reason, the things (important, opinion-laden things!) I’d like to tell you just. aren’t. coming. There’s been a lot of typing, deleting, typing, deleting. So I’ve put that one aside for a little while, in the hopes that with a little time to percolate, the words might come more easily.

In the meantime, there’s the backlog of stuff I’ve wanted to share with you, one of them being the chocolate chip cookie recipe I recently discovered from Christina Tosi’s cookbook, Milk Bar Life: Recipes and Stories. If you haven’t heard of her, Tosi is the wonder-woman behind NYC’s Milkbar, the sister bakery of David Chang’s Momofuku restaurant empire. If you’ve seen her segments on The Mind of a Chef, you’ll know that she is a mensch in the world of sweets; if there is anyone I would trust with a recipe for cake or cookies or pie, it’s certainly this lady.

Now, chocolate chip cookies might seem fairly straightforward, but as any amateur baker can tell you, they can still be capricious little buggers. A slight imbalance in gluten, sugar and fat can turn them into a liquefied mess or make them as hard as stone (or, lord forbid, cakey, fluffy cookies). I always thought that the key to the perfect chocolate chip cookie was extensive chilling and the use of fancy gear (the stand-mixer being the most coveted piece of machinery), but it turns out I’ve (we’ve?) just been overthinking things. Tosi’s recipe doesn’t require any special gadgetry or preternatural baking skills; the whole thing is done the old-fashioned way – in one bowl, with a wooden spoon (and no overnight chilling). With this recipe, there is nothing esoteric or complex to contend with; there is simply no mucking about. 

What you end up with is the Platonic ideal of the chocolate chip cookie – chewy in the centre, golden and crispy around the edges, and a not-too-sweet, buttery flavour where chocolate reigns supreme. While I hesitate using superlatives when it comes to recipes, this might just be the perfect chocolate chip cookie.

I hope you’ll give it a whirl.

—–

Special mention: I’d like to thank my cousin Liza for the handmade, Roisin Fagen tea towel that serves as the saucy backdrop to these photos. Along with these cookies, it’s one of my new favourite things.

Chocolate Chip Cookies – lightly adapted from Milk Bar Life: Recipes and Stories by Christina Tosi
Makes about 15 cookies

Chocolate Chip Cookies

Before we get started…

  • The recipe calls for quite a bit of chocolate (a whole 12 ounces! This woman means business!), but it’s all part of the perfect balance, so don’t be tempted to skimp.
  • The only ingredient that is a bit novel is the non-fat milk powder, but you can find this at most run-of-the-mill grocery stores. The powder deepens the flavour and lends to their chewy texture, so best not to skip it. If you’re worried that the rest of the bag is going to slowly perish in your cupboard until next year’s spring cleaning, rest assured that you’ll be making these cookies more than once, and before you know it, you’ll have successfully chipped away at that bag of milk powder. These cookies freeze really well too, so tripling or quadrupling the recipe is not a bad idea either.
  • Instead of using dark chocolate chips, I used a mix of dark chocolate and white chocolate pastilles, which I chopped into pieces, because that’s what I had on hand.

Ingredients

    • ½ pound (2 sticks) unsalted butter, melted and just warm to the touch
    • ¾ cup packed light brown sugar
    • ½ cup granulated sugar
    • 1 egg
    • 2 teaspoons vanilla extract
    • 1 ¾ cups all-purpose flour
    • 2 tablespoons nonfat milk powder
    • 1 ¼ teaspoons kosher salt
    • ½ teaspoon baking powder
    • ¼ teaspoon baking soda
    • 12 ounces chcolate (I used a mix of 70% dark + white chocolate), roughly chopped

Instructions

1) Preheat the oven to 375 degrees F. Prepare a baking sheet with parchment paper.

2) With a wooden spoon, mix the sugars together in a large bowl and add the melted butter. Stir vigorously for about a minute or more. Mix the egg and vanilla in the measuring cup you used for the sugar and add to the mixture. Stir until the mix has a glossy sheen, about one more minute.

3) Mix in the flour, milk powder, salt, baking powder, and baking soda until just combined. Stir in the chocolate chips and mix until evenly distributed.

4) Lightly form dough into balls about the size of a golf ball (or if you have a mini ice-cream scoop, you can use that for a more uniform result) and place on the baking sheet lined with parchment paper about 2 to 3 inches apart. Bake for 9-11 minutes or until golden brown around the edges but still soft in the middle. The cookies will fall as they cool. Transfer to a cooling rack to cool completely.

Chocolate Chip Cookies

Chocolate Chip Cookies

Share this:

  • Tweet
  • Share on Tumblr

Like this:

Like Loading...

Real Christmas

01 Friday Jan 2016

Posted by julia chews the fat in Cooking For Your Peeps, Holidays, Snacking, Sweet Tooth, The Basics

≈ 3 Comments

“I can’t believe it’s already over.” – Mom, on the drive home after Christmas dinner

This holiday is charged with so much expectation, emotion and excitement that when it’s over and done – after only a few short days of feasting, hugging and imbibing – it’s hard to believe it ever really happened. Christmas sometimes feels like one big blur of flour and sugar, sloppy two-cheeked kisses, chest colds, Burl Ives, and glitter (bits of which we’ll be finding in our apartment til March.)

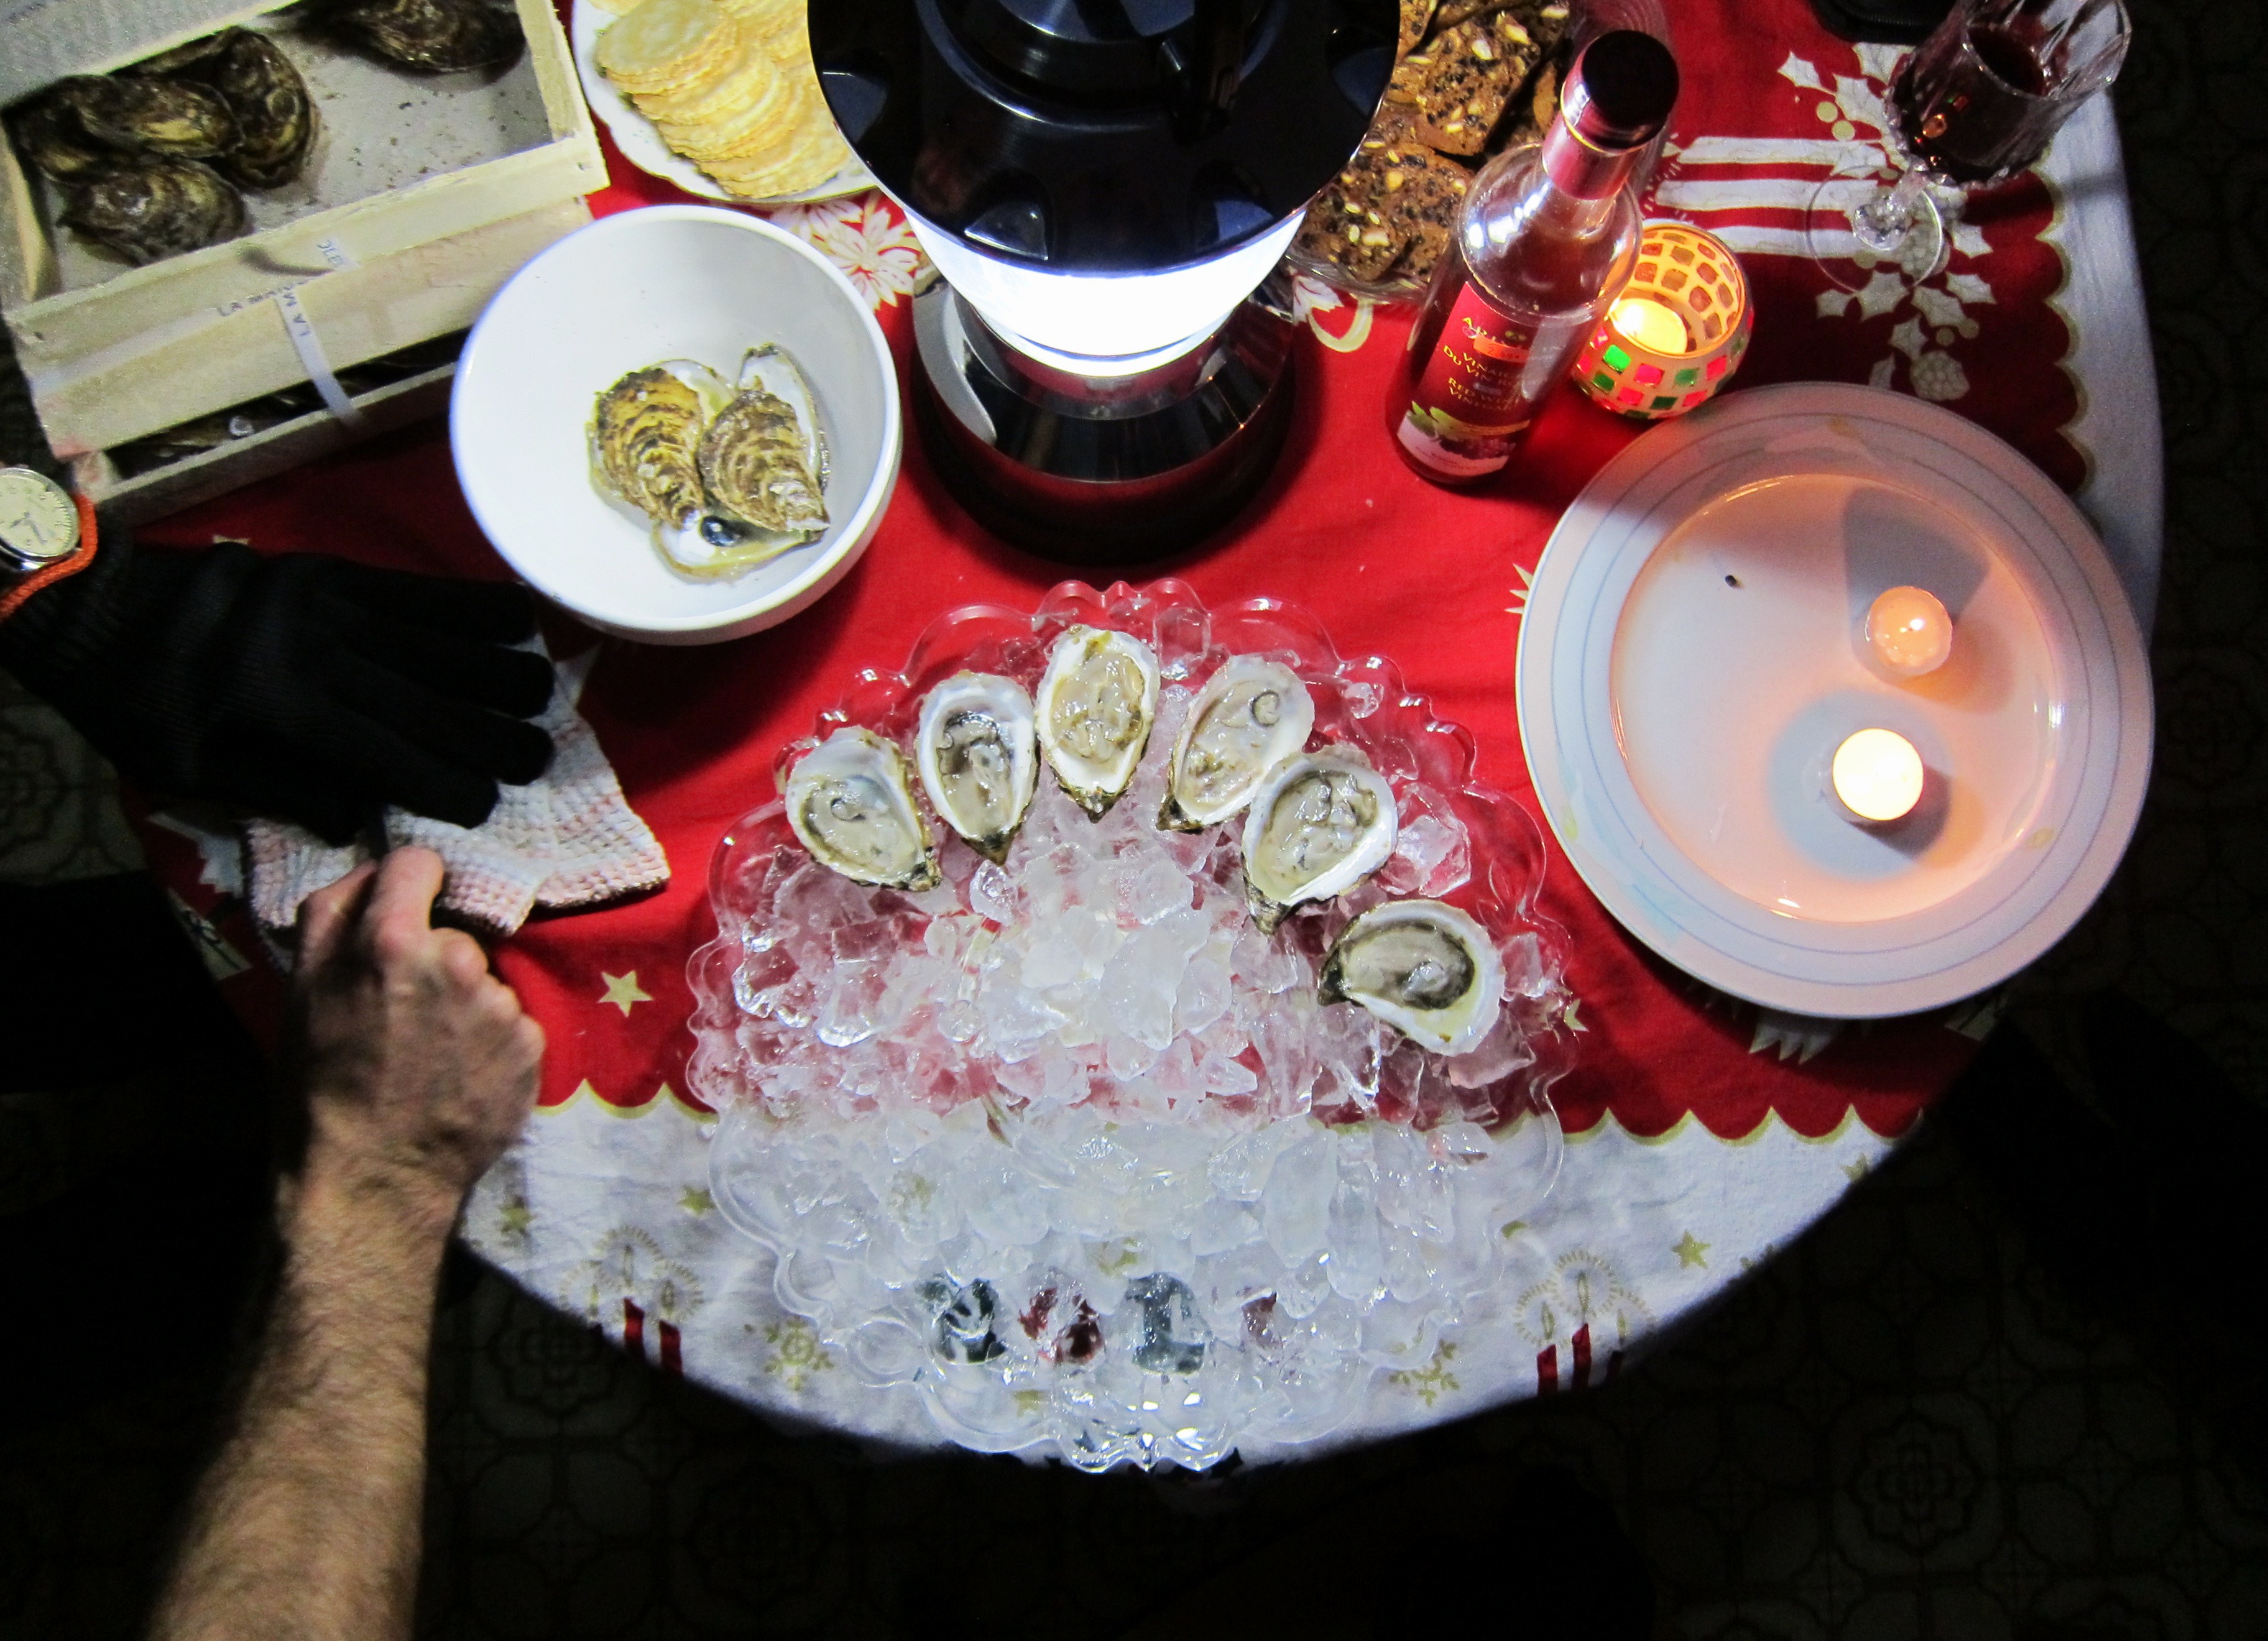
The funny thing is, despite the rushing around, the prep, the chaos, the outbursts, the kitchen meltdowns, the set-up, the clean-up, the mountains of dishes, I can’t imagine having it any other way. It’s bacchanal, it’s over-the-top, it’s insane. But it’s Christmas. Not the idyllic, gilded Christmases of the glossy magazines, or of Martha Stewart, or of people we come across on the Internet with seemingly perfect lives. It’s real. It’s messy. It’s exhausting. It’s emotional. But in between the messy bits comes lots of love and togetherness, laughter and gratitude. When we lost power on Christmas Eve – right before the seven-fish dinner was ready for the oven – we managed to pretend we weren’t worried, ignoring the three dozen shrimp quietly defrosting on the counter, opting instead to drink bubbly and eat crackers, while my (ever-optimistic, buoyant) brother shucked oysters by lamplight.

Things certainly could have been worse.

Oysters

When the power came back on, about an hour later, everyone cheered and kissed and toasted. It was like the final scene in It’s a Wonderful Life. Dinner was back on schedule, the wine flowed freely, and soon enough, the twelve of us gathered around the table for a feast fit for kings.
Christmas Eve Dinner

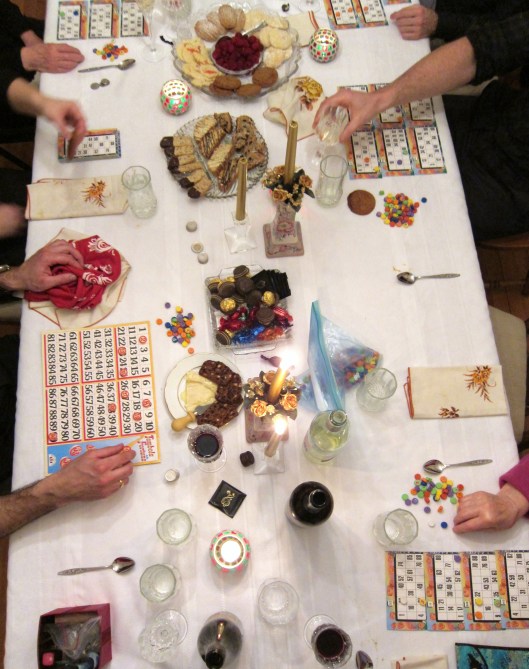
Once the last fork was laid down and the plates were cleared, Nonna pulled out her reading glasses, mom plated cookies and After Eights and we played Tombola, calling out the numbers in English, Italian, German, and French, so that everyone around the table could put their chips on the right spot. It didn’t feel good beating Grandma at Tombola three times in a row (it just instigated a fit of guilt-ridden, nervous laughter), but it did help me forget about my chest cold, as did learning – on Christmas Eve, no less – that the number 11 in German is both spelled and pronounced “elf”.

Tombola

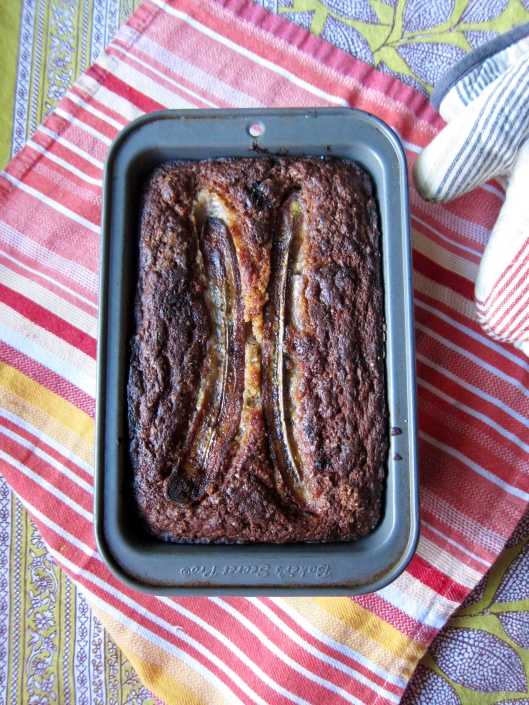
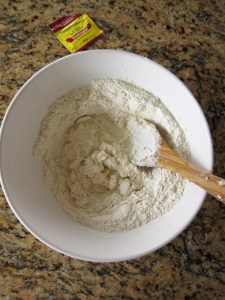
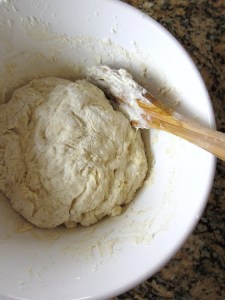
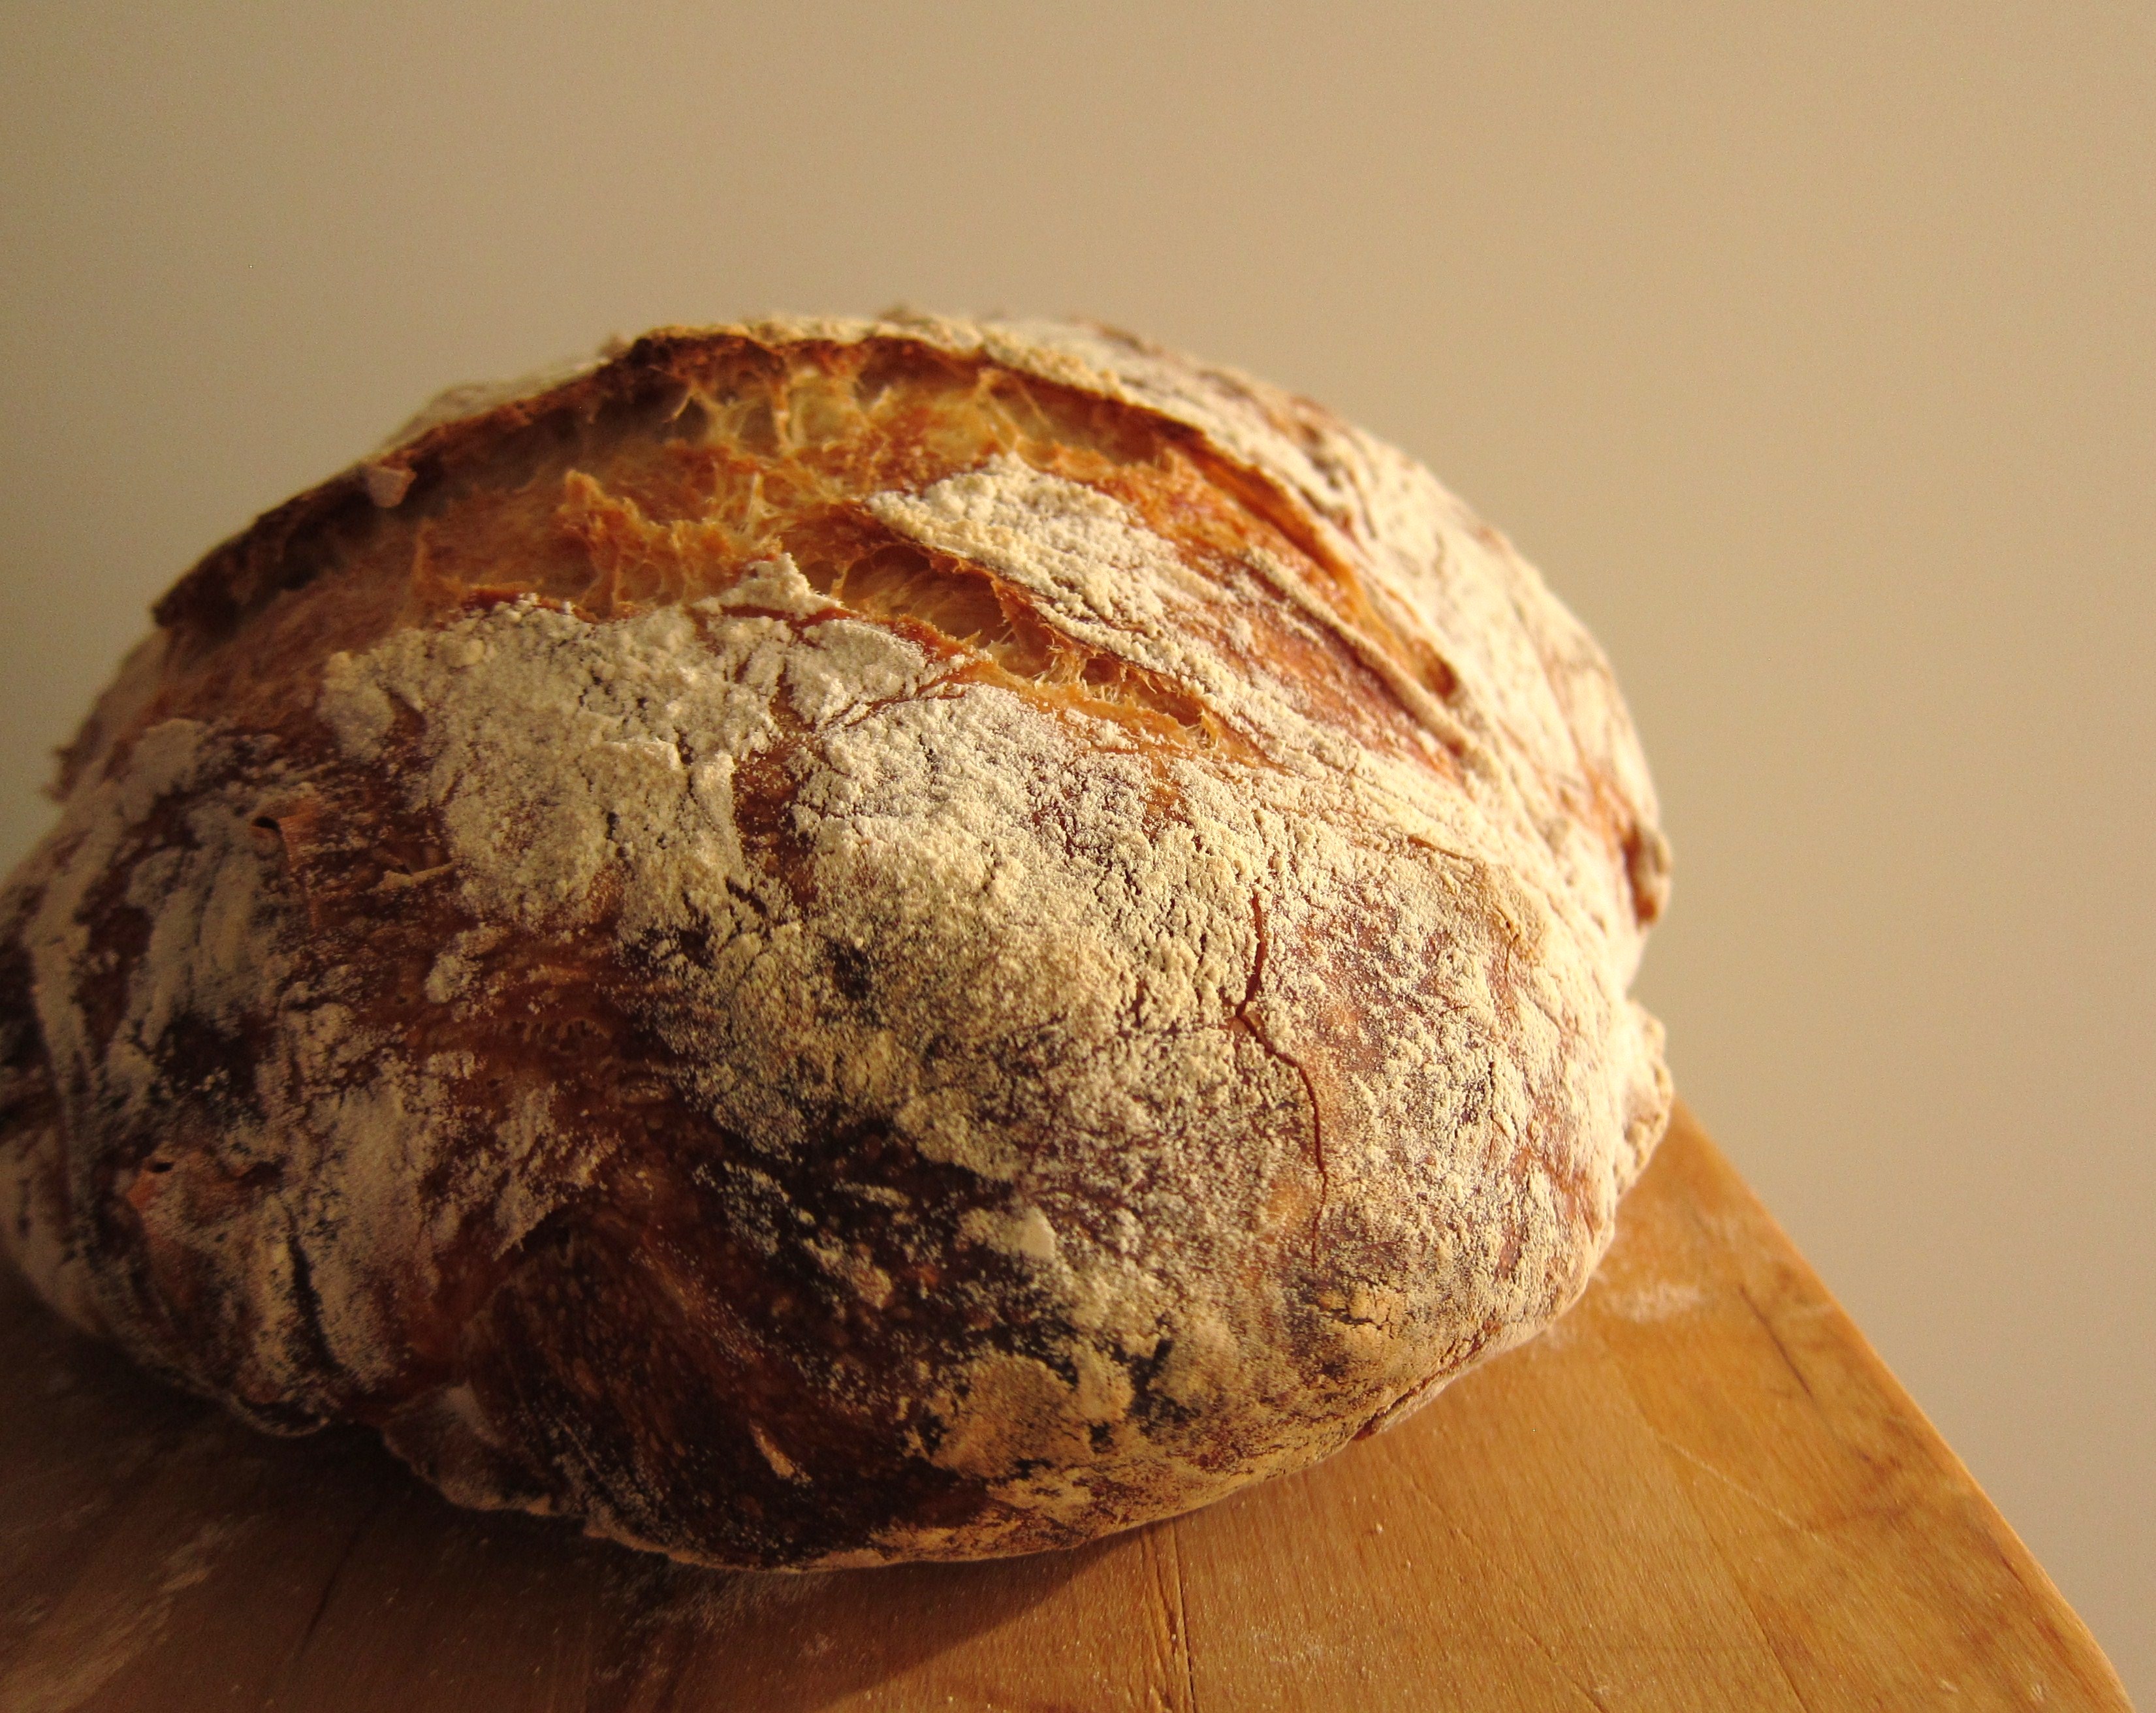
Family time aside, the thing I relished most this Christmas – the thing that ended up being the most restorative part of this whole holiday – was the baking. Not because the results were particularly successful (deflated meringues, chewy crackers, and lacklustre cioffe were among the flops), but because I had the chance to do most of it on my own – quietly and leisurely, in crumpled pyjamas. With the year winding down, I came to realise just how much that time on my own – especially in the kitchen – has been (was, is)  a subtle luxury. When I used to hear food people say that baking was “meditative”, I’d roll my eyes, thinking Ugh, how cheesy… But it turns out they were right. When you bake on your own, it’s just you, the dough, and nothing else. The rest of it – the distractions and concerns, decisions and regrets – can stay suspended for awhile.

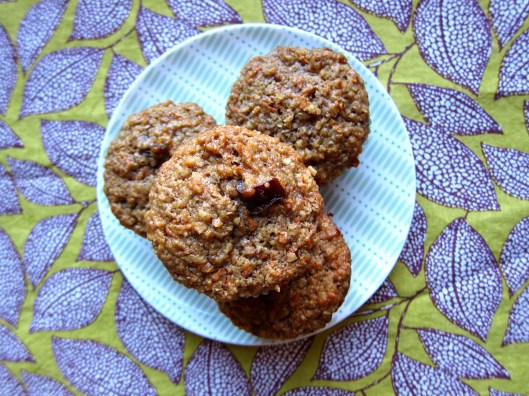
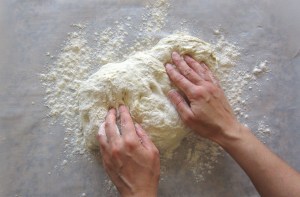
Somewhere between batches of madeleines and biscotti, shortbread cut-outs and these ginger cookies, I found that respite from an unquiet mind can come from nothing more than a little butter, sugar, flour and a rolling pin.

Who knew.

Here’s to making room for doing more of the things we love in the coming year. Wishing you all a bright and welcoming 2016 and looking forward to having you here again soon xx

—–

Orange Spice Madeleines – adapted from Port and Fin
Makes 16

Orange Spice Madeleines

Ingredients

  • 2 large eggs, beaten
  • ⅔ cup sugar
  • 1 cup + 1 Tbsp all-purpose flour
  • ½ cup + 1 Tbsp unsalted butter
  • ¼ tsp salt
  • 1 tsp pure vanilla extract
  • 1 large navel orange, zest
  • 1 tsp ground cinnamon
  • 1 tsp ground cloves
  • ¼ tsp ground cardamom

Directions

1) Melt the butter in a saucepan until it comes lightly browned and has a nutty fragrance (careful not to over-brown it – butter tends to burn rather easily). Set aside to cool slightly.

2) In a medium bowl, mix one cup of the flour, sugar, cinnamon, cloves and cardamom and set aside.

3) In a separate bowl, whisk the two eggs with the vanilla and salt until the eggs are frothy.

4) Add the wet ingredients to the dry ingredients and, with a spatula, stir until just combined. Take care not to over-stir.

5) Add the cooled melted butter and the orange zest and stir. It may take a minute for the butter to blend into the mixture. Again, take extra care not to over-mix.

6) Cover the bowl and place in the refrigerator to rest at least one hour and up to overnight.

7) Prepare a madeleine tin by brushing the moulds with the extra tablespoon of butter and lightly dusting them with flour, tapping off any excess. Place the pans in the freezer for at least an hour.

8) Preheat the oven to 350°F. Remove the batter from the refrigerator and the pan from the freezer. Fill each mould with approximately one tablespoon of batter.

9) Bake the madeleines for 10-15 minutes until the edges are browning and the middle is puffed up slightly. Using your forefinger, press lightly on the center hump – the madeleines are finished baking when they spring back at your touch. Remove the madeleines from the oven and let cool for 2 minutes. Then gently loosen the madeleines from their moulds and arrange onto a cooling rack. Dust with icing sugar (optional) and serve.

Orange Spice Madeleines

Orange Spice Madeleines

—–

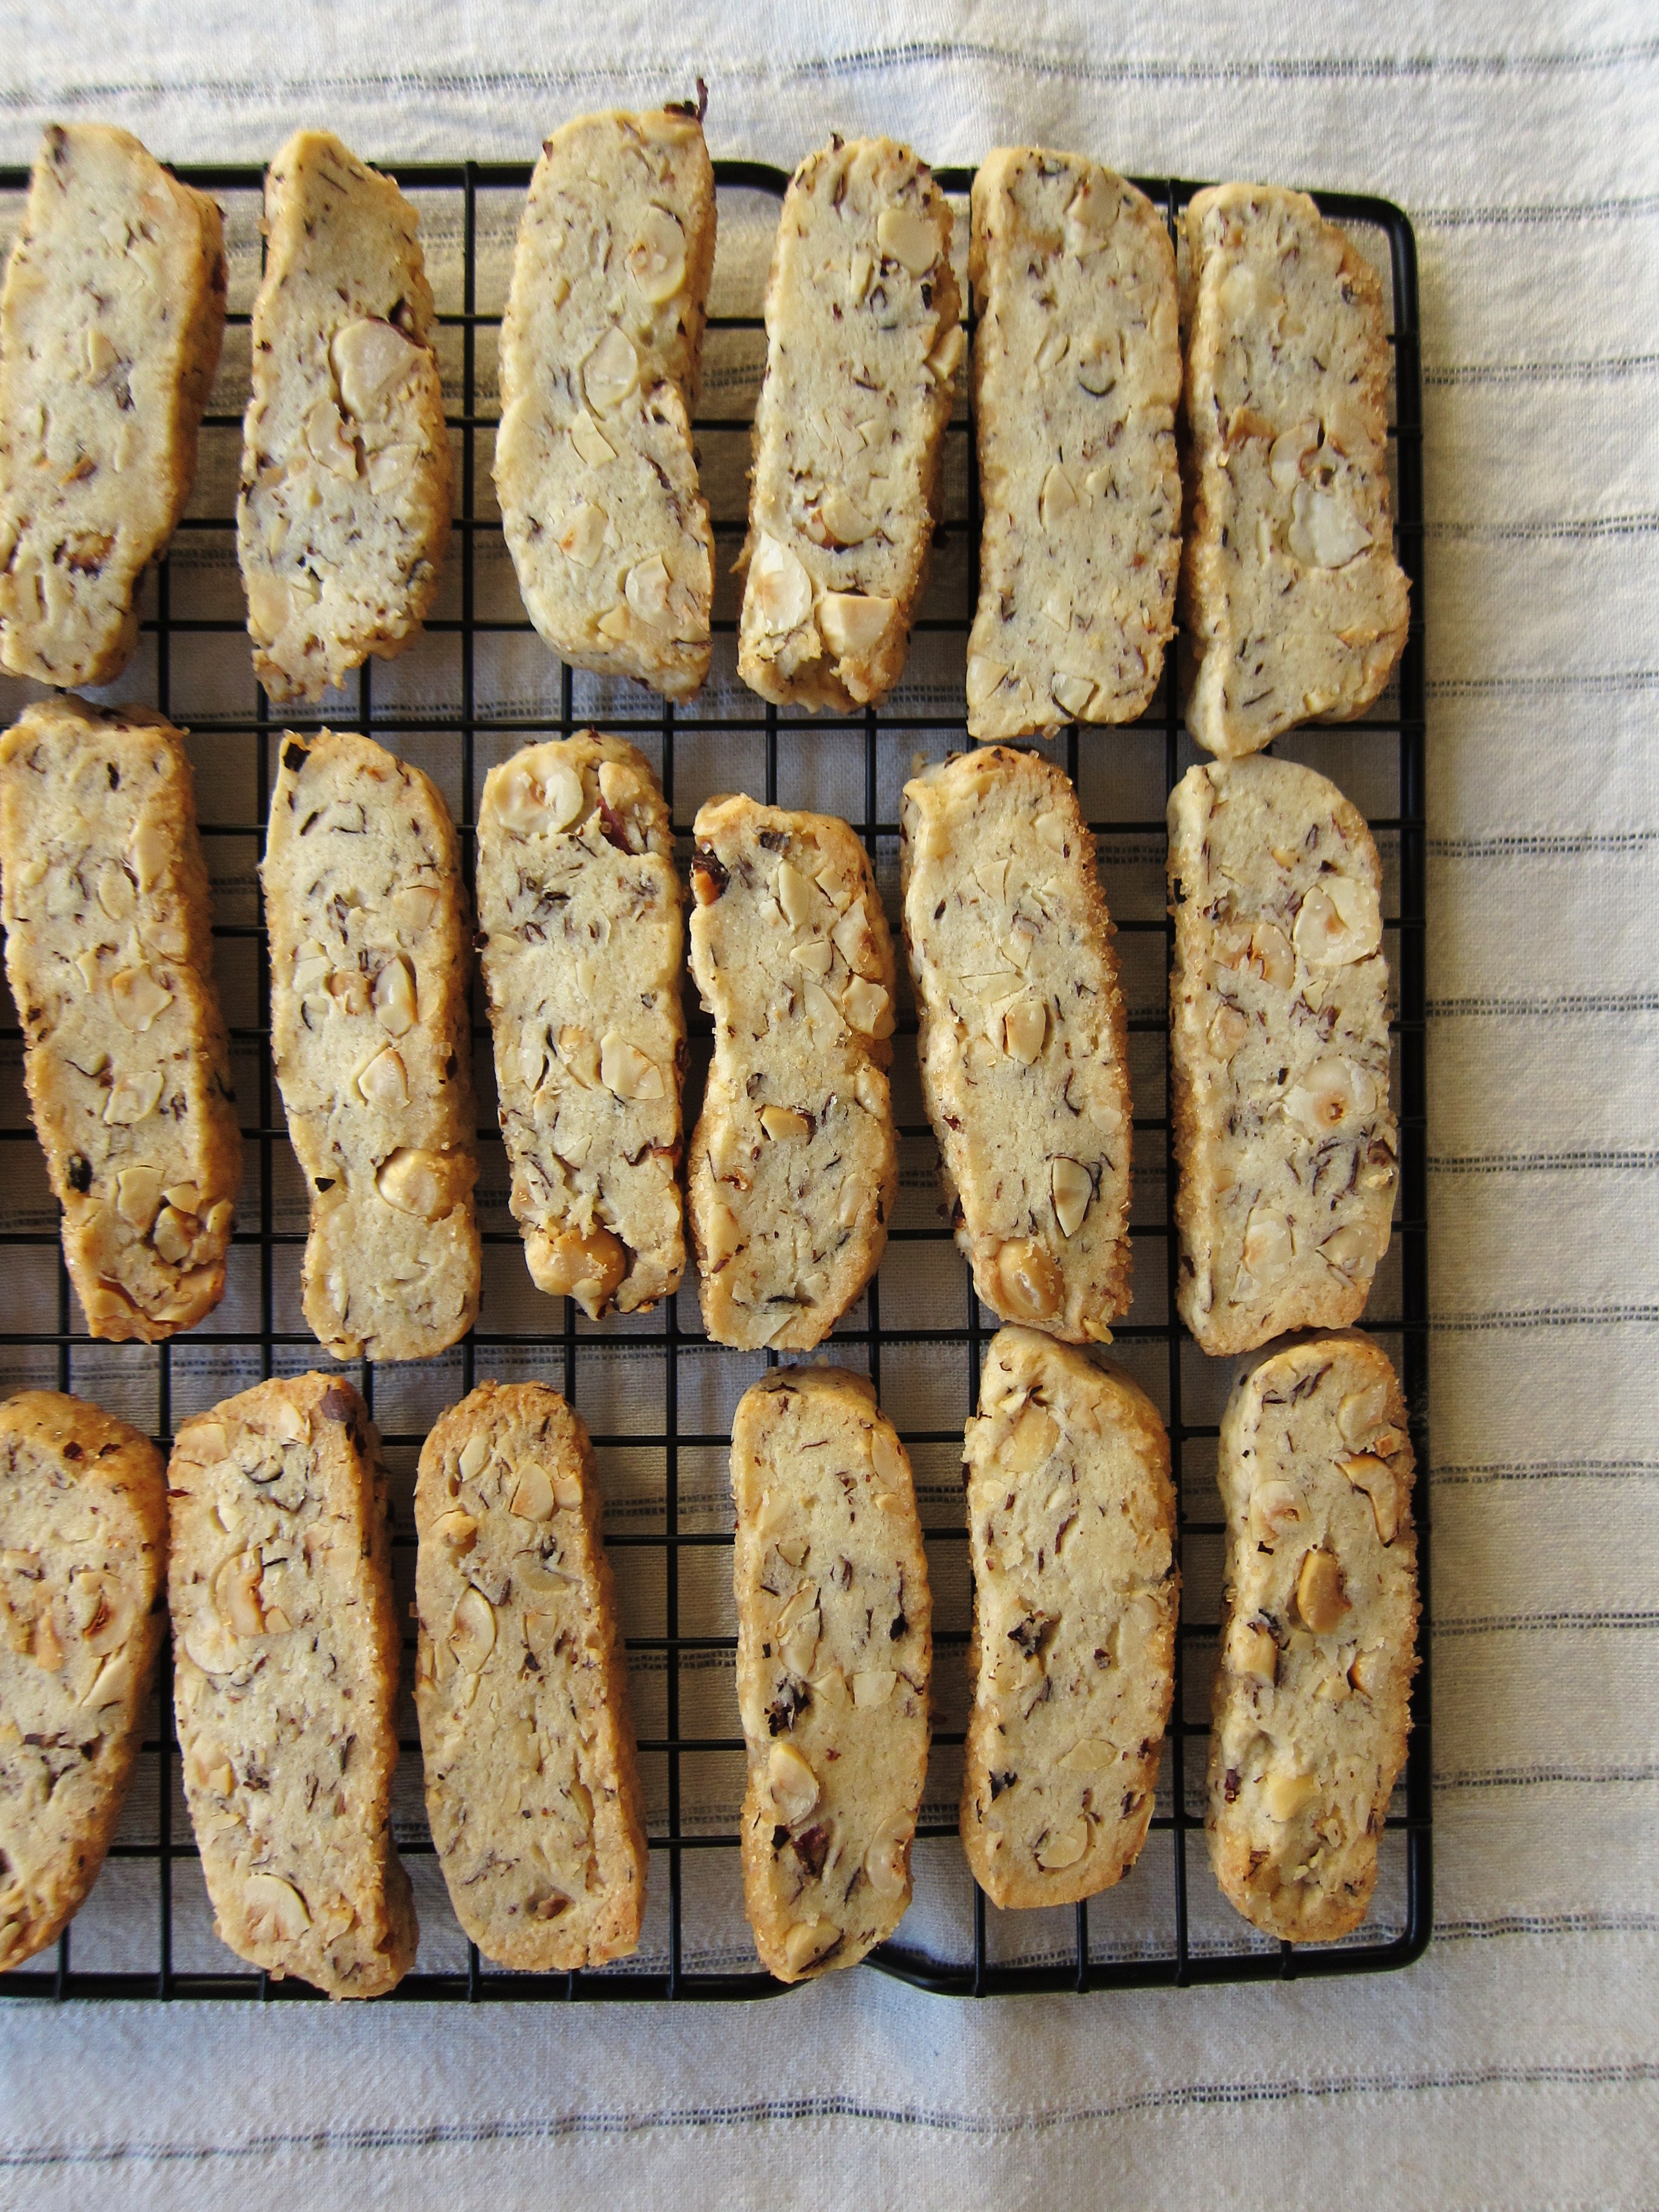
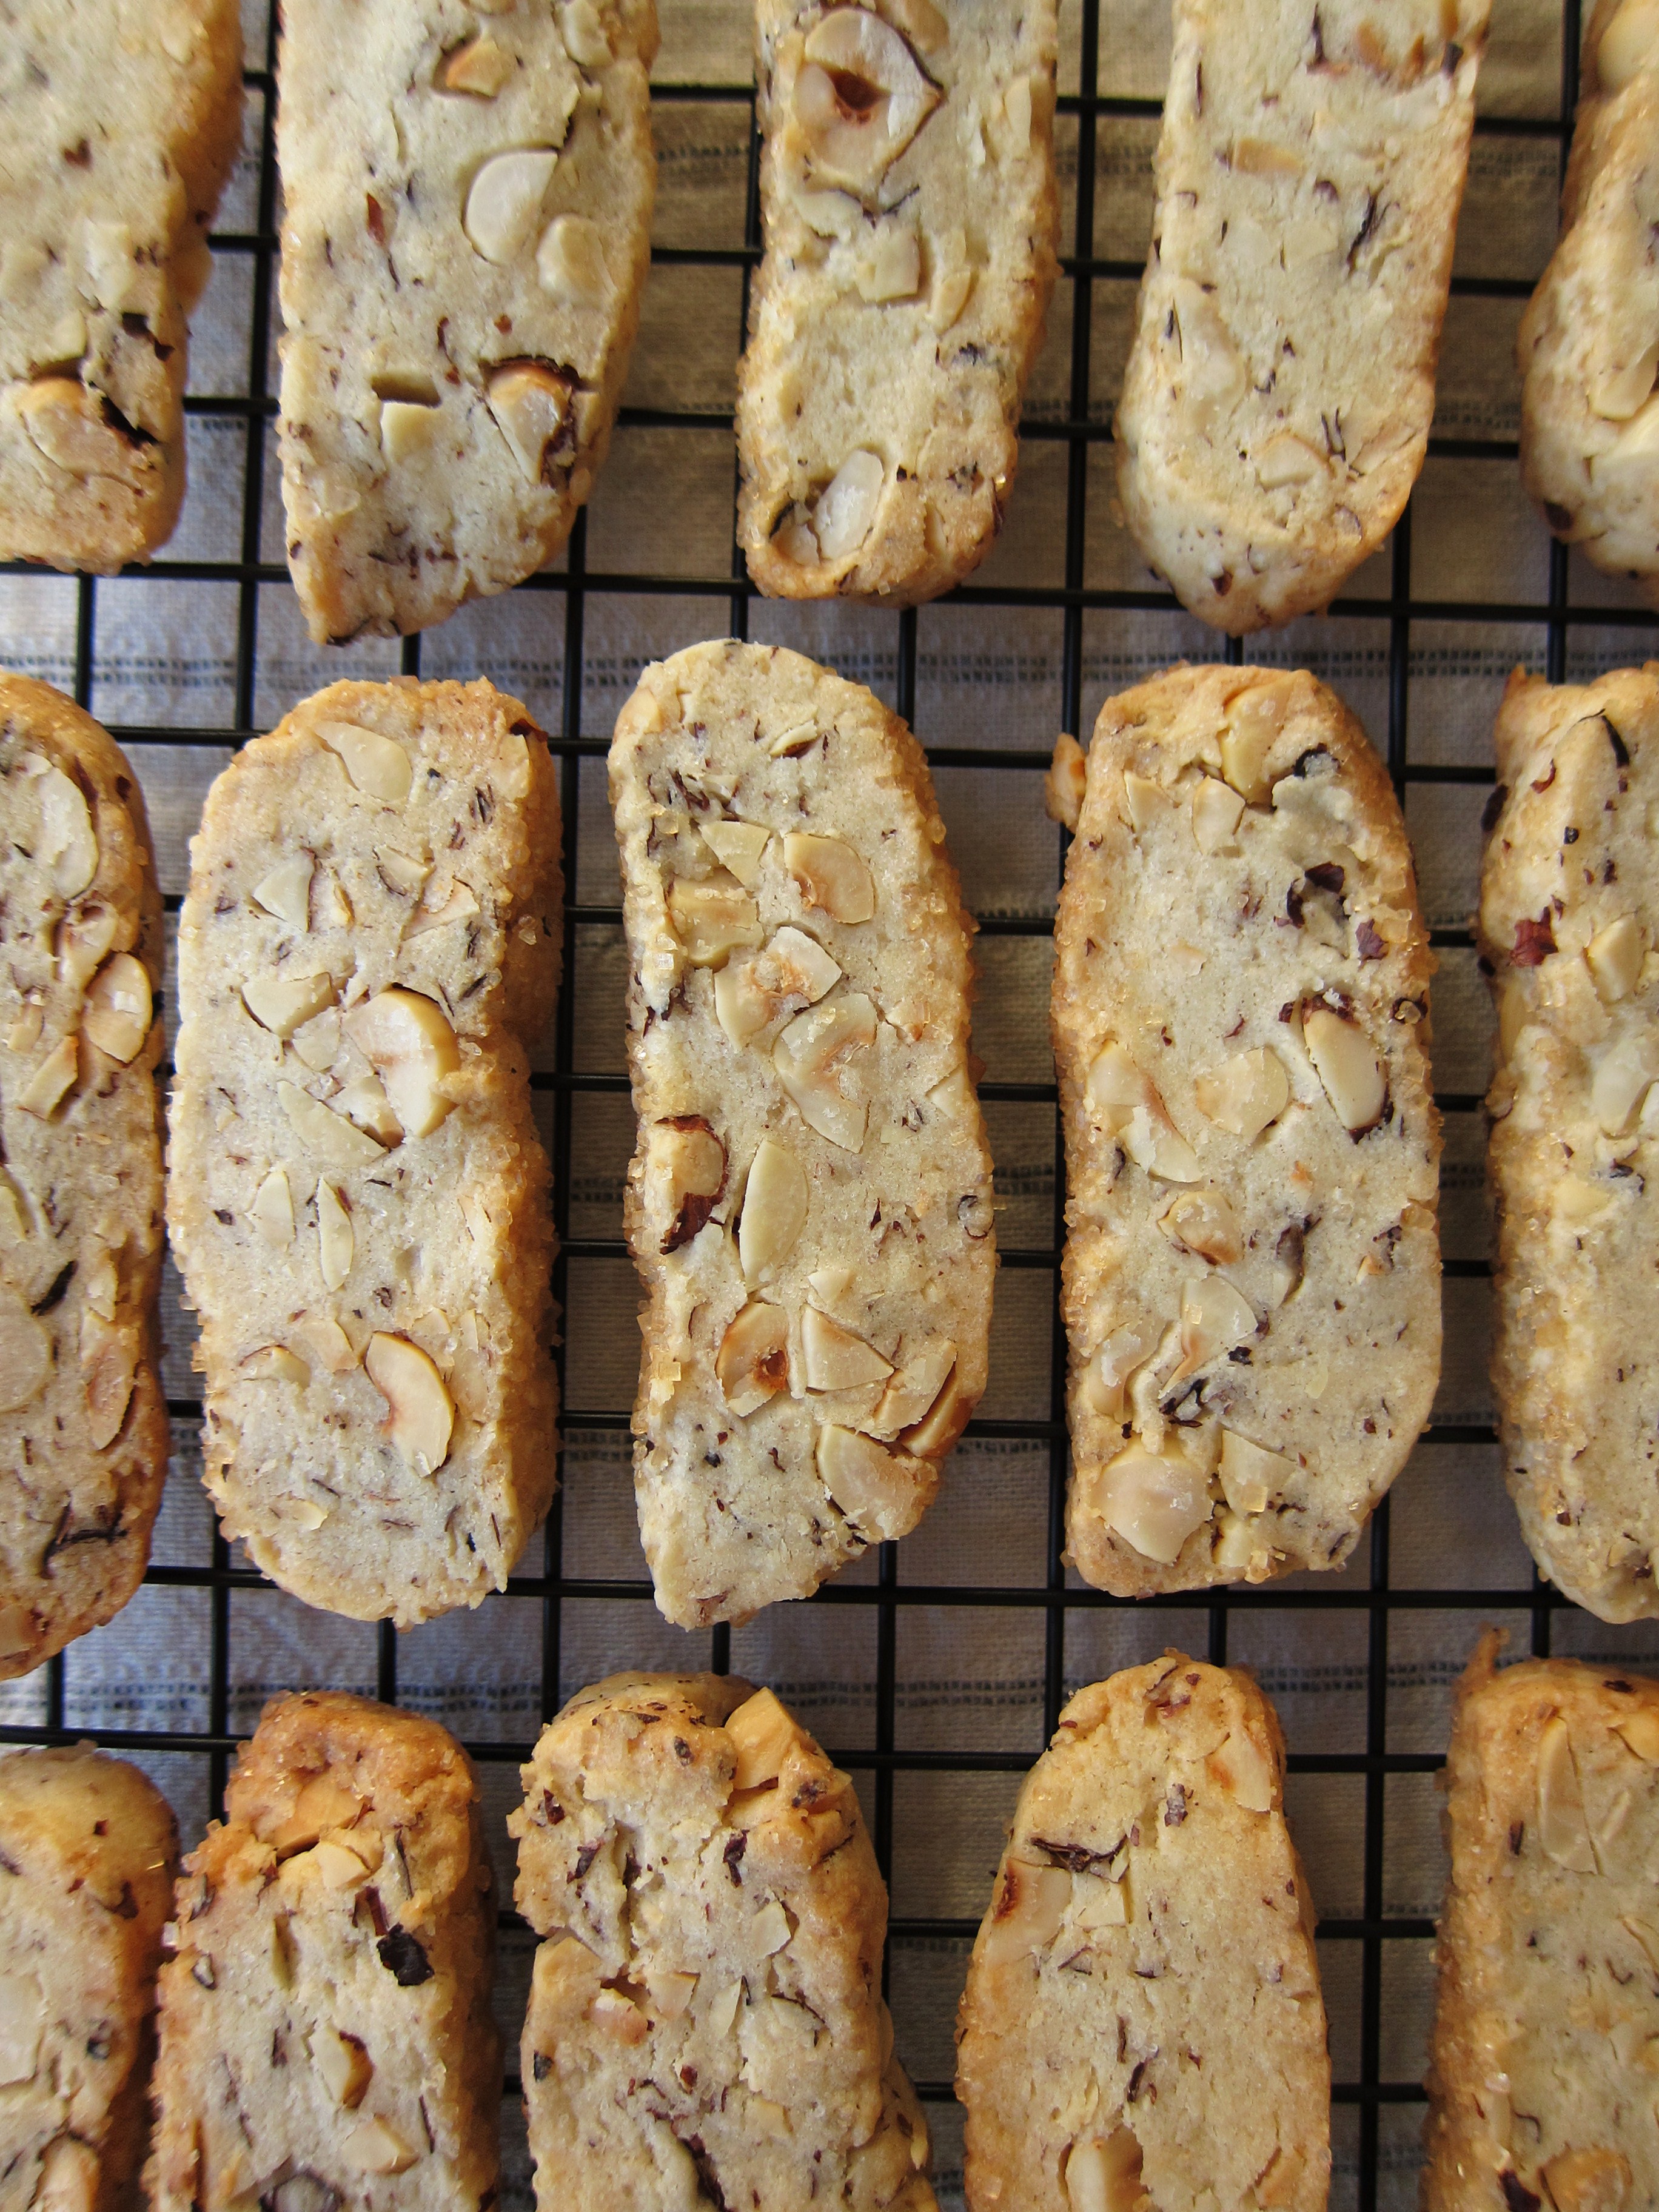
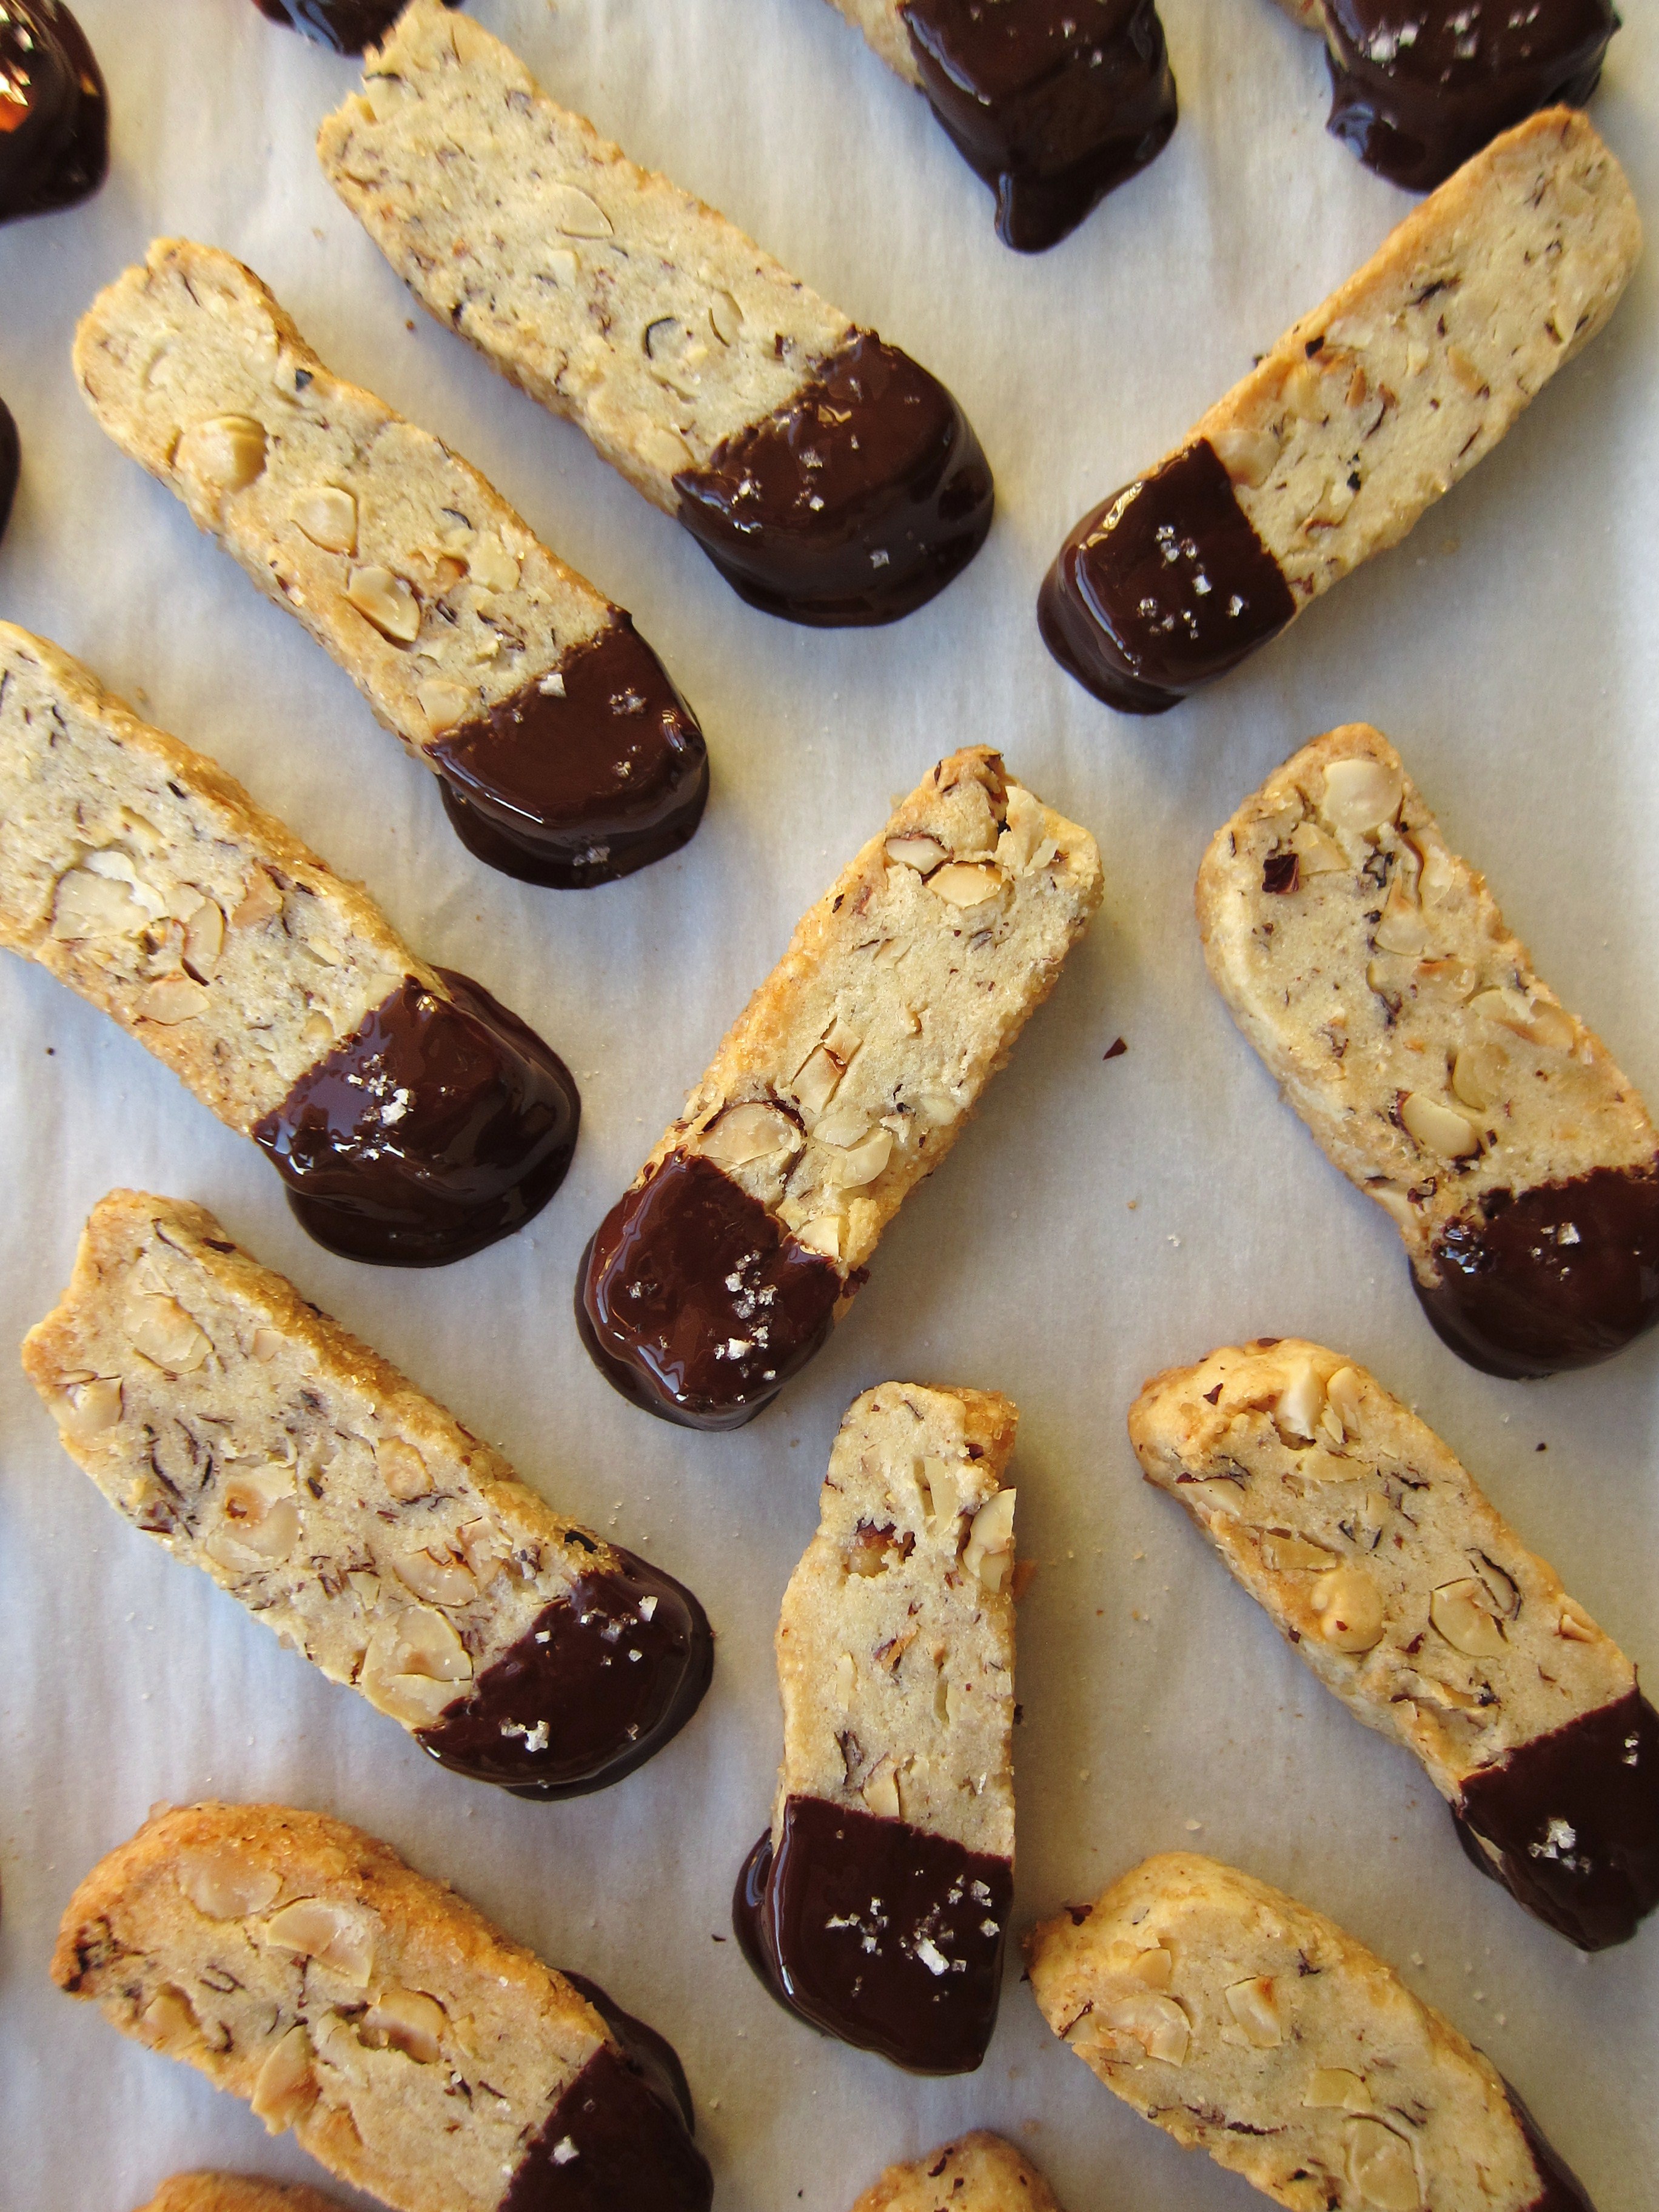
Hazelnut Biscotti with Orange Zest – from Canadian Living’s Christmas
Makes about 24

Hazelnut Biscotti

Ingredients

  • 1 3/4 cups all-purpose flour
  • 2 tsp baking powder
  • 3/4 cup whole hazelnuts, skin-on, toasted* 
  • 2 eggs
  • 3/4 cup granulated sugar
  • 1/3 cup butter, melted
  • 2 tsp pure vanilla extract
  • 1 1/2 tsp grated orange rind
  • 1 egg white, lightly beaten
  • 1/4 cup dark chocolate, melted, for drizzling (optional)

*to toast hazelnuts, simply lay them out on a baking sheet and bake at 300°F for about 6-8 minutes, or until fragrant.

Directions

1) To measure flour accurately, lightly spoon flour into dry measure, without tapping, until cup is heaping; level off with blunt edge of knife. In large bowl, combine flour, baking powder and toasted hazelnuts.

2) In a separate bowl, whisk together eggs, sugar, butter, vanilla, almond extract and grated orange rind; stir into flour mixture until soft sticky dough forms. Transfer to lightly floured surface; form into smooth ball.

Hazelnut Biscotti

3) Divide dough in half, roll each into 12-inch long log. Transfer to ungreased baking sheet.

4) Brush tops with egg white; bake in 350°F oven for 20 minutes.

5) Remove from oven and let cool on pan on rack for 5 minutes. Transfer each log to cutting board; cut diagonally into 3/4-inch thick slices.

6) Stand cookies upright on baking sheet; bake for 20 to 25 minutes longer or until golden. Transfer to rack and let cool.

7) If you choose to add a drizzle of chocolate to your biscotti: wait until they’ve cooled; then collect a teaspoon of the melted chocolate in a teaspoon and sway it back and forth over the biscotti. Allow the chocolate to set at room temperature before storing.

Note: Biscotti can be stored in airtight container for up to 2 weeks.

Hazelnut Biscotti
Hazelnut Biscotti
Hazelnut Biscotti
Hazelnut Biscotti
Hazelnut Biscotti
Hazelnut Biscotti

—–

Hazelnut Shortbread – adapted from Bakers Royale
Makes about 40 cookies


Ingredients

  • 2 1/2 cups all-purpose flour
  • 1/2 tsp salt
  • 1 cup granulated sugar
  • 12 Tbsp unsalted butter, slightly softened
  • 1 large egg yolk
  • 2 tsp. pure vanilla extract
  • 1 1/2 cups toasted hazelnut, coarsely chopped
  • 1 cup coarse sugar
  • 8 oz. dark chocolate (for dipping)

Directions

To prepare and refrigerate the dough:

1) Sift flour and salt into a bowl; set aside. With a hand beater, cream the butter on medium-low speed until smooth, about 1-2 minutes. Add in the sugar and beat until light and fluffy, about 2 minutes.

2) Add in the egg and vanilla, beat until blended. Reduce the mixer speed low and in the dry ingredients in three additions. Turn off the beater and fold in the nuts with a wooden spoon or spatula.

3) Portion the dough in half and shape each half into 15x3x1 inch rectangular logs. Press coarse sugar into each side. Cover with plastic wrap and push both ends with your hand toward the centre to tighten the dough. Chill prepared dough for at least 3 hours.

When ready to bake:

4) Heat oven to 350 degrees F. Line a baking sheet with parchment paper. Remove chilled dough and slice cookies to ½ inch thickness. Place each cookie 1 inch apart on a parchment-lined baking sheet.

5) Bake until cookies are lightly browned, about 18-20 minutes. Transfer cookies to a wire rack to cool completely.

6) Melt chocolate on the stove-top by making a bain-marie; stir occasionally. Dip one corner of cookie into melted chocolate and place on parchment paper to set. (you can also sprinkle a bit of flaked salt over the chocolate before it sets.) Serve or store in an airtight container for up to one week.

Hazelnut ShortbreadHazelnut ShortbreadHazelnut ShortbreadHazelnut Shortbread

—–

Toasted Almond Meringues – from mom’s repertoire

Makes about 40

But first, a few notes on meringue…

Theoretically, meringue is supposed to be simple – whip egg whites into soft peaks, add sugar, whip into stiff peaks, bake. But in practice, there are a few key things to keep in mind: 1) if the weather is humid, your egg whites might not rise enough, causing the meringue to deflate and become chewy. 2) It’s important that the equipment you’re using be extremely clean (bowl, beaters). Any trace of grease or fat (say, from a stray egg yolk that makes it into the bowl) can compromise the results. 3) Overbeating can also be a problem, causing the meringue to become more like taffy in consistency. (If you’re looking for more tips, Martha’s actually got some good ones here .)

This time around, my meringues deflated when they were pulled from the oven (see final photo below), on account of the fact that I made them on an unseasonably balmy/humid day and probably overbeat them. To see what these meringues should actually look like, you can find some photos here from my mom’s archive.

To all you meringue newbies – I hope none of this scares you off making meringue. With practice, you start to get a sense of its quirks and soon you’ll be able to whip some up with your eyes closed. At that point you’ll discover that pulling a perfect batch of meringues from the oven can be obscenely satisfying…

Toasted Almond Meringues

Ingredients

  • 2 egg whites (or 1/4 cup thawed eggs whites)
  • 1/4 teaspoon cream of tartar
  • 1/2 cup brown sugar
  • 1 tsp vanilla
  • 1/2 tsp almond extract
  • 1 cup sliced almonds, toasted*

*to toast the sliced almonds, simply lay them out on a baking sheet and bake at 300°F for about 4-5 minutes, or until golden.

Directions

Preheat the oven to 300º F .

In a bowl, beat egg whites with the cream of tartar until soft peaks start to form. Gradually add the the brown sugar until stiff peaks form. Fold in the vanilla, almond extract and sliced almonds.

Spoon teaspoonfuls onto a cookie tray which has been lined with parchment paper. Bake in a 300º F oven for 30 minutes. Remove from baking sheet and allow to cool on a metal rack.

Note: these meringues will appear a little more “toasted” than regular meringue – that’s ok. It’s because it calls for brown sugar instead of white.

Toasted Almond Meringues

Share this:

  • Tweet
  • Share on Tumblr

Like this:

Like Loading...

An Invitation

20 Friday Nov 2015

Posted by julia chews the fat in Condiments, Lunch & Dinner, Snacking, Vegetarian

≈ 11 Comments

The weight of this week hasn’t made me want to write about food. In light of recent events, it feels frivolous – and almost obscene – to blather on about cooking. It isn’t just Paris. It’s all of it. It’s Beirut. It’s Bamako. It’s the unconscionable rhetoric surrounding the Syrian refugee crisis. It’s the pundits who dissect every single detail of a horrifying event to spread their bigotry and fearmongering. It’s the fact that – amid all the pain and suffering – our impulse is to turn against eachother, to become wary and suspicious; to slam doors on the most vulnerable.

This post, in contrast, is an invitation. An invitation to gather, to extend a loving gesture, to bring people in close. Breaking bread with others can be a unifying force – it can foster greater acceptance and understanding of others; it can quell intolerance. Most of all, though, it is a tangible expression of unadulterated love.

World peace might not be a realistic expectation. But we can, at the very least, try to love one another a little more. So, at least for a little while, turn off the radio, shut off your computer, your phone. Silence the hot-air pundits. Bring together friends, family, and new faces too – to share, to love, to eat, with a heart that’s open and filled with gratitude.

Eat well, be well, dear readers. See you here again soon x

Traditional Muhammara (red pepper walnut dip from Turkey, via Syria)
Adapted from Olga Irez’s Delicious Istanbul
Serves 10 as appetizer/meze

Muhammara

  • 6-7 large (about 1 kg) red bell peppers
  • 1 large (about 60g) slice wholewheat bread, torn
  • 1/2 packed cup finely ground walnuts
  • 2 tbsp tomato paste
  • 2 tbsp extra virgin olive oil and more for serving
  • 1/2 tbsp pomegranate molasses*
  • 1 clove garlic
  • 1/2 tsp fresh mint
  • 1/4 tsp ground cumin
  • 1/4 tsp ground coriander
  • 1/4 tsp hot red pepper flakes and more for serving
  • 1/2 tsp fine sea salt

*I was able to find pomegranate molasses at my local Middle Eastern shop, but it can also be found in some regular grocery stores (PA in Montreal stocks it). Otherwise, you can replace it with lemon juice (though, you won’t get that nice sweetness that pomegranate molasses adds to the dip). Note: don’t buy the stuff that’s used as a syrup to add to carbonated water; the stuff you want is thick (like traditional molasses) and also goes by the name “pomegranate concentrated juice”.

Directions

1) Preheat the oven to 400F. Wash the peppers and arange them on a large baking tray and let roast, skin-on, for about 30 min, or until the peppers puff up and start to get charred spots. Set aside to cool while you are gathering the rest of the ingredients.

Muhammara Muhammara

2) When the peppers are cool enough to handle, remove the stems along with the seeds and peel off the skins. Place the peeled red peppers in a colander and let the juices drain into a bowl below (Olga Irez suggests reserving the juice to add to soups or stews and cook your grains in. You can even freeze the juice for future use).

Muhammara

3) Place the drained red peppers and garlic in the food processor and pulse into a purée. Soak the bread slice in water, then squeeze out the liquid. Toss the wet crumb in the blender and pulse into a smooth purée. Add the rest of the ingredients and mix with a spoon until combined. Taste and adjust the seasoning, if necessary.

Muhammara

4) To serve, transfer to a wide bowl and with the back of a spoon, make a light impression in the centre of the dip. Drizzle a bit of olive oil into the centre and sprinkle with red pepper flakes. Serve with flat bread.
Note: Muhammara can be refrigerated for up to 2-3 days.

Muhammara

Share this:

  • Tweet
  • Share on Tumblr

Like this:

Like Loading...

A Good Place to Start

30 Thursday Jul 2015

Posted by julia chews the fat in Breakfast & Brunch, Snacking, Sweet Tooth, Vegetarian

≈ 3 Comments

My younger brother and I grew up in a large split-level bungalow in the suburbs outside of Montreal. It didn’t have a white picket fence, but it was flanked by tall weeping birches, big swaths of grass and a cherry tree that bore bright red fruit right around mid-July. From the time we were born, until the time we each turned eighteen, it was the one and only house we’d ever lived in – the one with the family room fireplace and the secret cedar closet disguised as a bookshelf; the one with the damp-ish basement that always gave us the creeps and the “GARDE AU CHIEN” sign on the garage door left by the previous owner (which we kept, despite never owning a dog).

A few short years after we’d flown the coop, my parents decided to sell the split-level bungalow for the same reason most empty-nesters do – too much space for too few people. It was a process that I’d been largely removed from, having just moved in with my college boyfriend at the same time that I’d started my first desk job out of university. But we did come back to the house from time to time, for dinners and birthdays and for the occasional dip in the pool. Once the house went on the market, though, it suddenly became a very different place to be in. This space that was once ours would soon belong to another family, with new sets of feet padding the floors, new laughter, new smells. It was an odd thing to consider, but it was something that would float into my thoughts with every visit, when I’d sink my toes into the grey carpet of my old bedroom, or hear the antique clock chime in the dining room with that deep, guttural bong, bong, bong – both familiar and foreboding.

The house stayed on the market for several months. I want to say that it was close to a year, but my recollection of the exact time frame is a bit fuzzy. I do remember there being a pyrite problem that was discovered late in the game, changing the terms of the sale and the balance in negotiations. I remember that it was a year in favour of buyers, not sellers. I remember that the first real estate agent was a total nightmare and that there were times when the sale of the house felt like it would be in perpetual limbo. But I also remember that, throughout the highs and lows of the house-selling process, my mother baked. And baked. And baked. Before every open house, she’d have something sweet rising in the oven – a lemon loaf, a coffee cake, a pan of blueberry muffins. Initially, I thought it was mom just being mom – the ultimate hostess – but as it tuns out, her objective was strategic. By her logic, filling the house with the warm aroma of baked goods would encourage prospective buyers to – at least subconsciously – feel at home.

It was quite the trick.

The house did eventually sell – to a young family with two kids, a boy and a girl, mirroring our own family unit of four. And while there’s no way of knowing if their choice was influenced by the scent of buttered scones or a batch of oatmeal cookies crisping up in the oven, I suspect it couldn’t have hurt.

—–

All this came to mind a couple of weeks ago, when I was staring slack-jawed at all the boxes on the floor of our new apartment, overcome by that uneasy, post-move feeling where no place feels like home. I knew that if I was going to wrap my head (and my heart) around this new space, I had to take a cue from my mother and – for lack of a better word – “trick” myself into making it feel like home. And so, one quiet evening after work, I plunked my purse onto the floor, flipped on the radio, threw on an apron, and started fiddling in the cupboard for some flour, sugar, walnuts and dried figs – the few ingredients that had made the trip from the old apartment. I also happened to have a Goliath-sized zucchini on hand, recently excavated from Sophie‘s garden; that got shredded and tossed into a bowl alongside two eggs, some yogurt and a bit of brown sugar. The batter was stirred together and scooped into a greased loaf pan, then slid into the oven, where it baked low and slow for the better part of an hour. As the apartment gradually filled with the heady scent of sugar caramelising in the oven, things started to feel a little more familiar and a little less alien. Having something ticking away in there made everything inside these four walls feel more like home. My home. Our home.

There might still be dozens of books on the dining room floor and old wine boxes filled with miscellaneous cooking gear. But we’re getting there. And the kitchen turned out to be a good place to start.

Fig Zucchini Walnut Bread

Fig Zucchini Walnut Bread (makes 1 loaf) – adapted from A Brown Table

Ingredients

    • 1 lb zucchini
    • 1 cup dried figs, chopped
    • 2 large eggs
    • 1/4 cup minus 1 tablespoon olive oil*
    • 1 teaspoon vanilla extract
    • 3/4 cup brown sugar
    • 1/4 cup plain Greek yogurt
    • 4 1/4 ounces all-purpose flour
    • 4 1/4 ounces whole wheat flour
    • 1/2 teaspoon dried ginger powder
    • 1/8 tsp nutmeg (optional)
    • 1/4 teaspoon kosher sea salt
    • 1 teaspoon baking soda
    • 1 teaspoon baking powder
    • 1/2 cup chopped walnuts
    • 6 whole figs dried, thinly sliced across their length

*1 tablespoon olive oil + a little all-purpose flour for coating the loaf pan

Directions

1) Place a wire rack in the middle of the oven and preheat to 350°F. Coat a 8 1/2″ x 4 1/2″ loaf pan with a little oil and dust with a little flour.

2) Trim the ends off the zucchini and grate them into fine shreds. Transfer the zucchini into a larger strainer lined with cheesecloth or muslin (or, my personal favourite – a Du-Rag!). Bring the ends of the cheesecloth together and squeeze the zucchini to release as much as liquid as possible. Discard the liquid (or freeze in an ice-cube tray for later use in a vegetable stock) and place the shredded zucchini in a large mixing bowl.

039 Fig Zucchini Walnut Bread

3) Add the chopped dried figs to the zucchini along with the eggs, oil, vanilla, sugar and yogurt. Mix with a wooden spoon until combined.

Fig Zucchini Walnut Bread Fig Zucchini Walnut Bread

4) In a separate bowl, whisk the flours, ginger powder, nutmeg, salt, baking soda, and baking powder. Gradually combine the flour mixture into the wet ingredients. Fold the walnuts into the batter and then transfer the batter into the prepared loaf pan. Place the thinly sliced whole figs in a single center row on top of the batter in the pan.

Fig Zucchini Walnut Bread Fig Zucchini Walnut Bread

5) Bake for about 45-50 minutes, rotating once during the baking process. To test for doneness, stick a knife in the centre – if it comes out clean (with a few crumbs), it’s done. Allow the bread to cool for 10 minutes in the pan and the run the edges of a knife around the cake. Remove and allow the bread to cool on a wire rack. Keeps for 3-4 days at room temperature.

Fig Zucchini Walnut BreadFig Zucchini Walnut Bread

Share this:

  • Tweet
  • Share on Tumblr

Like this:

Like Loading...

Breaking Bread

31 Sunday May 2015

Posted by julia chews the fat in Breakfast & Brunch, Cooking For Your Peeps, Lunch & Dinner, Snacking, The Basics, Vegetarian

≈ 5 Comments

Homemade bread.

I’m a wimp when it’s come to those two words. As much as I like cooking, I’ve carefully avoided breadmaking for years, mostly for fear that it’s a labour-intensive process requiring special types of flour, fancy fresh yeast, elaborate kneading and expensive pieces of machinery, like electric bread makers and large mixers with paddle attachments. And that would just be to get the starter dough going. After that, there’d the issue of rising: Does it have to rise in a low heat oven? What if I don’t have a bread-proof setting on my oven? What if I kill the yeast? How will I know if I’ve killed the yeast? And so on and so forth.

Despite all this, I somehow own three cookbooks on bread – including Bernard Clayton’s New Complete Book of Breads, Soups and Stews, a hefty tome that has sat on the shelf undisturbed, for four whole winters now. I have an entire Pinterest board dedicated to bread, a place where I’ve been quietly stockpiling all sorts of recipes for leavened dough – from densely-flavoured sourdough to crackly baguette to Japanese milk toast – none of which I’ve actually made. But, despite my trepidation, I’m clearly interested in bread – the traditions, the techniques, the delicate alchemy that allows a sticky mass to transform into something crispy and chewy and ethereally light, all at once. It’s a magical beast. The unicorn of food. I’ve just been too timid to get close to it.

Then one day, out of nowhere, I decided to just effing do it already. It happened when I was making lunch with my mom over a long weekend this May:

Me: So, what if I made bread today?
Mom: Yeah, sure. If you want something easy, you should try that no-knead one Mark Bitterman did for the New York Times.
Me: You mean Mark Bittman?
Mom: Yeah, yeah…him. Anyways, it’s so easy. Seriously. There’s a video too. (she finds me the video online). Here, watch it. It’s all there. It’s super simple, you’ll see.

This isn’t the first time I’ve heard of this no-knead recipe. My mom’s been a big proponent of it for years. It’s a version of the old European clay-pot method, modernised by baker Jim Lahey, of Sullivan Street Bakery in Manhattan, and then popularised by Mark Bittman when he did a piece on it for The New York Times. In the video, Lahey walks us through his recipe, step by step, starting with the introductory promise that it’s so incredibly easy, “even a six year-old” (“or a four-year old!”) can make it.

With that bold endorsement in mind, I figured that if any recipe was going to help me cross the threshold into breadmaking, this would be it. The simplicity of Lahey’s recipe is what ultimately sold me. You don’t need to muck around with special bread flour or proofing or extraneous kneading, nor do you need an expensive mixer or a professional oven. All you need is –

flour
yeast
salt
water
your two hands

That, and a screaming-hot cast-iron Dutch oven. The cast-iron is an important part of the alchemy in this bread recipe, creating just the right amount of steam to get an airy interior and a crisp exterior. The idea is you set the pot in a 500ºF oven until it reaches temp, then toss in your dough (cover on for a bit, then cover off) and bake on high heat until the bread becomes crackly and lightly caramelised on the outside. Cast-iron pots retain heat extremely well, mimicking the qualities of a stone oven and a steam-injected oven at the same time. So, whether you’re a six year-old, or a four year-old (or even a monkey), the cast-iron pot will help your first attempt at bread look like this:

baked miche

It’s seriously one of the easiest things you’ll ever make. And when you’re cracking into that first piece of freshly baked bread, straight from your oven, you’ll be so happy you made a go of it.

Happy baking, friendlies x

—–

Notes on the recipe:

  • the dough needs at least 12 hours for the first rise, then another 2 hours for the second rise. Start the night before and let it rise overnight. The longer you let the dough rise (min. 12 hours, max 24 hours), the more flavourful it will become.
  • when my mom discovered this recipe, she quickly starting making her own adaptations, one of which resulted in a drop-dead gorgeous focaccia recipe. All you need to is add a bit of olive oil to the dough and stretch it out on a pizza pan for baking. (I’ve included her recipe for a cherry tomato version below). If you decide to make both the bread and the focaccia, just double the dough recipe.

Note on Dutch ovens: if you don’t already have one, it’s an insanely useful kitchen tool have. They’re especially practical in the winter – to make soups, stews, curries – but are a must-have for this bread recipe. If you’re worried about the financial commitment, remember that you don’t need to buy the top-of-the-line models (the ones that can go for upwards of $350 a pop); I got a Lagostina version on sale at Canadian Tire for $90 and it works like a charm. They usually come with a 10 or 25-year (and sometimes, lifetime) guarantee, so they’re in it for the long haul. Just make sure that you get one with a 500ºF-resistant metal knob on the cover so that you can make your bread (the ones that come with a hard plastic knob are no bueno).

Jim Lahey’s No-knead Bread – makes one white miche

Ingredients

  • 3 cups all-purpose flour
  • ¼ tsp dry yeast (like Fleischmann’s)
  • 1 ½ tsp salt
  • 1 ½ cup water

Crucial kitchen tool: cast-iron Dutch oven

DIRECTIONS

STEP 1 – RISING

1) In a mixing bowl combine the flour, yeast and salt and blend with a whisk.

2) Pour in 1 1/2 cup of water and mix with a wooden spoon. Scrape any excess flour from the bottom and sides of the bowl, making sure the ingredients are well incorporated and form into a ball. The dough will have a stringy texture.

3) Place a piece of plastic wrap on the bowl to avoid the dough from drying out. Allow to rise in a warm dry, and draft free place for at least 12 hours and up to 24 hours. (I left mine at room-temperature on the counter-top overnight.)


STEP 2 – FOLDING & SECOND RISING

1) Dust a large piece of parchment paper, measuring about 24 inches with flour to prevent the dough from sticking during its second rising. Scrape the risen dough onto the floured parchment paper.

2) Sprinkle some flour on the dough and on your hand to prevent sticking. Lightly pat down the dough with your hands to form a piece measuring approximately 10 x 10 inches.

3) Fold one side to the centre; then fold the other side to meet the edge of the first side, like a book (see images below). Take the top edge and fold to the centre; take the bottom edge and fold to meet the top edge.

4) Turn the dough and place the folded side of the dough on the parchment paper and dust with flour to prevent sticking. Loosely wrap the dough in the parchment paper and place on a baking sheet. Cover with a tea towel. Transfer to a warm and dry place and allow to rise a second time (2 hours).


STEP 3 – BAKING

1) Place the cast iron Dutch oven with its cover, on the second rack from the bottom of the oven. Preheat the oven to 500ºF.  Dust the smooth side of the risen dough with flour to prevent it from sticking to the bottom while baking.

2) Once the oven reaches the required temperature.  Remove the pot from the oven and take the cover off. Place the dough, folded side up into the pot and cover. Bake for 30 minutes at 500ºF.

3) Remove the cover, reduce the heat to 450º F and bake for an additional 15-30 minutes until the crust becomes golden brown. To check if the bread is cooked, remove the loaf from the pot and tap the bottom with a knife – if it sounds hollow, the bread should be done. Cool on a baking rack.

baked miche

baked miche - detail

baked miche

baked miche

baked miche - section

—–

Tomato Focaccia

Mom’s Cherry Tomato Focaccia – makes one 12″ pie

  • 2 cups cherry tomatoes, cut in half
  • 1 garlic clove, finely minced
  • 1 Tbsp dried oregano
  • 3 Tbsp extra virgin olive oil (plus a little more for the topping)
  • 2 Tbsp grated Parmigiano Reggiano
  • 1/4 cup sliced bocconcini or cubed mozzarella
  • salt flakes and freshly ground pepper (to taste)

1) Follow the directions for bread in the recipe above, adding 3 Tbsp of olive oil to the dough when you add the water.

2) After the first rise (see directions above), transfer the dough to a greased and floured 12″ pizza tray. Dust the dough lightly with flour, and with your hands spread out to the edges of the pizza pan. Place in a draft-free place to allow to rise a second time (2 hours).


3) While the dough is rising, prepare the topping by adding the prepared tomatoes in a bowl and toss with a drizzle of olive oil, the Parmigiano Reggiano, bocconcini (or mozzarella), minced garlic, and oregano. Season with salt and pepper.

Tomato Focaccia

4) Once the dough has risen a second time (after 2 hours), preheat the oven to 500º F. Spread the tomato mixture gently over the focaccia dough and bake at 500º F for 15-20 minutes.

Tomato Focaccia

Tomato Focaccia - detail

Tomato Focaccia

Tomato Focaccia - detail

Share this:

  • Tweet
  • Share on Tumblr

Like this:

Like Loading...

Olive Oil Carrot Cake

19 Sunday Apr 2015

Posted by julia chews the fat in Breakfast & Brunch, Snacking, Sweet Tooth

≈ 1 Comment

Today, dear friends, I’m offering you cake.

Does it matter that it came from the (very boring) utilitarian impulse to rid my fridge of a 5lb bag of carrots? Or that it burnt a little along the edges because I forgot to set the timer? Or that the carrots strewn decoratively over the top came out a bit crisper than expected? No, none of the this matters. Because, it is, after all, still cake.

Glorious, glorious cake.

Olive Oil Carrot Bread

Or at least that’s what I’m calling it, even if it’s worlds apart from the butter-and-frosting YOLO carrot cake I made a few weeks ago (if that thing were a person, it’d be the first one to finish the keg at the party and do a cannonball in the deep end of the pool.)

No, this cake, this loaf, marches to the beat of a different drum.

The original recipe refers to it a “bread”, but I think it feels and tastes a lot closer to a pound cake, the only real difference being that you swap the pound of butter (hence, POUND cake) for one cup of olive oil. (cardiologists, rejoice.) To be clear, though, this isn’t exactly health-cake either. At least not in the strictest sense of the word. It’s still got white flour and sugar (one and a quarter cups to be precise!) and all that good stuff. Which brings me back to the reason I’m calling it “cake”. It’s got a very moist crumb – thanks to the olive oil – and crisp edges, making it perfect for dunking into coffee or tea. The fact that it’s jam-packed with strands of fresh carrot leads me to believe that it’s also perfectly acceptable to call it breakfast cake.  (If you’re not convinced, just leave half a loaf in the copy room at work. By 9:30am, that thing will be demolished. Ta da! Breakfast for all!)

Olive Oil Carrot Cake – slightly adapted from Brooklyn Supper

  • 2 cups all-purpose flour
  • 1 tsp baking powder
  • ½ tsp baking soda
  • 1 tsp sea salt
  • ½ tsp freshly grated nutmeg
  • ½ tsp ground ginger
  • 3 eggs
  • 1 ¼ cups sugar
  • 2 cups grated carrots
  • 1 Tbsp lemon zest
  • 1 tsp vanilla extract
  • 1 cup extra virgin olive oil

1) Preheat oven to 350°F. Liberally butter a 9 x 5 inch loaf pan.

2) In a small bowl, combine the flour, baking powder and soda, salt, and spices.

3) In a large bowl, beat eggs and sugar on low speed (or with a whisk). Add grated carrots, zest, and vanilla. Fold in half the flour, all of the olive oil, and then the remaining flour. Mix just until everything is well combined.

4) Spoon into prepared loaf pan and bake for 40 minutes. Pull bread from oven and carefully lay 3 or 4 candied carrot halves across the top; spoon 2 tablespoons of the syrup over the top. Put back into the oven, and bake 20 – 30 minutes more or until a toothpick inserted in the center comes out with just a few crumbs attached.

5) Cool for 20 minutes, and then flip out onto a platter or rack to cool completely.

For the Candied Carrots (optional)

  • 4 small carrots
  • 1 cup sugar
  • 1 cup water

1) Trim the tops of the carrots, then peel and halve them. (if you’re using pretty, market-fresh carrots for this, you can leave a little spray of greens at the top.)

2) In a wide saucepan, heat the sugar and water over medium heat. When sugar has dissolved, add the carrots and turn heat down so that mixture bubbles ever so gently. Cook, swirling pan occasionally, for 20 minutes or until thinnest part of carrot is translucent.

Note: the carrot bread will keep for a few days, well-wrapped at room temperature.

Olive Oil Carrot Bread, section

Share this:

  • Tweet
  • Share on Tumblr

Like this:

Like Loading...
← Older posts

Facebook

Facebook

Instagram

No Instagram images were found.

Recent Posts

  • Layers and Rows
  • Finding Buoyancy
  • February
  • Wednesday
  • Cross My Heart, Miso

Archives

  • May 2017
  • April 2017
  • February 2017
  • December 2016
  • November 2016
  • September 2016
  • August 2016
  • July 2016
  • June 2016
  • May 2016
  • April 2016
  • March 2016
  • February 2016
  • January 2016
  • December 2015
  • November 2015
  • October 2015
  • September 2015
  • August 2015
  • July 2015
  • June 2015
  • May 2015
  • April 2015
  • March 2015
  • February 2015
  • January 2015
  • December 2014
  • November 2014
  • October 2014
  • September 2014
  • August 2014
  • July 2014
  • June 2014
  • May 2014
  • April 2014
  • March 2014
  • February 2014
  • January 2014
  • December 2013
  • October 2013
  • September 2013
  • August 2013
  • July 2013
  • June 2013
  • May 2013
  • April 2013
  • March 2013
  • February 2013
  • January 2013
  • December 2012
  • November 2012
  • October 2012
  • September 2012
  • August 2012
  • July 2012
  • June 2012
  • May 2012
  • April 2012
  • March 2012
  • February 2012

Categories

  • Beverage
  • Breakfast & Brunch
  • Condiments
  • Cooking For Your Peeps
  • Cooking Solo
  • Cooking with Nonna
  • Food Away From Home
  • Food Writing
  • Holidays
  • Intro
  • Lunch & Dinner
  • Snacking
  • Soups
  • Sweet Tooth
  • The Basics
  • Vegetarian

Enter your email address to follow this blog and receive notifications of new posts by email.

Join 80 other followers

Blog at WordPress.com.

  • Follow Following
    • julia chews the fat
    • Join 80 other followers
    • Already have a WordPress.com account? Log in now.
    • julia chews the fat
    • Customize
    • Follow Following
    • Sign up
    • Log in
    • Report this content
    • View site in Reader
    • Manage subscriptions
    • Collapse this bar
 

Loading Comments...
 

    %d bloggers like this: