• Home
  • About

julia chews the fat

julia chews the fat

Category Archives: Snacking

In times like these

04 Sunday Jan 2015

Posted by julia chews the fat in Holidays, Snacking, Vegetarian

≈ 2 Comments

I never thought I’d say it, but I’m glad December’s over. Or, to be even more to the point, I’m glad Christmas is over. It’s really weird seeing those words written down; I’m one of those kooks who starts buying brown kraft paper and earmarking Christmas cookie recipes as early as October. But this year, our family got handed a bit of a raw deal, starting with an emergency hospitalisation that took its toll on everyone – sleepless nights, worry, influenza, laryngitis, day-long headaches, back pain, more worry, endless commutes to the hospital, home and back. (Amid all this, I was in Montreal, then in Kingston, then in Montreal again, baiting and trapping mice in my apartment in between.) Almost every single person in my family was sick at some point, looking and feeling like death warmed over for the better part of three weeks. Having somehow dodged the illness bullet, I tried my best to pick up some of the slack – grocery shopping, cooking, cleaning, laundering. The day-to-day stuff that hangs heavy unless you’re in decent shape. I put together a small Christmas Eve dinner and a New Year’s Eve/Dad’s birthday dinner on the 31st. I made cookie dough. I played Burl Ives. I tried to make Christmas feel like Christmas. But, really, it all just felt discombobulated, lacklustre, weird. Weird having someone you love in the hospital on December 23rd, not knowing if or when they’d get out. Weird seeing your folks run around like chickens with their heads cut off when they should be sitting on the couch, drinking coffee and eating spice cookies. Weird not popping the New Year’s Eve champagne, or making stollen with dad or doing any of the other requisite holiday baking with mom.

Given that everyone was so exhausted that all they could think about was their next nap, it was hard to muster the enthusiasm to make food and eat it. But, perhaps counter-intuitively, I cooked. And cooked. And then cooked some more. Because when everything around me feels chaotic and unhinged, I gravitate towards the kitchen. It gives me a sense of purpose, of focus, a project that can take my mind off things and make me feel constructive – be it slicing onions or rolling dough into symmetrical balls. There’s something meditative about simple tasks in the kitchen like that. Even if no one really had much of an appetite, I felt that keeping something simmering on the stove or baking in the oven was a way to calm the storm and regain a semblance of normalcy, of home, of comfort. It’s my way of trying to be productive and helpful when the people I care about are out of steam; like a lot of people who like to cook, it’s my way of loving.

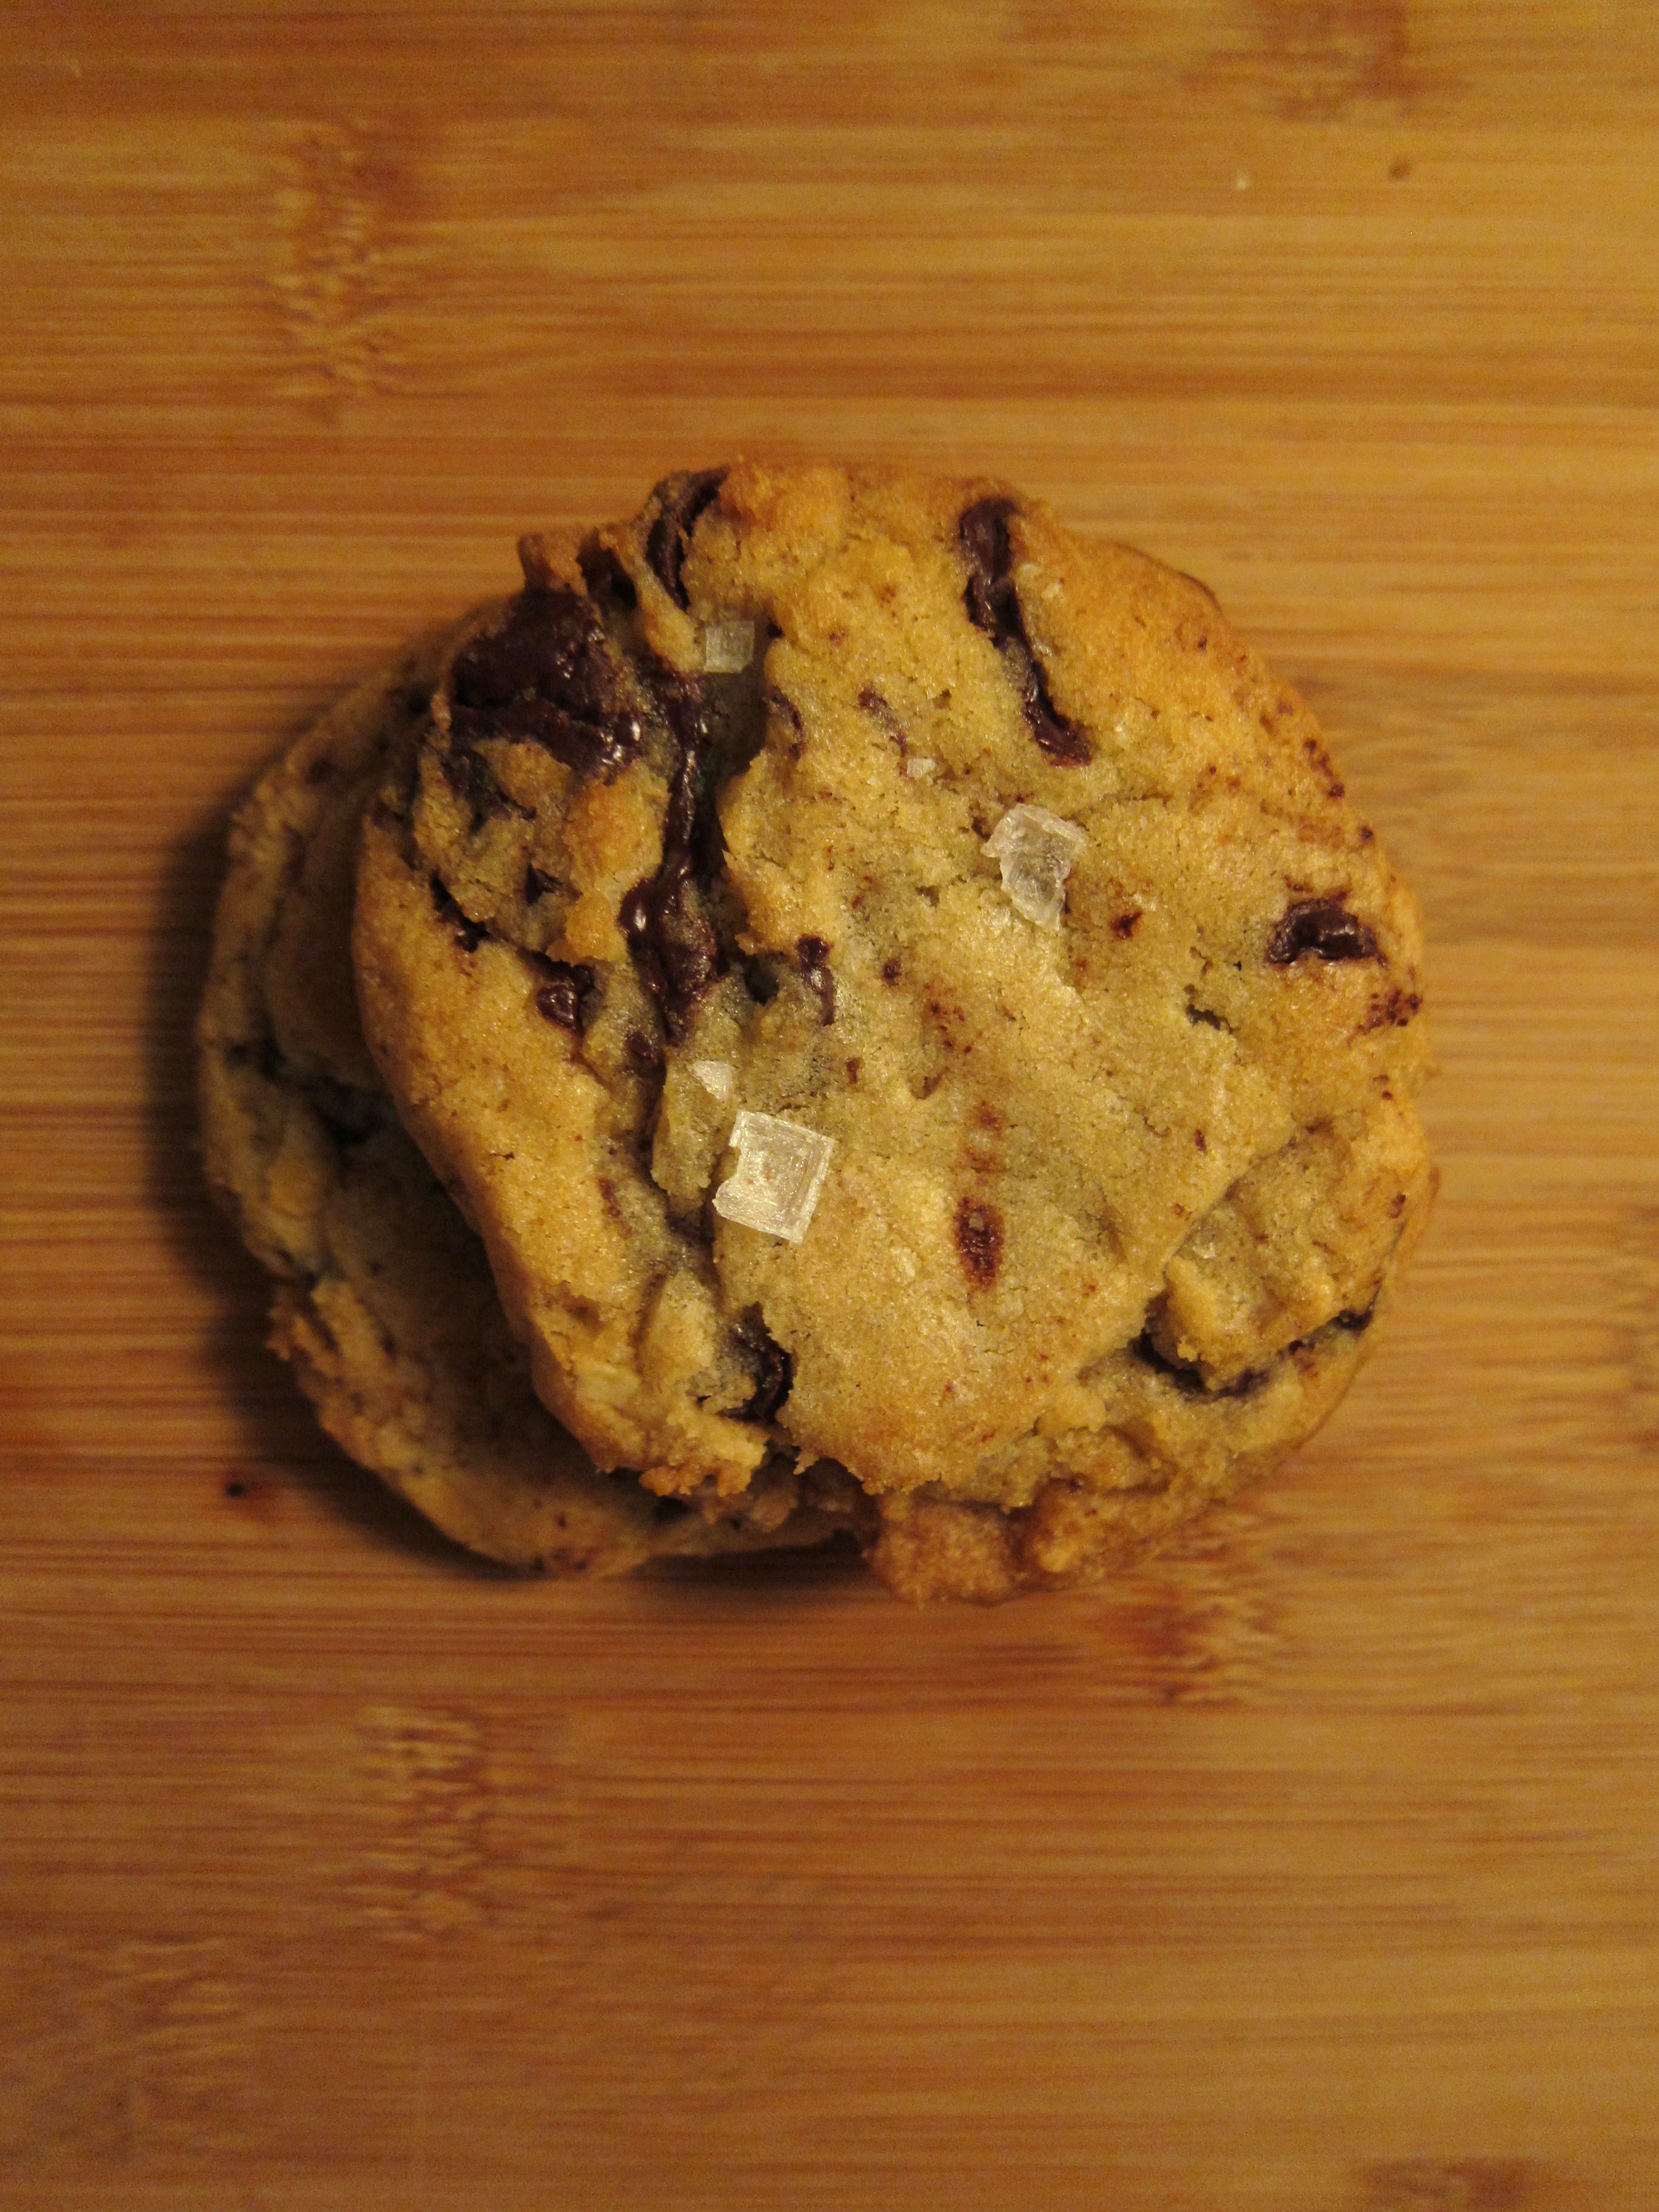
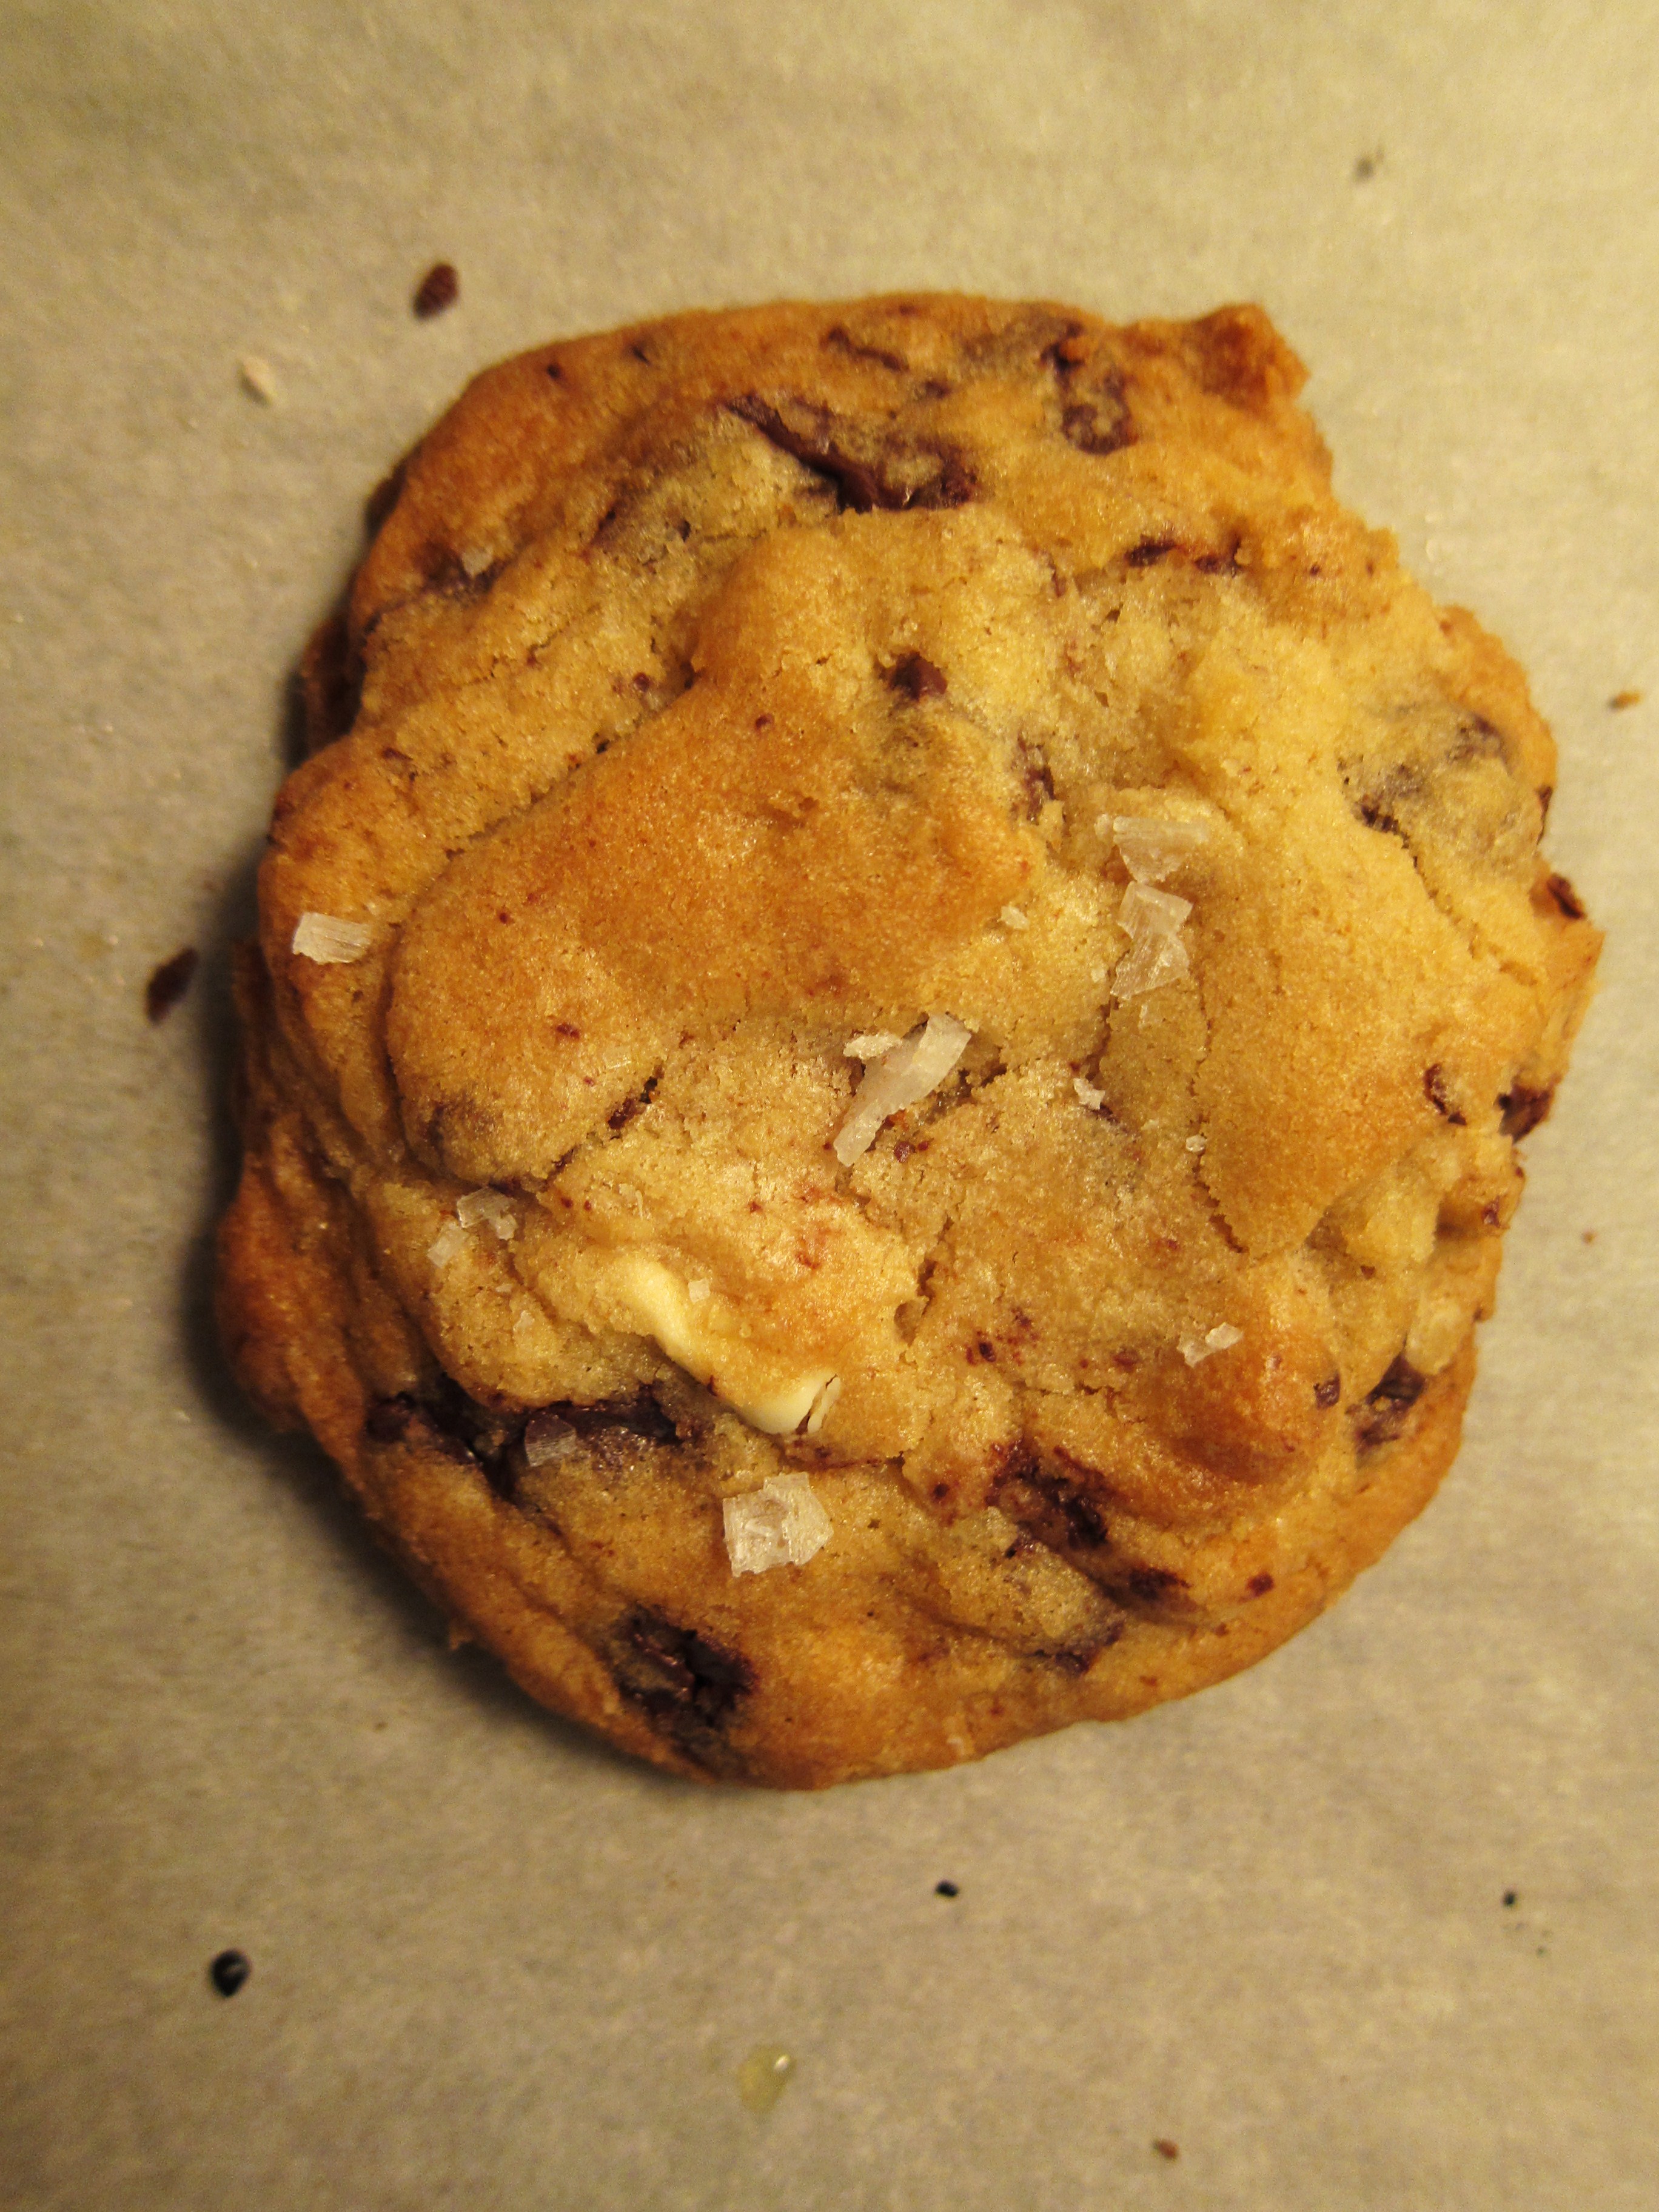
And so, over Christmas, I kept busy in the kitchen – I made those ginger-molasses cookies, a pot of minestrone, tofu bowls, the vegetarian version of this lasagna, garlic scrambled eggs, two pumpkin pies (which were a disaster, but nevermind), orange zest cranberry sauce, Anthony Bourdain’s porc au lait and hasselback potatoes, a cranberry-ginger upside-down cake, lemon roast chicken and parsnip purée, leek soup and sandwiches, chicken pot pie, tomato jam, and a bunch of salads for when everyone had reached their point of saturation with meat and starch.

With the last couple of days before heading back to work, I’ve been using the post-holiday down time to prep for the weeks to come. (which, looking at that freezing rain hammering down out there, turns out was the right decision.) Part of that prep has been to make stuff that can be tossed in the freezer for busy nights – tomato sauce, eggplant curry, fennel soup – as well as things that are good candidates for work-day snacks.

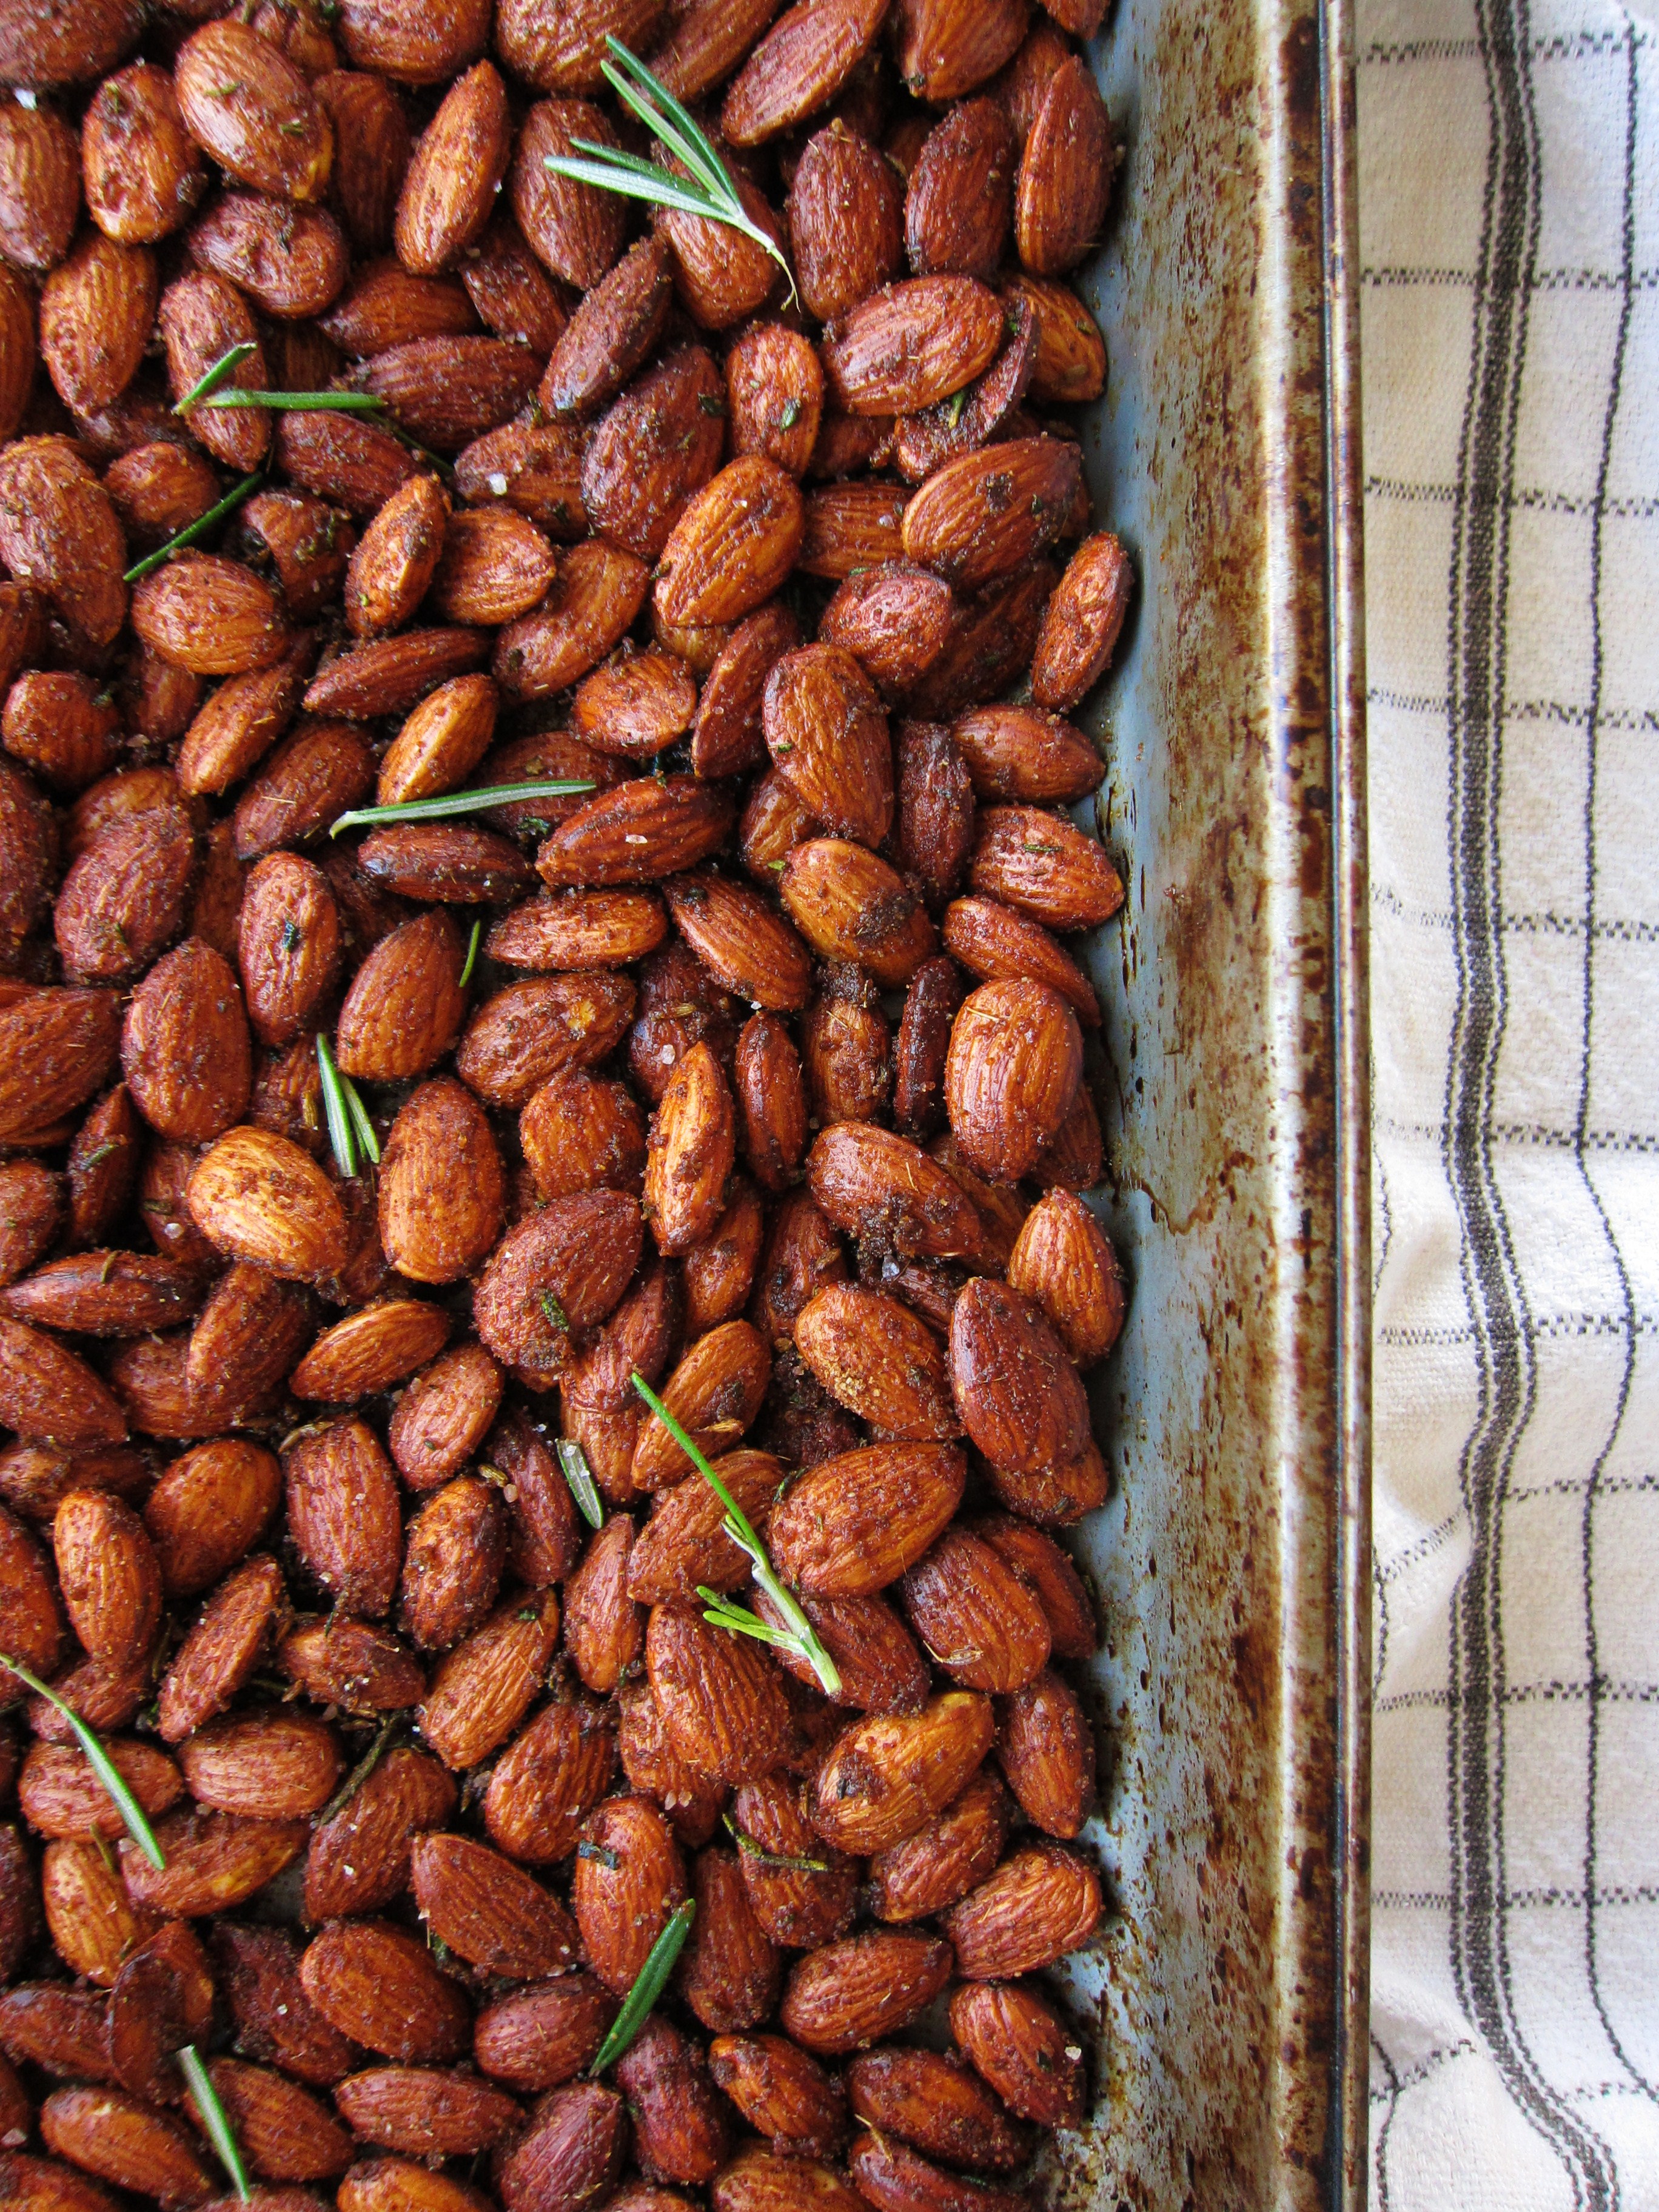
Which brings me to almond rosemary crisps.

I’ve had them bookmarked for a while now, but having never got a chance to make them, they ended up in my mañana, mañana pile (I suspect you have one too?). But then, a couple of days ago, I dug up the recipe after seeing the pile of dried fruit and nuts – the ones that were meant for holiday baking – languishing on the kitchen counter.

And that, dear friends, was the beginning of the end, because now I can’t stop stuffing my face with them.

Four days into January and they’ve quickly become my favourite thing of 2015. They’re earthy and salty and sweet, and the currants sort of caramelise in the oven, becoming a nice and chewy counterpart to the cracker’s crunch. They’re wispy and delicate and have a Scandinavian vibe about them, in that elegant, (but rustic), delicious (but healthy) kind of way. They’re super simple, but really, really good. And with cheese? Omagad.

I encourage you to make them. No, I implore you to make them. Now. And all through 2015.

—–

On a final note: when it’s all said and done, I do realise how lucky we were to have those short bursts of time together as a family. I’m grateful for playing Tombola on Christmas Eve with grandma, for Frandi’s German mulled wine, for mom’s perfect Christmas tree, for the Scott and Bailey marathon with my ragazzo, for being able to stay in pyjamas all day, for Christmas morning waffles, and for Uncle Pete and Aunt Barb’s incredible turkey dinner. None of us might’ve been in the best shape, but we still managed to pull it together. Sometimes the shake up helps you realise how lucky you actually are.

Thanks for checking in, dear readers. I am, as always, grateful to have you in my life. Here’s to high-jacked Christmases, recovery, love, family, friends and, last but not least, food. Happy 2015 to you and yours. x

Baked crackers - detail

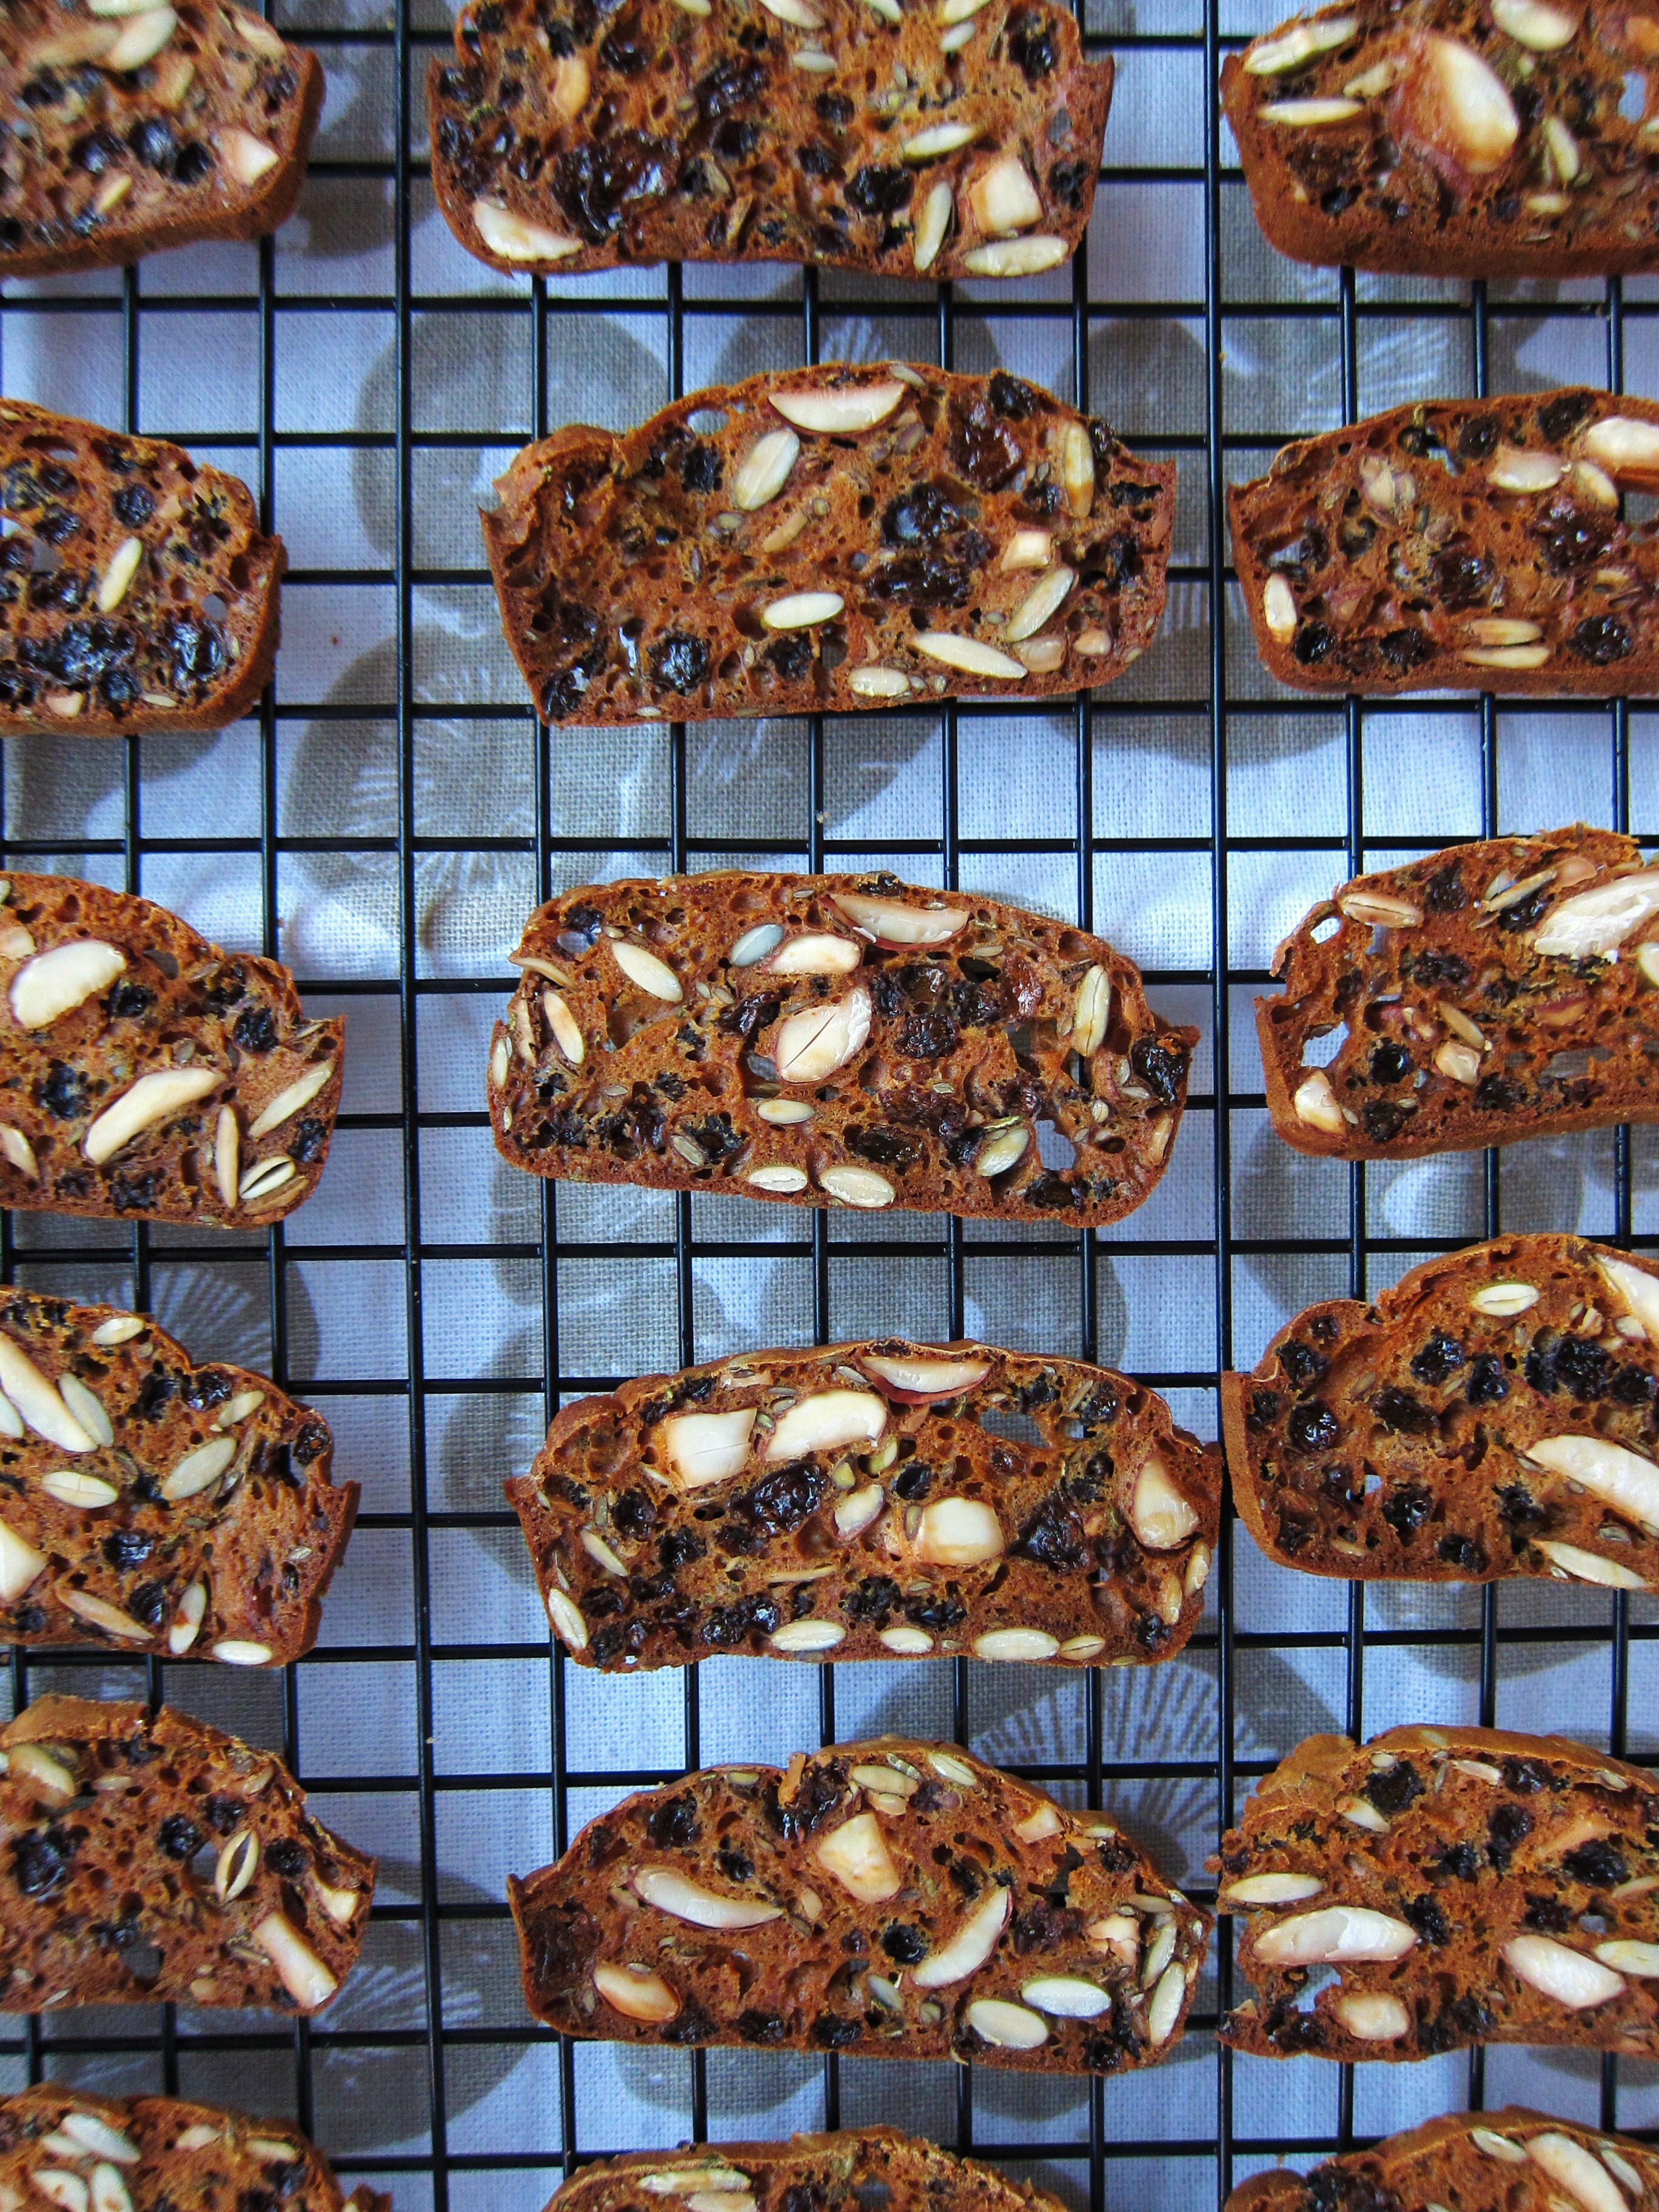
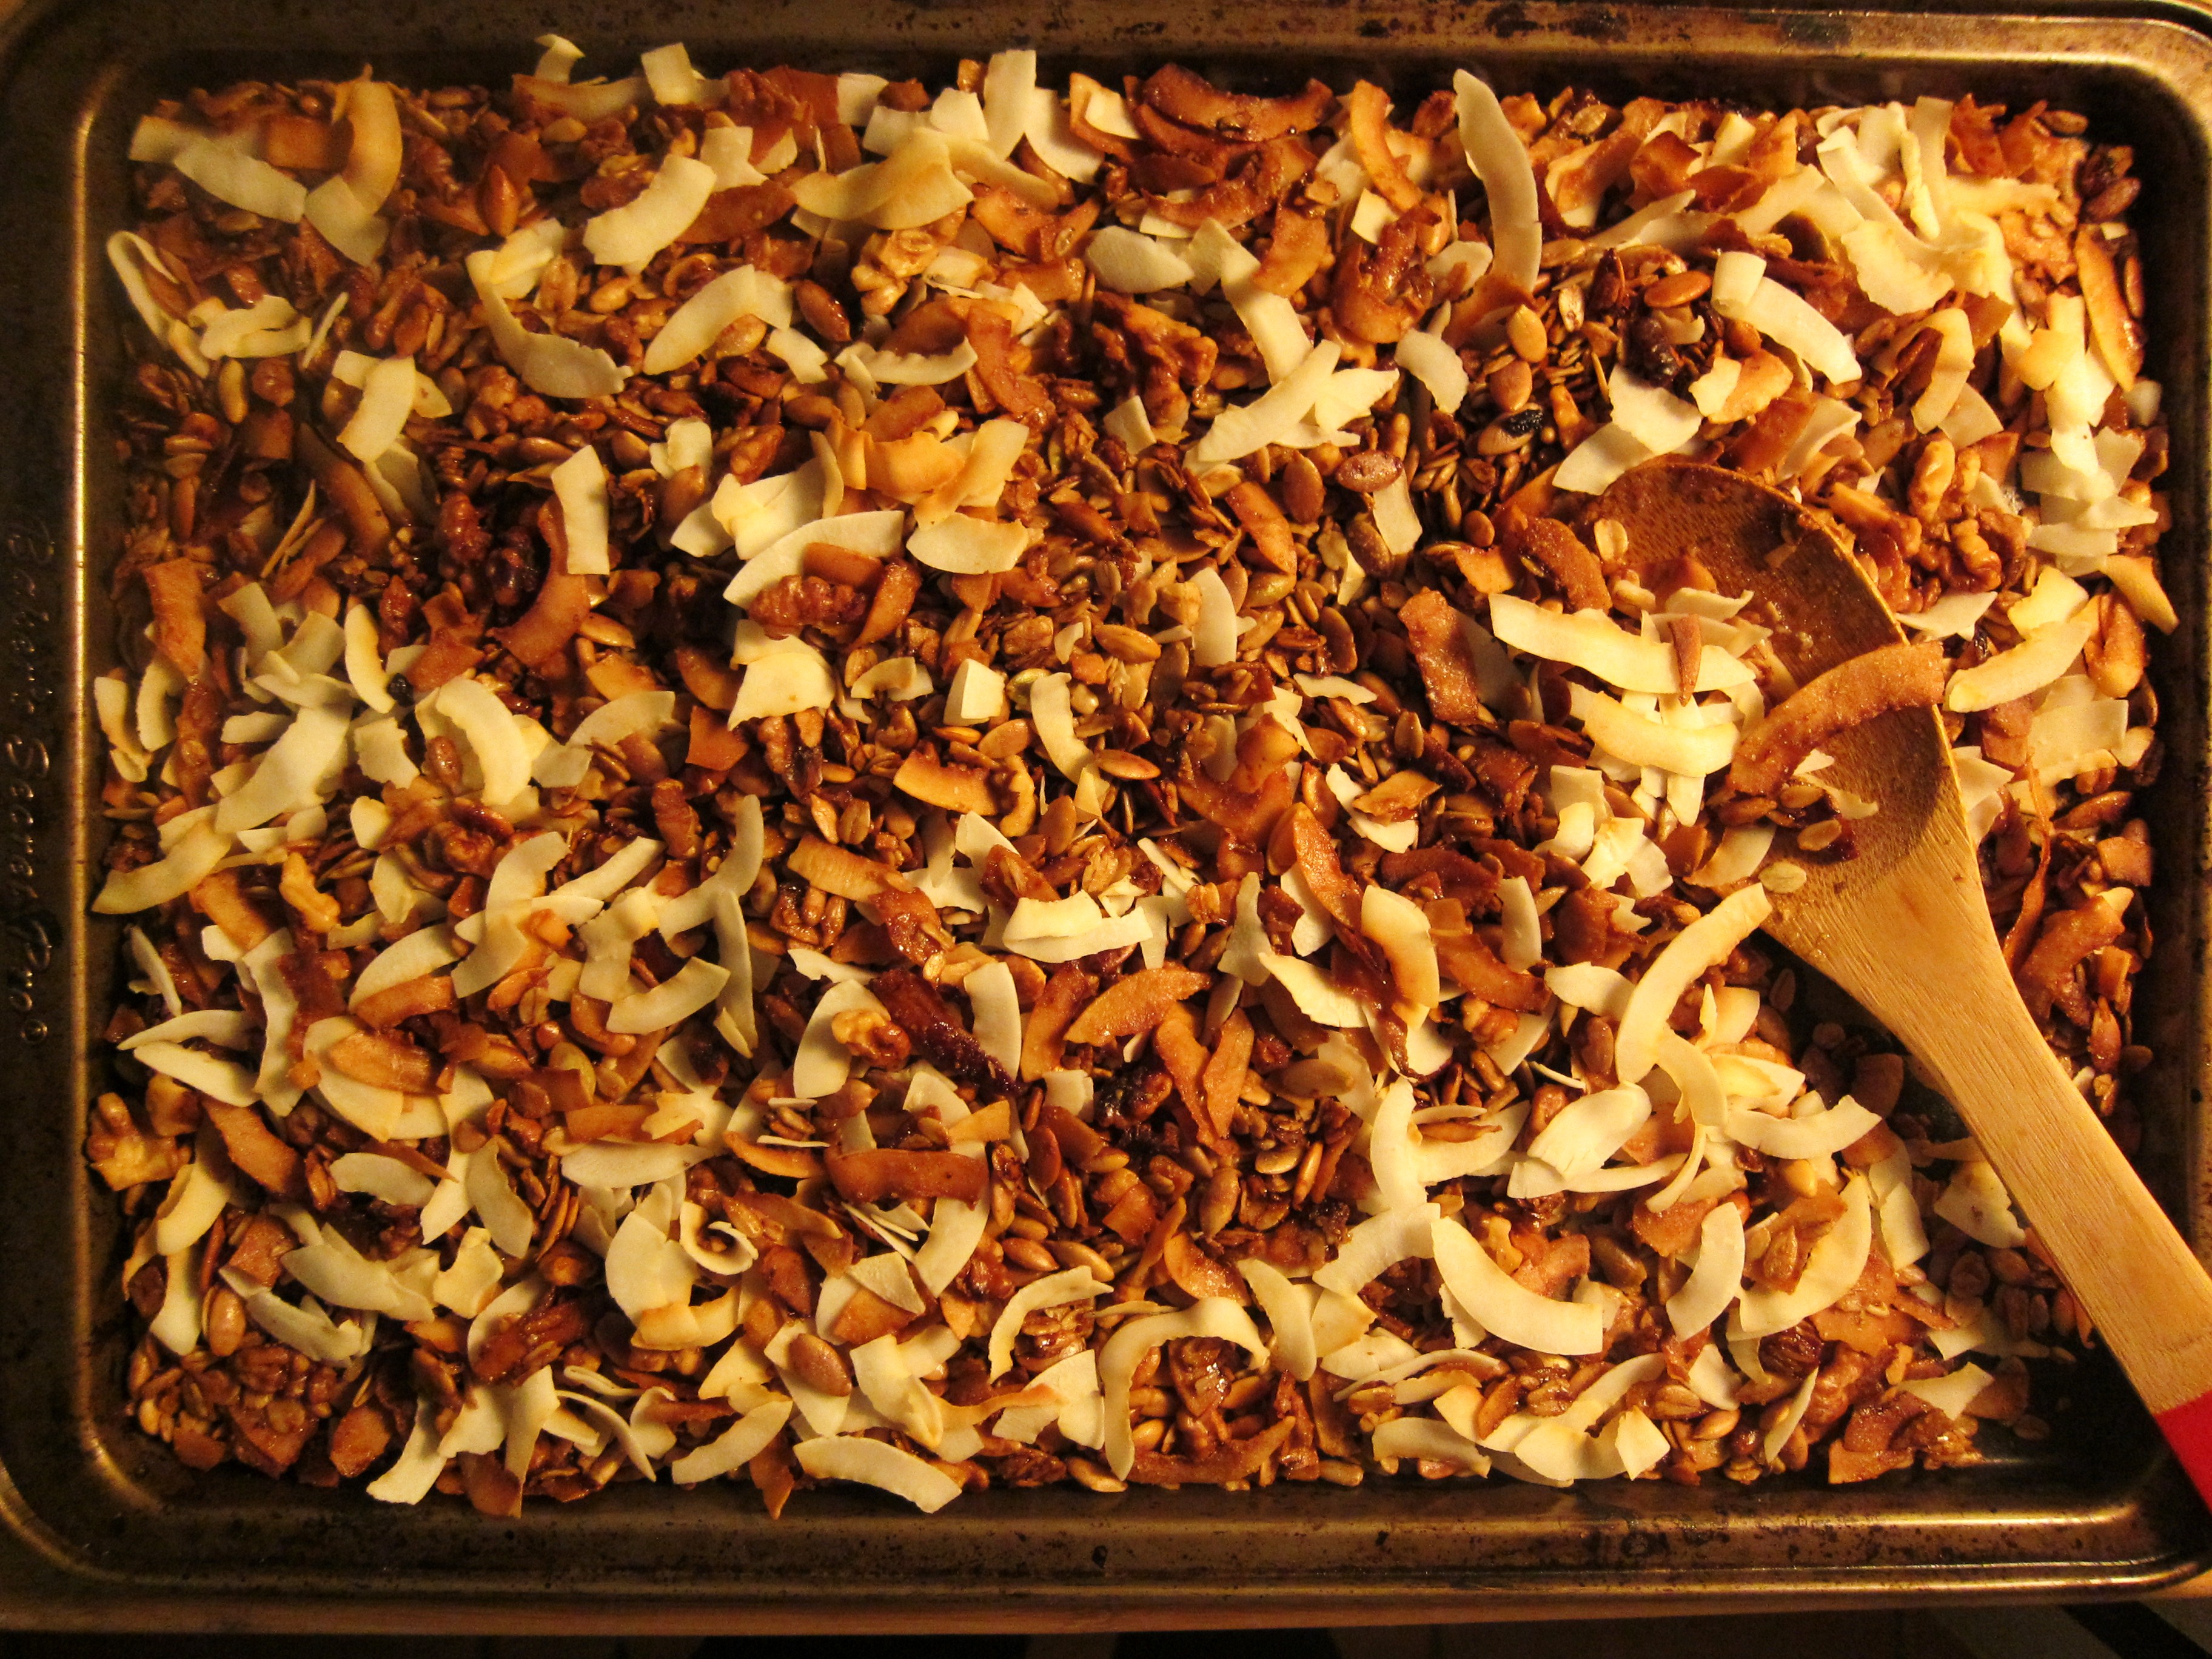
By the way – if you’re worried that making crackers is fussy work, it’s really not. The process is pretty straightforward – combine the wet and dry ingredients, pour into a baking tin, bake, chill, slice, bake again. The end result makes you wonder why you’ve never made crackers before. (and why the heck you’ve spent so much money on Raincoast Crisps.)

Almond Rosemary Crisps (makes about 60) – adapted from Fig and Honey

  • 1 cup plain flour
  • 1 tsp baking soda
  • 1/2 tsp salt
  • 1 cup unsweetened almond milk
  • 1/8 cup brown sugar
  • 1/8 cup honey
  • 1/2 cup currants, soaked in warm water till softened and drained
  • 1/4 cup raw almonds, halved
  • 1/4 cup pumpkin seeds
  • 1/8 cup whole flax seeds
  • 1 tbsp rosemary, chopped

Additional notes:
– the recipe can easily we doubled or tripled (which might be a good idea. They disappear at the speed of light)
– feel free to switch it up: sesame seeds and anise seeds are good alternatives to the flax seeds; raisins are a good replacement for the currants

Directions

Preheat oven to 350°F. Grease 2 mini-loaf tins with a light oil (sunflower, grapeseed or coconut oil)

In a medium bowl, combine the flour, baking soda and salt. Make a well in the centre and add in the almond milk, brown sugar and honey. Fold through until all the flour is incorporated into the liquid. Next add in all of the fruit, nuts, seeds and rosemary and fold until just evenly distributed. Pour batter into the mini-loaf tins and place in the oven.

Loaf batter

Bake for about 25 minutes until the tops are golden brown and a toothpick comes out clean.

Par-baked loaf

Transfer to a cooling rack. Once cooled, transfer loaves to the freezer and leave for about 1 hour.

After the loaves have chilled, preheat the oven to 275°F. Remove the loaves from the freezer and slice as thinly as possible, with a sharp chef’s knife (works better than a serrated knife).

Par-baked crackers

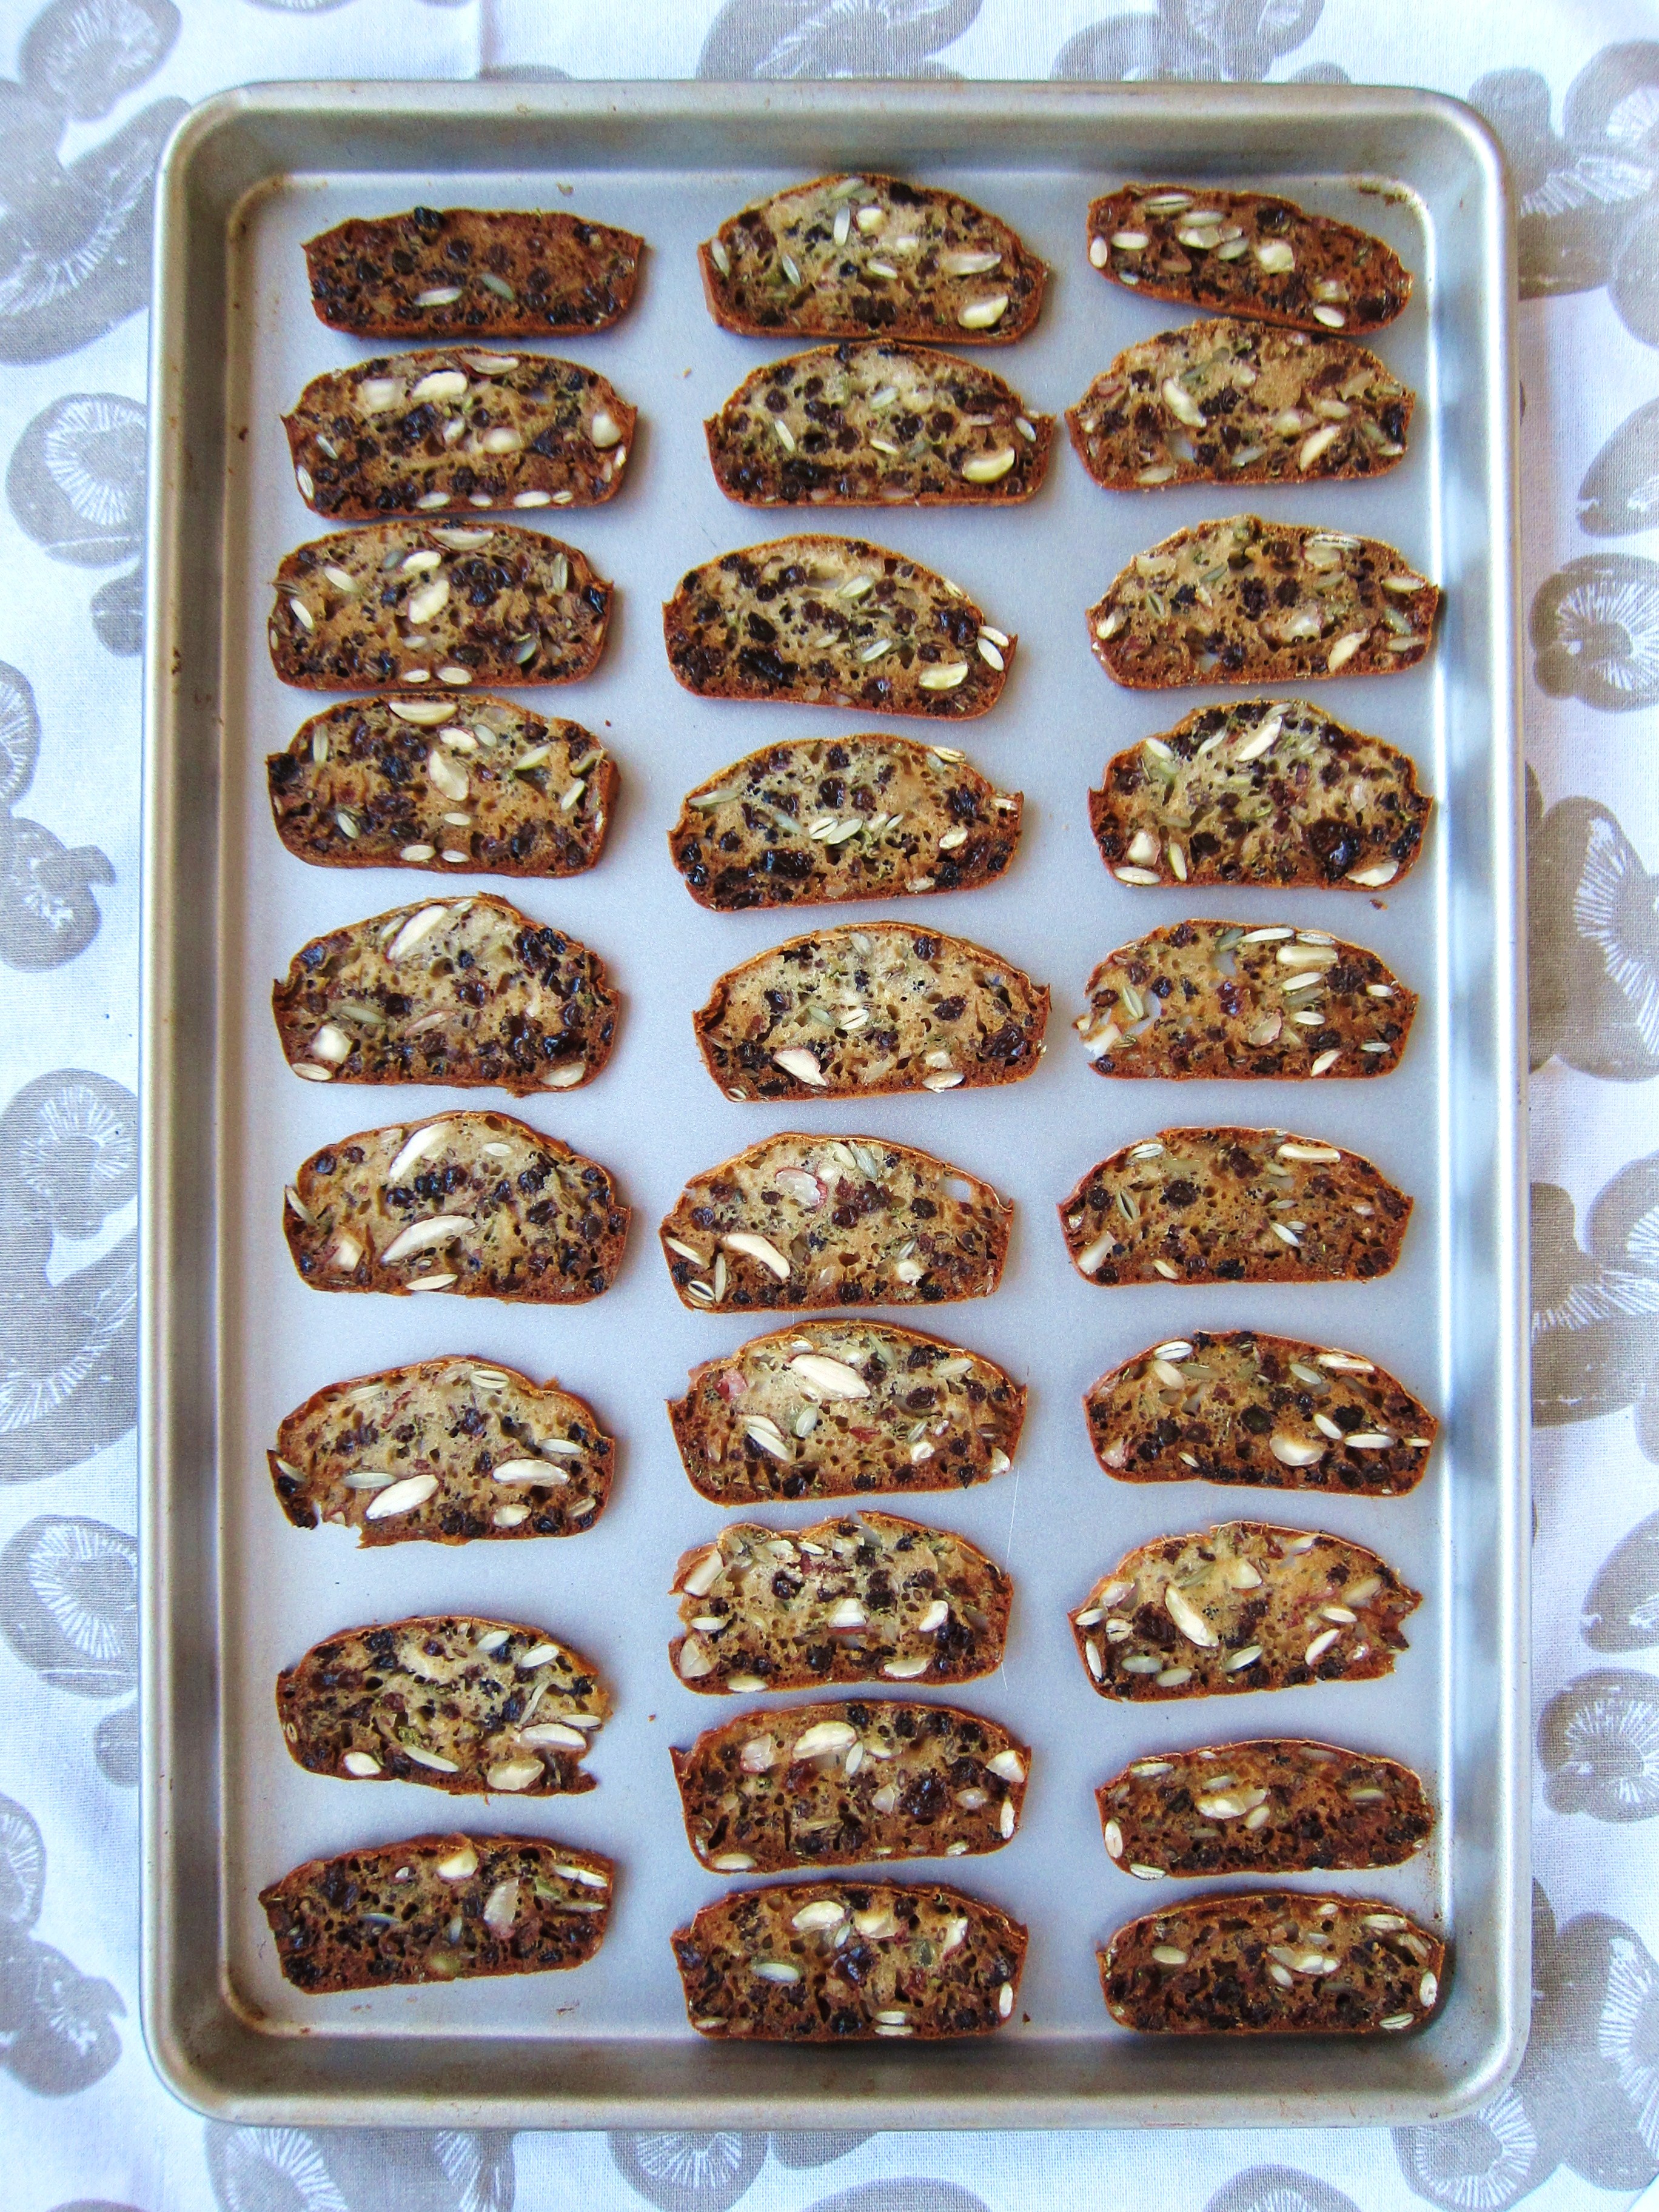
Place the slices in a single layer on a baking sheet and bake in the oven for a further 25-30 minutes until crisp and golden brown, flipping over once halfway.

Baked crackers

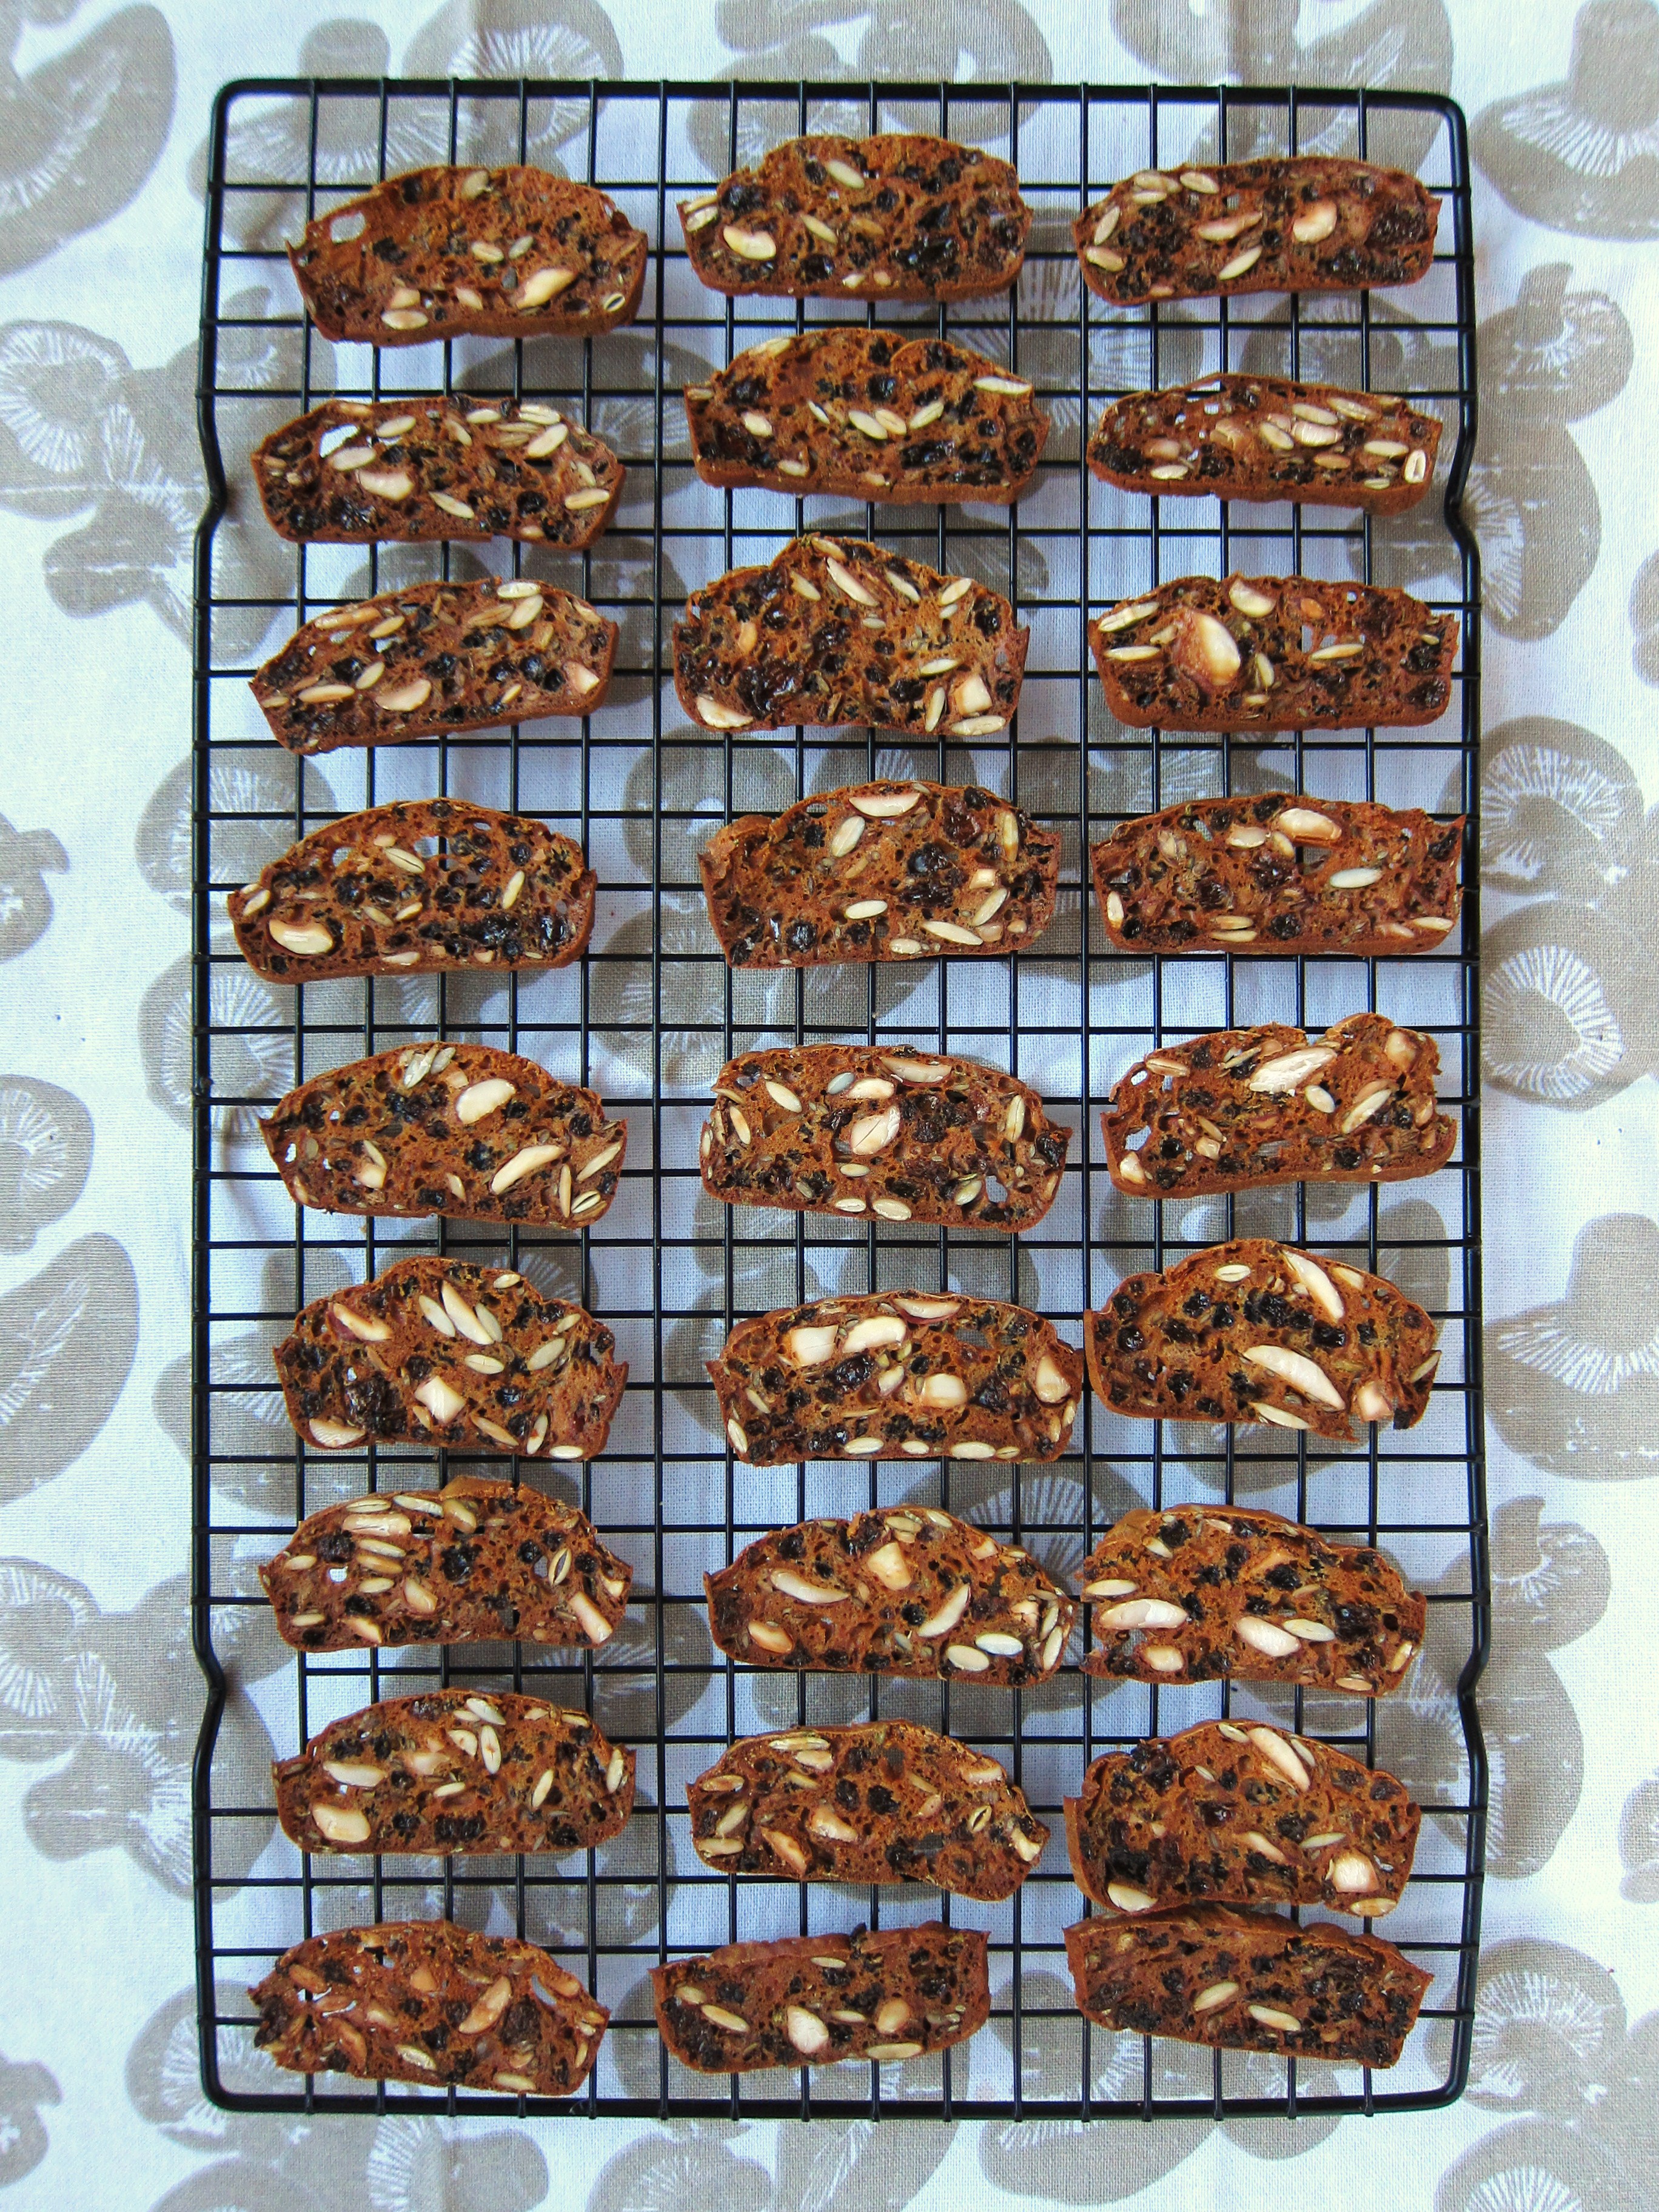
Once cooled, the crackers can be stored in an airtight tin. They can be eaten as-is, but pair up really well with cheese – anything from sharp cheddar to Gruyère to chèvre and beyond.

Crackers with cheese

Share this:

  • Tweet
  • Share on Tumblr

Like this:

Like Loading...

Weather Loops and Chocolate Chip Cookies

14 Friday Mar 2014

Posted by julia chews the fat in Snacking, Sweet Tooth, The Basics

≈ Leave a comment

I don’t know about you, but from where I’m sitting, this is the current state of affairs:

050

Not very reassuring, is it? We’re two weeks shy of April and I’m beginning to feel like Bill Murray in Groundhog Day – except that instead of a time loop, we’re stuck in a purgatorial weather loop. Happy spring, Quebec.

But, things are going to be okay. Because despite what’s happening outdoors (or in the metaphorical blizzard of your life), there’ll always be chocolate chip cookies. Big, honking chocolate chip cookies with chewy centres and crispy edges.

I fully encourage you to get inside, draw the curtains and slip a pan of these into the oven.

Baked cookie

A note on the recipe: Chocolate chip cookies always seem more straight-forward than they actually are. It’s surprising how difficult it can be to get them just right. This recipe is the result of one man’s quest to achieve the perfect chocolate chip cookie – one that strikes the perfect balance between chewy and crisp, light and rich. Like any good food nerd, he addresses the important issues of butter temperature, oven temperature, chilling, salting, kneading, as well as the the ratio of brown sugar to white sugar and the use of chocolate chips vs hand-chopped chocolate. But I think that the ace up this recipe’s sleeve is the addition of brown butter (beurre noisette) which gives these cookies a much-welcomed pinch on the butt.

Brown Butter Chocolate Chip Cookies (makes about 28) – J. Kenji López-Alt’s recipe via Serious Eats

  • 8 oz (2 sticks) unsalted butter
  • 1 standard ice cube (about 2 tablespoons frozen water)
  • 10 oz (about 2 cups) all-purpose flour
  • 3/4 tsp baking soda
  • 1 tsp table salt
  • 5 oz (about 3/4 cup) granulated sugar
  • 2 large eggs
  • 2 tsp vanilla extract
  • 5 oz (about 1/2 tightly packed cup plus 2 tablespoons) dark brown sugar
  • 10 oz mix of bitter-sweet, semi-sweet and white chocolate, roughly chopped into 1/2- to 1/4-inch chunks (for the sake of experimentation, I used a mix of chocolate chips and hand-chopped)
  • Coarse sea salt for garnish

076

Melt butter in a medium saucepan over medium-high heat. Cook, gently swirling pan constantly, until particles begin to turn golden brown and butter smells nutty, about 5 minutes. Remove from heat and continue swirling the pan until the butter is a rich brown, about 15 seconds longer. Transfer to a medium bowl and whisk over an ice bath. Transfer to refrigerator and allow to cool completely (about 10 minutes).

Chilled brown butter

Meanwhile, whisk together flour, baking soda, and salt in a large bowl. Place granulated sugar, eggs, and vanilla extract in a large bowl and mix with a hand beater on medium high speed until mixture is pale brownish-yellow and falls off the whisk in thick ribbons when lifted (about 5 minutes).

Batter

When brown butter mixture has cooled (it should be just starting to turn opaque again and firm around the edges), add brown sugar and cooled brown butter to egg mixture. Beat on medium speed to combine, about 15 seconds. Add flour mixture and mix on low speed until just barely combined but some dry flour still remains, about 15 seconds. Add chocolate and mix on low until dough comes together, about 15 seconds longer.

Dough

Turn out onto counter-top and form into a ball (without kneading/handling too much).

Forming dough

Forming doughWrap in cellophane and refrigerate dough at least overnight and up to three days.

Dough in cellophane

When ready to bake, adjust oven racks to upper and lower middle positions and preheat oven to 325°F. Measure out 1oz pieces of dough (with an ice cream scoop or spoon) and place on a parchment-lined baking sheet. Each ball should measure approximately 3 tablespoons in volume and you should be able to fit 6 to 8 balls on each sheet. Transfer to oven and bake until golden brown around edges but still soft, 13 to 16 minutes, rotating pans back to front and top and bottom half way through baking.

Baked cookies

Remove baking sheets from oven. While cookies are still hot, sprinkle very lightly with coarse salt and gently press it down to embed. Let cool for 2 minutes, then transfer cookies to a wire rack to cool completely.

Repeat steps 3 and 4 for remaining cookie dough. Allow cookies to cool completely before storing in an airtight container, plastic bag, or cookie jar at room temperature for up to 5 days.

Baked cookie

Share this:

  • Tweet
  • Share on Tumblr

Like this:

Like Loading...

Taking Back Cheese

20 Friday Dec 2013

Posted by julia chews the fat in Breakfast & Brunch, Lunch & Dinner, Snacking, The Basics, Vegetarian

≈ Leave a comment

For some time now, I’ve been buying ricotta under-the-radar from someone who makes it in their converted garage. You wouldn’t guess it, but this stuff is gorgeous – it’s creamy but unbelievably light and mild in flavour, almost sweet. It’s unlike any of the preservative-heavy schlock that’s often on offer in grocery stores. It comes in a beautifully moulded shape, ready to eat on its own, spread onto toast, sprinkled over salads, or baked in the oven on top of pasta (Nonna and I have a soft spot for this dish).

However, getting fresh cheese like this on a regular basis is a tad tricky. You need to be organised. You need to submit your order in advance and get yourself to the location. While it’s always worth it, it’s definitely not convenience food.

Then it came to my attention that ricotta could quite feasibly be made at home, without any special equipment or expertise. After all, it only involved 4 ingredients and some cheesecloth. But this idea cracked open a Pandora’s box of cheese-related questions: What type of ingredients work best? Should I be using rennet? Where do I get rennet? Do I need to boil the milk? How do I ensure I don’t poison anyone with my home-made concoctions?

I didn’t want to plunge knuckle-deep into whey before knowing a few ground rules. At the same time, I was weary of the vortex of conflictual information hanging out on the Internet and, ideally, I wanted to learn these skills first-hand with someone whose experience far surpassed mine.

Enter David Asher Rotsztain. 

David is an organic farmer, goatherd and cheesemaker based in Mayne Island, B.C. Through community outreach workshops, he teaches natural cheese-making methods that can easily adopted by the home cook. In other words, this is guerilla-cheese-making – taking back something that in modern times has been (rather counter-intuitively) entrusted with people and entities that are alien to us and our day-to-day.

By sheer luck, a local non-profit was offering workshops with David right around the time I was thinking about making ricotta. In the workshop, he spoke about different types of cheese, their idiosyncrasies, their benefits, their beauty. We talked about raw milk versus pasteurized, whole milk versus low-fat, the use of lemon juice compared to rennet, and the wonders of edible mold. It was an eye-opening experience that broke down the process into manageable pieces and made cheese-making more approachable than I could have imagined. As I quickly learned, good cheese involves only a handful of ingredients, some time, and a bit of know-how.

Until I get around to making ricotta, I’m going to leave you with the step-by-step process for making your own fromage frais, which is essentially yoghurt strained at room temperature for 24-28 hours. It’s ridiculously simple, and though it takes a bit of time, your patience will be rewarded with a lovely, creamy round of fresh cheese, ready to serve with bread for breakfast or alongside crackers on a (hm holiday?) cheese platter.

Enjoy ♥

Homemade Fromage Frais – makes about 250g

8 - finished fromage frais


You will need:

– 1 container good-quality yoghurt, without any emulsifiers, stabilizers or gelatin (for this recipe, I used a full-fat buffalo yoghurt I found here)

1 - yogurt
– about 1 tsp salt
– a big stockpot or very deep bowl
– a wooden spoon (or something similar) that will sit solidly across the bowl
– some cheesecloth (this can include unbleached muslin or nylon cloth, but David recommends a Du-Rag. Yep, that’s right – a Du-Rag. Its shape and tight meshing make it perfect for straining this cheese. And it’s a breeze to wash for future use)

2- cheese cloth
1) Wash your cheesecloth and allow to air-dry.
2) Drape the cheesecloth atop a bowl and pour the yoghurt into its centre. Pull together the four corners of the cloth around the yoghurt; twist and secure with a knot.

3- yogurt in cheese cloth

5 - squeezing & tying

3) Tie to the wooden spoon (or similar implement) and hang over stockpot or deep bowl. The cheese should be able to hang freely, not touching the bottom.

6 - hanging

4) Leave it to hang overnight at room temperature. As they whey* drips into the pot, the yoghurt will slowly become cheese.
(*do not discard whey by pouring it down the drain, as it is toxic to aquatic life. Instead, keep it to make ricotta or feed your plants, dogs or compost with it.)

5) After 24 hours, this cheese will have dripped dry. To improve flavour, and to help preserve it longer, salt the cheese by opening up the cheesecloth and sprinkling a teaspoon of salt over the surface of the cheese. Close the bag, and hang it again for another 4 hours.

7 - opening & salting

9 - cheese & toast

10 - cheese & toast - detail

Titbits from David:
*don’t squeeze the cheese to force out whey (it’s sooo tempting, but resisting will avoid any mishaps…)
*make this cheese with goat’s yoghurt, and you get chèvre.
*make this cheese with extra high fat yoghurt, and you get cream cheese.

And if you still need some cheese-making inspiration, watch this video (disclaimer: it may make you want to pack your bags, move to France, and become a shepherd).

Share this:

  • Tweet
  • Share on Tumblr

Like this:

Like Loading...

Recipes in absentia – almonds and artichokes

07 Monday Oct 2013

Posted by julia chews the fat in Cooking For Your Peeps, Snacking, Vegetarian

≈ 2 Comments

Those of you who don’t see me in my day-to-day have politely inquired if I’m still alive, if I’ve been suffering from a physical ailment or if I’ve escaped to a cabin in the woods without access to electricity or other humans.

While these are all very inventive deductions, none of them (fortunately?) reflect reality. I didn’t fall into a bottomless pit or knock my head and get amnesia. The truth is much more boring. The truth is, I’ve just been…

busy.

There are times when things hit you full throttle, all at once, and you end up spreading yourself a little too thin. This isn’t necessarily a bad thing (except for the spreading too thin part – that, as it happens, leads to migraines). It just means you have to reassess your free time so that you don’t completely lose your marbles. In my case, that means evenings and week-ends have been gobbled up by a variety of commitments, most of them in the realm of food – some involving menu-planning and cooking, some involving writing and research, and some involving an intersection of both – and all of which (unlike this blog) have been tightly connected to other people’s scheduling, all of it having to be done outside of the hours of my full-time day job. (which itself has a lovely by-product in the form of a 2-hour daily commute.) (bless all you people who do this with children. You are forces of nature.)

In the few sporadic lulls, I haven’t had the juice (nor physical, nor mental) to put down words on this page, opting instead for some catch up of these and these and reading this and listening to this, usually during those 20 gorgeous minutes before bed, or the relentless commute to and from work (I like my job, but that bus+subway+bus commute is a total soul-sucker). In the few quiet moments, I’ve stuck to things I know will be a guaranteed good time and, most importantly, far, far, far, faaaar removed from anything having to do with food.

—–

The first two weeks in October are stacking up to be a bit bonkers too, but I’m taking advantage of this Monday night respite to bring to you two recipes, both of which were made for a cocktail gathering organised by a photographer friend for a low-key shoot. I think you’ll like them – the almonds are smoky, salty and sweet, and partner up well with a pre-dinner drink (beer! bourbon! vermouth!); the artichoke bites come from a recipe I stole from my mom, who stole it from my grandma (thieves, the lot of us…). Mom’s is a much lighter version, as it uses panko instead of traditional breadcrumbs, which tend to get heavy and bit stodgy. I like to serve them warm with a lemon aïoli and some raw veg, like fennel or radish. Both recipes are highly addictive and tend to make a splash at parties – make them for friends and/or anyone you are trying to seduce. You’re bound to make the right impression.

—–

A final note: if I disappear again for a little bit, know that I’m likely still kicking around somewhere – perhaps invisible, but not far – and thinking about the next tasty concoction I’m eager to share with you.

Until next time, be well. Eat well.

spiced almonds

Spiced Almonds – adapted from Laura Calder (makes about 3 cups)

  • 1 cup whole, unsalted almonds (with their skins)
  • 1/2 teaspoon ground cumin
  • 1/2 teaspoon cumin seeds
  • 1 teaspoon hot paprika
  • 2 teaspoons chopped fresh rosemary
  • 2 teaspoons brown sugar
  • 2 teaspoons olive oil
  • fleur de sel (or sea salt)

Directions

Heat the oven to 400°F. Spread the almonds on a baking sheet and toast until darkened and fragrant (about 8 minutes). Remove and spill into a sauté pan, placed on medium heat. Add the cumin, cumin seeds, hot paprika, rosemary, and sugar. Drizzle with the oil and toss over the heat to coat (shaking the pan to coat them evenly works best). Add the fleur de sel and spill onto a baking sheet to cool. Once cooled, serve or store in a jar.

spiced almonds - detail

—–

Breaded Artichoke Bites – makes approx. 30

breaded artichokes - detail

    • 2 cans (about 13oz each) artichoke hearts – in water, not oil
    • 4 eggs, beaten
    • 1/2 cup flour
    • 1 cup panko breadcrumbs
    • 1 clove garlic, minced
    • 1 tsp salt
    • 2 tsp parsley, finely chopped
    • 1/3 cup grated parmesan
    • 1/2 cup sunflower or vegetable oil

(*Note: the flavourings can be adjusted to suit your taste, so feel free to play around with the quantities of garlic, parsley, cheese and salt by tasting the breadcrumb mixture as you go)

Directions

1) Strain artichokes and cut into 3-4 pieces (depending on the size you want); place on paper-towel or dish-towel and set aside.

2) Mix together panko breadcrumbs, garlic, salt, parsley and parmesan.

3) Set up the flour, beaten egg and panko mixture in separate bowls.

breading ingredients

4) Working in batches, place a few artichoke pieces in the flour and, working with two forks, dip into the beaten egg mixture, then the breadcrumbs, tossing lightly to coat.

5) Place finished pieces on a plate while you finish up the others.

6) Place a frying pan on medium-high heat and add the oil to the pan.

7) Once the oil is hot (but not smoking), reduce the heat to medium and fry the artichokes in batches, turning them once the bottoms are barely-golden and cooking them until the coating is evenly golden. Repeat in batches (try not to overcrowd the pan)*.

8) Transfer cooked artichokes to a paper towel-lined tray.

9) Serve warm or refrigerate (2 days max) and reheat on a parchment-lined baking sheet at 350°F for 8-10 minutes, turning once halfway through.

(*Note: if at some point the oil seems to be “dirty” with lots of darkened bits of breadcrumb, discard the hot oil in a tin and start the next few batches with fresh oil).

breaded artichokes

Lemon Aïoli – makes about 1 cup

  • 1 large egg yolk (the best you can afford)
  • 1/2 teaspoon Dijon mustard
  • 3/4 cup olive oil (the best you can afford)
  • lemon zest from 1/2 lemon
  • lemon juice from 1/2 lemon
  • 1/4 tsp salt

Directions

In a small bowl, whisk together the egg yolk and mustard. Whisking constantly, add the oil in a slow, steady stream. The aïoli should be quite thick. Whisk in the lemon juice and salt. Serve chilled, alongside artichoke bites.

—–

Share this:

  • Tweet
  • Share on Tumblr

Like this:

Like Loading...

Croissant speed-dating

21 Sunday Apr 2013

Posted by julia chews the fat in Breakfast & Brunch, Snacking, The Basics, Vegetarian

≈ 6 Comments

As I sit here and write these words, the scent of butter is emanating from by being. This is not a metaphor, or a poetic musing. I just straight up smell like butter. It might seem like an odd thing to confess, but these days, smelling like butter makes me feel like I’m doing something right.

Here’s why.

In 2 weeks and 2 days I’ll be heading to Paris (!) for the first time (!!). While I’ve already mapped out the standard Paris virgin’s itinerary (one that includes that little tower and little museum), I’ve also made room for a few other things, including a viennoiserie class in the 4th arrondissement where I’ll be learning how to make croissants, amandines and chocolatines. With a French pastry chef. BY THE SEINE.

Pinch me.

By total coincidence, April 20th happened to be “La Fête du croissant” in Montreal, which means that over a dozen bakeries in the city were showcasing their version of the iconic French crescent and offering them at reduced prices. Under the guise of “research” for my upcoming class, I thought this was the perfect opportunity to eat an obscene amount of pastry take some notes. I enlisted a few friends to do some bakery-hopping with me to help determine what made a good croissant, and what made a not-so-good croissant, assessments based on the holy Parisian tenets of:

  • appearance
  • layers/texture
  • sound/smell
  • taste

4 friends, 4 bakeries, all within a 4-block radius of my apartment. Voici les observations:

9:25am – with Julie at Monsieur Pinchot’s

M.PinchotOverall look: flat; floppy; not really crescent-shaped; the way someone’s eyes look after a long cry
Layers/texture: layers? what layers?; cakey interior; greasy
Sound/smell: no crunch (thus no sound); sweet, buttery smell
Taste: surprisingly nice taste…if it wasn’t pretending to be a croissant (Julie says, “Oueh…pas les meilleurs.”)

—–

9:50am – with Simon at Co’Pains d’abord

(*Note: due to large demand, they were out of regular croissant, hence the chocolatine)

Co'pains d'abordOverall look: pleasantly plump; toasty-coloured exterior
Layers/texture: visible layers; airy; rises back up after you bite into it
Sound/smell: crispy shell that crackles nicely; scent of butter
Taste: pleasantly buttery; lightly yeasty (in a good way) (N.B I discovered that Simon likes to eat the crispy exterior in its entirety before the soft interior. He gets points for adorability.)

—–

10:30am – with Marko & Marie-Lou, breakfast with croissants from Le Grain de blé

Grain de bléOverall look: perfect crescent shape (Marie-Lou says, “It looks like a crab.”)
Layers/texture: uniformly toasted exterior; heavier than they appear; dense; overcooked ends
Sound/smell: slight crunch when squeezed; no memorable scent
Taste: underwhelming; we ended up making ham & cheese sandwiches with them (Marko says, “Yeah, these suck.”)

—–

11:55am – Fous Desserts, with yours truly

Fous Desserts 1

Overall look: relaxed crescent shape; golden exterior; lightly glossy; sexy
Layers/texture: visible, delicate layers; easy to pull apart; crispy exterior; airy, soft interior
Sound/smell: exterior had a satisfying crunch; scent of wheat and butter
Taste: rich butter taste that hits the tongue and melts; very lightly yeasty; nicely balanced in sugar and salt

Look...at...those...ayers (!)

—-

Of the four, Fous Desserts knocked it out of the park. Their croissant is epic. From now on, there is no need for me to go anywhere else in my neighborhood. This is croissant that slays all others.

If you live in Montreal, or are visiting, here’s where you can find them:

Fous Desserts
809 Av. Laurier Est
Montréal H2J 1J2 [Qc] Canada
Tel: +1.514.273.9335
http://www.fousdesserts.com/acceuil.html

Thanks again to Julie, Simon, Marko & Marie-Lou  xx

Share this:

  • Tweet
  • Share on Tumblr

Like this:

Like Loading...

The Deep Freeze

27 Sunday Jan 2013

Posted by julia chews the fat in Breakfast & Brunch, Snacking, Sweet Tooth, The Basics

≈ 5 Comments

I fully acknowledge that talking about the weather is best left for encounters at the water cooler, in the elevator, on the sidewalk with that neighbor you only see twice a year – situations where there’s a mutual understanding that you’re both just filling conversational space with a topic that, while effortless to discuss, can be pretty dull.

But.

It has been one billion degrees below zero this week, and that kind of cold does all sorts of crazy to you. In times like these, talking about the weather becomes an integral part of social interaction, more along the lines of communal therapy than mundane chit chat.

Yes, it’s January. In Canada. In QUEBEC – land of the winter Carnaval and Igloofest. We weirdos have a tradition of celebrating the cold. We even have a formally appointed mascot. But this cold snap has tested our resilience. With temperatures at –40 C, cars seized, eyelashes froze, pipes burst. News reports reminded us, quite aggressively, that exposed skin would freeze in 10 minutes and that neglecting to reduce our energy consumption would cause blackouts.

It’s been brutal.

There is one thing, though, that comforts me – and that is knowing that there is a hefty batch of granola on the middle rack of the oven, slowly toasting itself into golden oblivion. Not just any granola. This granola:

Baked granola

I’m not a cereal person by nature, but this granola has completely bewitched me. I forgot about the cold, the snow, the icy side-walks and harsh winds. With the hot scent of brown sugar, pumpkin seeds and toasted coconut emanating from the oven, it could’ve been the zombie apocalypse out there and I wouldn’t have noticed.

Granola & yogurt

Toasted Olive Oil and Maple Granola (makes about 4.5 cups) – adapted from Nekisia Davis’ recipe featured on Food 52

  • 1 1/2 cups old-fashioned rolled oats
  • 1/2 cup raw pumpkin seeds, hulled
  • 1/2 cup raw sunflower seeds, hulled
  • 1/2 cup unsweetened coconut chips
  • 1/2 cup raw walnuts, coarsely chopped (or pecans, almonds)
  • 1/4 cup pure maple syrup
  • 1/4 cup extra-virgin olive oil
  • 1/4 cup packed light-brown sugar
  • 1 tsp coarse salt

Heat oven to 300° F degrees.

Put oats, pumpkin seeds, sunflower seeds, coconut, walnuts, syrup, olive oil, sugar, and 1 teaspoon salt in a large bowl and mix until well combined. Spread granola mixture in an even layer on a rimmed baking sheet. Transfer to oven and bake, stirring every 10 minutes, until granola is toasted (about 25-30 minutes).

Remove granola from oven. Let cool completely before serving or storing. Can be stored in an airtight container for up to 1 month.

Note: I added a few more coconut flakes for the last 5 minutes of baking to lighten up the colour.

Granola & yogurt

Share this:

  • Tweet
  • Share on Tumblr

Like this:

Like Loading...

Surviving Christmas dinner

29 Saturday Dec 2012

Posted by julia chews the fat in Beverage, Cooking For Your Peeps, Lunch & Dinner, Snacking, Vegetarian

≈ 2 Comments

Christmas dinner for 10, survived. But I’m not going to lie – the day after its execution, when I first sat down to write this, I had a knocker of a headache and pretty much just stared at the screen, mouth-breathing. I’m glad to have had these couple of days to step back and regroup.

So here we are, dear readers, on December 29th; I come to you with a sense of calm and sanity that I was unable to muster three days ago when the cooking parade was over and the kitchen looked like it had the worst hangover of its life. All I wanted to do was drink coffee and nap and watch bad movies until I felt functional again.

If nothing else, it was an interesting exercise in love and motivation – from the early-morning grocery shopping marathon, to the chopping, zesting, de-seeding, roasting, whipping, cocktail-shaking and family-wrangling – I have a new-found appreciation for the people who do this every holiday. People with kids, full-time jobs, partners…extra-curriculars. People who spend days, back-to-back, confined in their kitchen cube, but still manage to look like Doris Day when they set it all out on the table, maintaining polite conversation with their guests and smiling pleasantly throughout. You guys rule. Cha-peau!

That said, when you’re doing something out of love, the hard work is worth it. You might be a little worse for wear (box-grater wounds, oil burns, mental collapse) but you’ll recover. Plus, when your grandmother eats your food, puts her hand on your shoulder and very gently calls you “Brava”, all the bad melts away.

—–

Now since it’s almost New Year’s, I thought it’d be a good idea to lay out some (simple, sanity-friendly) recipes that you might find useful for your NYE entertaining. From the menu posted here, I’ve extracted a few delicious little things that would fit an end of year schmooze – whether you’re hosting for two, or a dozen (or even if you’re home sick and entertaining a party of one) – here are some tasty treats to say “Au revoir, 2012” and “Oh well, hello there, handsome 2013”.

Satsuma & Pomegranate Campari Cocktails – serves 6-8 (adapted from Baker’s Royale)

juiced satsuma

  • 4 parts satsuma (about 12), freshly squeezed, sieved and chilled*
  • 2 parts pomegranate juice**, freshly pressed, sieved and chilled
  • 2 parts Campari
  • 1 part white vermouth
  • fresh ice
  • strands of orange zest (optional)

*I know, I know…juicing fruit seems like a lot of work. But once you get into the swing of it, it ain’t that bad. And it makes the drinks so, so much better. Trust me on this one. Put on some music and karaoke your way through it if you want to. It’ll be worth it.

**Tips to de-seed and juice a pomegranate:

1) Remove any light-coloured clothing and put on an apron – things might get a little messy (à la slasher film).

2) Cut the pomegranate in half, hold it cut-side down with both hands over a large bowl and gently press the center, lifting the sides up slightly. This will help release the seeds from the pulp.

3) Holding the pomegranate over the bowl with one hand, cut-side down, firmly whack the skin-side (facing up, towards you) with the back of a wooden spoon until all of the seeds have fallen out into your hand and the bowl. Remove any little bits of pulp that may have found their way into the bowl (there shouldn’t be many).

4) Reserve about 1/4 of the seeds for serving. Pour the remaining seeds into a food processor and liquefy. Push the juice through a sieve to dispose of the tougher bits (the actual seeds within the juice-filled pod). Chill before use.

Serving the cocktail:

1) Divide the reserved pomegranate pods and orange zest strands evenly between 6-8 glasses (martini glasses or champagne coupes are pretty dapper).

2) Fill a cocktail shaker 1/4 full with ice.

3) Pour in the juices, the Campari and the vermouth. Shake until combined.

4) Serve in the prepared glasses. Bottoms up, baby.

pomegranate cocktail3

Persimmon and pear and caprese toasts (makes approx. 20 canapés) – adapted from Joy the Baker

  • 1 semi-firm persimmon, sliced + each slice cut into quarters
  • 1 medium pear (Bartlett or Anjou), sliced
  • 4-5 small bocconcini, sliced
  • 1 baguette, sliced thinly
  • 1/4 cup pesto (best way to revive frozen pesto from the summer)
  • basalmic vinegar (the best you can afford)
  • olive oil for brushing
  • fleur de sel and freshly cracked black pepper

persimmon toats detail

Directions

1) Preheat the oven to 350° F. Lay baguette slices on a pizza tray or baking sheet; brush with olive oil and bake for about 8 minutes, or until golden brown. Set aside to cool (if you want to do these ahead, conserve them in a brown paper bag until use).

2) Put pesto in a small bowl and brush onto the toasts. Next, toss the bocconcini slices into the bowl and stir to coat the cheese with pesto.

3) Arrange toasts on a serving platter and layer with a slice of persimmon, pear and bocconcini. Sprinkle with fleur de sel and cracked pepper. Finish with a gentle drizzle of balsamic vinegar*

(*if you have the time, it’s worth reducing the vinegar by heating it in a pan until it becomes a bit syrupy.)

Smoky sweet potato hummus – adapted from Blissful Eats

smokey hummus

Makes 4 cups

  • 1 pound sweet potatoes (about 2 medium)
  • 1 can chickpeas, drained and rinsed
  • 1 tsp chopped chipotle chili, canned in adobo sauce
  • 1 garlic clove, chopped
  • 2 Tbsp fresh lime juice
  • 2 Tbsp olive oil
  • 2 Tbsp tahini
  • coarse sea salt and freshly ground pepper

Directions:

Pre-heat the oven to 350° F.

Pierce potatoes several times with a fork; place on a foil lined baking sheet.  Bake until tender (about 45 mins).  Cool slightly, then peel and add to the bowl of a food processor.  Add chickpeas, lime juice, tahini, olive oil, chipotle and garlic.  Purée until smooth, adding up to 2 tablespoons of water if necessary. Season with salt and pepper. Garnish with a drizzle of olive oil and smoked paprika before serving.

Pita chips (makes about 60 chips)

  • 2 bags of pita bread (whole wheat and/or white)
  • herbes de Provence
  • olive oil
  • fleur de sel

Directions

1) Preheat the oven to 350° F.

3) Place pita slices on a pizza tray or baking sheet; brush with olive oil and sprinkle with herbes de Provence and fleur de sel. Bake for about 6 minutes, or until golden brown. Allow to cool and reserve in brown paper bags. Serve with smoky sweet potato hummus.

Share this:

  • Tweet
  • Share on Tumblr

Like this:

Like Loading...
Newer posts →

Facebook

Facebook

Instagram

No Instagram images were found.

Recent Posts

  • Layers and Rows
  • Finding Buoyancy
  • February
  • Wednesday
  • Cross My Heart, Miso

Archives

  • May 2017
  • April 2017
  • February 2017
  • December 2016
  • November 2016
  • September 2016
  • August 2016
  • July 2016
  • June 2016
  • May 2016
  • April 2016
  • March 2016
  • February 2016
  • January 2016
  • December 2015
  • November 2015
  • October 2015
  • September 2015
  • August 2015
  • July 2015
  • June 2015
  • May 2015
  • April 2015
  • March 2015
  • February 2015
  • January 2015
  • December 2014
  • November 2014
  • October 2014
  • September 2014
  • August 2014
  • July 2014
  • June 2014
  • May 2014
  • April 2014
  • March 2014
  • February 2014
  • January 2014
  • December 2013
  • October 2013
  • September 2013
  • August 2013
  • July 2013
  • June 2013
  • May 2013
  • April 2013
  • March 2013
  • February 2013
  • January 2013
  • December 2012
  • November 2012
  • October 2012
  • September 2012
  • August 2012
  • July 2012
  • June 2012
  • May 2012
  • April 2012
  • March 2012
  • February 2012

Categories

  • Beverage
  • Breakfast & Brunch
  • Condiments
  • Cooking For Your Peeps
  • Cooking Solo
  • Cooking with Nonna
  • Food Away From Home
  • Food Writing
  • Holidays
  • Intro
  • Lunch & Dinner
  • Snacking
  • Soups
  • Sweet Tooth
  • The Basics
  • Vegetarian

Enter your email address to follow this blog and receive notifications of new posts by email.

Join 80 other followers

Blog at WordPress.com.

Cancel

 
Loading Comments...
Comment
    ×
    %d bloggers like this: