• Home
  • About

julia chews the fat

julia chews the fat

Category Archives: Vegetarian

Finding Buoyancy

02 Sunday Apr 2017

Posted by julia chews the fat in Cooking with Nonna, The Basics, Vegetarian

≈ 13 Comments

We went to visit Nonna at her residence last Tuesday. She’s been there two weeks now, but it was my first time visiting her after her two-month stay at the hospital, where she’d been admitted on New Year’s Day. I’d heard that the first few days at the residence were difficult. She was angry and tired; she couldn’t fathom that she had ended up in what, at least on the surface, seemed like an extension of the hospital – a small room in a beige, paint-chipped ward where other residents wandered into eachother’s rooms, mistaking them for theirs.  As we rode over in the car, I was apprehensive, thinking about how she’d been feeling, her initial resistance and disbelief that she was never going back home. I thought about the empty house she left behind: the bedroom with the handmade doilies from Abruzzo, the dining room with the built-in buffet, filled with floral teacups and matching saucers; the kitchen with its tawny, 70s linoleum floor; the cellar where grandpa used to store demijohns of homemade wine…

My heart cracked.

On the night we visited, the residence was having a “brasserie” night. There was a raffle, dancing, and a DJ that played country music under a string of twinkle lights. Volunteers walked around in waist-aprons, handing out raffle tickets and prizes in the form of heart-shaped lollipops. The four of us sat at a table against the wall – mom, dad and I on plastic fold-out chairs and grandma in her plaid wheelchair. We encouraged her to have a glass of wine. They only had white, which she never drinks, but she had some anyway. After a couple of sips, she leaned in to tell me it was come l’acqua (“like water”). I promised to bring her the real stuff soon – the red Montepulciano she had every lunchtime at home, poured into a short tumbler from a twist-cap bottle. She nodded in collusion.

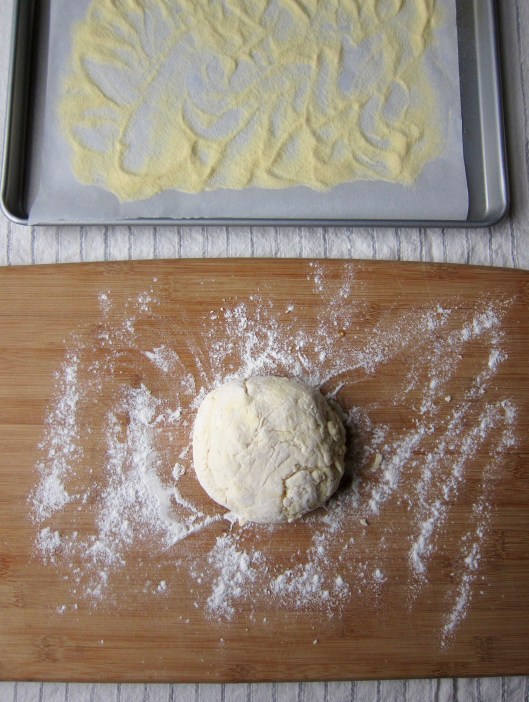
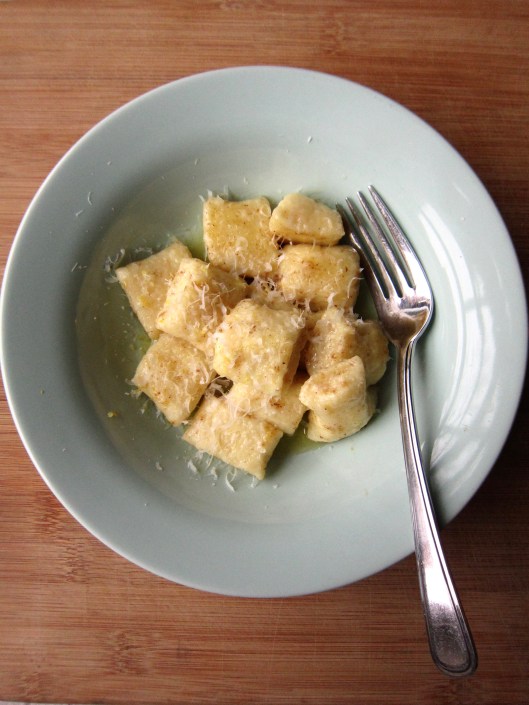
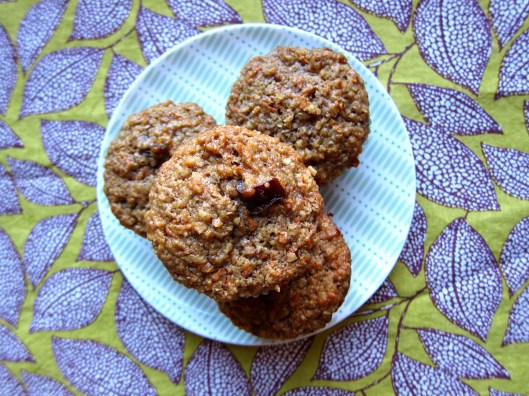
We shared a bag of Cheetos and watched people sway to a twangy version of Quand le soleil dit bonjour aux montagnes.  At one point I looked over at her, struck by how beautiful she looked, wrapped in a gold and burgundy shawl, and hair curled and set the day before by mom. It was lovely and disheartening in equal parts. Ninety-four years old. How does anyone get to ninety-four? It became clear that an era had ended, and that none of us were quite sure what would replace it. I thought about all the dinners and celebrations we’d had at her house – Christmas, Easter, birthdays, and everything in between, including the party we had after my brother and sister-in-law’s civil ceremony, when we hosted sixty people in a space that could comfortably hold thirty. I thought about the tomato-canning sessions every September that covered the kitchen in splatters of crushed passata, the assembly-line production of gnocchi, cookies, and ravioli; the summer afternoons in the backyard, sharing mounds of grapes and shooing away squirrels that snuck into the garden.

My heart cracked a little more.

032
IMG_2989
IMG_1631
042
011
031
045
087

It’s a strange type of grieving. The person you love is still there, still mentally with it, but their regular spark is missing, siphoned away by physical fragility, circumstance, and an obligation to adapt. It’s a difficult thing to witness, even if most families will – at some point – go through some variation of it.

As with all difficult transitions though, there’s always moments of reprieve, allowing some of the hard feelings to recede. On this night, it came in the form of some cheap wine, a bag of Cheetos, and an evening in eachother’s company. That combination somehow created a bit of buoyancy in all of us; we’d been given a chance to see a piece of our old selves again. And it was nice.

After an hour or so, when the DJ packed up his things and the bright lights came back on, we brought grandma back to her room and got her settled in. I kissed her goodnight. Ti amo, Nonna. She smiled, È stata una bella serata. It was the first time I’d seen her smile in weeks. Instead of cracking, my heart brimmed with the best kind of love. I felt grateful instead of sad, beholden to all the indelebile experiences I’ve had with her, and will continue to have, for as long as I possibly can.

—–

On loss and recipes

When it became clear that Nonna wasn’t going back home, and that our family dinners wouldn’t be the same as before, I found myself thinking about her recipes more than ever. Part of me worries that if I don’t hold onto them tightly, they might fall between the cracks, and become hazy, far-away memories, in the same way that when you lose someone, the details of their face become less vivid over time.

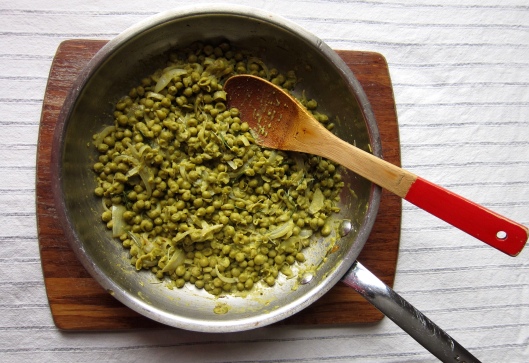
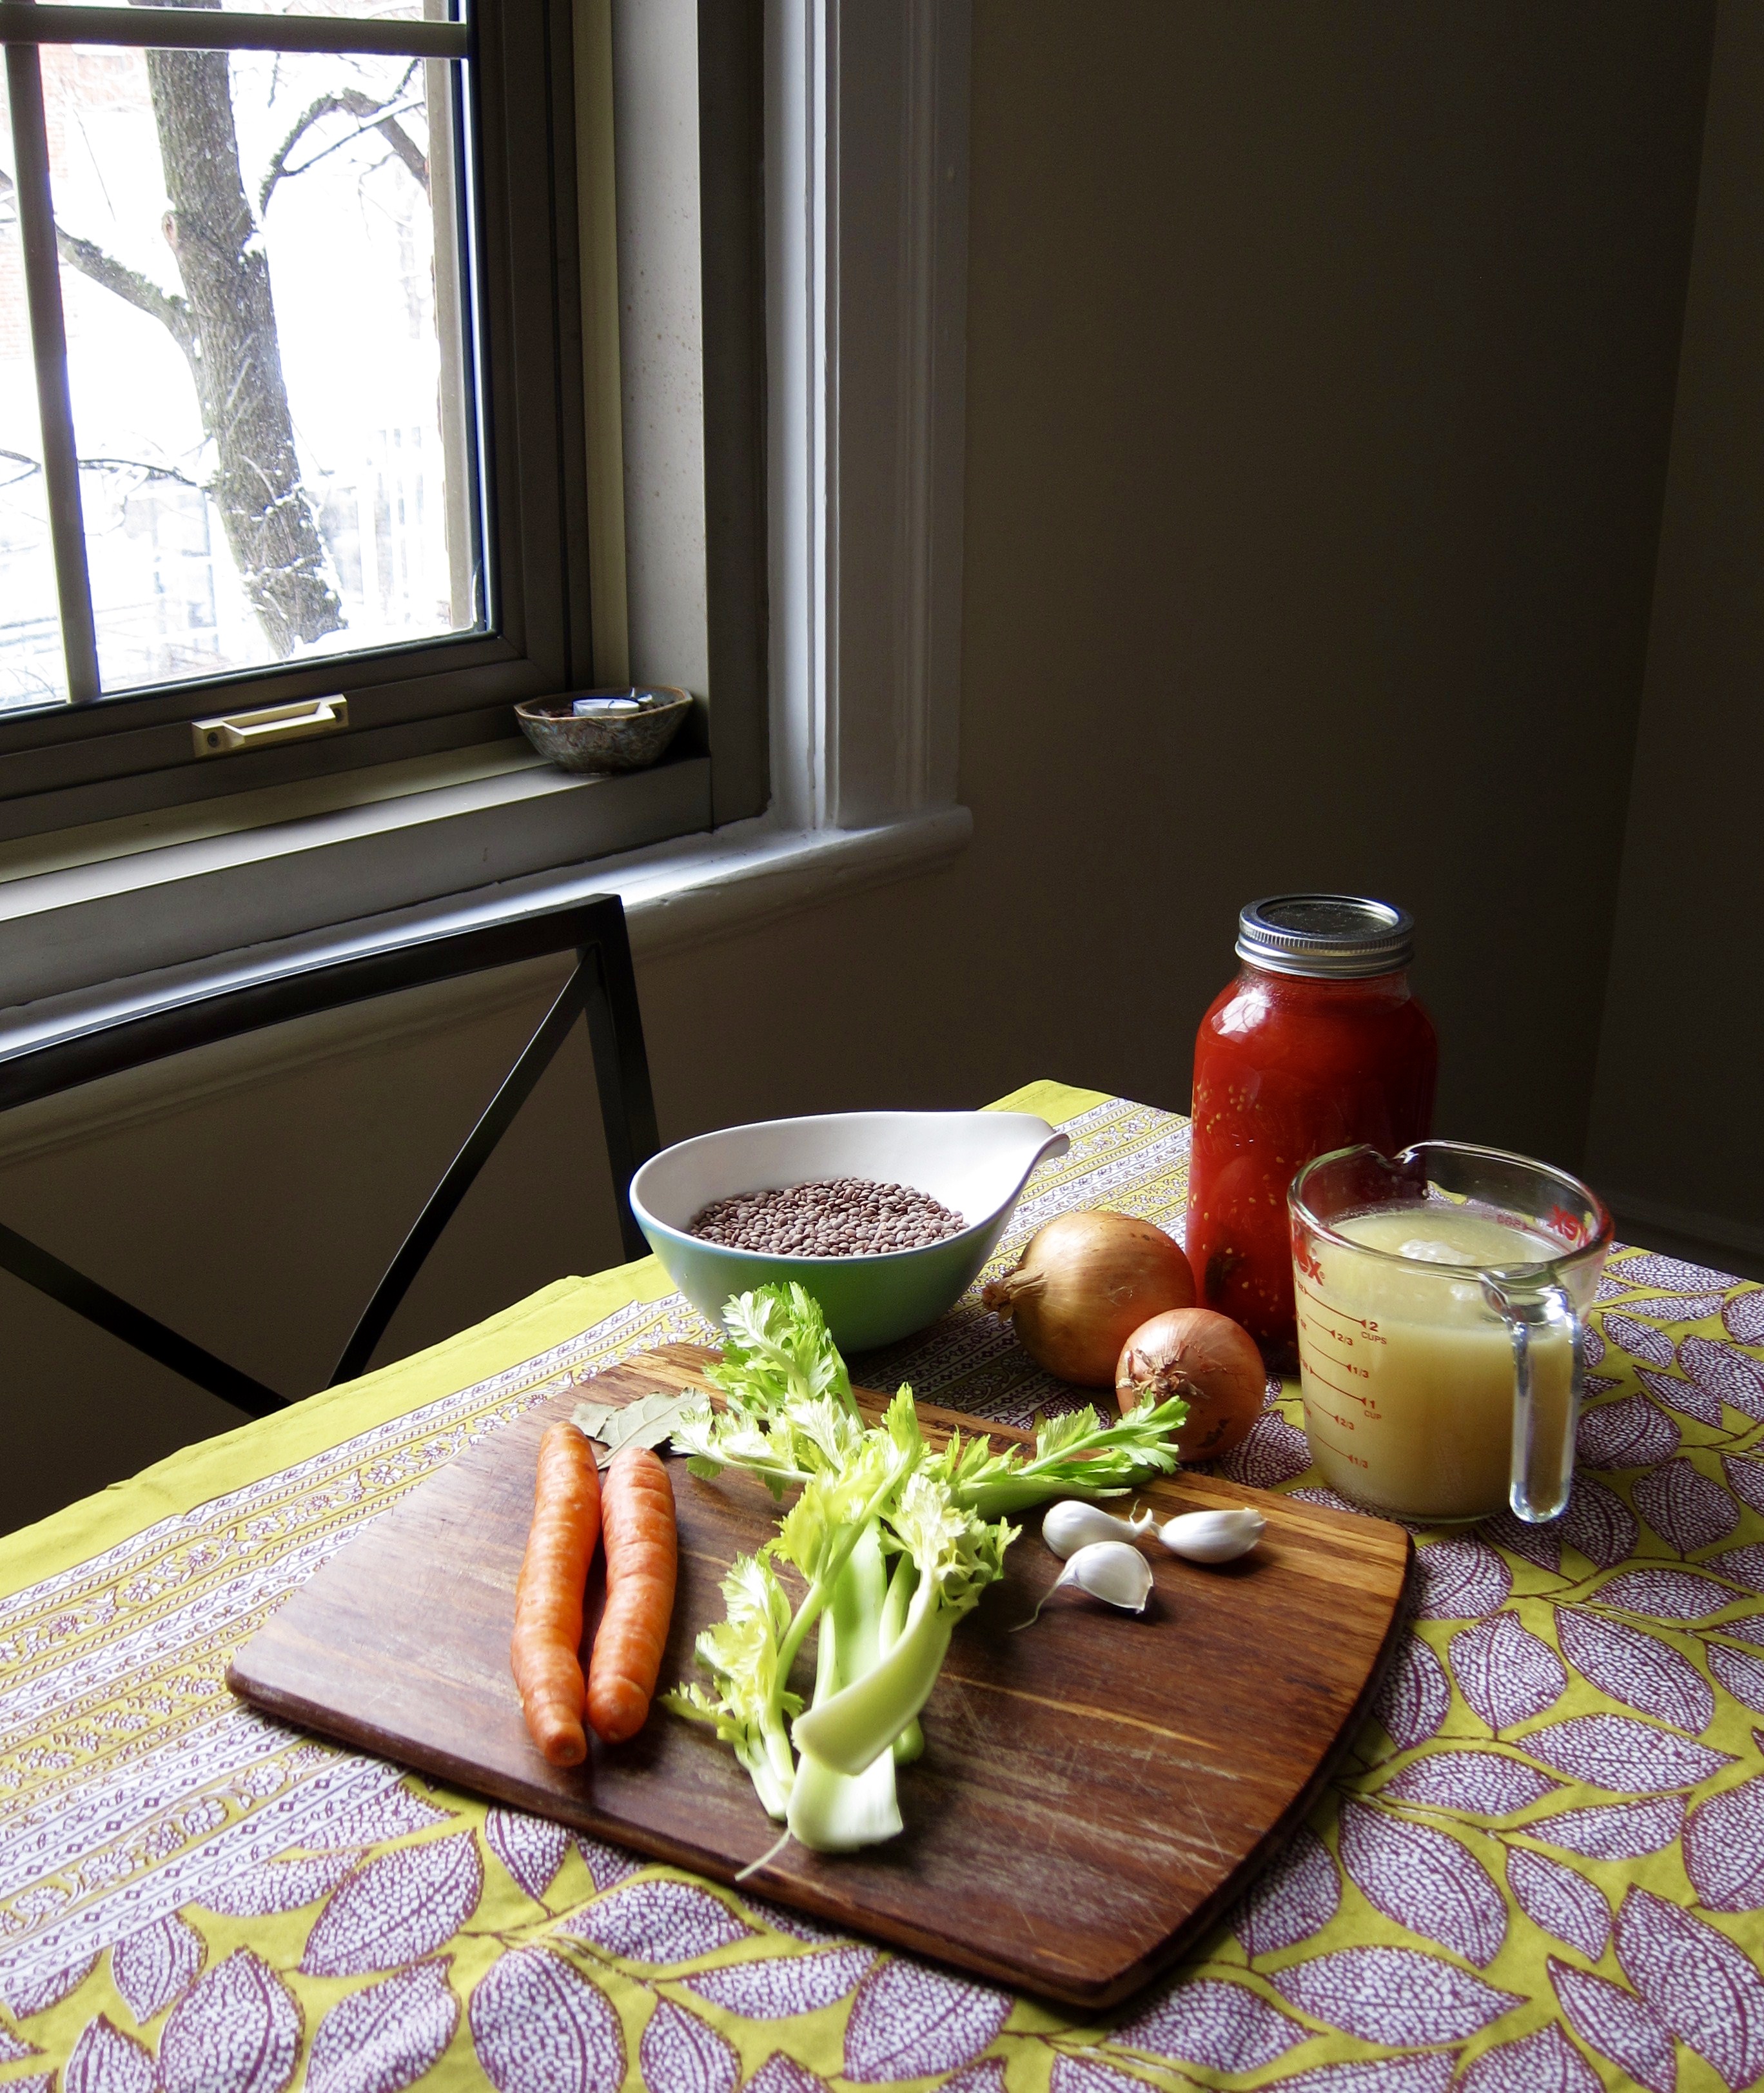
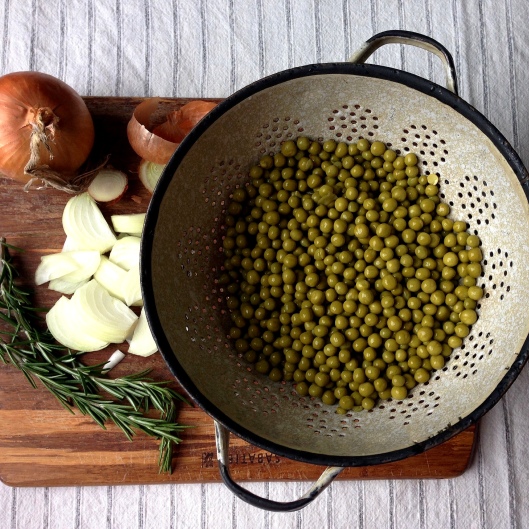
In the spirit of holding on tightly, I’ve been making her recipes whenever I can, writing them down, documenting not only the recipe, but the memories attached to them. One week, it might be her tomato sauce; another week it might be a minestrone or pasta fagioli. This week, it was her rosemary peas, a fixture at family dinners for as long as I can remember. They would usually be served alongside potato gnocchi, or pasta and polpette, or a pan-fried chop or steak. The thing that makes them stand out to me is how fundamentally basic they are, the well-loved anti-hero to fiddly recipes that require special ingredients. For one, you use canned peas (not the bright, freshly-shelled or frozen ones) and dried rosemary (not the fresh, elegant sprigs you might find growing on the windowsill) (full diclosure: I cheated this time, because I had fresh on hand). The only other ingredient – if you don’t count salt, pepper, and oil – is onion, which you cut into half-moons and sautée until translucent. The result is a beautifully mushy, sweet, aromatic mash that pairs well with with pasta dishes and meats like lamb, pork, or veal.

Mine will probably never taste exactly like hers. But I can sometimes get close, which is reason enough for me to keep trying.

Rosemary Peas // © julia chews the fat

Nonna’s Rosemary Peas

  • 1 can of peas, rinsed and drained
  • 1 small onion, sliced into half-moons
  • 1-2 tsp dried rosemary
  • 2 Tbsp olive oil
  • salt and pepper to taste

Directions:

Heat the oil in a pan on medium heat. When the oil is hot (but not smoking), add the sliced onion and cook until softened and glistening; add the rosemary and cook for a minute more, stirring every so often. Add the peas and stir to combine. Season with salt and pepper. Cook, stirring occasionally, until the onion has become golden and the peas have broken down a bit (about 10 minutes). Serve warm.

Rosemary Peas // © julia chews the fat

Share this:

  • Tweet
  • Share on Tumblr

Like this:

Like Loading...

Cross My Heart, Miso

12 Saturday Nov 2016

Posted by julia chews the fat in Breakfast & Brunch, Cooking For Your Peeps, Lunch & Dinner, Snacking, Soups, Sweet Tooth, Vegetarian

≈ 11 Comments

I am the kind of person that will buy a tub of miso, then leave it in the refrigerator door for an interminable length of time, under the naïve assumption that it will (eventually) find its way into a recipe. If you’re like me, you know that this moment rarely, if ever, comes. You also know that it leaves you with bad feelings when you do a deep clean of the fridge and realise it’s been there for a small eternity, opened, but with only one spoonful scooped out from the top. You ask yourself the following questions: Is it still good? How do I know it’s still good? Do I need to throw it out? Then concede to the following affirmations: Online message boards about expiration dates cannot be trusted. I’m going to need to throw this out. I am a horrible human being for throwing this out.

It’s a vicious cycle.

I’m not quite sure what happens in the ark of purchasing the miso, bringing it home, then, months later, scraping it into the bin. It’s confounding. Not to mention a heinous act of food waste. (especially considering that miso paste could probably out-live you and me and I’ve just been overly cautious about its perishability). And so, I’ve decided that from this day forward, I will never throw out another container of miso. Cross my heart and hope to die.

I come to you today with proof of my penance – two recipes made recently with the stash of miso paste in my fridge, both having helped put a considerable dent in my supply, all while broadening my miso repertoire (did you know you can use it in savoury and sweet dishes? And not just in miso soup?). I feel that this is the beginning of a new relationship.

One is a carrot soup with ginger, spiced with coriander and curry. The miso works nicely in the background, adding a bit of depth to a soup that might otherwise be ho-hum. The other is a recipe for banana bread (or cake, depending on your sensibilities), where the saltiness of the miso balances out the sweetness of the banana. I brought a loaf to my friends Marko and Marilou as part of a care package the week after their daughter was born and received a text from them the next day saying they’d polished it off, the last couple of slices served up for breakfast, toasted and slathered in butter.

I hope you’ll do the same x

Miso banana bread // © julia chews the fat

Miso Banana Bread – from Amelia Morris of Bon Appetempt

  • 5 medium overripe bananas
  • 1 cup all-purpose flour*
  • ½cup whole-wheat flour
  • ¼ cup of ground flax seeds
  • 1 teaspoon baking soda
  • ½ teaspoon baking powder
  • ¼ teaspoon salt
  • 1 stick unsalted butter, softened
  • 1 cup sugar
  • ¼ cup white (or yellow) miso
  • ½ whole-milk plain yogurt
  • 2 large eggs

*If you prefer, you can replace the whole-wheat flour and ground flax seeds with all-purpose flour (so 1¾ cups of all-purpose flour total)

Directions

1) Preheat oven to 350°F. Butter a loaf pan, dust with a light coating of flour and set aside.

2) Mash 4 of the bananas in a bowl. Set aside

3) Mix all the dry ingredients (except the sugar) in a separate bowl. Set aside.

4) In the bowl of a stand mixer (or, simply, another bowl). Combine the softened butter, miso. Beat until light and fluffy (about 5 mins). Add the sugar and beat until combined. Add the yogurt, then one egg at a time, beating between additions. Beat in mashed bananas. Then mix in the dry ingredients until just combined.

5) Transfer batter to prepared loaf pan. Slice remaining banana lengthwise and place on top of the batter. Bake for about 45 minutes (or until a skewer inserted in the centre comes out clean). Let cool on a baking rack for 20-30 minutes before serving.

Miso banana bread // © julia chews the fat

—–

Miso Carrot Soup – adapted from Wholehearted Eats

Serves 4-6

  • 1 yellow onion, chopped
  • 3 garlic cloves, chopped
  • 1 Tbsp. olive oil
  • 8 large carrots, peeled and chopped (about 5 cups)
  • 1 Tbsp curry powder (optional)
  • ½ tsp. dried coriander
  • 2-inch piece of ginger, peeled and minced
  • 6-7 cups stock, vegetable or chicken
  • 3 Tbsp. white miso paste
  • 1 tsp. tamari
  • garnishes: lemon wedges, cilantro, sesame seeds

Carrot Miso Soup // © julia chews the fat

Directions

1) Heat a medium pot to low and add the oil and onion. Sweat the onion until soft, translucent and golden. Add the garlic, dried coriander, curry (if using) and the minced ginger. Sauté for a couple of minutes until fragrant, stirring occasionally. Add the chopped carrots and sauté cook for few more minutes.

2) Next add 5 cups of the stock and bring the mixture to a simmer. Once it begins to simmer, cover with lid slightly ajar, and let it cook until the carrots and onions are very tender (about 3o minutes).

3) Take the soup off the heat and puree it in a blender or hand blender, until smooth. Bring the remaining 1-2 cups stock (if you like a thicker or thinner soup) to a boil, take it off the heat, and stir in the miso and tamari until combined. Add this mixture to the soup and stir to combine. To serve, add a squeeze of lemon, some sesame seeds and fresh cilantro.

Carrot Miso Soup // © julia chews the fat

Share this:

  • Tweet
  • Share on Tumblr

Like this:

Like Loading...

Pistou Soup

12 Friday Aug 2016

Posted by julia chews the fat in Lunch & Dinner, Soups, The Basics, Vegetarian

≈ 8 Comments

I realise that writing about soup in the dead-heat of summer might be a controversial choice. Very few of us think about craddling a big, hot bowl of anything when the cicadas are screaching outside and we’re still daydreaming about popsciles and swimming pools and cool, tile floors. But there is one soup that deserves our attention right now and not a moment later – and that, dear friends, is soupe au pistou.

Pistou soup is really a blank canvas for whatever is seasonably available. In the summer months, when market produce is abundant, you can more or less throw in whatever looks most attractive to you – zucchini, beans, chard, fresh peas. This is a handy back-pocket dish for people like me, who often browse the market without a list and end up adopting too many vegetables (because they all looked good and they all needed a home). Like ripe tomato salads and fragrant berry pies, this soup is an honest expression of summer, whose crowning glory (the pistou) is made with what might arguably one of the best endowments of June, July and August – sweet basil.

As you’ll see in the recipe below, French pistou is nearly identical to Italian pesto, the only difference being that the French variation doesn’t contain pine nuts. You can think of them as fraternal twins – both use generous amounts of fresh, leafy basil and parmesan cheese, pounded into a fragrant paste with a little olive oil and salt; both are delicious tossed into pasta, slathered onto fish, or swirled into vegetable soups like this one, which, I think, is one of the best ways to tip your hat to summer.

Go forth and harness the bounty.

IMG_2518

Pistou Soup – lightly adapted from David Lebovitz
Makes about 5 quarts of soup

Note: In a perfect world, you’re making this soup with dried beans that have been soaked overnight and cooked. But if you haven’t done this step, just use canned and don’t mention it to the purists.

  • 1 cup (200g) dried canelli beans (or canned)
  • 2 bay leaves
  • 3 tablespoons olive oil
  • 2 medium onions, peeled and diced (or: 3 leeks, cleaned and sliced)
  • 2 teaspoons chopped fresh thyme
  • 2 medium carrots carrots, peeled and diced
  • 1 medium zucchini, diced
  • 1/4 pound green beans, tips removed and cut crosswise into quarters
  • 2 leaves swiss chard, chopped (optional*)
  • a few leaves of raddichio, chopped (optional*)
  • a couple of green cabbage leaves, chopped (optional*)
  • 6 cloves of garlic, peeled and minced
  • 1 tablespoon sea salt, and freshly ground pepper, to taste
  • 1 cup  fresh, shelled fava beans  (or: fresh or frozen peas)
  • 1 cup dried pasta (any small variety will do, such as orzo, tubetti, or shells)

*optional because I tossed these only because I had them on hand.

For the pistou – makes 1 cup

  • 1 large clove of garlic, peeled
  • pinch of salt
  • 2 cups packed fresh basil leaves
  • 1/4 cup olive oil
  • 1 1/2 ounces parmesan, grated

Directions

If using dried beans:

  • Rinse and sort the beans. Soak the beans overnight covered in cold water.
  • The next day, drain the beans and put them in a large saucepan with the bay leaves and enough water to cover the beans with about 1 1/2 quarts (1.5l) of water. Cook the beans for about an hour, or until tender, adding more water if necessary to keep them immersed. Once cooked, remove the beans from the heat and set aside.

1) In a Dutch oven or large stockpot, heat the olive oil. Add the onions (or leeks) and cook, stirring occasionally, until soft and translucent.

2) Add the thyme, diced carrots, zucchini, green beans, cabbage (if using) garlic, and salt. Season with pepper, and cook, stirring occasionally, until the vegetables are cooked and fragrant (about 10 minutes). Add the cooked beans and their cooking liquid and bay leaves, then the peas and pasta, plus 2 quarts (2l) water. (if using canned beans, you’ll need to add about a 1/2 litre of water to make up for the cooking liquid). Bring the soup to a boil, and simmer a few minutes until the pasta is cooked. (if using the swiss chard and raddichio, you can toss them in a couple of minutes before the pasta is cooked.)

Note: If the soup is too thick, you can thin it with additional water, but make sure to adjust the seasoning too.

3) While the soup is cooking, make the pistou: pound the garlic to a paste in a mortar and pestle (or use a food processor) with a generous pinch of salt. Coarsely chop the basil leaves and pound them into the garlic until the mixture is relatively smooth. Drizzle in the olive oil slowly, while pounding, then pound in the cheese. Taste, and season with more salt if desired.

To serve: Remove the bay leaves. Ladle hot soup into bowls and add a generous spoonful of pistou to the centre. Serve with extra pistou on the side.

IMG_2525IMG_2529IMG_2534

Share this:

  • Tweet
  • Share on Tumblr

Like this:

Like Loading...

Faking Fancy

31 Tuesday May 2016

Posted by julia chews the fat in Breakfast & Brunch, Cooking For Your Peeps, Lunch & Dinner, The Basics, Vegetarian

≈ 3 Comments

You’re having friends over for dinner and you want to make something nice. But it’s a work night, a Thursday, so you’re already a bit bagged, and a little unmotivated, thinking about the Jenga tower of dishes that will invariably pile up in the sink if you start making something quote-unquote fancy.

This is when you need to pull a rabbit (or two) out of your hat to successfully fake your way to a meal fit for dinner guests – a meal that will involve minimal amounts of messing around in the kitchen, but will look and taste a little more special than the everday.

There are, of course, different ways you can do this. For starters, if you’re committed to the idea of using the oven, you can choose recipes that compliment eachother’s cooking time and temperature; that way, you can cook a couple of things at the same time, and even bake dessert at the end, with that still-warm oven. The other advantage is that you can slide whatever you’re making into the oven, let it work its magic, and go back to the things you were doing beforehand, like the multi-tasking mavrick you are.

We all have different shortcuts in the kitchen, which is nice, because it means that we can learn from eachother’s acumen – that mental Roladex of tips and tricks we’ve stockpiled over the years. Below you’ll find a few of my own back-pocket recipes (the rabbits up my sleeve, if you will) for when I’m having people over, but don’t want to fuss. It’s a simple potato and roast chicken dinner that can be served with a green salad or some steamed vegetables. The potatoes can be slipped into the oven about 30-40 minutes after the chicken. The dessert is easy too – no need to wrangle dough or batter, just toss some sugared apples onto some prepared puff pastry and watch it pouf up in the oven after the potatoes and chicken have come out.

All of it gives you more time to be with your guests, which, let’s be honest, is the most important part.

FAKING FANCY TIP NO.1 – RE-VAMPING THE HUMBLE POTATO

Potatoes, simply prepared, often come in two forms – boiled, or diced and roasted. Both of these options have virtues of their own, but there’s another variation on the potato that should be on everyone’s radar, and that, dear people, is the smashed potato. I first learned about smashed potatoes during a period in the mid-2000s when I binge-watched Laura Calder‘s French Food at Home, before food blogging and celebrity chef-dom had exploded and you could actually rely on The Food Network for quality programming (wow, can you hear the octogenarian coming through? Don’t get her started on styrofoam food packaging). The Food Network aside, Laura Calder is known in her own right for her pared-down, no-nonsense – and très, très français – approach to food, where the most important elements are quality of ingredients and method, as opposed to flashy additions or lengthy processes. Her smashed potatoes (she calls them “squished” potatoes) are simplicity incarnate, but the nice thing is that they are just the slightest bit different than a boiled or a roasted potato, because they’re in fact BOTH: you take some nice, small, waxy potatoes, skin-on, and let them cook in boiling water until just tender. Then you drain them, set them on a work surface and gently press each one with whatever sturdy kitchen equipment you have on hand (I like using the bottom of a cast iron pan), dress them with olive oil, a sprinkle of salt (I add fresh rosemary too), then lay them on a baking sheet and toss them into a hot oven for 30-40 minutes, turning once halway though. The beauty of the smashed potato is that you get a tender interior and these lacy, crispy edges. They also look more interesting than a in-tact boiled potato, sort of more lived-in and wild. And they are a treat to eat.

SMASHED BABY POTATOES WITH ROSEMARY – from Laura Calder

  • 2 lb baby potatoes
  • olive oil
  • flaky salt (such as Maldon)
  • freshly ground pepper
  • a couple spring of fresh rosemary

1) Scrub the potatoes and cook, unpeeled, in boiling salted water until tender. Drain. When cool enough to touch, gently squish them flat with whatever kitchen tool you see fit. Don’t let them explode, just flatten until the edges break a bit, but they are still in one piece. Toss with some olive oil, the rosemary sprigs, and season with salt and pepper.

2) Heat the oven to 400°F. Spread the potatoes on a baking sheet and bake for about 30-40 minutes, or until crisp outside, turning once halfway through.

(*I didn’t get a chance to capture the finished result, so you’ll have to use your imagination – but they come out crackly, crispy, dark golden on the outside. A bit knarly, but beautiful.)

Smashed Potatoes with Rosemary

Smashed Potatoes with Rosemary

—–
FAKING FANCY TIP no.2 – ELEVATING ROAST CHICKEN

Let’s be honest, there’s nothing particularly spectacular about roast chicken in and of itself. But if done right, roast chicken can be one of the most delicious things you’ll put on the table, especially if you employ a good, healthy dose of butter. Here too, you have different options. Molly Wizenburg has a recipe for Thomas Keller’s roast chicken where you slather it with melted butter after it’s cooked and serve it with Dijon mustard (which, though I’ve never tried it, actually sounds pretty wicked). My usual fall-back is smearing butter under the skin, along the breastbone, before cooking. For added flavour, I like to use compound butter – in other words, softened, unsalted butter that you mix with herbs, or zest, or other seasonings. The butter “insulates” the breast meat (which tends to get dry) from the heat of the oven, while permeating it with rich flavour. You don’t want to be using butter like this everyday (you’d be well on your way to a heart attack), but for occasions that are out of the ordinary – say, having friends over on a Thursday night – it’s a lovely way to make roast chicken a little more frilly.

Roast Chicken with Butter

WHOLE ROASTED CHICKEN WITH HERBED BUTTER

Ingredients

        • 1 whole, 1.5 kg (3-3.5 lbs) good-quality chicken (I like to get mine here when I can)
        • 1 lemon, pierced all over
        • 3-4 cloves of garlic, smashed, skin-on
        • a handful of fresh herbs – thyme, rosemary, tarragon, etc. – chopped
        • about 3 oz. butter, softened
        • salt and freshly ground pepper
        • 1/4 tsp paprika (for colour; optional)
        • kitchen twine

Directions

1) Take your chicken out of the fridge about 30 minutes before it goes into the oven.

2) Preheat the oven to 400ºF. Mix the chopped herbs with the softened butter, season with salt and pepper and stir to combine; set aside. In a small dish, mix some salt, freshly ground pepper and the paprika (if using). Prepare two lengths of kitchen twine to wrap the legs and the thighs.

3) Set aside a roasting pan big enough for your chicken. Blot the outside of the chicken with paper towel (removing excess moisture will help ensure a crispy skin). Season the chicken with the prepared salt, pepper and paprika. With the cavity of the chicken facing you, gently run your fingers under the skin along the breastbone, separating the skin from the meat. Then, gently stuff portions of herbed butter under the skin, spreading it evenly over the breast meat. Put the garlic cloves and lemon in the cavity of the chicken.

4) Tie the legs together snugly (this prevents the bird from drying out). If the lower half of the chicken looks like it’s still pretty loose, I sometimes tie a second piece of twine around the top of the thighs. Place the chicken in the preheated oven and roast for an hour to an hour and fifteen minutes (see note below*), basting a couple of times during cooking. Once the chicken is cooked, remove from the oven and let rest for about 15 minutes before carving. Serve with the pan juices.

A note on cooking whole chicken: total cooking time will vary, depending on the actual size of your chicken, as well as the intensity of your oven. A good rule of thumb is to calculate 15 mins per pound at 400ºF, but I use a meat thermometer just to be sure – it should read 165ºF* when inserted into the thickest part of the thigh but not touching bone. (*A lot of thermometers and government sources will give 180ºF as the ideal internal tempertaure, but they are usually overly-cautious (resulting in over-cooked, dry meat). If you pull it out when it reaches 165ºF and then let it rest, covered, for about 10-15 minutes, you’ll be good to go. The juices should run clear, not pink, when you cut into it.)

—–

FAKING FANCY TIP no.3 – USING FROZEN PUFF PASTRY

When you’re having people over, it’s sometimes nice to have something sweet at the end of dinner, but making a cake or a pie or something along those lines can be more work than it’s worth – the careful combining, the chilling, the rolling, the aforementioned sink full of dishes. This is when frozen puff pastry becomes a trusty pal – once thawed, it’s at your service and ready to use. The best part is that the free-form styling of the outer edges means that you can very easily get away with calling it “rustic”. Adding a quick dusting of powdered sugar to your finished tart (or any dessert for that matter) will make it look like a snowy, Scandanavian dream. I highly recommend it.

Puff Pastry Apple Tart

Puff Pastry Apple Tart

SIMPLE APPLE TART

        • 1 sheet all-butter puff pastry* (about 450 g), thawed
        • 2-3 firm, medium apples (such as Empire or Gala) – cored, halved and thinly sliced
        • 1 Tbsp granulated sugar
        • 2 Tbsp brown sugar
        • 3 Tbsp butter, melted
        • 1 Tbsp rum
        • squeeze of lemon
        • 2 Tbsp powdered sugar, for dusting (optional)

*one of the luxuries of living in Montreal is that many of us are within a stone’s throw of a bakery, many of which sell prepared puff pastry. If you don’t have a bakery close-by, you should be able to find puff pastry in the frozen foods section of most grocery stores.)

Directions

1) Preheat the oven to 400ºF. Line a baking sheet with parchment paper or a Silpat. In a bowl, add a sqeeze of lemon juice to the apple slices, then add both sugars, the melted butter, the rum, and gently combine; set aside.

2) On a lightly floured surface, unfold the puff pastry sheet. Roll it out a little bit (to about 1/2 inch thick). You should have a long rectangle about as long as a standard baking sheet (I don’t measure). Roll about 1 inch of the edges inward to form a border (or, if you prefer, you can lightly score a border along the inside of the rectangle, as this video demonstrates). Poke the inner rectangle all over with a fork to prevent air bubbles from forming while baking.

3) Layer the apple slices, overlapping them slightly. Bake for 25 minutes, until crust is golden brown, then transfer the pan to a wire rack. Once cool, dust with powdered sugar, the transfer tart to a cutting board for serving. Pairs well with vanilla ice cream (obviously).

Puff Pastry Apple Tart

Share this:

  • Tweet
  • Share on Tumblr

Like this:

Like Loading...

A Complicated Love

11 Wednesday May 2016

Posted by julia chews the fat in Lunch & Dinner, Soups, The Basics, Vegetarian

≈ 5 Comments

When I was younger, I wasn’t much of a picky eater, but tomatoes – either in their raw form or cooked – proved problematic for a good portion of my childhood. The woman who ran our daycare, Sandra, used to make us a lunch of Campbell’s tomato soup and Kraft-singles grilled cheese, about once a week. It probably goes without saying that the grilled cheese was gobbled up with ease; the soup, however, was another story. I can still remember the tart, salty, faintly metallic canned-tomato flavour that would coat the back of my throat with every reluctant spoonful. That tomato soup was the bane of my five-year-old existence; it was like punishment in a bowl.

Then there was that trip to Italy, to visit family – when I was seven and my brother was five – and neither of us would eat pasta with tomato sauce; only with burro (butter). This was incomprehensible to our Italian relatives, who’d shake their heads, and with furrowed brow, ask, “Ma, non ti piace i pomodori?” (Don’t you like tomatoes?). Their question breathed equal parts bewilderment and despair, but would quickly melt into capitulation with a shrug of the shoulders, when they’d swirl a spoonful of butter into our pasta, as requested. To the dismay of our relatives, we spent that entire trip avoiding pomodori in every way, shape and form.

Fortunately, I’ve since mended by ways with tomatoes; they’re often in the recipes I make at home – from sugo di pomodoro, to lentil soup, to foccacia, to tomato salad. That said, I’d be lying if I said that our relationship was an uncomplicated one. Raw tomatoes are the ones that still, on occasion, send a shiver down my spine. We can blame both latent childhood sensibilities and the Canadian climate for that one: I grew up in a place where, for a good six months of the year, tomatoes were (and still are) flown in from exotic destinations, arriving in a grainy, hard, tasteless state, then flaunted in their raw form – in big, rough chunks – tossed into a plain green salad, or Greek-style, swimming alongside cucumber and slivers of red onion. Unless those tomatoes are vine-ripened under the hot, summer sun and served within a few miles of where they were grown, tasting like the rich, sweetly acidic fruit that they should be, they usually aren’t coming anywhere near my lips. Otherwise, it’s just a waste, because I will, without fail, pick around them.

To this day – most likely stemming from Sandra’s Campbell’s soup days – I also don’t have a particular affinity for tomato soup. That said (and since the criteria by which my brain accepts and rejects tomatoes is still a total enigma) there is one notable exception – and that is for the Moroccan soup harira, a tomato-based blend made with chickpeas, lentils and a handful of spices. It’s traditionally served during Ramadan as a nutrient-rich dish to break the daily fast, but I’m told that it’s served in different regions of Morocco, all year round. I first had harira at my friend Sophie’s house, when her husband, Hicham, cooked us dinner one night, a few short weeks after he’d come to Canada. We had it as a starter to lamb tagine with dates. A CD of gnawa music played in the background. We drank wine. He tried to teach me a few expressions in Arabic, though I only remember the words for ‘hello’, ‘no’, ‘look’ and ‘enough’. But the harira – I’ll always remember the harira: silky and tangy and heady with spices. It was the one tomato soup that broke the rules to my aversion. And for that – and to Hicham – I am forever grateful.

—–

A note on the recipe: Most recipes incorporate meat (beef, lamb or chicken), broken up vermicelli noodles or rice, as well as a roux (called tadouira) of water and flour at the end of cooking to thicken it up a bit. The recipe below doesn’t have any of these things, but it’s a close approximation to Hicham’s harira, which is always filled with warm spices and creamy chickpeas, which he cooks from dried (not canned).

It’s a simple soup – but well-rounded, sustaining and comforting. Hope you like it.

Vegetarian Harira Soup

Makes 4-6 servings

Harira_prep

Ingredients

  • 100g lentils, rinsed and picked through
  • 150g cooked chickpeas
  • 2 Tbsp olive oil
  • 1 large onion, finely chopped
  • 2 cloves garlic, pressed
  • 3 Tbsp tomato paste
  • handful fresh parsley, chopped
  • 400g ripe tomatoes, smashed
  • 700ml vegetable stock
  • salt and pepper, to season

Spices:

  • 2 tsp ground cumin
  • 1 tsp turmeric
  • 1 tsp ginger powder
  • 1/2 tsp cinnamon
  • 1/4 tsp ground cloves
  • 1/4 tsp cayenne

To serve:

  • lemon
  • pita bread
  • fresh cilantro, chopped

Note: only add the salt at the end, otherwise the lentils won’t cook through.

Directions

1) Heat the olive oil in a large saucepan or Dutch oven. Sauté the onion until browned. Add the garlic, spices, tomato paste and sauté for about 1 minute. Add the parsley, lentils, and smashed tomatoes (with their juices) and stir.

2) Stir in the vegetable stock and bring to a boil over high heat; reduce the heat to medium-low and simmer for 40 minutes. Add the cooked chickpeas and simmer for another 5 minutes, or until the lentils are cooked through. Season with salt and pepper.

3) Ladle into bowls and top with chopped cilantro, a little olive oil and a squeeze of lemon juice (the lemon is important – don’t skip it!). Serve with pita or flatbread.

Harira


Share this:

  • Tweet
  • Share on Tumblr

Like this:

Like Loading...

Snack-Time Salvation

02 Monday May 2016

Posted by julia chews the fat in Snacking, Sweet Tooth, Vegetarian

≈ 2 Comments

A little while ago, I started buying Bounty bars from the second-floor vending machine at work. It might have been a relatively infrequent excursion, but as any office worker knows, when you sit in front of a computer for several hours on end, you start to crave bad stuff – usually something with high-fructose corn syrup and palm oil – around 3pm. And when you don’t have access to something healthy and sustaining, you sometimes end up scouring your desk drawer for pocket change to plunk into an old vending machine for something that will satisfy your primal brain.

In my case (and to make matters worse), I also had an accomplice. My friend and office mate – we’ll protect her identity by calling her “M” – also loved Bounty bars and, like me, was really good at reducing her dissonance. We agreed that splitting a candy bar between us wasn’t as bad as eating the whole thing by ourselves, and if we didn’t read the spooky list of ingredients and enjoyed it alongside a cup of herbal tea, it didn’t seem like such an unsensible thing to do.

But then “M” went on an eight-month work transfer out of town, and I was still getting Bountry bars out of the machine. One a month became two, then three, then I realised that it had become an almost-weekly habit. No bueno.

The obvious solution was to come equipped to work with snacks. Good snacks. Snacks that would make my mom and your mom proud that they had raised well-adjusted, responsible adults. That’s when I came across a recipe, from French food writer Clotilde Dusoulier, for homemade energy bars. A mixture of dates, nuts, cinnamon and cocoa, they’re sweet and chocolately, and filled with things that aren’t palm oil or high-fructose corn syrup (they’re actually filled with vitamin A, fibre, iron, calcium, antioxidants, and potassium. Thank you, dates!).  I rolled mine in shredded coconut for the “Bounty bar effect”, but if you don’t have any in the pantry, they’re swell without it too.

Here’s to better snacking in front of our computers. Have a good week, everyone x

Date-Coconut Energy Bites

Date-Coconut Energy Bites – adapted from Chocolate and Zucchini

    • 50 grams date paste*, diced
    • 100 grams mixed, unsalted nuts (Brazil nuts, pistachios, almonds, hazelnuts…)
    • 2 green cardamom pods, seeds only
    • 100 grams Medjool or fresh dates (about 4), pitted
    • 3 Tbsp unsweetened cocoa powder
    • 1/2 tsp ground cinnamon
    • 1 Tbsp cacao nibs
    • 1/4 cup unsweetened, shredded coconut (for rolling)
    • a good pinch salt

*Date paste can be found at natural foods stores, or in North African or Middle Eastern shops. It comes as a solid block, so if it seems dry and hard, cut it into slices and soak for an hour in a little cold water to soften. Drain well before using (save the date water – you can freeze it too – to use in smoothies).

Directions

1) In a food processor, combine the diced date paste, nuts, and cardamom, and process in short pulses until the nuts are chopped to small bits and blended with the paste. Add the rest of the ingredients and process in short pulses until the mixture comes together.

2) Pour the shredded coconut into a plate; scoop a teaspoon of the date-nut into your hands and form into balls between your palms. Then roll them in the shredded coconut.

3) Lay the date-coconut balls in a airtight container, with parchment paper between each layer to prevent sticking. Transfer to the fridge to set for a few hours or preferably overnight. They will keep in the refrigerator, covered, for about a week.

Date-Coconut Energy Bites

Share this:

  • Tweet
  • Share on Tumblr

Like this:

Like Loading...

Clandestine Food

01 Friday Apr 2016

Posted by julia chews the fat in Lunch & Dinner, The Basics, Vegetarian

≈ 6 Comments

If I play my cards right, I can sometimes get my hands on a batch of fresh ricotta, made by hand in someone’s converted garage a few neighbourhoods over from mine. It comes in the traditional moulded shape, marked with the tell-tale grooves of the straining basket. It’s not an exaggeration to say that that this is the best ricotta you’ll ever have outside of Italy – it’s pillowy and snowy white, and the flavour is so fresh, it’s almost sweet; you can eat it in its naked state by the spoonful.

Fresh Ricotta

Then there are the eggs. A couple of times a month, I get a batch of eggs from a separate supplier who, when they’re not at their day job, tend to a flock of free range chickens. The chickens are different, so their eggs are too – some are robin’s egg blue, others are deep orange or light brown with a smattering of freckles. I’ve gotten into the habit of opening the carton before I get home to catch a peek of what’s inside. There’s something about a motley crew of eggs – big next to tiny, freckled next to blue – that puts a smile on my face. It’s the kind of stuff that makes me really, dorkily, happy.

004

This ricotta and these eggs are part of a handful of familiar, clandestine foods that have made their way into my kitchen. They’re not luxury items in the classic sense; they’re not chic, or expensive, or novel, In fact they’re a lot cheaper than the fancy, artisanal products you might find at the store. But they are luxury items in the sense that it’s impossible to take them for granted. They are special by default. And I am head-over-heels in love with them.

Below you’ll find two recipes I made at Easter – both using eggs and ricotta (and lemon, in the spirit of Sicilian tradition) (and, possibly unconsciously, in the spirit of my trip to Sicily this summer). The first is a version of gnocchi that, instead of potato, is held together with egg, ricotta and a bit of flour. They’re called dunderi and are apparently an Amalfitan specialty, but I discovered them by watching this video on Tasting Table with Portland restauranteur Jenn Louis. I’d never made a non-potato gnocchi before, so I was a little apprehensive about them falling apart in the simmering water. But they turned out perfectly – soft, tender little dumplings, tossed in some browned butter with a little parmesan and lemon. They are a dream to eat. The second recipe is a simple, southern Italian-inspired cake that is perfect with coffee or tea. It’s hard to explain, but this for me is the prototypical Italian cake – no frills, not too many competing flavours, not exactly light, but not heavy either. Lots of lemon flavour. The leftovers from Easter were cut into wedges the next morning and dunked into espresso. (how any good Italian – and you – should eat your day-old cake).

Have a happy weekend everyone x

Dunderi with Lemon, Butter and Parmesan – recipe from Jenn Louis,via Tasting Table
Serves 4-6

Note: the measurements are in grams to yield more consistent results. If you don’t have one already, an electric scale is an indispensable tool when it comes to European recipes and baking. I only spend about $20 on mine and my only regret is that I didn’t get one sooner.

Dunderi with Lemon and Butter

Ingredients

For the Dunderi:

  • 480 grams whole-milk ricotta cheese
  • 6 egg yolks
  • 45 grams finely grated Parmigiano-Reggiano, using a microplane
  • Pinch freshly grated nutmeg
  • 1 teaspoon kosher salt
  • 160 grams, plus 2 tablespoons, all-purpose flour (plus more for dusting)
  • Semolina flour, for dusting

For the Sauce:

  • 110 grams (about 1 stick) butter
  • 2 teaspoons fresh lemon juice
  • Zest of 1 lemon
  • Kosher salt, to taste
  • Parmigiano-Reggiano, for serving

Directions

1) In a large bowl, mix the ricotta and egg yolks until smooth. Stir in the Parmesan, nutmeg, salt and flour until the dough just comes together.

2) Sprinkle the work surface with a generous dusting of flour. Scrape the dough onto the work surface and sprinkle with a little more flour to prevent the dough from sticking.

3) Line a rimmed baking sheet with parchment paper and dust with semolina flour.

4) Using a pastry cutter, divide the dough into 6 equal portions. With floured hands, roll each piece into a log about a ½ inch in diameter. Cut the log into ½-to-1-inch-long pieces. Place the dunderi on the prepared baking sheet and repeat with the remaining dough. Make sure the dunderi pieces are not touching, so they don’t stick together. Make ahead: The dunderi can be made, covered and chilled in the fridge for up to 2 days or frozen on the baking sheet and transferred to a resealable plastic bag. (if freezing, use within one month.)

Dunderi with Lemon and Butter

Dunderi with Lemon and ButterDunderi with Lemon and ButterDunderi with Lemon and ButterDunderi with Lemon and ButterDunderi with Lemon and ButterDunderi with Lemon and ButterDunderi with Lemon and ButterDunderi with Lemon and Butter

When ready to cook: 

1) Bring a large pot of salted water to a simmer over medium-high heat. Add the dunderi and simmer until they begin to float to the surface, 1-2 minutes.

2) Meanwhile, in a large skillet over medium heat, melt the butter until the butter becomes golden brown and toasty (6 to 8 minutes). Add the lemon juice and zest, and season with salt. Add the dumplings and toss to coat. Spoon each serving into a bowl and top with Parmesan. Serve immediately.

Dunderi with Lemon and Butter

Dunderi with Lemon and Butter

—–

Lemon-Ricotta Cake – adapted from Eat My Kitchen
Makes one 8″ cake

Ingredients

    • 80g butter, softened
    • 150g sugar
    • 80g ricotta
    • 3 eggs, separated
    • 4 Tbsp freshly squeezed lemon juice
    • zest of 1 lemon
    • 200g all-purpose flour
    • 3/4 tsp baking powder
    • pinch of salt
    • icing sugar to dust the cake

1) Set the oven to 350°F and butter the cake pan. Combine the flour and baking powder. Beat the egg whites with a pinch of salt till stiff.

2) Beat the butter and sugar till fluffy, add the ricotta and mix for a couple minutes. Add the egg yolks and continue mixing for 2 minutes. While still mixing, add the lemon juice and zest followed by the dry ingredients, mixing well for another minute. Stir a couple of tablespoons of the stiff egg whites into the dough before you carefully fold in all of the egg whites.

3) Scrape the dough into the prepared pan and bake for 30 minutes or until golden brown or when a skewer inserted into the centre comes out clean. Let the cake cool and dust with icing sugar.

Lemon-Ricotta Cake

Share this:

  • Tweet
  • Share on Tumblr

Like this:

Like Loading...

Muffin PSA

18 Friday Mar 2016

Posted by julia chews the fat in Breakfast & Brunch, Snacking, Sweet Tooth, Vegetarian

≈ 4 Comments

I’ve long held the belief that muffins are more or less just cake disguised as breakfast food. Most muffins I’ve come across in bakeries and cafés have an ultra-sweet crumb, studded with the usual flecks of fruit and nut, but more often than not, chocolate too (in different variations of the same theme – chocolate/banana, double chocolate and chocolate chip are the first ones to come to mind). The most confusing kinds have things like “cheesecake” centres, or grainy strusel toppings that are ninety-nine percent sugar. In a lot of ways, muffins have become the antithesis of sensible eating. Because if something like this can be called a muffin, clearly we’ve derailed somewhere along the way.

When I think of the ideal breakfast muffin – the Platonic ideal – it has to have a bit of brawn, something nutritious that will sustain me for the better part of the morning when paired with whatever fruit is in the fruit bowl.  The Platonic Muffin incorporates a type of flour that has some substance, some oumf (whole wheat, for instance) and a few octogenarian-approved ingredients like oat bran and dried fruit. The crumb shouldn’t be too sweet, and while nuts are welcome, chocolate and candy are not invited to the party. In other words, I want the kind of muffin that will lift me in the morning, when my eyes are half-mast in front of the computer, and the synapses in my brain aren’t yet at full throttle; I want it to give me a boost and make me feel productive; I want a muffin I can rely on.

Flipping through my cookbooks a few weekends ago, I came across Sara Forte’s Multigrain Muffin – a simple, but sturdy-looking thing that combines carrot, dates and buttermilk into the batter (ding ding ding!), along with different types of flour (ding ding ding!). Her cookbook, The Sprouted Kitchen: A Tastier Take on Whole Foods, is what I would call a book of healthy recipes – for the better part vegetarian, some raw, and (as laid out explicity in the title) all containing whole, unprocessed ingredients. Now, while I can get behind all of that, I sometimes have concerns about baked goods being labelled “healthy”, because it often means they taste like cardboard and have a mouthfeel akin to dry soil. But thankfully, this isn’t the case with these muffins- the use of different flours results in a balanced texture, the carrots and dates add sweetness without it tasting saccharine, and the buttermilk makes the whole thing moist and melt-in-your-mouth. It’s the kind of breakfast food that pushes all the right buttons.

This post isn’t sponsored by Sara or her cookbook; it’s just that since these muffins have been on heavy rotation at our house over the last little while, I felt it was my duty – as keeper of this blog – to share them with you instead of keeping them all to myself.

You can see this as a muffin PSA, from your local food nerd.

I hope you’ll give them a whirl.

Multigrain Carrot-Date Muffins

Multigrain Buttermilk Muffins with Carrot and Dates
Adapted from The Sprouted Kitchen: A Tastier Take on Whole Foods
Makes 12 muffins

  • 1 cup buttermilk*
  • 1/4 cup unsalted butter, melted and slightly cooled
  • 1 egg
  • 1 teaspoon vanilla extract
  • 1/4 cup finely chopped, pitted Medjool (or fresh) dates
  • 1 1/2 cups loosely packed grated carrots**
  • 3/4 cup whole wheat flour
  • 1/3 cup unbleached all-purpose flour
  • 3/4 cup oat bran
  • 1/2 cup almond meal
  • 1/2 cup muscovado sugar (I used raw sugar)
  • 1 teaspoon baking powder
  • 1 teaspoon baking soda
  • 1 teaspoon ground cinnamon
  • 1/4 teaspoon ground ginger
  • 1/2 teaspoon salt

* to make 1 cup of buttermilk, simply pour whole milk almost to one cup, topping up with about 1/2 Tbsp white vinegar. Let sit for a minute (it will curdle a bit), then it’s ready to be used in your baking.

**use the smaller holes of your box grater for this; the carrot will blend better into the batter.

Multigrain Carrot-Date Muffins

Directions

Preheat oven to 350F.

In a large bowl whisk together the first four ingredients. Add the dates and carrots and stir until combined. In another mixing bowl whisk together the remaining ingredients. Add the carrot-date mixture into the dry and stir until combined. Let the batter sit for 5 minutes to poof up a bit.

Line muffin pan with baking papers. Fill the papers 3/4 way up with batter. Bake for 20 minutes or until toothpick inserted in the center comes out clean.

Remove the pan from the oven and transfer muffins to a cooling rack. Can be stored for 3-4 days in an airtight container.

Multigrain Carrot-Date Muffins


Share this:

  • Tweet
  • Share on Tumblr

Like this:

Like Loading...

Easy Cooking – Pulses

09 Wednesday Mar 2016

Posted by julia chews the fat in Cooking For Your Peeps, Lunch & Dinner, The Basics, Vegetarian

≈ 3 Comments

I come to you today with an extension to the previous post on “easy cooking” to talk about pulses. Yes, pulses – not the ones that emanate from the heart, but rather the kind that make up that sub-set of legumes* (pronounced ley-gooms by most anglophones) which includes beans, lentils and dried peas.

(*Language note: the original French word légume(s) – pronounced ley-gyume in both the plural and singular – is used by francophones to describe vegetables. Lentils, peas, etc. are known as légumineuses.)

It’s perhaps not the sexiest of subjects, but a worthwhile one. Not only has the UN declared 2016 The International Year of the Pulses but, ever since Ottolenghi‘s books hit the mainstream and sustainable eating has nearly become a water cooler topic, the humble bean, lentil and chickpea have become de rigeur in the food world. Thankfully, they’re delicious as they are hip, and since pulses have a long history with food cultures across each continent, the recipe repertoire is vast and versatile.

I’ve slid pulses under the banner of “easy cooking”, simply because once you’ve made a few batches, it’s easy to incorporate them into different meals for the week, without too much trouble. On any given Sunday, when the kitchen becomes my workhorse, at least three of the four burners of the stove are on, cooking beans and chickpeas. I’ll soak them under cold water the night before so that they’re plump and rehydrated the next day. Then they just have to cook – usually anywhere from 30-60 minutes, depending. Beans aren’t fussy. You bring them to a boil, lower the heat, let them bubble away on low until the timer goes off. No need to hover over the stove; you can more or less ignore them and tend to other things (Skyping, reading, lip-synching…) while they cook. Lentils are the same, except they don’t need soaking and are ready in even less time (20 minutes or so).

It goes without saying that you can use always canned beans and chickpeas in your recipes (there’s a supply stationed in my cupboard right now) (because none of us are 19th-century homesteaders that make everything from scratch, all the time), but if you have a little time, cooking beans from dried is a nice alternative – they retain a nice al dente bite and their flavour is a lot more neutral/natural than the canned versions.

If you’re new to cooking pulses, here are some practical tips to keep in mind:

BEANS:

  • most require pre-soaking before cooking; however certain beans, such as mung or adzuki, and split peas don’t require pre-soaking
  • they will not cook properly if you add salt to the boiling water (reserve salt and add when they’re almost done cooking, if using)
  • when cooking, add enough water to cover them by about an inch, bring to gentle boil, then leave the lid on but slightly ajar.
  • cooking time can range between 30-60 minutes, depending on the type of bean (see more info in the links below)

LENTILS:

  • do not require pre-soaking before cooking
  • need to be picked over and rinsed before cooking
  • will not cook properly if you add salt to the boiling water (reserve salt and add when they’re almost done cooking, if using)
  • cooking ratio: 2 parts water, 1 part lentils 
  • red lentils are not the same as green, brown of Puy lentils; they cook faster and become softer (read: mushier) than other lentils. Two of my favourite recipes for red lentils are for Turkish red lentil soup and coconut dhal.

CHICKPEAS:

  • require pre-soaking before cooking
  • should be rinsed after soaking
  • will not cook properly if you add salt to the boiling water (reserve salt and add when they’re almost done cooking, if using)
  • when cooking, add enough water to cover them by about an inch, bring to gentle boil, then leave the lid on but slightly ajar
  • take about 1 hour to cook

For more information, visit these sites:

  • Pulse Canada
  • USA Dry Pea and Lentil Council
  • Taste
  • The Kitchn: beans, lentils
  • Miss Vickie – varieties + soaking (careful: cooking times re for pressure cookers)

Combinations: during the week, I like having a variety of cooked lentils, beans and grains (quinoa, farro, brown rice) in separate containers in the fridge. That way, they’re ready to be thrown into soups, stews, salads, pasta, etc.

Freezing: whatever won’t get used up in the next couple of days can be packed and frozen. Lay the cooked beans flat in one layer (e.g. on a baking sheet), allow them to freeze, then transfer to freezer bags or containers before putting them back in the freezer. The pre-freezing in one layer will prevent them from sticking together (same goes for dumplings, meatballs, etc.)

Quantities: if you’re going to spend the time cooking beans, go all the way. The idea isn’t to make portions large enough to survive the apocalype (in other words, no more than you can consume within the next few weeks) (freezer burn is a real thing), but make enough to have a small stockpile in the fridge/freezer of the different pulses that you like. That way, you’ll only have to set aside that time to cook beans about once a month/month and a half.

Below are some of my favorite recipes that use pulses – one with brown lentils, one with mung beans, and the last with chickpeas. They might even become your new back-pocket recipes.

—–

Classic Lentil Soup – makes 6 servings; freezes well

Note: this recipe does not require any pre-planning (soaking/cooking). The lentils cook in the soup.

Classic Lentil Soup

Ingredients

  • 300 grams dried brown lentils
  • 3 tablespoons olive oil
  • 1 celery stick (about 1 cup), finely chopped (reserve some celery leaves for garnish)
  • 1 medium carrot (about one cup), finely chopped
  • 1 large yellow onion (about 1 ½ cups, finely chopped)
  • 2-3 garlic cloves, peel removed and smashed
  • 14 ounces diced tomatoes in juice
  • 2 bay leaves
  • 6 cups water or vegetable broth
  • Salt to taste
  • Optional: olive oil and sherry vinegar for serving

Directions

1) Rinse and pick through the lentils (sometimes you can find tiny stones); set aside to drain.

2) Put a large casserole or soup pot on medium heat and add the 3 Tbsp olive oil. Once the oil is hot, but not smoking, add the onion, celery, carrot, and garlic and cook until soft and the onion is beginning to turn golden-brown, about 10 minutes. Add the bay leaves and cook for an additional 2 minutes. Then add the tomatoes with their juice, stir and cook for about 2 to 3 minutes.

3) Add the lentils and cover with the water (or broth). Cover and cook about 30-45 minutes over low-medium heat until the lentils are tender (check from time to time to see if you need to add a bit more water/broth). When they’re almost done cooking, add salt to taste.

4) Add salt to taste; serve with a drizzle of olive oil, a splash of sherry vinegar and some of the reserved celery leaves. When reheating any leftovers, add some water to loosen the lentils.

Classic Lentil Soup

Classic Lentil Soup

—–

Mung Bean and Carrot Salad with Feta – lightly adapted from Yotam Ottolenghi
Serves 4

Note: this recipe does not require any pre-soaking. Mung beans are ready to be cooked from dry.

Mung Bean and Carrot Salad

Ingredients

  • 140g dried green mung beans
  • 60ml olive oil, plus extra for drizzling
  • 1 tsp cumin seeds
  • 1 tsp caraway seeds
  • 1 tsp fennel seeds
  • 2 tbsp white wine vinegar
  • 2 garlic cloves, peeled and crushed
  • ½ tsp dried chilli flakes
  • 1 tsp salt
  • 3 large carrots, peeled and cut into 1cm batons
  • ½ tsp honey
  • small handful of fresh coriander, chopped
  • grated zest of 1 lemon
  • 140g feta, crumbled

Mung Beans

Directions

1) Bring a medium saucepan of water to a boil, add the beans and simmer for 20 minutes, until they are cooked but still retain a bite. Drain, shake well and transfer to a large bowl.

2) About three minutes before the beans are done, heat two tablespoons of oil in a small frying pan and add the seeds. Cook on medium heat, stirring often, until they start to pop – about three minutes – then pour, hot oil and all, over the beans, along with the vinegar, garlic, chilli and half a teaspoon of salt.

3) While the beans are cooking, lay the carrots in a pan large enough for them to form a shallow layer on the bottom. Pour over anough water to nearly submerge them, plus two tablespoons of oil and half a teaspoon each of honey and salt. Bring to a boil and keep on a high heat for eight minutes, by which time the water should have evaporated and the carrots become slightly caramelised but still crunchy. Drain some liquid, if needed.

4) Add the carrots to the bean bowl, along with the fresh coriander, and stir gently. Transfer to a shallow serving bowl, sprinkle over lemon zest, dot with feta and drizzle with olive oil.

Mung Bean and Carrot Salad

Mung Bean and Carrot Salad

—–

Spiced Eggplant with Chickpeas and Yogurt – adapted from Molly Wizenberg
Serves 6; freezes well

  • 3 large eggplants (about 3 ½ lb)
  • 2 Tbsp. olive oil
  • 1 tsp. cumin seeds
  • 1 medium yellow onion, finely chopped
  • 1 small jalapeño, seeded (or not) and finely chopped
  • 2 garlic cloves, finely chopped
  • 1 ½ Tbsp. minced fresh ginger
  • ¼ tsp. red pepper flakes
  • 3 medium tomatoes, finely chopped
  • ½ tsp. paprika
  • 1½ tsp curry powder
  • 1 cup cooked chickpeas (or canned)
  • ¾ cup chopped cilantro
  • ½ cup whole-milk plain yogurt
  • Salt, to taste
  • Garam masala, for serving

Directions

1) Preheat the oven to 450° F. Put the eggplants on a rimmed baking sheet, and pierce them all over with a knife. Bake for about 40-45 minutes, or until the skins are blackened and the flesh feels very soft when pressed. Let cool slightly, then slice them open lengthwise and, using a spoon, scrape the flesh from the skin into a large bowl. Mash the flesh coarsely and set aside (this part can be done a day ahead and refrigerated).

2) Heat the oil over medium-high heat in a large skillet. Add the cumin seeds and cook until they begin to sizzle and pop, about 10 seconds. Add the onion, and cook, stirring occasionally, until it is soft and beginning to brown, about 8-10 minutes. Add the jalapeño, garlic, ginger, red pepper flakes, paprika, curry powder and cook, stirring constantly, for 2 minutes. Add the tomatoes, and stir well. Cook until all the liquid has evaporated, about 10 minutes.

3) Add the eggplant, stir to combine, and cook over low heat for 10 minutes. Add the cooked chickpeas, and warm through. Reduce the heat to low, and stir in the cilantro, half of the yogurt, and salt.

Serve hot or warm, with remaining yogurt and sprinkled with garam masala. Partners well with basmati rice or naan bread.

(just so you know – this photo was taken in bad lighting, under a tungsten bulb; in real life, the colour is deeper richer, and less pink.)

Spiced Eggplant with Chickpeas and Yogurt

Share this:

  • Tweet
  • Share on Tumblr

Like this:

Like Loading...

Easy Cooking – Garlic & Chili Pepper

06 Sunday Mar 2016

Posted by julia chews the fat in Cooking with Nonna, Lunch & Dinner, The Basics, Vegetarian

≈ 3 Comments

I recently came across an article by Elizabeth Dunn, published last fall in The Atlantic called The Myth of ‘Easy’ Cooking. It’s basically critique of the “easy cooking” empire that has proliferated in recent years over every media platform known to man (newspapers, magazines, TV, online tutorials, books, blogs, vlogs…), touting super simple! stress-free! meals made faster than you can say Rachel Ray. Reading it from the perspective of someone who likes making things from scratch – to the point of actually seeking it out – I felt conflicted. On one hand, it felt transgressive to agree with someone that cast such a critical light on home cooking. (It is, after all, the backbone of this blog and the thing I’m most enthusiastic about when it comes to food); on the other hand, I felt that she had a point – one that not many food enthusiasts or people working in the field of food media (like herself) would be eager to lay bare so candidly.

She’s calling bullshit, and I like it.

Because I think that the crux of what she’s saying is true – “fast and easy” recipes in the world of modern home cookery are often presented as more straightforward and simple than they actually are. It’s become very fashionable to sell the idea that an entire meal – from starter to dessert – can be effortlessly whipped up in under twenty minutes. And this, after a heavy day at work, bookended by two frenzied commutes, plus the discovery that, while you were away, your bathroom flooded, or the fridge broke down, or that your child has inexplicably lodged a Lego block deep into their nasal cavity. (I don’t speak from parental experience, but I have it on good authority that kids do these kinds of things. Bless them.) All this to say that on a run-of-the-mill Tuesday night – even without anything out of the ordinary happening – you’re likely not jazzed about the idea of assembling Piri Piri chicken, with two-type mashed potatoes, arugula salad, and natas tarts for dessert (as boldly suggested on page 120 of Jamie Oliver’s Meals in Minutes).

Elizabeth Dunn has, very articulately and succinctly, hit the nail on the head about how today’s cooking empire (the books, the shows, the magazine articles and all the rest of it) has hijacked the principle of “simple cooking”. Simple cooking isn’t tossing some iceberg lettuce with oil and vinegar anymore – it’s topping it with freshly roasted chicken, toasted nuts, homemade croutons and some esoteric dressing that requires three different oils. (Don’t get me wrong, I love the idea of that salad; it’s just that on most weekdays, who’s making that whole thing from scratch?). So, in that sense, I agree with her – in making cooking a fashionable commodity, we’ve built this unrealistic, unattainable image of what simple cooking is supposed to represent; in falling under the spell of pretty pictures in gauzy magazines, we’ve lost sight of what real, simple, day-to-day cooking actually looks like.

In all this, it’s worth mentioning that “easy” cooking means something different for everyone. My time, energy, and money constraints are not identical to yours; same goes for our interest in cooking, which not only varies from person to person, but also from day to day. There are days when I’m full of vim and vigour and have no qualms about making a 3-course dinner from beginning to end. But then there are days when stove-top popcorn and a glass of fizzy water sounds like a reasonable dinner. (to the chagrin of every nutritionist out there.)

All that said, I still really do believe in the importance in making food at home – in whatever way, shape or form that comes to be. And so, in defense of home cooking, I will say this: easy can still stay easy. On days when I don’t feel like pulling together a meal, often I’ll give myself a little nudge, and – after thinking about how much that hip, third-wave, stone-oven pizza next door is going to cost me after tax and tip – I’m usually able to scrounge together something decent, without much time and effort.

In many ways, I have Nonna to thanks for this. She’s taught me a lot about simple cooking, including the holy trinity of olive oil, garlic, and peperoncini (red chili flakes). When combined with care, these three ingredients can elevate more or less anything in your fridge. Toss in an anchovy, and you’re well on your way to gold standard of peasant food.

Below you’ll find three recipes that incorporate olive oil, garlic and peperoncini (red chili flakes)- one for sautéed rapini, another for braised Savoy cabbage and the last, an improvised pasta dish with Romano beans. This is true easy cooking – no fireworks or esoteric ingredients. Just a couple of things from the crisper or freezer that you can toss together in between the time you get home and your child decides to see how far a Lego will go up their nose.

—–

RAPINI SAUTÉED IN GARLIC AND DRIED CHILI
(Rapini aglio e olio con peperoncini)

Having a little stockpile of cooked rapini in the freezer is one of the best gifts your past self can give your present self, on those days when all you can do is stare into the depths of fridge, mouth-breathing.These are some of my favourite ways to use this rapini:

• as-is, with a chunk of crusty bread to soak up the garlic oil
• swirled into pasta, with a generous dusting of Parmigiano-Reggiano
• on top of polenta
• on top of pizza
• alongside roasted chicken, spicy sausage, or meatballs
• in a curry

Rapini

Makes about 3 cups

  • 1 bunch of rapini (broccoli rabe)
  • 3-4 large garlic cloves, sliced
  • 1 tsp dried chili flakes (peperoncini)
  • 3 Tbsp good quality olive oil (or 1-2 Tbsp more, if you’re adding this rapini to pasta)
  • sea salt (or flaked salt, such as Maldon)

Directions

1) Put a large pot of water on to boil. Rinse the rapini under cold running water and pat dry with a dish towel.

Rapini

2) Trim the stems (if they look a little rough), then run a paring knife along the inside of the stem to make a cross-section at the bottom, like so (this will help the stems to cook evenly, along with the more delicate leaves):

Rapini
Rapini

3) Once the water has boiled, add the rapini and blanch for about 3 minutes. Remove from the boiling water and drain in a colander. Once cool enough to handle, gently squeeze out as much water as possible, then roughly chop the rapini into pieces (manageable enough the eat). (note: at this point you can freeze portions of the rapini that you aren’t using right away – just make sure to drain really well, then transfer to small freezer bags)

Rapini

4) Meanwhile, heat up the olive oil in a pan on medium heat. Once hot, add the sliced garlic and fry until just beginning to turn golden. Add the pepperoncini as fry for 10 seconds further. Add the blanched, chopped rapini and a good pinch of salt and cook for about another 5 minutes, stirring every so often. Check the seasoning, then serve as desired.

Rapini

—–

BRAISED CABBAGE WITH GARLIC AND DRIED CHILI
(Cavolo stufato)

Makes about 4 cups

  • 1/2 head of Savoy cabbage, centre rib removed and cut into 1″ slices
  • 3-4 large garlic cloves, sliced
  • 1/2 tsp dried chili flakes (pepperoncini)
  • 3 Tbsp good quality olive oil
  • 1 cup water or chicken stock
  • sea salt (or flaked salt, such as Maldon)

Garlic-Braised Cabbage

Directions:

1) Heat the olive oil in a pan on medium-high heat. Once hot, add the garlic and cook until golden (almost golden-brown). Add the chili flakes and stir, allowing them to flavour the oil (about 10 seconds).

2) Add the sliced cabbage and stir to combine. Season with salt. Cook for about 2 minutes, then add the water or stock.

3) Bring to a boil, then reduce the heat to low, cover and allow the cabbage to cook and break down (about 20-30 minutes). Serve with crusty bread, on pasta or with fish.

Garlic-Braised Cabbage

Garlic-Braised Cabbage

—–

SPAGHETTI WITH GARLIC & DRIED CHILI WITH ROMANO BEANS
(Spaghetti aglio e olio con fagioli)

Makes 2 servings

I like to cook big batches of beans and lentils all at one time, then either refrigerate them for the week, or freeze them (more on prepping pulses and legumes in an upcoming post). If freezing, lay the cooked beans in one layer on a baking sheet, freeze, then transfer to containers of freezer-proof bags (this prevents them from sticking together). They’ll keep for a couple of months. If you’re short on time, just used canned.

  • 200g spaghetti
  • 1/4 cup good quality olive oil
  • 3-4 large garlic cloves, sliced
  • 1/2 tsp dried chili flakes (peperoncini)
  • 1/2 cup cooked romano beans (or canned)
  • 1 anchovy filet
  • 1/4 cup breadcrumbs (I used panko)
  • 1/3 cup Parmagiano-Reggiano, plus more for serving
  • zest from 1/2 lemon
  • optional: pesto (I try to make some in the summer/early fall and freeze them in individual portions. More on that here.)

Spaghetti with garlic, dried chillis and romano beans

Directions

1) Boil the water for the spaghetti. Meanwhile, heat the olive oil in a pan on medium-high heat. Once hot, add the garlic and cook until golden (almost golden-brown). Add the chili flakes and stir, allowing them to flavour the oil (about 10 seconds).

2) Add the whole anchovy and stir; it will melt on its own. Add the beans, stir,and allow to cook for couple of minutes. Then add about 1/4 cup of water to help them break down a bit and form a sauce.

3) When the water comes to a rolling boil, add a small handful of coarse salt and then add the spaghetti; cook until al dente. (If the bean mixture looks a little dry, add some of the pasta water. The starch will help bring the it together.

4) While the beans are warming through and the pasta is cooking, set a dry pan on medium heat and toast the breadcrumbs, shaking the pan every so often to avoid burning them (2-3 minutes). Set aside.

5) Strain the pasta and then return to the pot. Add the garlic and bean mixture and stir to coat. Add the Parmigiano and stir to combine; serve in bowls, adding a little lemon zest, the toasted breadcrumbs and some additional Parmigiano to taste.

Spaghetti with garlic, dried chillis and romano beans

Share this:

  • Tweet
  • Share on Tumblr

Like this:

Like Loading...
← Older posts

Facebook

Facebook

Instagram

No Instagram images were found.

Recent Posts

  • Layers and Rows
  • Finding Buoyancy
  • February
  • Wednesday
  • Cross My Heart, Miso

Archives

  • May 2017
  • April 2017
  • February 2017
  • December 2016
  • November 2016
  • September 2016
  • August 2016
  • July 2016
  • June 2016
  • May 2016
  • April 2016
  • March 2016
  • February 2016
  • January 2016
  • December 2015
  • November 2015
  • October 2015
  • September 2015
  • August 2015
  • July 2015
  • June 2015
  • May 2015
  • April 2015
  • March 2015
  • February 2015
  • January 2015
  • December 2014
  • November 2014
  • October 2014
  • September 2014
  • August 2014
  • July 2014
  • June 2014
  • May 2014
  • April 2014
  • March 2014
  • February 2014
  • January 2014
  • December 2013
  • October 2013
  • September 2013
  • August 2013
  • July 2013
  • June 2013
  • May 2013
  • April 2013
  • March 2013
  • February 2013
  • January 2013
  • December 2012
  • November 2012
  • October 2012
  • September 2012
  • August 2012
  • July 2012
  • June 2012
  • May 2012
  • April 2012
  • March 2012
  • February 2012

Categories

  • Beverage
  • Breakfast & Brunch
  • Condiments
  • Cooking For Your Peeps
  • Cooking Solo
  • Cooking with Nonna
  • Food Away From Home
  • Food Writing
  • Holidays
  • Intro
  • Lunch & Dinner
  • Snacking
  • Soups
  • Sweet Tooth
  • The Basics
  • Vegetarian

Enter your email address to follow this blog and receive notifications of new posts by email.

Join 80 other subscribers

Blog at WordPress.com.

  • Follow Following
    • julia chews the fat
    • Join 80 other followers
    • Already have a WordPress.com account? Log in now.
    • julia chews the fat
    • Customize
    • Follow Following
    • Sign up
    • Log in
    • Report this content
    • View site in Reader
    • Manage subscriptions
    • Collapse this bar
 

Loading Comments...
 

    %d bloggers like this: