• Home
  • About

julia chews the fat

julia chews the fat

Monthly Archives: May 2016

Faking Fancy

31 Tuesday May 2016

Posted by julia chews the fat in Breakfast & Brunch, Cooking For Your Peeps, Lunch & Dinner, The Basics, Vegetarian

≈ 3 Comments

You’re having friends over for dinner and you want to make something nice. But it’s a work night, a Thursday, so you’re already a bit bagged, and a little unmotivated, thinking about the Jenga tower of dishes that will invariably pile up in the sink if you start making something quote-unquote fancy.

This is when you need to pull a rabbit (or two) out of your hat to successfully fake your way to a meal fit for dinner guests – a meal that will involve minimal amounts of messing around in the kitchen, but will look and taste a little more special than the everday.

There are, of course, different ways you can do this. For starters, if you’re committed to the idea of using the oven, you can choose recipes that compliment eachother’s cooking time and temperature; that way, you can cook a couple of things at the same time, and even bake dessert at the end, with that still-warm oven. The other advantage is that you can slide whatever you’re making into the oven, let it work its magic, and go back to the things you were doing beforehand, like the multi-tasking mavrick you are.

We all have different shortcuts in the kitchen, which is nice, because it means that we can learn from eachother’s acumen – that mental Roladex of tips and tricks we’ve stockpiled over the years. Below you’ll find a few of my own back-pocket recipes (the rabbits up my sleeve, if you will) for when I’m having people over, but don’t want to fuss. It’s a simple potato and roast chicken dinner that can be served with a green salad or some steamed vegetables. The potatoes can be slipped into the oven about 30-40 minutes after the chicken. The dessert is easy too – no need to wrangle dough or batter, just toss some sugared apples onto some prepared puff pastry and watch it pouf up in the oven after the potatoes and chicken have come out.

All of it gives you more time to be with your guests, which, let’s be honest, is the most important part.

FAKING FANCY TIP NO.1 – RE-VAMPING THE HUMBLE POTATO

Potatoes, simply prepared, often come in two forms – boiled, or diced and roasted. Both of these options have virtues of their own, but there’s another variation on the potato that should be on everyone’s radar, and that, dear people, is the smashed potato. I first learned about smashed potatoes during a period in the mid-2000s when I binge-watched Laura Calder‘s French Food at Home, before food blogging and celebrity chef-dom had exploded and you could actually rely on The Food Network for quality programming (wow, can you hear the octogenarian coming through? Don’t get her started on styrofoam food packaging). The Food Network aside, Laura Calder is known in her own right for her pared-down, no-nonsense – and très, très français – approach to food, where the most important elements are quality of ingredients and method, as opposed to flashy additions or lengthy processes. Her smashed potatoes (she calls them “squished” potatoes) are simplicity incarnate, but the nice thing is that they are just the slightest bit different than a boiled or a roasted potato, because they’re in fact BOTH: you take some nice, small, waxy potatoes, skin-on, and let them cook in boiling water until just tender. Then you drain them, set them on a work surface and gently press each one with whatever sturdy kitchen equipment you have on hand (I like using the bottom of a cast iron pan), dress them with olive oil, a sprinkle of salt (I add fresh rosemary too), then lay them on a baking sheet and toss them into a hot oven for 30-40 minutes, turning once halway though. The beauty of the smashed potato is that you get a tender interior and these lacy, crispy edges. They also look more interesting than a in-tact boiled potato, sort of more lived-in and wild. And they are a treat to eat.

SMASHED BABY POTATOES WITH ROSEMARY – from Laura Calder

  • 2 lb baby potatoes
  • olive oil
  • flaky salt (such as Maldon)
  • freshly ground pepper
  • a couple spring of fresh rosemary

1) Scrub the potatoes and cook, unpeeled, in boiling salted water until tender. Drain. When cool enough to touch, gently squish them flat with whatever kitchen tool you see fit. Don’t let them explode, just flatten until the edges break a bit, but they are still in one piece. Toss with some olive oil, the rosemary sprigs, and season with salt and pepper.

2) Heat the oven to 400°F. Spread the potatoes on a baking sheet and bake for about 30-40 minutes, or until crisp outside, turning once halfway through.

(*I didn’t get a chance to capture the finished result, so you’ll have to use your imagination – but they come out crackly, crispy, dark golden on the outside. A bit knarly, but beautiful.)

Smashed Potatoes with Rosemary

Smashed Potatoes with Rosemary

—–
FAKING FANCY TIP no.2 – ELEVATING ROAST CHICKEN

Let’s be honest, there’s nothing particularly spectacular about roast chicken in and of itself. But if done right, roast chicken can be one of the most delicious things you’ll put on the table, especially if you employ a good, healthy dose of butter. Here too, you have different options. Molly Wizenburg has a recipe for Thomas Keller’s roast chicken where you slather it with melted butter after it’s cooked and serve it with Dijon mustard (which, though I’ve never tried it, actually sounds pretty wicked). My usual fall-back is smearing butter under the skin, along the breastbone, before cooking. For added flavour, I like to use compound butter – in other words, softened, unsalted butter that you mix with herbs, or zest, or other seasonings. The butter “insulates” the breast meat (which tends to get dry) from the heat of the oven, while permeating it with rich flavour. You don’t want to be using butter like this everyday (you’d be well on your way to a heart attack), but for occasions that are out of the ordinary – say, having friends over on a Thursday night – it’s a lovely way to make roast chicken a little more frilly.

Roast Chicken with Butter

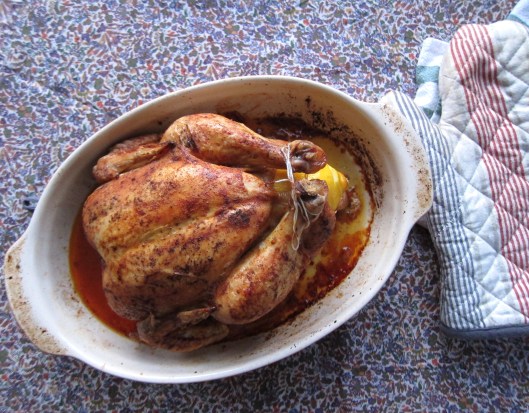
WHOLE ROASTED CHICKEN WITH HERBED BUTTER

Ingredients

        • 1 whole, 1.5 kg (3-3.5 lbs) good-quality chicken (I like to get mine here when I can)
        • 1 lemon, pierced all over
        • 3-4 cloves of garlic, smashed, skin-on
        • a handful of fresh herbs – thyme, rosemary, tarragon, etc. – chopped
        • about 3 oz. butter, softened
        • salt and freshly ground pepper
        • 1/4 tsp paprika (for colour; optional)
        • kitchen twine

Directions

1) Take your chicken out of the fridge about 30 minutes before it goes into the oven.

2) Preheat the oven to 400ºF. Mix the chopped herbs with the softened butter, season with salt and pepper and stir to combine; set aside. In a small dish, mix some salt, freshly ground pepper and the paprika (if using). Prepare two lengths of kitchen twine to wrap the legs and the thighs.

3) Set aside a roasting pan big enough for your chicken. Blot the outside of the chicken with paper towel (removing excess moisture will help ensure a crispy skin). Season the chicken with the prepared salt, pepper and paprika. With the cavity of the chicken facing you, gently run your fingers under the skin along the breastbone, separating the skin from the meat. Then, gently stuff portions of herbed butter under the skin, spreading it evenly over the breast meat. Put the garlic cloves and lemon in the cavity of the chicken.

4) Tie the legs together snugly (this prevents the bird from drying out). If the lower half of the chicken looks like it’s still pretty loose, I sometimes tie a second piece of twine around the top of the thighs. Place the chicken in the preheated oven and roast for an hour to an hour and fifteen minutes (see note below*), basting a couple of times during cooking. Once the chicken is cooked, remove from the oven and let rest for about 15 minutes before carving. Serve with the pan juices.

A note on cooking whole chicken: total cooking time will vary, depending on the actual size of your chicken, as well as the intensity of your oven. A good rule of thumb is to calculate 15 mins per pound at 400ºF, but I use a meat thermometer just to be sure – it should read 165ºF* when inserted into the thickest part of the thigh but not touching bone. (*A lot of thermometers and government sources will give 180ºF as the ideal internal tempertaure, but they are usually overly-cautious (resulting in over-cooked, dry meat). If you pull it out when it reaches 165ºF and then let it rest, covered, for about 10-15 minutes, you’ll be good to go. The juices should run clear, not pink, when you cut into it.)

—–

FAKING FANCY TIP no.3 – USING FROZEN PUFF PASTRY

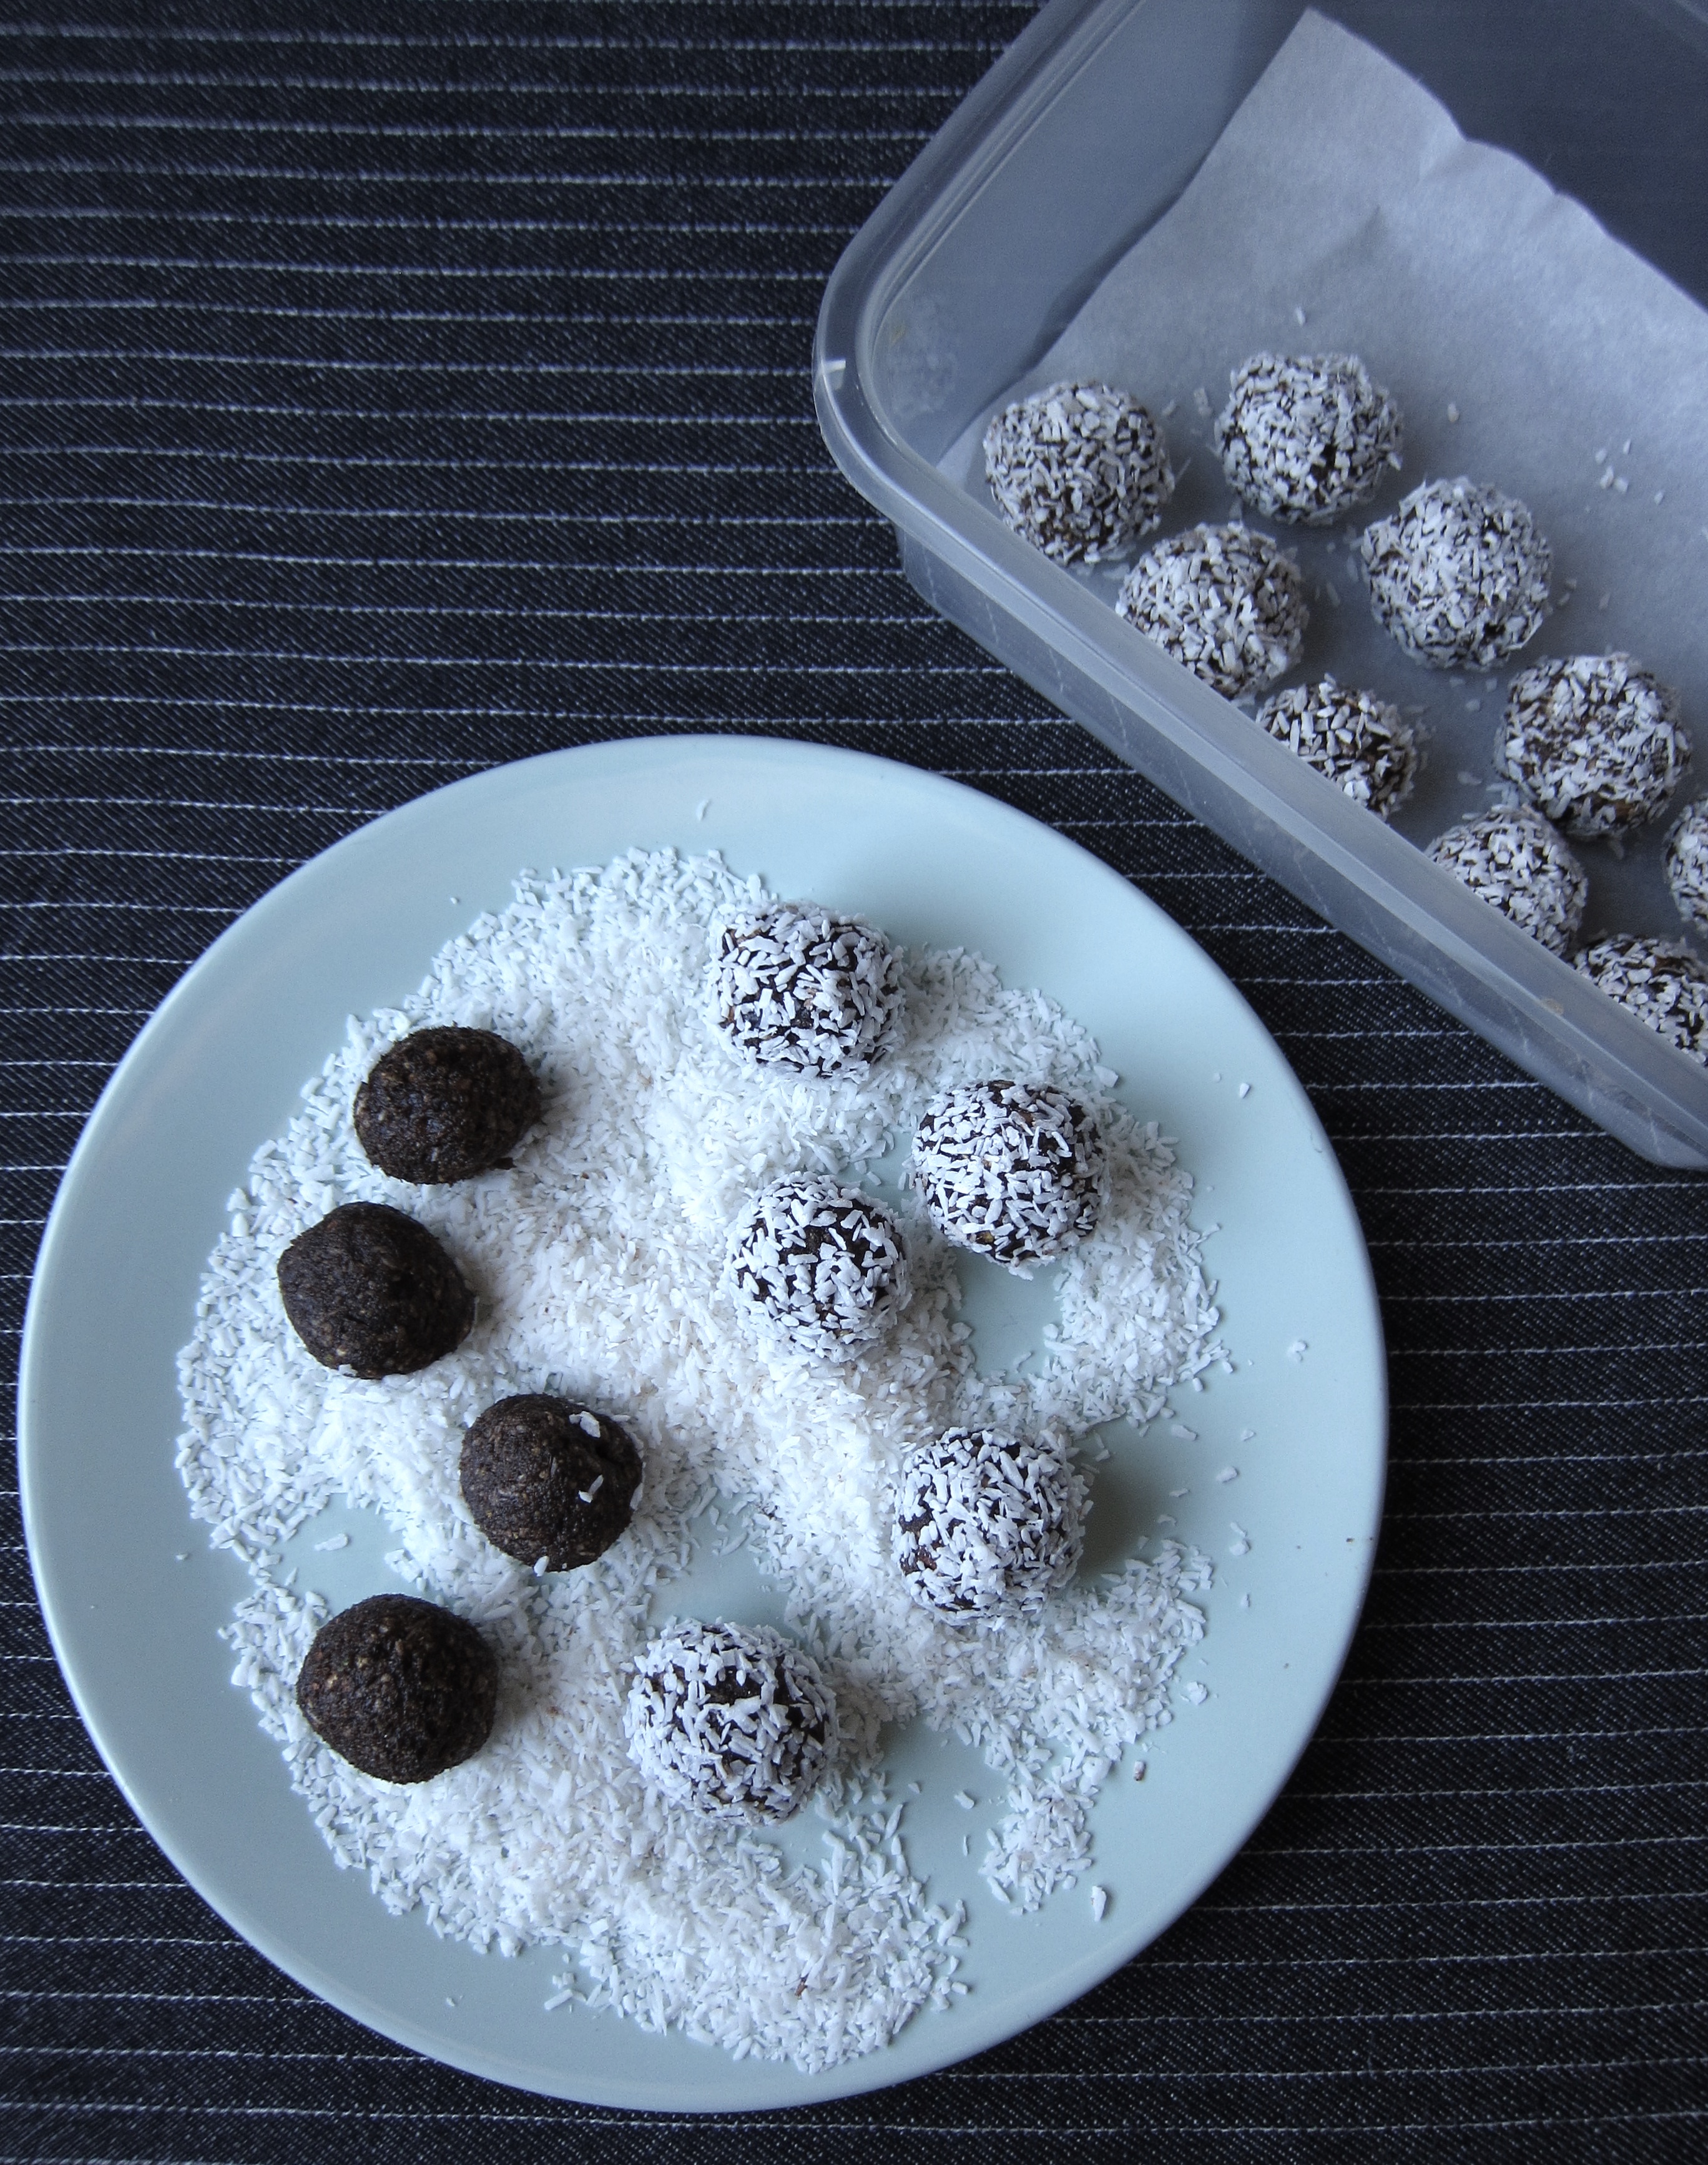
When you’re having people over, it’s sometimes nice to have something sweet at the end of dinner, but making a cake or a pie or something along those lines can be more work than it’s worth – the careful combining, the chilling, the rolling, the aforementioned sink full of dishes. This is when frozen puff pastry becomes a trusty pal – once thawed, it’s at your service and ready to use. The best part is that the free-form styling of the outer edges means that you can very easily get away with calling it “rustic”. Adding a quick dusting of powdered sugar to your finished tart (or any dessert for that matter) will make it look like a snowy, Scandanavian dream. I highly recommend it.
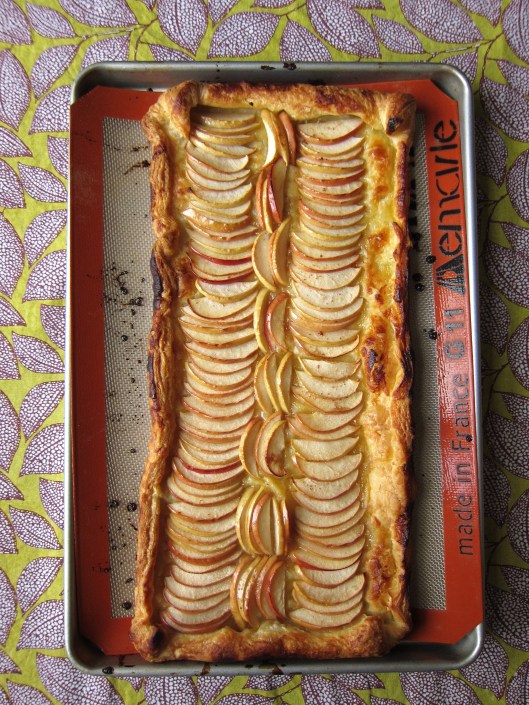
Puff Pastry Apple Tart

Puff Pastry Apple Tart

SIMPLE APPLE TART

        • 1 sheet all-butter puff pastry* (about 450 g), thawed
        • 2-3 firm, medium apples (such as Empire or Gala) – cored, halved and thinly sliced
        • 1 Tbsp granulated sugar
        • 2 Tbsp brown sugar
        • 3 Tbsp butter, melted
        • 1 Tbsp rum
        • squeeze of lemon
        • 2 Tbsp powdered sugar, for dusting (optional)

*one of the luxuries of living in Montreal is that many of us are within a stone’s throw of a bakery, many of which sell prepared puff pastry. If you don’t have a bakery close-by, you should be able to find puff pastry in the frozen foods section of most grocery stores.)

Directions

1) Preheat the oven to 400ºF. Line a baking sheet with parchment paper or a Silpat. In a bowl, add a sqeeze of lemon juice to the apple slices, then add both sugars, the melted butter, the rum, and gently combine; set aside.

2) On a lightly floured surface, unfold the puff pastry sheet. Roll it out a little bit (to about 1/2 inch thick). You should have a long rectangle about as long as a standard baking sheet (I don’t measure). Roll about 1 inch of the edges inward to form a border (or, if you prefer, you can lightly score a border along the inside of the rectangle, as this video demonstrates). Poke the inner rectangle all over with a fork to prevent air bubbles from forming while baking.

3) Layer the apple slices, overlapping them slightly. Bake for 25 minutes, until crust is golden brown, then transfer the pan to a wire rack. Once cool, dust with powdered sugar, the transfer tart to a cutting board for serving. Pairs well with vanilla ice cream (obviously).

Puff Pastry Apple Tart

Share this:

  • Tweet
  • Share on Tumblr

Like this:

Like Loading...

A Bit of a Blur

17 Tuesday May 2016

Posted by julia chews the fat in Cooking For Your Peeps, Lunch & Dinner

≈ Leave a comment

There isn’t time for many words today – this post is going to be a bit of a blur – because in twelve minutes flat, I have to head out the door, hop on a Bixi, and get my sorry rump to yoga class (I like to at least pretend that I’m a fit, adult woman. Come to think of it, I also like to pretend that I’m an adult woman. As in, a grown-up; as in, a lady.)

Before I run down the stairs and start frantically biking until I’m out of breath, arriving at the studio like the wheezing, sweating, mess of a lady that I sometimes am, I wanted to quickly – very quickly! – share a recipe with you. (It seems that my top priority is making sure you are all well fed. We can discuss my poor judgment another time. Along with my poor use of punctuation/over-use of parentheses in this post.)

But right now – SPICED CHICKEN PATTIES IN LETTUCE CUPS! WITH DATE CONFIT! THEY’RE A REVELATION! MAKE THEM! (I don’t know why I’m using caps; these things practically sell themselves. Which I’m grateful for, because I should’ve already left the house.)

Eat well and be well, friends. Big love x

—–

Spiced Chicken Patties in Lettuce Cups, with Date Confit – adapted from Food Republic
Serves 4

Chicken Lettuce Cups

Ingredients

Patties

  • 1 1/2 pounds boneless, skinless chicken breast, cubed*
  • 4 garlic cloves, finely chopped
  • 1-inch piece fresh ginger root, peeled and grated
  • 2 tsp Ras el hanout
  • 1 tsp curry
  • 1/4 tsp cayenne (optional)
  • 3 Tbsp olive oil

*economical alternative: I prefer buying a whole, good-quality chicken and taking it apart myself – using the different pieces for diffrent recipes and freezing anything I don’t use.

To serve

  • 16 small hearts of lettuce leaves
  • 1/2 English cucumber, quartered lengthwise, seeded and diced
  • 1 small red onion, finely chopped
  • 1 handful cilantro leaves

Date confit

  • 15 fresh dates, pitted and halved
  • 1 Tbsp olive oil
  • 2 shallots, chopped
  • 1/2 tsp ground cinnamon
  • 1 Thai chili, finely chopped
  • 1 tsp light brown sugar
  • 2 Tbsp pomegranate molasses
  • Sea salt and freshly ground black pepper

Directions

For the date confit:
Put the dates in a bowl, cover with just-boiled water and leave for 20-30 minutes. Meanwhile, heat the olive oil in a skillet and fry the shallots on medium-low heat, covered, for 15-20 minutes until very soft.

Drain the dates and add them to the pan, squashing them with the back of a fork to break them down. Stir in 4 tablespoons water, the cinnamon, chili and cook for 5 minutes longer, or until it forms a thick jam consistency. Add more water if it is too thick. Stir in the pomegranate molasses and season to taste with salt and pepper. Spoon the confit into a serving bowl and leave to cool.

For the chicken patties:
Meanwhile, heat the oven to 100°F. Pulse the chicken in a food processor, then add the garlic, ginger and spices. Season with salt and pepper. Pulse again to combine. Form the chicken mixture into 16 equal balls, the size of golf balls. Flatten each one to make a little patty. (Note: you can freeze the uncooked patties on parchment paper, in one layer (I use a pizza tray), then transfer to freezer-proof container, with parchment between each patty to prevent sticking).

Heat two-thirds of the oil in a large, nonstick skillet over medium heat. Fry the patties, in batches (don’t overcrowd the pan) for 3 minutes on each side. Just before they finish cooking on each side. Drain on paper towels and keep warm in the low oven while you cook the remaining patties, adding more oil when necessary.

For serving:
Put a chicken patty on top of each lettuce leaf, scatter a little cucumber, red onion and cilantro over and top with a spoonful of the date confit. Serve warm or at room temperature.

Chicken Lettuce Cups

Share this:

  • Tweet
  • Share on Tumblr

Like this:

Like Loading...

A Complicated Love

11 Wednesday May 2016

Posted by julia chews the fat in Lunch & Dinner, Soups, The Basics, Vegetarian

≈ 5 Comments

When I was younger, I wasn’t much of a picky eater, but tomatoes – either in their raw form or cooked – proved problematic for a good portion of my childhood. The woman who ran our daycare, Sandra, used to make us a lunch of Campbell’s tomato soup and Kraft-singles grilled cheese, about once a week. It probably goes without saying that the grilled cheese was gobbled up with ease; the soup, however, was another story. I can still remember the tart, salty, faintly metallic canned-tomato flavour that would coat the back of my throat with every reluctant spoonful. That tomato soup was the bane of my five-year-old existence; it was like punishment in a bowl.

Then there was that trip to Italy, to visit family – when I was seven and my brother was five – and neither of us would eat pasta with tomato sauce; only with burro (butter). This was incomprehensible to our Italian relatives, who’d shake their heads, and with furrowed brow, ask, “Ma, non ti piace i pomodori?” (Don’t you like tomatoes?). Their question breathed equal parts bewilderment and despair, but would quickly melt into capitulation with a shrug of the shoulders, when they’d swirl a spoonful of butter into our pasta, as requested. To the dismay of our relatives, we spent that entire trip avoiding pomodori in every way, shape and form.

Fortunately, I’ve since mended by ways with tomatoes; they’re often in the recipes I make at home – from sugo di pomodoro, to lentil soup, to foccacia, to tomato salad. That said, I’d be lying if I said that our relationship was an uncomplicated one. Raw tomatoes are the ones that still, on occasion, send a shiver down my spine. We can blame both latent childhood sensibilities and the Canadian climate for that one: I grew up in a place where, for a good six months of the year, tomatoes were (and still are) flown in from exotic destinations, arriving in a grainy, hard, tasteless state, then flaunted in their raw form – in big, rough chunks – tossed into a plain green salad, or Greek-style, swimming alongside cucumber and slivers of red onion. Unless those tomatoes are vine-ripened under the hot, summer sun and served within a few miles of where they were grown, tasting like the rich, sweetly acidic fruit that they should be, they usually aren’t coming anywhere near my lips. Otherwise, it’s just a waste, because I will, without fail, pick around them.

To this day – most likely stemming from Sandra’s Campbell’s soup days – I also don’t have a particular affinity for tomato soup. That said (and since the criteria by which my brain accepts and rejects tomatoes is still a total enigma) there is one notable exception – and that is for the Moroccan soup harira, a tomato-based blend made with chickpeas, lentils and a handful of spices. It’s traditionally served during Ramadan as a nutrient-rich dish to break the daily fast, but I’m told that it’s served in different regions of Morocco, all year round. I first had harira at my friend Sophie’s house, when her husband, Hicham, cooked us dinner one night, a few short weeks after he’d come to Canada. We had it as a starter to lamb tagine with dates. A CD of gnawa music played in the background. We drank wine. He tried to teach me a few expressions in Arabic, though I only remember the words for ‘hello’, ‘no’, ‘look’ and ‘enough’. But the harira – I’ll always remember the harira: silky and tangy and heady with spices. It was the one tomato soup that broke the rules to my aversion. And for that – and to Hicham – I am forever grateful.

—–

A note on the recipe: Most recipes incorporate meat (beef, lamb or chicken), broken up vermicelli noodles or rice, as well as a roux (called tadouira) of water and flour at the end of cooking to thicken it up a bit. The recipe below doesn’t have any of these things, but it’s a close approximation to Hicham’s harira, which is always filled with warm spices and creamy chickpeas, which he cooks from dried (not canned).

It’s a simple soup – but well-rounded, sustaining and comforting. Hope you like it.

Vegetarian Harira Soup

Makes 4-6 servings

Harira_prep

Ingredients

  • 100g lentils, rinsed and picked through
  • 150g cooked chickpeas
  • 2 Tbsp olive oil
  • 1 large onion, finely chopped
  • 2 cloves garlic, pressed
  • 3 Tbsp tomato paste
  • handful fresh parsley, chopped
  • 400g ripe tomatoes, smashed
  • 700ml vegetable stock
  • salt and pepper, to season

Spices:

  • 2 tsp ground cumin
  • 1 tsp turmeric
  • 1 tsp ginger powder
  • 1/2 tsp cinnamon
  • 1/4 tsp ground cloves
  • 1/4 tsp cayenne

To serve:

  • lemon
  • pita bread
  • fresh cilantro, chopped

Note: only add the salt at the end, otherwise the lentils won’t cook through.

Directions

1) Heat the olive oil in a large saucepan or Dutch oven. Sauté the onion until browned. Add the garlic, spices, tomato paste and sauté for about 1 minute. Add the parsley, lentils, and smashed tomatoes (with their juices) and stir.

2) Stir in the vegetable stock and bring to a boil over high heat; reduce the heat to medium-low and simmer for 40 minutes. Add the cooked chickpeas and simmer for another 5 minutes, or until the lentils are cooked through. Season with salt and pepper.

3) Ladle into bowls and top with chopped cilantro, a little olive oil and a squeeze of lemon juice (the lemon is important – don’t skip it!). Serve with pita or flatbread.

Harira


Share this:

  • Tweet
  • Share on Tumblr

Like this:

Like Loading...

Snack-Time Salvation

02 Monday May 2016

Posted by julia chews the fat in Snacking, Sweet Tooth, Vegetarian

≈ 2 Comments

A little while ago, I started buying Bounty bars from the second-floor vending machine at work. It might have been a relatively infrequent excursion, but as any office worker knows, when you sit in front of a computer for several hours on end, you start to crave bad stuff – usually something with high-fructose corn syrup and palm oil – around 3pm. And when you don’t have access to something healthy and sustaining, you sometimes end up scouring your desk drawer for pocket change to plunk into an old vending machine for something that will satisfy your primal brain.

In my case (and to make matters worse), I also had an accomplice. My friend and office mate – we’ll protect her identity by calling her “M” – also loved Bounty bars and, like me, was really good at reducing her dissonance. We agreed that splitting a candy bar between us wasn’t as bad as eating the whole thing by ourselves, and if we didn’t read the spooky list of ingredients and enjoyed it alongside a cup of herbal tea, it didn’t seem like such an unsensible thing to do.

But then “M” went on an eight-month work transfer out of town, and I was still getting Bountry bars out of the machine. One a month became two, then three, then I realised that it had become an almost-weekly habit. No bueno.

The obvious solution was to come equipped to work with snacks. Good snacks. Snacks that would make my mom and your mom proud that they had raised well-adjusted, responsible adults. That’s when I came across a recipe, from French food writer Clotilde Dusoulier, for homemade energy bars. A mixture of dates, nuts, cinnamon and cocoa, they’re sweet and chocolately, and filled with things that aren’t palm oil or high-fructose corn syrup (they’re actually filled with vitamin A, fibre, iron, calcium, antioxidants, and potassium. Thank you, dates!).  I rolled mine in shredded coconut for the “Bounty bar effect”, but if you don’t have any in the pantry, they’re swell without it too.

Here’s to better snacking in front of our computers. Have a good week, everyone x

Date-Coconut Energy Bites

Date-Coconut Energy Bites – adapted from Chocolate and Zucchini

    • 50 grams date paste*, diced
    • 100 grams mixed, unsalted nuts (Brazil nuts, pistachios, almonds, hazelnuts…)
    • 2 green cardamom pods, seeds only
    • 100 grams Medjool or fresh dates (about 4), pitted
    • 3 Tbsp unsweetened cocoa powder
    • 1/2 tsp ground cinnamon
    • 1 Tbsp cacao nibs
    • 1/4 cup unsweetened, shredded coconut (for rolling)
    • a good pinch salt

*Date paste can be found at natural foods stores, or in North African or Middle Eastern shops. It comes as a solid block, so if it seems dry and hard, cut it into slices and soak for an hour in a little cold water to soften. Drain well before using (save the date water – you can freeze it too – to use in smoothies).

Directions

1) In a food processor, combine the diced date paste, nuts, and cardamom, and process in short pulses until the nuts are chopped to small bits and blended with the paste. Add the rest of the ingredients and process in short pulses until the mixture comes together.

2) Pour the shredded coconut into a plate; scoop a teaspoon of the date-nut into your hands and form into balls between your palms. Then roll them in the shredded coconut.

3) Lay the date-coconut balls in a airtight container, with parchment paper between each layer to prevent sticking. Transfer to the fridge to set for a few hours or preferably overnight. They will keep in the refrigerator, covered, for about a week.

Date-Coconut Energy Bites

Share this:

  • Tweet
  • Share on Tumblr

Like this:

Like Loading...

Facebook

Facebook

Instagram

No Instagram images were found.

Recent Posts

  • Layers and Rows
  • Finding Buoyancy
  • February
  • Wednesday
  • Cross My Heart, Miso

Archives

  • May 2017
  • April 2017
  • February 2017
  • December 2016
  • November 2016
  • September 2016
  • August 2016
  • July 2016
  • June 2016
  • May 2016
  • April 2016
  • March 2016
  • February 2016
  • January 2016
  • December 2015
  • November 2015
  • October 2015
  • September 2015
  • August 2015
  • July 2015
  • June 2015
  • May 2015
  • April 2015
  • March 2015
  • February 2015
  • January 2015
  • December 2014
  • November 2014
  • October 2014
  • September 2014
  • August 2014
  • July 2014
  • June 2014
  • May 2014
  • April 2014
  • March 2014
  • February 2014
  • January 2014
  • December 2013
  • October 2013
  • September 2013
  • August 2013
  • July 2013
  • June 2013
  • May 2013
  • April 2013
  • March 2013
  • February 2013
  • January 2013
  • December 2012
  • November 2012
  • October 2012
  • September 2012
  • August 2012
  • July 2012
  • June 2012
  • May 2012
  • April 2012
  • March 2012
  • February 2012

Categories

  • Beverage
  • Breakfast & Brunch
  • Condiments
  • Cooking For Your Peeps
  • Cooking Solo
  • Cooking with Nonna
  • Food Away From Home
  • Food Writing
  • Holidays
  • Intro
  • Lunch & Dinner
  • Snacking
  • Soups
  • Sweet Tooth
  • The Basics
  • Vegetarian

Enter your email address to follow this blog and receive notifications of new posts by email.

Join 80 other subscribers

Blog at WordPress.com.

  • Follow Following
    • julia chews the fat
    • Join 80 other followers
    • Already have a WordPress.com account? Log in now.
    • julia chews the fat
    • Customize
    • Follow Following
    • Sign up
    • Log in
    • Report this content
    • View site in Reader
    • Manage subscriptions
    • Collapse this bar
 

Loading Comments...
 

    %d bloggers like this: