• Home
  • About

julia chews the fat

julia chews the fat

Category Archives: Condiments

An Invitation

20 Friday Nov 2015

Posted by julia chews the fat in Condiments, Lunch & Dinner, Snacking, Vegetarian

≈ 11 Comments

The weight of this week hasn’t made me want to write about food. In light of recent events, it feels frivolous – and almost obscene – to blather on about cooking. It isn’t just Paris. It’s all of it. It’s Beirut. It’s Bamako. It’s the unconscionable rhetoric surrounding the Syrian refugee crisis. It’s the pundits who dissect every single detail of a horrifying event to spread their bigotry and fearmongering. It’s the fact that – amid all the pain and suffering – our impulse is to turn against eachother, to become wary and suspicious; to slam doors on the most vulnerable.

This post, in contrast, is an invitation. An invitation to gather, to extend a loving gesture, to bring people in close. Breaking bread with others can be a unifying force – it can foster greater acceptance and understanding of others; it can quell intolerance. Most of all, though, it is a tangible expression of unadulterated love.

World peace might not be a realistic expectation. But we can, at the very least, try to love one another a little more. So, at least for a little while, turn off the radio, shut off your computer, your phone. Silence the hot-air pundits. Bring together friends, family, and new faces too – to share, to love, to eat, with a heart that’s open and filled with gratitude.

Eat well, be well, dear readers. See you here again soon x

Traditional Muhammara (red pepper walnut dip from Turkey, via Syria)
Adapted from Olga Irez’s Delicious Istanbul
Serves 10 as appetizer/meze

Muhammara

  • 6-7 large (about 1 kg) red bell peppers
  • 1 large (about 60g) slice wholewheat bread, torn
  • 1/2 packed cup finely ground walnuts
  • 2 tbsp tomato paste
  • 2 tbsp extra virgin olive oil and more for serving
  • 1/2 tbsp pomegranate molasses*
  • 1 clove garlic
  • 1/2 tsp fresh mint
  • 1/4 tsp ground cumin
  • 1/4 tsp ground coriander
  • 1/4 tsp hot red pepper flakes and more for serving
  • 1/2 tsp fine sea salt

*I was able to find pomegranate molasses at my local Middle Eastern shop, but it can also be found in some regular grocery stores (PA in Montreal stocks it). Otherwise, you can replace it with lemon juice (though, you won’t get that nice sweetness that pomegranate molasses adds to the dip). Note: don’t buy the stuff that’s used as a syrup to add to carbonated water; the stuff you want is thick (like traditional molasses) and also goes by the name “pomegranate concentrated juice”.

Directions

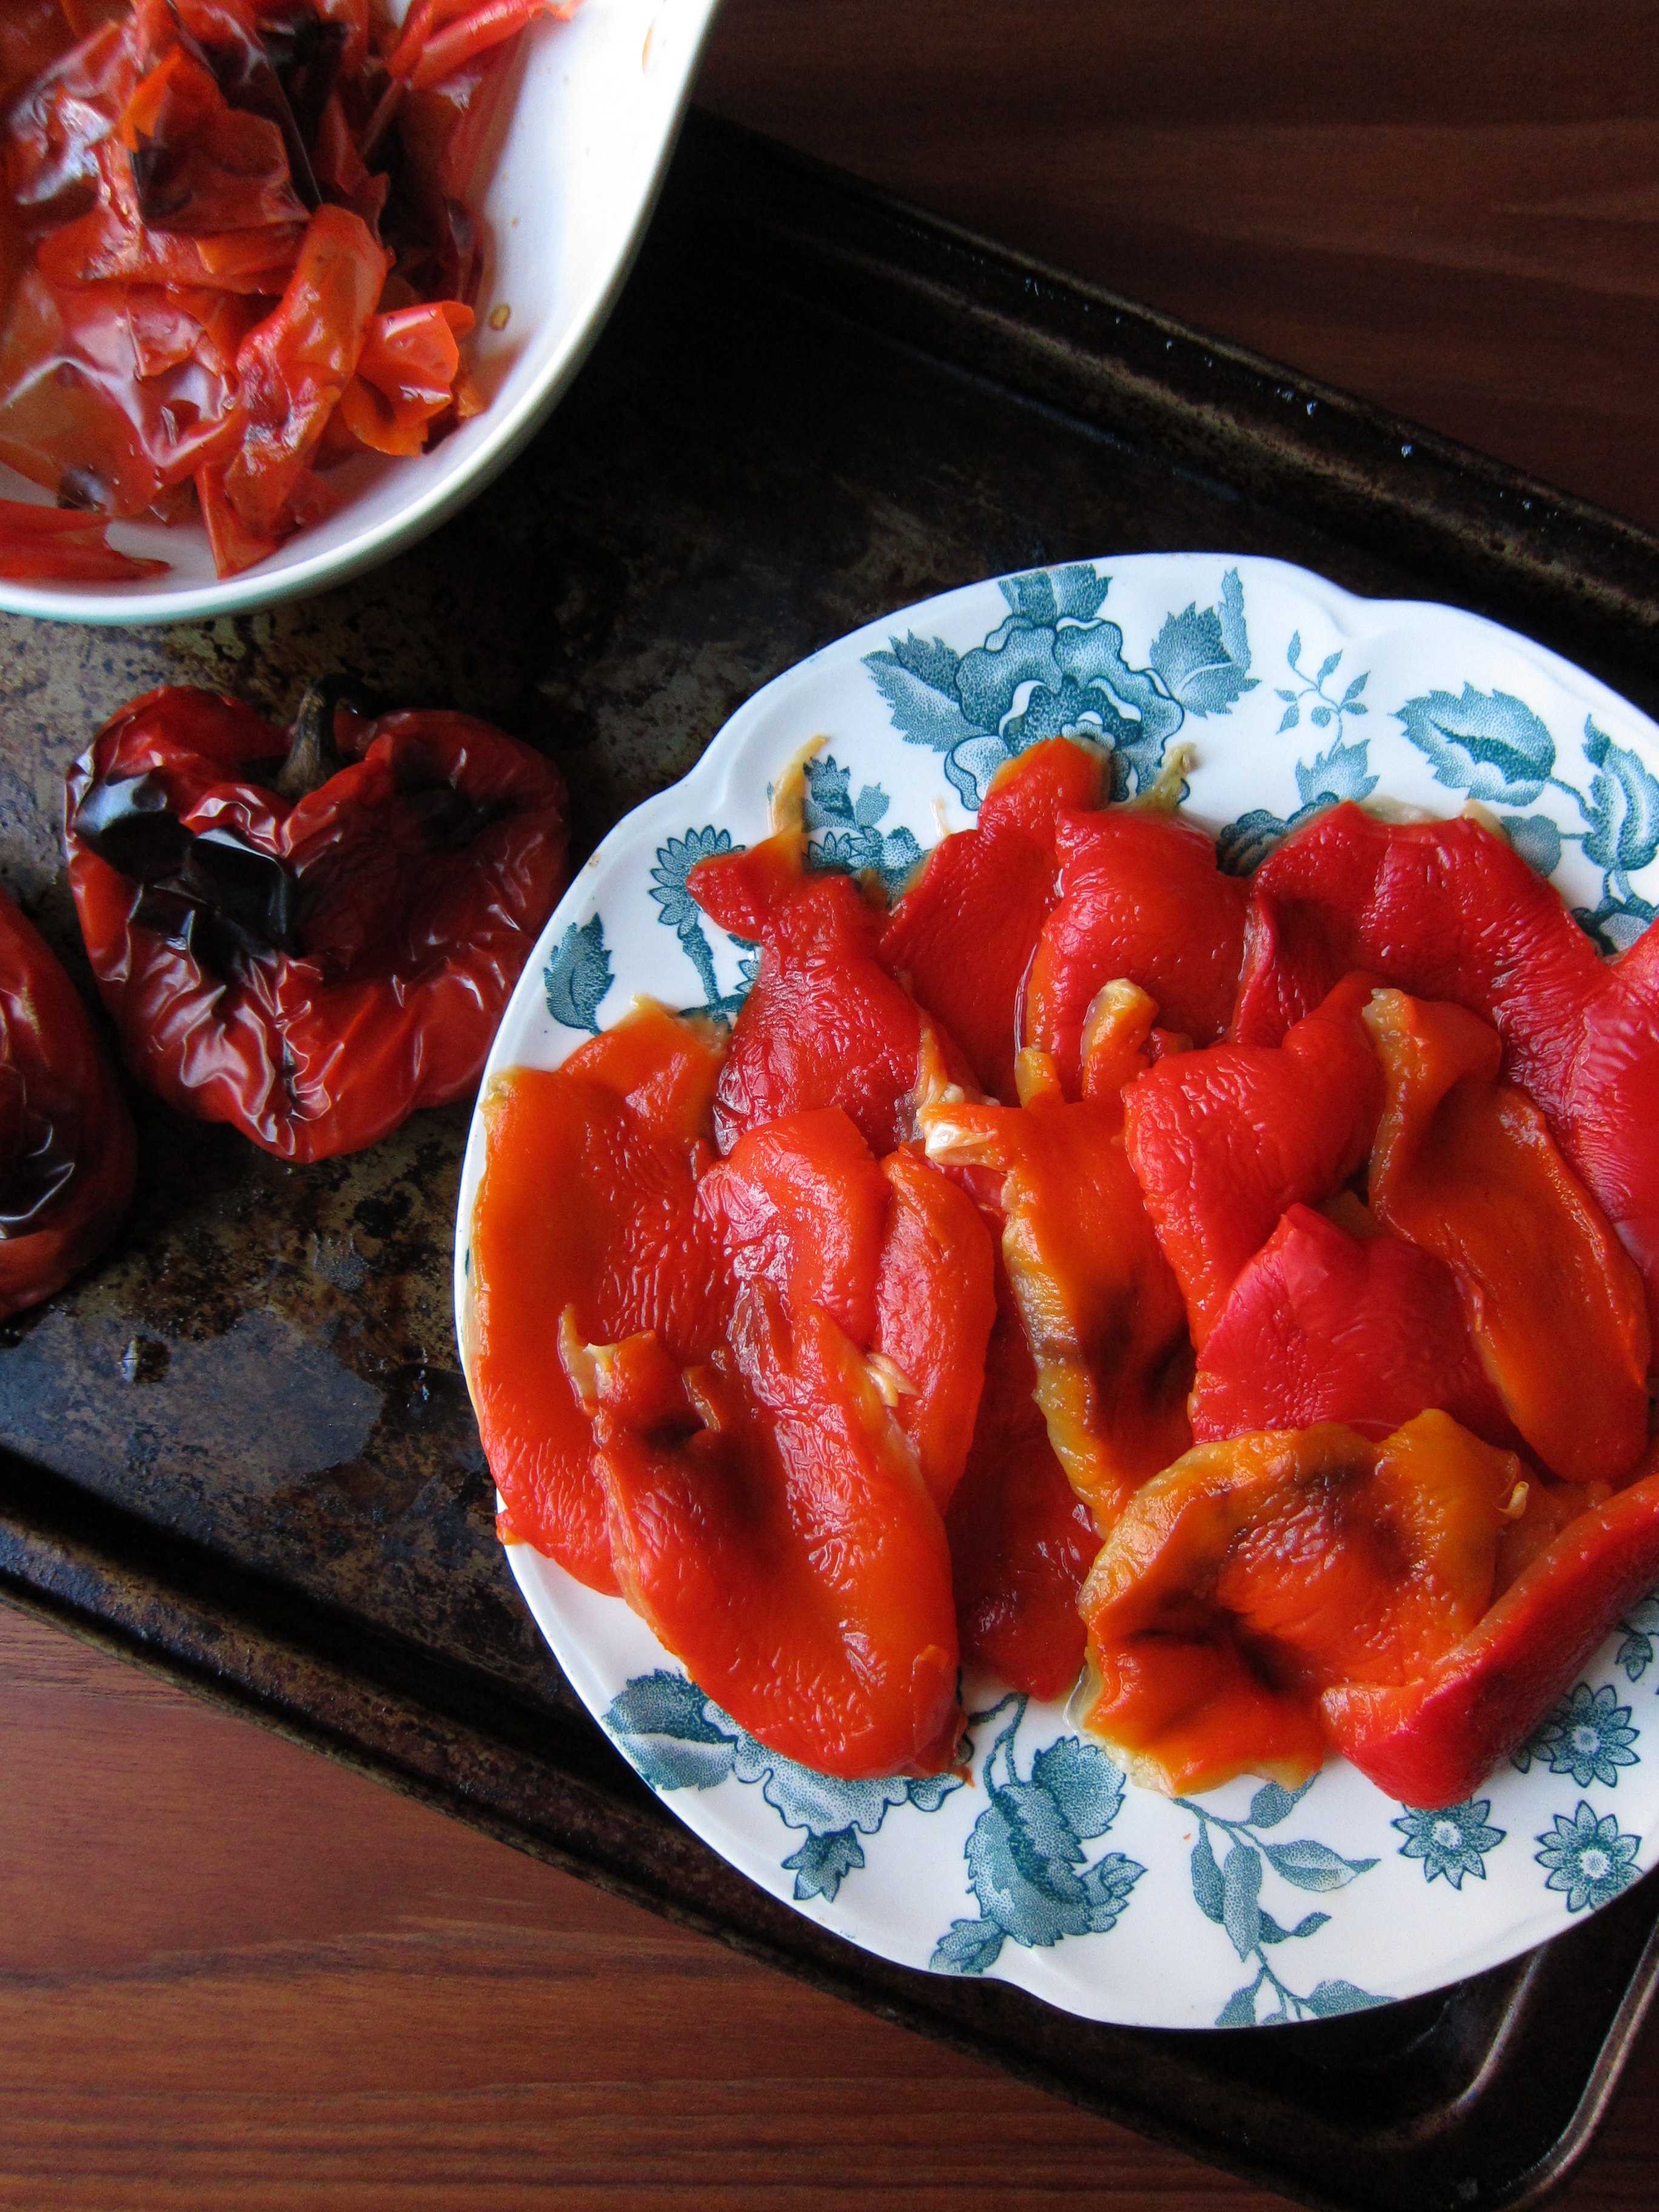
1) Preheat the oven to 400F. Wash the peppers and arange them on a large baking tray and let roast, skin-on, for about 30 min, or until the peppers puff up and start to get charred spots. Set aside to cool while you are gathering the rest of the ingredients.

Muhammara Muhammara

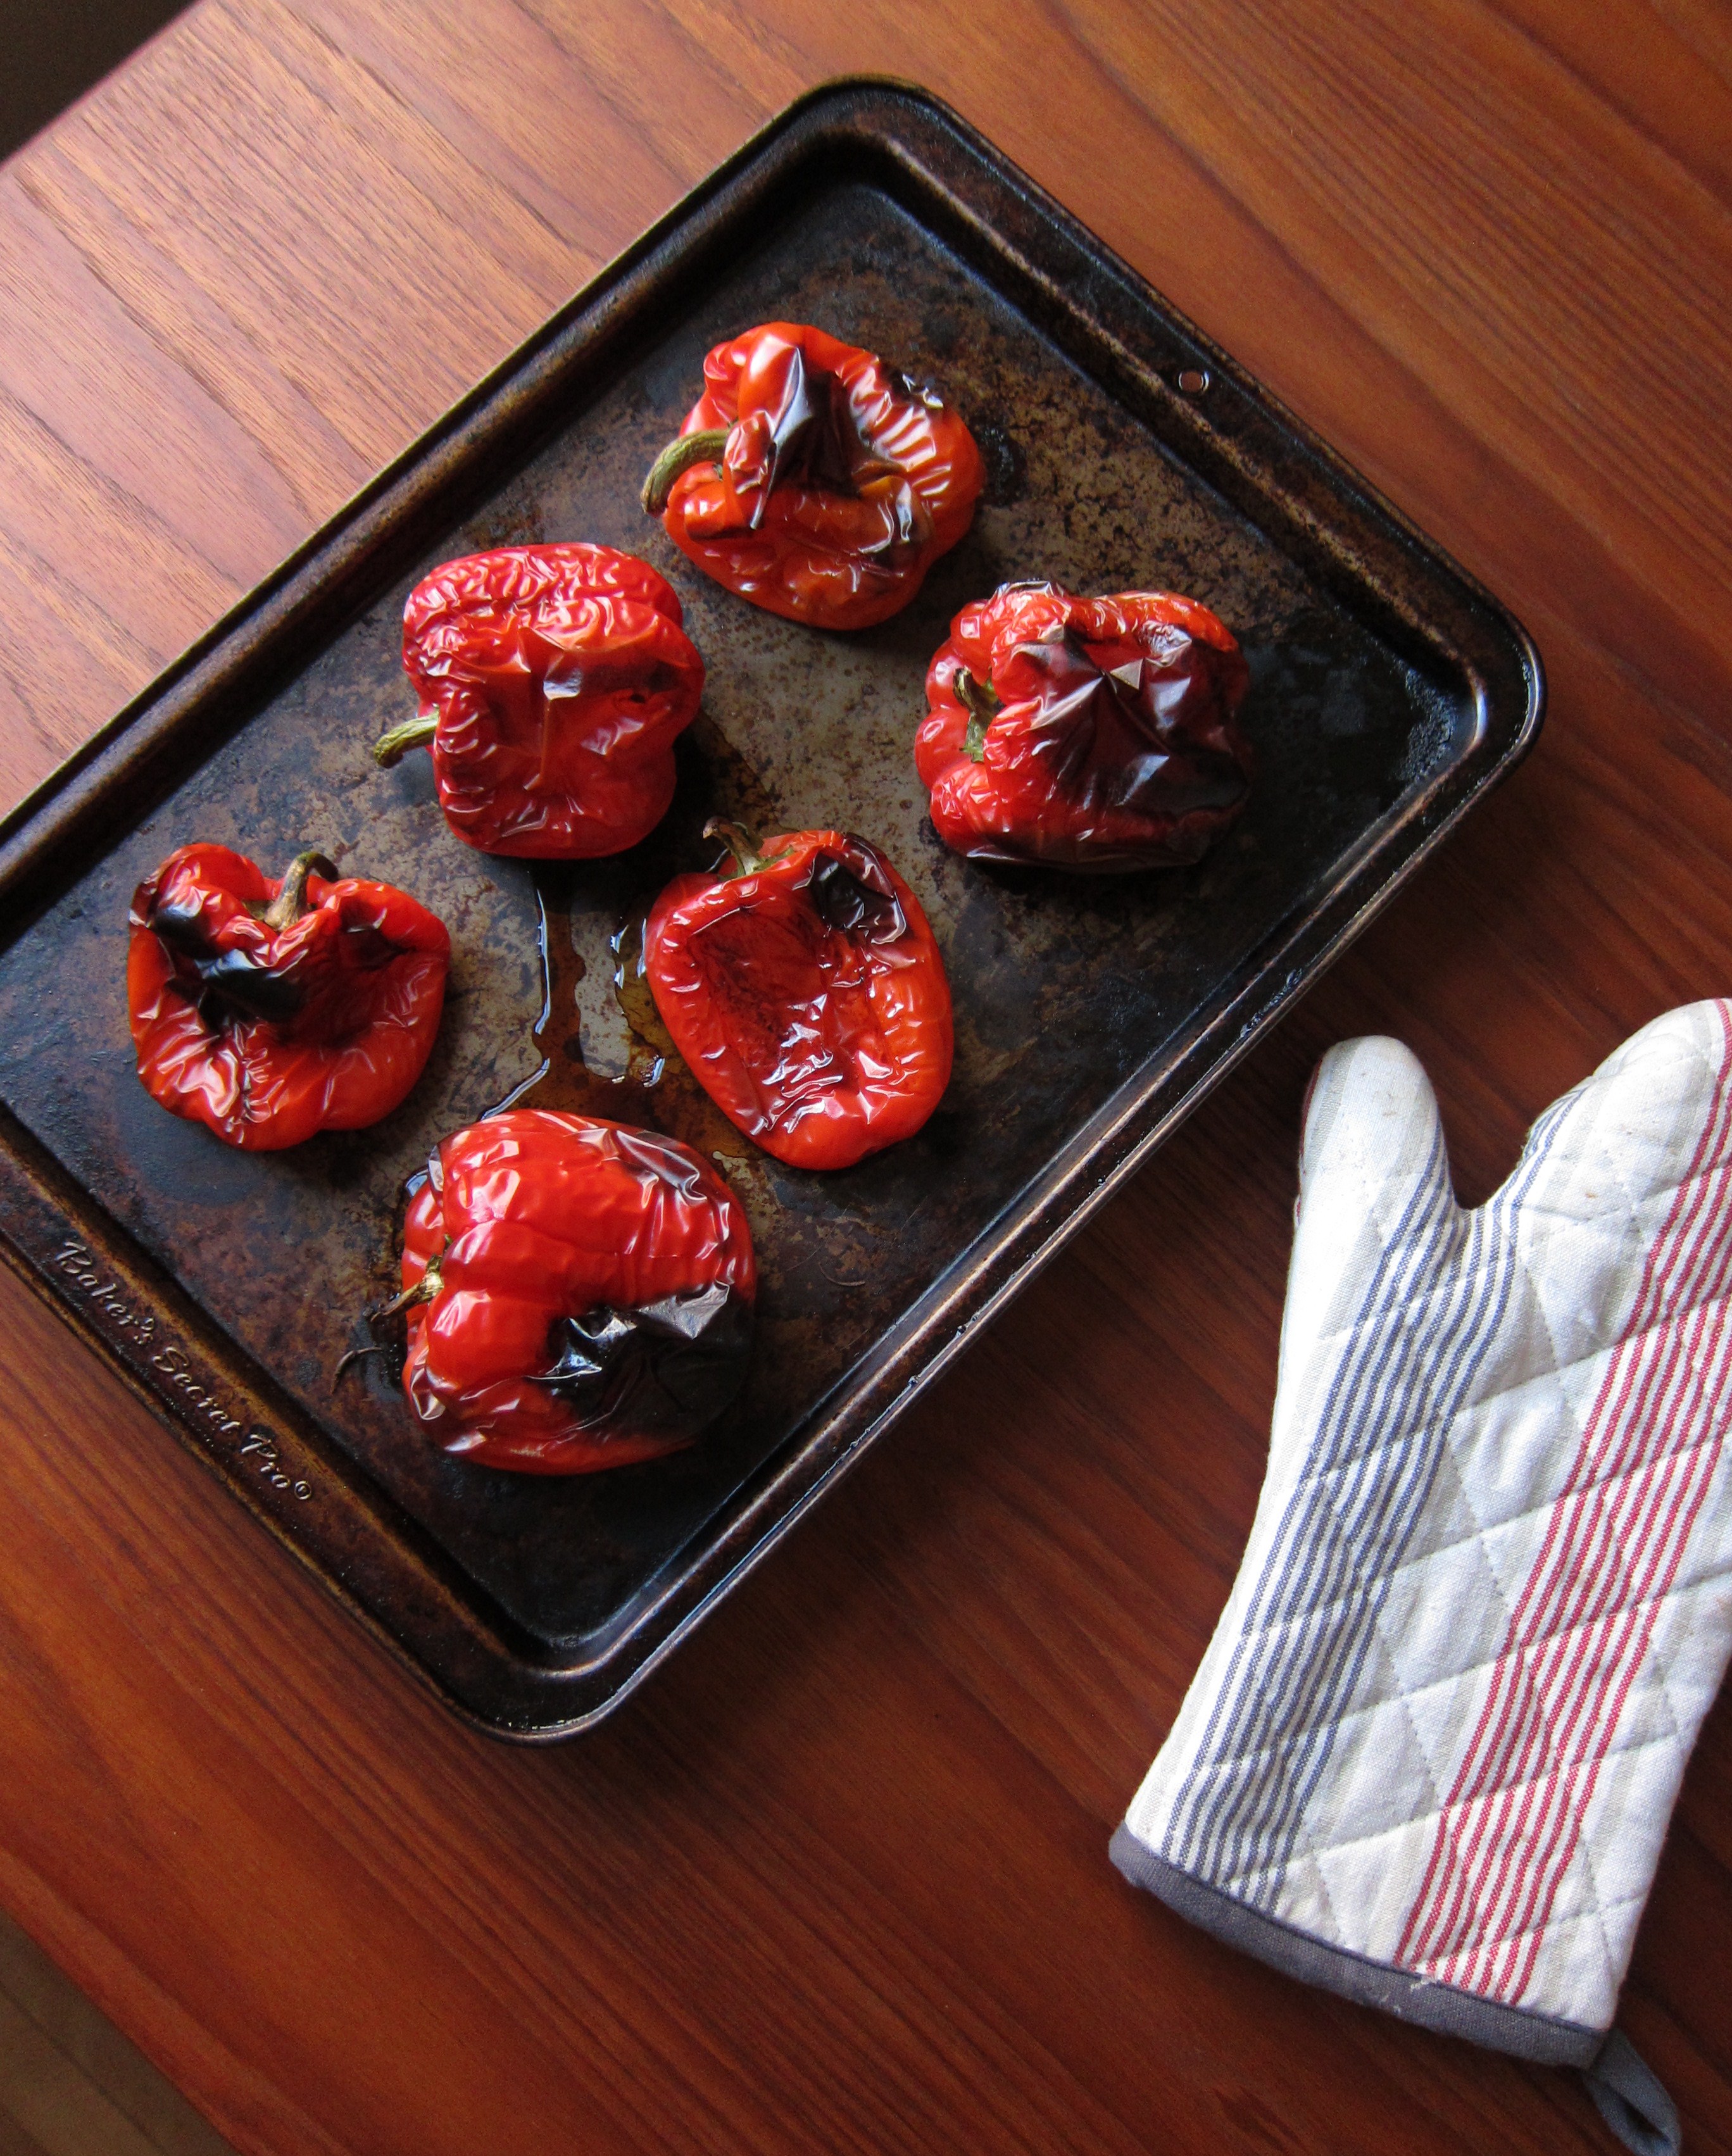
2) When the peppers are cool enough to handle, remove the stems along with the seeds and peel off the skins. Place the peeled red peppers in a colander and let the juices drain into a bowl below (Olga Irez suggests reserving the juice to add to soups or stews and cook your grains in. You can even freeze the juice for future use).

Muhammara

3) Place the drained red peppers and garlic in the food processor and pulse into a purée. Soak the bread slice in water, then squeeze out the liquid. Toss the wet crumb in the blender and pulse into a smooth purée. Add the rest of the ingredients and mix with a spoon until combined. Taste and adjust the seasoning, if necessary.

Muhammara

4) To serve, transfer to a wide bowl and with the back of a spoon, make a light impression in the centre of the dip. Drizzle a bit of olive oil into the centre and sprinkle with red pepper flakes. Serve with flat bread.
Note: Muhammara can be refrigerated for up to 2-3 days.

Muhammara

Share this:

  • Tweet
  • Share on Tumblr

Like this:

Like Loading...

As much as you can carry

18 Friday Sep 2015

Posted by julia chews the fat in Condiments, Lunch & Dinner, The Basics, Vegetarian

≈ 8 Comments

End of season visits to the outdoor food market are always a little bittersweet for me. I get goosebumps of excitement and pangs of regret in equal parts. It’s a complicated phase in our relationship – I feel nervous and happy all at once.

I suppose it’s because I’m not very good with endings – even if I know that in reality, this isn’t an ending in the classic sense. Elegant stalks of rhubarb and asparagus will come back by May; sweet peas and baby zucchini in June; baskets of gemstone-coloured berries and velvet-skinned peaches through July and August. But in that transition between summer and fall, I always get a little panicky, at a loss as to how to maximise the last real days of the food market. I end up leaving the house without a recipe or a plan, only to wander around aimlessly between the market stalls with the jittery excitement of a puppy who circles the barbecue, hoping he’ll get tossed a hot-dog. I want all the strawberries, all the cucumbers and melons, and all those gorgeous batches of red romaine and frilly frisée from the grey-haired woman at the centre of the market I call “Madame Laitue”. Because she – like the berries and all other ephemeral summer foodstuffs – will soon pull an eight-month disappearing act. And secretly, the thought of it makes me a little sad. And a little desperate.

So, during my last visit, I binge-shopped my way through the last of the summer produce – pints of berries, a few long striped “snake” cucumbers, bunches of fresh herbs and French radishes, baskets of flat romano beans and cherry tomatoes, and several heads of Madame Laitue’s finest lettuce – again, with no recipe, no plan, spurred on only by a need to get it before it’s all gone.

For good measure, I also picked up nothing less than an obscene amount of basil – four whole stalks worth – because when something’s as beautiful and temporary as this, you throw pragmatism out the window and buy as much as you can carry.

Basil for pesto

So that’s what I did – I bought as much as I could haul home, cradled in one arm, like an enormous pageant-sized bouquet. For $10, It was the best purchase I’d made all week. The people I passed on the street seemed to agree, flashing me smiles and “oh la las” usually reserved for hunks and babes. (Montrealers are a special breed of Canadian and don’t shy away from expressing their affinity for food.)

There was one old man, though, who seemed totally confounded by what I was holding. He took a seat next to me on the metro, stared at my leafy bouquet for a little while, then coyly asked,

“C’est un aromatique ça?”

“Oui, c’est du basilic.”

“Mais c’est très fort comme odeur, non?”

“Haha, oui, en effet! Mais c’est délicieux! Vous voulez goûter?” (I pull off a leaf for him to try; he declines)

“Qu’est-ce que vous allez faire avec tout ça?”

“Du pesto, monsieur.”

“Mais c’est quoi ça, du pesto?”

In that moment I wished I could take him back home with me and make him a batch of pesto; wished I could see the look on his face when he tried it for the first time, swirled into a bowl of warm pasta dressed with parmesan; wished I could show him why, when you see fresh basil at the market, you take home as much as you can carry.

Basil for pesto

Basil Pesto (a riff on mom’s version) – makes about 3 cups of pesto

  • 8 cups basil leaves (stripped from the stalk)
  • 1 cup flat-leaf parsley
  • 2-3 garlic cloves (adjust to taste)
  • 1 cup Parmigiano-Reggiano, grated
  • 2/3 cup olive oil
  • salt, to taste
  • 1 cup pine nuts (optional)

Notes:

  1. Pine nuts are a nice (and super traditional) addition to pesto. We don’t use them anymore because two of our in-laws have nut allergies (and, also because they’re esspennnsive). But if you can splurge on some, they add great flavour and texture. If using, just add the pinenuts into the processor with the other ingredients (1/2 cup in the first processed batch and another 1/2 cup in the second – see directions below).
  2. In traditional pesto-making, a mortar and pestle are used to mush everything together, but a food processor will work just as well.
  3. Parsley is not something pesto purists would add in, but mom does it and it tastes amazing.
  4. Pesto, like any sauce, is about adjusting and tasting. You can use this recipe as a guide, but trust your tastebuds when it comes to the final result.

Pesto prep

Directions

1) In a food processor, chop the garlic. Add half of the basil, parsley and grated parmesan cheese (and 1/2 cup of pinenuts, if using) and pulsate for about 10 seconds.

2) With a spatula, scrape down the sides, put the top of the processor back on. Get your oil ready, turn on the processor and slowly add half the oil through the feed tube, until a paste forms. Season with salt.

3) Repeat with the remaining bail, parsley and parmesan cheese (and 1/2 cup of pinenuts, if using). You may need to remove the first batch of pesto from the processor, if there isn’t enough room; I just did one batch over the other and it worked fine. Taste it and adjust accordingly (add a bit of salt, a bit of oil…)

Pesto

Notes: to refrigerate, place pesto in a glass jar and cover with olive oil. Use within a few days. To freeze, place spoonfuls on a tray lined with parchment paper. Once frozen, wrap individually (or in pairs) in parchment paper and transfer to freezer bags. The pesto will keep for several months in the freezer.

Pesto

Share this:

  • Tweet
  • Share on Tumblr

Like this:

Like Loading...

Fire Cider, Humble Healer

19 Wednesday Feb 2014

Posted by julia chews the fat in Condiments, The Basics, Vegetarian

≈ 3 Comments

The other day, when the weatherman said it’d be -25°C with the wind chill and that we’d be graced with (more!) snow, I felt my lips curve into a child-like pout, uttering a defeated, “But, nooo…” as I stared into my closet, shivering in my nightgown, trying to decide which sweater was still up for the task.

Welcome to winter in Quebec.

If the snow and sleet and wind packed up and left tomorrow, I’m sure we would all let out a communal sigh of relief. In getting through the last vestiges of winter, we are are bagged, fed up, cranky and infirm. Almost everyone I know right now is hosting some wonderful microbial visitor – this season alone, my personal tally has included two sinus-colds, one big chest-cold, one bout of laryngitis, one digestive-related ailment, one 36-hour flu, and two sprained necks.

Sexiest winter EVER.

For one reason or another, my system’s been under siege since December. Right around when one thing would end, another would begin. After making my way through dozens of lemon-ginger infusions, spoonfuls of honey and doses of Buckley’s syrup (not to mention a few lacklustre dates with Mr.Neti Pot and Mr.Humidifier), it seemed a different tactic was in order. Then I remembered hearing about a traditional folk elixir by the name of Fire Cider – a potent, pungent concoction used by herbalists to ward off the evil spirits of winter (rhinovirus, norovirus, bronchiolitis, and all their friends).

Essentially, it’s a witches’ brew of sweet and savoury elements all jammed into one jar. At once peppery, astringent, funky and sweet, the first taste will be intense and astonishing, but once you’ve got a spoonful racing down your throat, you’ll feel recharged and pumped and ready to get back on the bandwagon.

(or at least ready to slip on that sweater and brace the cold again)

Fire Cider – adapted from herbalist Rosemary Gladstar’s recipe (check out the cute video here!)

Makes about 1 pint
Fire Cider ingredients

  • 1/2 cup peeled and diced garlic
  • 1/2 cup peeled and diced onion
  • 1/4 cup peeled and diced ginger
  • 1/4 cup peeled and diced turmeric
  • 1 habanero chile, split in half
  • 1 orange (or blood orange), quartered and thinly sliced crosswise
  • 1/2 lemon, quartered and thinly sliced crosswise
  • 1/2 cup chopped parsley
  • 2 tablespoons chopped rosemary
  • 2 tablespoons chopped thyme
  • 1 teaspoon black peppercorns
  • 2 to 3 cups apple cider vinegar (at least 5% acidity)
  • 1/4 cup honey, or more to taste

Place all of the vegetables, fruits, herbs, and spices in a clean 1-quart jar. Fill the jar with vinegar, covering all the ingredients and making sure there are no air bubbles. Cap the jar. If using a metal lid, place a piece of parchment or wax paper between the jar and the lid to prevent corrosion from the vinegar. Shake well.

Let the jar sit for 3 weeks, shaking daily.

Strain the vinegar into a clean jar. Add more honey to taste. Refrigerate and use within 6 months.

Fire Cider

*Note: if you have a bold palate, you can take the cider straight up (1-2 tablespoons at the first sign of a cold, repeating every 3-4 hours until symptoms subside; alternately, some take it throughout the winter season as a preventative). If it turns out that this elixir is too intense for you to knock back straight, here are some nifty ways you can incorporate it into your edibles.

  • Use in place of vinegar in salad dressings, condiments and marinades
  • Drizzle on steamed vegetables or sautéed greens
  • Add to soups and chilis
  • Add a couple dashes in your next Bloody Mary

Share this:

  • Tweet
  • Share on Tumblr

Like this:

Like Loading...

Facebook

Facebook

Instagram

No Instagram images were found.

Recent Posts

  • Layers and Rows
  • Finding Buoyancy
  • February
  • Wednesday
  • Cross My Heart, Miso

Archives

  • May 2017
  • April 2017
  • February 2017
  • December 2016
  • November 2016
  • September 2016
  • August 2016
  • July 2016
  • June 2016
  • May 2016
  • April 2016
  • March 2016
  • February 2016
  • January 2016
  • December 2015
  • November 2015
  • October 2015
  • September 2015
  • August 2015
  • July 2015
  • June 2015
  • May 2015
  • April 2015
  • March 2015
  • February 2015
  • January 2015
  • December 2014
  • November 2014
  • October 2014
  • September 2014
  • August 2014
  • July 2014
  • June 2014
  • May 2014
  • April 2014
  • March 2014
  • February 2014
  • January 2014
  • December 2013
  • October 2013
  • September 2013
  • August 2013
  • July 2013
  • June 2013
  • May 2013
  • April 2013
  • March 2013
  • February 2013
  • January 2013
  • December 2012
  • November 2012
  • October 2012
  • September 2012
  • August 2012
  • July 2012
  • June 2012
  • May 2012
  • April 2012
  • March 2012
  • February 2012

Categories

  • Beverage
  • Breakfast & Brunch
  • Condiments
  • Cooking For Your Peeps
  • Cooking Solo
  • Cooking with Nonna
  • Food Away From Home
  • Food Writing
  • Holidays
  • Intro
  • Lunch & Dinner
  • Snacking
  • Soups
  • Sweet Tooth
  • The Basics
  • Vegetarian

Enter your email address to follow this blog and receive notifications of new posts by email.

Join 80 other subscribers

Blog at WordPress.com.

  • Follow Following
    • julia chews the fat
    • Join 80 other followers
    • Already have a WordPress.com account? Log in now.
    • julia chews the fat
    • Customize
    • Follow Following
    • Sign up
    • Log in
    • Report this content
    • View site in Reader
    • Manage subscriptions
    • Collapse this bar
 

Loading Comments...
 

    %d bloggers like this: