• Home
  • About

julia chews the fat

julia chews the fat

Monthly Archives: December 2013

A Better Kind of Fruitcake

31 Tuesday Dec 2013

Posted by julia chews the fat in Breakfast & Brunch, Cooking For Your Peeps, Holidays, Sweet Tooth, The Basics, Vegetarian

≈ 4 Comments

Almost twenty years ago, at Christmastime, my dad bought a loaf of stollen for the first time. He brought it home, cut it up and plated it. We were eager to try something so foreign and – for kids growing up in the burbs in the 90s – so exotic-sounding. But, one bite in, our excitement quickly unravelled, being replaced with the uneasy feeling of being duped. Not unlike a lot of the holiday fruitcakes I’ve reluctantly tasted over the years, this store-bought stollen was dry and lacklustre – a pasty-coloured loaf studded with nondescript dried fruit that rolled out off the sides with each bite.

It was miserable.

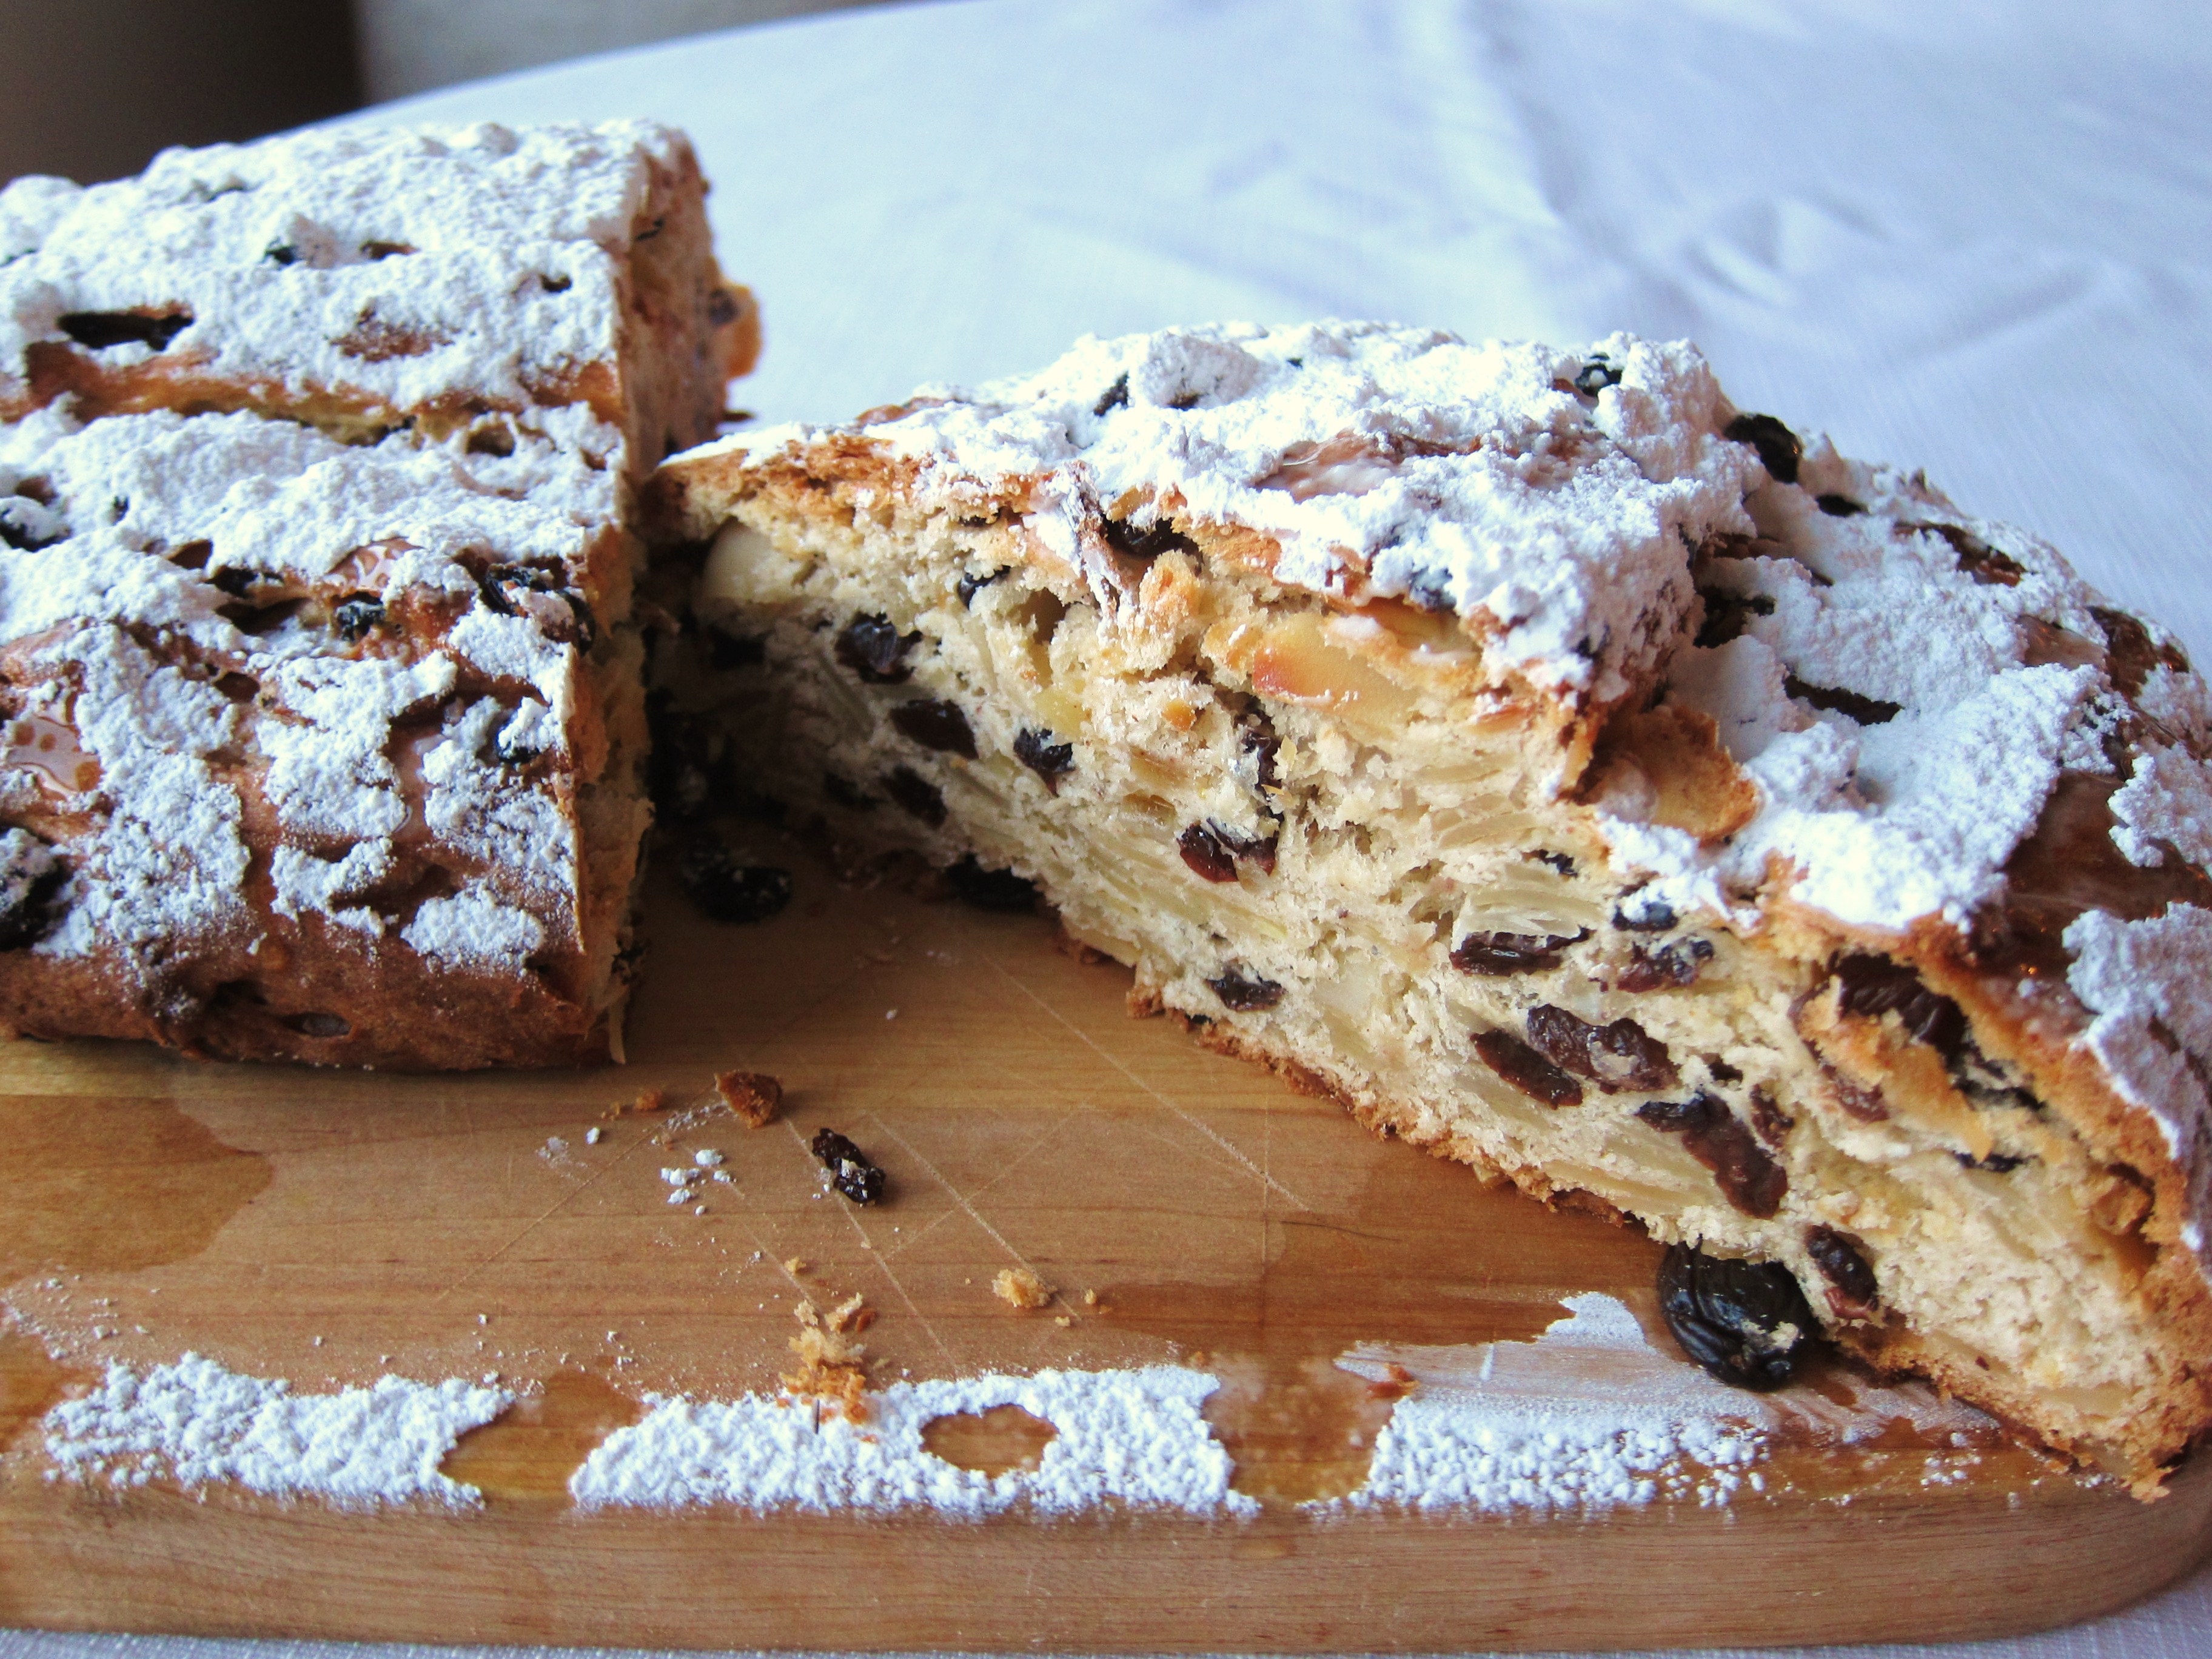
Unlike the rest of us, my dad saw the potential of this German-style fruitcake and shortly thereafter, set out to make his own. He sourced different recipes, even quizzing our German neighbour, Mrs. Nack, for secret stollen-making tips. And then, nearly every year since, he’s gone into full stollen-production mode – drenching the fruit several days ahead, making the dough, cutting the loaves, baking them, dusting them with sugar and wrapping them attentively. For someone who doesn’t bake (or have a Teutonic bone in his body), dad’s got this German sweet bread down to an art. The final result is a beautifully dense, yeasty bread, brimming with sliced almonds and a boozy mixture of currants, raisins and citrus peel. The longer it sits, the better it gets, as the brandy further permeates the crumb and the almonds slowly transform into marzipan. There isn’t a trace of neon-coloured maraschino or stale walnut in this fruitcake. Not if dad has anything to do with it. And that’s the way we like it.

Wishing a very happy birthday to my dad ♥ and a Happy New Year to all of you, dear readers! Looking forward to sharing more tasty edibles with you in 2014.

Dresden Stollen – makes 4 medium loaves or 6 small ones stollen 21

  • 1⅓ cups currants
  • 1 cup orange zest
  • 1 cup lemon zest
  • 3 cups raisins (Thompson or sultanas)
  • 4 ⅓ cups sliced, blanched almonds
  • 6½ cups (1 kilo) sifted flour
  • 6 packets yeast (8 gr each)
  • 2 cups icing sugar
  • ½ tsp ground cardamom
  • tsp cinnamon
  • 2 pinches mace
  • 2 pinches allspice
  • ½ tsp salt
  • 1 cup brandy
  • 2 cups lukewarm milk (reserve 1 cup for proofing the yeast)
  • 1⅓ lbs butter, room-temperature

Pour the brandy over the mixture of currants, raisins, almonds & citrus zest. Mix and cover, allowing to soak overnight (or over several days). stollen 2 
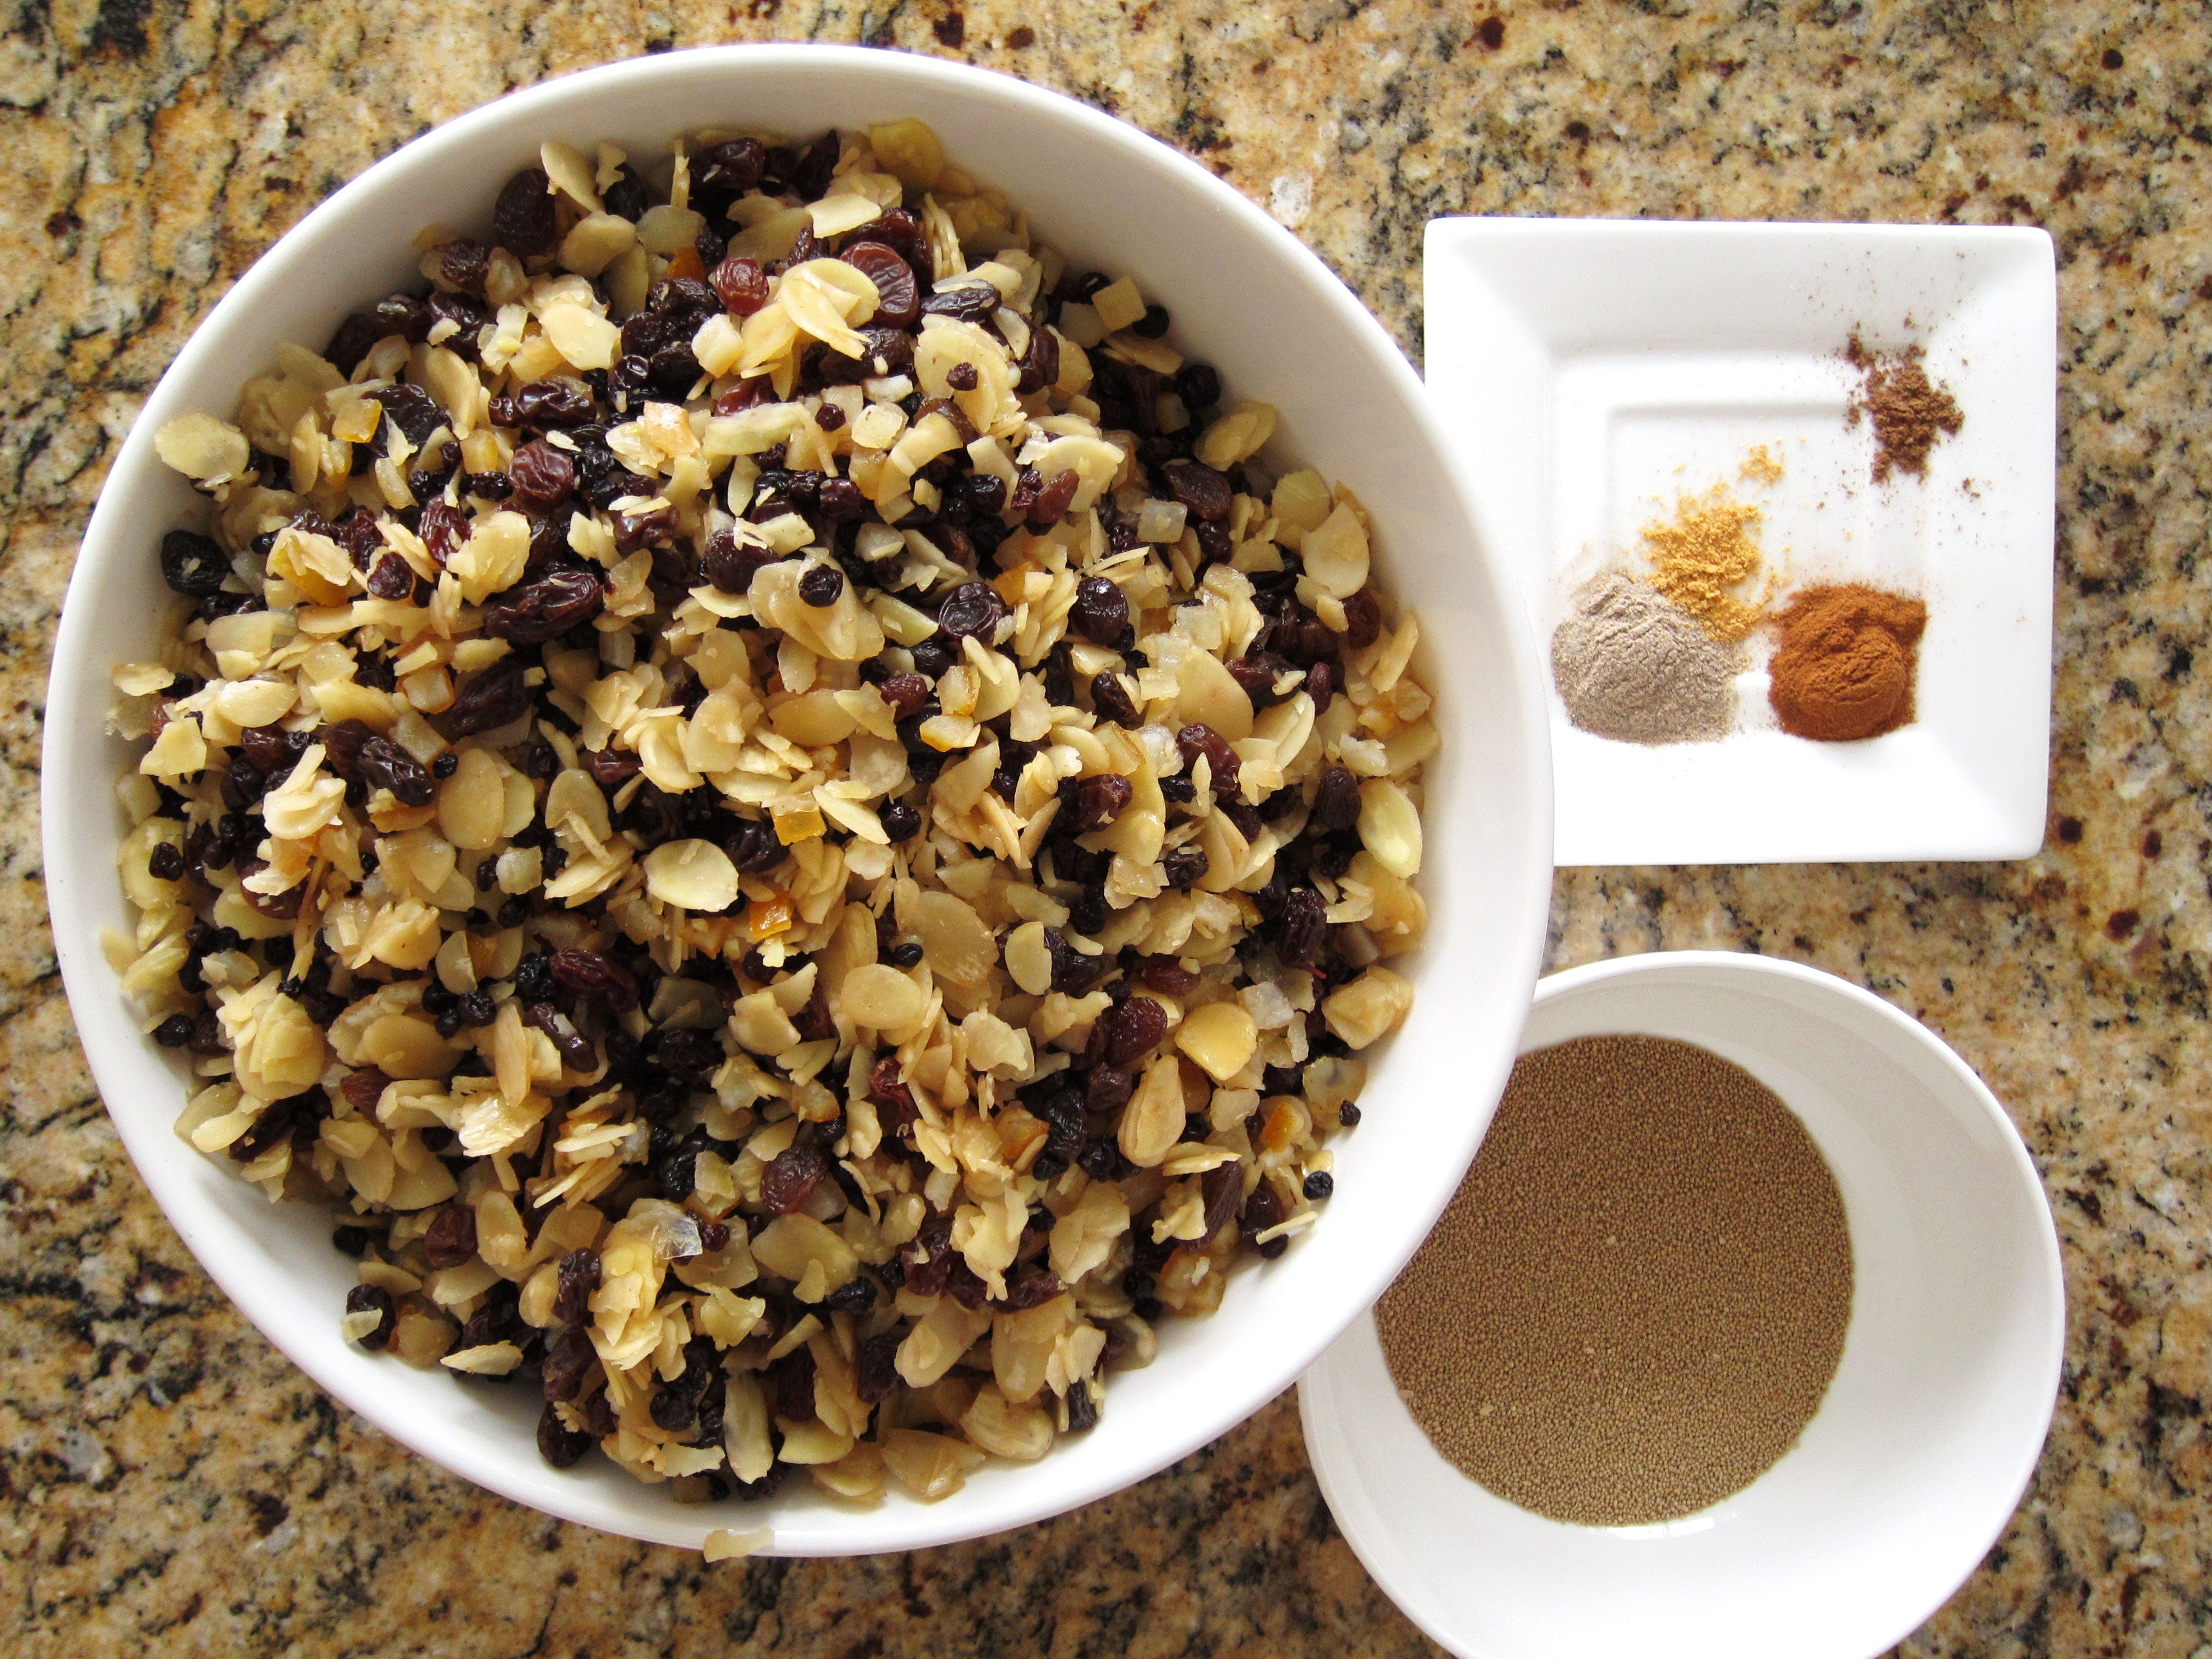
Proof the yeast by sprinkling it over 1 cup of the lukewarm milk (about 100ºF) to which has been added a tablespoon of sugar. Set aside in a warm place for about 10 minutes. The yeast is active if it forms a creamy foam on top of the milk. Sift the flour into a large mixing bowl. Add the room-temp butter, icing sugar, the remainder of lukewarm milk, spices and the proofed yeast mixture and mix. Transfer to a slightly floured work surface and knead thoroughly. stollen 3 stollen 4 stollen 5 Cover the dough and allow to rise for approx. 30 minutes in a warm place. Add the prepared fruit mixture. Knead the fruit mixture thoroughly into the dough. The dough should be smooth and elastic. stollen 12 Roll the dough into a long thick cylinder shape and cut into 4-6 pieces. Form into loaves. stollen 15 
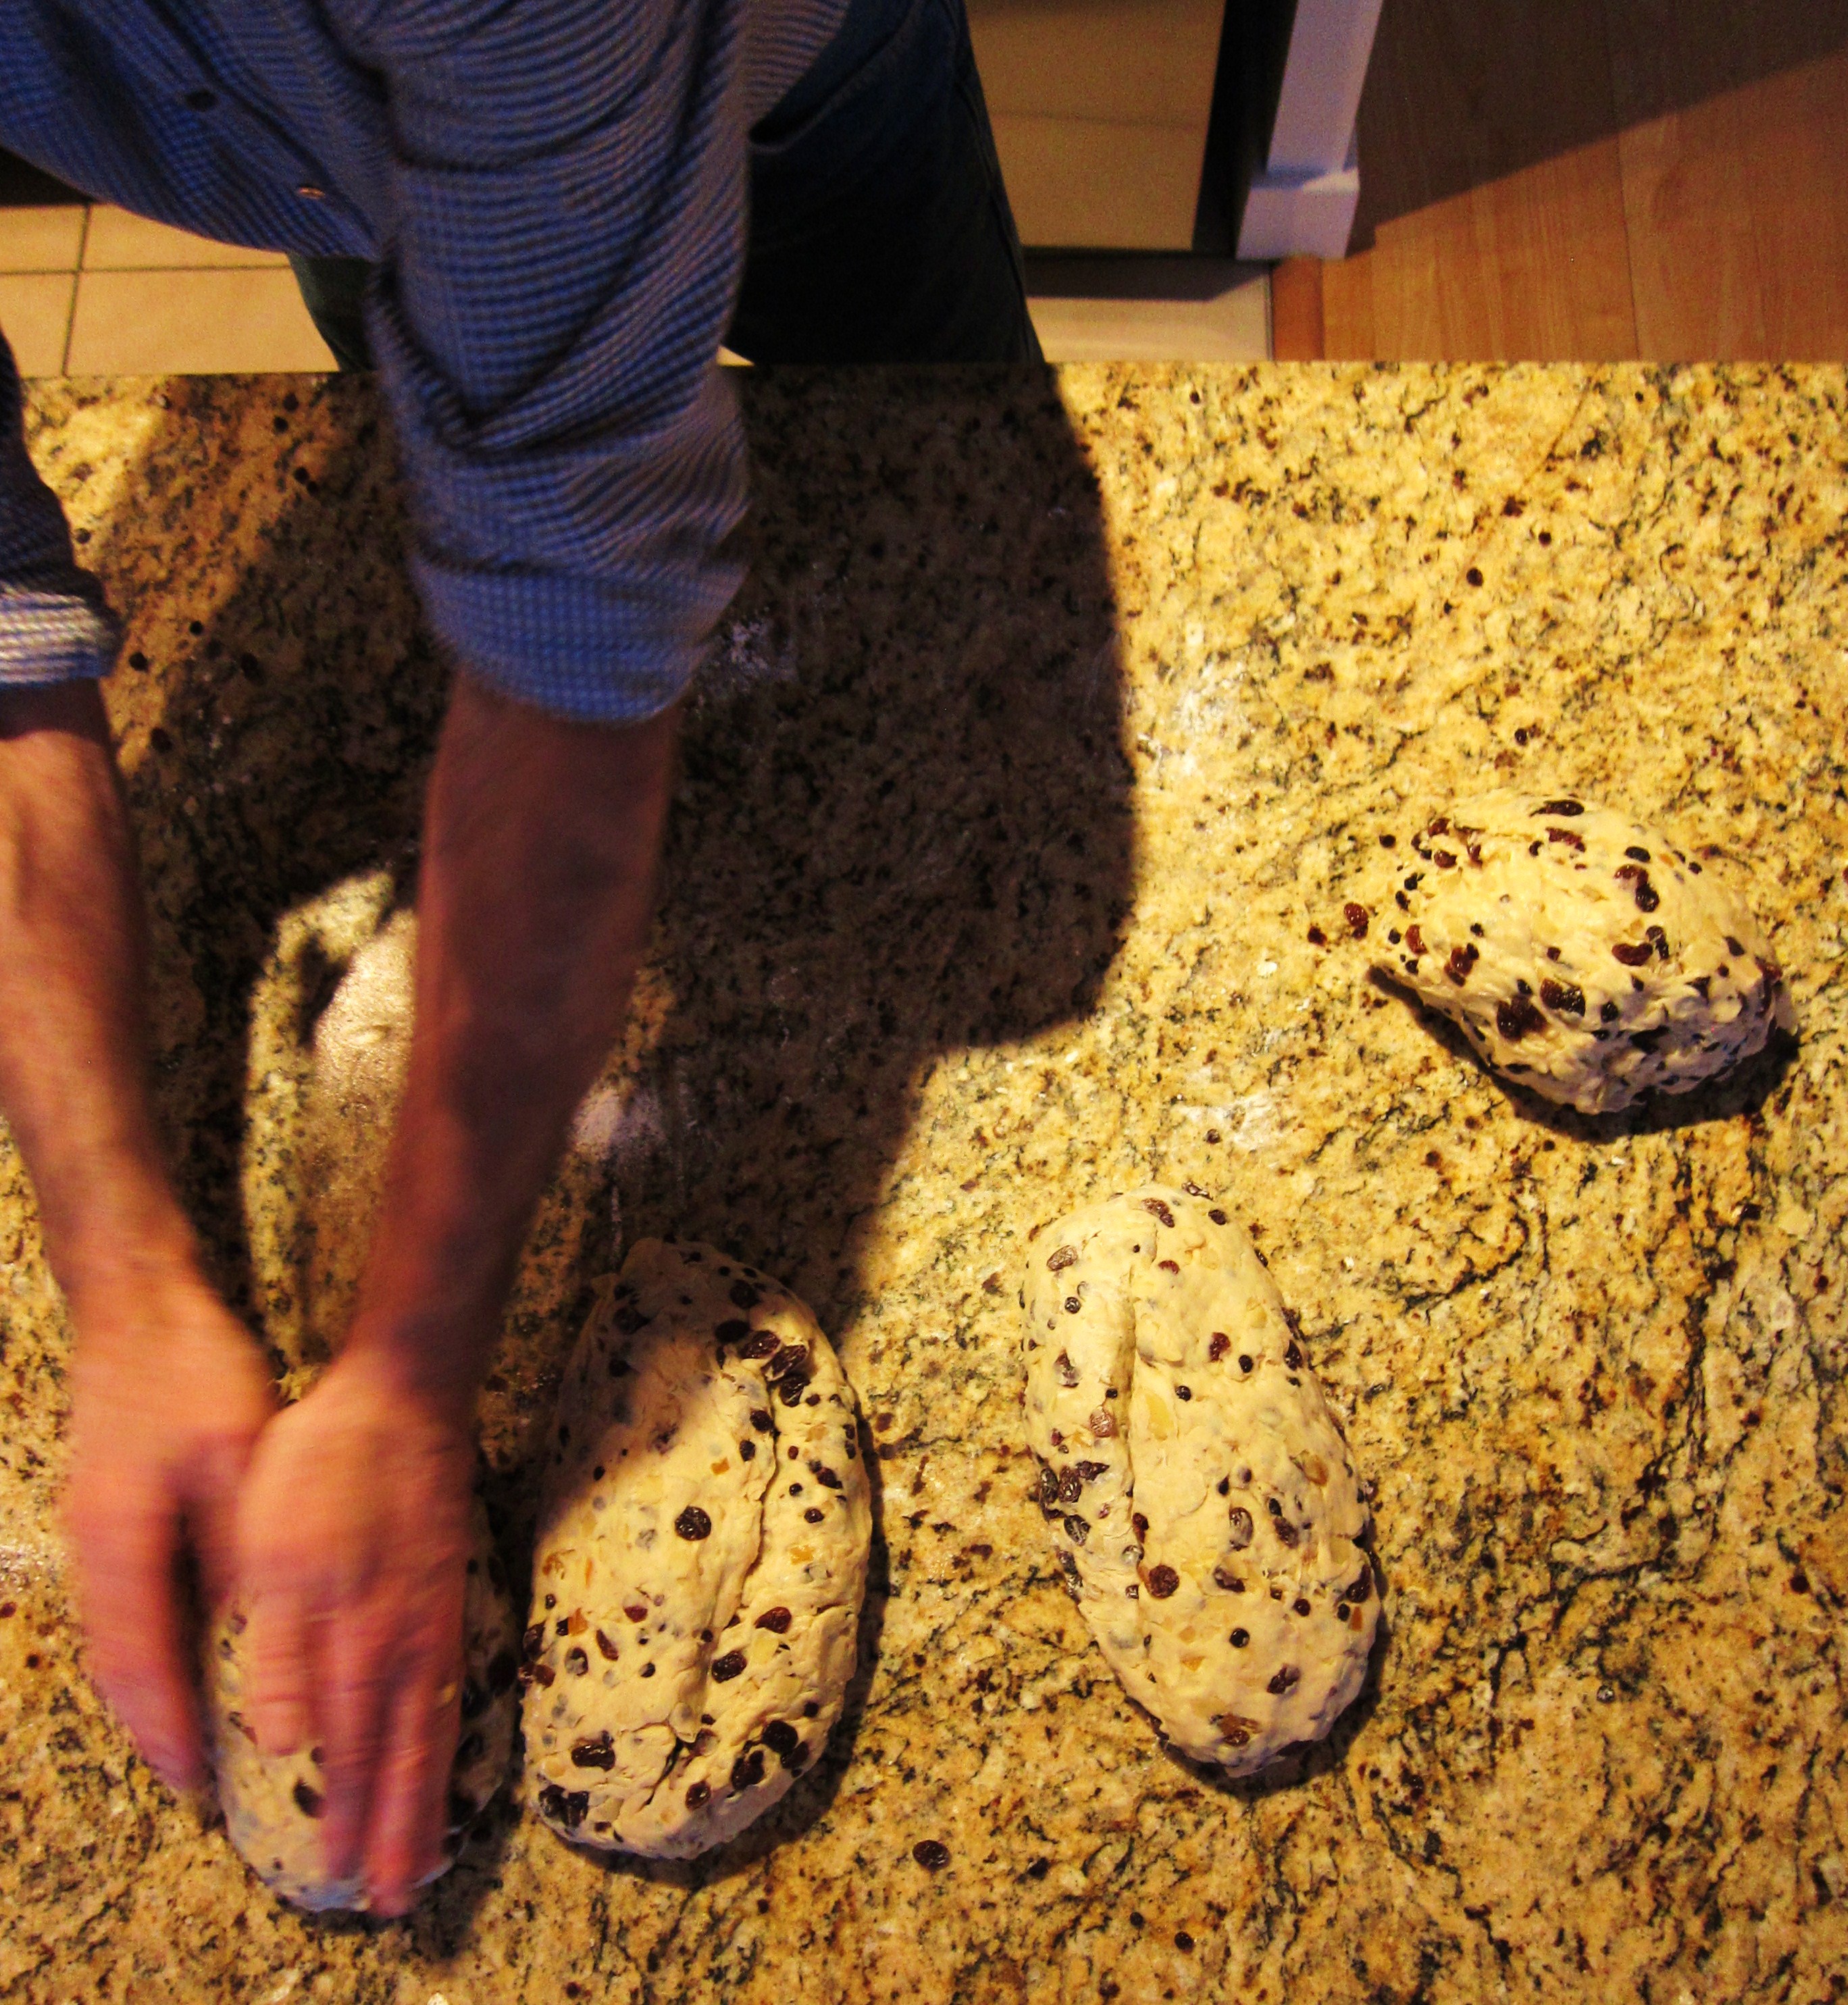
Transfer to a greased and floured baking tray, cover with a clean dish towel and leave to rise for 20-30 minutes in a warm, draft-free place. Preheat the oven to 350º F and bake for 50 minutes. stollen 17 stollen 18While the stollen is still warm, brush with melted butter and dust with icing sugar. Drizzle a little brandy over-top. Wrap well in muslin cloth or aluminium foil and store in a cool place. stollen 19 stollen 20 stollen 22 
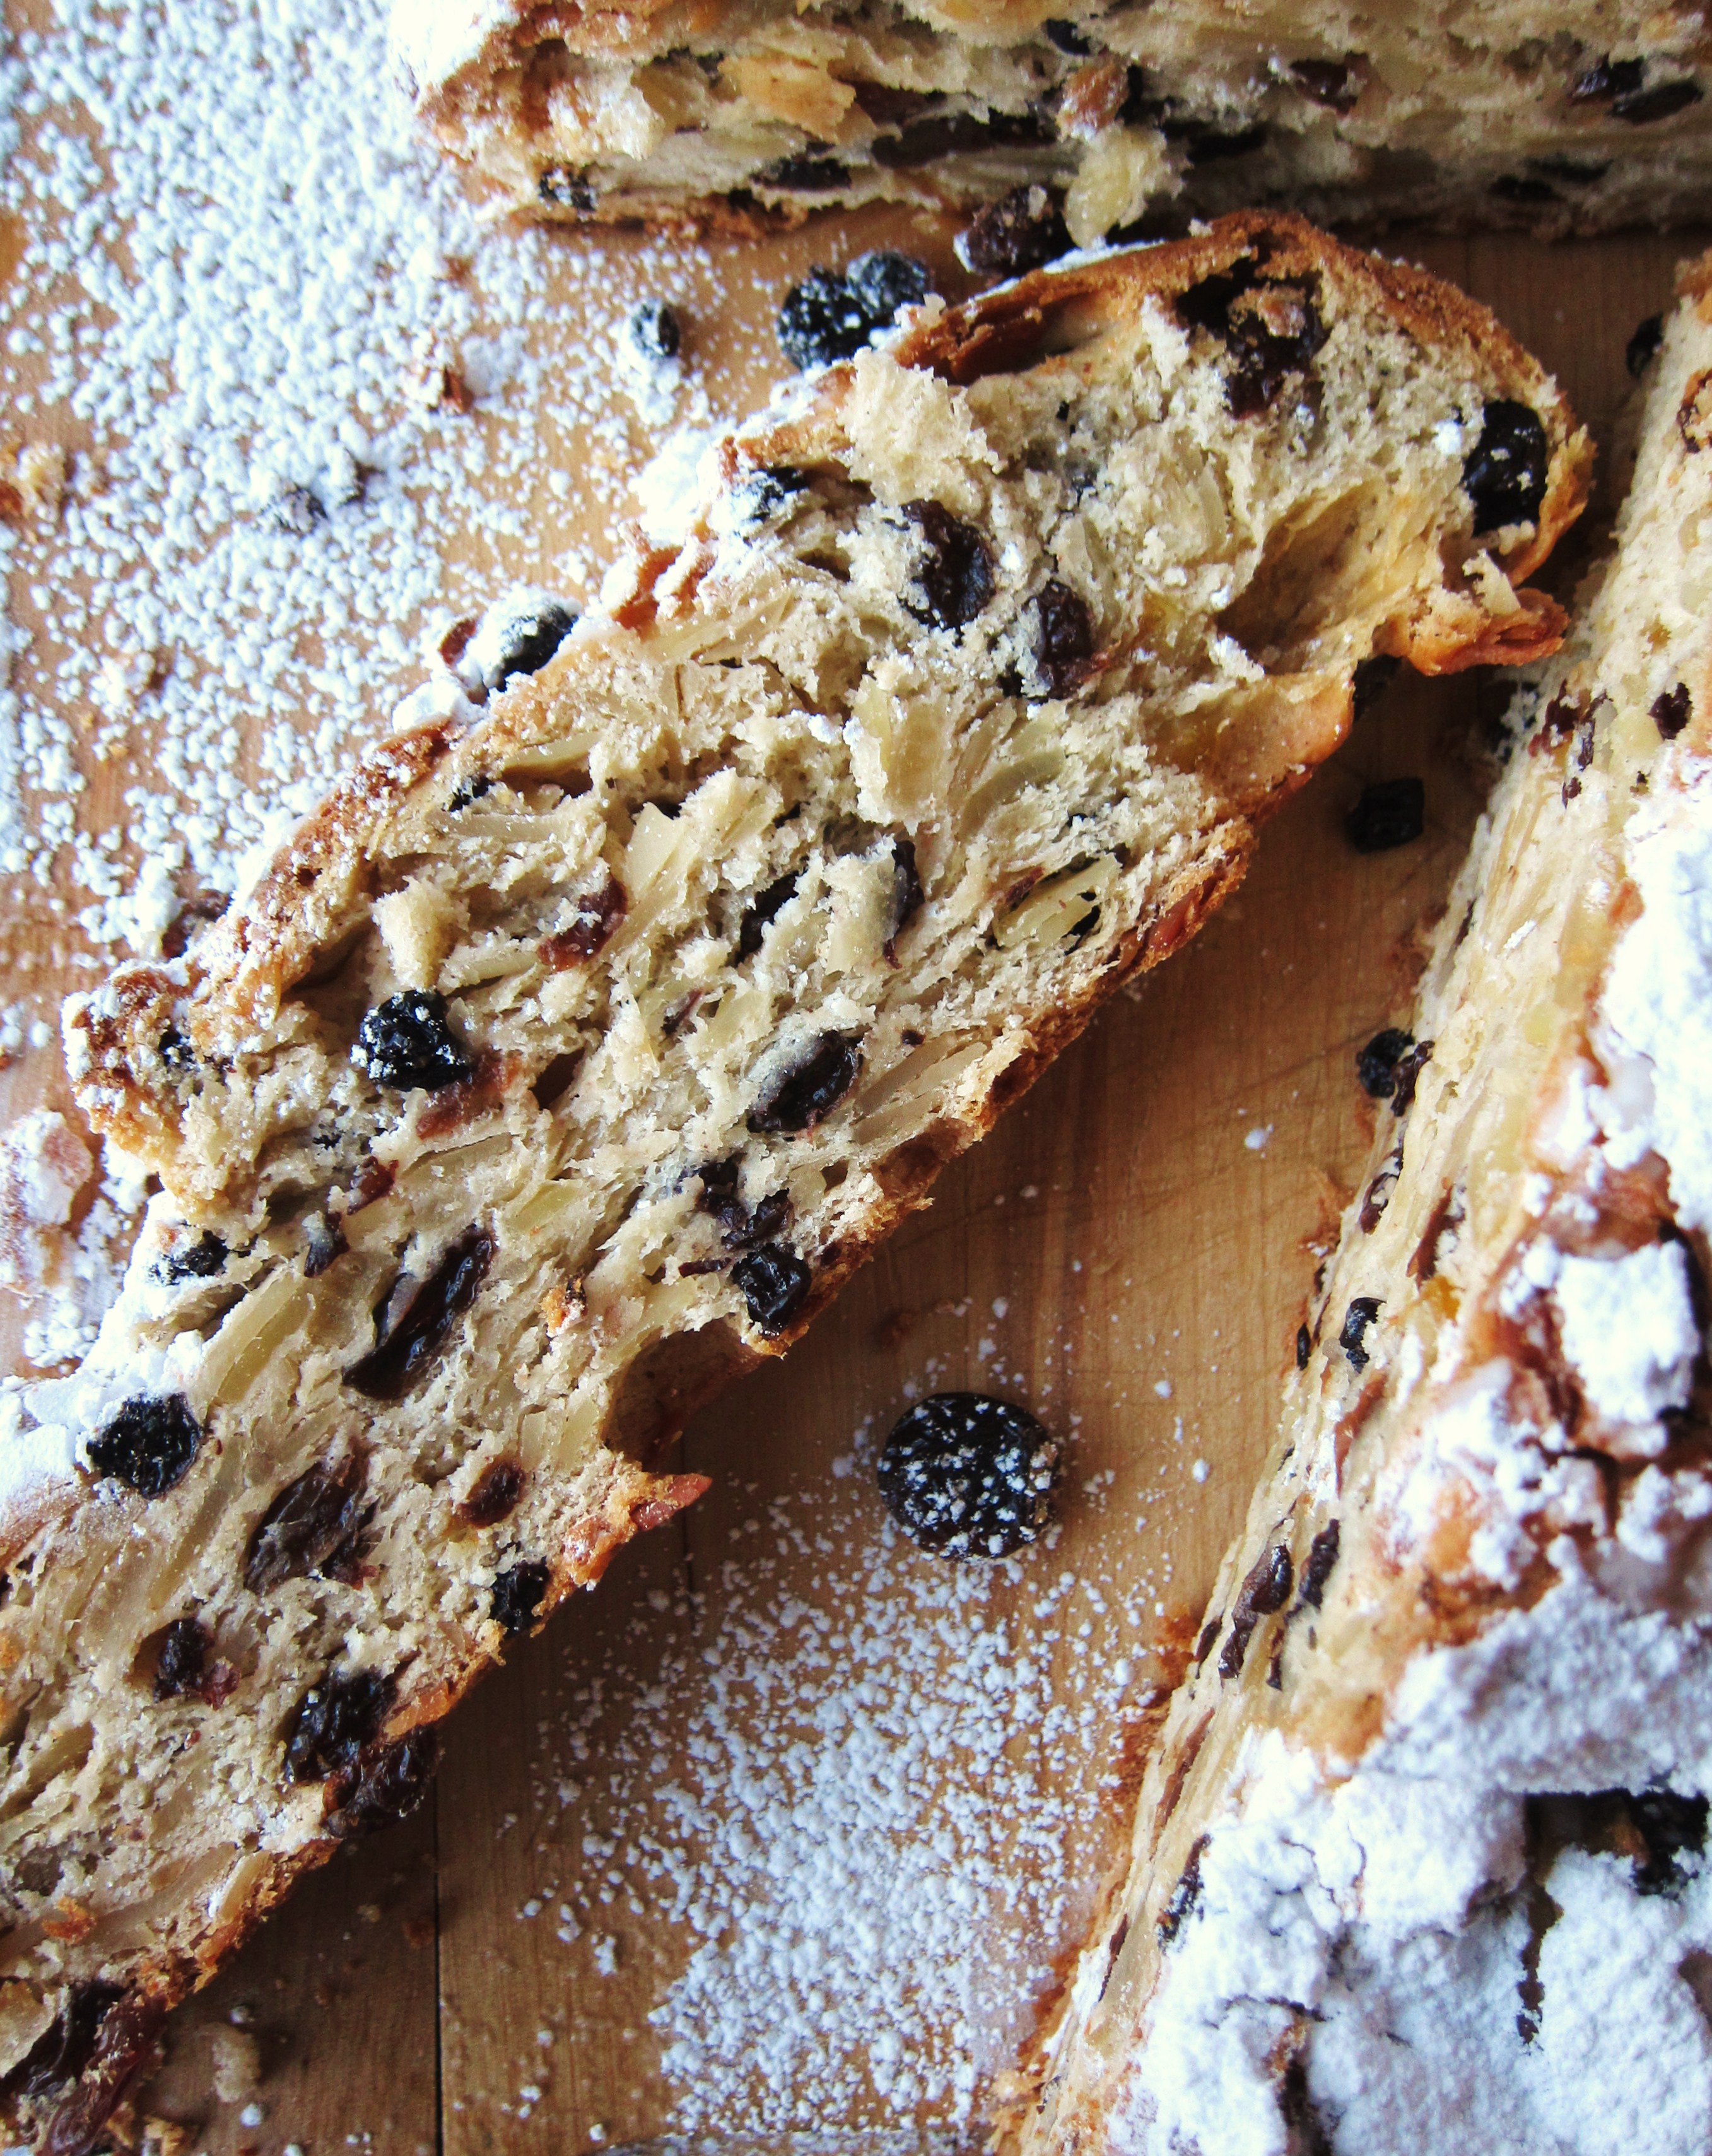
Note: Dad likes to douse his stollen every couple of days with brandy to keep it moist (and, let’s be honest, make it more delicious and boozy). Just re-dust the whole loaf with a bit of powdered sugar before serving.

Share this:

  • Tweet
  • Share on Tumblr

Like this:

Like Loading...

Holiday Eating

27 Friday Dec 2013

Posted by julia chews the fat in Cooking For Your Peeps, Holidays, Sweet Tooth, Vegetarian

≈ 5 Comments

“I’ve decided. I’m having stuffing for breakfast.” – Mom (Boxing Day, 10:34am)

These are the kinds of assertions that make Christmas the beautiful thing that it is. A nip of bourbon in your morning coffee; shortbread cookies for breakfast. It’s unrestricted, backwards-eating at it’s best. Because really, who’s going to say that you can’t? There’s a unspoken understanding that from December 24th to January 6th, it’s the Wild West of eating and imbibing – there are no rules, and each is left to their own devices with the cornucopia of leftovers in the fridge. (And, yes, your head’s always in the fridge, because you’re constantly hungry. Even though you just ate.) For some reason, you also find yourself wanting to drink filtered coffee all day…or at least before you hit the mimosas, cocktails, red wine and hot toddies (usually in that order, but not always).

Christmas cookies are an important part of the no-rules, bacchanal feasting that goes on in our house at this time of year. Highly versatile, they can be eaten as an pre-breakfast “appetite-opener”, a “light” dessert after a holiday meal, or as a post-nap snack. They are glad to be whatever you want them to be, whenever you want them.

Like every year, I began amassing Christmas cookie recipes in mid-November, with the unrealistic hope that I’d be able to make all two dozen of them. Then, by the time December 23rd rolled around, I had widdled the list down to a more reasonable five or six, in addition to the “untouchables” (i.e. the ones firmly cemented in the italo-anglo traditions of my family, and which we do not mess with – anise pizzelle, fennel-seed doughnuts, chocolate chichinotti, shortbread cut-outs and ginger snaps).

This year, I locked down three new favourites, one with molasses, one with chocolate and one dusted with powdered sugar. They are each very different, but all equally addictive. Dunk them in a hot cup of coffee after a long walk in the snow. Or while sipping champagne in the bathtub. Whichever scenario suits you best.

Warmest of holidays to you and yours ♥

ginger-molasses cookies

Smoky Ginger-Molasses Cookies – from Reclaiming Provincial
(makes around 2 dozen cookies)

  • 5 black cardamom pods
  • 1 cup of sugar + 1/2 cup of sugar, divided
  • 3/4 cup of unsalted butter (12 tbsp / 1.5 sticks)
  • 1/4 cup molasses
  • 1 egg
  • 1 cup of bread flour
  • 1 cup of all-purpose flour
  • 2 tsp baking soda
  • 1/2 tsp salt
  • 1 tsp cinnamon
  • 1/2 tsp ginger
  • 1/2 tsp nutmeg
  • 1/2 tsp ground cloves
  • 1/8 tsp black pepper

3 days in advance:
Combine whole cardamom pods and 1/2 cup of sugar in a jar. Cover and let sit.

ginger-molasses cookies

To make the cookies:
Remove cardamom pods from the rolling sugar. Crack open pods, remove seeds and crush them with a mortar and pestle. Set aside.

Melt butter in a saucepan over medium-low heat. Add the cardamom pods and let simmer until the butter begins to foam. Remove from heat and let rest for 15 minutes, then remove pods and discard. Let butter cool to room temperature.

Sift together flour, baking soda, salt, spices, crushed cardamom seeds, and pepper.

In another bowl, cream together butter and the cup of sugar. Beat in molasses, then the egg. Gradually beat in dry ingredients until just combined. Cover and chill in the fridge for at least 2 hours, or up to 2 days.

Preheat the oven to 375°F and line a baking sheet with parchment or a Silpat.

Form heaping tablespoons of batter into balls; roll in the 1/2 cup of infused sugar. Place on a baking sheet two inches apart.

Bake cookies for 8–10 minutes. Let cool on the baking sheet for 2 minutes, then transfer to a cooling rack.

ginger-molasses cookies

—–

Almond Crescents
(makes about 2 dozen)

almond crescents

  • 1/2 lb unsalted butter
  • 3/4 cup powdered sugar
  • 2 egg yolks, well beaten
  • 1 cup ground almonds (blanched)
  • 1 tsp vanilla extract
  • 2 cups flour

Beat the egg yolks at high speed until light in colour.

Cream butter in a bowl; add sugar and beat with electric beaters for 1 minute. Add egg yolks, beating to blend. Add almonds and vanilla, then mix with a wooden spoon. Fold in flour a little at a time with the wooden spoon until just blended.

Refrigerate dough for 30 minutes (and up to 2 days)

Divide dough into 4 potions and roll out each portion on a floured work surface into a log shape. Cut segments (about the length of your index finger)and shape them into crescents.

almond crescents

Preheat the oven to 400°F. Bake on a parchment-lined baking sheet for 7-10 minutes. Allow to cool for a few minutes, then roll in powdered sugar while warm.

almond crescents

—–

Chocolate Crackle Cookies – from Martha Stewart

Chocolate Crackle

(makes about 3 dozen)

  • 8 ounces dark chocolate (such as 70 percent cacao), finely chopped
  • 1 cup blanched almonds, toasted
  • 1/2 cup all-purpose flour
  • 1 teaspoon baking powder
  • 1/2 tsp salt
  • 1 stick unsalted butter, room temperature
  • 1 cup packed light-brown sugar
  • 2 large eggs
  • 1 teaspoon pure vanilla extract
  • 1 cup granulated sugar
  • 1 cup confectioners’ (powdered) sugar

Melt chocolate in a double boiler or a heatproof bowl set over a pan of simmering water, stirring. Let cool. Pulse almonds in a food processor until very finely chopped. Transfer to a medium bowl, and stir in flour, baking powder, and 1/2 teaspoon salt.

Beat butter and brown sugar with a mixer on medium-high speed until fluffy, 2 to 3 minutes. Mix in eggs and vanilla. Mix in chocolate. Reduce speed to low, and mix in almond-flour mixture. Refrigerate dough until firm, about 1 hour (note: the batter will not seem like a regular cookie dough, but more like a cross between cake batter and ganache to make truffles. It’s ok – roll with it. After some time in the fridge, it’ll firm up and you’ll be able to scoop it out).

Preheat oven to 350°F. Form dough into 1-inch balls. Roll in granulated sugar to coat, then in confectioners’ sugar to coat. Arrange on parchment-lined baking sheets, spacing about 1 inch apart. Bake, rotating sheets halfway through, until surfaces crack, about 14 minutes. Transfer sheets to wire racks; let cool.

Chocolate Crackle

Share this:

  • Tweet
  • Share on Tumblr

Like this:

Like Loading...

Taking Back Cheese

20 Friday Dec 2013

Posted by julia chews the fat in Breakfast & Brunch, Lunch & Dinner, Snacking, The Basics, Vegetarian

≈ Leave a comment

For some time now, I’ve been buying ricotta under-the-radar from someone who makes it in their converted garage. You wouldn’t guess it, but this stuff is gorgeous – it’s creamy but unbelievably light and mild in flavour, almost sweet. It’s unlike any of the preservative-heavy schlock that’s often on offer in grocery stores. It comes in a beautifully moulded shape, ready to eat on its own, spread onto toast, sprinkled over salads, or baked in the oven on top of pasta (Nonna and I have a soft spot for this dish).

However, getting fresh cheese like this on a regular basis is a tad tricky. You need to be organised. You need to submit your order in advance and get yourself to the location. While it’s always worth it, it’s definitely not convenience food.

Then it came to my attention that ricotta could quite feasibly be made at home, without any special equipment or expertise. After all, it only involved 4 ingredients and some cheesecloth. But this idea cracked open a Pandora’s box of cheese-related questions: What type of ingredients work best? Should I be using rennet? Where do I get rennet? Do I need to boil the milk? How do I ensure I don’t poison anyone with my home-made concoctions?

I didn’t want to plunge knuckle-deep into whey before knowing a few ground rules. At the same time, I was weary of the vortex of conflictual information hanging out on the Internet and, ideally, I wanted to learn these skills first-hand with someone whose experience far surpassed mine.

Enter David Asher Rotsztain. 

David is an organic farmer, goatherd and cheesemaker based in Mayne Island, B.C. Through community outreach workshops, he teaches natural cheese-making methods that can easily adopted by the home cook. In other words, this is guerilla-cheese-making – taking back something that in modern times has been (rather counter-intuitively) entrusted with people and entities that are alien to us and our day-to-day.

By sheer luck, a local non-profit was offering workshops with David right around the time I was thinking about making ricotta. In the workshop, he spoke about different types of cheese, their idiosyncrasies, their benefits, their beauty. We talked about raw milk versus pasteurized, whole milk versus low-fat, the use of lemon juice compared to rennet, and the wonders of edible mold. It was an eye-opening experience that broke down the process into manageable pieces and made cheese-making more approachable than I could have imagined. As I quickly learned, good cheese involves only a handful of ingredients, some time, and a bit of know-how.

Until I get around to making ricotta, I’m going to leave you with the step-by-step process for making your own fromage frais, which is essentially yoghurt strained at room temperature for 24-28 hours. It’s ridiculously simple, and though it takes a bit of time, your patience will be rewarded with a lovely, creamy round of fresh cheese, ready to serve with bread for breakfast or alongside crackers on a (hm holiday?) cheese platter.

Enjoy ♥

Homemade Fromage Frais – makes about 250g

8 - finished fromage frais


You will need:

– 1 container good-quality yoghurt, without any emulsifiers, stabilizers or gelatin (for this recipe, I used a full-fat buffalo yoghurt I found here)

1 - yogurt
– about 1 tsp salt
– a big stockpot or very deep bowl
– a wooden spoon (or something similar) that will sit solidly across the bowl
– some cheesecloth (this can include unbleached muslin or nylon cloth, but David recommends a Du-Rag. Yep, that’s right – a Du-Rag. Its shape and tight meshing make it perfect for straining this cheese. And it’s a breeze to wash for future use)

2- cheese cloth
1) Wash your cheesecloth and allow to air-dry.
2) Drape the cheesecloth atop a bowl and pour the yoghurt into its centre. Pull together the four corners of the cloth around the yoghurt; twist and secure with a knot.

3- yogurt in cheese cloth

5 - squeezing & tying

3) Tie to the wooden spoon (or similar implement) and hang over stockpot or deep bowl. The cheese should be able to hang freely, not touching the bottom.

6 - hanging

4) Leave it to hang overnight at room temperature. As they whey* drips into the pot, the yoghurt will slowly become cheese.
(*do not discard whey by pouring it down the drain, as it is toxic to aquatic life. Instead, keep it to make ricotta or feed your plants, dogs or compost with it.)

5) After 24 hours, this cheese will have dripped dry. To improve flavour, and to help preserve it longer, salt the cheese by opening up the cheesecloth and sprinkling a teaspoon of salt over the surface of the cheese. Close the bag, and hang it again for another 4 hours.

7 - opening & salting

9 - cheese & toast

10 - cheese & toast - detail

Titbits from David:
*don’t squeeze the cheese to force out whey (it’s sooo tempting, but resisting will avoid any mishaps…)
*make this cheese with goat’s yoghurt, and you get chèvre.
*make this cheese with extra high fat yoghurt, and you get cream cheese.

And if you still need some cheese-making inspiration, watch this video (disclaimer: it may make you want to pack your bags, move to France, and become a shepherd).

Share this:

  • Tweet
  • Share on Tumblr

Like this:

Like Loading...

Hello, Winter.

01 Sunday Dec 2013

Posted by julia chews the fat in Cooking For Your Peeps, Cooking Solo, Lunch & Dinner, Vegetarian

≈ 2 Comments

Well, this is awkward. The last post I left you with involved a late-autumn frolic through the orchard and some apples. And now there’s somehow a solid layer of snow on the ground.

Hm. Funny how that happens.

If it’s any consolation, you haven’t missed much in the kitchen department – I haven’t been cooking a whole lot these days and even when I have, the results have been nothing to cry home about. And with Taste MTL happening earlier in the month, I was busy stuffing my gob here and here for my work with The Main, plus here because I was told it was fantastic (which it was).

Then health stuff made the last couple of weeks feel icky and prompted a lot of early nights, boiled artichoke dinners and zero computer screens after 7pm. It hasn’t exactly been girl-gone-wild around here.

With that unpleasantness out of the way (and with a bit more time on my hands), I’ve been catching up on winter recipe collecting, fattening up my Pinterest board and bookmarking my Ottolenghi and Bernard Clayton cookbooks, all of which has gotten me really jazzed about cooking through the colder months. There’s also the fact that there are ONLY 24 MORE SLEEPS ‘TIL CHRISTMAS, which means I’ve started to daydream about truffles, caramels, shortbreads, fig tarts, ginger cookies, pannetone, paneforte, torrone, clementines, pomegranates, almonds, chestnuts, lemons, persimmons, cinnamon, rosemary, sage, thyme, bourbon…and all the other usual suspects that I’m keen to share with friends and family and you!

While that stuff is in the works, I’d like to leave you with a recipe I made the other day that hit all the right (wintery) buttons. It’s essentially a caramelized, aromatic eggplant filled with pearly Israeli couscous, tangy yogurt and crunchy almonds. You’ll see that the recipe calls for sumac. If you haven’t already used this in your cooking, I highly encourage you to get your hands on some (barter or beg if you have to). Used mostly in Middle Eastern cuisine, it’s a fine, burgundy-coloured spice that has a lemony kick – good for sprinkling over salads, pilafs, roasted potatoes and grilled meats.

Thanks for checking in. See you here again soon, lovelies.

Spiced Eggplant with Herbed Israeli Couscous – serves 2 as a main, or 4 as a side
(adapted from Souvlaki for the Soul)

Couscous Eggplant

Ingredients

– 2 baby (Italian) eggplants, cut into 1cm slices
– ½ tsp turmeric
– ½ tsp ground coriander
– ½ tsp ground cumin
– ¼ tsp ground cinnamon
– ½ cup cooked Israeli couscous
– a handful of chopped flat-leaf parsley
– a handful chopped coriander (cilantro)
– ¼ cup slivered (or chopped) almonds, skin-on (or not)
– olive oil
– lemon juice
– salt and pepper
– Greek yogurt to serve
– sumac for garnish (optional)

Directions:

Pre-heat the oven to 350° F. Combine the ground turmeric, coriander, cinnamon and cumin in a bowl.

Drizzle the eggplants with some olive oil and and rub each with some of the spice mixture. Cook in the oven till eggplants have softened (approx 30-35 mins).

Combine the cooked couscous, herbs and almonds along with a drizzle of olive oil and a squeeze of lemon juice. Stir to combine.

Spoon the couscous mixture into each eggplant piece, adding a dollop of yogurt and a sprinkle of sumac to each. Serve straight away.

Couscous Eggplant - detail

Share this:

  • Tweet
  • Share on Tumblr

Like this:

Like Loading...

Facebook

Facebook

Instagram

No Instagram images were found.

Recent Posts

  • Layers and Rows
  • Finding Buoyancy
  • February
  • Wednesday
  • Cross My Heart, Miso

Archives

  • May 2017
  • April 2017
  • February 2017
  • December 2016
  • November 2016
  • September 2016
  • August 2016
  • July 2016
  • June 2016
  • May 2016
  • April 2016
  • March 2016
  • February 2016
  • January 2016
  • December 2015
  • November 2015
  • October 2015
  • September 2015
  • August 2015
  • July 2015
  • June 2015
  • May 2015
  • April 2015
  • March 2015
  • February 2015
  • January 2015
  • December 2014
  • November 2014
  • October 2014
  • September 2014
  • August 2014
  • July 2014
  • June 2014
  • May 2014
  • April 2014
  • March 2014
  • February 2014
  • January 2014
  • December 2013
  • October 2013
  • September 2013
  • August 2013
  • July 2013
  • June 2013
  • May 2013
  • April 2013
  • March 2013
  • February 2013
  • January 2013
  • December 2012
  • November 2012
  • October 2012
  • September 2012
  • August 2012
  • July 2012
  • June 2012
  • May 2012
  • April 2012
  • March 2012
  • February 2012

Categories

  • Beverage
  • Breakfast & Brunch
  • Condiments
  • Cooking For Your Peeps
  • Cooking Solo
  • Cooking with Nonna
  • Food Away From Home
  • Food Writing
  • Holidays
  • Intro
  • Lunch & Dinner
  • Snacking
  • Soups
  • Sweet Tooth
  • The Basics
  • Vegetarian

Enter your email address to follow this blog and receive notifications of new posts by email.

Join 80 other subscribers

Blog at WordPress.com.

  • Follow Following
    • julia chews the fat
    • Join 80 other followers
    • Already have a WordPress.com account? Log in now.
    • julia chews the fat
    • Customize
    • Follow Following
    • Sign up
    • Log in
    • Report this content
    • View site in Reader
    • Manage subscriptions
    • Collapse this bar
 

Loading Comments...
 

    %d bloggers like this: