• Home
  • About

julia chews the fat

julia chews the fat

Monthly Archives: April 2016

Cast-Iron Love

30 Saturday Apr 2016

Posted by julia chews the fat in Cooking For Your Peeps, Lunch & Dinner, The Basics

≈ 2 Comments

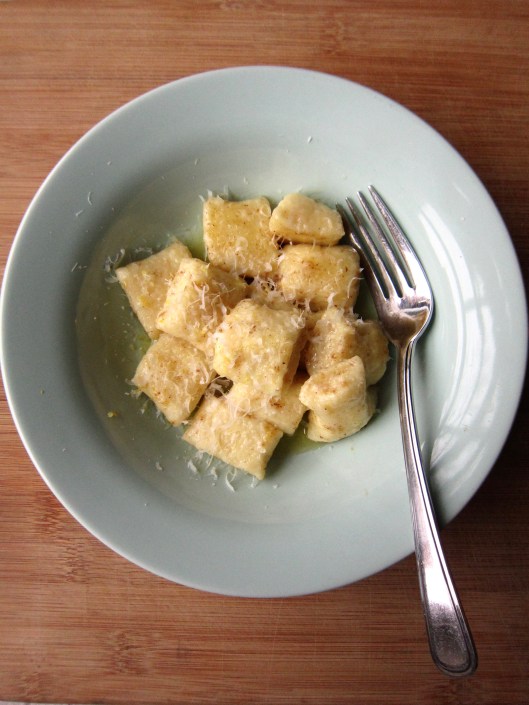
I’ll never tire of that sight – that hot mess of slowly-braised meat, bright veg, and pillowy dumplings, mingling together in a heavy-bottomed pan. Like many gifts in one. It might be the extravagant use of meat (which we all know we should be eating less of), but this, to me, is luxury food. In perhaps its truest, most rewarding form.

It might seem late to be posting about braised anything one day shy of May, but the weatherman seems to think there are a few more crisp, cool days ahead of us – at least in these parts (I could swear I saw a snowflake yesterday) – and so I think there’s still some wiggle room for a few more dishes like these, the ones that require the slow, steady heat of the oven to attain their full potential.

These are the kind of dishes that make me feel gratified about rescuing that old, blaze-coloured Creuset from the family basement a few years ago, when no one wanted it, either for lack of space, or to prioritize lighter, less cumbersome cookware. Over the years, and before its hibernation in the basement, it had become a well-used and well-loved beast, bearing a hefty scar – a deep, cinereal gash right across the lid – from an earlier incident involving a sharp plunge to the tile floor, back in the house I grew up in. Some might have thrown the thing away, but Dad, the industrious Anglo-Saxon that he is, worked his magic with the sodering iron and sealed it back together, to create something of a Franken-Creuset.

IMG_1445

Bequeathed with what is now considered a family heirloom, I try to find ways to use it whenever I can, and as often as I can. And each time, I marvel at how it turns unglamorous cuts of meat into ravishingly beautiful braised dishes that you want to mop up with bread until there’s nothing left on the plate. I’ve learnt to appreciate my Creuset, its scar a tangible reminder to handle it with care. It rewards me in kind, every time.

—–

Braised Lamb with Dumplings and Date-Mint Chutney

Adapted from The Complete Irish Pub Cookbook and Joe Beef for Food 52
Serves 4

Braised Lamb with Dumplings and Date-Mint Chutney

For the Lamb

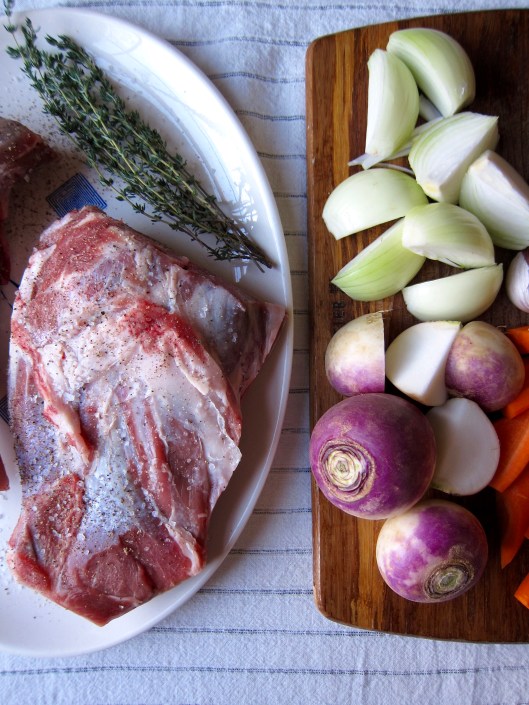
  • 2 lb (about 1 kg) lamb shoulder, bone-in*
  • Salt and pepper, to season
  • 3 Tbsp olive oil
  • 1 onion, quartered
  • 1 small leek, white + light green part cut into rings
  • 1 carrot, peeled and chopped into chunks
  • 3-4 small turnips, washed and quartered
  • 10 cloves garlic, smashed and skins removed
  • 10 sprigs thyme
  • 1 cup dry white wine
  • 1 1/2 cup beef stock (plus one cup to add at the end with the dumplings)
  • 1 cup frozen or very fresh shelled peas (to add at the end of cooking)

*depending on the size of your baking vessel, you can ask your butcher to cut the lamb shoulder in half.

For the Date-Mint Chutney

  • 1 cup pitted dates
  • 1/4 cup water
  • 1/4 cup cider vinegar
  • Pinch of cayenne pepper
  • 1/8 cup jarred horseradish
  • 2 Tbsp fresh mint
  • 1/2 Tsbp Worcestershire sauce

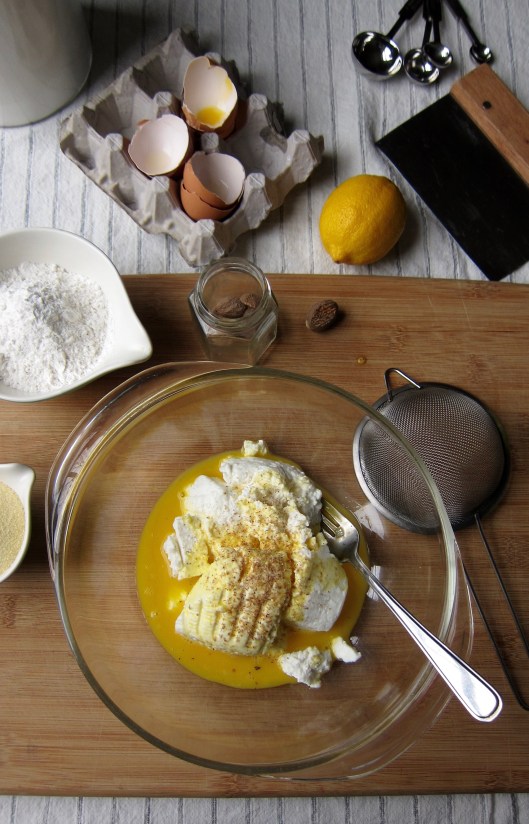
For the Herb Dumplings

  • 1 cup all-purpose flour
  • 1 tsp baking powder
  • 1/2 tsp salt
  • 1/4 tsp black pepper
  • 1 1/2 Tbsp finely chopped parsley
  • 1 1/2 Tbsp finely chopped fresh mint
  • 2 Tbsp unsalted butter
  • 1 egg
  • 2 Tbsp milk

Braised Lamb with Dumplings and Date-Mint Chutney

Braised Lamb with Dumplings and Date-Mint Chutney

Directions

1) Preheat the oven to 375° F. MAKE THE LAMB: Season the lamb on all sides with salt and pepper. Heat the oil in a large ovenproof sauté pan over high heat. Add the lamb and sear for 3 or 4 minutes on each side, or until you get a nice golden crust. Transfer to a plate.

2) Reduce the heat to medium, throw in the onion, leek, turnip, carrot, and garlic, and cook, stirring occasionally, for about 5 minutes, or until nicely browned. Add the thyme, nestle the lamb on top of the vegetables, and pour in the wine and the beef stock. Cover the pan, place in the oven, and braise for 4 hours, basting the lamb every 30 minutes or so with the pan juices. If the pan begins to dry out, add some water.

3) While the lamb is cooking, MAKE THE CHUTNEY: In a small pot, combine the dates and water, bring to a boil over high heat, and boil for about 10 minutes, or until soft. Reduce the heat to medium, add the vinegar, and cayenne, and stir well. Cook, stirring occasionally, for 10 minutes, or until the sugar is dissolved and the condiment has the consistency of jam. Remove from the heat, add the horseradish, mint, and Worcestershire sauce, and whisk until combined. Let cool before serving. (Leftover condiment can be stored in a tightly capped jar in the refrigerator for up to 1 month.)

4) MAKE THE DUMPLINGS (see instructions below)

5) About 20 minutes before the meat is ready, heat the remaining cup of stock in a saucepan; remove the lamb from the oven and arrange the dumplings around the meat, pouring over the hot stock; add the peas. Cover and return to the oven to cook about 15 minutes longer.

4) When the lamb is ready, transfer it to a warmed platter with the vegetables and dumplings. Serve the condimint on the side.

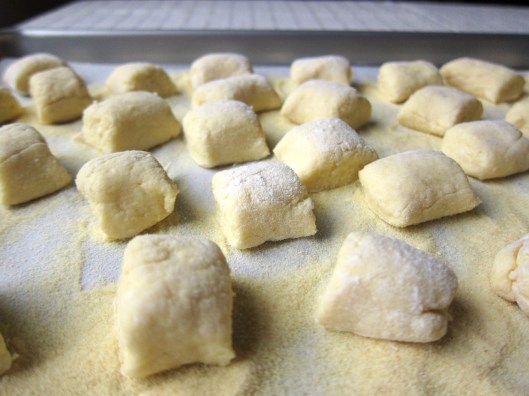
To make the dumplings

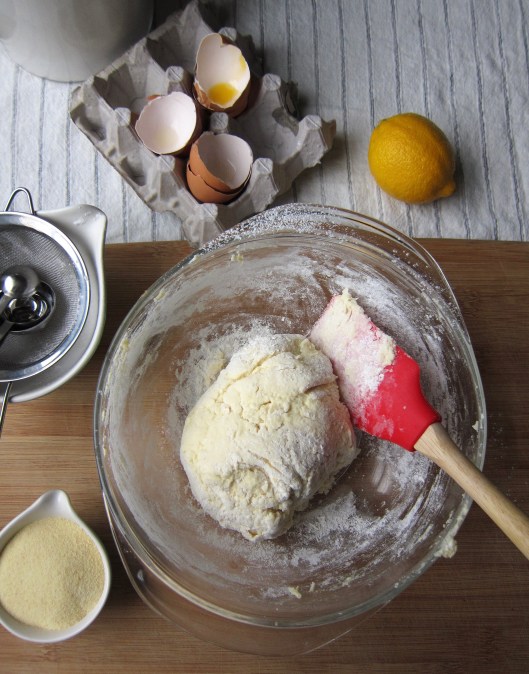
1) Heat a large saucepan of salted water. Sift flour, baking powder, and salt in a bowl. Mix in the black pepper and fresh herbs. Rub in the butter untill the mixture resembles coarse breadcrumbs. In a seperate bowl, beat together the egg and milk, then stir into the flour to make a soft, sticky dough.

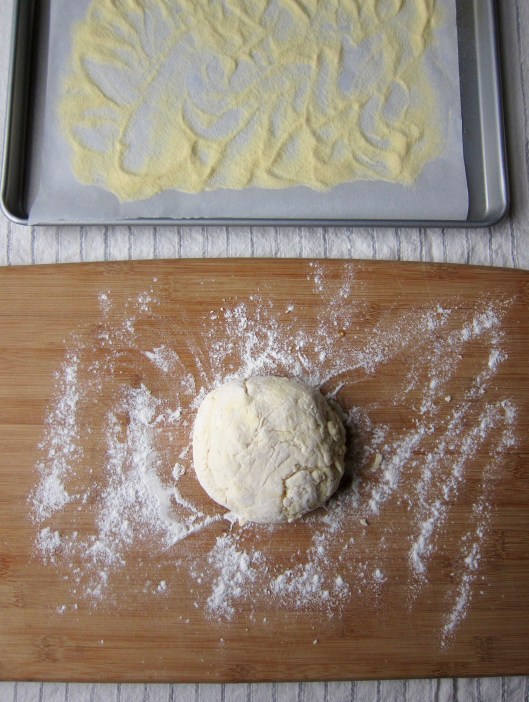
2) With floured hands, divide the dough into 10-12 pieces and roll into balls. Once the water in the saucepan has reached a gentle boil, drop the dumplings, one by one, into the water; partially cover and cook for 10 minutes. Using a slotted spoon, gently remove the dumplings and set them in a colander to drain. Transfer to a plate and set aside.

Braised Lamb with Dumplings and Date-Mint Chutney

Braised Lamb with Dumplings and Date-Mint Chutney

Share this:

  • Tweet
  • Share on Tumblr

Like this:

Like Loading...

Method to the Madness

22 Friday Apr 2016

Posted by julia chews the fat in Cooking For Your Peeps, Lunch & Dinner

≈ Leave a comment

Today I bring to you a recipe from Mandy Lee’s site, Lady and Pups. It’s one of my favourite places to procrastinate on the Web, especially when I should be doing more constructive things, like organising my taxes or folding laundry or emailing the landlady. It’s easy to fall under the spell of Mandy’s moody photos and acerbic prose. Her recipes too – as they always sound absurdly good, in that no-holds-barred, debauched, lick-your-fingers-clean kind of way. Take a look at this recipe for hot rice noodles, or the one for this magnificent thing. Couldn’t you see yourself happily staining your face and all your clothes with either of those cradled in your hands?

Of course you can.

But, there is one caveat –

If you’ve ever followed a Mandy Lee recipe, you’ll know that they’re not for the weak. They’re not from the dinner-in-minutes-Rachel-Ray school of cooking; they are from the school of hard knocks.(this is, after all, the woman who convinced me – through those moody photos and that acerbic prose – to make ramen soup from scratch with 30 cloves of peeled garlic). This aggressive caveat isn’t meant to dissuade you; I’m just saying that if you’re looking for an easy, breezy, work-week meal that you can throw together right after the pants come off and the wide-stretch leggings go on, this one’s not for you. In fact, it’s the antithesis of that. Making a Mandy Lee recipe is a commitment. There is usually a long list of ingredients and and even longer list of instructions, generally with bits in FULL CAPS so that you don’t screw anything up.

I just want to be clear about that.

Are you still there?

Good. I’m glad! Because like any worthwhile, long-term commitment, Mandy’s recipes will always reward you in spades. Her recipes might look insane, spanning longer than most newspaper articles. But there is a method to her madness.

Breathe deep and just trust it.

A note on the recipe: below is Mandy’s Turmeric Butter Chicken Rice (with a few small tweaks from me). What’s brilliant about this recipe is that 1) she has you cook the rice in the oven with chicken broth and coconut milk, infusing every grain with luscious, rich flavours; and 2) she has you cook the chicken ABOVE the rice, balanced on a baking rack (I used a metal cookie-cooling rack) over the baking dish. This means that, as the chicken cooks, it’s precious juices and fat drip down into the rice, making it even more delicious. The process itself is a sight to behold – I spent a good minute or so watching the magic happen through the oven door, completely entranced.

A few more liner notes:

1- Mandy Lee has the chicken marinate between 2-6 hours, so keep that in mind time-wise (I didn’t do this, because I’m notoriously bad at following recipes and I missed that piece of instruction. (And it was a Tuesday night. After work. Hahahaha let’s find MORE reasons to make a long day longer!). All said, it worked out fine without marination, but I imagine it would be even better had I followed her advice.)

2- There are three major components here: Consider prepping the chicken and the coconut sauce in advance – the chicken will have time to marinate and the sauce can easily be reheated as soon as you’re ready to use it.

3- Since you’re dealing with raw chicken, it’s best to get all your ingredients and appliances ready before you begin. For instance, not having the skewers ready when you’re done wrangling a raw, buttery chicken is not a pleasant experience. I speak from experience. Have everything ready at your fingertips and I promise that things will go much more smoothly. (This might be another reason why prepping the chicken in advance might be worth it – getting that part out of the way is half the work.)

4 – I re-worked the instructions a little so that it (hopefully) is a little easier to follow.

Ok. Have at it.

Turmeric Butter Chicken Rice – lightly adapted from Mandy Lee’s recipe on Lady and Pups, inspired by Zak Pelaccio’s recipe in “Eat With Your Hands”

SPICY COCONUT SAUCE:

  • 1 ½ cup coconut milk (usually 1 can)
  • ½ lemongrass stalk, white part only
  • 2 small red chilis
  • 1 green onion
  • 1 tsp apple cider vinegar (I used this to replace the 2 tsp of yellow mustard in the original recipe, which happens to be the one condiment I never have on hand)
  • 2 tsp fish sauce
  • ¼ tsp freshly ground black pepper
  • 1 Tbsp (14 grams) unsalted butter
  • 2 Tbsp chopped fresh cilantro

TURMERIC BUTTER CHICKEN RICE:

  • 1 whole chicken (about 3 lbs)
  • 5 cloves garlic, smashed
  • 1 ½” ginger, cut into chunks
  • 3 small red chilis
  • 3 Tbsp fish sauce
  • 1 ½ tsp ground turmeric
  • ½ tsp ground coriander
  • ½ tsp freshly ground black pepper
  • 4 Tbsp (57 grams) unsalted butter
  • 2 cups jasmine rice
  • 1 ½ cup coconut milk (usually 1 can)
  • 1 ½ cup chicken stock
  • 2 stalks lemongrass, white part only, smashed and cut into segments
  • pinch of salt and black pepper to season

Mandy Lee's Turmeric Butter Chicken Rice

Directions

MAKE THE SPICY COCONUT SAUCE: In a food-processor, blend everything under “Spicy Coconut Sauce”, except for the butter and fresh cilantro, until puréed. Add the butter, then bring the mixture to a gentle boil, and cook for about 20 mins until reduced by 1/3. Take off the heat and add the fresh chopped cilantro. Set aside until needed.

MAKE THE TURMERIC BUTTER CHICKEN RICE:

Step 1 – prepping the chicken

1) Rinse and clean out the cavity of the chicken, then pat dry and set aside. In a food-processor, purée garlic, ginger, red chilis, fish sauce, ground turmeric, ground coriander and ground black pepper until smooth. Take out about 2 tbsp of this turmeric-mixture and set aside. Then add the butter to the rest of the mixture and run the processor again until evenly incorporated (this is your “turmeric butter”). Reserve 1 tbsp of the turmeric butter for cooking the rice.

Mandy Lee's Turmeric Butter Chicken Rice

2) With the remaining turmeric butter: Gently insert your hands in-between the flesh and skin of the chicken from the neck-opening at the top of the breasts, separating the two layers to make space for stuffing the turmeric butter. Work slowly and gently so you do not puncture the skin, and make sure you do it all the way to the back-thighs that are attached to the back-bone, evenly distributing under the skin of the whole chicken.

3) Place ½ of the smashed lemongrass stalk inside the cavity, then with toothpicks, sew/seal the skins around BOTH the opening of the cavity and the neck. Now, rub the reserved turmeric-mixture WITHOUT BUTTER, evenly over the whole chicken. Let marinate for anywhere from 2-6 hours.

Step 2 – prepping the rice/cooking the chicken and rice

4) Preheat the oven on 420F. Put the jasmine rice in a sieve, then rinse and gently swish under running water to remove excess starch. Drain well and set aside. In a large, shallow baking-dish (a shallow dish will allow the rice cook evenly), melt the reserved 1 tbsp of turmeric butter over medium-high heat, then cook the rice in it for about 3 mins. Add the coconut milk and chicken stock, then scatter the lemongrass on the top. Bring the liquid to a simmer and cook for 3 min without stirring.

5) Now, place a baking-rack over the baking-dish, and set the chicken on top, breast-side down first (this gives the thighs a head start and prevents the breasts from overcooking). Place the whole thing in the middle-rack of the oven and roast for 15 min, then gently turn the chicken over so the breast-side now faces up, and roast for another 30-35 min until the chicken is browned. Remove the baking-rack with the chicken on top, and let rest for 10 min. Leave the rice in the oven during this time so it can finish cooking.

Mandy Lee's Turmeric Butter Chicken Rice

Step 3 – serving the chicken and rice with the coconut sauce

6) Remove all the lemongrass from the rice. The best way to cut the chicken is with a scissors, and make sure that you do it right over the rice so it can catch all the precious juice/butter that comes out of the chicken. Remove the lemongrass from inside the cavity, then serve immediately with the spicy coconut sauce (reheated gently over low heat).

Mandy Lee's Turmeric Butter Chicken Rice

Share this:

  • Tweet
  • Share on Tumblr

Like this:

Like Loading...

One for the pot, one for the cook

07 Thursday Apr 2016

Posted by julia chews the fat in Cooking For Your Peeps, Lunch & Dinner

≈ 3 Comments

Cooking has been fairly perfunctory these days. I’ve lacked that that little kick, that jolt of inspiration I usually get when I see something new – a recipe, an article, a video – that makes me want to roll up my sleeves and get to it. This means that my stovetop has seen a a lot of greens and beans on rotation (roma beans with kale, lima beans with rapini, black eyed peas with spinach…you get the idea), in other words, a mix-and-match troupe of dishes so simple that you could make them even if you’d been lobotomized. I can stand there, mouth-breathing over a pan of frying shallots and beans, letting my mind drift off to wherever it may go, and have a (more or less) wholesome dinner ready within 4 and half minutes. They aren’t necessarily the most satisfying of meals (creatively, spiritually, aesthetically…), but hey – they do the job.

It’s easy to fall into a cooking funk when your overall motivation feels floppy, sluggish, unharnessed. It usually starts when you catch yourself buying the identical set of groceries week in and week out, before replicating the same dishes week in and week out. My fallbacks tend to be the aformentioned beans and greens, roast chicken and white fish, usually cod or halibut, that gets tossed in the oven with a layer of seasoned breadcrumbs I keep in the freezer, and a drizzle of olive oil. They are good back-pocket dishes, but ones that get a bit dull once they’ve been on heavy rotation.

To break the slump, I went looking for new ideas and managed to lock down the two recipes below after taking stock of what I had in the booze cabinet. The first is a fragrant, anise-clementine chicken recipe from Ottolenghi that is sticky, jammy, crispy and sweet, with a subtle twang of liquorice flavour from the Pernod; the second is a lemon-scented cod dish, studded with olives and poached in white wine, then topped with fresh parsley. Both are beautiful-looking and delicious and, while definitely an upgrade from beans and greens, they too could be made post-lobotomy if you had to. For each, you just stick everything in a pan, anoint with booze* and sling into the oven. Thankfully, the rest gets figured out on its own.

(*one for the pan, one for the cook.)

Clementine Pernod Chicken

Pernod-Clementine Chicken – adapted from Ottolenghi’s Jerusalem
Serves 4-6

Ingredients

    • 5 Tbsp Pernod (or Arak, or Ouzo)
    • 1/4 cup olive oil
    • 3 Tbsp freshly squeezed orange (or clementine) juice
    • 3 Tbsp freshly squeezed lemon juice
    • 2 Tbsp grainy mustard
    • 3 Tbsp light brown sugar or honey
    • 1 tsp sea salt
    • freshly ground pepper
    • 8 bone-in, skin-on chicken pieces (thighs and drumsticks)
    • 4 clementines (washed but unpeeled) sliced thin
    • a few sprigs of thyme
    • 3 medium onions (and/or fennel bulbs) cut lengthwise and then into quarters
    • 2 tsp fennel seeds

Clementine Pernod Chicken

Directions

1) In a large mixing bowl, whisk together Pernod, oil, orange and lemon juices, mustard, brown sugar and salt. Season with pepper, to taste.

2) Place chicken skin side up in large roasting pan with clementine slices, thyme sprigs, onion pieces (and/or fennel wedges) and fennel seeds. Pour sauce over top and gently toss everything together with your hands. (alternately, you can prep in advance and marinate: place chicken with clementine slices, thyme sprigs, onion/fennel wedges, and fennel seeds in a large mixing bowl or ziplock bag. Turn several times to coat. Marinate chicken for several hours or overnight.)

3) Preheat oven to 475°F. After 30 minutes, turn the oven down to 400ºF and continue roasting until the skin is brown and crisp, about 20 to 25 minutes longer. Remove pan from the oven.

4) Transfer chicken and clementines and onion pieces with juices to a serving platter. Let rest 5 to 10 minutes before serving. Pairs well with a crisp salad and a knob of bread to soak up the juices.

Clementine Pernod Chicken

—–

Slow-Baked Cod with Lemon, Olives and White Wine – adapted from Real Simple
Serves 4

Ingredients

  • 2 lb cod fillets (or halibut)
  • ¾ cup dry white wine
  • ½ cup Kalamata olives
  • zest from 1 lemon, cut into strips
  • 1 Tbsp olive oil
  • salt and pepper, to season
  • ¼ tsp red pepper flakes
  • ¼ cup fresh flat-leaf parsley, chopped

Directions

Heat oven to 400° F.

Place the fish in a small roasting pan. Add the wine – it should reach about halfway up the sides of the fish. Scatter the olives and lemon zest around the fish. Drizzle with the oil and season with salt, pepper, and red pepper flakes.

Roast until the fish is cooked through and flakes easily with a fork, about 15-20 minutes. Remove from oven and sprinkle with the parsley. Divide the fish among individual plates and spoon the olives and wine sauce over the top.

Cod with Lemon and OlivesCod with Lemon and OlivesCod with Lemon and Olives

Share this:

  • Tweet
  • Share on Tumblr

Like this:

Like Loading...

Clandestine Food

01 Friday Apr 2016

Posted by julia chews the fat in Lunch & Dinner, The Basics, Vegetarian

≈ 6 Comments

If I play my cards right, I can sometimes get my hands on a batch of fresh ricotta, made by hand in someone’s converted garage a few neighbourhoods over from mine. It comes in the traditional moulded shape, marked with the tell-tale grooves of the straining basket. It’s not an exaggeration to say that that this is the best ricotta you’ll ever have outside of Italy – it’s pillowy and snowy white, and the flavour is so fresh, it’s almost sweet; you can eat it in its naked state by the spoonful.

Fresh Ricotta

Then there are the eggs. A couple of times a month, I get a batch of eggs from a separate supplier who, when they’re not at their day job, tend to a flock of free range chickens. The chickens are different, so their eggs are too – some are robin’s egg blue, others are deep orange or light brown with a smattering of freckles. I’ve gotten into the habit of opening the carton before I get home to catch a peek of what’s inside. There’s something about a motley crew of eggs – big next to tiny, freckled next to blue – that puts a smile on my face. It’s the kind of stuff that makes me really, dorkily, happy.

004

This ricotta and these eggs are part of a handful of familiar, clandestine foods that have made their way into my kitchen. They’re not luxury items in the classic sense; they’re not chic, or expensive, or novel, In fact they’re a lot cheaper than the fancy, artisanal products you might find at the store. But they are luxury items in the sense that it’s impossible to take them for granted. They are special by default. And I am head-over-heels in love with them.

Below you’ll find two recipes I made at Easter – both using eggs and ricotta (and lemon, in the spirit of Sicilian tradition) (and, possibly unconsciously, in the spirit of my trip to Sicily this summer). The first is a version of gnocchi that, instead of potato, is held together with egg, ricotta and a bit of flour. They’re called dunderi and are apparently an Amalfitan specialty, but I discovered them by watching this video on Tasting Table with Portland restauranteur Jenn Louis. I’d never made a non-potato gnocchi before, so I was a little apprehensive about them falling apart in the simmering water. But they turned out perfectly – soft, tender little dumplings, tossed in some browned butter with a little parmesan and lemon. They are a dream to eat. The second recipe is a simple, southern Italian-inspired cake that is perfect with coffee or tea. It’s hard to explain, but this for me is the prototypical Italian cake – no frills, not too many competing flavours, not exactly light, but not heavy either. Lots of lemon flavour. The leftovers from Easter were cut into wedges the next morning and dunked into espresso. (how any good Italian – and you – should eat your day-old cake).

Have a happy weekend everyone x

Dunderi with Lemon, Butter and Parmesan – recipe from Jenn Louis,via Tasting Table
Serves 4-6

Note: the measurements are in grams to yield more consistent results. If you don’t have one already, an electric scale is an indispensable tool when it comes to European recipes and baking. I only spend about $20 on mine and my only regret is that I didn’t get one sooner.

Dunderi with Lemon and Butter

Ingredients

For the Dunderi:

  • 480 grams whole-milk ricotta cheese
  • 6 egg yolks
  • 45 grams finely grated Parmigiano-Reggiano, using a microplane
  • Pinch freshly grated nutmeg
  • 1 teaspoon kosher salt
  • 160 grams, plus 2 tablespoons, all-purpose flour (plus more for dusting)
  • Semolina flour, for dusting

For the Sauce:

  • 110 grams (about 1 stick) butter
  • 2 teaspoons fresh lemon juice
  • Zest of 1 lemon
  • Kosher salt, to taste
  • Parmigiano-Reggiano, for serving

Directions

1) In a large bowl, mix the ricotta and egg yolks until smooth. Stir in the Parmesan, nutmeg, salt and flour until the dough just comes together.

2) Sprinkle the work surface with a generous dusting of flour. Scrape the dough onto the work surface and sprinkle with a little more flour to prevent the dough from sticking.

3) Line a rimmed baking sheet with parchment paper and dust with semolina flour.

4) Using a pastry cutter, divide the dough into 6 equal portions. With floured hands, roll each piece into a log about a ½ inch in diameter. Cut the log into ½-to-1-inch-long pieces. Place the dunderi on the prepared baking sheet and repeat with the remaining dough. Make sure the dunderi pieces are not touching, so they don’t stick together. Make ahead: The dunderi can be made, covered and chilled in the fridge for up to 2 days or frozen on the baking sheet and transferred to a resealable plastic bag. (if freezing, use within one month.)

Dunderi with Lemon and Butter

Dunderi with Lemon and ButterDunderi with Lemon and ButterDunderi with Lemon and ButterDunderi with Lemon and ButterDunderi with Lemon and ButterDunderi with Lemon and ButterDunderi with Lemon and ButterDunderi with Lemon and Butter

When ready to cook: 

1) Bring a large pot of salted water to a simmer over medium-high heat. Add the dunderi and simmer until they begin to float to the surface, 1-2 minutes.

2) Meanwhile, in a large skillet over medium heat, melt the butter until the butter becomes golden brown and toasty (6 to 8 minutes). Add the lemon juice and zest, and season with salt. Add the dumplings and toss to coat. Spoon each serving into a bowl and top with Parmesan. Serve immediately.

Dunderi with Lemon and Butter

Dunderi with Lemon and Butter

—–

Lemon-Ricotta Cake – adapted from Eat My Kitchen
Makes one 8″ cake

Ingredients

    • 80g butter, softened
    • 150g sugar
    • 80g ricotta
    • 3 eggs, separated
    • 4 Tbsp freshly squeezed lemon juice
    • zest of 1 lemon
    • 200g all-purpose flour
    • 3/4 tsp baking powder
    • pinch of salt
    • icing sugar to dust the cake

1) Set the oven to 350°F and butter the cake pan. Combine the flour and baking powder. Beat the egg whites with a pinch of salt till stiff.

2) Beat the butter and sugar till fluffy, add the ricotta and mix for a couple minutes. Add the egg yolks and continue mixing for 2 minutes. While still mixing, add the lemon juice and zest followed by the dry ingredients, mixing well for another minute. Stir a couple of tablespoons of the stiff egg whites into the dough before you carefully fold in all of the egg whites.

3) Scrape the dough into the prepared pan and bake for 30 minutes or until golden brown or when a skewer inserted into the centre comes out clean. Let the cake cool and dust with icing sugar.

Lemon-Ricotta Cake

Share this:

  • Tweet
  • Share on Tumblr

Like this:

Like Loading...

Facebook

Facebook

Instagram

No Instagram images were found.

Recent Posts

  • Layers and Rows
  • Finding Buoyancy
  • February
  • Wednesday
  • Cross My Heart, Miso

Archives

  • May 2017
  • April 2017
  • February 2017
  • December 2016
  • November 2016
  • September 2016
  • August 2016
  • July 2016
  • June 2016
  • May 2016
  • April 2016
  • March 2016
  • February 2016
  • January 2016
  • December 2015
  • November 2015
  • October 2015
  • September 2015
  • August 2015
  • July 2015
  • June 2015
  • May 2015
  • April 2015
  • March 2015
  • February 2015
  • January 2015
  • December 2014
  • November 2014
  • October 2014
  • September 2014
  • August 2014
  • July 2014
  • June 2014
  • May 2014
  • April 2014
  • March 2014
  • February 2014
  • January 2014
  • December 2013
  • October 2013
  • September 2013
  • August 2013
  • July 2013
  • June 2013
  • May 2013
  • April 2013
  • March 2013
  • February 2013
  • January 2013
  • December 2012
  • November 2012
  • October 2012
  • September 2012
  • August 2012
  • July 2012
  • June 2012
  • May 2012
  • April 2012
  • March 2012
  • February 2012

Categories

  • Beverage
  • Breakfast & Brunch
  • Condiments
  • Cooking For Your Peeps
  • Cooking Solo
  • Cooking with Nonna
  • Food Away From Home
  • Food Writing
  • Holidays
  • Intro
  • Lunch & Dinner
  • Snacking
  • Soups
  • Sweet Tooth
  • The Basics
  • Vegetarian

Enter your email address to follow this blog and receive notifications of new posts by email.

Join 80 other subscribers

Blog at WordPress.com.

  • Follow Following
    • julia chews the fat
    • Join 80 other followers
    • Already have a WordPress.com account? Log in now.
    • julia chews the fat
    • Customize
    • Follow Following
    • Sign up
    • Log in
    • Report this content
    • View site in Reader
    • Manage subscriptions
    • Collapse this bar
 

Loading Comments...
 

    %d bloggers like this: