
For some time now, I’ve been buying ricotta under-the-radar from someone who makes it in their converted garage. You wouldn’t guess it, but this stuff is gorgeous – it’s creamy but unbelievably light and mild in flavour, almost sweet. It’s unlike any of the preservative-heavy schlock that’s often on offer in grocery stores. It comes in a beautifully moulded shape, ready to eat on its own, spread onto toast, sprinkled over salads, or baked in the oven on top of pasta (Nonna and I have a soft spot for this dish).
However, getting fresh cheese like this on a regular basis is a tad tricky. You need to be organised. You need to submit your order in advance and get yourself to the location. While it’s always worth it, it’s definitely not convenience food.
Then it came to my attention that ricotta could quite feasibly be made at home, without any special equipment or expertise. After all, it only involved 4 ingredients and some cheesecloth. But this idea cracked open a Pandora’s box of cheese-related questions: What type of ingredients work best? Should I be using rennet? Where do I get rennet? Do I need to boil the milk? How do I ensure I don’t poison anyone with my home-made concoctions?
I didn’t want to plunge knuckle-deep into whey before knowing a few ground rules. At the same time, I was weary of the vortex of conflictual information hanging out on the Internet and, ideally, I wanted to learn these skills first-hand with someone whose experience far surpassed mine.
Enter David Asher Rotsztain.
David is an organic farmer, goatherd and cheesemaker based in Mayne Island, B.C. Through community outreach workshops, he teaches natural cheese-making methods that can easily adopted by the home cook. In other words, this is guerilla-cheese-making – taking back something that in modern times has been (rather counter-intuitively) entrusted with people and entities that are alien to us and our day-to-day.
By sheer luck, a local non-profit was offering workshops with David right around the time I was thinking about making ricotta. In the workshop, he spoke about different types of cheese, their idiosyncrasies, their benefits, their beauty. We talked about raw milk versus pasteurized, whole milk versus low-fat, the use of lemon juice compared to rennet, and the wonders of edible mold. It was an eye-opening experience that broke down the process into manageable pieces and made cheese-making more approachable than I could have imagined. As I quickly learned, good cheese involves only a handful of ingredients, some time, and a bit of know-how.
Until I get around to making ricotta, I’m going to leave you with the step-by-step process for making your own fromage frais, which is essentially yoghurt strained at room temperature for 24-28 hours. It’s ridiculously simple, and though it takes a bit of time, your patience will be rewarded with a lovely, creamy round of fresh cheese, ready to serve with bread for breakfast or alongside crackers on a (hm holiday?) cheese platter.
Enjoy ♥
Homemade Fromage Frais – makes about 250g
You will need:
– 1 container good-quality yoghurt, without any emulsifiers, stabilizers or gelatin (for this recipe, I used a full-fat buffalo yoghurt I found here)

– about 1 tsp salt
– a big stockpot or very deep bowl
– a wooden spoon (or something similar) that will sit solidly across the bowl
– some cheesecloth (this can include unbleached muslin or nylon cloth, but David recommends a Du-Rag. Yep, that’s right – a Du-Rag. Its shape and tight meshing make it perfect for straining this cheese. And it’s a breeze to wash for future use)

1) Wash your cheesecloth and allow to air-dry.
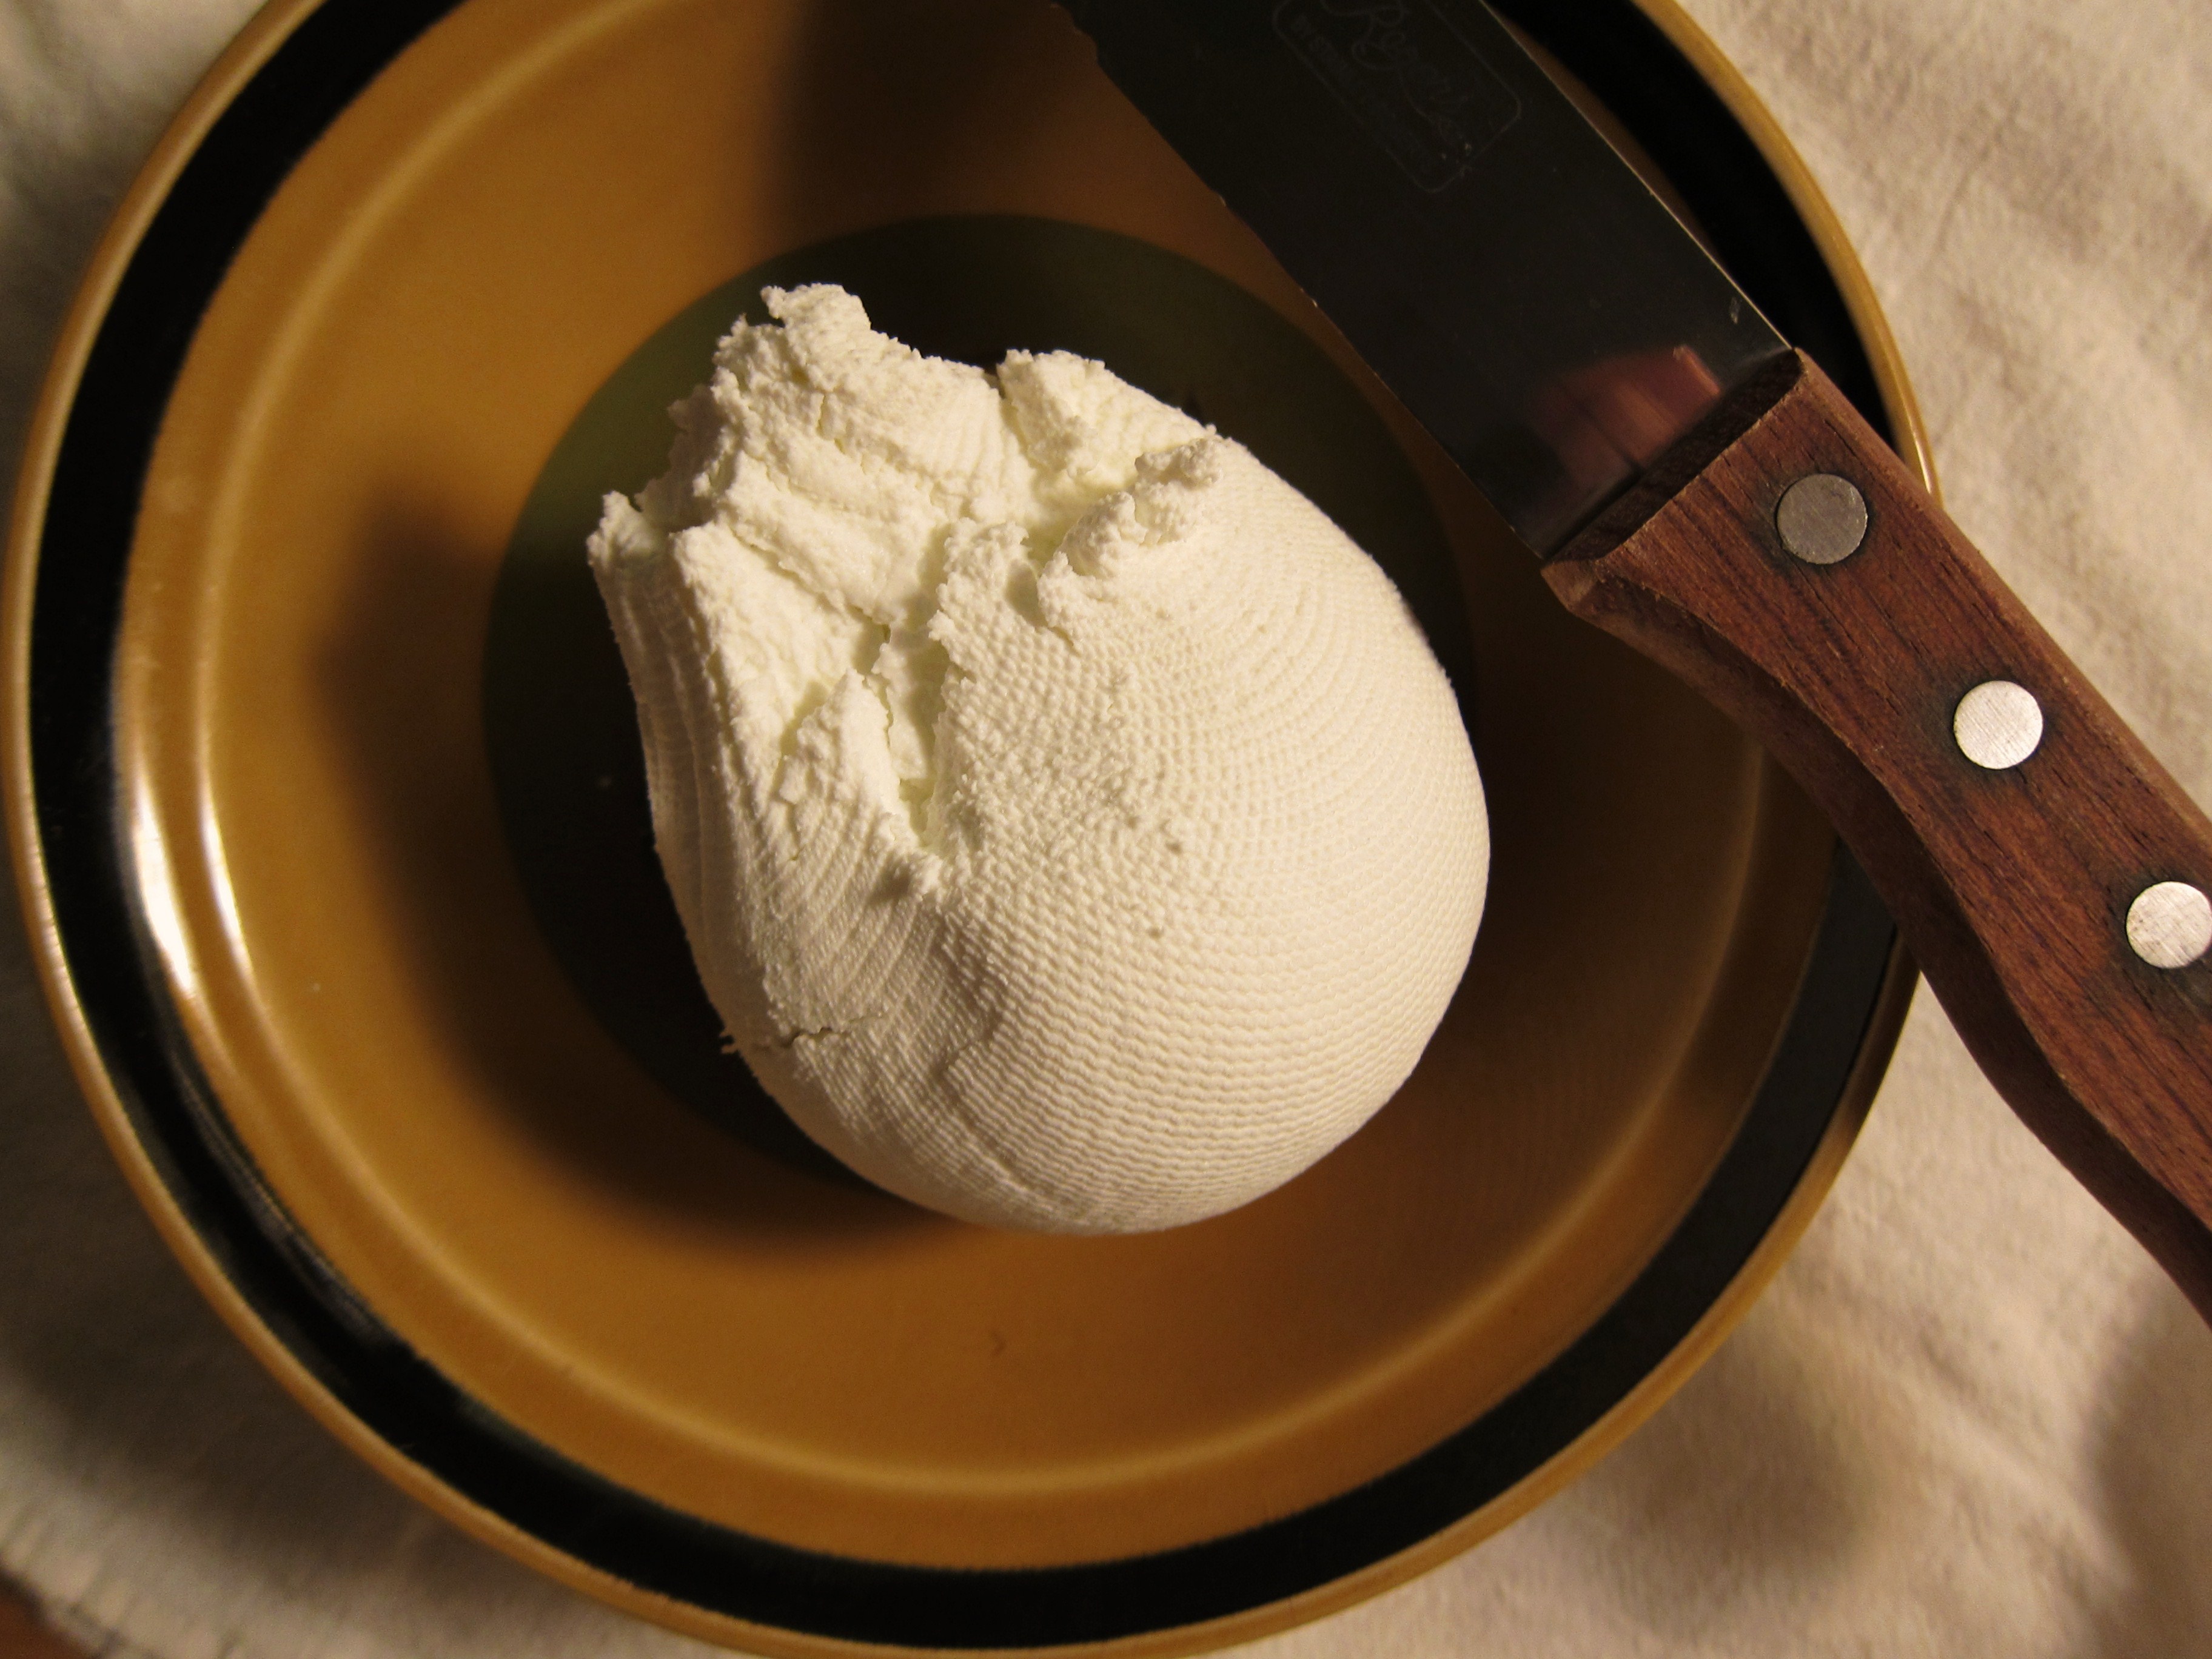
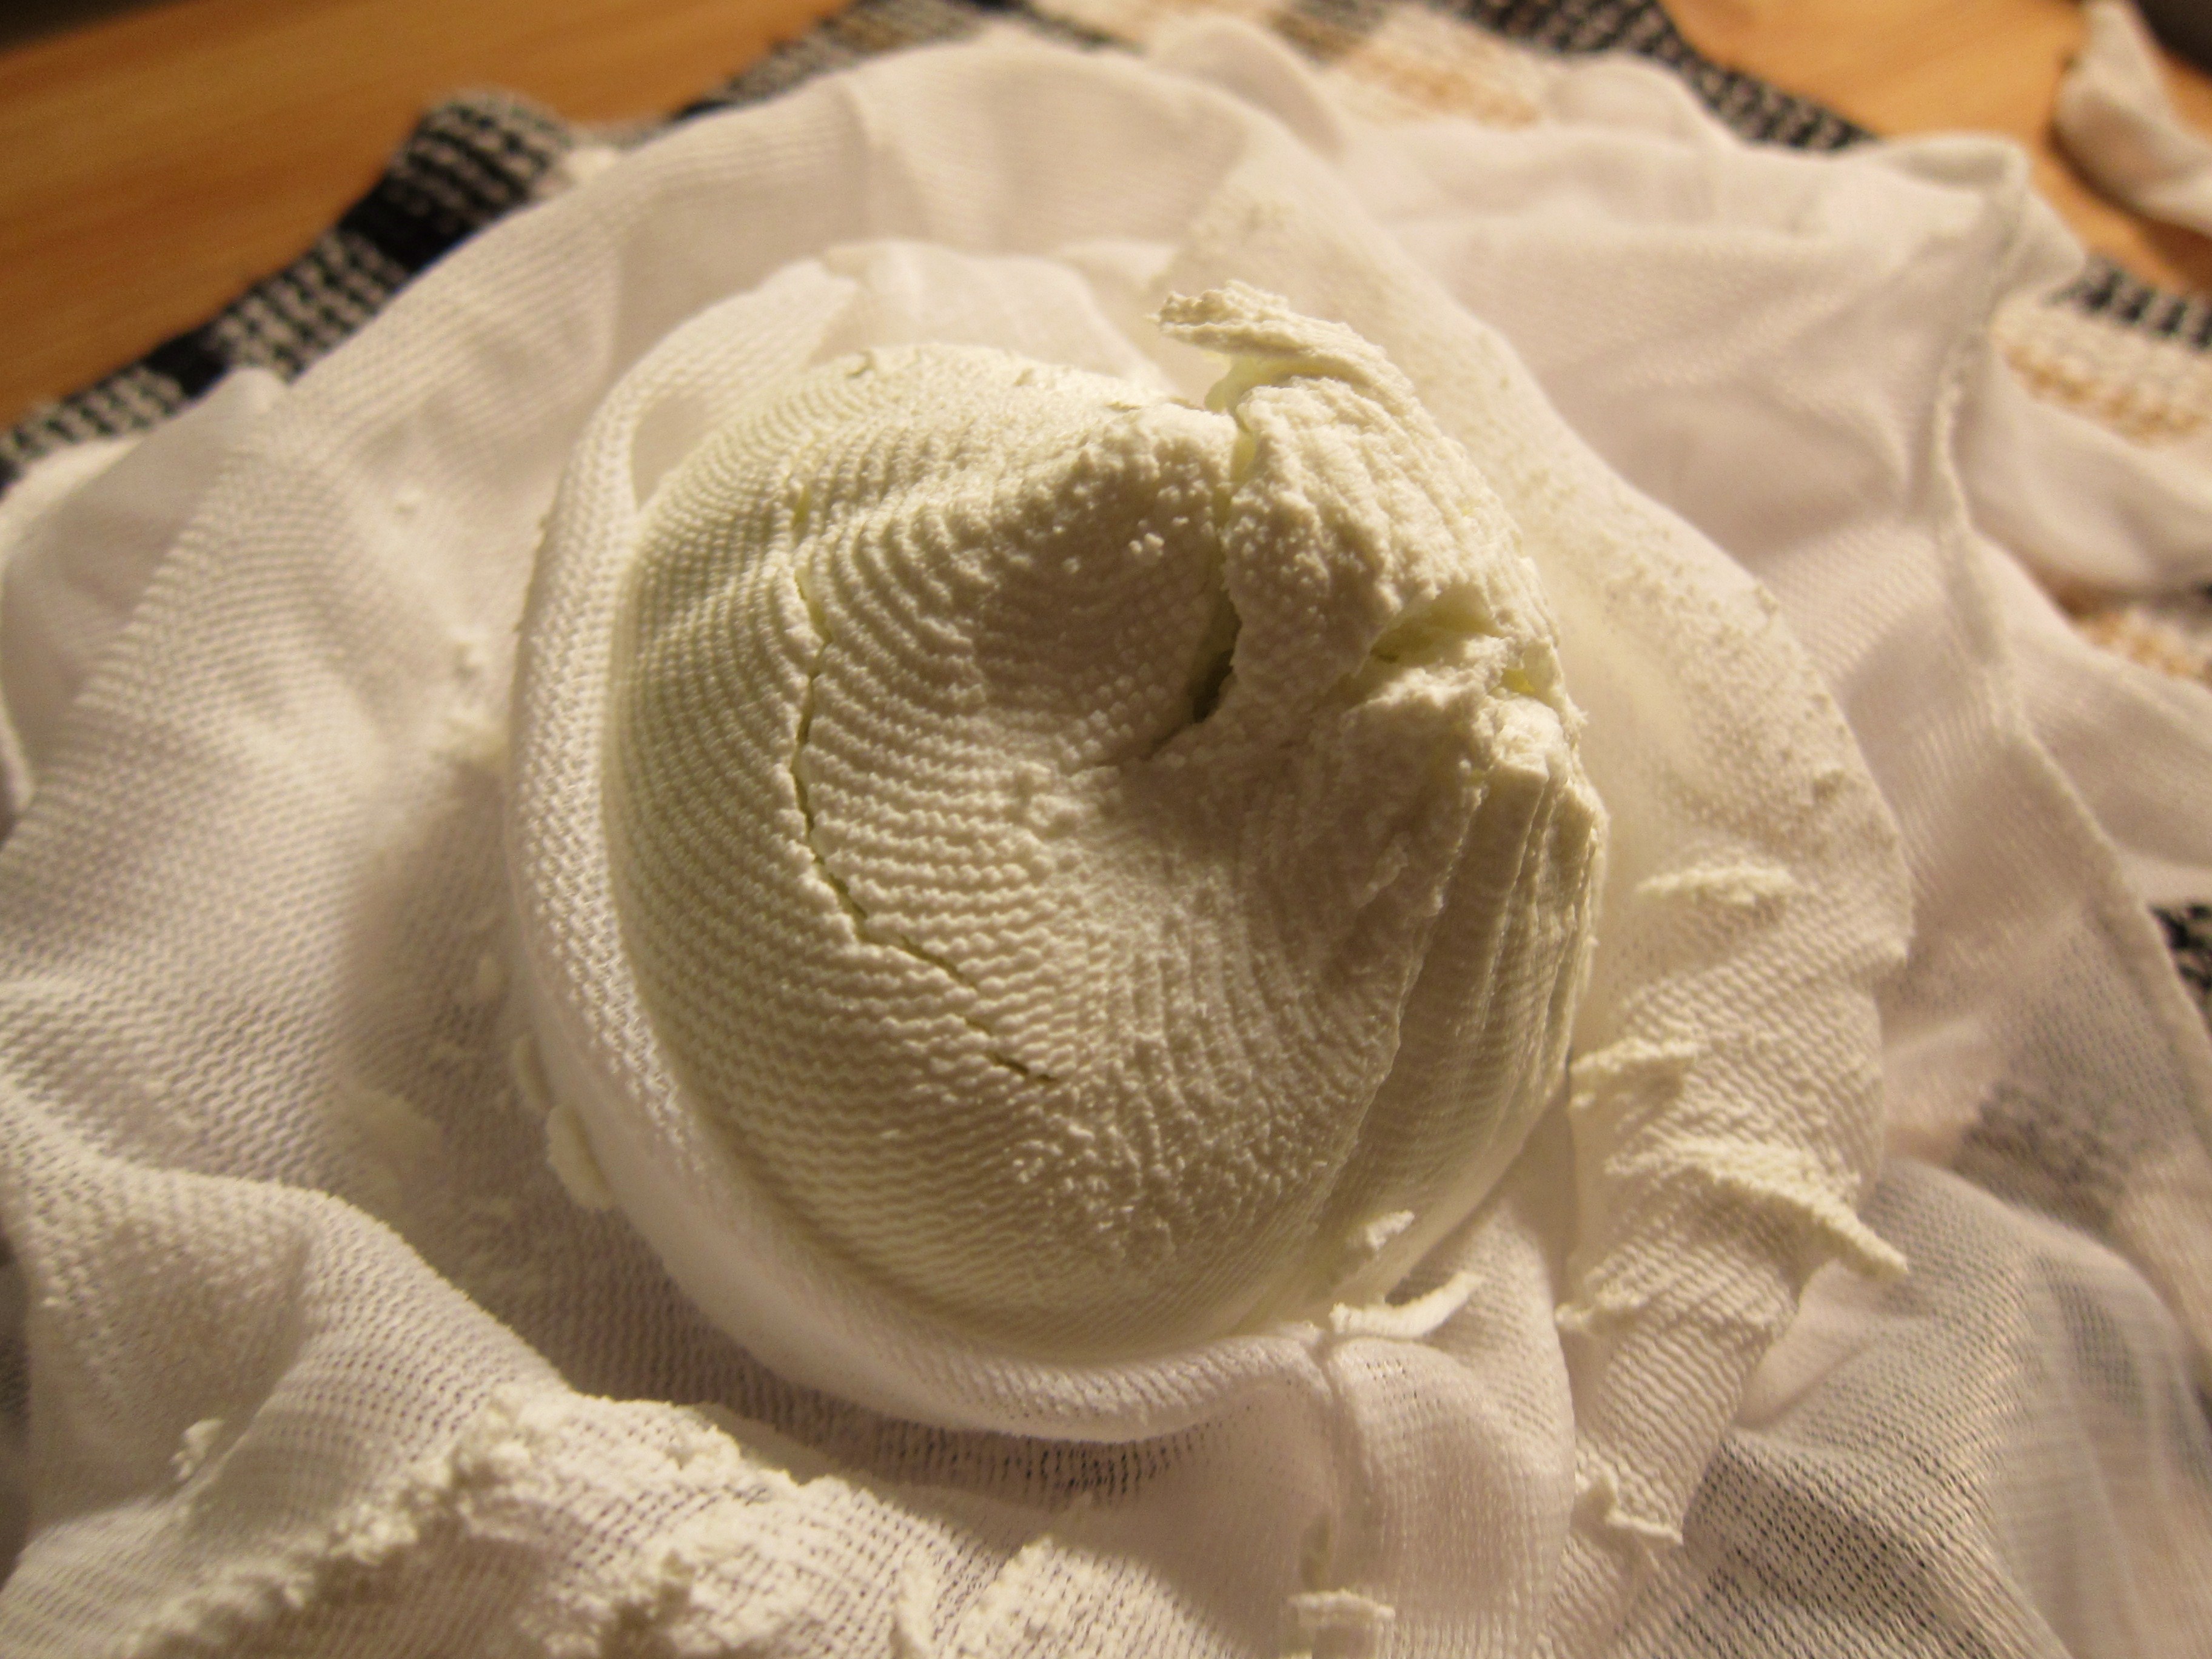
2) Drape the cheesecloth atop a bowl and pour the yoghurt into its centre. Pull together the four corners of the cloth around the yoghurt; twist and secure with a knot.


3) Tie to the wooden spoon (or similar implement) and hang over stockpot or deep bowl. The cheese should be able to hang freely, not touching the bottom.

4) Leave it to hang overnight at room temperature. As they whey* drips into the pot, the yoghurt will slowly become cheese.
(*do not discard whey by pouring it down the drain, as it is toxic to aquatic life. Instead, keep it to make ricotta or feed your plants, dogs or compost with it.)
5) After 24 hours, this cheese will have dripped dry. To improve flavour, and to help preserve it longer, salt the cheese by opening up the cheesecloth and sprinkling a teaspoon of salt over the surface of the cheese. Close the bag, and hang it again for another 4 hours.


Titbits from David:
*don’t squeeze the cheese to force out whey (it’s sooo tempting, but resisting will avoid any mishaps…)
*make this cheese with goat’s yoghurt, and you get chèvre.
*make this cheese with extra high fat yoghurt, and you get cream cheese.
And if you still need some cheese-making inspiration, watch this video (disclaimer: it may make you want to pack your bags, move to France, and become a shepherd).

