• Home
  • About

julia chews the fat

julia chews the fat

Category Archives: Vegetarian

Party Patties

01 Tuesday Mar 2016

Posted by julia chews the fat in Cooking For Your Peeps, Cooking Solo, Lunch & Dinner, Snacking, Vegetarian

≈ 4 Comments

It feels strange to be writing a post about sandwiches, considering that I’m not what you’d call a “sandwich enthusiast”. Sandwiches are fine and all, but for me they usually function as a perfunctory filler – the thing I pick up at an airport before a flight, or at the work cafeteria when I’ve forgotten my lunch and the hot meal du jour looks dodgy. I don’t know about you, but it’s hard for me to get exited about ham on rye or a floppy veggie wrap. Sandwiches have just never been my jam.

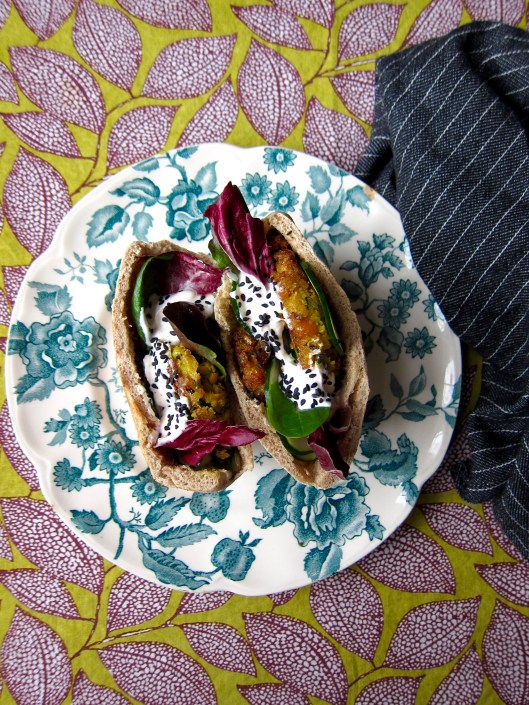
That said, I’m a big advocate of the falafel sandwich. In fact, I don’t think I’ve ever come across a falafel sandwich I didn’t like, even the cheap ones I used to inhale during my undergrad days (usually between classes or after late-night drinking excursions), that we’d buy from the dingy Lebanese take-out places around the downtown campus. The best ones had a crunchy exterior that gave way to a soft, crumbling chickpea interior. The ones slathered in garlicky tahini sauce, fresh parsley, bright pink pickled turnip, and wrapped in soft flatbread. Compared to what else was on offer around school – 99¢ pizza, McDonald’s, dubious-looking panini at the Coffee Depot – these falafel sandwiches were often a student’s best option for a cheap, quick, tasty bite.

Since then, and after a few attempts of my own, I’ve come to realize that while falafels are great take-out food, they can be tricky to make well at home. I suspect that it’s because the best ones are made with a deep-fryer (surprise, surprise…) and since I don’t actually have a deep fryer – which, for my overall health, not to mention exposed extremities, is probably a good thing – it means that I don’t ever really find myself trying to make falafel from scratch. Instead, I usually end up picking up one from that well-loved vegan spot in my neighbourhood, because it’s good and close-by and they can have that thing ordered, dressed and wrapped up in five minutes flat. But since I’m not made of money and can’t take on the role of La Panthère verte’s most valuable patron, I’ve been looking for alternatives I can make at home – where my pocketbook can stay clear from any cash registers and 8$ organic sandwiches.

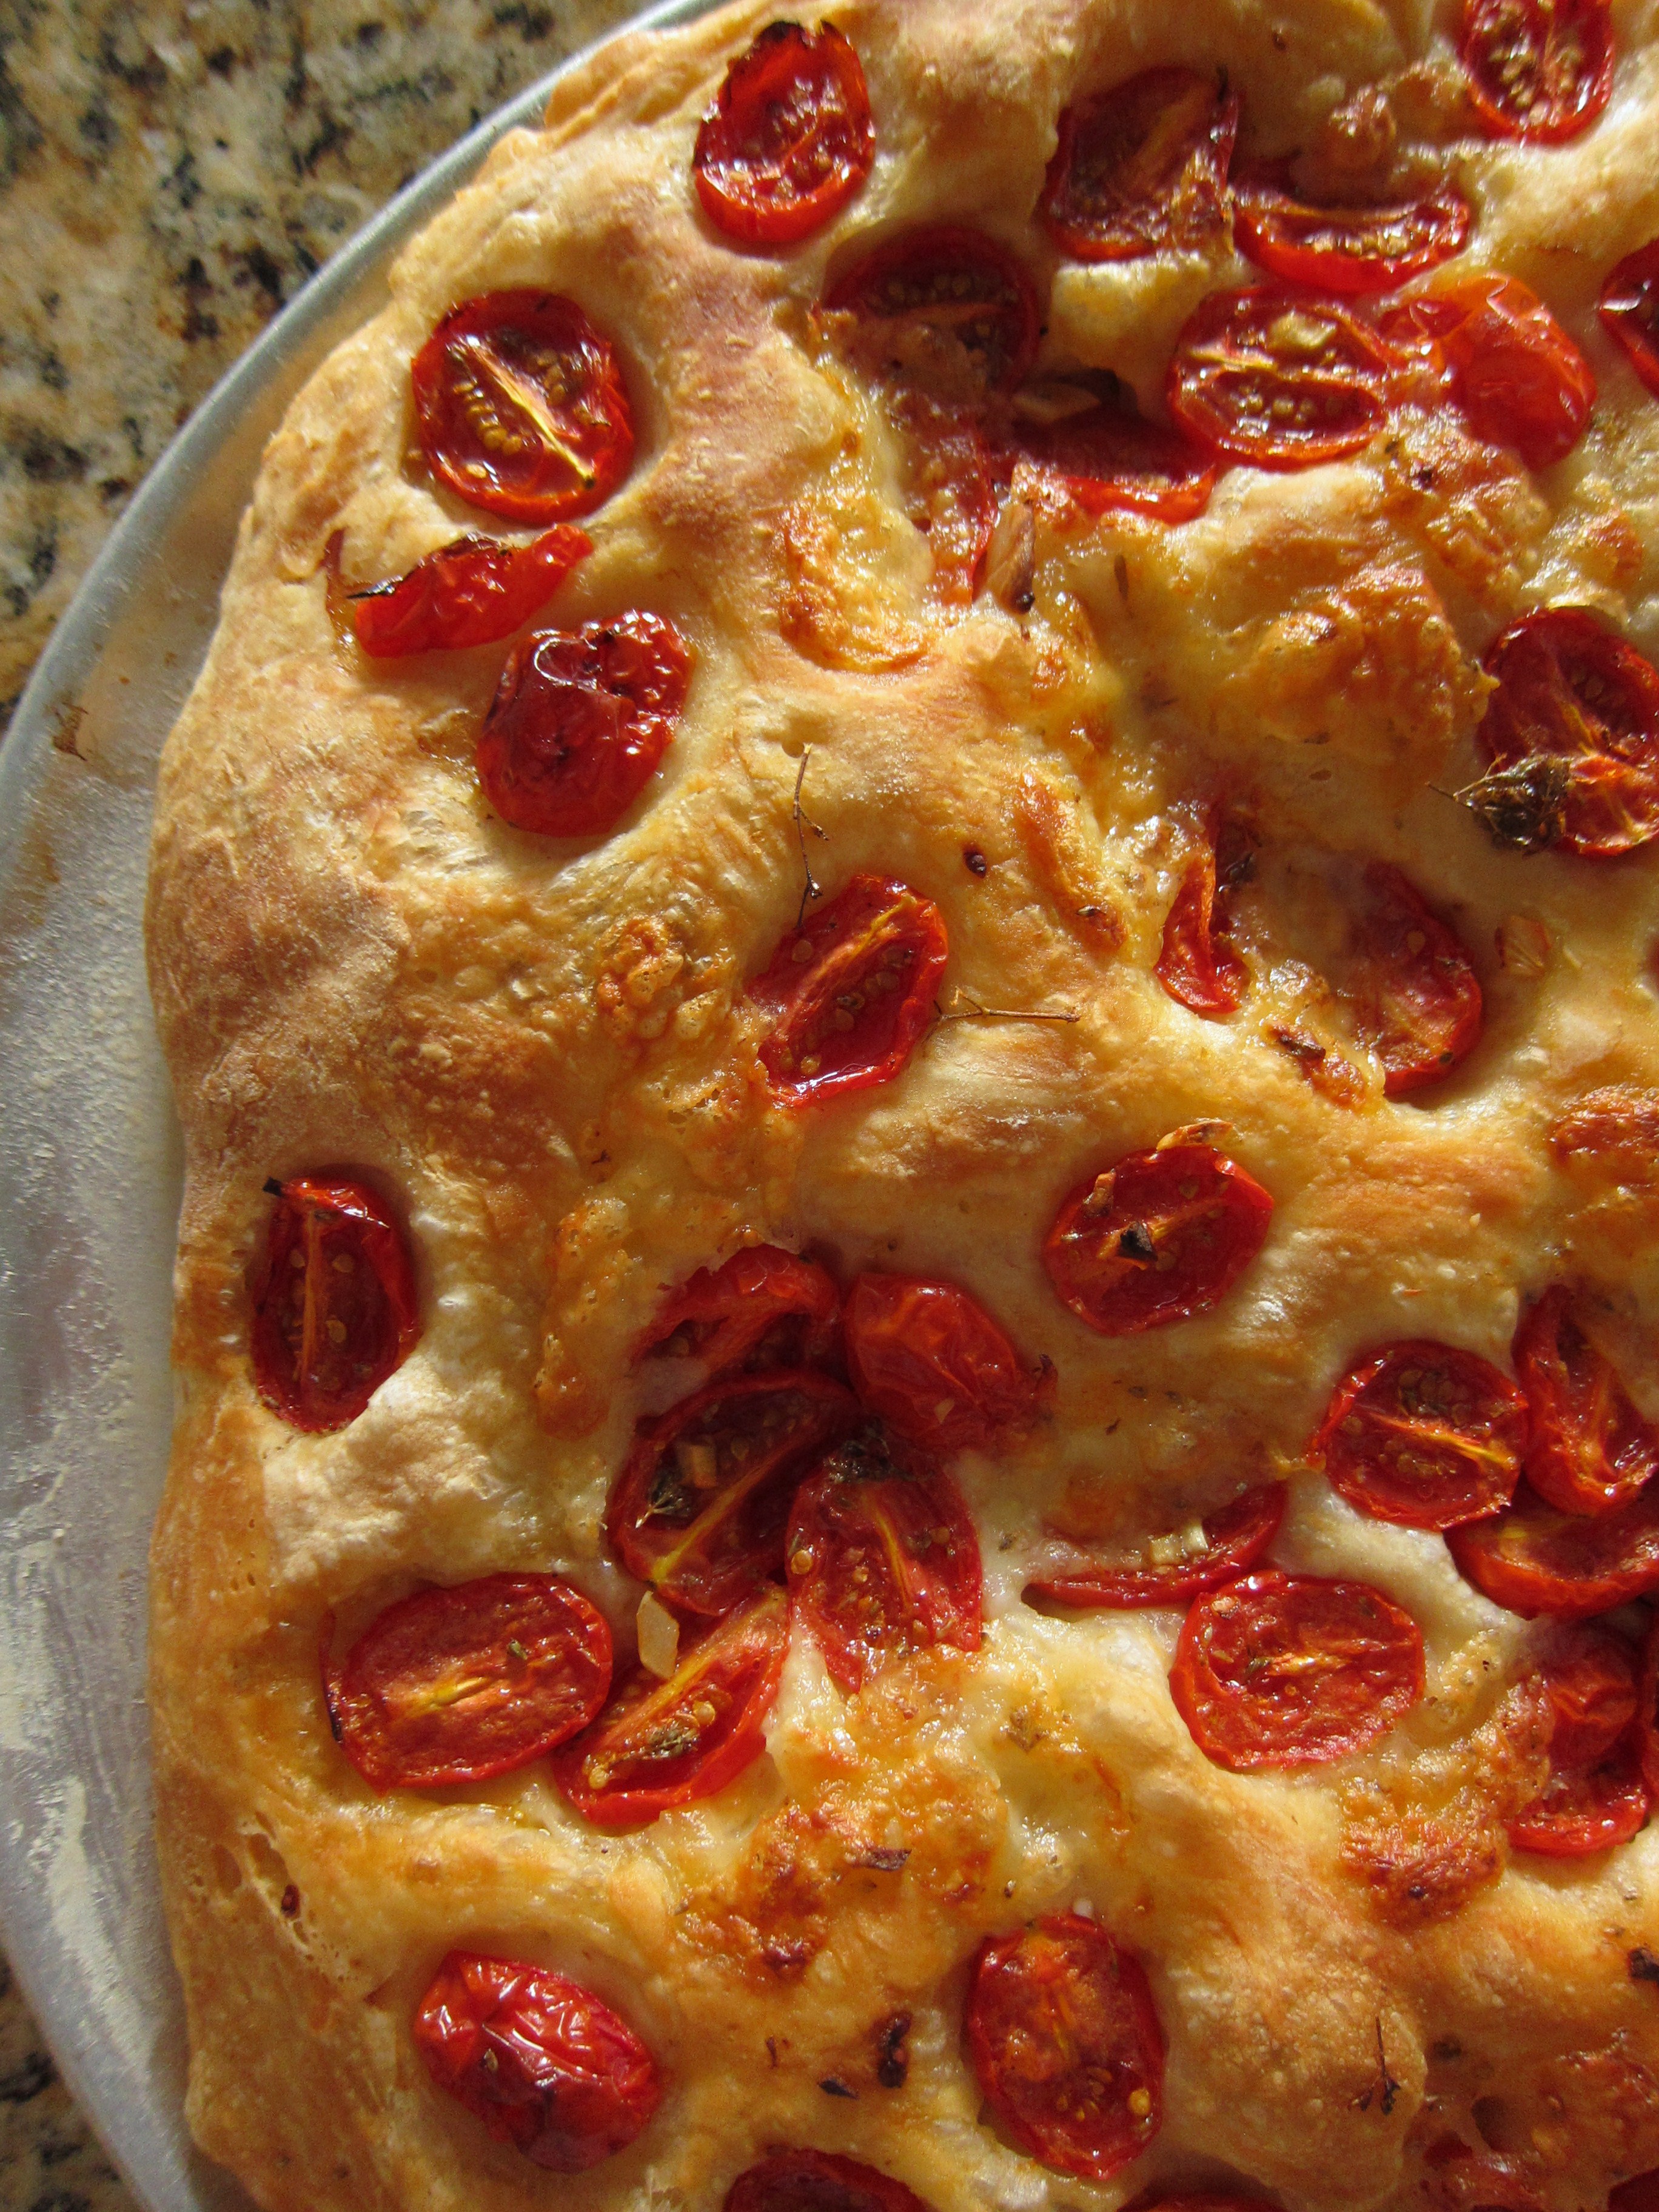
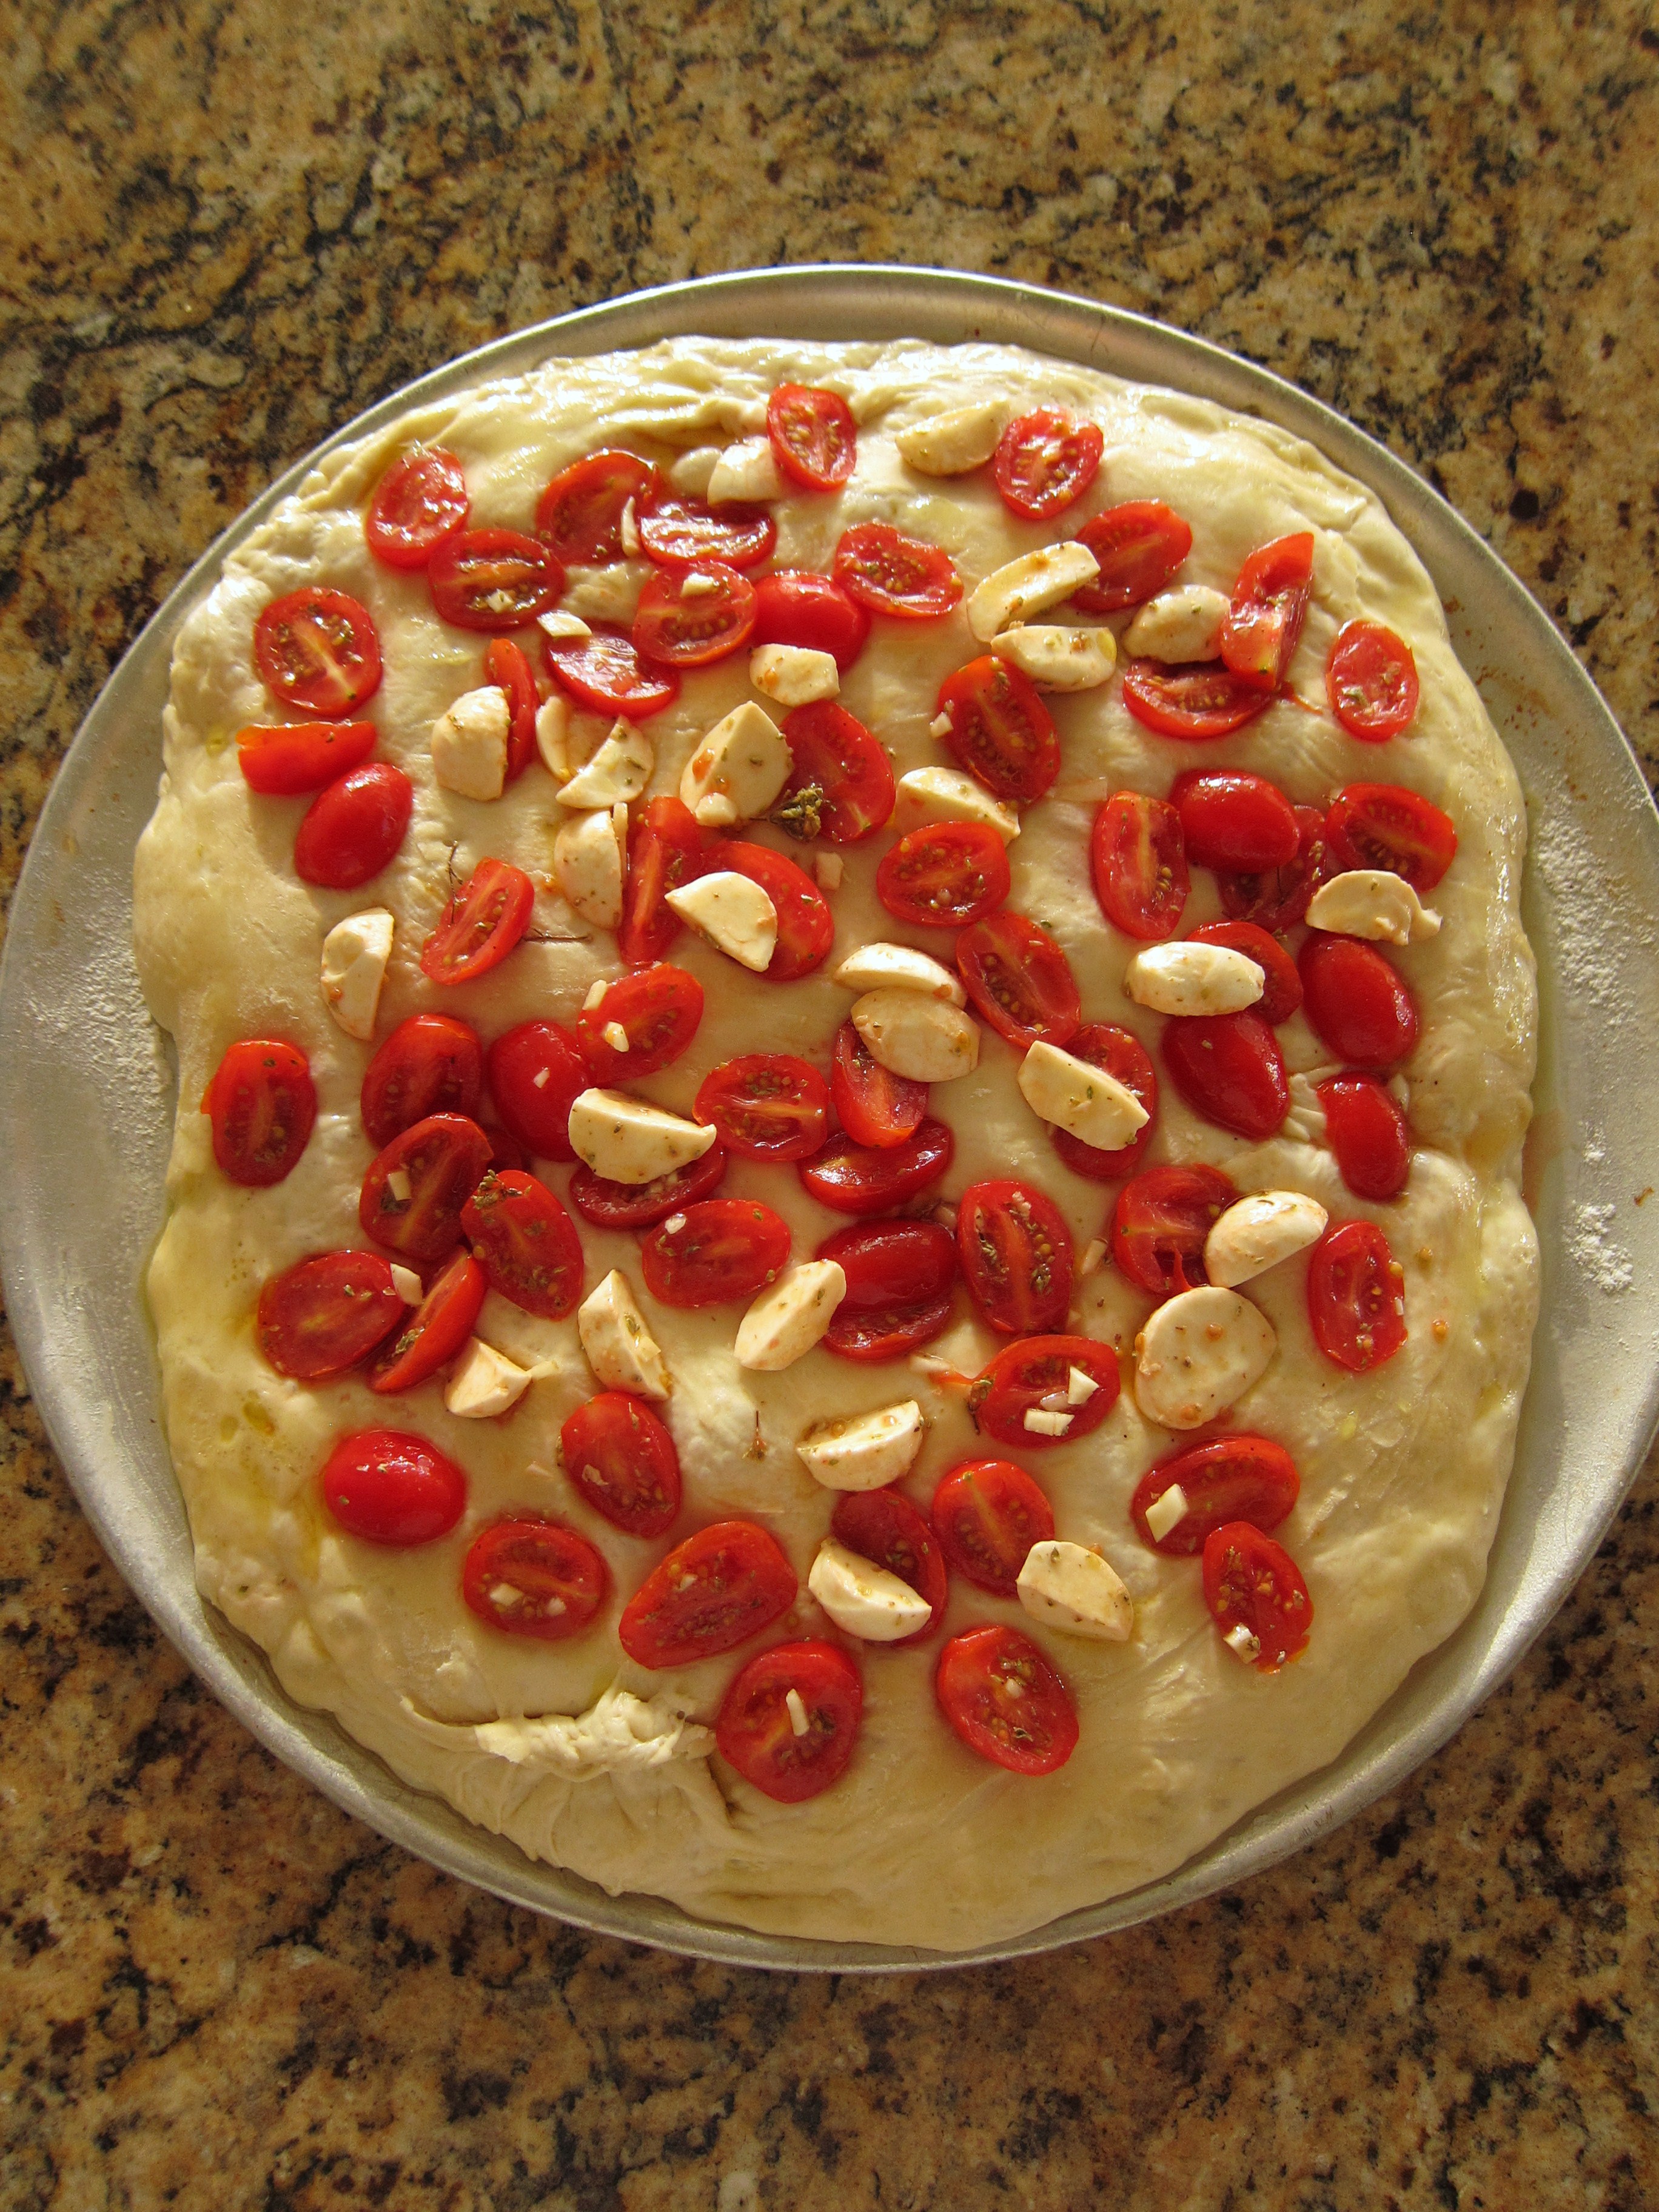
In scouring the Internet for ways to use up the zucchini that were starting to wither away in the crisper drawer, I came across this recipe from Martha Stewart, which reminded me a little of falafel sandwiches (because of the chickpeas and the pita), but looked more home-kitchen friendly. (in truth, my eagerness to try the recipe may be chalked up to the fact that I mistakenly read it as “Zucchini Party Sandwiches” and my curiosity got the best of me. They weren’t in fact “party” sandwiches, but patty sandwiches – though, since making them, I would have no qualms calling them “party” sandwiches, given how colourful and flavourful they are.) (like a party in your mouth, har har…).

They’re something of a cross between a zucchini latke and a falafel – more toothsome than the former, less complicated than the latter. I tweaked Martha’s recipe slightly, using canola oil to fry them in (because, again – unlike Martha – I’m not made of money) and incorporating some curry powder, cayenne and a small amount of olive oil to the mixture for some added oumf. I highly recommend that you do the same, as the flavours mingle really well together; like people do, when the party goes from good to dancing-on-the-tables (!) great.

Have a good week, everybody x

Curried Zucchini-Chickpea Patty Sandwiches

Curried Zucchini-Chickpea Pa(r)tty Sandwiches – adapted from Martha Stewart
Serves 8 (a half-pita each)

Ingredients

  • 1 15.5-oz can chickpeas, drained and rinsed
  • 1 cup plain breadcrumbs (I used panko)
  • 1 medium zucchini, grated
  • 1 small red onion, grated
  • 1 egg, beaten
  • 1 Tbsp curry powder
  • ¼ tsp cayenne
  • 1 teaspoon coarse salt
  • freshly ground black pepper to taste
  • 1 Tbsp olive oil – for flavour
  • ¼ cup canola oil (or sunflower oil) – for frying

To serve:

  • 4 whole-wheat pitas, halved
  • 1 cup Greek yogurt
  • 1 cup fresh mint leaves
  • ½ cucumber, thinly sliced
  • A handful of lettuce leaves, and/or arugula and/or radicchio

Directions

1) Mash chickpeas in a bowl until more or less smooth (with a few nubs left in-tact). Stir in breadcrumbs, grated zucchini, onion, egg, curry, cayenne, salt and pepper. Form into eight 4-by-1/2-inch patties and set aside.

2) Put a pan on medium-high heat and warm the canola oil until hot, but not smoking. Fry the patties until golden and crisp, about 2 to 3 minutes per side.

3) Meanwhile, warm the halved pitas in the toaster on in a dry pan, just to warm through.

4) Stuff the pita halves with the cooked patties, some cucumber, lettuce, mint and yogurt.

Curried Zucchini-Chickpea Patty Sandwiches

Curried Zucchini-Chickpea Patty Sandwiches

Share this:

  • Tweet
  • Share on Tumblr

Like this:

Like Loading...

January’s Refrain

15 Friday Jan 2016

Posted by julia chews the fat in Holidays, Sweet Tooth, The Basics, Vegetarian

≈ 5 Comments

After the debauchery comes le détox.

I ate so much. It’s awful. Salads from now on.

This a common refrain in January, one that we seem to come across just about everywhere – magazine articles, ads, blogs, the Lifestyle section of newspapers, and even the water cooler at work. It seems that everyone is in “detox”* mode, eliminating and abstaining after The Great Big Binge; groaning, biting their lower lips and confessing about just how bad they’ve been.

Fifty Shades of Fruitcake.

(*I have very strong opinions about the word “detox” as it applies to diet, which is why I’m putting it in quotations. Unless it’s being used to describe the process of someone coming off hard drugs or being treated for mercury poisoning, the word “detox” is a unicorn word – pretty, but imaginary.)

I think it’s fascinating how much we link food to guilt. Ingredients are compartmentalized into strict categories of “good” and “bad”, so that when we’ve had a slice of cake we’ve been naughty, but if we drink nothing but juice for ten days straight, we’re suddenly very, very good. Schedule in that colonic and you’re well on your way to sainthood.

With the turn of the calendar on January 1st, there comes reflection, regret, and the goal of redemption. How do I undo all the bad things I’ve done? How do I wipe the slate clean? The terms detox, clean eating and carb-free – the Holy Trinity of Orthorexia – have cemented themselves into the language we use to talk about healthy eating, especially around the time everyone’s making resolutions they won’t keep. And frankly, it

drives

me

mental.

I can understand the desire for self-improvement. I can get behind the idea of not eating in excess and limiting the intake highly processed foods. But I don’t think we’re doing ourselves any favours by adopting attitudes of excessive food guilt; nor do I think that a handful of gummy bears is the difference between living a virtuous life or a debased one.

There was  an article I read recently about the French approach to food (we’re using wide-sweeping generalisations about the French here, but still…), making the argument that food and pleasure can and should co-exist. I think there’s something to be said for the this model of eating, which not only allows for pleasure, but encourages it. You want a piece of cheese? Have it. A glass of wine. Yes. You eat your vegetables too – not because you have to, but because they’re vibrant and exciting and delicious and they too will make you feel good.  I recognise that, especially in the last decade or so, the French have also adopted some of the same health trends as North Americans (after all, sans gluten shops have been popping up in Paris and both BBC Travel and The New York Times posted articles about the demise of the baguette in France), but I still think that the French take their food very seriously, in that it’s supposed to be enjoyed, savoured, appreciated, not admonished on the basis of calories or the fact that it doesn’t abide to the diet du jour.

Which brings me to galette des rois.

In January, while half of North America is suffering through Gwyneth-esque cleanses, the French are celebrating. In anticipation of the Epiphany, on January 6th, bakeries start to fill their vitrines with large, round cakes with scored tops called galette des rois – two layers of puff pastry, with crème d’amande (almond cream) in between. A fève (bean) is hidden inside the galette before baking and whomever gets the slice with the fève becomes “king” or “queen” for the day and gets to wear a nifty paper crown. Many bakeries in Montreal offer them through the month of January, but on a whim, I decided to try making one this year (with mixed results, see more below).

It’s celebratory food. It’s January food. It’s the food that we cherish because it’s special and because we don’t eat it everyday. And for those reasons, it’s meant to be enjoyed with gusto, not the guilt we’ve been trained to carry with us each time we raise a forkful of cake to our mouths.

So, I invite you – to pull up a chair, a plate, and dig in.

Galette des rois (serves 8) – from Clotilde Dusoulier’s site Chocolate and Zucchini

Note: in true French fashion, these measurements are in grams, allowing for more accuracy. If you don’t already have a kitchen scale, consider buying one – they come in different price ranges. I bought an electric one for 20$ a few years ago and it’s one of the best kitchen gadgets I own.

  • 500 grams (17 2/3 ounces) all-butter puff pastry, thawed if frozen
    For the crème d’amande:
  • 125 grams unsalted butter, softened
  • 125 grams granulated sugar
  • 130 grams almond flour (i.e. almond meal or finely ground
    almonds)
  • 8 grams corn starch
  • a good pinch sea salt
  • 2 large eggs
  • 1 tablespoon rum (or Grand Marnier)
    For the eggwash and glaze:
  • 1 egg yolk
    Accessories:
  • 1 porcelain trinket or dried bean
  • 1 paper crown

Galette des rois

Directions*:

(*what you see below might seem like a daunting list of directions, but I promise – especially since you’re using bought puff pastry – it’s a pretty simple recipe.)

1) Prepare the crème d’amande: Beat the butter until creamy, but avoid incorporating air into it. In a separate bowl, combine the sugar, almonds, corn starch, and salt. Stir with a whisk to remove any lumps. Add to the almond mixture to the creamed butter and mix until smooth. Add the rum, then the eggs, one at a time, mixing well between each addition. Cover and refrigerate for an hour or overnight.

2) Roll out the puff pastry: Divide the puff pastry in 2 equal pieces, and roll each one out to form a rough circle a little larger than 12 inches in diameter. Use a sharp knife and an upturned plate of the right dimension to cut a neat 12-inch circle out of one, and a slightly larger one with the other, adding about 1/4 inch all around the edge of the plate.

3) Assemble the galette: Place the smaller of the two circles on a piece of parchment paper or a silicone baking mat. In a small bowl, combine the egg yolk with a tablespoon water (or milk, if you have it handy) until smooth. Using a pastry brush, brush the outer rim of the dough lightly with the eggwash by a width of about 1 inch. Make sure not to wet the actual edge of the dough, or it will impede its rise. Pour the crème d’amande in the center and spread it out inside the eggwash ring with a spatula. Place a porcelain fève, a dried bean, or the trinket of your choice in the crème d’amande. Press it down gently to bury it. Transfer the second round of dough precisely on top of the first, smooth it out gently over the crème d’amande to remove any air pockets, and press it down all around the sides to seal.

4) Score the galette: Using the back of the tip of your knife (i.e. the dull side), draw a decorative pattern on top of the galette, using just enough pressure to score the dough without piercing it (skip to 7:30 of this video for an example of scoring design) (I free-styled it!). Brush the top of the galette lightly with the egg wash: again, make sure it doesn’t drip over the edges, or the egg wash will seal the layers of the puff pastry in this spot and it won’t rise as well. Using the tip of your knife, pierce 5 holes in the top dough – one in the centre, and four around the sides – to ensure an even rise. Transfer to a rimmed baking sheet lined with parchment paper (or silicone baking sheet, like a Silpat) and refrigerate for 1 hour. (Alternatively, you can place the galette in the freezer at this point, on the baking sheet, and bake it the next day).

Galette des rois

Galette des rois

5) Bake the galette: Preheat the oven to 360°F; if the galette was in the freezer, take it out while the oven preheats. Insert the galette in the middle of the oven and bake for 30 minutes (35 if it was frozen), until puffy and golden brown. Place on a rack to cool completely and serve at room temperature (or, if you prefer, rewarm slightly in the oven before serving).

***WORD TO THE WISE: don’t attempt to slice the sides of the puff pastry after you’ve laid one layer on top of the other, as I did (I tried to make a more symetrical circle). Doing so will cause the crème d’amande to spill out in a dramatic fashion…

Galette des rois

That said, most things are fixable, especially when it comes to “rustic” home cooking…

(and it turns out that the baked filling is delicious on its own.)

Galette des rois

Share this:

  • Tweet
  • Share on Tumblr

Like this:

Like Loading...

Sugo di pomodoro

15 Tuesday Dec 2015

Posted by julia chews the fat in Cooking For Your Peeps, Cooking with Nonna, Lunch & Dinner, The Basics, Vegetarian

≈ 1 Comment

In the kitchen, there aren’t many things for which grandma, Nonna, has any steadfast rules. Tomato sauce, however, is one noteworthy exception. Here is an abridged, translated version of a recent conversation we had over the phone:

“Nonna, I made your sauce yesterday. Era buonissimo.”
“Did you put in the leek? And a bit of carrot? And celery?”
“Sì. Of course. Certo.”
“But not too much of each?”
“No, not too much of each.”
“And the butter? Il burro. Did you remember to put it in?”
“Yes, Nonna.”
“Ok, hai fatto bene. Brava. Good girl.”

I’ve made Nonna’s tomato sauce a hundred times over. Maybe even more, considering it was one of the very first things I learned to cook. Like all her recipes, the ones that I’ve been able to replicate with ease are like badges, tangible mementos of a culinary heritage – hers, mine, ours. It turns out that when you have Italian roots – even if it only makes up half of you – tomato sauce isn’t really just tomato sauce. It’s a birthright. You have to take special care to preserve it; to share it, but to safeguard it too.

Variations of sugo di pomodoro differ across Italy and across families – some might add aromatics, like basil; others sometimes add salt or a bit of sugar. It’s one of those great backbone recipes that’s slightly different from household to household. I think the key to Nonna’s recipe is poco poco, or “just a little bit”. You want just a little bit of leek, of onion, of carrot, of celery. These ingredients make up your base, your sofrito (or mirepoix in French); if you go overboard with any of them, the flavour won’t be balanced. That said, trust your judgement and your tastebuds – if you feel it needs more or less of anything, adjust it. As simple as it may be, this recipe gets better with practice. Keep making it, over and over, until you love it and think Nonna would too.

Nonna’s Tomato Sauce (sugo di pomodoro della Nonna)

Tomato Sauce

Ingredients

  • 1 medium onion, chopped (about 1/2 cup)
  • 1 small carrot, chopped (about 1/4 cup)
  • 1 small celery stalk, chopped (about 1/4 cup)
  • 1/2 small leek (white part only), chopped (about 1/3 cup)
  • 2 cloves of garlic, minced
  • 1 heaped Tbsp tomato paste
  • 800ml-1 L* canned or jarred tomatoes (preferably San Marzano)
  • olive oil (about 1/4 cup)
  • a knob of butter

*a large standard can of tomatoes is usually 796ml; we use homemade jarred tomatoes, each Mason jar containing 1L.

Notes! 

  1. Unlike a lot of recipes out there, Nonna doesn’t add salt, sugar, pepper, chili flakes or aromatics to her tomato sauce. This isn’t bolognese, so no meat either.
  2. You might have leftover chopped vegetables (i.e one small carrot be a little more that 1/4 cup); you can freeze any leftovers for stock or double the recipe.
  3. The sauce will be more flavourful if you allow it to simmer for an hour or so. (Grandpa used to start his sauce at about 10am to serve at lunchtime, but he was hardcore about sauce-making.)
  4. You can also use this sauce to cook meatballs the old-fashioned way; see recipe here.

Tomato Sauce

Directions

1) Heat olive oil and butter in a large saucepan or Dutch oven, on medium-high heat. Once the oil is hot (but not smoking), add the onion and sauté until softened. Reduce the heat to medium. Add the garlic and sauté for another minute. Then add the leek, carrot, celery and sauté together until everything is softened and the onion and garlic are golden to golden-brown. Add the tomato paste and sauté for another minute or so.

2) Add the tomatoes and stir to combine; reduce the heat to medium-low and allow to simmer, half-covered, for 30 minutes to an hour (depending on how much time you have). Remember to stir occasionally.

3) Remove sauce from the heat; blitz with a hand-blender until smooth, or leave as-is if you prefer a more rustic sauce. Serve on pasta, gnocchi, polenta, or pizza with a good sprinkling of parmesan. Alternately, you can freeze the sauce for up to 4 months.

Tomato Sauce

Tomato Sauce


Share this:

  • Tweet
  • Share on Tumblr

Like this:

Like Loading...

Care Package

27 Friday Nov 2015

Posted by julia chews the fat in Breakfast & Brunch, Cooking For Your Peeps, Lunch & Dinner, Soups, Sweet Tooth, Vegetarian

≈ 1 Comment

A friend of mine had a little boy just a over two weeks ago now – a beautiful little chicken of a baby, with soft cheeks, delicate fingers and the requisite new-baby smell. He is definitely a sight to behold, with his miniature yawns and peach-fuzz hair. Regardless of a few nicks from his sharp newborn nails – and a few surprise vibrations from his diaper – he charmed me through and through, in that way that babies are preternaturally good at, without even trying.

With the mini baby boom happening in my circle of friends right now, the one thing I’ve come to understand is just how precious the resources of time and energy are to new moms and dads. Squeezing in a shower or running an errand are rare opportunities that are seized with an acute sense appreciation, if not urgency. Other activities, namely, making a full meal, are easily relegated to the back-burner (sorry for the pun). I’ve heard that a banana and a box of crackers will suffice when you’ve been on four-hour sleep cycles – at best! – and have a little person who needs you in a way that no one else has before.

Knowing that my friend and her husband were busy acclimatising to their new unit of three (diapers, feedings, and all the rest of it), I thought I should come equipped with couple of homemade treats – things that could be frozen or eaten as-is, without any prep, aside from a quick re-heating. In fact, it’s also the kind of food any non-parent would want in the fridge or freezer on those frantically busy days when they don’t have one more ounce to give.

Parent or non-parent, this soup and this cake are my virtual gifts to you. Enjoy xx

Turkish Lentil Soup – makes 4-6 servings

Turkish Red Lentil Soup

  • 225 grams red lentils (approx 1 1/8 cups)
  • 1 medium onion, finely chopped
  • 1 stalk celery, finely chopped
  • 1 carrot, finely chopped
  • 3-4 cloves garlic, peeled and sliced in half lengthwise
  • 2 Tbsp tomato paste
  • 1-2 Tbsp extra virgin olive oil
  • 1.5 litres vegetable stock (plus 1-2 cups more, as needed)
  • 1 small piece ginger, grated
  • 2 tsp ground cumin
  • 2 tsp curry powder
  • 1-2 tsp paprika
  • 1 tsp mustard seeds
  • Fresh mint (or cilantro) and lemon to serve
  • Salt and pepper

Directions

1) Set the vegetable stock in a pot on medium heat to warm up.

2) Heat the olive oil in a large pot, and sauté the vegetables with the garlic cloves, for about 10 minutes. Add tomato paste, spices and grated ginger, and cook for a few more minutes. Add lentils, washed and drained, and cover with hot vegetable stock.

3) Bring to a boil, reduce heat and simmer with the lid on for about 30 or 40 minutes, until the lentils begin to fall apart. Add more stock if they look a bit dry (just remember it should be a soup-like consistency). Season with salt and pepper, to taste.

4) Set aside two or three ladles of soup, and puree the rest in a blender (optional).

5) Serve with chopped fresh mint (or cilantro) and lemon juice. Do not skip this – it’s what makes all the difference!

Turkish Red Lentil Soup

—–

Date-Walnut Banana Cake with Coconut
Lightly adapted from Lunch Lady’s Black Gold Banana Cake
Makes one 9x5x3″ loaf

  • 4 medium overripe bananas
  • 1 1/2 cups all-purpose flour (I used 1 cup white +1/2 cup whole-wheat)
  • 1 1/2 tsp baking powder
  • 1/2 tsp baking soda
  • pinch of salt
  • 1/2 cup raw caster sugar
  • 2/3 cup coconut oil, melted
  • 1 tsp pure vanilla extract
  • 1/2 cup Medjool dates, chopped
  • 1/4 cup walnuts, chopped
  • 1/4 cup unsweetened shredded coconut

Date-Walnut Banana Cake

Directions

1) Preheat the oven to 350˚F.
2) Place the overripe bananas into a mixing bowl and beat until puréed. Add the vanilla, coconut oil, and sugar, and beat again until combined.
3) Fold in the flour, raising agents, salt, and walnuts until thoroughly combined.
4) Fold in the chopped Medjool dates and shredded coconut; pour the batter into a loaf tin lined with parchment paper.
5) Bake for 45 mins to an hour, or until skewer comes out clean, cool on wire rack.

Date-Walnut Banana Cake

Date-Walnut Banana Cake

Date-Walnut Banana Cake

Date-Walnut Banana Cake

Share this:

  • Tweet
  • Share on Tumblr

Like this:

Like Loading...

An Invitation

20 Friday Nov 2015

Posted by julia chews the fat in Condiments, Lunch & Dinner, Snacking, Vegetarian

≈ 11 Comments

The weight of this week hasn’t made me want to write about food. In light of recent events, it feels frivolous – and almost obscene – to blather on about cooking. It isn’t just Paris. It’s all of it. It’s Beirut. It’s Bamako. It’s the unconscionable rhetoric surrounding the Syrian refugee crisis. It’s the pundits who dissect every single detail of a horrifying event to spread their bigotry and fearmongering. It’s the fact that – amid all the pain and suffering – our impulse is to turn against eachother, to become wary and suspicious; to slam doors on the most vulnerable.

This post, in contrast, is an invitation. An invitation to gather, to extend a loving gesture, to bring people in close. Breaking bread with others can be a unifying force – it can foster greater acceptance and understanding of others; it can quell intolerance. Most of all, though, it is a tangible expression of unadulterated love.

World peace might not be a realistic expectation. But we can, at the very least, try to love one another a little more. So, at least for a little while, turn off the radio, shut off your computer, your phone. Silence the hot-air pundits. Bring together friends, family, and new faces too – to share, to love, to eat, with a heart that’s open and filled with gratitude.

Eat well, be well, dear readers. See you here again soon x

Traditional Muhammara (red pepper walnut dip from Turkey, via Syria)
Adapted from Olga Irez’s Delicious Istanbul
Serves 10 as appetizer/meze

Muhammara

  • 6-7 large (about 1 kg) red bell peppers
  • 1 large (about 60g) slice wholewheat bread, torn
  • 1/2 packed cup finely ground walnuts
  • 2 tbsp tomato paste
  • 2 tbsp extra virgin olive oil and more for serving
  • 1/2 tbsp pomegranate molasses*
  • 1 clove garlic
  • 1/2 tsp fresh mint
  • 1/4 tsp ground cumin
  • 1/4 tsp ground coriander
  • 1/4 tsp hot red pepper flakes and more for serving
  • 1/2 tsp fine sea salt

*I was able to find pomegranate molasses at my local Middle Eastern shop, but it can also be found in some regular grocery stores (PA in Montreal stocks it). Otherwise, you can replace it with lemon juice (though, you won’t get that nice sweetness that pomegranate molasses adds to the dip). Note: don’t buy the stuff that’s used as a syrup to add to carbonated water; the stuff you want is thick (like traditional molasses) and also goes by the name “pomegranate concentrated juice”.

Directions

1) Preheat the oven to 400F. Wash the peppers and arange them on a large baking tray and let roast, skin-on, for about 30 min, or until the peppers puff up and start to get charred spots. Set aside to cool while you are gathering the rest of the ingredients.

Muhammara Muhammara

2) When the peppers are cool enough to handle, remove the stems along with the seeds and peel off the skins. Place the peeled red peppers in a colander and let the juices drain into a bowl below (Olga Irez suggests reserving the juice to add to soups or stews and cook your grains in. You can even freeze the juice for future use).

Muhammara

3) Place the drained red peppers and garlic in the food processor and pulse into a purée. Soak the bread slice in water, then squeeze out the liquid. Toss the wet crumb in the blender and pulse into a smooth purée. Add the rest of the ingredients and mix with a spoon until combined. Taste and adjust the seasoning, if necessary.

Muhammara

4) To serve, transfer to a wide bowl and with the back of a spoon, make a light impression in the centre of the dip. Drizzle a bit of olive oil into the centre and sprinkle with red pepper flakes. Serve with flat bread.
Note: Muhammara can be refrigerated for up to 2-3 days.

Muhammara

Share this:

  • Tweet
  • Share on Tumblr

Like this:

Like Loading...

As much as you can carry

18 Friday Sep 2015

Posted by julia chews the fat in Condiments, Lunch & Dinner, The Basics, Vegetarian

≈ 8 Comments

End of season visits to the outdoor food market are always a little bittersweet for me. I get goosebumps of excitement and pangs of regret in equal parts. It’s a complicated phase in our relationship – I feel nervous and happy all at once.

I suppose it’s because I’m not very good with endings – even if I know that in reality, this isn’t an ending in the classic sense. Elegant stalks of rhubarb and asparagus will come back by May; sweet peas and baby zucchini in June; baskets of gemstone-coloured berries and velvet-skinned peaches through July and August. But in that transition between summer and fall, I always get a little panicky, at a loss as to how to maximise the last real days of the food market. I end up leaving the house without a recipe or a plan, only to wander around aimlessly between the market stalls with the jittery excitement of a puppy who circles the barbecue, hoping he’ll get tossed a hot-dog. I want all the strawberries, all the cucumbers and melons, and all those gorgeous batches of red romaine and frilly frisée from the grey-haired woman at the centre of the market I call “Madame Laitue”. Because she – like the berries and all other ephemeral summer foodstuffs – will soon pull an eight-month disappearing act. And secretly, the thought of it makes me a little sad. And a little desperate.

So, during my last visit, I binge-shopped my way through the last of the summer produce – pints of berries, a few long striped “snake” cucumbers, bunches of fresh herbs and French radishes, baskets of flat romano beans and cherry tomatoes, and several heads of Madame Laitue’s finest lettuce – again, with no recipe, no plan, spurred on only by a need to get it before it’s all gone.

For good measure, I also picked up nothing less than an obscene amount of basil – four whole stalks worth – because when something’s as beautiful and temporary as this, you throw pragmatism out the window and buy as much as you can carry.

Basil for pesto

So that’s what I did – I bought as much as I could haul home, cradled in one arm, like an enormous pageant-sized bouquet. For $10, It was the best purchase I’d made all week. The people I passed on the street seemed to agree, flashing me smiles and “oh la las” usually reserved for hunks and babes. (Montrealers are a special breed of Canadian and don’t shy away from expressing their affinity for food.)

There was one old man, though, who seemed totally confounded by what I was holding. He took a seat next to me on the metro, stared at my leafy bouquet for a little while, then coyly asked,

“C’est un aromatique ça?”

“Oui, c’est du basilic.”

“Mais c’est très fort comme odeur, non?”

“Haha, oui, en effet! Mais c’est délicieux! Vous voulez goûter?” (I pull off a leaf for him to try; he declines)

“Qu’est-ce que vous allez faire avec tout ça?”

“Du pesto, monsieur.”

“Mais c’est quoi ça, du pesto?”

In that moment I wished I could take him back home with me and make him a batch of pesto; wished I could see the look on his face when he tried it for the first time, swirled into a bowl of warm pasta dressed with parmesan; wished I could show him why, when you see fresh basil at the market, you take home as much as you can carry.

Basil for pesto

Basil Pesto (a riff on mom’s version) – makes about 3 cups of pesto

  • 8 cups basil leaves (stripped from the stalk)
  • 1 cup flat-leaf parsley
  • 2-3 garlic cloves (adjust to taste)
  • 1 cup Parmigiano-Reggiano, grated
  • 2/3 cup olive oil
  • salt, to taste
  • 1 cup pine nuts (optional)

Notes:

  1. Pine nuts are a nice (and super traditional) addition to pesto. We don’t use them anymore because two of our in-laws have nut allergies (and, also because they’re esspennnsive). But if you can splurge on some, they add great flavour and texture. If using, just add the pinenuts into the processor with the other ingredients (1/2 cup in the first processed batch and another 1/2 cup in the second – see directions below).
  2. In traditional pesto-making, a mortar and pestle are used to mush everything together, but a food processor will work just as well.
  3. Parsley is not something pesto purists would add in, but mom does it and it tastes amazing.
  4. Pesto, like any sauce, is about adjusting and tasting. You can use this recipe as a guide, but trust your tastebuds when it comes to the final result.

Pesto prep

Directions

1) In a food processor, chop the garlic. Add half of the basil, parsley and grated parmesan cheese (and 1/2 cup of pinenuts, if using) and pulsate for about 10 seconds.

2) With a spatula, scrape down the sides, put the top of the processor back on. Get your oil ready, turn on the processor and slowly add half the oil through the feed tube, until a paste forms. Season with salt.

3) Repeat with the remaining bail, parsley and parmesan cheese (and 1/2 cup of pinenuts, if using). You may need to remove the first batch of pesto from the processor, if there isn’t enough room; I just did one batch over the other and it worked fine. Taste it and adjust accordingly (add a bit of salt, a bit of oil…)

Pesto

Notes: to refrigerate, place pesto in a glass jar and cover with olive oil. Use within a few days. To freeze, place spoonfuls on a tray lined with parchment paper. Once frozen, wrap individually (or in pairs) in parchment paper and transfer to freezer bags. The pesto will keep for several months in the freezer.

Pesto

Share this:

  • Tweet
  • Share on Tumblr

Like this:

Like Loading...

A Good Place to Start

30 Thursday Jul 2015

Posted by julia chews the fat in Breakfast & Brunch, Snacking, Sweet Tooth, Vegetarian

≈ 3 Comments

My younger brother and I grew up in a large split-level bungalow in the suburbs outside of Montreal. It didn’t have a white picket fence, but it was flanked by tall weeping birches, big swaths of grass and a cherry tree that bore bright red fruit right around mid-July. From the time we were born, until the time we each turned eighteen, it was the one and only house we’d ever lived in – the one with the family room fireplace and the secret cedar closet disguised as a bookshelf; the one with the damp-ish basement that always gave us the creeps and the “GARDE AU CHIEN” sign on the garage door left by the previous owner (which we kept, despite never owning a dog).

A few short years after we’d flown the coop, my parents decided to sell the split-level bungalow for the same reason most empty-nesters do – too much space for too few people. It was a process that I’d been largely removed from, having just moved in with my college boyfriend at the same time that I’d started my first desk job out of university. But we did come back to the house from time to time, for dinners and birthdays and for the occasional dip in the pool. Once the house went on the market, though, it suddenly became a very different place to be in. This space that was once ours would soon belong to another family, with new sets of feet padding the floors, new laughter, new smells. It was an odd thing to consider, but it was something that would float into my thoughts with every visit, when I’d sink my toes into the grey carpet of my old bedroom, or hear the antique clock chime in the dining room with that deep, guttural bong, bong, bong – both familiar and foreboding.

The house stayed on the market for several months. I want to say that it was close to a year, but my recollection of the exact time frame is a bit fuzzy. I do remember there being a pyrite problem that was discovered late in the game, changing the terms of the sale and the balance in negotiations. I remember that it was a year in favour of buyers, not sellers. I remember that the first real estate agent was a total nightmare and that there were times when the sale of the house felt like it would be in perpetual limbo. But I also remember that, throughout the highs and lows of the house-selling process, my mother baked. And baked. And baked. Before every open house, she’d have something sweet rising in the oven – a lemon loaf, a coffee cake, a pan of blueberry muffins. Initially, I thought it was mom just being mom – the ultimate hostess – but as it tuns out, her objective was strategic. By her logic, filling the house with the warm aroma of baked goods would encourage prospective buyers to – at least subconsciously – feel at home.

It was quite the trick.

The house did eventually sell – to a young family with two kids, a boy and a girl, mirroring our own family unit of four. And while there’s no way of knowing if their choice was influenced by the scent of buttered scones or a batch of oatmeal cookies crisping up in the oven, I suspect it couldn’t have hurt.

—–

All this came to mind a couple of weeks ago, when I was staring slack-jawed at all the boxes on the floor of our new apartment, overcome by that uneasy, post-move feeling where no place feels like home. I knew that if I was going to wrap my head (and my heart) around this new space, I had to take a cue from my mother and – for lack of a better word – “trick” myself into making it feel like home. And so, one quiet evening after work, I plunked my purse onto the floor, flipped on the radio, threw on an apron, and started fiddling in the cupboard for some flour, sugar, walnuts and dried figs – the few ingredients that had made the trip from the old apartment. I also happened to have a Goliath-sized zucchini on hand, recently excavated from Sophie‘s garden; that got shredded and tossed into a bowl alongside two eggs, some yogurt and a bit of brown sugar. The batter was stirred together and scooped into a greased loaf pan, then slid into the oven, where it baked low and slow for the better part of an hour. As the apartment gradually filled with the heady scent of sugar caramelising in the oven, things started to feel a little more familiar and a little less alien. Having something ticking away in there made everything inside these four walls feel more like home. My home. Our home.

There might still be dozens of books on the dining room floor and old wine boxes filled with miscellaneous cooking gear. But we’re getting there. And the kitchen turned out to be a good place to start.

Fig Zucchini Walnut Bread

Fig Zucchini Walnut Bread (makes 1 loaf) – adapted from A Brown Table

Ingredients

    • 1 lb zucchini
    • 1 cup dried figs, chopped
    • 2 large eggs
    • 1/4 cup minus 1 tablespoon olive oil*
    • 1 teaspoon vanilla extract
    • 3/4 cup brown sugar
    • 1/4 cup plain Greek yogurt
    • 4 1/4 ounces all-purpose flour
    • 4 1/4 ounces whole wheat flour
    • 1/2 teaspoon dried ginger powder
    • 1/8 tsp nutmeg (optional)
    • 1/4 teaspoon kosher sea salt
    • 1 teaspoon baking soda
    • 1 teaspoon baking powder
    • 1/2 cup chopped walnuts
    • 6 whole figs dried, thinly sliced across their length

*1 tablespoon olive oil + a little all-purpose flour for coating the loaf pan

Directions

1) Place a wire rack in the middle of the oven and preheat to 350°F. Coat a 8 1/2″ x 4 1/2″ loaf pan with a little oil and dust with a little flour.

2) Trim the ends off the zucchini and grate them into fine shreds. Transfer the zucchini into a larger strainer lined with cheesecloth or muslin (or, my personal favourite – a Du-Rag!). Bring the ends of the cheesecloth together and squeeze the zucchini to release as much as liquid as possible. Discard the liquid (or freeze in an ice-cube tray for later use in a vegetable stock) and place the shredded zucchini in a large mixing bowl.

039 Fig Zucchini Walnut Bread

3) Add the chopped dried figs to the zucchini along with the eggs, oil, vanilla, sugar and yogurt. Mix with a wooden spoon until combined.

Fig Zucchini Walnut Bread Fig Zucchini Walnut Bread

4) In a separate bowl, whisk the flours, ginger powder, nutmeg, salt, baking soda, and baking powder. Gradually combine the flour mixture into the wet ingredients. Fold the walnuts into the batter and then transfer the batter into the prepared loaf pan. Place the thinly sliced whole figs in a single center row on top of the batter in the pan.

Fig Zucchini Walnut Bread Fig Zucchini Walnut Bread

5) Bake for about 45-50 minutes, rotating once during the baking process. To test for doneness, stick a knife in the centre – if it comes out clean (with a few crumbs), it’s done. Allow the bread to cool for 10 minutes in the pan and the run the edges of a knife around the cake. Remove and allow the bread to cool on a wire rack. Keeps for 3-4 days at room temperature.

Fig Zucchini Walnut BreadFig Zucchini Walnut Bread

Share this:

  • Tweet
  • Share on Tumblr

Like this:

Like Loading...

My Kind of Food

16 Tuesday Jun 2015

Posted by julia chews the fat in Lunch & Dinner, Vegetarian

≈ 8 Comments

I first heard of Yotam Ottolenghi about four years ago, at an all-ladies, vegetarian dinner party (if you needed proof of my G-rated social circles, there it is). Arriving after a long day at work and an interminable commute, I gave a few quick hellos before making a beeline for the appetizer table, zeroing in on a bowl of dip nestled in a ring of pita chips. Thinking it was baba ganoush, I was expecting something neutral, familiar, and a little inert. But after the first bite, I got sucker-punched by something altogether different – a mix of tangy and sweet, bitter and earthy, creamy and light. I never thought I could get excited about dip, but this stuff was a revelation. Omagah wha iv dis schtuff? I asked my host, mouth full, with a second chip already half-submerged in the dip. Have you heard of this cookbook called Plenty?, she asked. By Ottolenghi? I shook my head no. She found the cookbook and flipped through it until she came to the recipe for Burnt Aubergine with Tahini. This is what you’re eating. Isn’t it great?

That would mark the beginning of my love affair with Ottolenghi, now four years strong. It’s rare that I want to cook all of the recipes in a cookbook (in fact, I collect more cookbooks than I actually use), but when I flip through my copies of Jerusalem, Plenty, and Plenty More, they’re bookmarked with so many Post-Its they look like fringed piñatas, ready to burst, becoming some of my most reliable, well-thumbed kitchen companions. Recent Ottolenghi discoveries include honey-roasted carrots with tahini yogurt, grilled lettuce with farro and lemon, urad dal with coconut and cilantro, brussel sprouts with caramelised garlic and lemon peel, and alphonso mango and curried chickpea salad (which I actually just made last night and completely demolished in one sitting).

Through his cookbooks, I’ve learnt how delicate plays on flavour – like adding za’atar or sumac to roast chicken, or lime zest to a salad – can elevate a dish without overwhelming it. He strikes that tricky balance between what’s familiar and novel, what’s subtle and bold. Nothing in his cooking is explicitly for show. There are no obvious fireworks; no molecular gastronomy on display. Just well-balanced, unfussy, honest food that is delicious and gorgeous and can be made easily with your own two hands.

In short, my kind of food.

Below is one of my favourite Ottolenghi recipes to make in the spring – Herbed Rice Salad with Fava Beans and Pistachios. This salad is great on its own, but would also pair up nicely with a piece of fish. Don’t skip the lime zest – that subtle pop of citrus is what makes this salad what it is.

Be sure to make it when fava bean season is at its peak.

Fava beans

Yotam Ottolenghi’s Herbed Rice Salad with Fava Beans and Pistachios – serves 6 as a side

Ingredients:

  • ½ cup wild rice
  • salt
  • 1 cup basmati rice
  • 1 dried Iranian lime (optional)
  • 1 cup fresh shelled fava beans (from about 1 pound of pods)
  • ½ cup chopped dill
  • ½ cup chopped flat-leaf parsley
  • ½ cup unsalted, raw pistachios
  • ¼ cup olive oil
  • 2 tsp finely grated lemon zest
  • ¼ cup fresh lemon juice
  • 1 tsp finely grated lime zest

Directions:

1) Cook wild rice in a medium pot of boiling salted water until tender and grains start to split, 35–40 minutes. Drain and set aside to cool.

2) Meanwhile, combine basmati rice, lime, if using, and 1 ½ cups water in a medium saucepan, season with salt, and bring to a boil. Reduce heat, cover, and simmer 10 minutes. Remove from heat and fluff with a fork. Cover; let sit until water is absorbed, about 5 minutes. Let cool and discard lime.

3) Cook the shelled fava beans in a large saucepan of boiling salted water until tender, about 4 minutes. Drain, then transfer to a bowl of ice water. Drain again and peel them, by “pinching” the opaque, light green skins between your fingers until the bright green beans pop out.

Fava beans Fava beans Fava beans Fava beans Fava beans Fava beans

4) Toss wild rice, basmati rice, dill, parsley, pistachios, oil, lemon zest and juice, lime powder, and fava beans in a large bowl. Season with salt and serve.

Note: Fava beans can be cooked and peeled 2 days ahead; cover and chill. Wild and basmati rice can be cooked 2 days ahead; cover and chill.

fava rice salad fava rice salad

Share this:

  • Tweet
  • Share on Tumblr

Like this:

Like Loading...

Breaking Bread

31 Sunday May 2015

Posted by julia chews the fat in Breakfast & Brunch, Cooking For Your Peeps, Lunch & Dinner, Snacking, The Basics, Vegetarian

≈ 5 Comments

Homemade bread.

I’m a wimp when it’s come to those two words. As much as I like cooking, I’ve carefully avoided breadmaking for years, mostly for fear that it’s a labour-intensive process requiring special types of flour, fancy fresh yeast, elaborate kneading and expensive pieces of machinery, like electric bread makers and large mixers with paddle attachments. And that would just be to get the starter dough going. After that, there’d the issue of rising: Does it have to rise in a low heat oven? What if I don’t have a bread-proof setting on my oven? What if I kill the yeast? How will I know if I’ve killed the yeast? And so on and so forth.

Despite all this, I somehow own three cookbooks on bread – including Bernard Clayton’s New Complete Book of Breads, Soups and Stews, a hefty tome that has sat on the shelf undisturbed, for four whole winters now. I have an entire Pinterest board dedicated to bread, a place where I’ve been quietly stockpiling all sorts of recipes for leavened dough – from densely-flavoured sourdough to crackly baguette to Japanese milk toast – none of which I’ve actually made. But, despite my trepidation, I’m clearly interested in bread – the traditions, the techniques, the delicate alchemy that allows a sticky mass to transform into something crispy and chewy and ethereally light, all at once. It’s a magical beast. The unicorn of food. I’ve just been too timid to get close to it.

Then one day, out of nowhere, I decided to just effing do it already. It happened when I was making lunch with my mom over a long weekend this May:

Me: So, what if I made bread today?
Mom: Yeah, sure. If you want something easy, you should try that no-knead one Mark Bitterman did for the New York Times.
Me: You mean Mark Bittman?
Mom: Yeah, yeah…him. Anyways, it’s so easy. Seriously. There’s a video too. (she finds me the video online). Here, watch it. It’s all there. It’s super simple, you’ll see.

This isn’t the first time I’ve heard of this no-knead recipe. My mom’s been a big proponent of it for years. It’s a version of the old European clay-pot method, modernised by baker Jim Lahey, of Sullivan Street Bakery in Manhattan, and then popularised by Mark Bittman when he did a piece on it for The New York Times. In the video, Lahey walks us through his recipe, step by step, starting with the introductory promise that it’s so incredibly easy, “even a six year-old” (“or a four-year old!”) can make it.

With that bold endorsement in mind, I figured that if any recipe was going to help me cross the threshold into breadmaking, this would be it. The simplicity of Lahey’s recipe is what ultimately sold me. You don’t need to muck around with special bread flour or proofing or extraneous kneading, nor do you need an expensive mixer or a professional oven. All you need is –

flour
yeast
salt
water
your two hands

That, and a screaming-hot cast-iron Dutch oven. The cast-iron is an important part of the alchemy in this bread recipe, creating just the right amount of steam to get an airy interior and a crisp exterior. The idea is you set the pot in a 500ºF oven until it reaches temp, then toss in your dough (cover on for a bit, then cover off) and bake on high heat until the bread becomes crackly and lightly caramelised on the outside. Cast-iron pots retain heat extremely well, mimicking the qualities of a stone oven and a steam-injected oven at the same time. So, whether you’re a six year-old, or a four year-old (or even a monkey), the cast-iron pot will help your first attempt at bread look like this:

baked miche

It’s seriously one of the easiest things you’ll ever make. And when you’re cracking into that first piece of freshly baked bread, straight from your oven, you’ll be so happy you made a go of it.

Happy baking, friendlies x

—–

Notes on the recipe:

  • the dough needs at least 12 hours for the first rise, then another 2 hours for the second rise. Start the night before and let it rise overnight. The longer you let the dough rise (min. 12 hours, max 24 hours), the more flavourful it will become.
  • when my mom discovered this recipe, she quickly starting making her own adaptations, one of which resulted in a drop-dead gorgeous focaccia recipe. All you need to is add a bit of olive oil to the dough and stretch it out on a pizza pan for baking. (I’ve included her recipe for a cherry tomato version below). If you decide to make both the bread and the focaccia, just double the dough recipe.

Note on Dutch ovens: if you don’t already have one, it’s an insanely useful kitchen tool have. They’re especially practical in the winter – to make soups, stews, curries – but are a must-have for this bread recipe. If you’re worried about the financial commitment, remember that you don’t need to buy the top-of-the-line models (the ones that can go for upwards of $350 a pop); I got a Lagostina version on sale at Canadian Tire for $90 and it works like a charm. They usually come with a 10 or 25-year (and sometimes, lifetime) guarantee, so they’re in it for the long haul. Just make sure that you get one with a 500ºF-resistant metal knob on the cover so that you can make your bread (the ones that come with a hard plastic knob are no bueno).

Jim Lahey’s No-knead Bread – makes one white miche

Ingredients

  • 3 cups all-purpose flour
  • ¼ tsp dry yeast (like Fleischmann’s)
  • 1 ½ tsp salt
  • 1 ½ cup water

Crucial kitchen tool: cast-iron Dutch oven

DIRECTIONS

STEP 1 – RISING

1) In a mixing bowl combine the flour, yeast and salt and blend with a whisk.

2) Pour in 1 1/2 cup of water and mix with a wooden spoon. Scrape any excess flour from the bottom and sides of the bowl, making sure the ingredients are well incorporated and form into a ball. The dough will have a stringy texture.

3) Place a piece of plastic wrap on the bowl to avoid the dough from drying out. Allow to rise in a warm dry, and draft free place for at least 12 hours and up to 24 hours. (I left mine at room-temperature on the counter-top overnight.)


STEP 2 – FOLDING & SECOND RISING

1) Dust a large piece of parchment paper, measuring about 24 inches with flour to prevent the dough from sticking during its second rising. Scrape the risen dough onto the floured parchment paper.

2) Sprinkle some flour on the dough and on your hand to prevent sticking. Lightly pat down the dough with your hands to form a piece measuring approximately 10 x 10 inches.

3) Fold one side to the centre; then fold the other side to meet the edge of the first side, like a book (see images below). Take the top edge and fold to the centre; take the bottom edge and fold to meet the top edge.

4) Turn the dough and place the folded side of the dough on the parchment paper and dust with flour to prevent sticking. Loosely wrap the dough in the parchment paper and place on a baking sheet. Cover with a tea towel. Transfer to a warm and dry place and allow to rise a second time (2 hours).


STEP 3 – BAKING

1) Place the cast iron Dutch oven with its cover, on the second rack from the bottom of the oven. Preheat the oven to 500ºF.  Dust the smooth side of the risen dough with flour to prevent it from sticking to the bottom while baking.

2) Once the oven reaches the required temperature.  Remove the pot from the oven and take the cover off. Place the dough, folded side up into the pot and cover. Bake for 30 minutes at 500ºF.

3) Remove the cover, reduce the heat to 450º F and bake for an additional 15-30 minutes until the crust becomes golden brown. To check if the bread is cooked, remove the loaf from the pot and tap the bottom with a knife – if it sounds hollow, the bread should be done. Cool on a baking rack.

baked miche

baked miche - detail

baked miche

baked miche

baked miche - section

—–

Tomato Focaccia

Mom’s Cherry Tomato Focaccia – makes one 12″ pie

  • 2 cups cherry tomatoes, cut in half
  • 1 garlic clove, finely minced
  • 1 Tbsp dried oregano
  • 3 Tbsp extra virgin olive oil (plus a little more for the topping)
  • 2 Tbsp grated Parmigiano Reggiano
  • 1/4 cup sliced bocconcini or cubed mozzarella
  • salt flakes and freshly ground pepper (to taste)

1) Follow the directions for bread in the recipe above, adding 3 Tbsp of olive oil to the dough when you add the water.

2) After the first rise (see directions above), transfer the dough to a greased and floured 12″ pizza tray. Dust the dough lightly with flour, and with your hands spread out to the edges of the pizza pan. Place in a draft-free place to allow to rise a second time (2 hours).


3) While the dough is rising, prepare the topping by adding the prepared tomatoes in a bowl and toss with a drizzle of olive oil, the Parmigiano Reggiano, bocconcini (or mozzarella), minced garlic, and oregano. Season with salt and pepper.

Tomato Focaccia

4) Once the dough has risen a second time (after 2 hours), preheat the oven to 500º F. Spread the tomato mixture gently over the focaccia dough and bake at 500º F for 15-20 minutes.

Tomato Focaccia

Tomato Focaccia - detail

Tomato Focaccia

Tomato Focaccia - detail

Share this:

  • Tweet
  • Share on Tumblr

Like this:

Like Loading...

Getting to Cake

14 Thursday May 2015

Posted by julia chews the fat in Breakfast & Brunch, Cooking For Your Peeps, Sweet Tooth, The Basics, Vegetarian

≈ Leave a comment

Blueberry-lined cake tin

I’ve fixated on these photos and this blank page for longer than I’m proud to admit. It’s been an uncomfortable dance – coming back to the page at least a half dozen times, starting, stopping, flipping sentences, deleting whole paragraphs, trying the whole thing over from scratch. At one point, I even poured myself a glass of bourbon, thinking that if nothing else was helping, it might. (It didn’t. I got heartburn instead). At that point, I started wishing I had a typewriter – not because I thought it would solve my writing issues, but because I fantasized about ripping the page from the machine’s roller, crumpling it into a ball, and tossing it unceremoniously into the trash can, along with my frustrations. A bit of visceral, paper-crunching therapy would be nice right now. Somehow, pressing down aggressively on the backspace button isn’t half as satisfying. But, this is real life, not a smoky film noir, so I’ll have to content myself with the sticky backspace button on my I’m-old-and-I-almost-died-but-haha-I’m-not-dead-yet-so-you’re-still-stuck-with-me-you-cheap-bastard! laptop. My only solace is knowing that we’re this much closer to getting to cake. Just a few more words and we’re there…

In the simplest of terms, what I’d like to tell you about this cake is this:

1) It’s drop-dead delicious
2) It’s absurdly easy to make
3) Everyone who tastes it, without fault, will ask for seconds (or thirds, depending)

I think these three points form a pretty solid endorsement, especially when it comes to baked sweets, which often get a bad rap for being fussy. It’s a fail-proof, fool-proof dessert, capable of making anybody’s palate swoon. The batter bakes up fluffy and light, and the blueberries become nice and syrupy, crowning the top in a smooth, indigo-tinged layer. You’ll be grateful to know about this cake the moment you get invited to a last-minute dinner party, or picnic, or office gathering, and you’re asked to bring the dessert!! when really you were hoping they’d ask you to bring the wine and cheese. It’s a cake that comes together really quickly and without much mess, whether you’re a dessert-making novice or a baking pro who’s just feeling a little lazy that day. Once you lay that beautiful thing in front of your dining companions, the pieces will glide effortlessly, one by one, off the serving plate until all that’s left are a smattering of crumbs, blue-tinged lips and happy bellies.

—–

Quick note on the recipe: I’m still using frozen blueberries right now, since we’re not in blueberry season in Quebec yet, but the recipe works with either – fresh or frozen. It’s entirely up to you.

Quick note on the pictures: for the final result, you’ll have to use your imagination – the cake got flipped, berry-side up, onto a serving plate much later in the day and the camera wasn’t nearby. Which is ok, because darting for the camera might have ruined the moment. To give you an idea, it will more or less look like this. When you flip the cake, remember to be bold – lay a serving plate on top of the pan, keep one hand on the plate and one hand on the bottom of the cake pan, and flip, confidently and swiftly, in one go. If you’re worried about the berries sticking to the bottom of the pan, don’t fret – the butter at the bottom of the pan will ensure that the cake slips out of the pan without incident.

Now go forth and make cake!

Blueberry Upside Down Cake – adapted from Canadian Living Magazine

  • ¼ cup melted butter
  • ½ cup brown sugar
  • 2 cups blueberries (fresh or frozen)
  • 1 Tbsp lemon juice
  • ½ cup butter
  • ¾ cup granulated sugar
  • 1 egg
  • 1 tsp vanilla
  • 1 ⅓ cups all-purpose flour
  • 2 tsp baking powder
  • ¼ tsp salt
  • 1 tsp cinnamon (optional)
  • ¾ cup milk

1) Preheat the oven to 350°F.

2) In 9-inch square cake pan, combine melted butter and brown sugar; spread evenly on bottom. Spread blueberries evenly over top. Sprinkle with lemon juice.

3) Cream butter; gradually add sugar, beating until light. Beat in egg and vanilla. Sift or mix together flour, baking powder, salt and cinnamon if using. Add dry ingredients alternately with milk to creamed mixture.

4) Spread batter evenly over blueberry layer.

5) Bake in preheated oven for 45 to 50 minutes or until toothpick inserted in centre comes out clean. Let cool 10 minutes in pan, then turn out on to large flat plate.

Spreading the batter

Batter spread

Batter - detail

Baked cake

Baked cake - detail

Share this:

  • Tweet
  • Share on Tumblr

Like this:

Like Loading...
← Older posts
Newer posts →

Facebook

Facebook

Instagram

No Instagram images were found.

Recent Posts

  • Layers and Rows
  • Finding Buoyancy
  • February
  • Wednesday
  • Cross My Heart, Miso

Archives

  • May 2017
  • April 2017
  • February 2017
  • December 2016
  • November 2016
  • September 2016
  • August 2016
  • July 2016
  • June 2016
  • May 2016
  • April 2016
  • March 2016
  • February 2016
  • January 2016
  • December 2015
  • November 2015
  • October 2015
  • September 2015
  • August 2015
  • July 2015
  • June 2015
  • May 2015
  • April 2015
  • March 2015
  • February 2015
  • January 2015
  • December 2014
  • November 2014
  • October 2014
  • September 2014
  • August 2014
  • July 2014
  • June 2014
  • May 2014
  • April 2014
  • March 2014
  • February 2014
  • January 2014
  • December 2013
  • October 2013
  • September 2013
  • August 2013
  • July 2013
  • June 2013
  • May 2013
  • April 2013
  • March 2013
  • February 2013
  • January 2013
  • December 2012
  • November 2012
  • October 2012
  • September 2012
  • August 2012
  • July 2012
  • June 2012
  • May 2012
  • April 2012
  • March 2012
  • February 2012

Categories

  • Beverage
  • Breakfast & Brunch
  • Condiments
  • Cooking For Your Peeps
  • Cooking Solo
  • Cooking with Nonna
  • Food Away From Home
  • Food Writing
  • Holidays
  • Intro
  • Lunch & Dinner
  • Snacking
  • Soups
  • Sweet Tooth
  • The Basics
  • Vegetarian

Enter your email address to follow this blog and receive notifications of new posts by email.

Join 80 other followers

Blog at WordPress.com.

Cancel

 
Loading Comments...
Comment
    ×
    %d bloggers like this: