• Home
  • About

julia chews the fat

julia chews the fat

Category Archives: The Basics

January’s Refrain

15 Friday Jan 2016

Posted by julia chews the fat in Holidays, Sweet Tooth, The Basics, Vegetarian

≈ 5 Comments

After the debauchery comes le détox.

I ate so much. It’s awful. Salads from now on.

This a common refrain in January, one that we seem to come across just about everywhere – magazine articles, ads, blogs, the Lifestyle section of newspapers, and even the water cooler at work. It seems that everyone is in “detox”* mode, eliminating and abstaining after The Great Big Binge; groaning, biting their lower lips and confessing about just how bad they’ve been.

Fifty Shades of Fruitcake.

(*I have very strong opinions about the word “detox” as it applies to diet, which is why I’m putting it in quotations. Unless it’s being used to describe the process of someone coming off hard drugs or being treated for mercury poisoning, the word “detox” is a unicorn word – pretty, but imaginary.)

I think it’s fascinating how much we link food to guilt. Ingredients are compartmentalized into strict categories of “good” and “bad”, so that when we’ve had a slice of cake we’ve been naughty, but if we drink nothing but juice for ten days straight, we’re suddenly very, very good. Schedule in that colonic and you’re well on your way to sainthood.

With the turn of the calendar on January 1st, there comes reflection, regret, and the goal of redemption. How do I undo all the bad things I’ve done? How do I wipe the slate clean? The terms detox, clean eating and carb-free – the Holy Trinity of Orthorexia – have cemented themselves into the language we use to talk about healthy eating, especially around the time everyone’s making resolutions they won’t keep. And frankly, it

drives

me

mental.

I can understand the desire for self-improvement. I can get behind the idea of not eating in excess and limiting the intake highly processed foods. But I don’t think we’re doing ourselves any favours by adopting attitudes of excessive food guilt; nor do I think that a handful of gummy bears is the difference between living a virtuous life or a debased one.

There was  an article I read recently about the French approach to food (we’re using wide-sweeping generalisations about the French here, but still…), making the argument that food and pleasure can and should co-exist. I think there’s something to be said for the this model of eating, which not only allows for pleasure, but encourages it. You want a piece of cheese? Have it. A glass of wine. Yes. You eat your vegetables too – not because you have to, but because they’re vibrant and exciting and delicious and they too will make you feel good.  I recognise that, especially in the last decade or so, the French have also adopted some of the same health trends as North Americans (after all, sans gluten shops have been popping up in Paris and both BBC Travel and The New York Times posted articles about the demise of the baguette in France), but I still think that the French take their food very seriously, in that it’s supposed to be enjoyed, savoured, appreciated, not admonished on the basis of calories or the fact that it doesn’t abide to the diet du jour.

Which brings me to galette des rois.

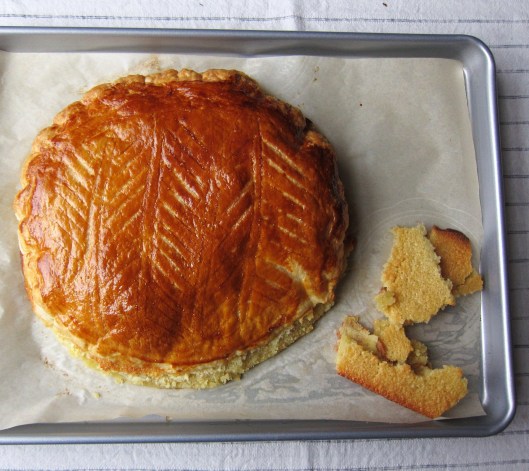
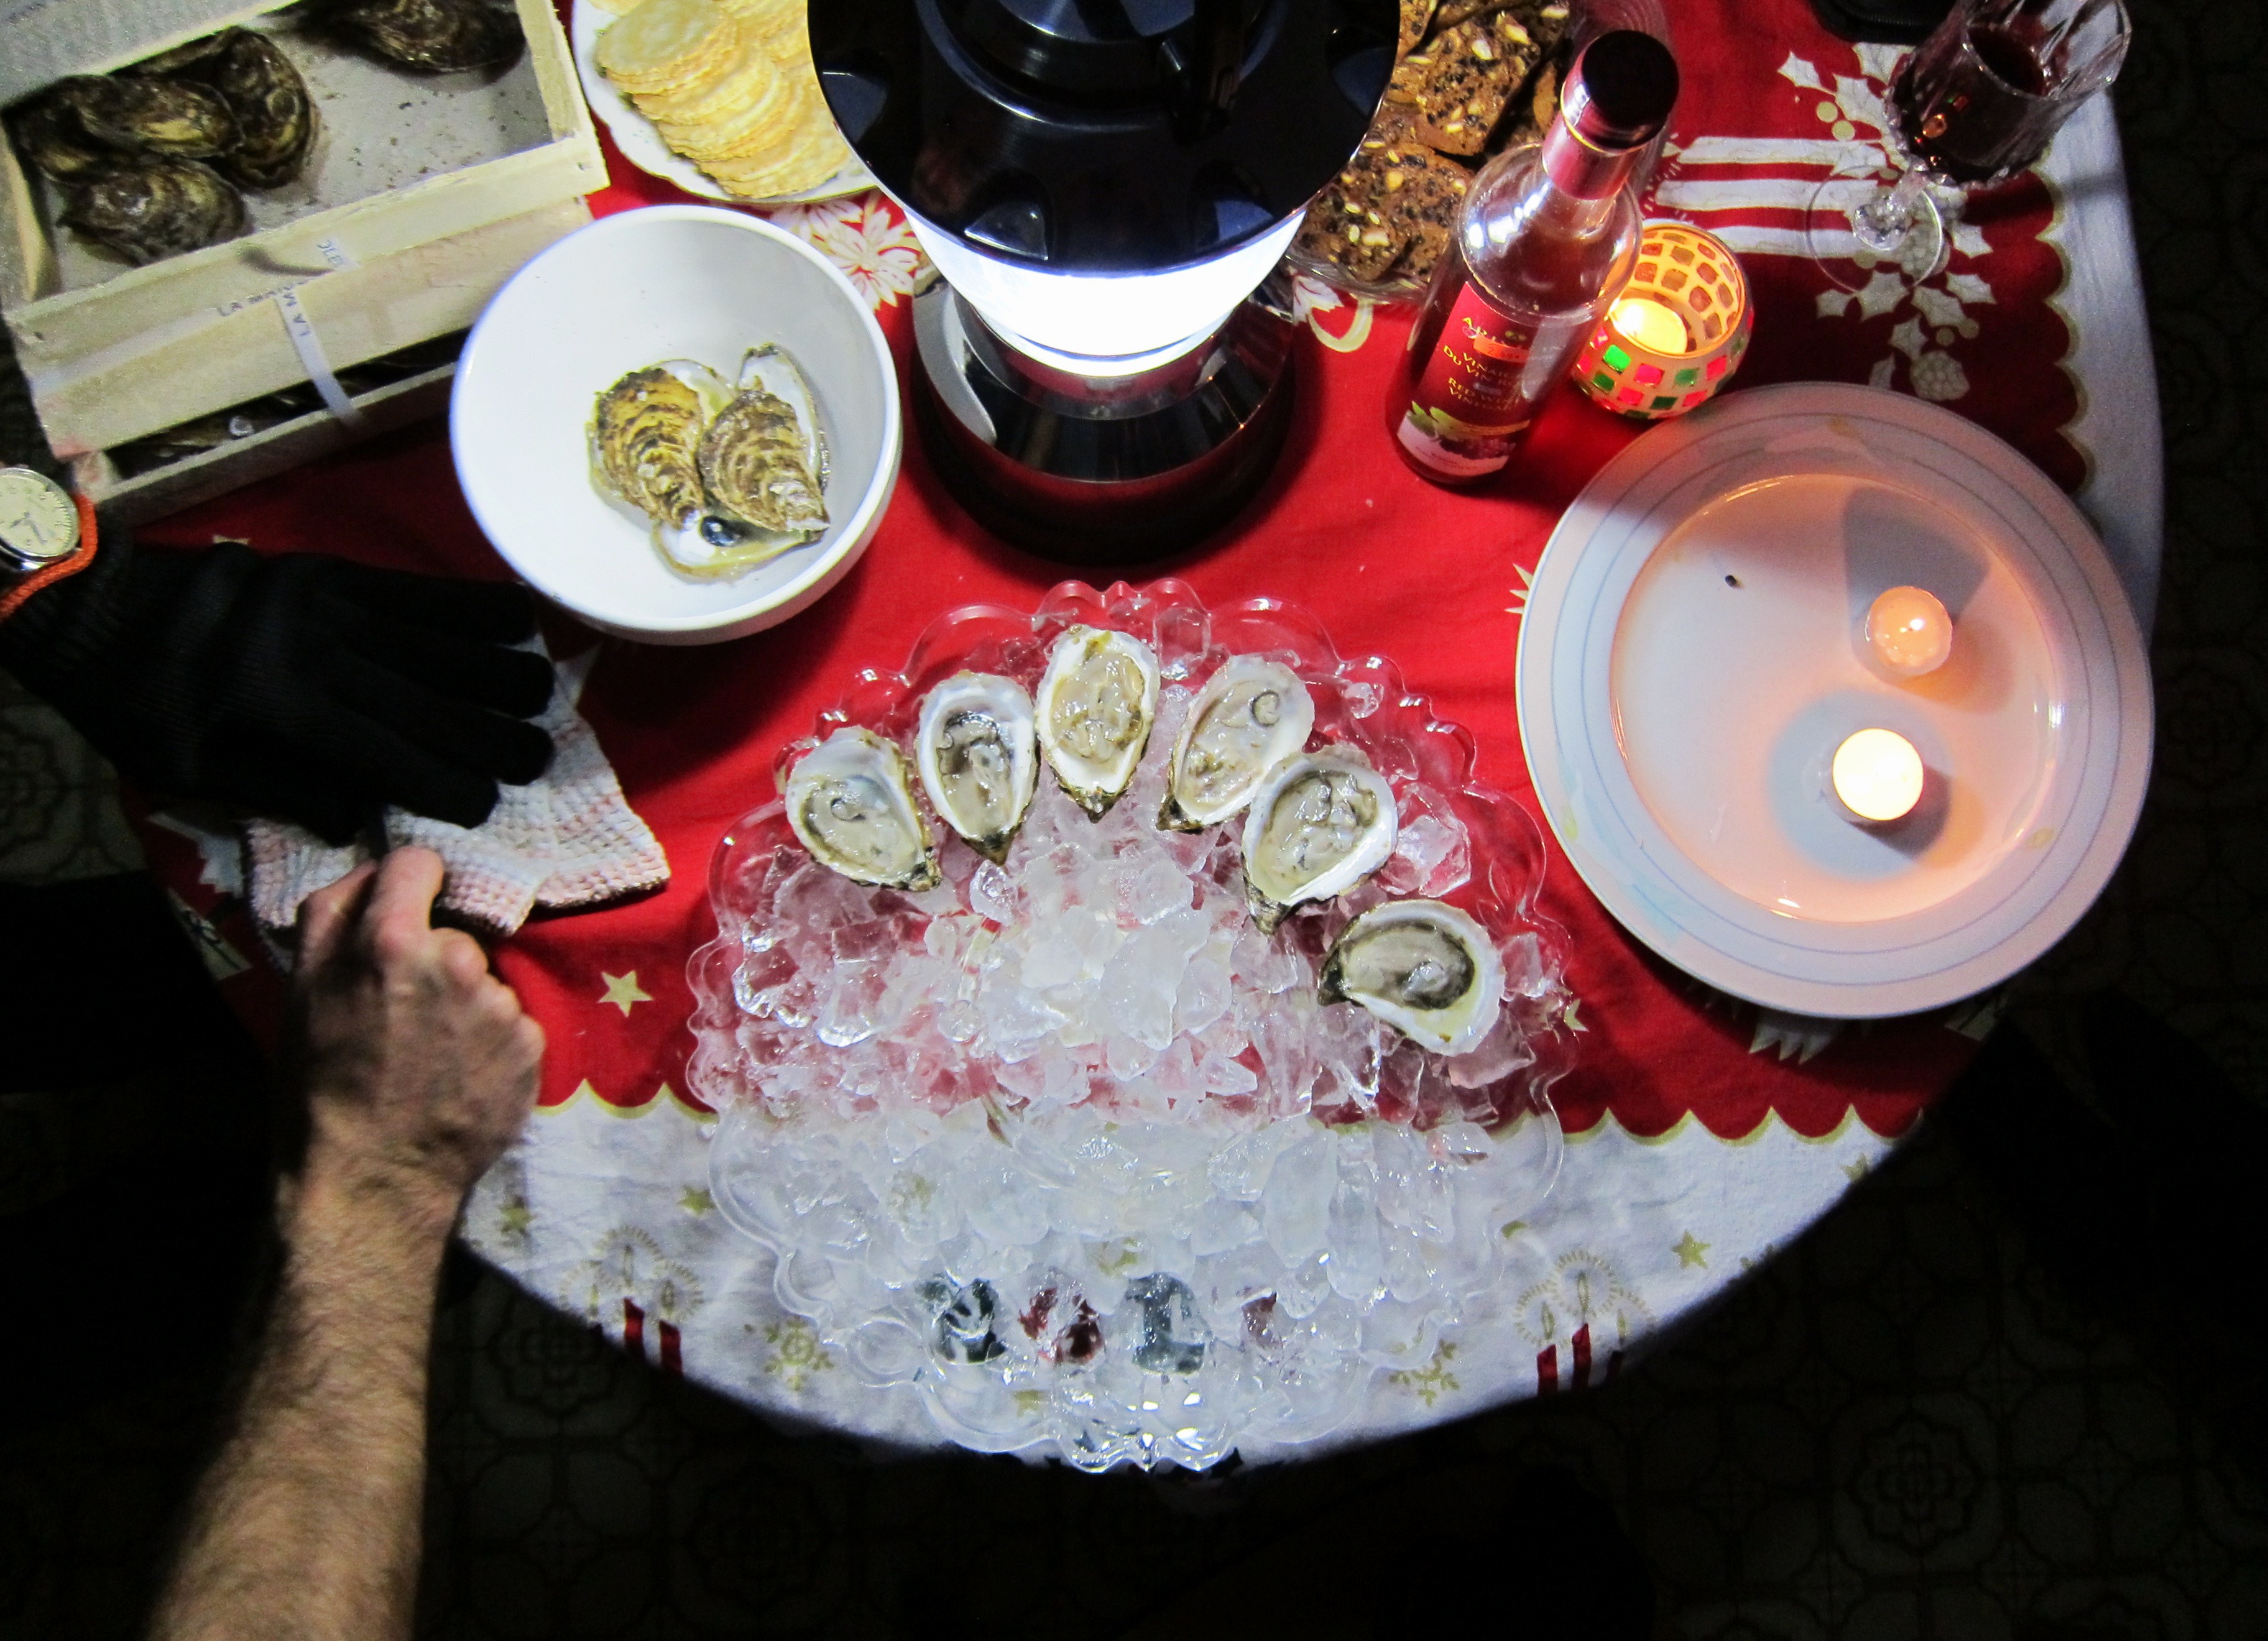
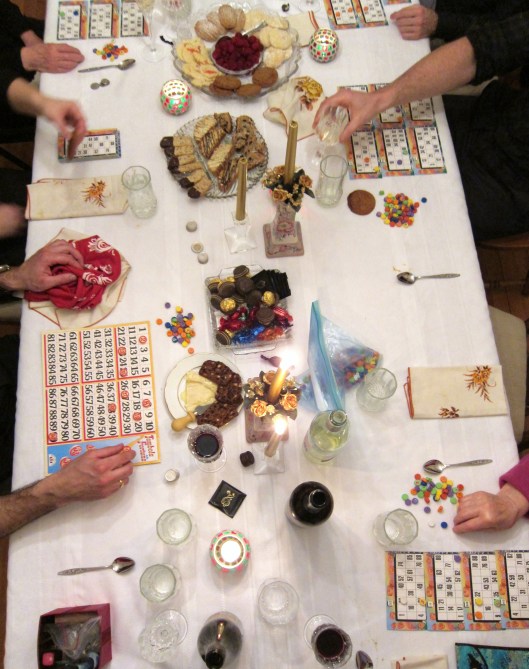
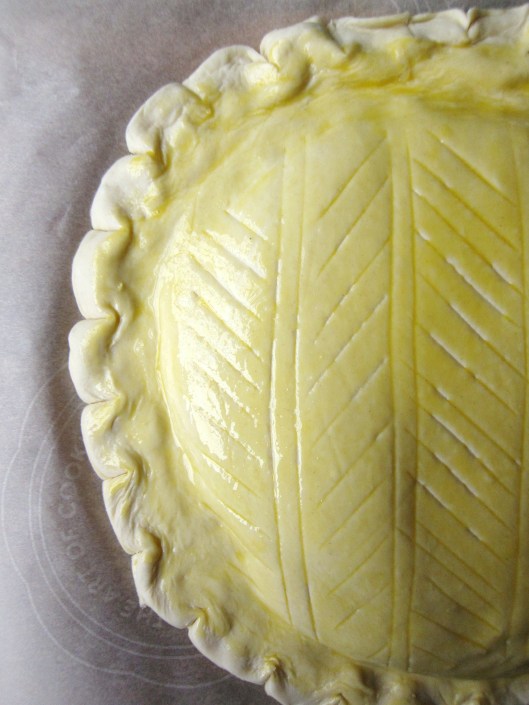
In January, while half of North America is suffering through Gwyneth-esque cleanses, the French are celebrating. In anticipation of the Epiphany, on January 6th, bakeries start to fill their vitrines with large, round cakes with scored tops called galette des rois – two layers of puff pastry, with crème d’amande (almond cream) in between. A fève (bean) is hidden inside the galette before baking and whomever gets the slice with the fève becomes “king” or “queen” for the day and gets to wear a nifty paper crown. Many bakeries in Montreal offer them through the month of January, but on a whim, I decided to try making one this year (with mixed results, see more below).

It’s celebratory food. It’s January food. It’s the food that we cherish because it’s special and because we don’t eat it everyday. And for those reasons, it’s meant to be enjoyed with gusto, not the guilt we’ve been trained to carry with us each time we raise a forkful of cake to our mouths.

So, I invite you – to pull up a chair, a plate, and dig in.

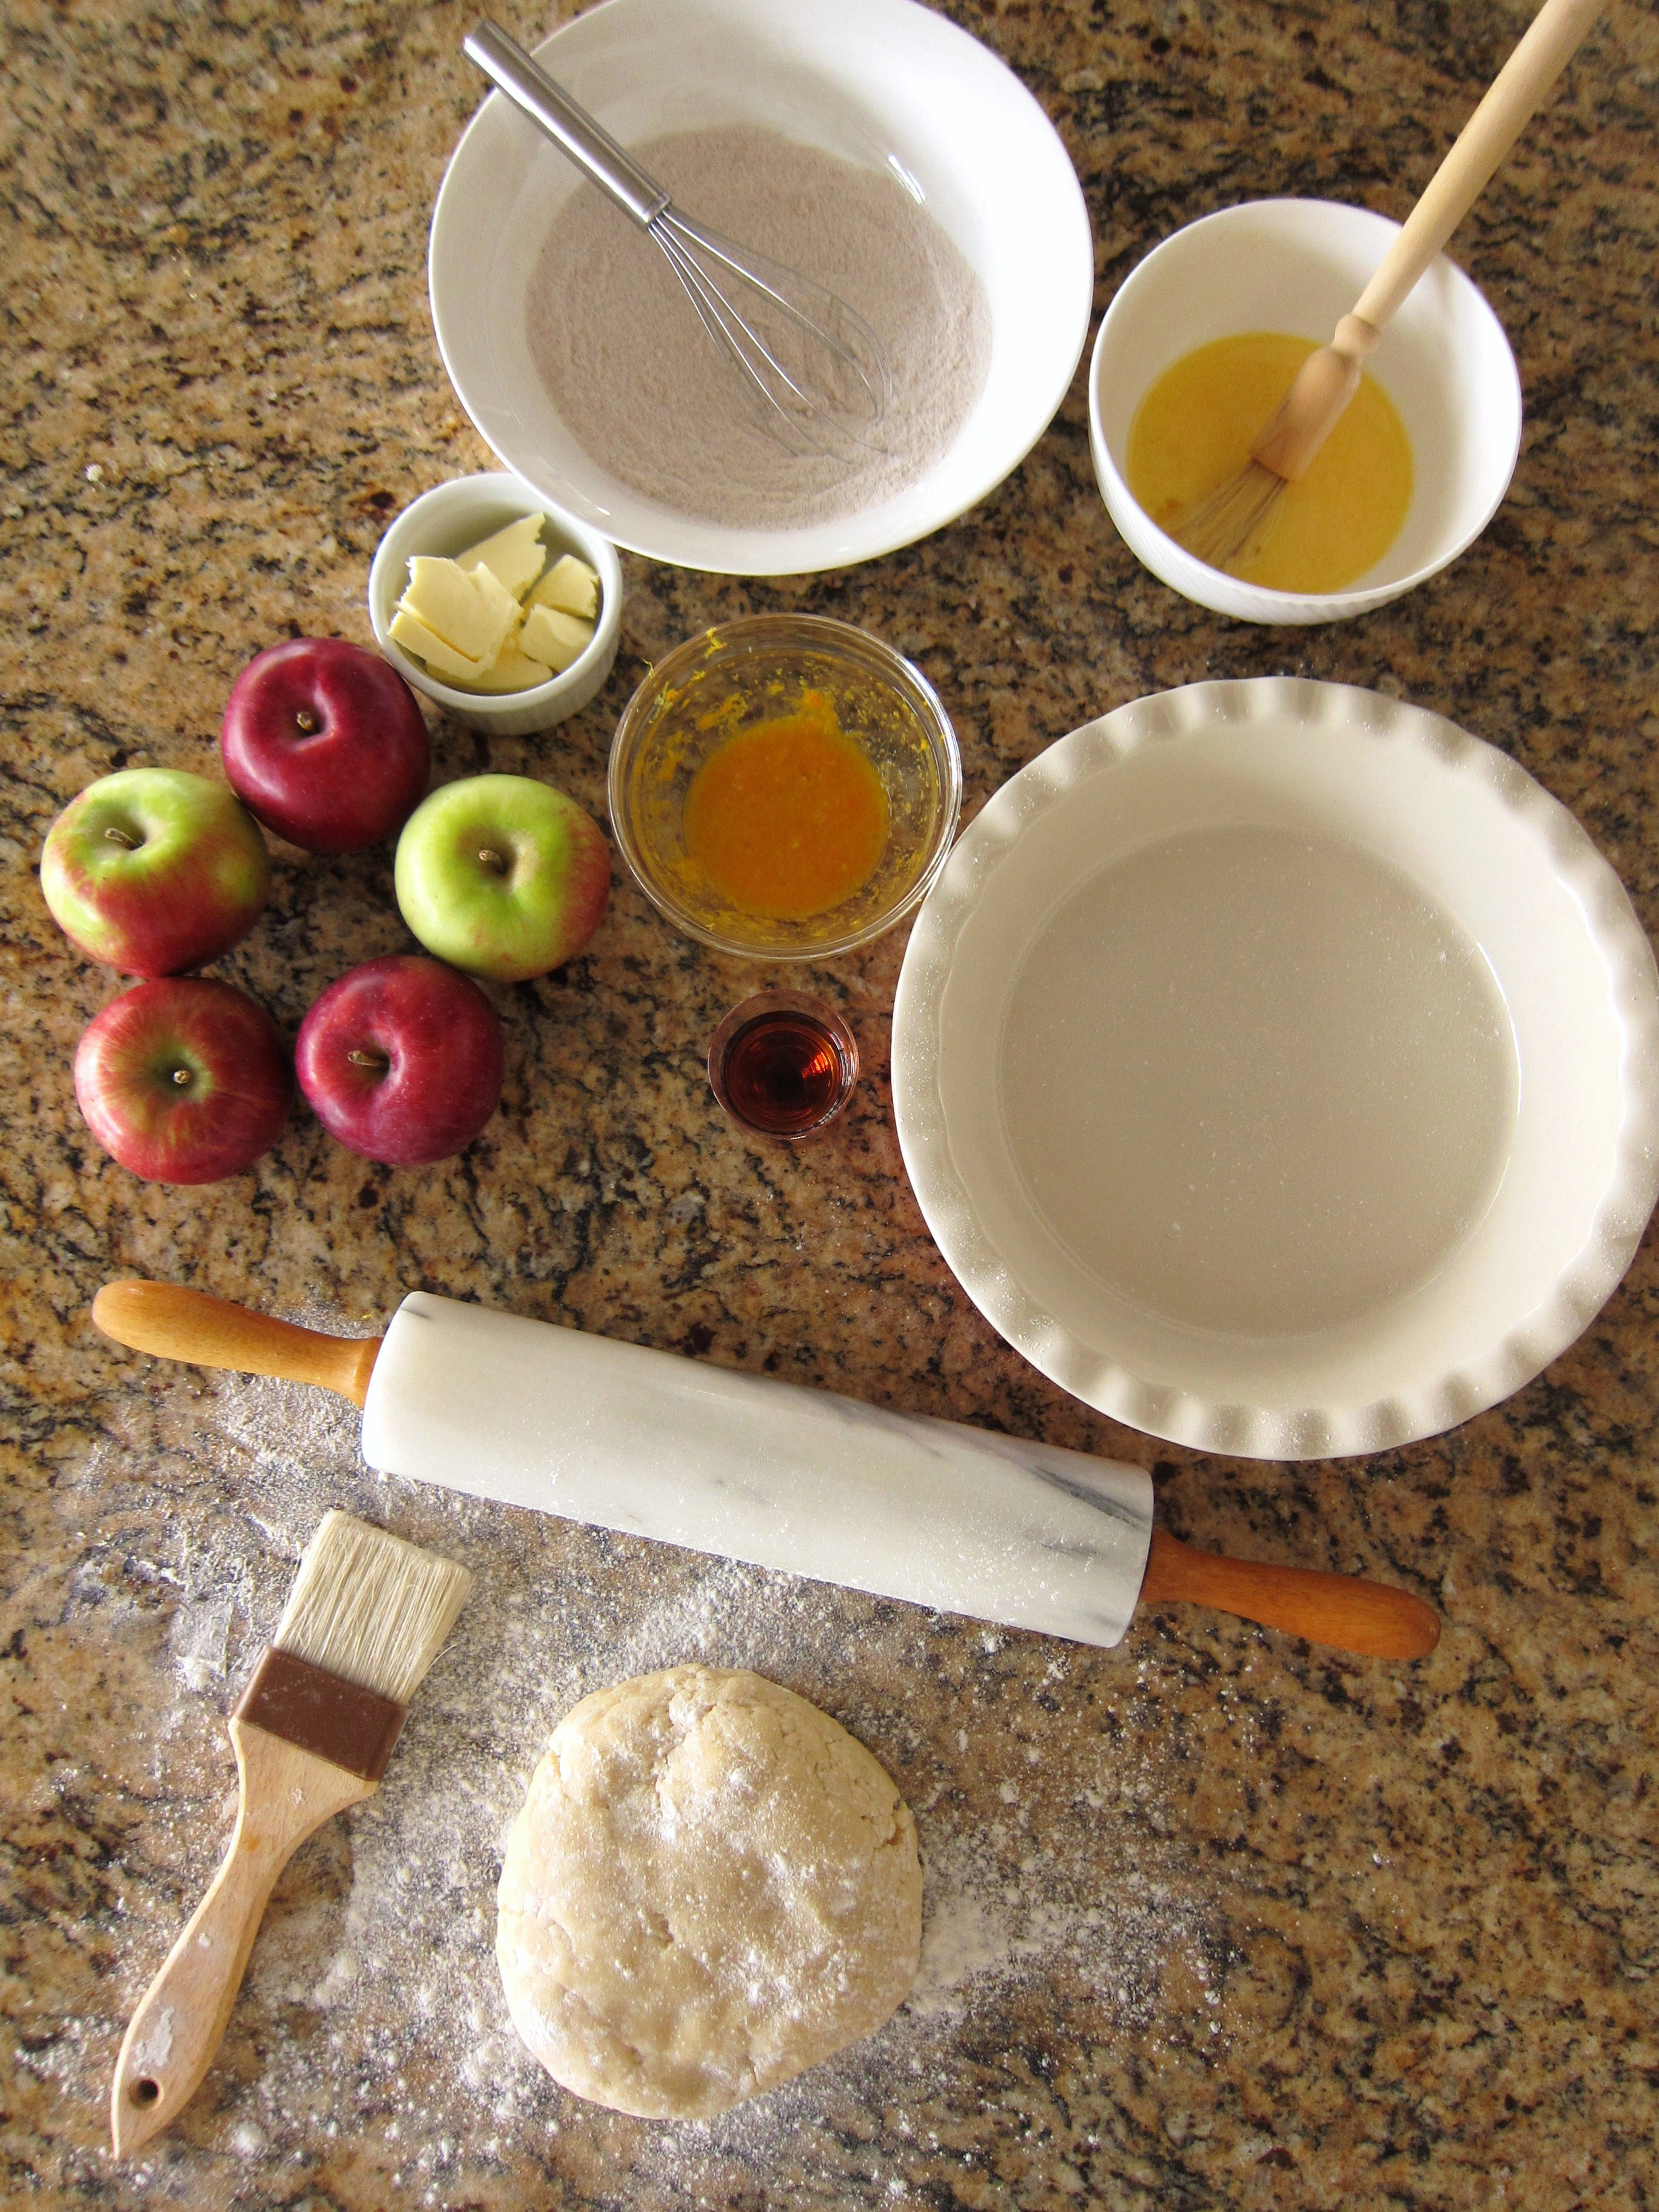
Galette des rois (serves 8) – from Clotilde Dusoulier’s site Chocolate and Zucchini

Note: in true French fashion, these measurements are in grams, allowing for more accuracy. If you don’t already have a kitchen scale, consider buying one – they come in different price ranges. I bought an electric one for 20$ a few years ago and it’s one of the best kitchen gadgets I own.

  • 500 grams (17 2/3 ounces) all-butter puff pastry, thawed if frozen
    For the crème d’amande:
  • 125 grams unsalted butter, softened
  • 125 grams granulated sugar
  • 130 grams almond flour (i.e. almond meal or finely ground
    almonds)
  • 8 grams corn starch
  • a good pinch sea salt
  • 2 large eggs
  • 1 tablespoon rum (or Grand Marnier)
    For the eggwash and glaze:
  • 1 egg yolk
    Accessories:
  • 1 porcelain trinket or dried bean
  • 1 paper crown

Galette des rois

Directions*:

(*what you see below might seem like a daunting list of directions, but I promise – especially since you’re using bought puff pastry – it’s a pretty simple recipe.)

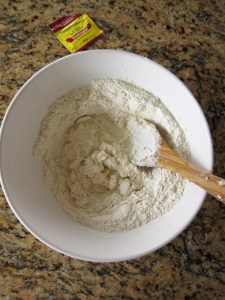
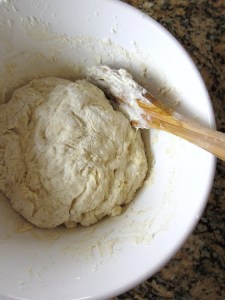
1) Prepare the crème d’amande: Beat the butter until creamy, but avoid incorporating air into it. In a separate bowl, combine the sugar, almonds, corn starch, and salt. Stir with a whisk to remove any lumps. Add to the almond mixture to the creamed butter and mix until smooth. Add the rum, then the eggs, one at a time, mixing well between each addition. Cover and refrigerate for an hour or overnight.

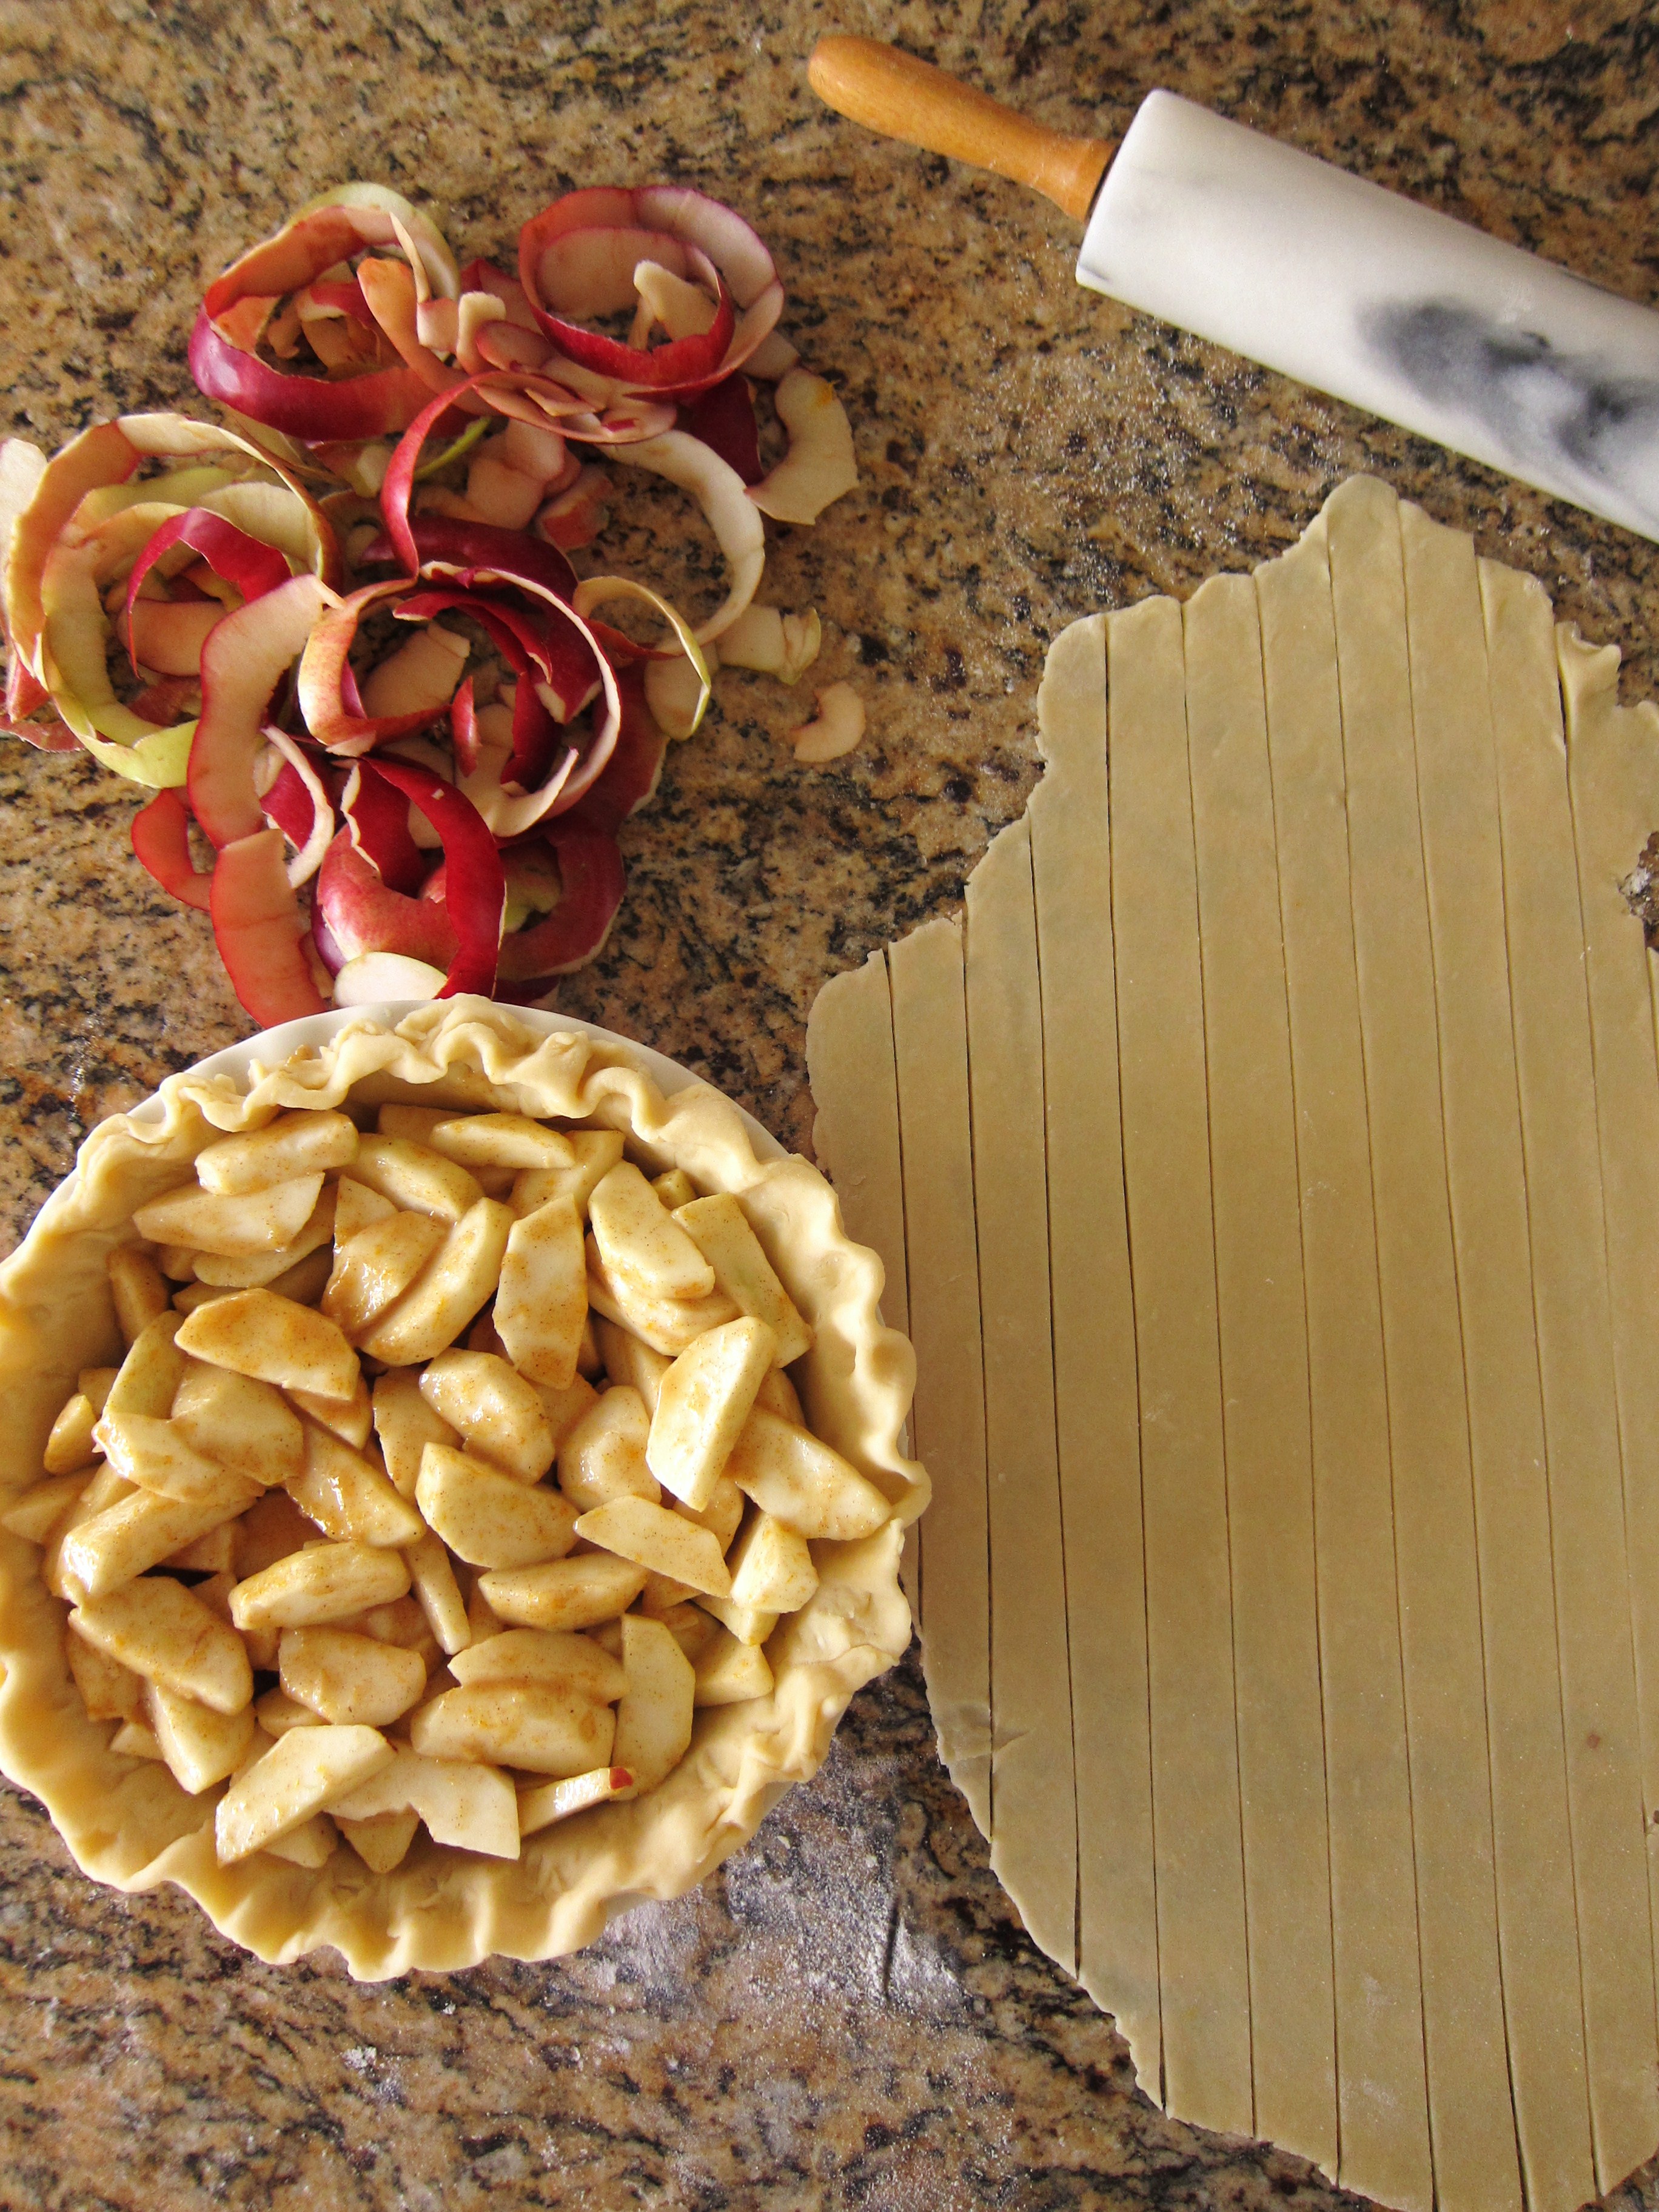
2) Roll out the puff pastry: Divide the puff pastry in 2 equal pieces, and roll each one out to form a rough circle a little larger than 12 inches in diameter. Use a sharp knife and an upturned plate of the right dimension to cut a neat 12-inch circle out of one, and a slightly larger one with the other, adding about 1/4 inch all around the edge of the plate.

3) Assemble the galette: Place the smaller of the two circles on a piece of parchment paper or a silicone baking mat. In a small bowl, combine the egg yolk with a tablespoon water (or milk, if you have it handy) until smooth. Using a pastry brush, brush the outer rim of the dough lightly with the eggwash by a width of about 1 inch. Make sure not to wet the actual edge of the dough, or it will impede its rise. Pour the crème d’amande in the center and spread it out inside the eggwash ring with a spatula. Place a porcelain fève, a dried bean, or the trinket of your choice in the crème d’amande. Press it down gently to bury it. Transfer the second round of dough precisely on top of the first, smooth it out gently over the crème d’amande to remove any air pockets, and press it down all around the sides to seal.

4) Score the galette: Using the back of the tip of your knife (i.e. the dull side), draw a decorative pattern on top of the galette, using just enough pressure to score the dough without piercing it (skip to 7:30 of this video for an example of scoring design) (I free-styled it!). Brush the top of the galette lightly with the egg wash: again, make sure it doesn’t drip over the edges, or the egg wash will seal the layers of the puff pastry in this spot and it won’t rise as well. Using the tip of your knife, pierce 5 holes in the top dough – one in the centre, and four around the sides – to ensure an even rise. Transfer to a rimmed baking sheet lined with parchment paper (or silicone baking sheet, like a Silpat) and refrigerate for 1 hour. (Alternatively, you can place the galette in the freezer at this point, on the baking sheet, and bake it the next day).

Galette des rois

Galette des rois

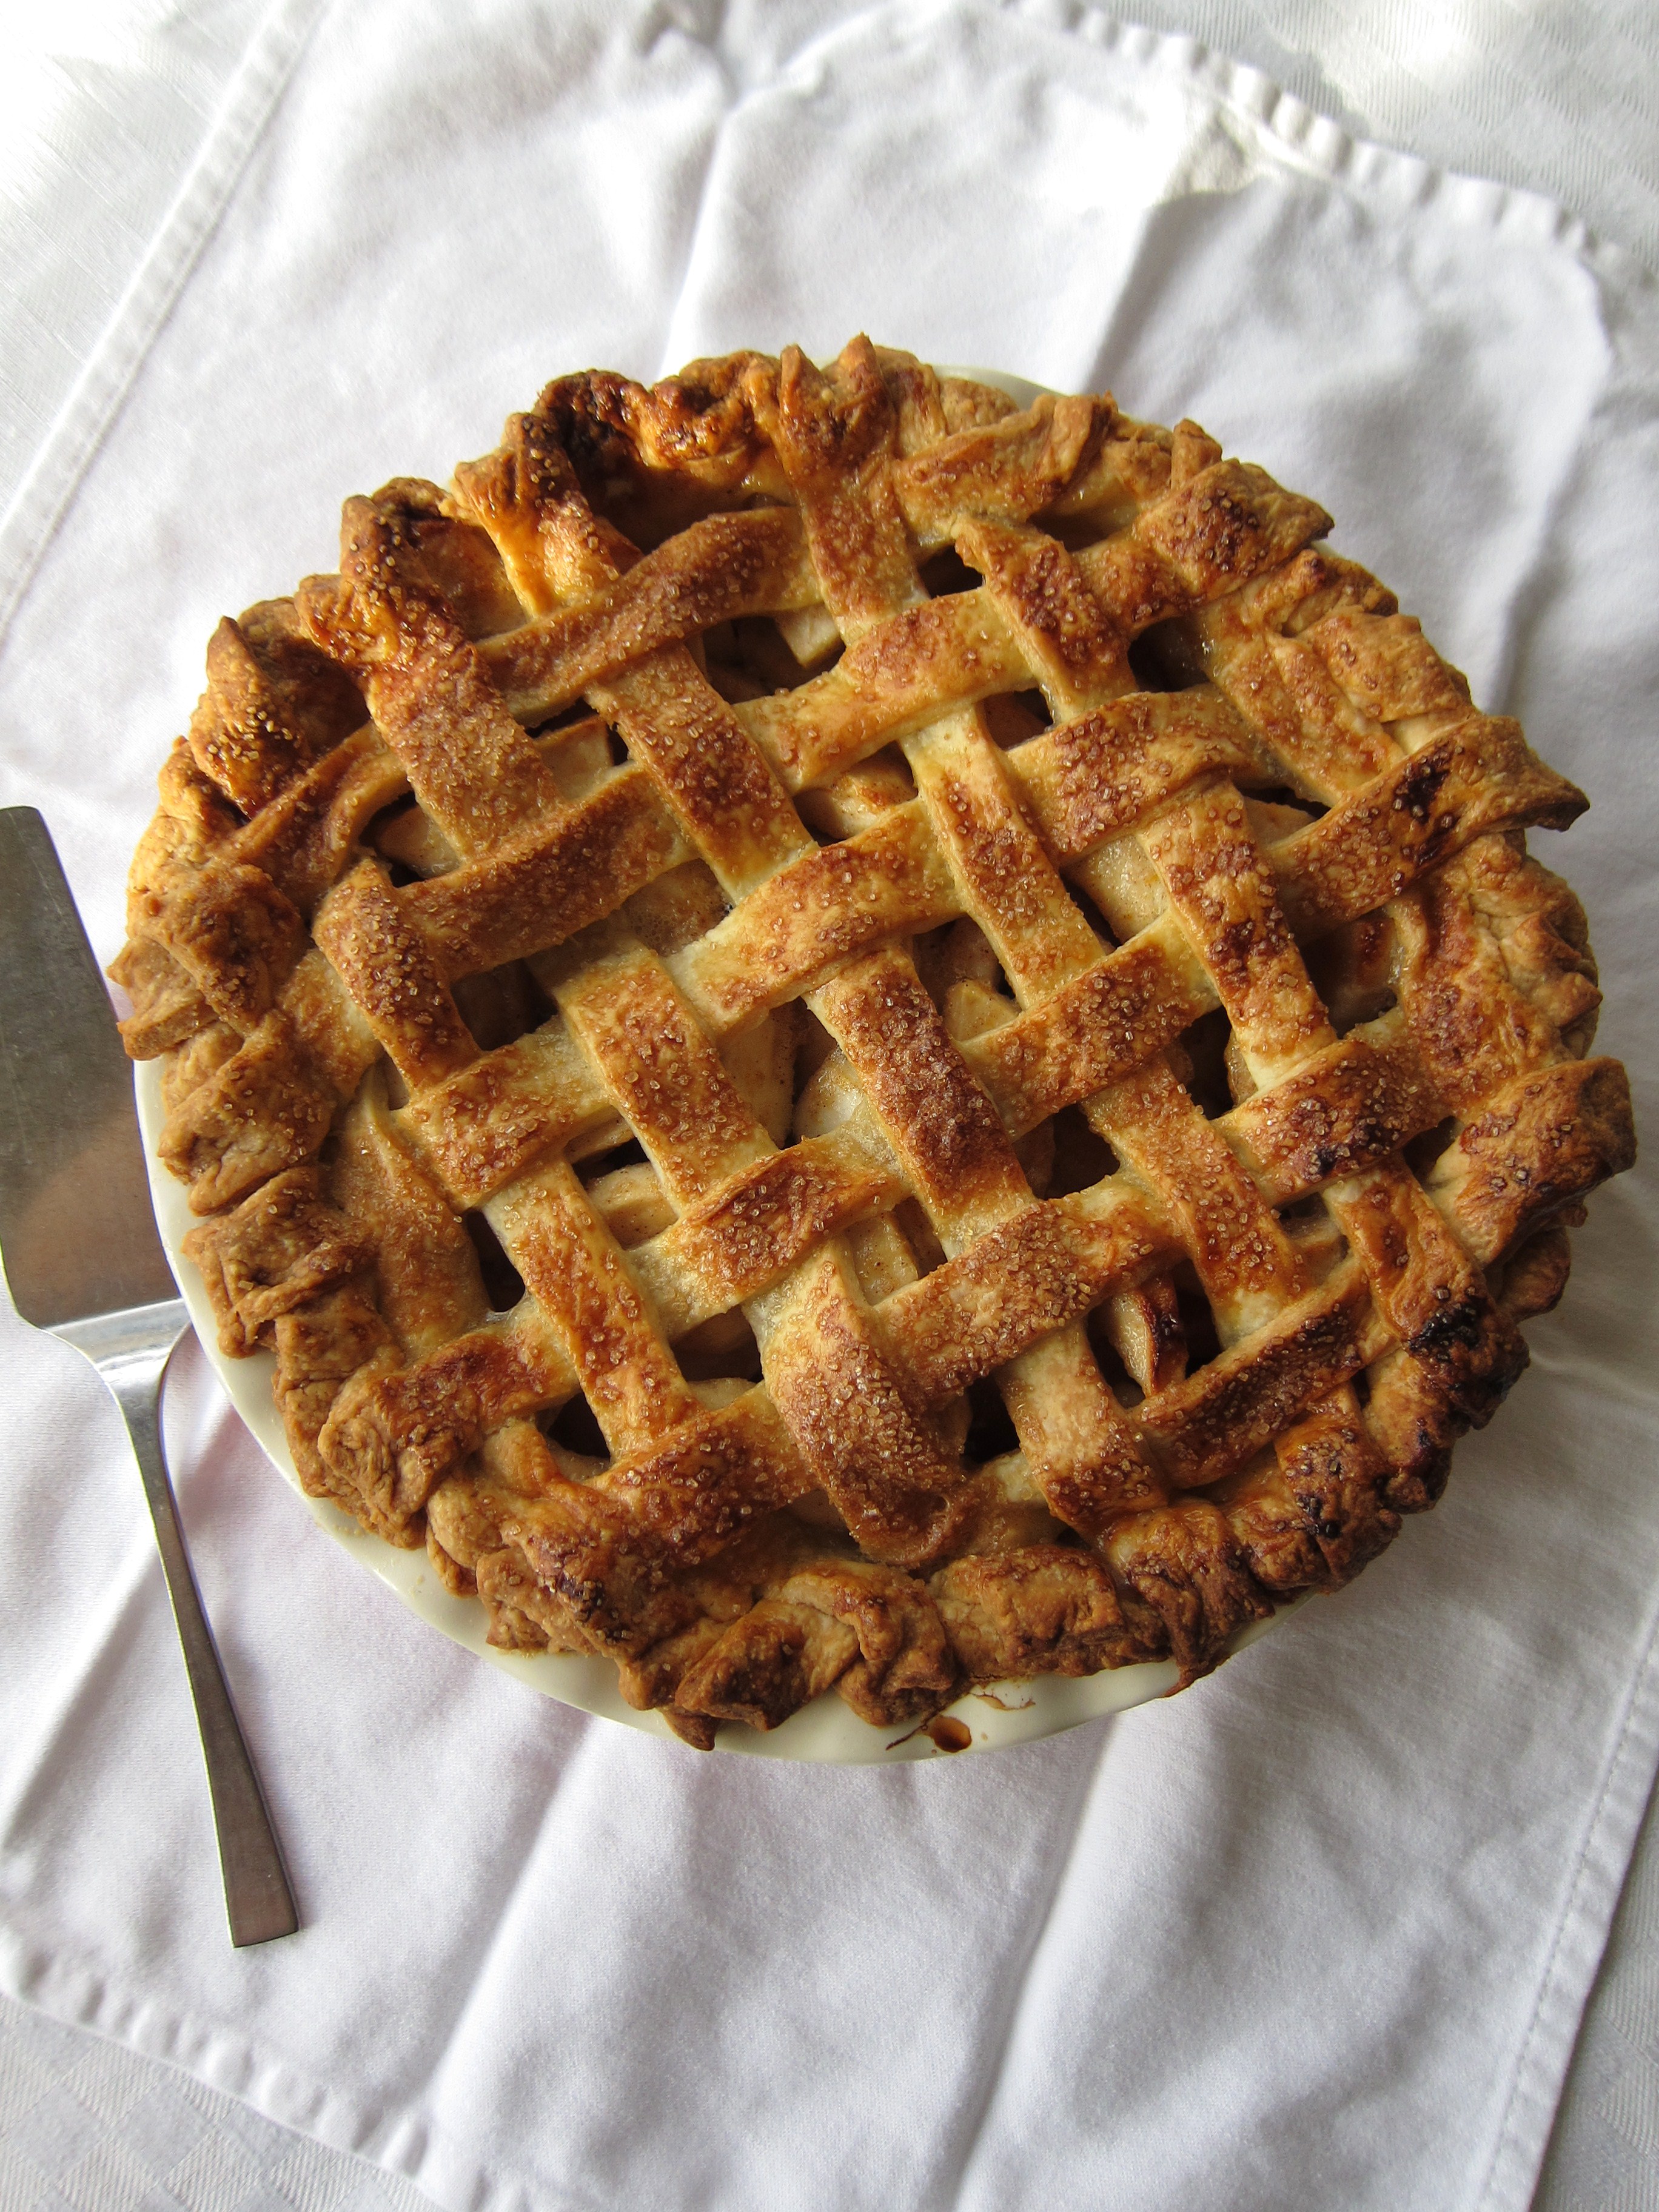
5) Bake the galette: Preheat the oven to 360°F; if the galette was in the freezer, take it out while the oven preheats. Insert the galette in the middle of the oven and bake for 30 minutes (35 if it was frozen), until puffy and golden brown. Place on a rack to cool completely and serve at room temperature (or, if you prefer, rewarm slightly in the oven before serving).

***WORD TO THE WISE: don’t attempt to slice the sides of the puff pastry after you’ve laid one layer on top of the other, as I did (I tried to make a more symetrical circle). Doing so will cause the crème d’amande to spill out in a dramatic fashion…

Galette des rois

That said, most things are fixable, especially when it comes to “rustic” home cooking…

(and it turns out that the baked filling is delicious on its own.)

Galette des rois

Share this:

  • Tweet
  • Share on Tumblr

Like this:

Like Loading...

100th

04 Monday Jan 2016

Posted by julia chews the fat in Cooking For Your Peeps, Food Away From Home, Lunch & Dinner, The Basics

≈ 10 Comments

We began the New Year by discovering a smattering of mold, a constellation of green and black across a metre of bubbled paint, on our living room wall, right behind the couch.

Yey, a new year! A fresh start! With some health-compromising fungus! Cool!

I’m trying not to see it as a bad omen, a bad start to the year; trying not to think about the fact that this nagging cough from my cold has hung on longer than usual; trying not to think about the cost of a dehumidifier in the days after the financial haemorrhage that is Christmas; trying not to be annoyed that our landlady’s solution to the humidity is to Pfft, just turn up the heat!, which only makes things worse by turning our place into a sauna any time we cook, hang laundry and shower within the same 48 hours (partly because our apartment wasn’t outfitted with a bathroom fan, nor a kitchen fan.)

But I’m trying – really hard – not to think about any of that, right after my man bleaches down the wall and sets up the rotating space heater, and I recount the time someone I knew had to be operated on because he had fungus growing under his cheeks, in his sinus cavity. La la la.

To distract myself, I’m writing this post, which WordPress tells me is my 100th. They even sent me a notification with an image of a miniature trophy and an exclamation mark. So I guess that means we should celebrate? You, me and this 100th batch of words? Let’s forget about fungus. Let’s instead turn our attention to tacos. Because in an ideal world, I think most celebrations would start with tacos. Don’t you?

I’ve actually been hanging onto this recipe for a few weeks now, from early December, when we had a bunch of people over for a two-cake, Planter’s punch, tacos-with-all-the-fixings-fiesta for my man’s birthday. It seemed fitting seeing that at the same time last year, we were in Tulum, beach combing, laying under palm trees, speaking broken (very broken) Spanish, and eating our weight in tacos.

We were partial to one thatch-roofed taqueria/bar right off the beach called La Eufemia; what they offered was straightforward, cheap, and more authentic than the Italian and Asian-fusion stuff the guys down the road were shilling. So it became a bit of a daily ritual – 2 Coronas and three or four tacos each, then a walk on the beach, or along the tiki torch-lined road. Simple, but perfect.

Tulum

TulumTulum

The fish tacos (pictured above) might have been La Eufemia‘s crowning glory, but their al pastor were pretty great too – pork shoulder rubbed in a mix of chiles, then slowly grilled until tender, served on tortillas with chopped onion, pineapple, and cilantro. We wanted to re-create something at home along the same lines, but without a grill or rotisserie, char-grilling the meat didn’t seem feasible. The other option was to slice the meat, then grill it, but seemed like a sure-fire way to dry it out. So instead, we left the pork shoulder intact, marinated it overnight (in the traditional al pastor spices), slow-cooked it, then once it was out of the oven, pulled the whole thing apart with two forks, and served it with fresh cilantro, onion and the pineapple it had been cooked with. The whole thing was smoky and sweet, tender and caramelised. We had leftovers for the better part of the week, but we didn’t complain because each time we put one together, it was like a little party, a fiesta, a miniature escape…

(…like the one this blog post gave me from that fuzzy, fungal surprise we found behind the couch. Thanks for bearing with me. Now you will be rewarded with tacos.)

Slow-Cooked Pork Tacos – marinade from Food & Wine
Serves 8

Notes:
1- this recipe easily doubles if you’re cooking for a crowd
2- the pork needs to marinate overnight, so plan accordingly

011

Ingredients

  • 1 tablespoon vegetable oil, plus more for brushing
  • 3 garlic cloves
  • 1 teaspoon dried oregano
  • 1/2 teaspoon ground cumin
  • 1/2 teaspoon pepper
  • 1/4 teaspoon ground cloves
  • 4 fresh guajillo chiles—stemmed, seeded and cut into 2-inch pieces
  • 1/3 cup pineapple juice
  • 1/4 cup white vinegar
  • 2 tablespoons chipotle in adobo, chopped (original recipe calls for achiote paste, but I wasn’t able to find any)
  • Sea salt
  • 2 pounds boneless, whole pork shoulder
  • 1/2 medium pineapple, peeled and sliced 1/2 inch thick
  • 1 medium red onion, sliced crosswise 1/2 inch thick
  • Warm corn tortillas, chopped cilantro, thinly sliced red onion, lime wedges for serving*

*Other (possibly inauthentic al pastor toppings): queso (or feta), shredded red cabbage, quick-pickled radishes, chipotle powder

DIRECTIONS

1) Preheat the oven to 325°F

2) In a medium saucepan, heat the 1 tablespoon of oil. Add the garlic and cook over moderately high heat, turning occasionally, until lightly browned, about 1 minute. Stir in the oregano, cumin, pepper and cloves and cook until fragrant, about 1 minute. Add the chiles and cook, stirring, until blistered in spots, about 30 seconds. Add the pineapple juice, vinegar and achiote paste and bring to a boil. Remove from the heat and let stand for 5 minutes.

3) Transfer the chile mixture to a blender and purée until smooth. Season with salt. Scrape the marinade into a large, sturdy plastic bag. Add the pork and turn to coat. Set the bag in a small baking dish and refrigerate overnight.

4) Preheat a grill pan. Brush the pineapple and onion with oil. Grill over medium-high heat, turning once, until lightly charred and softened, 3 to 5 minutes. Transfer to a roasting pan.

5) Remove the pork from the marinade. In the same pan used for the pineapple, grill the whole pork shoulder over medium-high heat until browned on all sides. Transfer to the roasting pan, nestling it among the pineapple and onion wedges. Pour remaining marinade from bag on top. Cover loosely with foil and bake in the preheated oven for approximately 3 hours (let the pork cook undisturbed for 2 hours, then begin checking it every half hour. The pork is done when it is fork-tender, in other words, when it easily falls apart.)

6) Shred pork with two forks; season with salt. Serve with warm corn tortillas, chopped cilantro, sliced red onion and lime wedges (and/or any other toppings of your choice).

Tacos al Pastor

Tacos al Pastor

Tacos al Pastor

Share this:

  • Tweet
  • Share on Tumblr

Like this:

Like Loading...

Real Christmas

01 Friday Jan 2016

Posted by julia chews the fat in Cooking For Your Peeps, Holidays, Snacking, Sweet Tooth, The Basics

≈ 3 Comments

“I can’t believe it’s already over.” – Mom, on the drive home after Christmas dinner

This holiday is charged with so much expectation, emotion and excitement that when it’s over and done – after only a few short days of feasting, hugging and imbibing – it’s hard to believe it ever really happened. Christmas sometimes feels like one big blur of flour and sugar, sloppy two-cheeked kisses, chest colds, Burl Ives, and glitter (bits of which we’ll be finding in our apartment til March.)

The funny thing is, despite the rushing around, the prep, the chaos, the outbursts, the kitchen meltdowns, the set-up, the clean-up, the mountains of dishes, I can’t imagine having it any other way. It’s bacchanal, it’s over-the-top, it’s insane. But it’s Christmas. Not the idyllic, gilded Christmases of the glossy magazines, or of Martha Stewart, or of people we come across on the Internet with seemingly perfect lives. It’s real. It’s messy. It’s exhausting. It’s emotional. But in between the messy bits comes lots of love and togetherness, laughter and gratitude. When we lost power on Christmas Eve – right before the seven-fish dinner was ready for the oven – we managed to pretend we weren’t worried, ignoring the three dozen shrimp quietly defrosting on the counter, opting instead to drink bubbly and eat crackers, while my (ever-optimistic, buoyant) brother shucked oysters by lamplight.

Things certainly could have been worse.

Oysters

When the power came back on, about an hour later, everyone cheered and kissed and toasted. It was like the final scene in It’s a Wonderful Life. Dinner was back on schedule, the wine flowed freely, and soon enough, the twelve of us gathered around the table for a feast fit for kings.
Christmas Eve Dinner

Once the last fork was laid down and the plates were cleared, Nonna pulled out her reading glasses, mom plated cookies and After Eights and we played Tombola, calling out the numbers in English, Italian, German, and French, so that everyone around the table could put their chips on the right spot. It didn’t feel good beating Grandma at Tombola three times in a row (it just instigated a fit of guilt-ridden, nervous laughter), but it did help me forget about my chest cold, as did learning – on Christmas Eve, no less – that the number 11 in German is both spelled and pronounced “elf”.

Tombola

Family time aside, the thing I relished most this Christmas – the thing that ended up being the most restorative part of this whole holiday – was the baking. Not because the results were particularly successful (deflated meringues, chewy crackers, and lacklustre cioffe were among the flops), but because I had the chance to do most of it on my own – quietly and leisurely, in crumpled pyjamas. With the year winding down, I came to realise just how much that time on my own – especially in the kitchen – has been (was, is)  a subtle luxury. When I used to hear food people say that baking was “meditative”, I’d roll my eyes, thinking Ugh, how cheesy… But it turns out they were right. When you bake on your own, it’s just you, the dough, and nothing else. The rest of it – the distractions and concerns, decisions and regrets – can stay suspended for awhile.

Somewhere between batches of madeleines and biscotti, shortbread cut-outs and these ginger cookies, I found that respite from an unquiet mind can come from nothing more than a little butter, sugar, flour and a rolling pin.

Who knew.

Here’s to making room for doing more of the things we love in the coming year. Wishing you all a bright and welcoming 2016 and looking forward to having you here again soon xx

—–

Orange Spice Madeleines – adapted from Port and Fin
Makes 16

Orange Spice Madeleines

Ingredients

  • 2 large eggs, beaten
  • ⅔ cup sugar
  • 1 cup + 1 Tbsp all-purpose flour
  • ½ cup + 1 Tbsp unsalted butter
  • ¼ tsp salt
  • 1 tsp pure vanilla extract
  • 1 large navel orange, zest
  • 1 tsp ground cinnamon
  • 1 tsp ground cloves
  • ¼ tsp ground cardamom

Directions

1) Melt the butter in a saucepan until it comes lightly browned and has a nutty fragrance (careful not to over-brown it – butter tends to burn rather easily). Set aside to cool slightly.

2) In a medium bowl, mix one cup of the flour, sugar, cinnamon, cloves and cardamom and set aside.

3) In a separate bowl, whisk the two eggs with the vanilla and salt until the eggs are frothy.

4) Add the wet ingredients to the dry ingredients and, with a spatula, stir until just combined. Take care not to over-stir.

5) Add the cooled melted butter and the orange zest and stir. It may take a minute for the butter to blend into the mixture. Again, take extra care not to over-mix.

6) Cover the bowl and place in the refrigerator to rest at least one hour and up to overnight.

7) Prepare a madeleine tin by brushing the moulds with the extra tablespoon of butter and lightly dusting them with flour, tapping off any excess. Place the pans in the freezer for at least an hour.

8) Preheat the oven to 350°F. Remove the batter from the refrigerator and the pan from the freezer. Fill each mould with approximately one tablespoon of batter.

9) Bake the madeleines for 10-15 minutes until the edges are browning and the middle is puffed up slightly. Using your forefinger, press lightly on the center hump – the madeleines are finished baking when they spring back at your touch. Remove the madeleines from the oven and let cool for 2 minutes. Then gently loosen the madeleines from their moulds and arrange onto a cooling rack. Dust with icing sugar (optional) and serve.

Orange Spice Madeleines

Orange Spice Madeleines

—–

Hazelnut Biscotti with Orange Zest – from Canadian Living’s Christmas
Makes about 24

Hazelnut Biscotti

Ingredients

  • 1 3/4 cups all-purpose flour
  • 2 tsp baking powder
  • 3/4 cup whole hazelnuts, skin-on, toasted* 
  • 2 eggs
  • 3/4 cup granulated sugar
  • 1/3 cup butter, melted
  • 2 tsp pure vanilla extract
  • 1 1/2 tsp grated orange rind
  • 1 egg white, lightly beaten
  • 1/4 cup dark chocolate, melted, for drizzling (optional)

*to toast hazelnuts, simply lay them out on a baking sheet and bake at 300°F for about 6-8 minutes, or until fragrant.

Directions

1) To measure flour accurately, lightly spoon flour into dry measure, without tapping, until cup is heaping; level off with blunt edge of knife. In large bowl, combine flour, baking powder and toasted hazelnuts.

2) In a separate bowl, whisk together eggs, sugar, butter, vanilla, almond extract and grated orange rind; stir into flour mixture until soft sticky dough forms. Transfer to lightly floured surface; form into smooth ball.

Hazelnut Biscotti

3) Divide dough in half, roll each into 12-inch long log. Transfer to ungreased baking sheet.

4) Brush tops with egg white; bake in 350°F oven for 20 minutes.

5) Remove from oven and let cool on pan on rack for 5 minutes. Transfer each log to cutting board; cut diagonally into 3/4-inch thick slices.

6) Stand cookies upright on baking sheet; bake for 20 to 25 minutes longer or until golden. Transfer to rack and let cool.

7) If you choose to add a drizzle of chocolate to your biscotti: wait until they’ve cooled; then collect a teaspoon of the melted chocolate in a teaspoon and sway it back and forth over the biscotti. Allow the chocolate to set at room temperature before storing.

Note: Biscotti can be stored in airtight container for up to 2 weeks.

Hazelnut Biscotti
Hazelnut Biscotti
Hazelnut Biscotti
Hazelnut Biscotti
Hazelnut Biscotti
Hazelnut Biscotti

—–

Hazelnut Shortbread – adapted from Bakers Royale
Makes about 40 cookies


Ingredients

  • 2 1/2 cups all-purpose flour
  • 1/2 tsp salt
  • 1 cup granulated sugar
  • 12 Tbsp unsalted butter, slightly softened
  • 1 large egg yolk
  • 2 tsp. pure vanilla extract
  • 1 1/2 cups toasted hazelnut, coarsely chopped
  • 1 cup coarse sugar
  • 8 oz. dark chocolate (for dipping)

Directions

To prepare and refrigerate the dough:

1) Sift flour and salt into a bowl; set aside. With a hand beater, cream the butter on medium-low speed until smooth, about 1-2 minutes. Add in the sugar and beat until light and fluffy, about 2 minutes.

2) Add in the egg and vanilla, beat until blended. Reduce the mixer speed low and in the dry ingredients in three additions. Turn off the beater and fold in the nuts with a wooden spoon or spatula.

3) Portion the dough in half and shape each half into 15x3x1 inch rectangular logs. Press coarse sugar into each side. Cover with plastic wrap and push both ends with your hand toward the centre to tighten the dough. Chill prepared dough for at least 3 hours.

When ready to bake:

4) Heat oven to 350 degrees F. Line a baking sheet with parchment paper. Remove chilled dough and slice cookies to ½ inch thickness. Place each cookie 1 inch apart on a parchment-lined baking sheet.

5) Bake until cookies are lightly browned, about 18-20 minutes. Transfer cookies to a wire rack to cool completely.

6) Melt chocolate on the stove-top by making a bain-marie; stir occasionally. Dip one corner of cookie into melted chocolate and place on parchment paper to set. (you can also sprinkle a bit of flaked salt over the chocolate before it sets.) Serve or store in an airtight container for up to one week.

Hazelnut ShortbreadHazelnut ShortbreadHazelnut ShortbreadHazelnut Shortbread

—–

Toasted Almond Meringues – from mom’s repertoire

Makes about 40

But first, a few notes on meringue…

Theoretically, meringue is supposed to be simple – whip egg whites into soft peaks, add sugar, whip into stiff peaks, bake. But in practice, there are a few key things to keep in mind: 1) if the weather is humid, your egg whites might not rise enough, causing the meringue to deflate and become chewy. 2) It’s important that the equipment you’re using be extremely clean (bowl, beaters). Any trace of grease or fat (say, from a stray egg yolk that makes it into the bowl) can compromise the results. 3) Overbeating can also be a problem, causing the meringue to become more like taffy in consistency. (If you’re looking for more tips, Martha’s actually got some good ones here .)

This time around, my meringues deflated when they were pulled from the oven (see final photo below), on account of the fact that I made them on an unseasonably balmy/humid day and probably overbeat them. To see what these meringues should actually look like, you can find some photos here from my mom’s archive.

To all you meringue newbies – I hope none of this scares you off making meringue. With practice, you start to get a sense of its quirks and soon you’ll be able to whip some up with your eyes closed. At that point you’ll discover that pulling a perfect batch of meringues from the oven can be obscenely satisfying…

Toasted Almond Meringues

Ingredients

  • 2 egg whites (or 1/4 cup thawed eggs whites)
  • 1/4 teaspoon cream of tartar
  • 1/2 cup brown sugar
  • 1 tsp vanilla
  • 1/2 tsp almond extract
  • 1 cup sliced almonds, toasted*

*to toast the sliced almonds, simply lay them out on a baking sheet and bake at 300°F for about 4-5 minutes, or until golden.

Directions

Preheat the oven to 300º F .

In a bowl, beat egg whites with the cream of tartar until soft peaks start to form. Gradually add the the brown sugar until stiff peaks form. Fold in the vanilla, almond extract and sliced almonds.

Spoon teaspoonfuls onto a cookie tray which has been lined with parchment paper. Bake in a 300º F oven for 30 minutes. Remove from baking sheet and allow to cool on a metal rack.

Note: these meringues will appear a little more “toasted” than regular meringue – that’s ok. It’s because it calls for brown sugar instead of white.

Toasted Almond Meringues

Share this:

  • Tweet
  • Share on Tumblr

Like this:

Like Loading...

Sugo di pomodoro

15 Tuesday Dec 2015

Posted by julia chews the fat in Cooking For Your Peeps, Cooking with Nonna, Lunch & Dinner, The Basics, Vegetarian

≈ 1 Comment

In the kitchen, there aren’t many things for which grandma, Nonna, has any steadfast rules. Tomato sauce, however, is one noteworthy exception. Here is an abridged, translated version of a recent conversation we had over the phone:

“Nonna, I made your sauce yesterday. Era buonissimo.”
“Did you put in the leek? And a bit of carrot? And celery?”
“Sì. Of course. Certo.”
“But not too much of each?”
“No, not too much of each.”
“And the butter? Il burro. Did you remember to put it in?”
“Yes, Nonna.”
“Ok, hai fatto bene. Brava. Good girl.”

I’ve made Nonna’s tomato sauce a hundred times over. Maybe even more, considering it was one of the very first things I learned to cook. Like all her recipes, the ones that I’ve been able to replicate with ease are like badges, tangible mementos of a culinary heritage – hers, mine, ours. It turns out that when you have Italian roots – even if it only makes up half of you – tomato sauce isn’t really just tomato sauce. It’s a birthright. You have to take special care to preserve it; to share it, but to safeguard it too.

Variations of sugo di pomodoro differ across Italy and across families – some might add aromatics, like basil; others sometimes add salt or a bit of sugar. It’s one of those great backbone recipes that’s slightly different from household to household. I think the key to Nonna’s recipe is poco poco, or “just a little bit”. You want just a little bit of leek, of onion, of carrot, of celery. These ingredients make up your base, your sofrito (or mirepoix in French); if you go overboard with any of them, the flavour won’t be balanced. That said, trust your judgement and your tastebuds – if you feel it needs more or less of anything, adjust it. As simple as it may be, this recipe gets better with practice. Keep making it, over and over, until you love it and think Nonna would too.

Nonna’s Tomato Sauce (sugo di pomodoro della Nonna)

Tomato Sauce

Ingredients

  • 1 medium onion, chopped (about 1/2 cup)
  • 1 small carrot, chopped (about 1/4 cup)
  • 1 small celery stalk, chopped (about 1/4 cup)
  • 1/2 small leek (white part only), chopped (about 1/3 cup)
  • 2 cloves of garlic, minced
  • 1 heaped Tbsp tomato paste
  • 800ml-1 L* canned or jarred tomatoes (preferably San Marzano)
  • olive oil (about 1/4 cup)
  • a knob of butter

*a large standard can of tomatoes is usually 796ml; we use homemade jarred tomatoes, each Mason jar containing 1L.

Notes! 

  1. Unlike a lot of recipes out there, Nonna doesn’t add salt, sugar, pepper, chili flakes or aromatics to her tomato sauce. This isn’t bolognese, so no meat either.
  2. You might have leftover chopped vegetables (i.e one small carrot be a little more that 1/4 cup); you can freeze any leftovers for stock or double the recipe.
  3. The sauce will be more flavourful if you allow it to simmer for an hour or so. (Grandpa used to start his sauce at about 10am to serve at lunchtime, but he was hardcore about sauce-making.)
  4. You can also use this sauce to cook meatballs the old-fashioned way; see recipe here.

Tomato Sauce

Directions

1) Heat olive oil and butter in a large saucepan or Dutch oven, on medium-high heat. Once the oil is hot (but not smoking), add the onion and sauté until softened. Reduce the heat to medium. Add the garlic and sauté for another minute. Then add the leek, carrot, celery and sauté together until everything is softened and the onion and garlic are golden to golden-brown. Add the tomato paste and sauté for another minute or so.

2) Add the tomatoes and stir to combine; reduce the heat to medium-low and allow to simmer, half-covered, for 30 minutes to an hour (depending on how much time you have). Remember to stir occasionally.

3) Remove sauce from the heat; blitz with a hand-blender until smooth, or leave as-is if you prefer a more rustic sauce. Serve on pasta, gnocchi, polenta, or pizza with a good sprinkling of parmesan. Alternately, you can freeze the sauce for up to 4 months.

Tomato Sauce

Tomato Sauce


Share this:

  • Tweet
  • Share on Tumblr

Like this:

Like Loading...

The Merits of Normalcy and Apple Pie

30 Friday Oct 2015

Posted by julia chews the fat in Cooking For Your Peeps, Sweet Tooth, The Basics

≈ 5 Comments

Many moons ago – twenty three years-worth to be exact – I spent a summer at ballet camp. It wasn’t your regular, run-of-the-mill summer camp, though. This one required an audition, in a big theatre, with throngs of people, and a long line of evaluators holding clipboards. This definitely wasn’t sleepover camp, à la Wet Hot American Summer.

I was ten at the time, and it was my dance teacher, Miranda, who had first suggested it. The National Ballet of Canada is coming to Montreal for summer camp auditions. Is that something you’d like to try? It was a conversation she had with my parents and I in her sunny office facing the studio, where Guy, the in-house pianist, made the room resonate with Chopin. I really think you’d have a chance of getting in. You should go! She’d known me since I was three and knew how much I loved dancing. I’d practically grown up at her studio, spending Saturdays and after-school hours spinning around on point, or clicking across the floor in character shoes. It was the place where I’d memorised dozens of choreographies; where I’d learned how to fondue, pas-de-chat, arabesque, and spin round and round on one spot without getting dizzy.

My memory of what followed that conversation in Miranda’s office isn’t crystal clear; I just remember saying “yes” to the proposal, having a geeky photo of myself taken in the local newspaper, and going to the audition, where dozens of chignoned girls milled around with numbers pinned to the front and back of their leotards. The room crackled with excitement; girls giggled and practised their pirouettes. A few others stood nervously, gnawing at their cuticles. After each round, the judges deliberated for an little while, trading notes, glances, murmurs. After some time, I was called back to the table to be told, with bright, toothy smiles, Congratulations! We would like to invite you to our summer camp at The National Ballet School!

I’d never seen strangers so ecstatic for me.

A few weeks later, our family unit of four packed into the Corolla and made the six-hour trip to Toronto, so they could help me get settled in. I shared a dorm room with a girl named Jocelyn – an effervescent, bright kid from BC who had big, blue, friendly eyes. Hi! I’m Jocelyn! Welcome to our room! We became instant friends – the kind you make when you’re in new, unfamiliar territory and you mutually decide that you’re going to stick together like glue. As far as ephemeral camp-friendships go, Jocelyn was maybe the closest thing I had to a best friend. She shared her sour candies with me, along with my quiet uneasiness about Ms. Yovanovitch, the frostiest of all our teachers, who always wore black and didn’t seem very fond of children. It wasn’t long before we gave her a secret nickname – one that rhymed easily with Yovanovitch and was, well…more accurate.

Without even knowing it, Jocelyn made being there seem normal, like the whole thing was no big deal. We worked hard and did as we were told, but when class was over, we didn’t think much about our successes or failures in the studio. Other girls did extra work in the hallways after class, practising choreographies or perfecting their form; some cried at night, worried they weren’t talented enough, or that the teachers didn’t like them. Jocelyn and I had more important preoccupations, like trying to find secret (haunted?) rooms in the school’s hidden corners, or practising party tricks, like reaching our chin with our tongue, in an attempt to mimic the tall gangly girl in the grade above us who could do it with great finesse. (She also happened to be able to stretch both her legs behind her head and walk around on her hands, but that surpassed our (very limited) acrobatic talents.)

As a ten year-old who had always danced for fun, I learned very quickly that camp at The National Ballet is work. You’re there to be disciplined, focused, engaged; your main tasks are to listen, learn, and practice practice practice. Even if you’re not a professional yet, you’re there to be – and behave like – a capital B Ballerina. Yes, it’s exciting and yes there’s downtime, but ultimately you’re there to put in a full day of dancing and to push your body as far as it will go. And in that sense, your body isn’t really your own, but rather an extension of the work. Your feet get bloody and blistered; you wrap them in gauze and tape, then stuff the ends of your point shoes with wads of cotton to cushion the blow. Your limbs and midriff are poked and squeezed and stretched by your instructors – Tight tight tight! Tuck in your belly! Lower your ribs! Head up! Not too far up! Looong necks! Point those toes! Point point point! Hands! Light hands! All of it is done with smiles and good doses of encouragement – Good good good! Beeeautiful! Yes! Comme ça! Oui! – but at times the constant instruction could be dizzying. Miranda might have been a rigorous teacher (she was, in fact, a former National Ballet dancer), but at her studio, dancing was still ultimately about having a good time; about movement and expression. There were no clipboards, no evaluations, no physiotherapists telling us we had abnormalities to “fix”. Prior to ballet camp, I’d never been told that my back had an irregular curvature, or that the arches of my feet weren’t, well, arched enough; I’d never had to stick my feet into stretching devices or undergo back-straightening exercises in a physiotherapy clinic.

This was all weird, new stuff to me; it created a new awareness of my body – both in terms of its potential and its limitations. Since our bodies were under the microscope every single day, it was preoccupation that was palpable, inside the studio, as well as outside of it. During breaks or in the evenings when we’d be getting ready for bed, girls talked about their bellies, their legs, their arms. They compared themselves to others constantly. There were rumours that a couple of the older girls threw up. Before ballet camp, I’d never heard of binging or purging or abstaining from food. And while no one really talked about it explicitly, it was clear that food was treated as fuel or, more nefariously, as an evil temptation. We met with a nutritionist every week who noted our food consumption on her hand-held chart. What did you eat this morning before class? And after class? My mom seems to recall that this was to prevent eating disorders (which in all fairness, it probably was), but I remember thinking it was weird that someone was asking me what I’d had for breakfast. (I never told them that I sometimes complemented my breakfast with a handful of Sour Patch Kids. I pat my ten-year-old self on the back for that one.)

Luckily, none of this had any lasting detrimental effects, due to the fact that I was a pretty naïve kid (as far as I was concerned, I was at summer camp. For FUN!), and that I had incredibly supportive, level-headed parents who were the exact opposite of stage parents – they encouraged my interest in dance, but never made it feel like an obligation, or like my life depended on it. And for those reasons, I don’t have bad or traumatic memories of my time at The National Ballet. Overall, I remember it as an exciting time that was full of new, interesting, fun things. It’s frankly only when I look at it through the lens of an adult that things seem a bit less romantic.

—–

This adult lens was in full focus last month, as I sat in a dark corner of the parterre at Place des arts, watching The National Ballet of Canada perform a highly-anticipated three-part show. It was an incredible performance – the dancers glided and spun across the stage with effortless power and grace – but I was distracted; my mind kept drifting to what-if thoughts. What if I had stayed? What if I’d said “yes” instead of “no when they invited me back? It was an odd thing to consider. I couldn’t fathom how different my life would have been. In that moment, the bodies that moved across the stage seemed surreal – the men looked like Greek sculptures, the women like tall, slender cranes. They looked like other-worldly beings – ones that live, eat and breathe very different things than I do.

From ballet to bodies to diet, I started to think about how staying with the National Ballet (for however long it would have lasted…maybe until puberty?) would have undoubtedly affected my relationship with food. I thought about how my interest in food would have diverged considerably; how I would probably hesitate before eating a piece of cake or a slice of cheese, after doing a mental cost-benefit analysis of the caloric intake.

When I think back to that time, that brief summer when my body wasn’t really my own, it makes me that much more appreciative of the place I find myself in now. It’s a place where I don’t have to worry about my body determining my success; where I don’t have to push my feet into stretching devices or tell a nutritionist what I had for breakfast. It’s a place where I can still dance for fun and where I can make an apple pie for my family and enjoy it with them, without thinking twice.

Amen to that.

Classic Apple Pie

Classic Apple-Pie with Lattice Crust – crust adapted from Laura Calder; filling adapted from Apt 2B

For the Crust

  • 2 ¼ cups flour
  • ½ tsp salt
  • 2 Tbsp sugar
  • 1 cup butter, cut into pieces
  • ‎ ⅓ cup ice-cold water

Put the flour, salt and sugar in the bowl of a food processor; then add the pieces of butter. Pulse until you reach a coarse crumb texture. Keep pulsing while slowly adding the cold water through the feed tube until the dough starts to come together (if you don’t have a food processor, you can also do this with your hands.)

Turn out the dough onto a floured work space and work it gently until it comes together, being careful not to overwork it. Flatten into two equal-sized discs and refrigerate for about 20 minutes.

For the Filling

  • 4-5 large apples (about 3 lbs) – I like Cortland, Spartan or Honeycrisp
  • zest and juice of one lemon
  • zest and juice of half of an orange
  • 1/2 cup sugar
  • 1/4 cup all-purpose flour
  • 1/8 teaspoon allspice
  • 1/8 teaspoon freshly grated nutmeg
  • 1/2 teaspoon cinnamon
  • 1 tsp vanilla extract
  • 1Tbsp bourbon
  • 1/2 teaspoon salt
  • 2 tablespoons butter

Peel the apples and cut them into 1/2” chunks. Place the apples in a large bowl then add lemon and orange juices and zests, stir gently to combine. Add the rest of the filling ingredients (except the butter) and stir gently to combine.

For the Topping

  • 1 egg, beaten
  • a few teaspoons of coarse sugar (like turbinado or light demerara)

Directions

Preheat oven to 400ºF

1) Remove one piece of the dough from the fridge. On a lightly floured surface, roll it out into a 12” circle 1/4” thick and place it into a 9 or 10 inch pie pan. Place in the fridge while you prepare the rest of the pie.

Classic Apple Pie

Classic Apple Pie

Classic Apple Pie

2) Fill the prepared pie shell with the apple mixture, dot with the 2 tablespoons butter. Remove the second crust from the fridge, roll it out to the same size as the pie dish and cut into long strips (between 1 ½-2”). Criss-cross them in a lattice-top pattern (Bon Appétit has a great little video here), trim the edges so there is about ½” of overhang, then crimp the edges.

Classic Apple Pie

3) If the crust seems soft or warm, slide the whole pie into the fridge or freezer for about 15 mins before you bake it. When you are ready to bake brush the top of the pie with a beaten egg and sprinkle with a good dose of coarse sugar.

Classic Apple Pie

4) Put the pie on a baking sheet to catch any drips and bake for 15 minutes on the lowest rack of your oven, then lower the oven temp to 350º and bake for 40-50 minutes or until the crust is deep golden brown and the apple juices bubble.

Classic Apple Pie

Share this:

  • Tweet
  • Share on Tumblr

Like this:

Like Loading...

As much as you can carry

18 Friday Sep 2015

Posted by julia chews the fat in Condiments, Lunch & Dinner, The Basics, Vegetarian

≈ 8 Comments

End of season visits to the outdoor food market are always a little bittersweet for me. I get goosebumps of excitement and pangs of regret in equal parts. It’s a complicated phase in our relationship – I feel nervous and happy all at once.

I suppose it’s because I’m not very good with endings – even if I know that in reality, this isn’t an ending in the classic sense. Elegant stalks of rhubarb and asparagus will come back by May; sweet peas and baby zucchini in June; baskets of gemstone-coloured berries and velvet-skinned peaches through July and August. But in that transition between summer and fall, I always get a little panicky, at a loss as to how to maximise the last real days of the food market. I end up leaving the house without a recipe or a plan, only to wander around aimlessly between the market stalls with the jittery excitement of a puppy who circles the barbecue, hoping he’ll get tossed a hot-dog. I want all the strawberries, all the cucumbers and melons, and all those gorgeous batches of red romaine and frilly frisée from the grey-haired woman at the centre of the market I call “Madame Laitue”. Because she – like the berries and all other ephemeral summer foodstuffs – will soon pull an eight-month disappearing act. And secretly, the thought of it makes me a little sad. And a little desperate.

So, during my last visit, I binge-shopped my way through the last of the summer produce – pints of berries, a few long striped “snake” cucumbers, bunches of fresh herbs and French radishes, baskets of flat romano beans and cherry tomatoes, and several heads of Madame Laitue’s finest lettuce – again, with no recipe, no plan, spurred on only by a need to get it before it’s all gone.

For good measure, I also picked up nothing less than an obscene amount of basil – four whole stalks worth – because when something’s as beautiful and temporary as this, you throw pragmatism out the window and buy as much as you can carry.

Basil for pesto

So that’s what I did – I bought as much as I could haul home, cradled in one arm, like an enormous pageant-sized bouquet. For $10, It was the best purchase I’d made all week. The people I passed on the street seemed to agree, flashing me smiles and “oh la las” usually reserved for hunks and babes. (Montrealers are a special breed of Canadian and don’t shy away from expressing their affinity for food.)

There was one old man, though, who seemed totally confounded by what I was holding. He took a seat next to me on the metro, stared at my leafy bouquet for a little while, then coyly asked,

“C’est un aromatique ça?”

“Oui, c’est du basilic.”

“Mais c’est très fort comme odeur, non?”

“Haha, oui, en effet! Mais c’est délicieux! Vous voulez goûter?” (I pull off a leaf for him to try; he declines)

“Qu’est-ce que vous allez faire avec tout ça?”

“Du pesto, monsieur.”

“Mais c’est quoi ça, du pesto?”

In that moment I wished I could take him back home with me and make him a batch of pesto; wished I could see the look on his face when he tried it for the first time, swirled into a bowl of warm pasta dressed with parmesan; wished I could show him why, when you see fresh basil at the market, you take home as much as you can carry.

Basil for pesto

Basil Pesto (a riff on mom’s version) – makes about 3 cups of pesto

  • 8 cups basil leaves (stripped from the stalk)
  • 1 cup flat-leaf parsley
  • 2-3 garlic cloves (adjust to taste)
  • 1 cup Parmigiano-Reggiano, grated
  • 2/3 cup olive oil
  • salt, to taste
  • 1 cup pine nuts (optional)

Notes:

  1. Pine nuts are a nice (and super traditional) addition to pesto. We don’t use them anymore because two of our in-laws have nut allergies (and, also because they’re esspennnsive). But if you can splurge on some, they add great flavour and texture. If using, just add the pinenuts into the processor with the other ingredients (1/2 cup in the first processed batch and another 1/2 cup in the second – see directions below).
  2. In traditional pesto-making, a mortar and pestle are used to mush everything together, but a food processor will work just as well.
  3. Parsley is not something pesto purists would add in, but mom does it and it tastes amazing.
  4. Pesto, like any sauce, is about adjusting and tasting. You can use this recipe as a guide, but trust your tastebuds when it comes to the final result.

Pesto prep

Directions

1) In a food processor, chop the garlic. Add half of the basil, parsley and grated parmesan cheese (and 1/2 cup of pinenuts, if using) and pulsate for about 10 seconds.

2) With a spatula, scrape down the sides, put the top of the processor back on. Get your oil ready, turn on the processor and slowly add half the oil through the feed tube, until a paste forms. Season with salt.

3) Repeat with the remaining bail, parsley and parmesan cheese (and 1/2 cup of pinenuts, if using). You may need to remove the first batch of pesto from the processor, if there isn’t enough room; I just did one batch over the other and it worked fine. Taste it and adjust accordingly (add a bit of salt, a bit of oil…)

Pesto

Notes: to refrigerate, place pesto in a glass jar and cover with olive oil. Use within a few days. To freeze, place spoonfuls on a tray lined with parchment paper. Once frozen, wrap individually (or in pairs) in parchment paper and transfer to freezer bags. The pesto will keep for several months in the freezer.

Pesto

Share this:

  • Tweet
  • Share on Tumblr

Like this:

Like Loading...

Panzanella and Cucina Povera

21 Friday Aug 2015

Posted by julia chews the fat in Lunch & Dinner, The Basics

≈ 4 Comments

Salvaging leftovers – while not the most romantic or esoteric of cooking practices – is the departure point for the better part of the cooking I do. I suspect the same applies to you.

We might not always be thrilled about cooking what’s hanging out in there, especially after a hectic day, but there is a kind of satisfaction that comes from pulling together random (and sometimes less-than-pretty) ingredients and turning them into a legitimate meal. A leftover chicken carcass; floppy celery tops; speckled bananas; a pint of yogurt hovering near the expiry date – to the salvager, these are all opportunities in disguise.

For the most part I learnt how to cook with odds and ends by watching my maternal grandparents plug away in the kitchen. (You may have already met them here. Or here. Or even here.) They left their tiny, tight-knit village in the Apennines in the 1950s, but prior to that, they’d endured their fair share of hardships (the Spanish flu, Second World War rationing, pilferage by foreign soldiers…), which meant that they’d learnt how to make do with very little. By the time they came to Canada, they’d become experts of cucina povera. It flowed through their veins. They could pull together meals from seemingly nothing, with an effortlesness that came from years of self-sufficiency. It was a waste-not-want-not approach, as dishes like pasta e fagioli, rapini aglio olio, ribolatta, and polenta were all inexpensive ways of using up pantry items, scraps and leftovers.

The term “poor man’s cooking” might come across as pejorative, but cucina povera – while born of economic necessity – is actually a treasure trove of traditions and regional customs, passed down from one generation to the next. Also, cooking with less doesn’t necessarily mean going without. Nonna often reminds me that – even in the leanest times – they always ate well, by which she means that her family not always had food on the table, but always had good food on the table. A bit of olive oil, some sliced garlic, chili flakes and spaghetti were all that was needed to make a slippery plate of pasta aglio olio; a potato, some leftover cabbage, polenta and a chunk of pancetta made a flavourful bowl of cazzarielli soup; leftover beans, fried up with thin slices of onion and swiss chard, served on a thick piece of toasted bread, and topped with a ladleful of broth made a satisfying lunch. And since all it took was a little water or an extra onion to stretch out a meal, it could feed as many hungry mouths as it needed to, with the leftovers reworked and reinvented the next day to make something altogether new. It’s a testament to how any ingredient – no matter how modest – can be transformed into something delicious and sustaining; it’s also one of truer expressions of Italian arrangiarsi (the art of making something out of nothing) which I think is the ace up the sleeve of many Italian grandparents.

Bread – and especially stale, leftover bread – is an important staple in cucina povera, in part because it can be easily reworked. The Tuscans make a type of soup with day-old bread, ripe tomatoes, garlic and basil called pappa al pomodoro, to be eaten preferably (but not exclusively) in the shade on a blistering summer’s day. There’s also pan grattato, rustic breadcrumbs made from stale bread, then toasted in oil, herbs, and seasonings (anchovies, lemon zest) and sprinkled over pasta as a replacement for its more expensive counterparts, Parmigiano and pecorino. Panzanella is another way that Italians use up stale bread. It’s essentially a bread salad made with ripe tomatoes, some cucumber, onion, olive oil, a dash of vinegar and a bit of basil. Some will tell you to toast the bread beforehand; some will have you soak the bread in a bit of water to revive it. Others might have mush up the bread and the tomato into a pappa, or pulp, before combining with the other ingredients. But most recipes, regardless of the toast or no toast principle, insist that you mix the pieces of bread with the tomato wedges and allow it all to rest at room temperature for about an hour before serving, so that the juices from the tomato can be absorbed into the bread. This is the one secret behind panzanella: the slow soak. It’s important that the ingredients have time to mellow out together, allowing that ripe, summery tomato flavour to seep into the bread’s crumb and soften it.

—–

Now, before you scroll down any further, know this: the recipe below is not panzanella autentica, but it’s something of a close cousin. Which is why we’re going to call it “panzanella-style” salad. You’ll see that there are a few non-traditional flourishes, including shredded raddichio, some fried chorizo and fresh mozzarella (these last two not being very cucina povera, I might add). But, at the very least, this salad was made in the spirit of “waste not want not”: I had a half-loaf of stale bread, a bunch of fresh basil that needed some freshening up, a nub of chorizo hanging out at the back of the fridge, and a pint of cherry tomatoes ripening on the windowsill.

The result proves that scouring the fridge can bear rich rewards.

Panzanella

Panzanella-Style Salad with Fresh Mozzarella

  • 1 pint mixed-colour cherry tomatoes, halved (or larger tomatoes cut into quarters)
  • 1 shallot, minced
  • 1 small head raddichio, thinly sliced
  • about 1 cup stale bread, cubed
  • 1 clove garlic, pressed
  • about 50g fresh mozzarella, such as mozzarella di bufala*
  • about 50g dried chorizo, diced (optional) – I used this one
  • bunch of fresh basil, thinly sliced
  • good quality olive oil
  • red wine vinegar
  • salt and freshly ground black pepper

*Montreal: there are now producers that make buffalo mozzarella in Quebec; ask your local cheesemonger about it.

Directions

1) Set a pan on medium-high heat; add a glug of olive oil. Once it’s hot (but not smoking), add the cubed bread and toast until golden. Remove from pan and set aside.

2) With the leftover oil in the pan, lightly fry the garlic (about 20 seconds), then return the bread to the man and mix to combine. Transfer the bread and garlic into a large bowl. Add the halved (or quartered) tomatoes, sliced basil, diced shallot  and toss to combine. Drizzle some olive oil over the top and add a small splash of red wine vinegar. Season with salt and pepper, give it a final toss and set aside at room temperature for 30 minutes to an hour.

3) Put the pan from before back on medium-high heat. Once hot, add the diced chorizo and fry until slightly crispy (about 3 minutes).

4) Add the sliced raddichio to the bread mixture and mix to combine. Place the mixture on a serving platter. Shread the mozzarella over top, then sprinkle the salad with the fried chorizo and some of its rendered fat. Serve immediately.

Panzanella

Panzanella

Panzanella

Share this:

  • Tweet
  • Share on Tumblr

Like this:

Like Loading...

Box Brain

01 Wednesday Jul 2015

Posted by julia chews the fat in The Basics

≈ 6 Comments

This is a photo of the apartment that I’ve just moved out of, back when I had just moved in and went on a plastering-slash-painting rampage, one week after dislocating my shoulder for the fifth (and thankfully, last time). While the photo is now four years old, I feel that it perfectly encapsulates pre and post-moving day syndrome.

I get tired just looking at it.

apartment

We’ve all been through it at some point – you’ve spent the last several weeks organizing, emailing, calling, visiting, meeting landlords, future and previous tenants, exchanging keys, scheduling, rescheduling, cancelling, reactivating, booking, renting, selling, packing, and orchestrating all the logistics of moving the contents of one apartment to another, all while your bank account haemorrhages from all the inevitable (and surprise! we want more money from you!) expenses that rear their ugly head right around move time. You’re happy to be leaving your current apartment, but your sense of space and belonging is temporarily in limbo as you sink into your new surroundings – the neighbourhood, the people, the commute, the way the new apartment smells like someone else, an unfamiliar space that is now monopolized by dingy cardboard boxes that have taken up residency over every square inch of the floor. All of it feels alien. And exhausting. And endless.

At least for now.

I still feel as though my brain is packed away in one of the unmarked boxes in the far corner of the room. I’m also still trying to come to terms with how small the new fridge is and the fact that there are no drawers in the kitchen, leaving me to keep all the utensils in the box they were packed in. On the floor. Because that’s where everything else seems to be.

So, until I find my brain and my bearings (and regain at-home Internet service), I’ll be over here riding out this ultra-wholesome diet of pizza, chips and take-out.

Be back soon. x

Share this:

  • Tweet
  • Share on Tumblr

Like this:

Like Loading...

For Dad

21 Sunday Jun 2015

Posted by julia chews the fat in The Basics

≈ 11 Comments

Dad, thank you for –

Being the one who taught me how to drive, how to deal with a fusebox and how to trim and paint a room like a pro. And for (still) answering my questions about pest control, caulking, household electricity, bathroom plumbing and any other technical issue I throw your way.

Climbing up trees and onto the roof for those crazy, night-time snowball fights we had when we were kids. (and thank you for teaching me how to craft the perfect snowball so that I stood a chance against my brother and boy cousins.)

Being a total goof.

Building that castle tree-house in the back yard. That thing was insane. I still can’t believe you built it.

All those painstaking hours of pool maintenance so that we could swim all summer long.

Getting us that stupid cat we’d always wanted, even though (unbeknownst to us) you were allergic.

All those teeny-tiny notes in miniature handwriting that you’d leave under our pillow, from The Tooth Fairy, and for the sooty footprints you’d leave by the fireplace to prove that Santa Claus had really been there.

Singing songs to us at bedtime, as The Swedish Chef.

Keeping that enormous collection of National Geographic magazines in the family room, at kid-level, so that we could look at them whenever we wanted.

Answering all of my why-is-the-sky-blue nature and science questions, before the Internet.

Bringing me back all those Archie comics from your business trips to the States.

Barbecuing us dinner through the Ice Storm of ’98.

Teaching me how to make stollen.

Making your own wine and beer, before it was cool.

Happily taking all the black and yellow candies and the burnt toast that we pawned off on you.

Making me brush my teeth, even when I didn’t want to.

Helping me through those long hours of math homework, when all I wanted to do was tear my hair out and cry.

Not disowning me when I was going through the hormonal roller coaster that is l’adolescence au féminin.

Helping me move from one apartment to the next, not once, not twice, but FIVE times, without complaining once, despite the fact that summer moves are always hot and sweaty and downright miserable.

Being one of the first people to comment on this blog and for rooting me on along the way.

Most of all, thank you for your patience and unconditional support. Neither goes unnoticed. I’m lucky to have a dad that’s always there for me, no matter what.

Happy Father’s Day, dad. Love you with all my heart. x

dad

Share this:

  • Tweet
  • Share on Tumblr

Like this:

Like Loading...

Breaking Bread

31 Sunday May 2015

Posted by julia chews the fat in Breakfast & Brunch, Cooking For Your Peeps, Lunch & Dinner, Snacking, The Basics, Vegetarian

≈ 5 Comments

Homemade bread.

I’m a wimp when it’s come to those two words. As much as I like cooking, I’ve carefully avoided breadmaking for years, mostly for fear that it’s a labour-intensive process requiring special types of flour, fancy fresh yeast, elaborate kneading and expensive pieces of machinery, like electric bread makers and large mixers with paddle attachments. And that would just be to get the starter dough going. After that, there’d the issue of rising: Does it have to rise in a low heat oven? What if I don’t have a bread-proof setting on my oven? What if I kill the yeast? How will I know if I’ve killed the yeast? And so on and so forth.

Despite all this, I somehow own three cookbooks on bread – including Bernard Clayton’s New Complete Book of Breads, Soups and Stews, a hefty tome that has sat on the shelf undisturbed, for four whole winters now. I have an entire Pinterest board dedicated to bread, a place where I’ve been quietly stockpiling all sorts of recipes for leavened dough – from densely-flavoured sourdough to crackly baguette to Japanese milk toast – none of which I’ve actually made. But, despite my trepidation, I’m clearly interested in bread – the traditions, the techniques, the delicate alchemy that allows a sticky mass to transform into something crispy and chewy and ethereally light, all at once. It’s a magical beast. The unicorn of food. I’ve just been too timid to get close to it.

Then one day, out of nowhere, I decided to just effing do it already. It happened when I was making lunch with my mom over a long weekend this May:

Me: So, what if I made bread today?
Mom: Yeah, sure. If you want something easy, you should try that no-knead one Mark Bitterman did for the New York Times.
Me: You mean Mark Bittman?
Mom: Yeah, yeah…him. Anyways, it’s so easy. Seriously. There’s a video too. (she finds me the video online). Here, watch it. It’s all there. It’s super simple, you’ll see.

This isn’t the first time I’ve heard of this no-knead recipe. My mom’s been a big proponent of it for years. It’s a version of the old European clay-pot method, modernised by baker Jim Lahey, of Sullivan Street Bakery in Manhattan, and then popularised by Mark Bittman when he did a piece on it for The New York Times. In the video, Lahey walks us through his recipe, step by step, starting with the introductory promise that it’s so incredibly easy, “even a six year-old” (“or a four-year old!”) can make it.

With that bold endorsement in mind, I figured that if any recipe was going to help me cross the threshold into breadmaking, this would be it. The simplicity of Lahey’s recipe is what ultimately sold me. You don’t need to muck around with special bread flour or proofing or extraneous kneading, nor do you need an expensive mixer or a professional oven. All you need is –

flour
yeast
salt
water
your two hands

That, and a screaming-hot cast-iron Dutch oven. The cast-iron is an important part of the alchemy in this bread recipe, creating just the right amount of steam to get an airy interior and a crisp exterior. The idea is you set the pot in a 500ºF oven until it reaches temp, then toss in your dough (cover on for a bit, then cover off) and bake on high heat until the bread becomes crackly and lightly caramelised on the outside. Cast-iron pots retain heat extremely well, mimicking the qualities of a stone oven and a steam-injected oven at the same time. So, whether you’re a six year-old, or a four year-old (or even a monkey), the cast-iron pot will help your first attempt at bread look like this:

baked miche

It’s seriously one of the easiest things you’ll ever make. And when you’re cracking into that first piece of freshly baked bread, straight from your oven, you’ll be so happy you made a go of it.

Happy baking, friendlies x

—–

Notes on the recipe:

  • the dough needs at least 12 hours for the first rise, then another 2 hours for the second rise. Start the night before and let it rise overnight. The longer you let the dough rise (min. 12 hours, max 24 hours), the more flavourful it will become.
  • when my mom discovered this recipe, she quickly starting making her own adaptations, one of which resulted in a drop-dead gorgeous focaccia recipe. All you need to is add a bit of olive oil to the dough and stretch it out on a pizza pan for baking. (I’ve included her recipe for a cherry tomato version below). If you decide to make both the bread and the focaccia, just double the dough recipe.

Note on Dutch ovens: if you don’t already have one, it’s an insanely useful kitchen tool have. They’re especially practical in the winter – to make soups, stews, curries – but are a must-have for this bread recipe. If you’re worried about the financial commitment, remember that you don’t need to buy the top-of-the-line models (the ones that can go for upwards of $350 a pop); I got a Lagostina version on sale at Canadian Tire for $90 and it works like a charm. They usually come with a 10 or 25-year (and sometimes, lifetime) guarantee, so they’re in it for the long haul. Just make sure that you get one with a 500ºF-resistant metal knob on the cover so that you can make your bread (the ones that come with a hard plastic knob are no bueno).

Jim Lahey’s No-knead Bread – makes one white miche

Ingredients

  • 3 cups all-purpose flour
  • ¼ tsp dry yeast (like Fleischmann’s)
  • 1 ½ tsp salt
  • 1 ½ cup water

Crucial kitchen tool: cast-iron Dutch oven

DIRECTIONS

STEP 1 – RISING

1) In a mixing bowl combine the flour, yeast and salt and blend with a whisk.

2) Pour in 1 1/2 cup of water and mix with a wooden spoon. Scrape any excess flour from the bottom and sides of the bowl, making sure the ingredients are well incorporated and form into a ball. The dough will have a stringy texture.

3) Place a piece of plastic wrap on the bowl to avoid the dough from drying out. Allow to rise in a warm dry, and draft free place for at least 12 hours and up to 24 hours. (I left mine at room-temperature on the counter-top overnight.)


STEP 2 – FOLDING & SECOND RISING

1) Dust a large piece of parchment paper, measuring about 24 inches with flour to prevent the dough from sticking during its second rising. Scrape the risen dough onto the floured parchment paper.

2) Sprinkle some flour on the dough and on your hand to prevent sticking. Lightly pat down the dough with your hands to form a piece measuring approximately 10 x 10 inches.

3) Fold one side to the centre; then fold the other side to meet the edge of the first side, like a book (see images below). Take the top edge and fold to the centre; take the bottom edge and fold to meet the top edge.

4) Turn the dough and place the folded side of the dough on the parchment paper and dust with flour to prevent sticking. Loosely wrap the dough in the parchment paper and place on a baking sheet. Cover with a tea towel. Transfer to a warm and dry place and allow to rise a second time (2 hours).


STEP 3 – BAKING

1) Place the cast iron Dutch oven with its cover, on the second rack from the bottom of the oven. Preheat the oven to 500ºF.  Dust the smooth side of the risen dough with flour to prevent it from sticking to the bottom while baking.

2) Once the oven reaches the required temperature.  Remove the pot from the oven and take the cover off. Place the dough, folded side up into the pot and cover. Bake for 30 minutes at 500ºF.

3) Remove the cover, reduce the heat to 450º F and bake for an additional 15-30 minutes until the crust becomes golden brown. To check if the bread is cooked, remove the loaf from the pot and tap the bottom with a knife – if it sounds hollow, the bread should be done. Cool on a baking rack.

baked miche

baked miche - detail

baked miche

baked miche

baked miche - section

—–

Tomato Focaccia

Mom’s Cherry Tomato Focaccia – makes one 12″ pie

  • 2 cups cherry tomatoes, cut in half
  • 1 garlic clove, finely minced
  • 1 Tbsp dried oregano
  • 3 Tbsp extra virgin olive oil (plus a little more for the topping)
  • 2 Tbsp grated Parmigiano Reggiano
  • 1/4 cup sliced bocconcini or cubed mozzarella
  • salt flakes and freshly ground pepper (to taste)

1) Follow the directions for bread in the recipe above, adding 3 Tbsp of olive oil to the dough when you add the water.

2) After the first rise (see directions above), transfer the dough to a greased and floured 12″ pizza tray. Dust the dough lightly with flour, and with your hands spread out to the edges of the pizza pan. Place in a draft-free place to allow to rise a second time (2 hours).


3) While the dough is rising, prepare the topping by adding the prepared tomatoes in a bowl and toss with a drizzle of olive oil, the Parmigiano Reggiano, bocconcini (or mozzarella), minced garlic, and oregano. Season with salt and pepper.

Tomato Focaccia

4) Once the dough has risen a second time (after 2 hours), preheat the oven to 500º F. Spread the tomato mixture gently over the focaccia dough and bake at 500º F for 15-20 minutes.

Tomato Focaccia

Tomato Focaccia - detail

Tomato Focaccia

Tomato Focaccia - detail

Share this:

  • Tweet
  • Share on Tumblr

Like this:

Like Loading...
← Older posts
Newer posts →

Facebook

Facebook

Instagram

No Instagram images were found.

Recent Posts

  • Layers and Rows
  • Finding Buoyancy
  • February
  • Wednesday
  • Cross My Heart, Miso

Archives

  • May 2017
  • April 2017
  • February 2017
  • December 2016
  • November 2016
  • September 2016
  • August 2016
  • July 2016
  • June 2016
  • May 2016
  • April 2016
  • March 2016
  • February 2016
  • January 2016
  • December 2015
  • November 2015
  • October 2015
  • September 2015
  • August 2015
  • July 2015
  • June 2015
  • May 2015
  • April 2015
  • March 2015
  • February 2015
  • January 2015
  • December 2014
  • November 2014
  • October 2014
  • September 2014
  • August 2014
  • July 2014
  • June 2014
  • May 2014
  • April 2014
  • March 2014
  • February 2014
  • January 2014
  • December 2013
  • October 2013
  • September 2013
  • August 2013
  • July 2013
  • June 2013
  • May 2013
  • April 2013
  • March 2013
  • February 2013
  • January 2013
  • December 2012
  • November 2012
  • October 2012
  • September 2012
  • August 2012
  • July 2012
  • June 2012
  • May 2012
  • April 2012
  • March 2012
  • February 2012

Categories

  • Beverage
  • Breakfast & Brunch
  • Condiments
  • Cooking For Your Peeps
  • Cooking Solo
  • Cooking with Nonna
  • Food Away From Home
  • Food Writing
  • Holidays
  • Intro
  • Lunch & Dinner
  • Snacking
  • Soups
  • Sweet Tooth
  • The Basics
  • Vegetarian

Enter your email address to follow this blog and receive notifications of new posts by email.

Join 80 other subscribers

Blog at WordPress.com.

  • Follow Following
    • julia chews the fat
    • Join 80 other followers
    • Already have a WordPress.com account? Log in now.
    • julia chews the fat
    • Customize
    • Follow Following
    • Sign up
    • Log in
    • Report this content
    • View site in Reader
    • Manage subscriptions
    • Collapse this bar
 

Loading Comments...
 

    %d bloggers like this: