Revisiting fennel & citrus

I know what you’re thinking. Really? A fennel-orange salad? Yawn. Next.

But I’m here to tell you that this one, this salad deserves acknowledgement. It’s the perfect example of how something we treated as ubiquitously blah can be re-invented, re-appropriated and newly appreciated. Like vintage fashion (no, not those high-waisted acid-wash jeans from grade eight, but more like that stunning large-brimmed sun hat your great aunt used to wear, poolside. Or your grandmother’s satin peep-toe slippers. In other words, the elegant retro fashion of a stone-cold fox).

This salad is like a great vintage piece you want to wear over and over again. There’s nothing ground-breaking or earth-shattering about it. Nothing hardcore. But it’s a good salad. A simple, and dare I say, classy salad. And one definitely worth your attention. Most of the fennel-citrus salads I’ve had in my life have been forgettable at best – in large part because either a) the whole thing wilts under the weight of a creamy dressing, or b) the fennel slices looks like they were hacked to pieces with a dull machete, or c) there is a disproportionate amount of fennel, leading you to ask, “Will this salad never END?”.

The recipe below, happily, avoids all these pitfalls. Equal parts crunchy, juicy and sweet, it’s got lemony tones from the sumac dressing, plus a peppery wink from the radish. This salad has got it going onAnd if you needed another reason to make it, just look at how gosh-darn pretty it is! 

A stone-cold fox of a salad, if you ask me.

Fennel Orange Salad

Fennel-Citrus Salad with Sumac Dressing – serves 4 as a starter

3 tablespoons extra-virgin olive oil
1 tablespoon fresh lemon juice
2 teaspoons white balsamic vinegar
1 teaspoon sumac
1/2 teaspoon finely grated orange zest
Coarse salt
Freshly ground black pepper
2 medium fennel bulbs
4 radishes, trimmed
2 oranges

Important note: I fully endorse the use of a mandoline to get paper-thin fennel and radish slices. It might be masochistic of me (8 times out of 10 I will nick the end of my finger on the second-to-last slice), but I continue to use it for recipes like this, as it yields the best results.

Whisk together the olive oil, lemon juice, vinegar, and sumac, and orange zest and season with salt and pepper. Set aside.

Cut off and discard the stalks from the fennel bulbs, reserving some of the fronds for garnish. Halve the fennel bulbs lengthwise and cut out and discard the cores. Thinly slice the fennel bulbs using a mandoline (or sharp knife). Transfer to a large serving platter. Thinly slice the radishes using a mandoline (or sharp knife). Add to the fennel. Peel and cut the orange into slices, arrange on top of the fennel and radish (for an extra pretty salad, trim the orange into suprêmes. Nifty video here).

Whisk the dressing and drizzle it over the salad. Toss gently to coat.

Fennel Orange Salad - detail

Fire Cider, Humble Healer

The other day, when the weatherman said it’d be -25°C with the wind chill and that we’d be graced with (more!) snow, I felt my lips curve into a child-like pout, uttering a defeated, “But, nooo…” as I stared into my closet, shivering in my nightgown, trying to decide which sweater was still up for the task.

Welcome to winter in Quebec.

If the snow and sleet and wind packed up and left tomorrow, I’m sure we would all let out a communal sigh of relief. In getting through the last vestiges of winter, we are are bagged, fed up, cranky and infirm. Almost everyone I know right now is hosting some wonderful microbial visitor – this season alone, my personal tally has included two sinus-colds, one big chest-cold, one bout of laryngitis, one digestive-related ailment, one 36-hour flu, and two sprained necks.

Sexiest winter EVER.

For one reason or another, my system’s been under siege since December. Right around when one thing would end, another would begin. After making my way through dozens of lemon-ginger infusions, spoonfuls of honey and doses of Buckley’s syrup (not to mention a few lacklustre dates with Mr.Neti Pot and Mr.Humidifier), it seemed a different tactic was in order. Then I remembered hearing about a traditional folk elixir by the name of Fire Cider – a potent, pungent concoction used by herbalists to ward off the evil spirits of winter (rhinovirus, norovirus, bronchiolitis, and all their friends).

Essentially, it’s a witches’ brew of sweet and savoury elements all jammed into one jar. At once peppery, astringent, funky and sweet, the first taste will be intense and astonishing, but once you’ve got a spoonful racing down your throat, you’ll feel recharged and pumped and ready to get back on the bandwagon.

(or at least ready to slip on that sweater and brace the cold again)

Fire Cider – adapted from herbalist Rosemary Gladstar’s recipe (check out the cute video here!)

Makes about 1 pint
Fire Cider ingredients

  • 1/2 cup peeled and diced garlic
  • 1/2 cup peeled and diced onion
  • 1/4 cup peeled and diced ginger
  • 1/4 cup peeled and diced turmeric
  • 1 habanero chile, split in half
  • 1 orange (or blood orange), quartered and thinly sliced crosswise
  • 1/2 lemon, quartered and thinly sliced crosswise
  • 1/2 cup chopped parsley
  • 2 tablespoons chopped rosemary
  • 2 tablespoons chopped thyme
  • 1 teaspoon black peppercorns
  • 2 to 3 cups apple cider vinegar (at least 5% acidity)
  • 1/4 cup honey, or more to taste

Place all of the vegetables, fruits, herbs, and spices in a clean 1-quart jar. Fill the jar with vinegar, covering all the ingredients and making sure there are no air bubbles. Cap the jar. If using a metal lid, place a piece of parchment or wax paper between the jar and the lid to prevent corrosion from the vinegar. Shake well.

Let the jar sit for 3 weeks, shaking daily.

Strain the vinegar into a clean jar. Add more honey to taste. Refrigerate and use within 6 months.

Fire Cider

*Note: if you have a bold palate, you can take the cider straight up (1-2 tablespoons at the first sign of a cold, repeating every 3-4 hours until symptoms subside; alternately, some take it throughout the winter season as a preventative). If it turns out that this elixir is too intense for you to knock back straight, here are some nifty ways you can incorporate it into your edibles.

  • Use in place of vinegar in salad dressings, condiments and marinades
  • Drizzle on steamed vegetables or sautéed greens
  • Add to soups and chilis
  • Add a couple dashes in your next Bloody Mary

Red Velvet Valentine

Valentine’s is those days on the calendar when it’s socially acceptable to be a loopy, romantic nutbar; the one day of the year when you can crank up the cheeseball dial and no one will fault you for it. You can send love notes, litter your desk with bowls of cinnamon-candy hearts and promise your office mates bright red, fluffy cupcakes with hand-whipped frosting…

…or so you thought.

I was so excited to make these cupcakes. Excited about trying the old technique of using beets make the batter electric pink. Excited about using a pastry bag to add an artful slick of cream cheese frosting on top. Excited about the beautiful Swedish paper cups that I’d found months prior and that I’d purposely saved for this day (yes, yes I did). But most of all, I was excited about finally redeeming myself since the last Valentine’s cupcake failure.

Expectations were high, people. Valentine-in-a-bow-tie high.

Despite my well-laid plan (I was rested! I had plenty of time! I had prepped all the ingredients!), lady fortune had a different one in store – one involving me forgetting to add the butter, then having to scrape the batter out of the pretty paper cups and back into the bowl…only to remove from the oven, 18 minutes later, twelve flat, dense cylinders in greasy-bottomed paper cups. The icing flipped me the bird too, as it initially resisted its extrusion from the pastry bag, then shifted in consistency to seep out in a nondescript, gooey mass.

While the icing improved after a bit of chilling in the fridge, there was no saving the cake. Dense, chewy, beety (undercooked?), they hovered somewhere between expired vegan health cake and a 4th grade science experiment. These were not lovely, fluffy, cherubs-singing-from-the-heavens cupcakes. These were fists-shaking-at-the-heavens cupcakes. These were “I hate you” cupcakes.

As it so happens, this was also the day my friend Matthew was showing me how to use a DSLR. And thank GOD for that, because without him, I’m not sure I could’ve made these things look half as edible. With his keen eye, he managed to help me make these cupcakes look delicious and elegant and lovely – everything they most definitely were not.

Here’s to faking it! Happy Valentine’s xx

4 cupcakes

cupcake with bite

cupcake with bite - detail

(IF YOU DARE, HERE’S THE RECIPE)

All Natural Red Velvet Cupcakes (makes approx 12) – adapted from this recipe

3/4 cup beet purée (directions follow)
1 tablespoon freshly squeezed lemon juice
1 1/2 teaspoons rice vinegar
1 cup sugar
1 stick butter (8 tablespoons), at room temperature
3/4 teaspoon pure vanilla extract
3/4 teaspoon kosher salt
3/4 teaspoon baking powder
1 1/4 cups unbleached all-purpose flour (not bleached flour)
2 eggs
1/2 cup buttermilk
1 tablespoon natural cocoa powder (not Dutch Process, or dark cocoa powder)

Beet purée: 2 medium beets, or 1 large beet, scrubbed and rinsed

Fill a saucepan with water, add the beets and bring to a boil. Allow the beets to cook until very tender (approx. 30 mins).

When beets are cooled completely, peel, and cut into large chunks. Place in a food processor fitted with the steel blade. Process for 2 minutes, or until extremely smooth. Empty the food processor of the beet purée. Measure out 3/4 cup and set aside (save any extra purée for another use).

Preheat oven to 350ºF. In a large bowl, sift the dry ingredients. In a separate bowl, cream the butter and sugar, then add the eggs, vanilla, buttermilk, vinegar and lemon juice. Beat or whisk until combined. Add the beet purée. Mix some more until the mixture is uniform.

Line a standard muffin tin with paper cupcake liners. Scoop mixture evenly into cupcake liners.

Bake for 18 minutes, or until the cupcakes in the center spring back up when touched. Remove cupcakes from the pan and place on a wire rack to cool completely.

Cream Cheese Frosting

1 8oz package cream cheese, at room temperature
1 stick (8 tablespoons) unsalted butter, at room temperature
2 cups confectioner’s (powdered) sugar
1-2 tablespoons heavy cream
1/2 teaspoon pure vanilla extract

Beat all ingredients together with an electric mixer until smooth and fluffy. Frost cooled cupcakes.

Feed a cold, starve a fever

There’s nothing quite like a 24-hour stomach virus to annihilate your interest in food in one fell swoop. Even a day or so after the last few nauseous waves have passed through your body, you’re still sensitive to words like “pizza” and “stew”, which make your squirm uncomfortably as the mental images of oozy cheese and braised meat wade in your head.

Once that phase passes, you enter the “I’m feeling back on track holy geez I’m starving feed me now” phase of recovery, causing you to make the premature decision to eat real food again, at which point your body promptly reminds you that getting cocky le gastro will get you nowhere. It’s taken up residence in your body and, no matter how short its stay, it owns you. After a short and regretful holiday with Mr. Grilled Cheese, you begrudgingly return to your sobering diet of soda crackers and water.

You’re only truly out of the woods when food becomes appealing, enjoyable and friendly to your body again. That said, you still need to ease your way back in, with things that are light and nutritive. Nothing with too much pizazz. Nothing with jazz hands.

I found this recipe by searching “immunity food” on the Interweb. Nourishing, gingery and easy on the eyes, this soup hit all the right buttons, becoming the magical cure that made me feel human again.

Eat it hot, straight from the pot and watch as all the bad melts away…

Get-Well Soup (makes approx. 4 servings) – adapted from 101 Cookbooks

Healing Soup

  • 1 medium onion, quartered and thinly sliced
  • 3 celery stalks, thinly sliced
  • 1 medium carrot, thinly sliced
  • 8 medium garlic cloves, very thinly sliced
  • 2 tablespoons grated ginger, peeled
  • 3/4 teaspoon finely ground white pepper, plus more to taste
  • 1 1/2 cups mushrooms, trimmed (shitake or brown)
  • 8 ounces firm tofu, sliced into thin slabs
  • 2 1/2 teaspoons sea salt
  • olive oil for sautéing
  • chopped green onions, sliced radish, daikon and sprouts for serving

Heat the oil in a large soup pot over medium heat, and stir in the onion, celery, garlic, and ginger; gently sauté just until soft. Stir in the white pepper, salt and 10 cups of water. Turn up the heat and simmer for 15 minutes. Meanwhile, heat a bit more oil in a pan. Once hot, add the sliced mushrooms and brown until crispy. Remove and set aside. If the pan is dry, add a splash more oil, heat it up and add the tofu slices, cooking them about 2 minutes each side. Ladle the soup into shallow soup bowls and top with lots of green onions, pea shoots, radish and carrots slices, along with some fried mushroom and tofu.
Healing Soup

A Better Kind of Fruitcake

Almost twenty years ago, at Christmastime, my dad bought a loaf of stollen for the first time. He brought it home, cut it up and plated it. We were eager to try something so foreign and – for kids growing up in the burbs in the 90s – so exotic-sounding. But, one bite in, our excitement quickly unravelled, being replaced with the uneasy feeling of being duped. Not unlike a lot of the holiday fruitcakes I’ve reluctantly tasted over the years, this store-bought stollen was dry and lacklustre – a pasty-coloured loaf studded with nondescript dried fruit that rolled out off the sides with each bite.

It was miserable.

Unlike the rest of us, my dad saw the potential of this German-style fruitcake and shortly thereafter, set out to make his own. He sourced different recipes, even quizzing our German neighbour, Mrs. Nack, for secret stollen-making tips. And then, nearly every year since, he’s gone into full stollen-production mode – drenching the fruit several days ahead, making the dough, cutting the loaves, baking them, dusting them with sugar and wrapping them attentively. For someone who doesn’t bake (or have a Teutonic bone in his body), dad’s got this German sweet bread down to an art. The final result is a beautifully dense, yeasty bread, brimming with sliced almonds and a boozy mixture of currants, raisins and citrus peel. The longer it sits, the better it gets, as the brandy further permeates the crumb and the almonds slowly transform into marzipan. There isn’t a trace of neon-coloured maraschino or stale walnut in this fruitcake. Not if dad has anything to do with it. And that’s the way we like it.

Wishing a very happy birthday to my dad ♥ and a Happy New Year to all of you, dear readers! Looking forward to sharing more tasty edibles with you in 2014.

Dresden Stollen – makes 4 medium loaves or 6 small ones stollen 21

  • 1⅓ cups currants
  • 1 cup orange zest
  • 1 cup lemon zest
  • 3 cups raisins (Thompson or sultanas)
  • 4 ⅓ cups sliced, blanched almonds
  • 6½ cups (1 kilo) sifted flour
  • 6 packets yeast (8 gr each)
  • 2 cups icing sugar
  • ½ tsp ground cardamom
  • tsp cinnamon
  • 2 pinches mace
  • 2 pinches allspice
  • ½ tsp salt
  • 1 cup brandy
  • 2 cups lukewarm milk (reserve 1 cup for proofing the yeast)
  • 1⅓ lbs butter, room-temperature

Pour the brandy over the mixture of currants, raisins, almonds & citrus zest. Mix and cover, allowing to soak overnight (or over several days). stollen 2 Proof the yeast by sprinkling it over 1 cup of the lukewarm milk (about 100ºF) to which has been added a tablespoon of sugar. Set aside in a warm place for about 10 minutes. The yeast is active if it forms a creamy foam on top of the milk. Sift the flour into a large mixing bowl. Add the room-temp butter, icing sugar, the remainder of lukewarm milk, spices and the proofed yeast mixture and mix. Transfer to a slightly floured work surface and knead thoroughly. stollen 3 stollen 4 stollen 5 Cover the dough and allow to rise for approx. 30 minutes in a warm place. Add the prepared fruit mixture. Knead the fruit mixture thoroughly into the dough. The dough should be smooth and elastic. stollen 12 Roll the dough into a long thick cylinder shape and cut into 4-6 pieces. Form into loaves. stollen 15 Transfer to a greased and floured baking tray, cover with a clean dish towel and leave to rise for 20-30 minutes in a warm, draft-free place. Preheat the oven to 350º F and bake for 50 minutes. stollen 17 stollen 18While the stollen is still warm, brush with melted butter and dust with icing sugar. Drizzle a little brandy over-top. Wrap well in muslin cloth or aluminium foil and store in a cool place. stollen 19 stollen 20 stollen 22 Note: Dad likes to douse his stollen every couple of days with brandy to keep it moist (and, let’s be honest, make it more delicious and boozy). Just re-dust the whole loaf with a bit of powdered sugar before serving.

Holiday Eating

“I’ve decided. I’m having stuffing for breakfast.” – Mom (Boxing Day, 10:34am)

These are the kinds of assertions that make Christmas the beautiful thing that it is. A nip of bourbon in your morning coffee; shortbread cookies for breakfast. It’s unrestricted, backwards-eating at it’s best. Because really, who’s going to say that you can’t? There’s a unspoken understanding that from December 24th to January 6th, it’s the Wild West of eating and imbibing – there are no rules, and each is left to their own devices with the cornucopia of leftovers in the fridge. (And, yes, your head’s always in the fridge, because you’re constantly hungry. Even though you just ate.) For some reason, you also find yourself wanting to drink filtered coffee all day…or at least before you hit the mimosas, cocktails, red wine and hot toddies (usually in that order, but not always).

Christmas cookies are an important part of the no-rules, bacchanal feasting that goes on in our house at this time of year. Highly versatile, they can be eaten as an pre-breakfast “appetite-opener”, a “light” dessert after a holiday meal, or as a post-nap snack. They are glad to be whatever you want them to be, whenever you want them.

Like every year, I began amassing Christmas cookie recipes in mid-November, with the unrealistic hope that I’d be able to make all two dozen of them. Then, by the time December 23rd rolled around, I had widdled the list down to a more reasonable five or six, in addition to the “untouchables” (i.e. the ones firmly cemented in the italo-anglo traditions of my family, and which we do not mess with – anise pizzelle, fennel-seed doughnuts, chocolate chichinotti, shortbread cut-outs and ginger snaps).

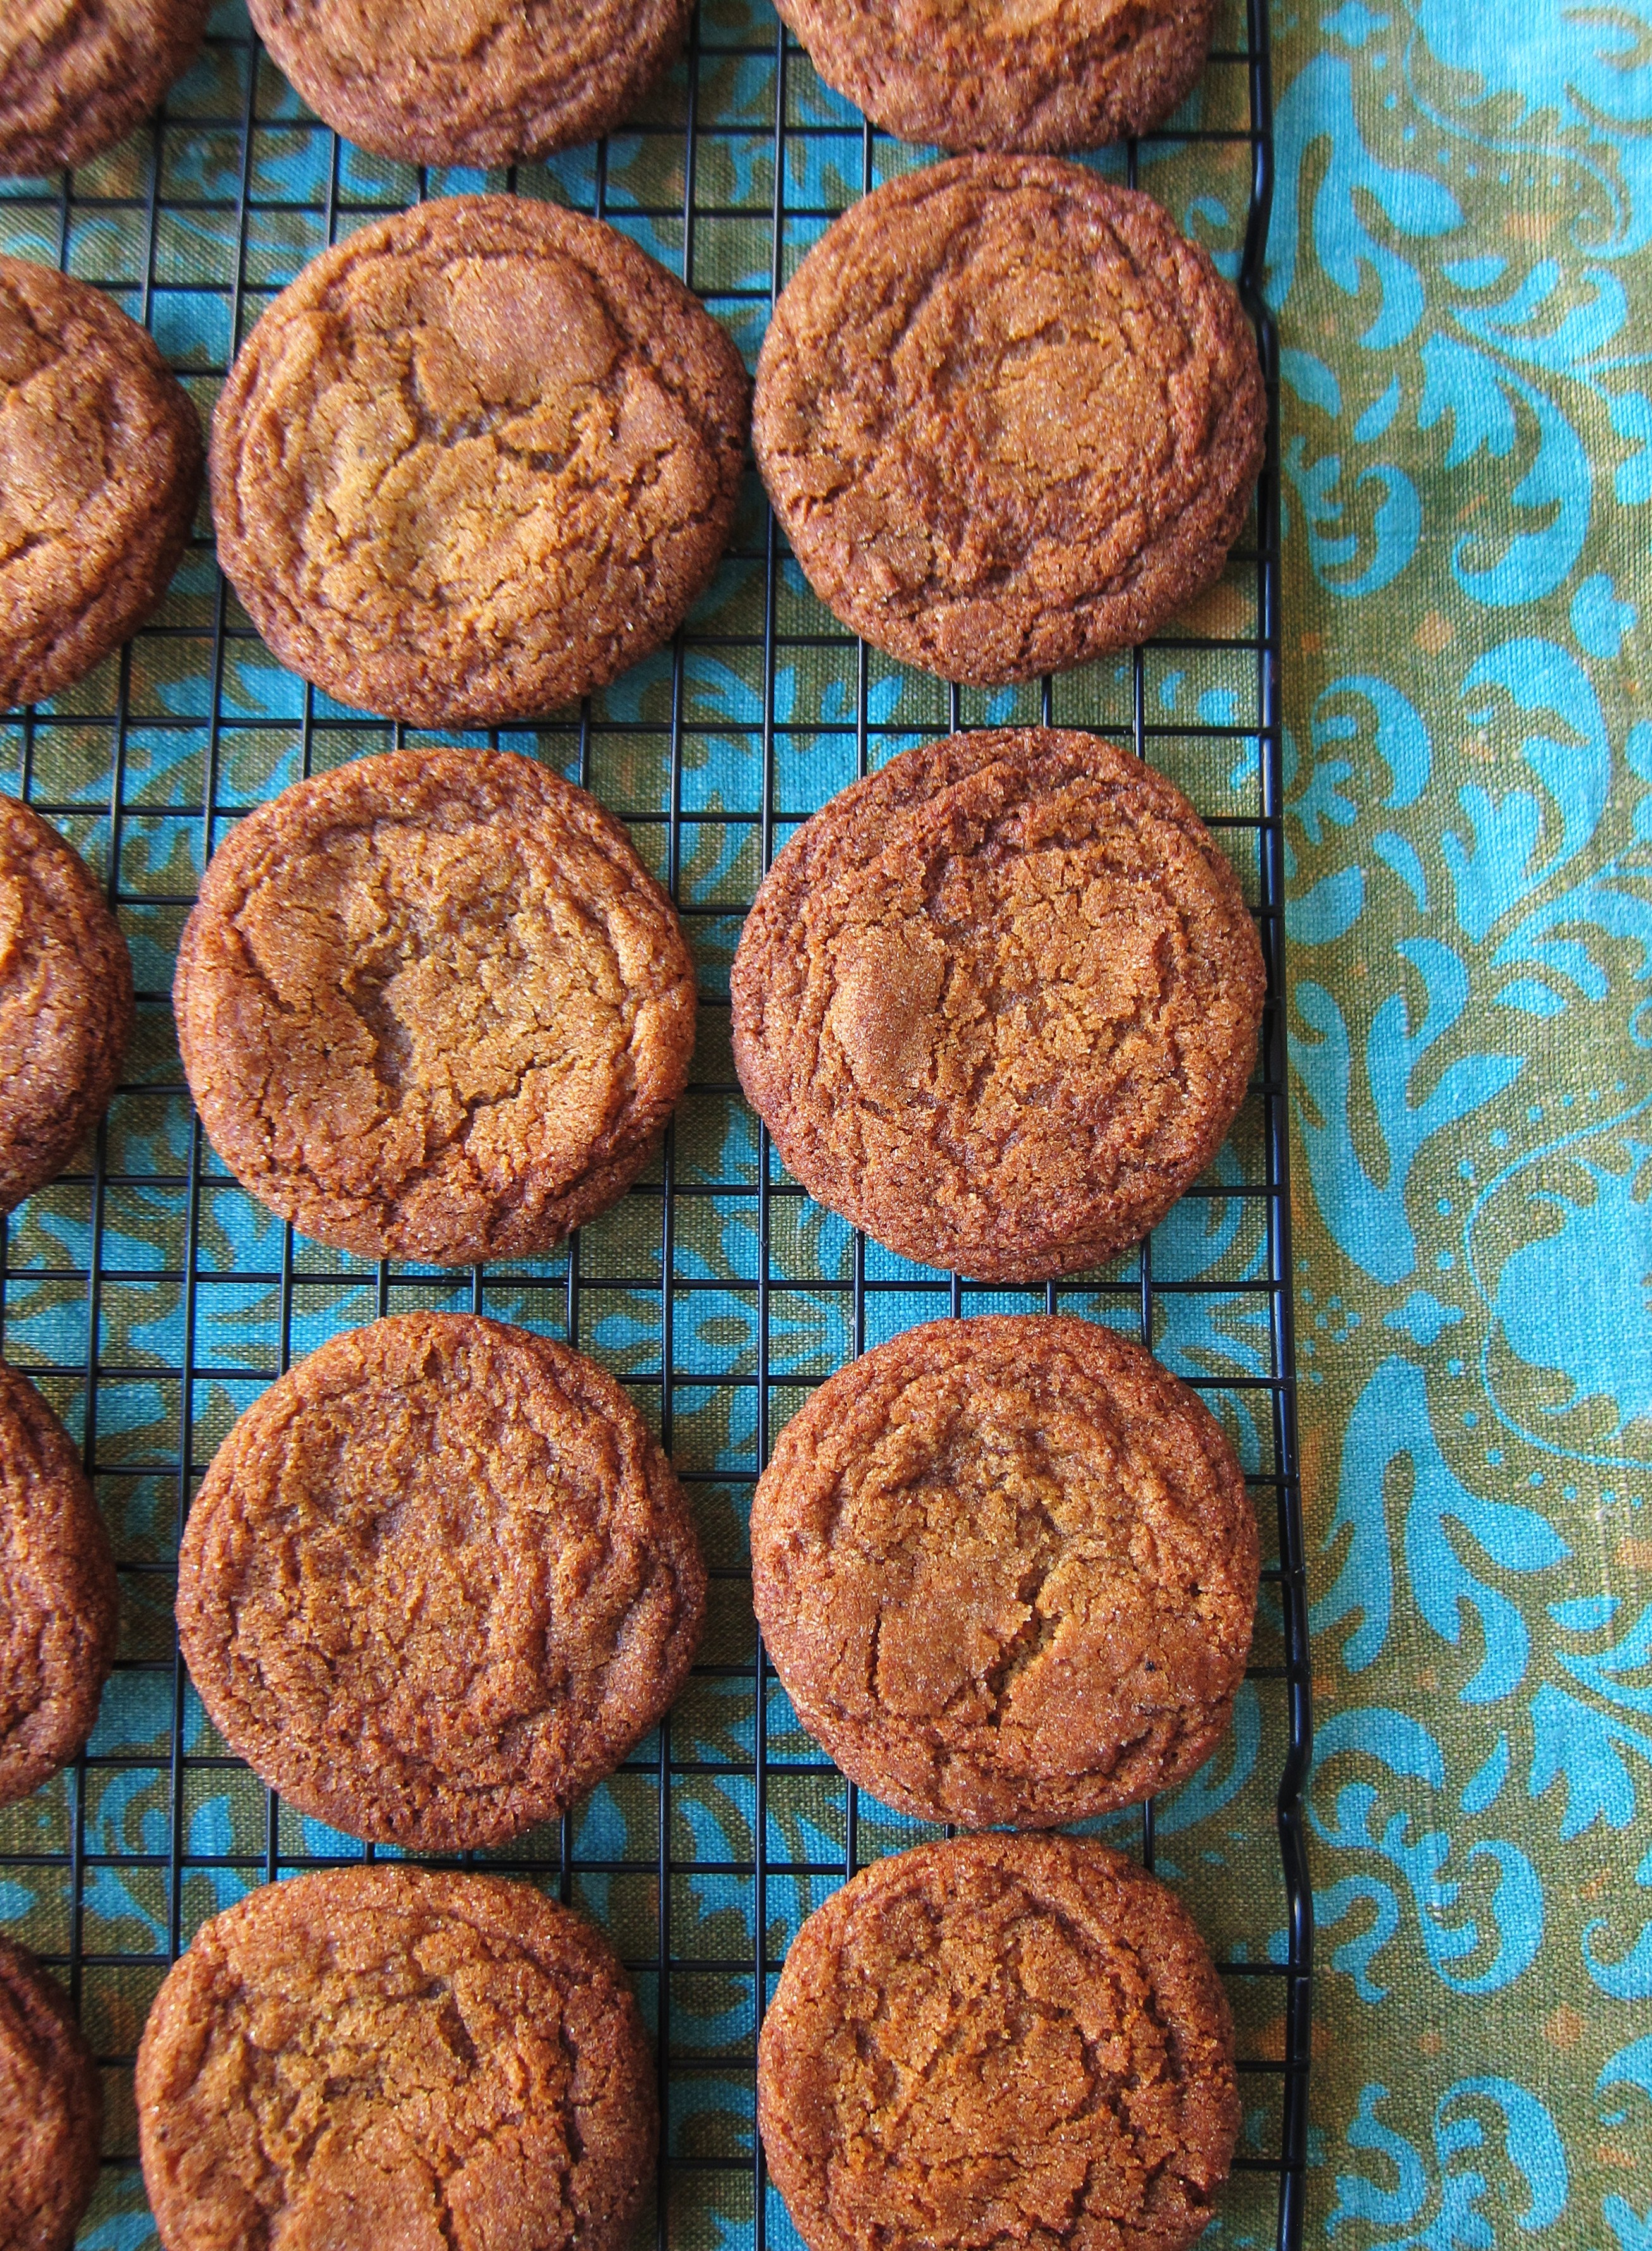
This year, I locked down three new favourites, one with molasses, one with chocolate and one dusted with powdered sugar. They are each very different, but all equally addictive. Dunk them in a hot cup of coffee after a long walk in the snow. Or while sipping champagne in the bathtub. Whichever scenario suits you best.

Warmest of holidays to you and yours ♥

ginger-molasses cookies

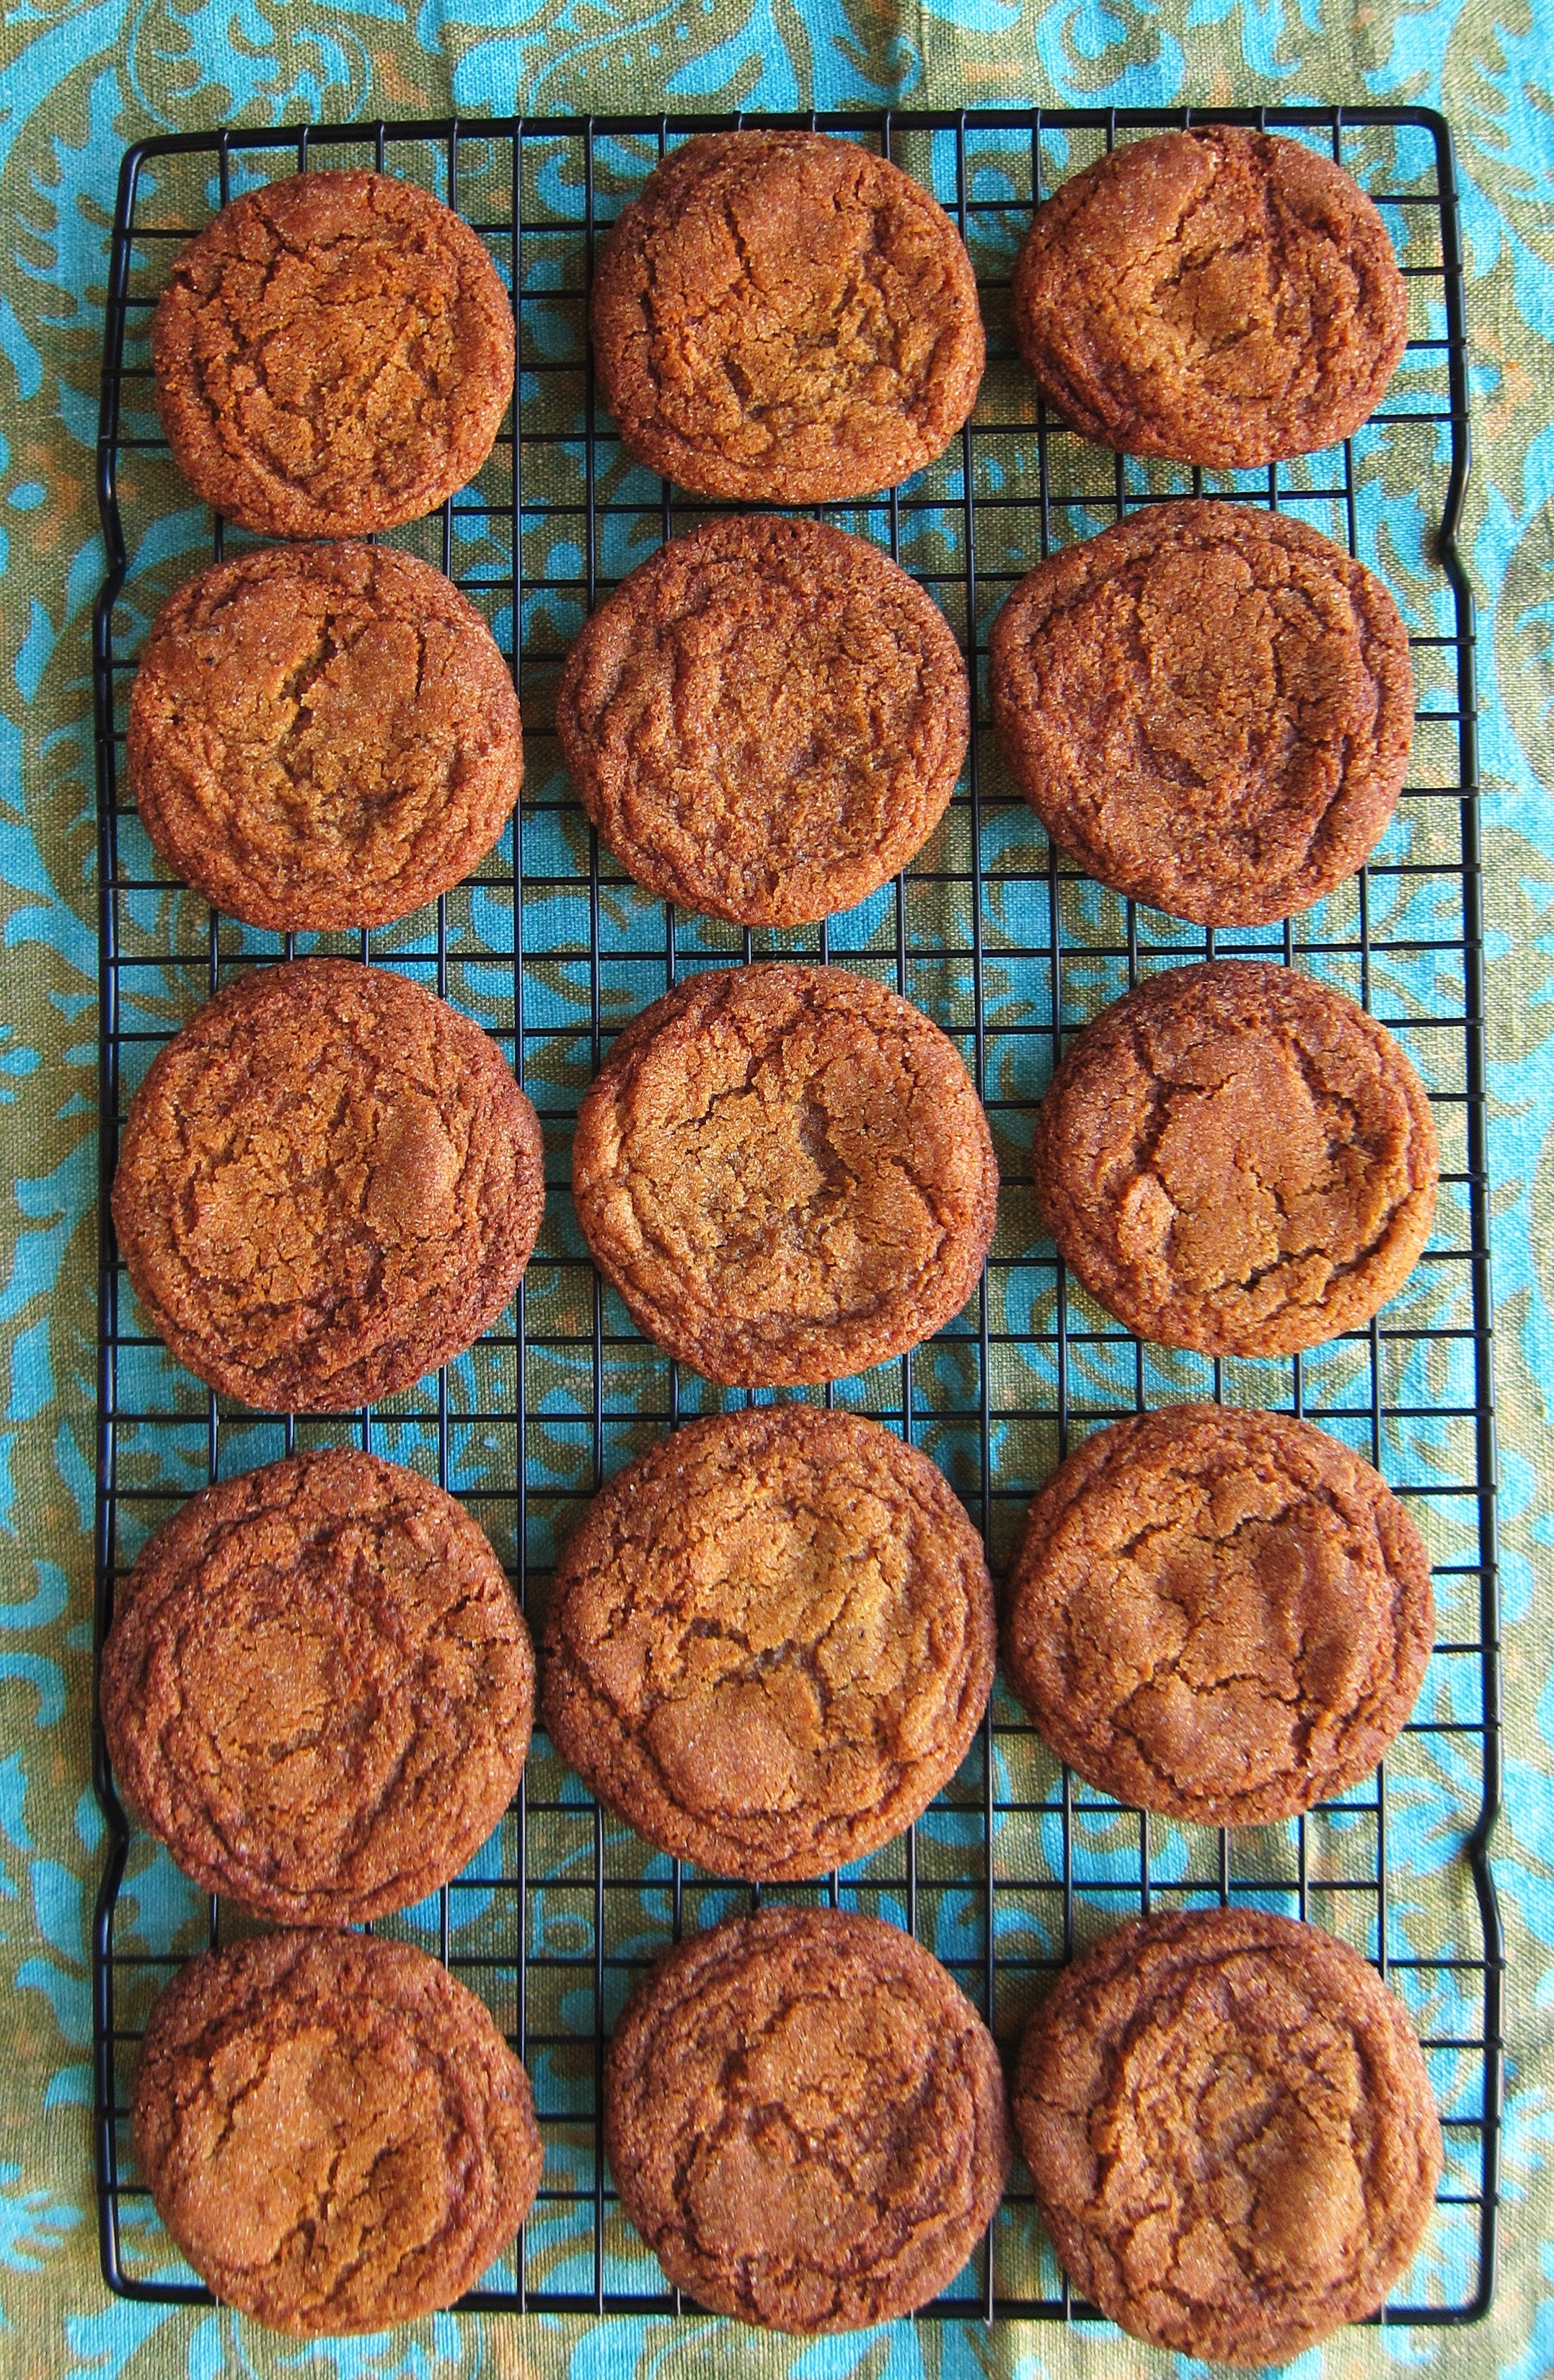
Smoky Ginger-Molasses Cookies – from Reclaiming Provincial
(makes around 2 dozen cookies)

  • 5 black cardamom pods
  • 1 cup of sugar + 1/2 cup of sugar, divided
  • 3/4 cup of unsalted butter (12 tbsp / 1.5 sticks)
  • 1/4 cup molasses
  • 1 egg
  • 1 cup of bread flour
  • 1 cup of all-purpose flour
  • 2 tsp baking soda
  • 1/2 tsp salt
  • 1 tsp cinnamon
  • 1/2 tsp ginger
  • 1/2 tsp nutmeg
  • 1/2 tsp ground cloves
  • 1/8 tsp black pepper

3 days in advance:
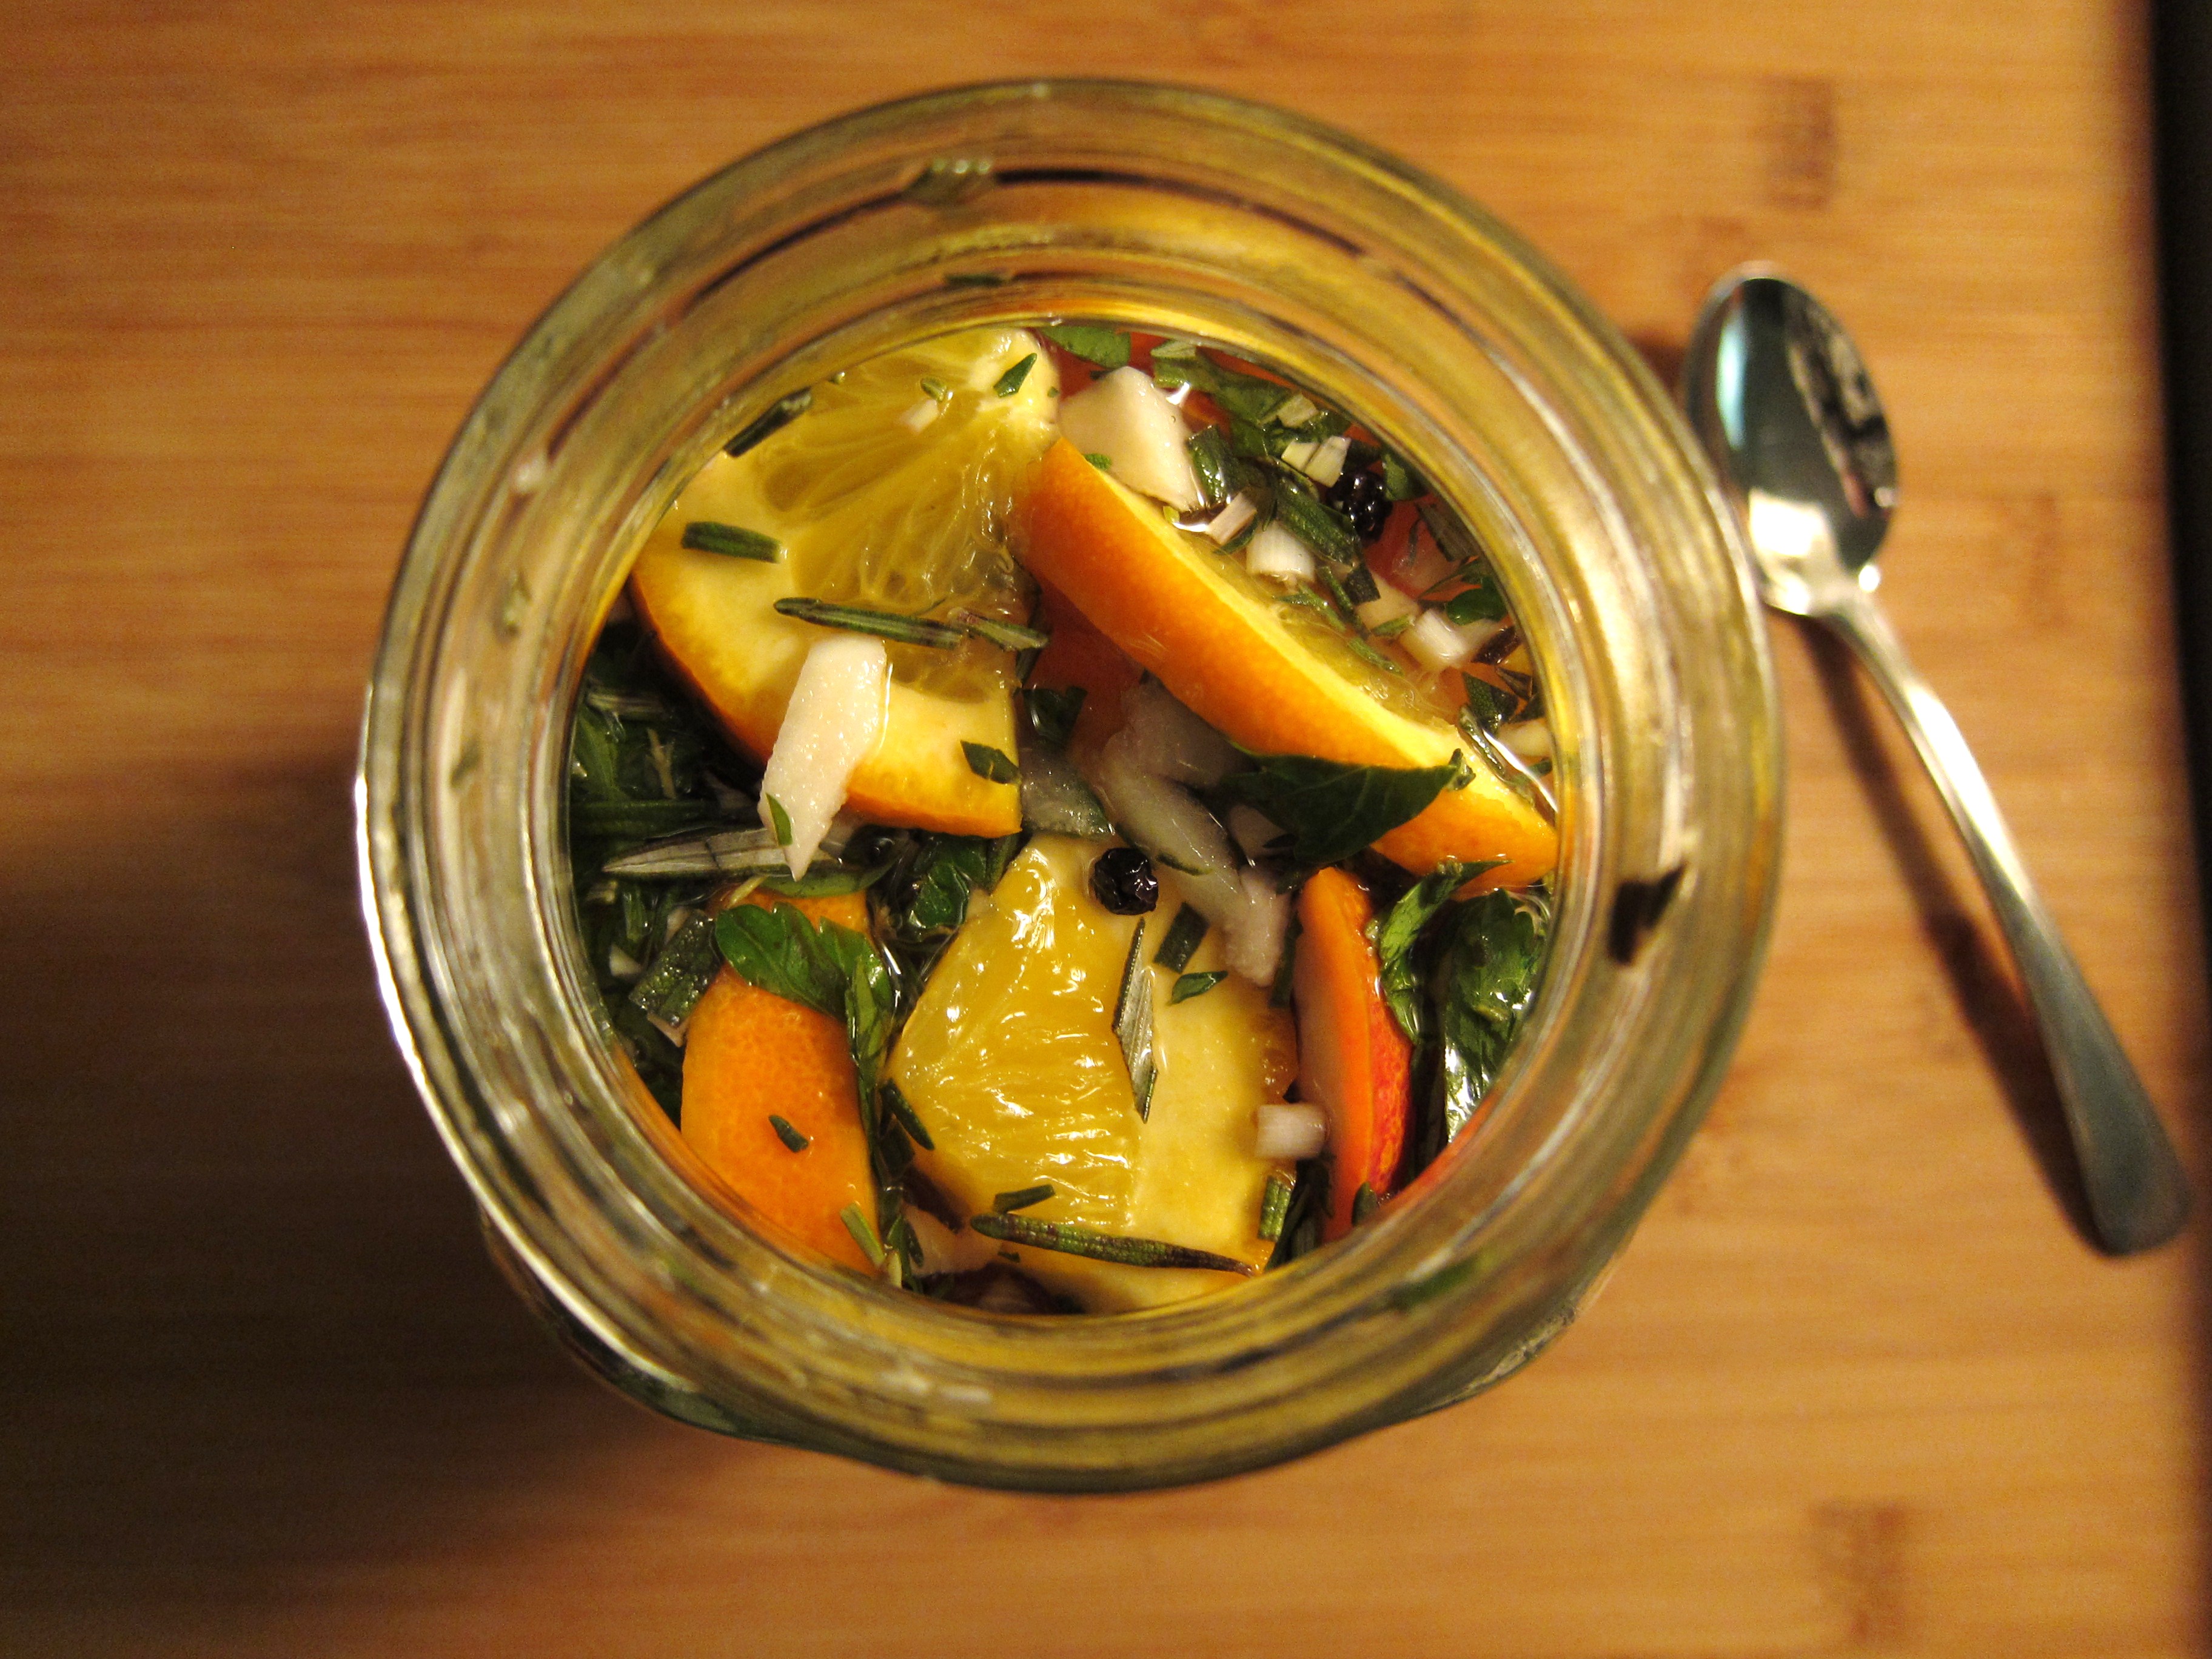
Combine whole cardamom pods and 1/2 cup of sugar in a jar. Cover and let sit.

ginger-molasses cookies

To make the cookies:
Remove cardamom pods from the rolling sugar. Crack open pods, remove seeds and crush them with a mortar and pestle. Set aside.

Melt butter in a saucepan over medium-low heat. Add the cardamom pods and let simmer until the butter begins to foam. Remove from heat and let rest for 15 minutes, then remove pods and discard. Let butter cool to room temperature.

Sift together flour, baking soda, salt, spices, crushed cardamom seeds, and pepper.

In another bowl, cream together butter and the cup of sugar. Beat in molasses, then the egg. Gradually beat in dry ingredients until just combined. Cover and chill in the fridge for at least 2 hours, or up to 2 days.

Preheat the oven to 375°F and line a baking sheet with parchment or a Silpat.

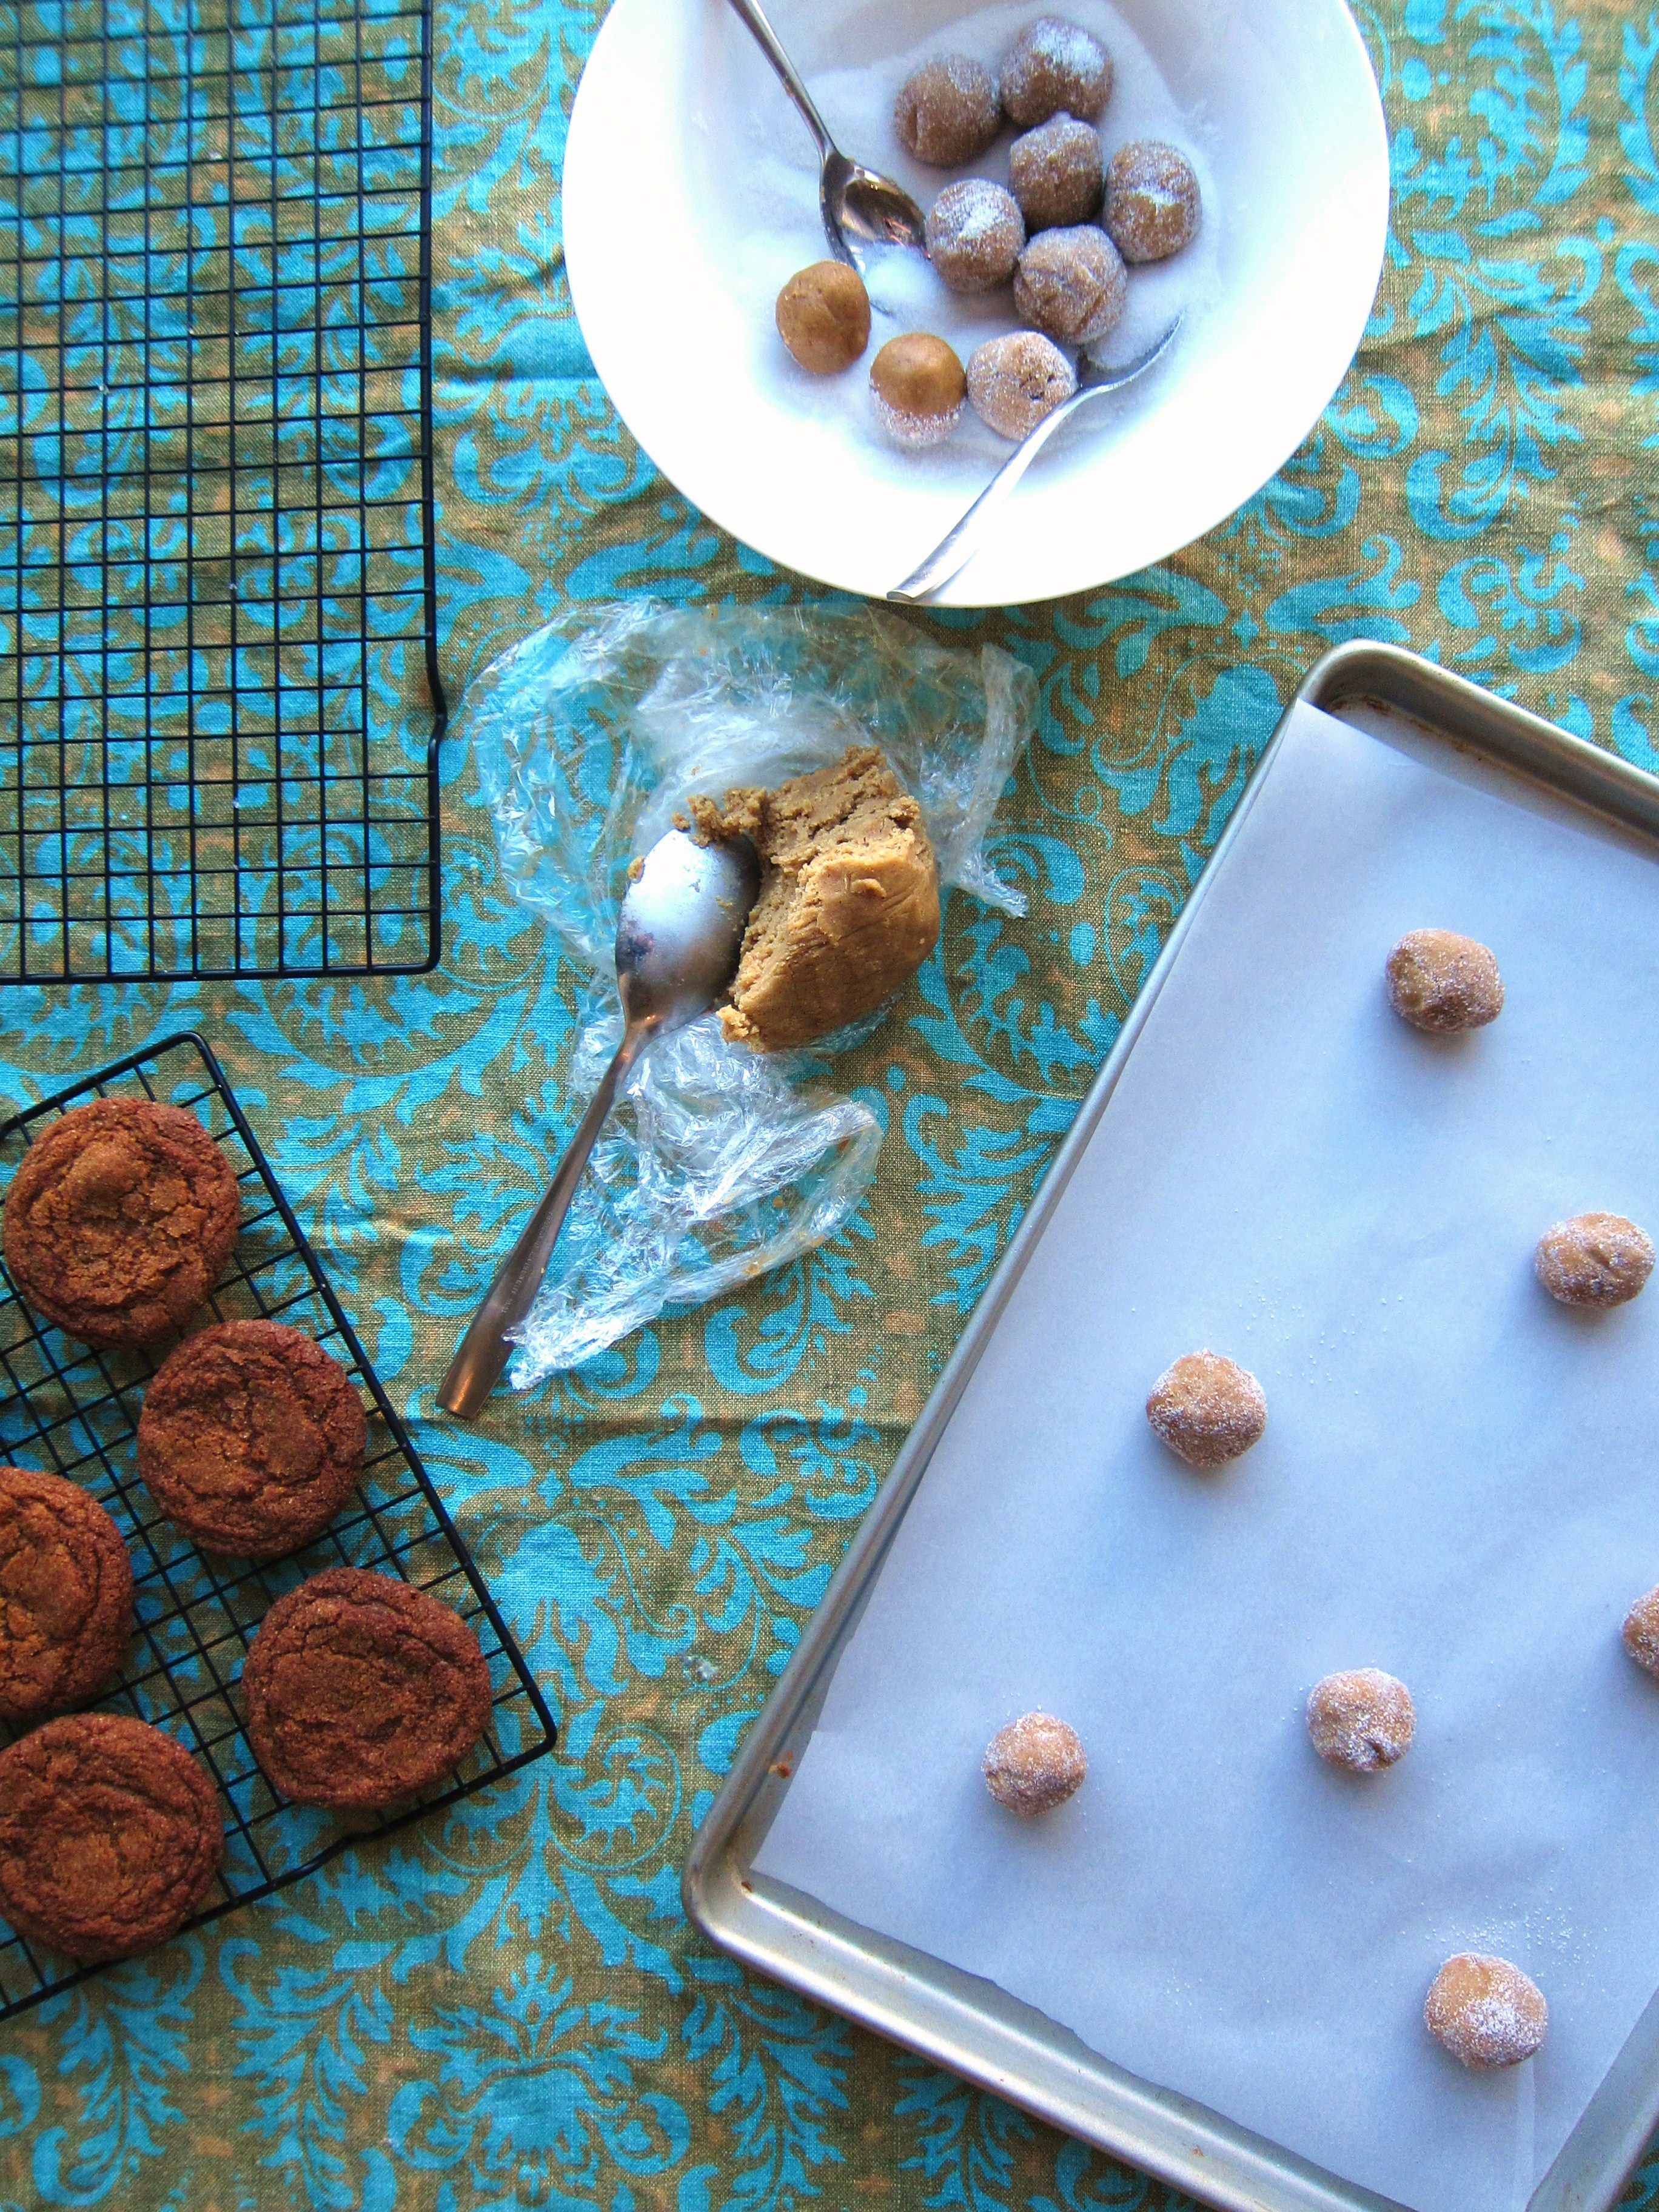
Form heaping tablespoons of batter into balls; roll in the 1/2 cup of infused sugar. Place on a baking sheet two inches apart.

Bake cookies for 8–10 minutes. Let cool on the baking sheet for 2 minutes, then transfer to a cooling rack.

ginger-molasses cookies

—–

Almond Crescents
(makes about 2 dozen)

almond crescents

  • 1/2 lb unsalted butter
  • 3/4 cup powdered sugar
  • 2 egg yolks, well beaten
  • 1 cup ground almonds (blanched)
  • 1 tsp vanilla extract
  • 2 cups flour

Beat the egg yolks at high speed until light in colour.

Cream butter in a bowl; add sugar and beat with electric beaters for 1 minute. Add egg yolks, beating to blend. Add almonds and vanilla, then mix with a wooden spoon. Fold in flour a little at a time with the wooden spoon until just blended.

Refrigerate dough for 30 minutes (and up to 2 days)

Divide dough into 4 potions and roll out each portion on a floured work surface into a log shape. Cut segments (about the length of your index finger)and shape them into crescents.

almond crescents

Preheat the oven to 400°F. Bake on a parchment-lined baking sheet for 7-10 minutes. Allow to cool for a few minutes, then roll in powdered sugar while warm.

almond crescents

—–

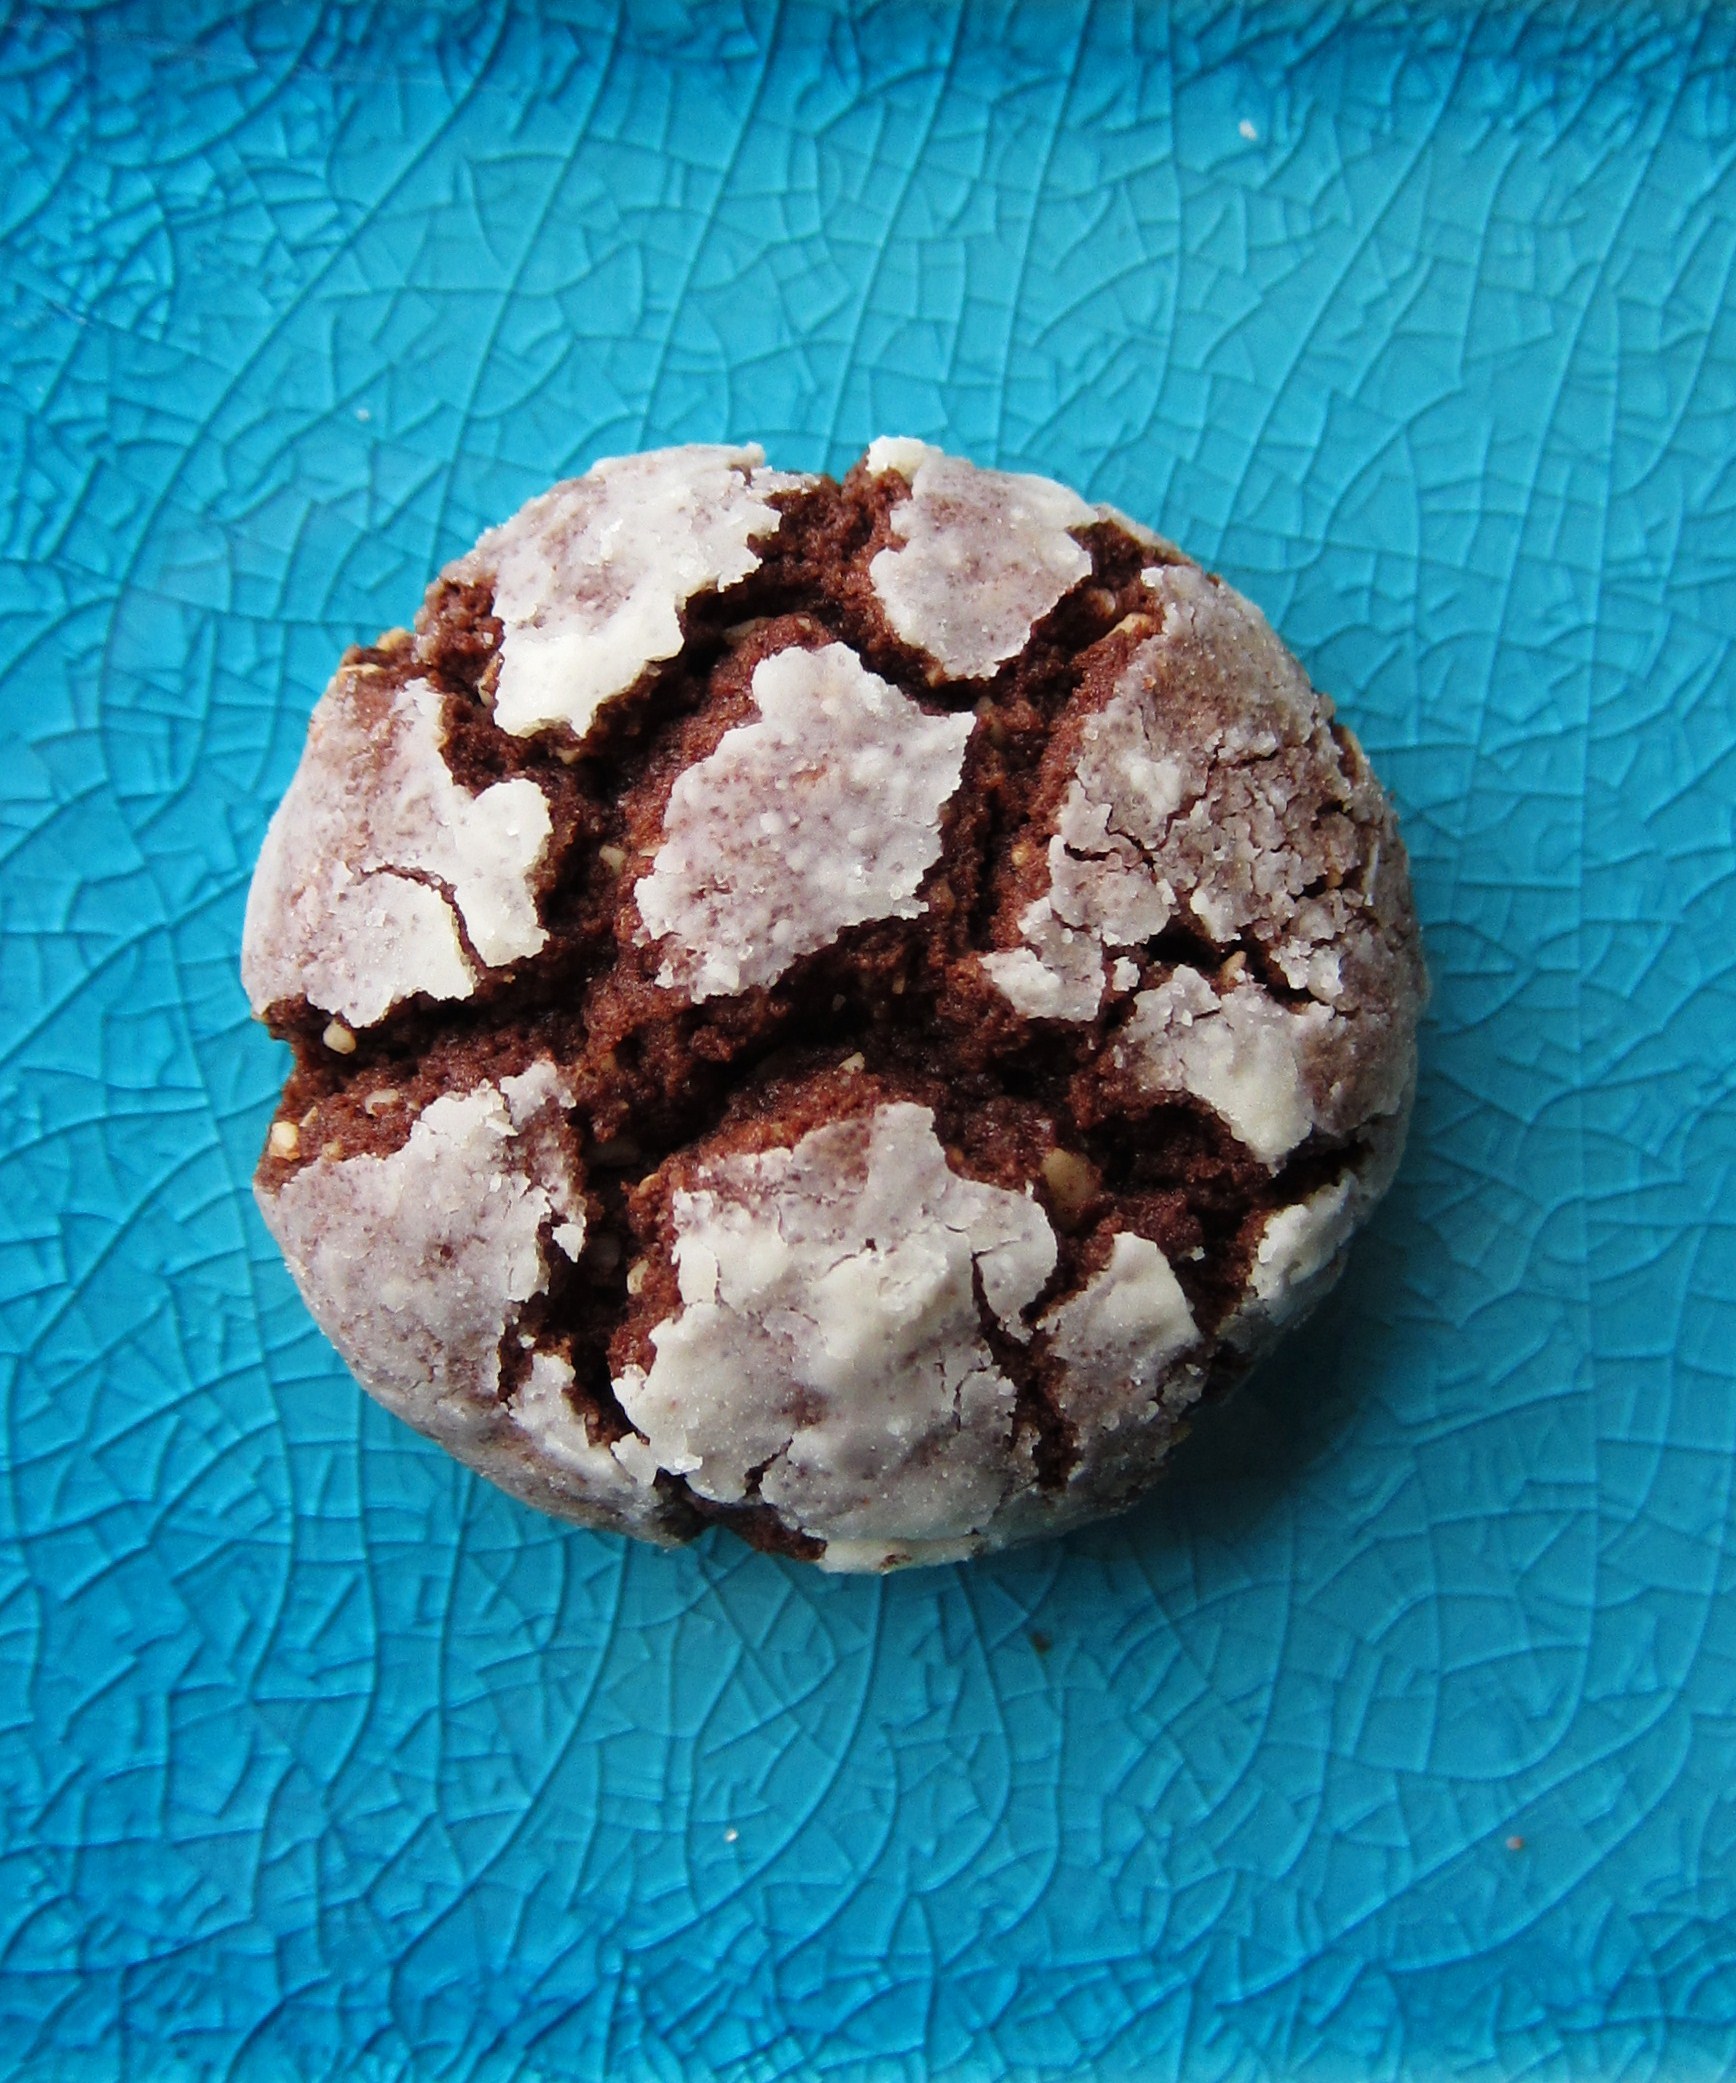
Chocolate Crackle Cookies – from Martha Stewart

Chocolate Crackle

(makes about 3 dozen)

  • 8 ounces dark chocolate (such as 70 percent cacao), finely chopped
  • 1 cup blanched almonds, toasted
  • 1/2 cup all-purpose flour
  • 1 teaspoon baking powder
  • 1/2 tsp salt
  • 1 stick unsalted butter, room temperature
  • 1 cup packed light-brown sugar
  • 2 large eggs
  • 1 teaspoon pure vanilla extract
  • 1 cup granulated sugar
  • 1 cup confectioners’ (powdered) sugar

Melt chocolate in a double boiler or a heatproof bowl set over a pan of simmering water, stirring. Let cool. Pulse almonds in a food processor until very finely chopped. Transfer to a medium bowl, and stir in flour, baking powder, and 1/2 teaspoon salt.

Beat butter and brown sugar with a mixer on medium-high speed until fluffy, 2 to 3 minutes. Mix in eggs and vanilla. Mix in chocolate. Reduce speed to low, and mix in almond-flour mixture. Refrigerate dough until firm, about 1 hour (note: the batter will not seem like a regular cookie dough, but more like a cross between cake batter and ganache to make truffles. It’s ok – roll with it. After some time in the fridge, it’ll firm up and you’ll be able to scoop it out).

Preheat oven to 350°F. Form dough into 1-inch balls. Roll in granulated sugar to coat, then in confectioners’ sugar to coat. Arrange on parchment-lined baking sheets, spacing about 1 inch apart. Bake, rotating sheets halfway through, until surfaces crack, about 14 minutes. Transfer sheets to wire racks; let cool.
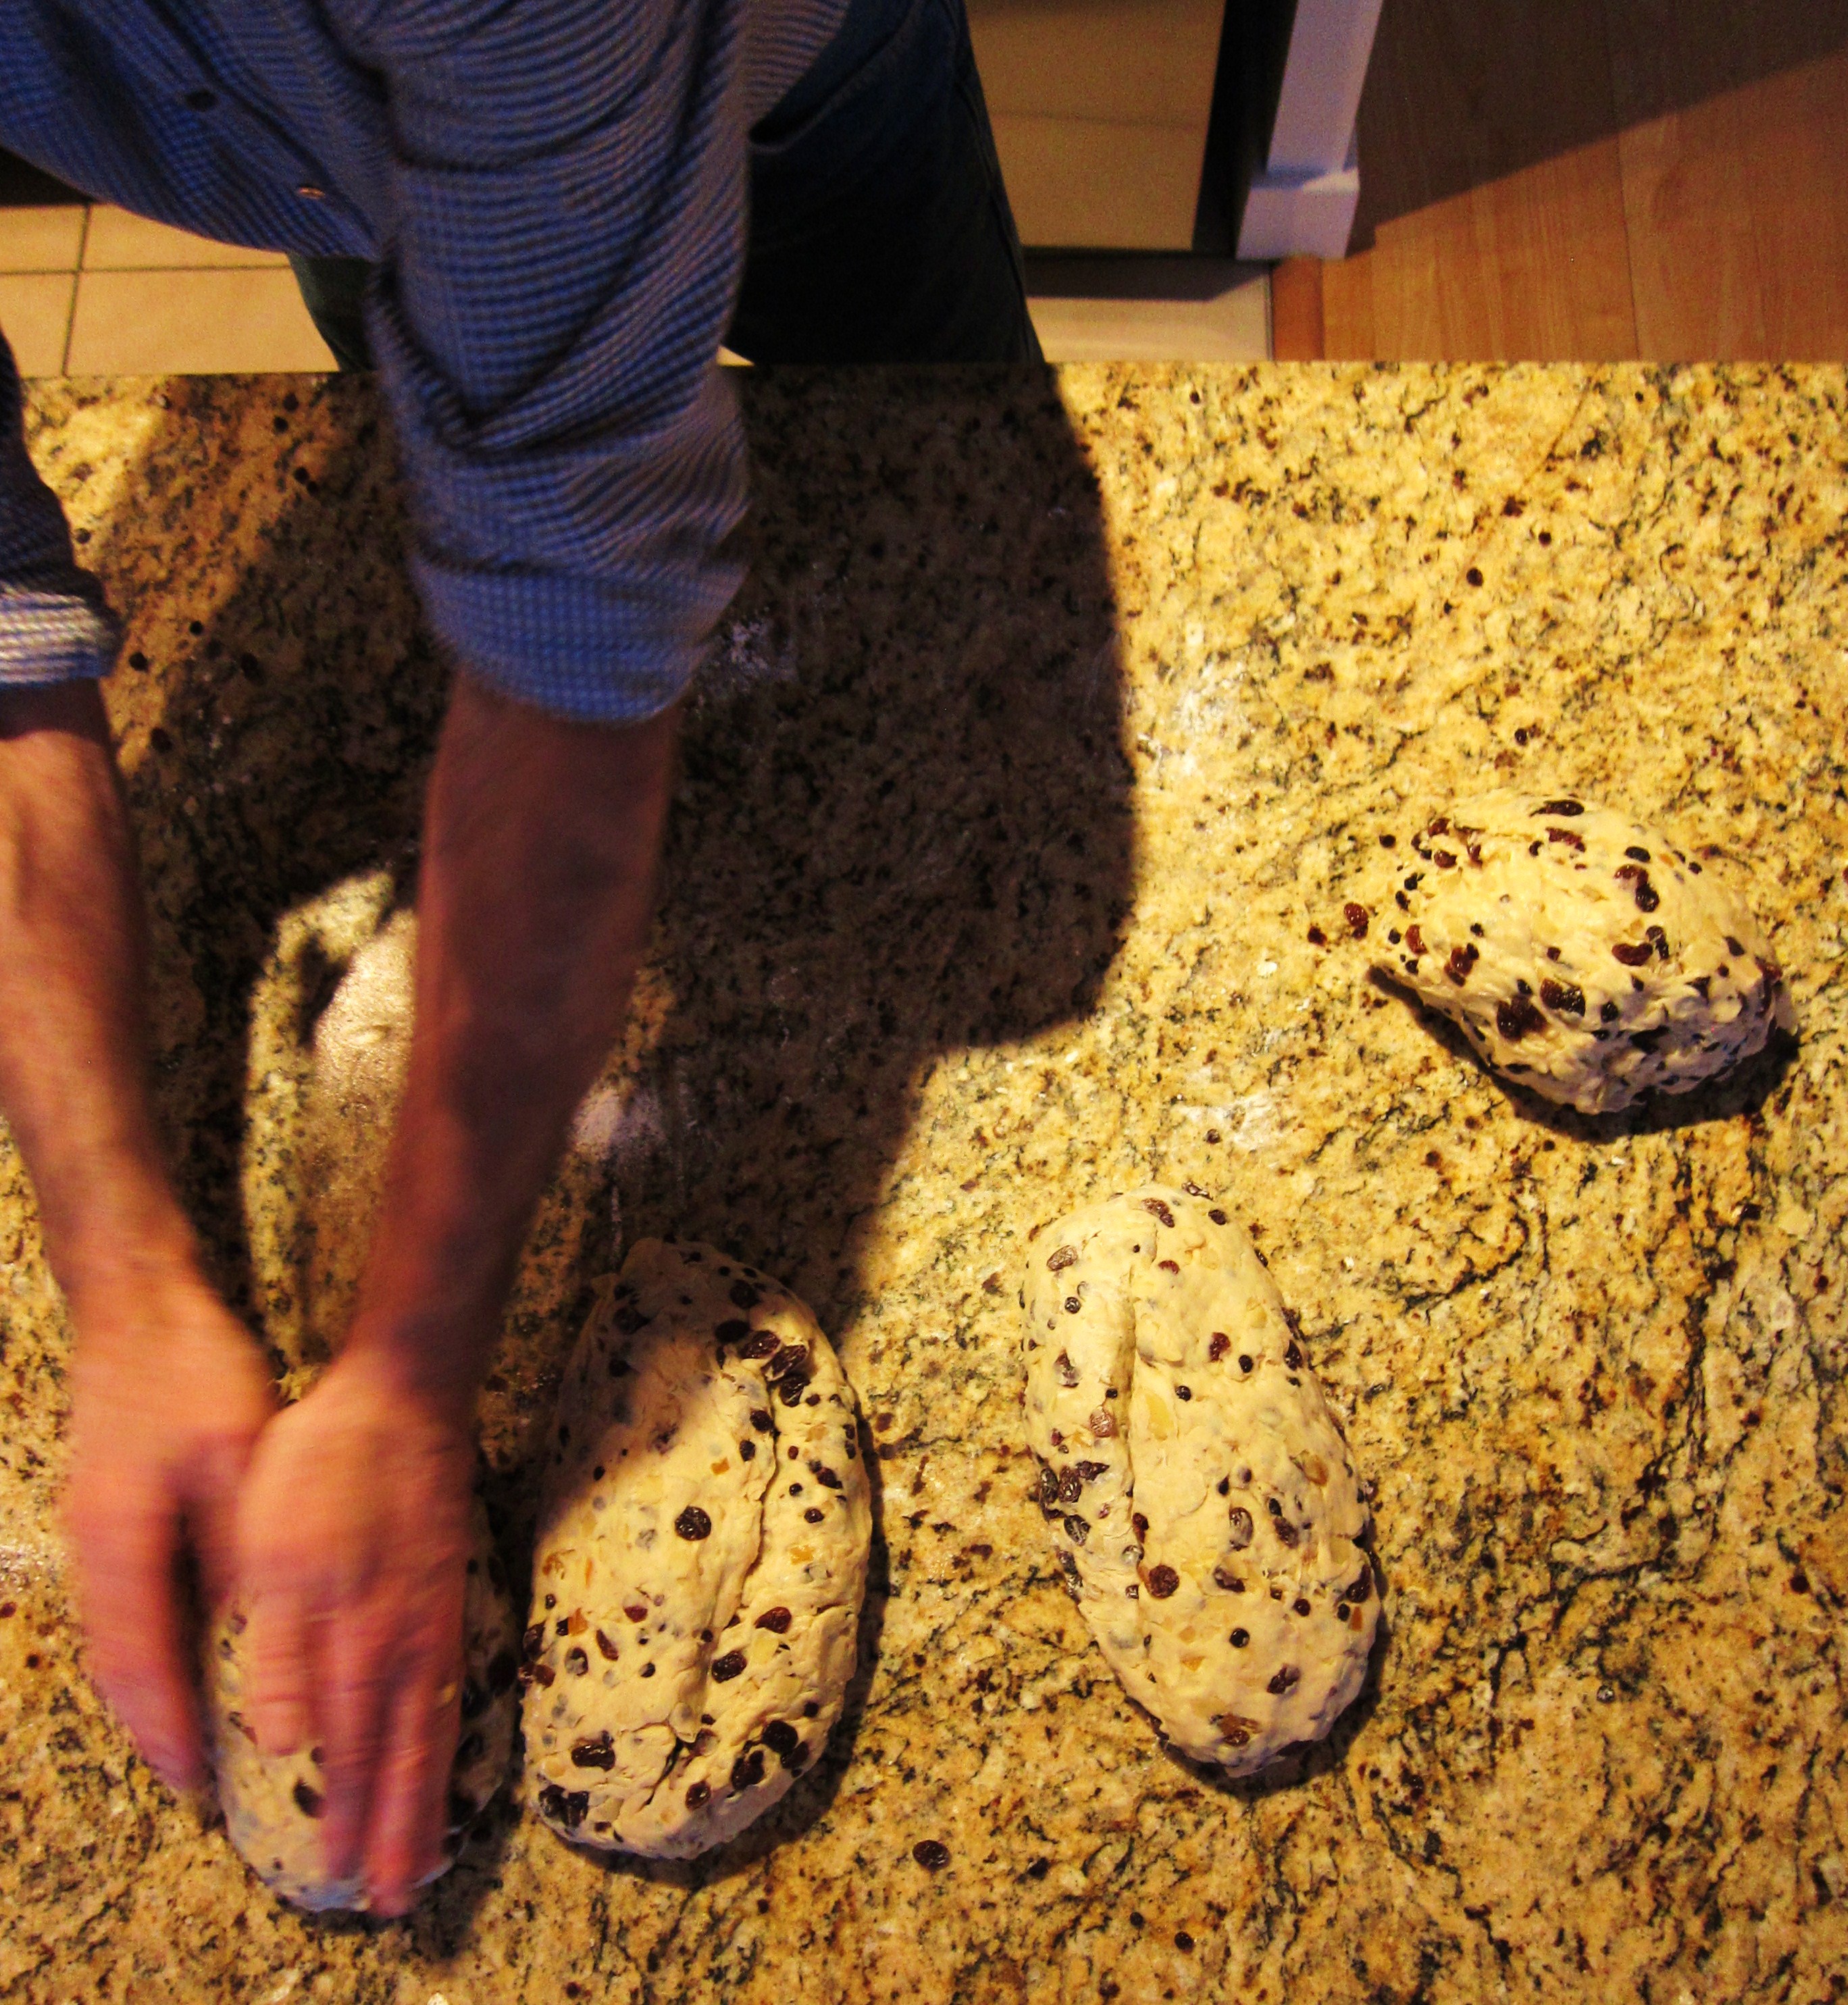
Chocolate Crackle

Taking Back Cheese

For some time now, I’ve been buying ricotta under-the-radar from someone who makes it in their converted garage. You wouldn’t guess it, but this stuff is gorgeous – it’s creamy but unbelievably light and mild in flavour, almost sweet. It’s unlike any of the preservative-heavy schlock that’s often on offer in grocery stores. It comes in a beautifully moulded shape, ready to eat on its own, spread onto toast, sprinkled over salads, or baked in the oven on top of pasta (Nonna and I have a soft spot for this dish).

However, getting fresh cheese like this on a regular basis is a tad tricky. You need to be organised. You need to submit your order in advance and get yourself to the location. While it’s always worth it, it’s definitely not convenience food.

Then it came to my attention that ricotta could quite feasibly be made at home, without any special equipment or expertise. After all, it only involved 4 ingredients and some cheesecloth. But this idea cracked open a Pandora’s box of cheese-related questions: What type of ingredients work best? Should I be using rennet? Where do I get rennet? Do I need to boil the milk? How do I ensure I don’t poison anyone with my home-made concoctions?

I didn’t want to plunge knuckle-deep into whey before knowing a few ground rules. At the same time, I was weary of the vortex of conflictual information hanging out on the Internet and, ideally, I wanted to learn these skills first-hand with someone whose experience far surpassed mine.

Enter David Asher Rotsztain

David is an organic farmer, goatherd and cheesemaker based in Mayne Island, B.C. Through community outreach workshops, he teaches natural cheese-making methods that can easily adopted by the home cook. In other words, this is guerilla-cheese-making – taking back something that in modern times has been (rather counter-intuitively) entrusted with people and entities that are alien to us and our day-to-day.

By sheer luck, a local non-profit was offering workshops with David right around the time I was thinking about making ricotta. In the workshop, he spoke about different types of cheese, their idiosyncrasies, their benefits, their beauty. We talked about raw milk versus pasteurized, whole milk versus low-fat, the use of lemon juice compared to rennet, and the wonders of edible mold. It was an eye-opening experience that broke down the process into manageable pieces and made cheese-making more approachable than I could have imagined. As I quickly learned, good cheese involves only a handful of ingredients, some time, and a bit of know-how.

Until I get around to making ricotta, I’m going to leave you with the step-by-step process for making your own fromage frais, which is essentially yoghurt strained at room temperature for 24-28 hours. It’s ridiculously simple, and though it takes a bit of time, your patience will be rewarded with a lovely, creamy round of fresh cheese, ready to serve with bread for breakfast or alongside crackers on a (hm holiday?) cheese platter.

Enjoy ♥

Homemade Fromage Frais – makes about 250g

8 - finished fromage frais


You will need:

– 1 container good-quality yoghurt, without any emulsifiers, stabilizers or gelatin (for this recipe, I used a full-fat buffalo yoghurt I found here)

1 - yogurt
– about 1 tsp salt
– a big stockpot or very deep bowl
– a wooden spoon (or something similar) that will sit solidly across the bowl
– some cheesecloth (this can include unbleached muslin or nylon cloth, but David recommends a Du-Rag. Yep, that’s right – a Du-Rag. Its shape and tight meshing make it perfect for straining this cheese. And it’s a breeze to wash for future use)

2- cheese cloth
1) Wash your cheesecloth and allow to air-dry.
2) Drape the cheesecloth atop a bowl and pour the yoghurt into its centre. Pull together the four corners of the cloth around the yoghurt; twist and secure with a knot.

3- yogurt in cheese cloth

5 - squeezing & tying

3) Tie to the wooden spoon (or similar implement) and hang over stockpot or deep bowl. The cheese should be able to hang freely, not touching the bottom.

6 - hanging

4) Leave it to hang overnight at room temperature. As they whey* drips into the pot, the yoghurt will slowly become cheese.
(*do not discard whey by pouring it down the drain, as it is toxic to aquatic life. Instead, keep it to make ricotta or feed your plants, dogs or compost with it.)

5) After 24 hours, this cheese will have dripped dry. To improve flavour, and to help preserve it longer, salt the cheese by opening up the cheesecloth and sprinkling a teaspoon of salt over the surface of the cheese. Close the bag, and hang it again for another 4 hours.

7 - opening & salting

9 - cheese & toast

10 - cheese & toast - detail

Titbits from David:
*don’t squeeze the cheese to force out whey (it’s sooo tempting, but resisting will avoid any mishaps…)
*make this cheese with goat’s yoghurt, and you get chèvre.
*make this cheese with extra high fat yoghurt, and you get cream cheese.

And if you still need some cheese-making inspiration, watch this video (disclaimer: it may make you want to pack your bags, move to France, and become a shepherd).

Hello, Winter.

Well, this is awkward. The last post I left you with involved a late-autumn frolic through the orchard and some apples. And now there’s somehow a solid layer of snow on the ground.

Hm. Funny how that happens.

If it’s any consolation, you haven’t missed much in the kitchen department – I haven’t been cooking a whole lot these days and even when I have, the results have been nothing to cry home about. And with Taste MTL happening earlier in the month, I was busy stuffing my gob here and here for my work with The Main, plus here because I was told it was fantastic (which it was).

Then health stuff made the last couple of weeks feel icky and prompted a lot of early nights, boiled artichoke dinners and zero computer screens after 7pm. It hasn’t exactly been girl-gone-wild around here.

With that unpleasantness out of the way (and with a bit more time on my hands), I’ve been catching up on winter recipe collecting, fattening up my Pinterest board and bookmarking my Ottolenghi and Bernard Clayton cookbooks, all of which has gotten me really jazzed about cooking through the colder months. There’s also the fact that there are ONLY 24 MORE SLEEPS ‘TIL CHRISTMAS, which means I’ve started to daydream about truffles, caramels, shortbreads, fig tarts, ginger cookies, pannetone, paneforte, torrone, clementines, pomegranates, almonds, chestnuts, lemons, persimmons, cinnamon, rosemary, sage, thyme, bourbon…and all the other usual suspects that I’m keen to share with friends and family and you!

While that stuff is in the works, I’d like to leave you with a recipe I made the other day that hit all the right (wintery) buttons. It’s essentially a caramelized, aromatic eggplant filled with pearly Israeli couscous, tangy yogurt and crunchy almonds. You’ll see that the recipe calls for sumac. If you haven’t already used this in your cooking, I highly encourage you to get your hands on some (barter or beg if you have to). Used mostly in Middle Eastern cuisine, it’s a fine, burgundy-coloured spice that has a lemony kick – good for sprinkling over salads, pilafs, roasted potatoes and grilled meats.

Thanks for checking in. See you here again soon, lovelies.

Spiced Eggplant with Herbed Israeli Couscous – serves 2 as a main, or 4 as a side
(adapted from Souvlaki for the Soul)

Couscous Eggplant

Ingredients

– 2 baby (Italian) eggplants, cut into 1cm slices
– ½ tsp turmeric
– ½ tsp ground coriander
– ½ tsp ground cumin
– ¼ tsp ground cinnamon
– ½ cup cooked Israeli couscous
– a handful of chopped flat-leaf parsley
– a handful chopped coriander (cilantro)
– ¼ cup slivered (or chopped) almonds, skin-on (or not)
– olive oil
– lemon juice
– salt and pepper
– Greek yogurt to serve
– sumac for garnish (optional)

Directions:

Pre-heat the oven to 350° F. Combine the ground turmeric, coriander, cinnamon and cumin in a bowl.

Drizzle the eggplants with some olive oil and and rub each with some of the spice mixture. Cook in the oven till eggplants have softened (approx 30-35 mins).

Combine the cooked couscous, herbs and almonds along with a drizzle of olive oil and a squeeze of lemon juice. Stir to combine.

Spoon the couscous mixture into each eggplant piece, adding a dollop of yogurt and a sprinkle of sumac to each. Serve straight away.

Couscous Eggplant - detail

Orchard tale, apple tart

It was mid-October when Shane, Margaux and I went apple picking in Oka. We walked through dewy grass, relishing the cool, fresh air that smelled of earth and leaves. Everything was misty and moody and gorgeously still.

1 - raspberry field

view from the belvedere

It being late in the season, and drizzling, meant that we were the only three people in a large, rolling orchard surrounded by flame-coloured trees. We wandered through the rows, plucking apples, some as dark as plums and others as large as grapefruit. From time to time, geese flew overhead in squawking, V-shaped strings.

empire

4 - autumnal orchard

We carried our bounty back to the house to be weighed, where our host served hot cups of carrot-apple soup. Our plans to go for a short hike were overheard. “You can reach the National Park through the orchard, you know.”

6 - lunch break

Grateful for the advice, we followed the long path through the orchard to the point where it met the Park, stepping into a tree-filled landscape dotted with yellow leaves that fell to the forest floor like snowflakes.

7 - Oka National Park

On the edge of the forest came a clearing, leading us to a look-out over the River of Two Mountains. In a miraculous change of weather, the cloudy mist had given way to full sunshine, beaming and hot.

8 - view Lake of Two Mountains

view from the chapel lookout

—–

The only consolation for leaving this enchanting place was the batch of round, red beauties we got to take home with us – four kinds, each with a personality of their own.

10 - freshly picked

While all were delicious, I had a soft spot for the crunchy, plum-coloured Empire, which were used in this tart. I wasn’t sure they would survive the heat of the oven, but they held their shape, fanning out elegantly along the crust and bejewelling the top of the custard with their beautiful, dark skins. It sounds chic, but it’s actually very simple. And a nice way to pay homage to the familiar flavours of apple, vanilla and butter. If you close your eyes, you can almost smell the orchard.

11 - French apple tart

12 - French apple tart detail

French Apple Tart  – makes enough for one large tart + one small

Shortbread pastry – adapted from a Laura Calder recipe

  • 2 ¼ cups flour
  • ½ tsp salt
  • 2 Tbsp sugar
  • 1 cup butter, cut into pieces
  • ⅓ cup ice-cold water

Put the flour, salt and sugar in the bowl of a food processor; then add the pieces of butter. Pulse until you reach a coarse crumb texture. Keep pulsing while slowly adding the cold water through the feed tube until the dough starts to come together (if you don’t have a food processor, you can also do this with your hands.)

Turn out the dough onto a floured work space and work it gently until it comes together, being careful not to overwork it. Flatten into a disc and refrigerate for about 20 minutes.

Filling – adapted from The Encyclopedia of French Cooking, 1982

  • juice of one lemon
  • 1 ½ lbs crisp apples
  • ⅓ cup milk
  • ⅓ cup heavy cream
  • 2 eggs, beaten
  • ¼ cup sugar
  • 1 tsp vanilla extract (or ½ tsp fresh vanilla, from the pod)

Pour the lemon juice into a large bowl. Cut and core the apples one by one, slicing them thinly (about 1 cm thick) and adding them to the bowl of lemon juice, stirring to prevent discoloration.

Preheat the oven to 450°F.

Remove the dough from the fridge and roll it out on a floured surface into a circle large enough to line the base and sides of a tart pan (preferably with a removable base). Roll the rolling pin over the top to remove the access dough off the sides.

Arrange the apple slices in a tart pan in a circular pattern, working from the edge of the dish inwards, and overlapping the slices slightly. Bake in the preheated oven for 10 minutes.

Meanwhile, put the remaining filling ingredients in a bowl and whisk together.

After the 10 minutes, remove the tart pan from the oven and reduce the oven to 375ºF.  Pour the egg mixture over the apple slices. Return to the oven and continue baking for an additional 30 minutes at 375º F. Serve warm.

13 - French apple tart slice

Verger écologique d’Oka
445 Rang de l’Annonciation
Oka, QC J0N 1E0
(450) 479-6464
www.vergerbrabantvincent.wordpress.com

(Orchard photos by Shane, Margaux and me)

Recipes in absentia – almonds and artichokes

Those of you who don’t see me in my day-to-day have politely inquired if I’m still alive, if I’ve been suffering from a physical ailment or if I’ve escaped to a cabin in the woods without access to electricity or other humans.

While these are all very inventive deductions, none of them (fortunately?) reflect reality. I didn’t fall into a bottomless pit or knock my head and get amnesia. The truth is much more boring. The truth is, I’ve just been…

busy.

There are times when things hit you full throttle, all at once, and you end up spreading yourself a little too thin. This isn’t necessarily a bad thing (except for the spreading too thin part – that, as it happens, leads to migraines). It just means you have to reassess your free time so that you don’t completely lose your marbles. In my case, that means evenings and week-ends have been gobbled up by a variety of commitments, most of them in the realm of food – some involving menu-planning and cooking, some involving writing and research, and some involving an intersection of both – and all of which (unlike this blog) have been tightly connected to other people’s scheduling, all of it having to be done outside of the hours of my full-time day job. (which itself has a lovely by-product in the form of a 2-hour daily commute.) (bless all you people who do this with children. You are forces of nature.)

In the few sporadic lulls, I haven’t had the juice (nor physical, nor mental) to put down words on this page, opting instead for some catch up of these and these and reading this and listening to this, usually during those 20 gorgeous minutes before bed, or the relentless commute to and from work (I like my job, but that bus+subway+bus commute is a total soul-sucker). In the few quiet moments, I’ve stuck to things I know will be a guaranteed good time and, most importantly, far, far, far, faaaar removed from anything having to do with food.

—–

The first two weeks in October are stacking up to be a bit bonkers too, but I’m taking advantage of this Monday night respite to bring to you two recipes, both of which were made for a cocktail gathering organised by a photographer friend for a low-key shoot. I think you’ll like them – the almonds are smoky, salty and sweet, and partner up well with a pre-dinner drink (beer! bourbon! vermouth!); the artichoke bites come from a recipe I stole from my mom, who stole it from my grandma (thieves, the lot of us…). Mom’s is a much lighter version, as it uses panko instead of traditional breadcrumbs, which tend to get heavy and bit stodgy. I like to serve them warm with a lemon aïoli and some raw veg, like fennel or radish. Both recipes are highly addictive and tend to make a splash at parties – make them for friends and/or anyone you are trying to seduce. You’re bound to make the right impression.

—–

A final note: if I disappear again for a little bit, know that I’m likely still kicking around somewhere – perhaps invisible, but not far – and thinking about the next tasty concoction I’m eager to share with you.

Until next time, be well. Eat well.

spiced almonds

Spiced Almonds – adapted from Laura Calder (makes about 3 cups)

  • 1 cup whole, unsalted almonds (with their skins)
  • 1/2 teaspoon ground cumin
  • 1/2 teaspoon cumin seeds
  • 1 teaspoon hot paprika
  • 2 teaspoons chopped fresh rosemary
  • 2 teaspoons brown sugar
  • 2 teaspoons olive oil
  • fleur de sel (or sea salt)

Directions

Heat the oven to 400°F. Spread the almonds on a baking sheet and toast until darkened and fragrant (about 8 minutes). Remove and spill into a sauté pan, placed on medium heat. Add the cumin, cumin seeds, hot paprika, rosemary, and sugar. Drizzle with the oil and toss over the heat to coat (shaking the pan to coat them evenly works best). Add the fleur de sel and spill onto a baking sheet to cool. Once cooled, serve or store in a jar.

spiced almonds - detail

—–

Breaded Artichoke Bites – makes approx. 30

breaded artichokes - detail

    • 2 cans (about 13oz each) artichoke hearts – in water, not oil
    • 4 eggs, beaten
    • 1/2 cup flour
    • 1 cup panko breadcrumbs
    • 1 clove garlic, minced
    • 1 tsp salt
    • 2 tsp parsley, finely chopped
    • 1/3 cup grated parmesan
    • 1/2 cup sunflower or vegetable oil

(*Note: the flavourings can be adjusted to suit your taste, so feel free to play around with the quantities of garlic, parsley, cheese and salt by tasting the breadcrumb mixture as you go)

Directions

1) Strain artichokes and cut into 3-4 pieces (depending on the size you want); place on paper-towel or dish-towel and set aside.

2) Mix together panko breadcrumbs, garlic, salt, parsley and parmesan.

3) Set up the flour, beaten egg and panko mixture in separate bowls.

breading ingredients

4) Working in batches, place a few artichoke pieces in the flour and, working with two forks, dip into the beaten egg mixture, then the breadcrumbs, tossing lightly to coat.

5) Place finished pieces on a plate while you finish up the others.

6) Place a frying pan on medium-high heat and add the oil to the pan.

7) Once the oil is hot (but not smoking), reduce the heat to medium and fry the artichokes in batches, turning them once the bottoms are barely-golden and cooking them until the coating is evenly golden. Repeat in batches (try not to overcrowd the pan)*.

8) Transfer cooked artichokes to a paper towel-lined tray.

9) Serve warm or refrigerate (2 days max) and reheat on a parchment-lined baking sheet at 350°F for 8-10 minutes, turning once halfway through.

(*Note: if at some point the oil seems to be “dirty” with lots of darkened bits of breadcrumb, discard the hot oil in a tin and start the next few batches with fresh oil).

breaded artichokes

Lemon Aïoli – makes about 1 cup

  • 1 large egg yolk (the best you can afford)
  • 1/2 teaspoon Dijon mustard
  • 3/4 cup olive oil (the best you can afford)
  • lemon zest from 1/2 lemon
  • lemon juice from 1/2 lemon
  • 1/4 tsp salt

Directions

In a small bowl, whisk together the egg yolk and mustard. Whisking constantly, add the oil in a slow, steady stream. The aïoli should be quite thick. Whisk in the lemon juice and salt. Serve chilled, alongside artichoke bites.

—–