• Home
  • About

julia chews the fat

julia chews the fat

Category Archives: The Basics

Feed a cold, starve a fever

24 Friday Jan 2014

Posted by julia chews the fat in Lunch & Dinner, The Basics, Vegetarian

≈ 2 Comments

There’s nothing quite like a 24-hour stomach virus to annihilate your interest in food in one fell swoop. Even a day or so after the last few nauseous waves have passed through your body, you’re still sensitive to words like “pizza” and “stew”, which make your squirm uncomfortably as the mental images of oozy cheese and braised meat wade in your head.

Once that phase passes, you enter the “I’m feeling back on track holy geez I’m starving feed me now” phase of recovery, causing you to make the premature decision to eat real food again, at which point your body promptly reminds you that getting cocky le gastro will get you nowhere. It’s taken up residence in your body and, no matter how short its stay, it owns you. After a short and regretful holiday with Mr. Grilled Cheese, you begrudgingly return to your sobering diet of soda crackers and water.

You’re only truly out of the woods when food becomes appealing, enjoyable and friendly to your body again. That said, you still need to ease your way back in, with things that are light and nutritive. Nothing with too much pizazz. Nothing with jazz hands.

I found this recipe by searching “immunity food” on the Interweb. Nourishing, gingery and easy on the eyes, this soup hit all the right buttons, becoming the magical cure that made me feel human again.

Eat it hot, straight from the pot and watch as all the bad melts away…

Get-Well Soup (makes approx. 4 servings) – adapted from 101 Cookbooks

Healing Soup

  • 1 medium onion, quartered and thinly sliced
  • 3 celery stalks, thinly sliced
  • 1 medium carrot, thinly sliced
  • 8 medium garlic cloves, very thinly sliced
  • 2 tablespoons grated ginger, peeled
  • 3/4 teaspoon finely ground white pepper, plus more to taste
  • 1 1/2 cups mushrooms, trimmed (shitake or brown)
  • 8 ounces firm tofu, sliced into thin slabs
  • 2 1/2 teaspoons sea salt
  • olive oil for sautéing
  • chopped green onions, sliced radish, daikon and sprouts for serving

Heat the oil in a large soup pot over medium heat, and stir in the onion, celery, garlic, and ginger; gently sauté just until soft. Stir in the white pepper, salt and 10 cups of water. Turn up the heat and simmer for 15 minutes. Meanwhile, heat a bit more oil in a pan. Once hot, add the sliced mushrooms and brown until crispy. Remove and set aside. If the pan is dry, add a splash more oil, heat it up and add the tofu slices, cooking them about 2 minutes each side. Ladle the soup into shallow soup bowls and top with lots of green onions, pea shoots, radish and carrots slices, along with some fried mushroom and tofu.
Healing Soup

Share this:

  • Tweet
  • Share on Tumblr
Like Loading...

A Better Kind of Fruitcake

31 Tuesday Dec 2013

Posted by julia chews the fat in Breakfast & Brunch, Cooking For Your Peeps, Holidays, Sweet Tooth, The Basics, Vegetarian

≈ 4 Comments

Almost twenty years ago, at Christmastime, my dad bought a loaf of stollen for the first time. He brought it home, cut it up and plated it. We were eager to try something so foreign and – for kids growing up in the burbs in the 90s – so exotic-sounding. But, one bite in, our excitement quickly unravelled, being replaced with the uneasy feeling of being duped. Not unlike a lot of the holiday fruitcakes I’ve reluctantly tasted over the years, this store-bought stollen was dry and lacklustre – a pasty-coloured loaf studded with nondescript dried fruit that rolled out off the sides with each bite.

It was miserable.

Unlike the rest of us, my dad saw the potential of this German-style fruitcake and shortly thereafter, set out to make his own. He sourced different recipes, even quizzing our German neighbour, Mrs. Nack, for secret stollen-making tips. And then, nearly every year since, he’s gone into full stollen-production mode – drenching the fruit several days ahead, making the dough, cutting the loaves, baking them, dusting them with sugar and wrapping them attentively. For someone who doesn’t bake (or have a Teutonic bone in his body), dad’s got this German sweet bread down to an art. The final result is a beautifully dense, yeasty bread, brimming with sliced almonds and a boozy mixture of currants, raisins and citrus peel. The longer it sits, the better it gets, as the brandy further permeates the crumb and the almonds slowly transform into marzipan. There isn’t a trace of neon-coloured maraschino or stale walnut in this fruitcake. Not if dad has anything to do with it. And that’s the way we like it.

Wishing a very happy birthday to my dad ♥ and a Happy New Year to all of you, dear readers! Looking forward to sharing more tasty edibles with you in 2014.

Dresden Stollen – makes 4 medium loaves or 6 small ones stollen 21

  • 1⅓ cups currants
  • 1 cup orange zest
  • 1 cup lemon zest
  • 3 cups raisins (Thompson or sultanas)
  • 4 ⅓ cups sliced, blanched almonds
  • 6½ cups (1 kilo) sifted flour
  • 6 packets yeast (8 gr each)
  • 2 cups icing sugar
  • ½ tsp ground cardamom
  • tsp cinnamon
  • 2 pinches mace
  • 2 pinches allspice
  • ½ tsp salt
  • 1 cup brandy
  • 2 cups lukewarm milk (reserve 1 cup for proofing the yeast)
  • 1⅓ lbs butter, room-temperature

Pour the brandy over the mixture of currants, raisins, almonds & citrus zest. Mix and cover, allowing to soak overnight (or over several days). stollen 2 Proof the yeast by sprinkling it over 1 cup of the lukewarm milk (about 100ºF) to which has been added a tablespoon of sugar. Set aside in a warm place for about 10 minutes. The yeast is active if it forms a creamy foam on top of the milk. Sift the flour into a large mixing bowl. Add the room-temp butter, icing sugar, the remainder of lukewarm milk, spices and the proofed yeast mixture and mix. Transfer to a slightly floured work surface and knead thoroughly. stollen 3 stollen 4 stollen 5 Cover the dough and allow to rise for approx. 30 minutes in a warm place. Add the prepared fruit mixture. Knead the fruit mixture thoroughly into the dough. The dough should be smooth and elastic. stollen 12 Roll the dough into a long thick cylinder shape and cut into 4-6 pieces. Form into loaves. stollen 15 Transfer to a greased and floured baking tray, cover with a clean dish towel and leave to rise for 20-30 minutes in a warm, draft-free place. Preheat the oven to 350º F and bake for 50 minutes. stollen 17 stollen 18While the stollen is still warm, brush with melted butter and dust with icing sugar. Drizzle a little brandy over-top. Wrap well in muslin cloth or aluminium foil and store in a cool place. stollen 19 stollen 20 stollen 22 Note: Dad likes to douse his stollen every couple of days with brandy to keep it moist (and, let’s be honest, make it more delicious and boozy). Just re-dust the whole loaf with a bit of powdered sugar before serving.

Share this:

  • Tweet
  • Share on Tumblr
Like Loading...

Taking Back Cheese

20 Friday Dec 2013

Posted by julia chews the fat in Breakfast & Brunch, Lunch & Dinner, Snacking, The Basics, Vegetarian

≈ Leave a comment

For some time now, I’ve been buying ricotta under-the-radar from someone who makes it in their converted garage. You wouldn’t guess it, but this stuff is gorgeous – it’s creamy but unbelievably light and mild in flavour, almost sweet. It’s unlike any of the preservative-heavy schlock that’s often on offer in grocery stores. It comes in a beautifully moulded shape, ready to eat on its own, spread onto toast, sprinkled over salads, or baked in the oven on top of pasta (Nonna and I have a soft spot for this dish).

However, getting fresh cheese like this on a regular basis is a tad tricky. You need to be organised. You need to submit your order in advance and get yourself to the location. While it’s always worth it, it’s definitely not convenience food.

Then it came to my attention that ricotta could quite feasibly be made at home, without any special equipment or expertise. After all, it only involved 4 ingredients and some cheesecloth. But this idea cracked open a Pandora’s box of cheese-related questions: What type of ingredients work best? Should I be using rennet? Where do I get rennet? Do I need to boil the milk? How do I ensure I don’t poison anyone with my home-made concoctions?

I didn’t want to plunge knuckle-deep into whey before knowing a few ground rules. At the same time, I was weary of the vortex of conflictual information hanging out on the Internet and, ideally, I wanted to learn these skills first-hand with someone whose experience far surpassed mine.

Enter David Asher Rotsztain. 

David is an organic farmer, goatherd and cheesemaker based in Mayne Island, B.C. Through community outreach workshops, he teaches natural cheese-making methods that can easily adopted by the home cook. In other words, this is guerilla-cheese-making – taking back something that in modern times has been (rather counter-intuitively) entrusted with people and entities that are alien to us and our day-to-day.

By sheer luck, a local non-profit was offering workshops with David right around the time I was thinking about making ricotta. In the workshop, he spoke about different types of cheese, their idiosyncrasies, their benefits, their beauty. We talked about raw milk versus pasteurized, whole milk versus low-fat, the use of lemon juice compared to rennet, and the wonders of edible mold. It was an eye-opening experience that broke down the process into manageable pieces and made cheese-making more approachable than I could have imagined. As I quickly learned, good cheese involves only a handful of ingredients, some time, and a bit of know-how.

Until I get around to making ricotta, I’m going to leave you with the step-by-step process for making your own fromage frais, which is essentially yoghurt strained at room temperature for 24-28 hours. It’s ridiculously simple, and though it takes a bit of time, your patience will be rewarded with a lovely, creamy round of fresh cheese, ready to serve with bread for breakfast or alongside crackers on a (hm holiday?) cheese platter.

Enjoy ♥

Homemade Fromage Frais – makes about 250g

8 - finished fromage frais


You will need:

– 1 container good-quality yoghurt, without any emulsifiers, stabilizers or gelatin (for this recipe, I used a full-fat buffalo yoghurt I found here)

1 - yogurt
– about 1 tsp salt
– a big stockpot or very deep bowl
– a wooden spoon (or something similar) that will sit solidly across the bowl
– some cheesecloth (this can include unbleached muslin or nylon cloth, but David recommends a Du-Rag. Yep, that’s right – a Du-Rag. Its shape and tight meshing make it perfect for straining this cheese. And it’s a breeze to wash for future use)

2- cheese cloth
1) Wash your cheesecloth and allow to air-dry.
2) Drape the cheesecloth atop a bowl and pour the yoghurt into its centre. Pull together the four corners of the cloth around the yoghurt; twist and secure with a knot.

3- yogurt in cheese cloth

5 - squeezing & tying

3) Tie to the wooden spoon (or similar implement) and hang over stockpot or deep bowl. The cheese should be able to hang freely, not touching the bottom.

6 - hanging

4) Leave it to hang overnight at room temperature. As they whey* drips into the pot, the yoghurt will slowly become cheese.
(*do not discard whey by pouring it down the drain, as it is toxic to aquatic life. Instead, keep it to make ricotta or feed your plants, dogs or compost with it.)

5) After 24 hours, this cheese will have dripped dry. To improve flavour, and to help preserve it longer, salt the cheese by opening up the cheesecloth and sprinkling a teaspoon of salt over the surface of the cheese. Close the bag, and hang it again for another 4 hours.

7 - opening & salting

9 - cheese & toast

10 - cheese & toast - detail

Titbits from David:
*don’t squeeze the cheese to force out whey (it’s sooo tempting, but resisting will avoid any mishaps…)
*make this cheese with goat’s yoghurt, and you get chèvre.
*make this cheese with extra high fat yoghurt, and you get cream cheese.

And if you still need some cheese-making inspiration, watch this video (disclaimer: it may make you want to pack your bags, move to France, and become a shepherd).

Share this:

  • Tweet
  • Share on Tumblr
Like Loading...

Campari per la stronza

15 Monday Jul 2013

Posted by julia chews the fat in Beverage, The Basics

≈ 1 Comment

Bitter is a contentious flavour, dividing people into two camps – the lovers and the haters. To justify their aversion, the haters will point to anthropology, arguing that bitterness is the sensory cue for poison, and so humans are biologically hard-wired to avoid it. They will say that scrunching our noses and spitting out something that’s bitter is a normal, natural survival mechanism that helps us stay alive.

Sorry, haters, but by that logic, I (and most of my relatives) would’ve croaked a long time ago.

Bitter foodstuffs are my kryptonite. It comes part and parcel with being mezza italiana. I’d be hard-pressed to imagine a world without rapini, raddichio, dandelion greens, or chicory; grapefruit, lemon peel, licorice, or chinotto, espresso, and quinine. To me, and a lot of people out there, these things are just totally exquisite. Euphoric, even. The first sip of an IPA is enough to send me into a blissful trance. And don’t even get me started on marmalades, or we’ll be here all day.

Another one of my favourites in the world of bitter things – especially on a hot, blistering day like today – is that ruby-red elixir, Campari. I happen to know a lot of people that think Campari is completely revolting – specifically, “supertasters“, anthropology nerds (see 1st paragraph) and those who have made the ill-fated decision to knock back several glasses at a party – straight, no chaser – only to suffer the consequences of Campari sans modération. If that did happen to you, I don’t expect you to fall in love with Campari. But I also suspect that there are a lot of you out there who don’t drink it basically because you don’t know what to do with it. If that’s the case, I’d like to introduce you to the cocktail below.

This drink strikes the balance between bitter and sweet and is enjoyed undiluted (i.e. without watery or fizzy things added). The name comes from a former paramour who, despite being initially confused by my obsession with bitter drinks, came to cultivate a fondness for them too. The cocktail was improvised on a day we wanted to make Negronis, but were out of gin. He baptised it “La Stronza” and, well, the name sort of stuck. It’s a cross between a traditional Negroni and an Americano, the difference being that you nix the club soda and you switch the gin for some dry vermouth. Served on ice, it’s one of the best ways to quench mid-summer heat AND get your bitterness fix.

Negroni

La Stronza – serves one

  • 1 oz Campari
  • 1 oz sweet (red) vermouth
  • 1 oz dry (white) vermouth
  • 1 orange peel twist
  • dash of orange bitters (optional)
  • ice cubes

Prep an Old-Fashioned (lowball) glass with ice cubes. In a chilled cocktail shaker or pint glass, stir together the sweet, dry vermouth and Campari until well combined. Pour over ice and garnish with orange twist.

Share this:

  • Tweet
  • Share on Tumblr
Like Loading...

Learning to grin and bear it

30 Thursday May 2013

Posted by julia chews the fat in Cooking For Your Peeps, Food Away From Home, Sweet Tooth, The Basics, Vegetarian

≈ 11 Comments

“One of the secrets, and pleasures, of cooking is to learn to correct something if it goes awry; and one of the lessons is to grin and bear it if it cannot be fixed.” – Julia Child

A couple of weeks back, I took a short viennoiserie class with the lovely people at La Cuisine Paris, where pastry chef Guillemette guided half a dozen of us through the different techniques and steps required to make croissants, amandines and chocolatines. It was a bit of a surreal experience (pastry class, in Paris, in the springtime – pinch me), and despite not really being in my element, I ploughed away and left the class with a palpable sense of accomplishment. However minimal that accomplishment may actually be in grand scheme of things…still…I MADE CROISSANT. High five.

Arriving back in Montreal, I knew that if the information was left to hang out in the dusty recesses of my brain, I was sure to forget the details and subtleties that Guillemette had imparted to us. Not wanting to waste the potential of the experience, I stocked up on supplies and found the first available weekend to make a go of it. To my surprise, I also had volunteers willing to roll up their sleeves and do it with me – which was perfect, because not only would I have additional man-power, but I’d also have (other) inexperienced people to blame if it all went to hell.

Just kidding ♥

—–

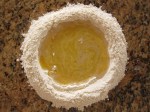
The start was promising – I had my yeast from the baker, my electronic scale, my mise en place. The whole set-up was disturbingly perfect. Even the starter dough, the thing I was most worried about, seemed to look and feel like it should when I tucked it into the fridge to rest overnight. I began to feel a little like Maria in that scene from the Sound of Music.

But soon, I was brought back to the reality of my amateurism. And things got ugly. Fast.

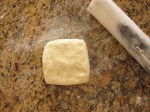
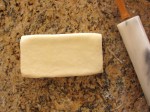
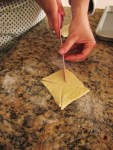
On the second turn (folding) of my puff pastry dough, the underside was showing signs of tearing. At first, it was just one tear, which I quickly (sloppily) patched up. But then the more I rolled, the more the dough started to look like it was suffering from third degree burns. The butter began to ooze out from air pockets that had formed during rolling, resulting in a pot-marked dough that looked nothing like the one I had made in class. Family was in the room, so I restrained from swearing aloud, but in my head there was a foul-mouthed sailor blaspheming on repeat.

Distracted by my ugly, ugly dough, I forgot to add a slick of egg wash to the first batch of croissants, which may explain why they turned out more like overcooked dinner rolls. My guinea pigs taste-testers assured me they were good, but I’m pretty sure I heard someone compare them to the kind that come in the blue tube – you know, the one with that freakishly upbeat, miniature weirdo made of dough. With that as the barometer, I can’t say the croissants came close to the real deal. But while you wouldn’t pay good money for them, you’d probably eat them if they were hanging out on your aunt’s brunch table…and you were bored.

Then came the amandines, which looked promising before going into the oven, but then for some reason, decided to get their freak on: as they baked, the almond paste flowed liberally off the pastry, causing these pretty little “baskets” and “pinwheels” to morph into nondescript blobs, some of them binding together and making Siamese twins (I blame this not on the recipe, but rather my decision to make the almond flour from scratch. Bad move…).

The saving grace in this whole process were the chocolatines. They (miraculously) turned out flaky and delicious and even looked normal. Not perfect, not the best…but good. The taste-testers even took seconds, which is usually a good sign. Right at the moment when my faith in this experiment was sinking, the chocolatines bolstered my confidence and gave me hope that it is possible to make good croissant at home.

Phew.


—–

I suppose the bigger lesson in all this is that sometimes our expectations in the kitchen are shot down; sometimes the bread hasn’t risen or the cake has stuck to the tin or, in the words of Ms.Child, “the cat has fallen into the stew”. C’est la vie, mes amis. What would be more tragic is if these kinds of experiences turned us off from ever trying these things in the first place…

…ultimately causing us to miss out on moments like these:

Because, let’s be honest – an afternoon in the company of apron-clad men is time well spent.

On that note, I whole-heartedly encourage you to try making your own croissant. Here are a few things I learned (the hard way) and that you might want to keep in mind:

1) Give yourself plenty of time. No matter what recipe you end up using, all of them will require you to rest the starter dough (minimum 6 hours for mine) and the rolled dough between “turns” (folds).

2) If the dough seems warm or sticky or springs back a lot when rolling, put it back in the fridge. Along the lines of the point above, you’re better to err on the side of caution and rest your dough, even if it’s for a longer period of time than the recipe suggests.

3) When rolling the dough, be firm but gentle. The final result you’re aiming for is a light, flaky croissant that has several airy layers. It won’t reach it’s potential if you start getting rough with it – you’ll end up tearing the dough and making holes in the layers. NO BUENO.

4) Chill out. You are not a pastry chef, nor trying to be one. If things start to look scary, step away for a minute and take a deep breath. The Earth will not stop turning if your croissants aren’t perfect. Even if they’re inedible, you get a gajillion food-nerd points just for trying.

—-

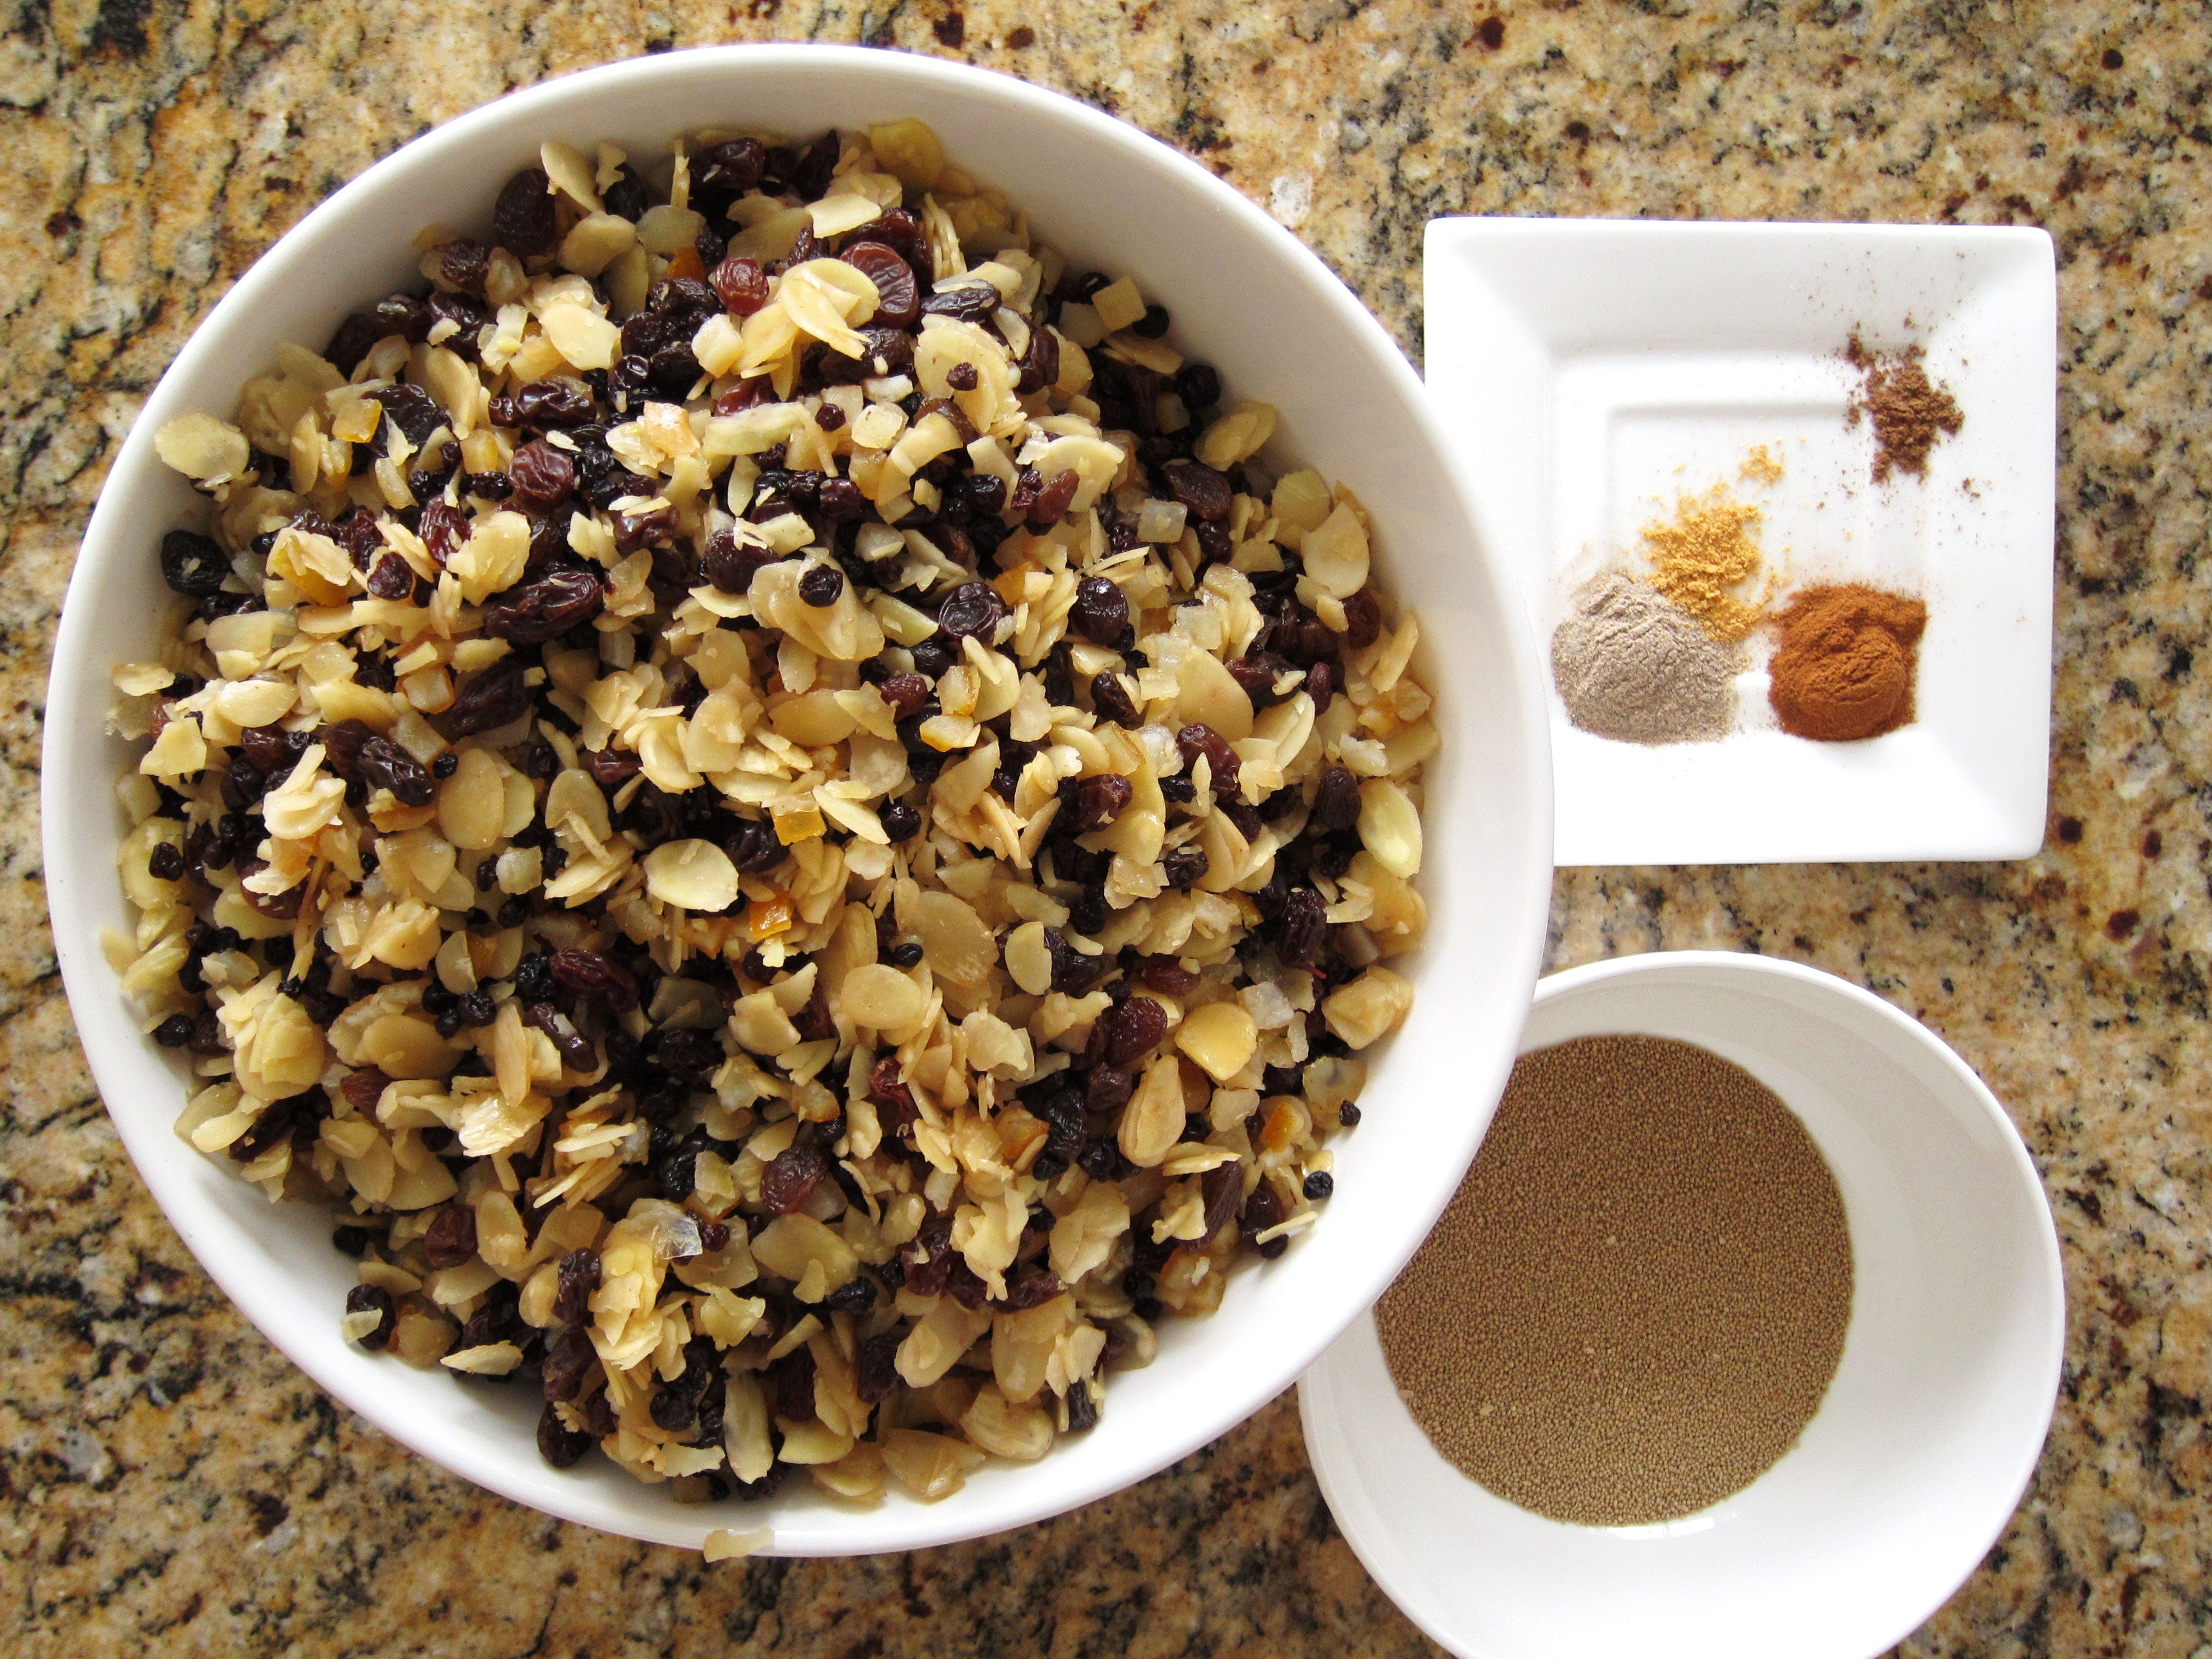
One last thing: Guillemette has kindly allowed me to share her almond cream recipe with you (merci Guillemette!). It’s traditionally used as a filling for almond croissant (amandines), but it’s also wicked in coffee cake and probably most places you would normally use marzipan.

Almond Cream (makes about 2 cups) – from La Cuisine Paris

  • 55g sugar
  • 55g softened butter
  • 1 egg (also about 55g)
  • 55g almond flour
  • 15 g all-purpose flour
  • almond extract or rhum (to taste)

Combine butter and sugar in mixing bowl and mixwith a wooden spoon until creamy. Add egg and mix until completely combined. Add the almond flour and all-purpose flour and mix well. Add flavoring and stir to combine. Cover and place in fridge 10-15 minutes before adding to amandines (can be kept in the fridge for up to 4 days or frozen and defrosted in the fridge).
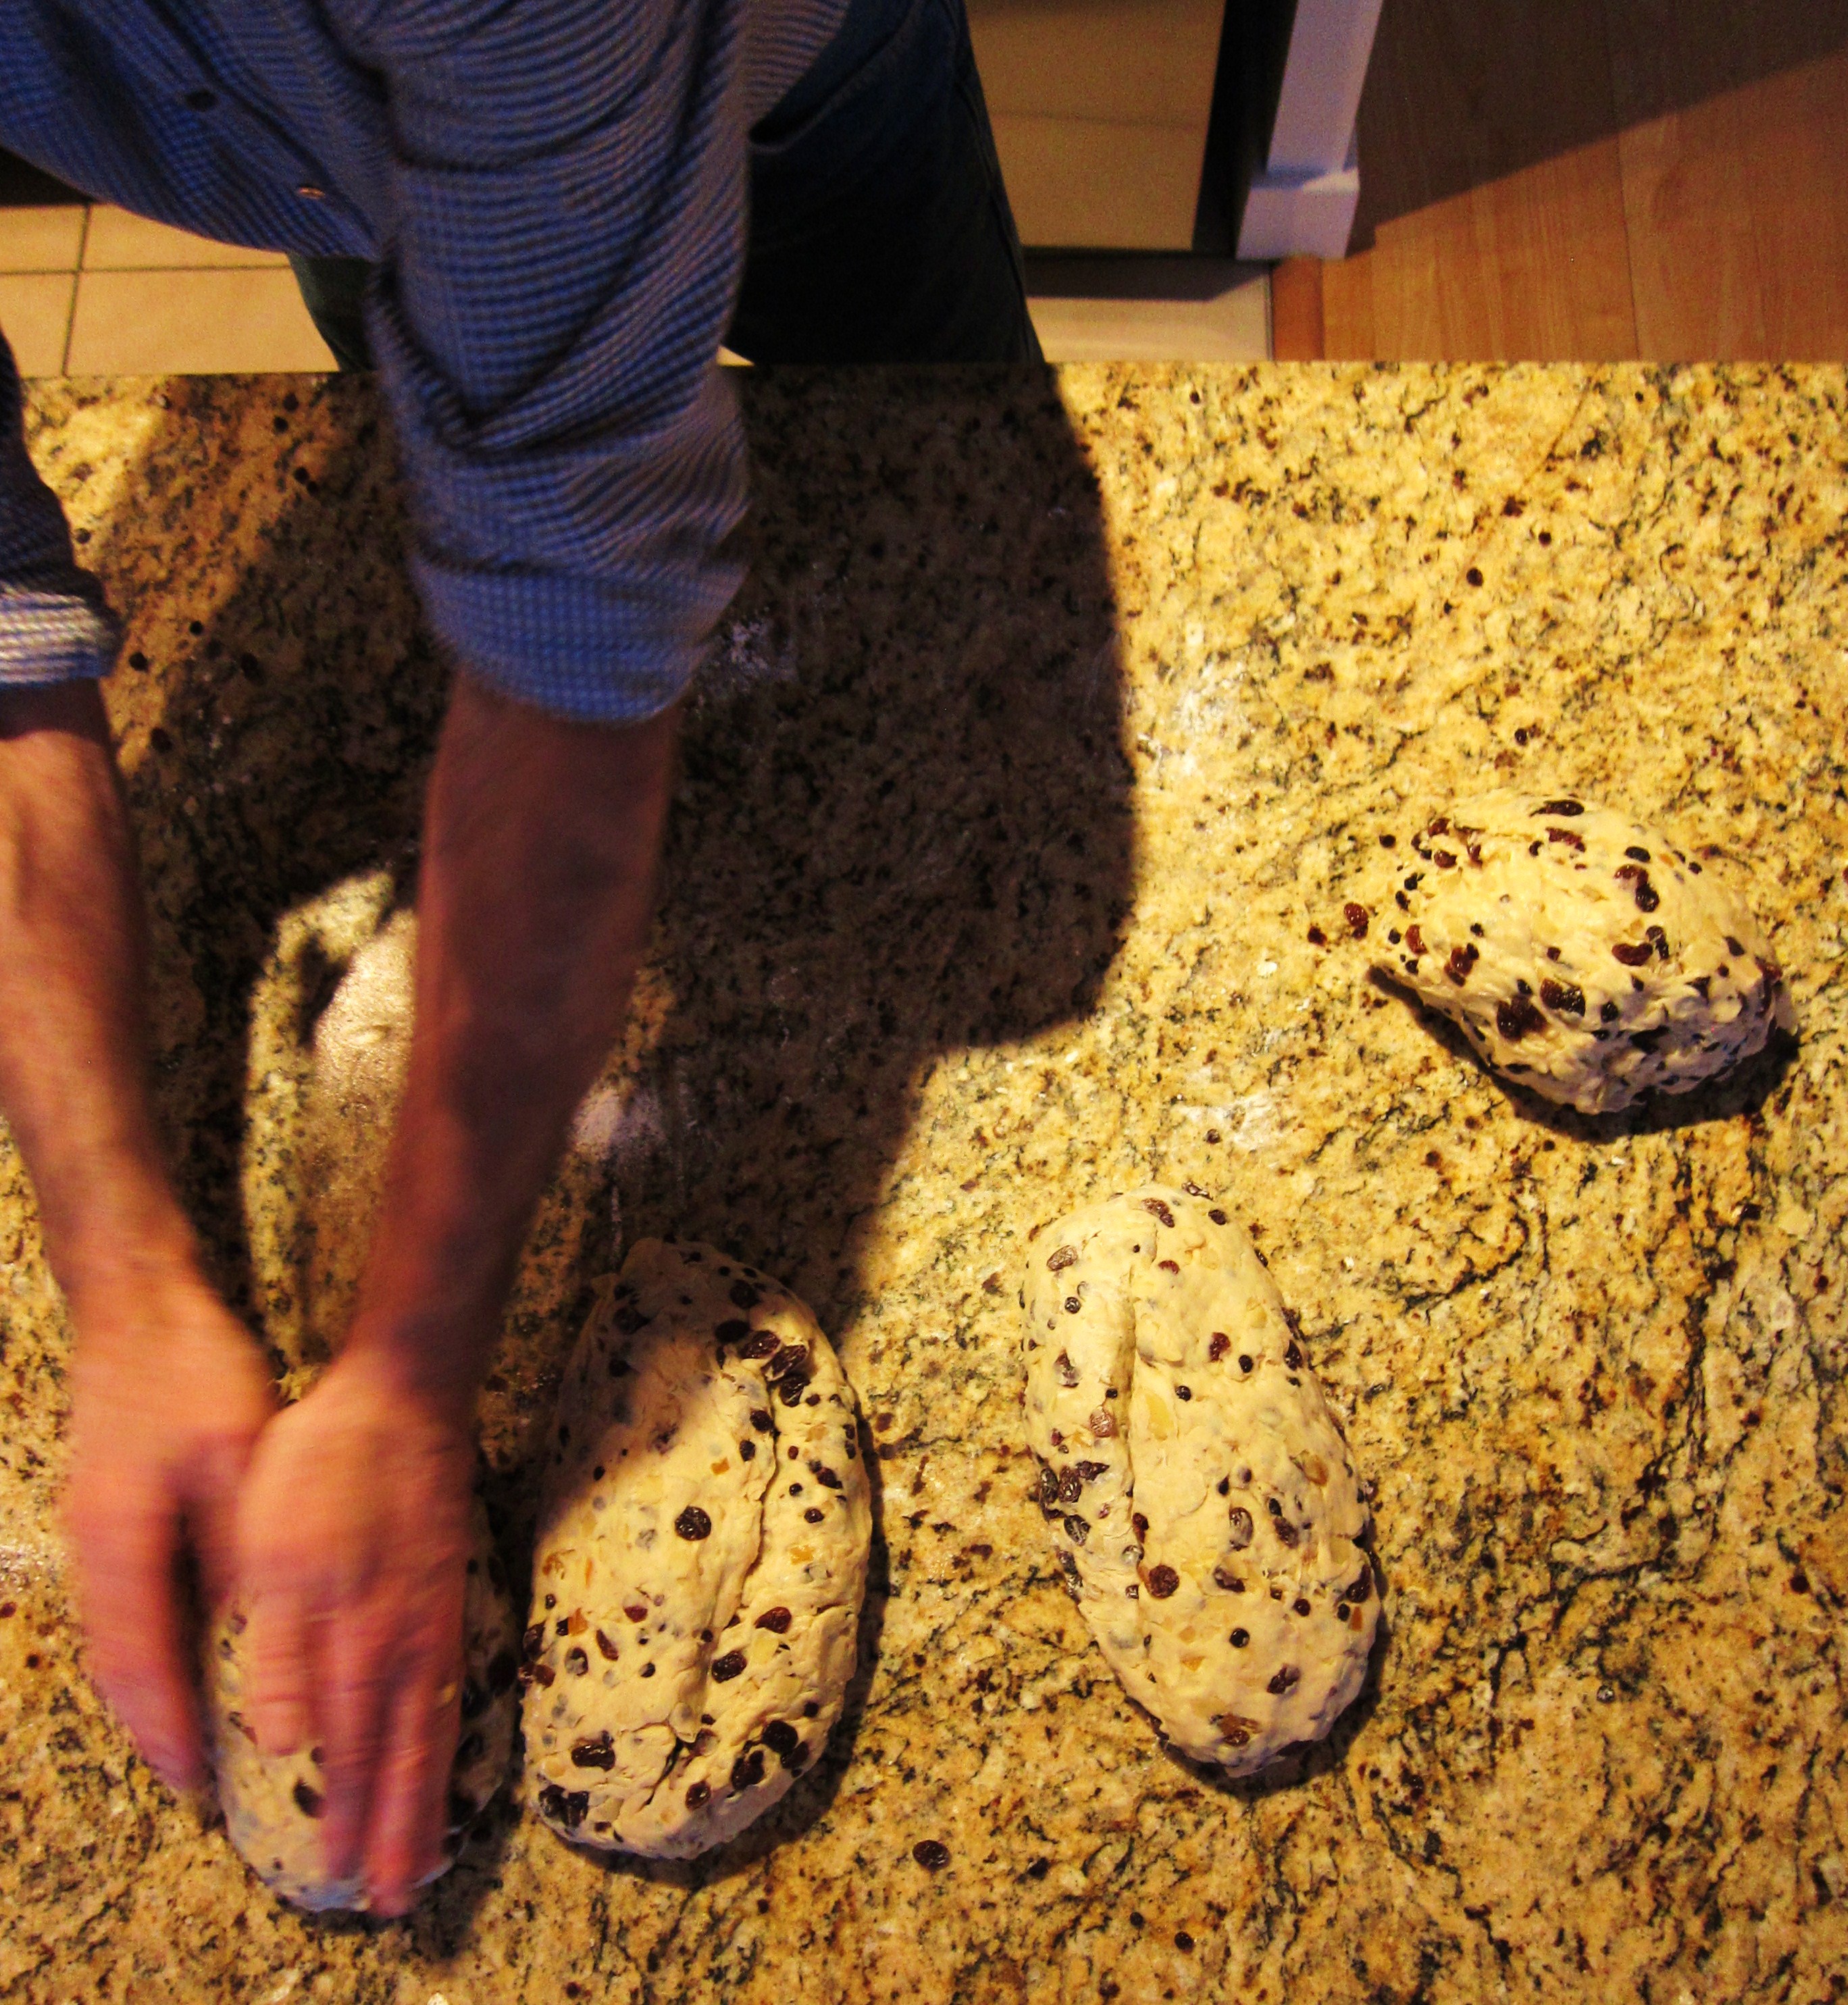
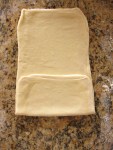
Share this:

  • Tweet
  • Share on Tumblr
Like Loading...

Lone wolf-ing it

29 Monday Apr 2013

Posted by julia chews the fat in Cooking Solo, Lunch & Dinner, The Basics, Vegetarian

≈ 4 Comments

I will admit that eating alone, and actually enjoying it, is somewhat of an acquired taste. Cooking just for yourself can be severely unmotivating because a) you know that you don’t need to impress/take care of anyone else; b) no one will reproach you for eating crackers for dinner or plucking something directly out of the jar with the fridge door wide open; and c) after a day of working, commuting, running errands, and overall hustling, it’s hard to muster the courage to dive head first into the kitchen to construct a meal. Once you get home after navigating through bursts of people and cars and buses and potholes, that popcorn and half-empty bottle of Perrier start to look like the best thing you’ve seen all day. In other words, when we’re tired and we know we’ll be dining solo, we usually gravitate towards things that are easy to grab and immediately gratifying (helloooo pickles), ultimately leading us to spoil our appetite for anything more substantial.

But I’m here to tell you that there’s is a better way. Even if you’re feeling capital “L” LAAAZY. Put down the box of Triscuits and allow me to introduce me to your new best friend: Cacio e pepe.

This is one of my go-to meals when I’m feeling completely bagged and uninspired. It takes under 10 minutes to make, it’s warm and comforting and home-made and a gentle reminder of how lone wolfing-it can be, well…nice.

Cacio e pepe (serves 1)

Cacio e pepe

¼ lb good-quality* dried spaghetti, linguini or bucatini
¼ cup (plus 1 Tbsp) very finely grated good-quality parmesan**
freshly ground black pepper
sea salt

*given the simplicity of this recipe, the quality of the ingredients is paramount. Don’t cheap out. You’ll regret it.

**for dishes like this, grating cheese on a microplane or the smallest holes of your box grater works best – that way the cheese melts as soon as it hits the hot pasta, resulting in a oozy, luscious plate of goodness.

Directions:

Cook the spaghetti in a large pot of boiling salted water until al dente.

Put a medium pot of fresh water to boil; once the water has reached a rolling boil, season with salt and add the pasta.

While the pasta is cooking, fill a deep glass or ceramic dish with hot water and submerge your favourite pasta bowl or plate in the water to warm it up before serving.

Once the pasta is cooked al dente, reserve ¼ cup of the cooking water, and then drain the pasta in a colander. Do not shake off the excess water. Transfer back to the pot, off the heat, and sprinkle with ¼ cup of the cheese and about 1 Tbsp of the cooking water. Mix to combine. Add a little more cooking water if you think the pasta looks dry.

Remove the pasta bowl from the warm water (without drying it) and place the pasta into it. Finish with some freshly ground black pepper and a sprinkling of the remaining cheese. Serve straight away with simple steamed greens or a salad (if desired).

Share this:

  • Tweet
  • Share on Tumblr
Like Loading...

Croissant speed-dating

21 Sunday Apr 2013

Posted by julia chews the fat in Breakfast & Brunch, Snacking, The Basics, Vegetarian

≈ 6 Comments

As I sit here and write these words, the scent of butter is emanating from by being. This is not a metaphor, or a poetic musing. I just straight up smell like butter. It might seem like an odd thing to confess, but these days, smelling like butter makes me feel like I’m doing something right.

Here’s why.

In 2 weeks and 2 days I’ll be heading to Paris (!) for the first time (!!). While I’ve already mapped out the standard Paris virgin’s itinerary (one that includes that little tower and little museum), I’ve also made room for a few other things, including a viennoiserie class in the 4th arrondissement where I’ll be learning how to make croissants, amandines and chocolatines. With a French pastry chef. BY THE SEINE.

Pinch me.

By total coincidence, April 20th happened to be “La Fête du croissant” in Montreal, which means that over a dozen bakeries in the city were showcasing their version of the iconic French crescent and offering them at reduced prices. Under the guise of “research” for my upcoming class, I thought this was the perfect opportunity to eat an obscene amount of pastry take some notes. I enlisted a few friends to do some bakery-hopping with me to help determine what made a good croissant, and what made a not-so-good croissant, assessments based on the holy Parisian tenets of:

  • appearance
  • layers/texture
  • sound/smell
  • taste

4 friends, 4 bakeries, all within a 4-block radius of my apartment. Voici les observations:

9:25am – with Julie at Monsieur Pinchot’s

M.PinchotOverall look: flat; floppy; not really crescent-shaped; the way someone’s eyes look after a long cry
Layers/texture: layers? what layers?; cakey interior; greasy
Sound/smell: no crunch (thus no sound); sweet, buttery smell
Taste: surprisingly nice taste…if it wasn’t pretending to be a croissant (Julie says, “Oueh…pas les meilleurs.”)

—–

9:50am – with Simon at Co’Pains d’abord

(*Note: due to large demand, they were out of regular croissant, hence the chocolatine)

Co'pains d'abordOverall look: pleasantly plump; toasty-coloured exterior
Layers/texture: visible layers; airy; rises back up after you bite into it
Sound/smell: crispy shell that crackles nicely; scent of butter
Taste: pleasantly buttery; lightly yeasty (in a good way) (N.B I discovered that Simon likes to eat the crispy exterior in its entirety before the soft interior. He gets points for adorability.)

—–

10:30am – with Marko & Marie-Lou, breakfast with croissants from Le Grain de blé

Grain de bléOverall look: perfect crescent shape (Marie-Lou says, “It looks like a crab.”)
Layers/texture: uniformly toasted exterior; heavier than they appear; dense; overcooked ends
Sound/smell: slight crunch when squeezed; no memorable scent
Taste: underwhelming; we ended up making ham & cheese sandwiches with them (Marko says, “Yeah, these suck.”)

—–

11:55am – Fous Desserts, with yours truly

Fous Desserts 1

Overall look: relaxed crescent shape; golden exterior; lightly glossy; sexy
Layers/texture: visible, delicate layers; easy to pull apart; crispy exterior; airy, soft interior
Sound/smell: exterior had a satisfying crunch; scent of wheat and butter
Taste: rich butter taste that hits the tongue and melts; very lightly yeasty; nicely balanced in sugar and salt

Look...at...those...ayers (!)

—-

Of the four, Fous Desserts knocked it out of the park. Their croissant is epic. From now on, there is no need for me to go anywhere else in my neighborhood. This is croissant that slays all others.

If you live in Montreal, or are visiting, here’s where you can find them:

Fous Desserts
809 Av. Laurier Est
Montréal H2J 1J2 [Qc] Canada
Tel: +1.514.273.9335
http://www.fousdesserts.com/acceuil.html

Thanks again to Julie, Simon, Marko & Marie-Lou  xx

Share this:

  • Tweet
  • Share on Tumblr
Like Loading...

Breakfast for the Unstoppable Woman

28 Thursday Mar 2013

Posted by julia chews the fat in Breakfast & Brunch, Cooking For Your Peeps, Lunch & Dinner, The Basics

≈ 4 Comments

Nonna turned 90 this month. Which means, amongst other things, that she has witnessed the world transform itself over a span of 9 decades. NINE! How do you celebrate the birthday of someone who has been around for the rise and fall of 42 Italian Prime-ministers, the inauguration of 8 popes, 1 World War and the birth of their first great-grandchild?

Well, it seems only right to give her exactly what she asks for. “Brakfaste. Con il pannecake.”

She uses the word thoughtfully and with intention. While there is a term for “breakfast” in Italian (prima colazione), the two are hardly interchangeable. Traditional colazione in Italy usually consists of nothing more than a dry biscuit and a caffè latte, if that. When I stayed with a second-cousin in Florence a few years ago, she took great care to stock the pantry with what she thought would cater to my North American sensibilities – sugary cereal, pre-packaged “croissants” and individually-wrapped crostate – each specimen coated with the faint aroma of factory plastic. At some point in our co-habitation, she came to understand that I’d much rather have the traditional “S” biscuit and coffee than ready-to-eat factory pastries. (There’s a handful of processed foods that have a special place in my heart – probably quite literally – but this stuff? No grazie.) I imagine that most contemporary Italian families have things like yogurt and toast in the morning. But for the older batch, breakfast still isn’t emphasized as a meal. Not even on weekends.

Here, however, we’ll get together on occasion for a familial Canadian-style breakfast, with scrambled eggs and pancakes and bacon and filtered coffee. And despite it not being something my grandmother grew up with, she has come to fully embrace its merits, amongst them, baked beans – ones made Québec-style, with brown sugar, a healthy dose of molasses and a few sizeable chunks of lardon. Sure, it’s not a skinny dish. But it’s not like you’re eating it everyday. It’s for special occasions, hearty gatherings…like 90th birthday parties.

—–

The recipe below has been swiped from my mom’s collection. It’s based on the traditional fèves au lard (a.k.a “bines“) that you can find on most breakfast menus in Québec. It may not be the most delicate-looking, but it is a thing of beauty, I assure you. Through the beans simmer quite a long time, they are still toothsome; the sauce is pleasantly sticky, sweet and tangy. Everything a good baked bean should be.

Baked beans

Mom’s Baked Beans (Fèves au lard)

Serves 8-10 as a side

*Note: give yourself several hours for these – they are not hard to make, but it takes time to make good ones (see details below)

  • 1 pound dried navy beans, soaked overnight
  • 5 cups cold water
  • 1/2 pound salted pork belly cut into 1″ pieces
  • 1 onion, chopped
  • 2 tsp cider vinegar
  • 1/2 cup ketchup
  • 1/2 cup dark molasses
  • 1/4 cup brown sugar
  • 1 tsp dry mustard
  • 1 tsp salt

Cover the beans in cold water and soak the beans overnight. The next morning, strain and rinse the beans. Add the beans to a pot with 5 cups of fresh cold water. Boil for 30 minutes. Do not add salt to the water as this hinders the cooking process. Transfer the beans and water to an ovenproof casserole. Stir in the remaining ingredients. Cover and bake in a 250ºF oven for 7-8 hours.

Share this:

  • Tweet
  • Share on Tumblr
Like Loading...

Greek jigsaw puzzle

21 Thursday Mar 2013

Posted by julia chews the fat in Lunch & Dinner, The Basics, Vegetarian

≈ 4 Comments

Sometimes the decision to make one meal over another comes down to what’s hanging out in the fridge. It’s not romantic. Or intellectual. It just, is.

But that’s ok, because I think a lot of us are predisposed to rifling through the fridge (and pantry), rounding up what’s there and assessing our options. If there’s something missing, I might excavate something from the freezer (pesto, rapini, cooked canelli beans…) or head to the store to fill in the blanks. It might not be the most exciting way to pull together a meal, but the act of selecting and matching disparate items from your kitchen and making something delicious can be pretty satisfying – like watching a jigsaw puzzle come together. And this nerd LOVES a good jigsaw puzzle. Like this one, for instance.

It’s a Tuesday night, and I have exactly six things in my fridge aside from condiments, some butter and a sad-looking yellow pepper: phyllo, eggs, spinach, green onion, feta, cream – a Greek sextet that cleanly spell out:

SPA-NA-KO-PITA

The missing piece here is the dill, for which I will have to make an excursion through the remnants of a 30cm snowfall. But the dill is crucial, so I suck it up and suit up.

—–

A little while later, laying eyes on the final product – a flaky confection of souffléed eggs speckled with bright green spinach and soft feta – I am consoled that it was worth every slushy step.

Spanakopita

Spanakopita (makes about 4 servings for a meal)

(Note: This recipe is one that my mom was given by a friend via a Greek woman in the 70s – in other words, this recipe has total Greek cred. It was a staple at dinner parties, when mom would fold them into bite-size triangles and serve them around the room while guests drank cocktails – a notion that conjures up images of people in brightly-colored florals, walking around holding a spinach pastry in one hand and a Harvey Wallbanger in the other. Everyone smoking indoors. It’s probably not exactly how things went down, but that’s how I like to imagine it. Growing up in the 80s, I just remember them being an exciting feature at family gatherings…and also being the first thing to vanish off the buffet table.)

Ingredients:

1 lb. (1 package) fresh phyllo dough
1/2 cup melted butter
16 oz fresh spinach
4 green onions
large handful fresh dill (about 1/2 cup finely chopped)
1/4 cup finely chopped parsley
1 cup crumbled feta cheese
4 eggs well beaten
1/2 cup 35% cream
pinch of salt
pinch of pepper

Directions:

In a small amount of boiling water, cook the spinach leaves just until wilted. Transfer to a bowl of ice water until completely cooled. Drain the spinach, wring with your hands to remove the moisture and set aside. In a food processor, finely chop the green onions and set aside. Put the dill and parsley in the bowl of the food processor, finely chop and set aside. Pulse the cooked spinach a few times in the food processor.

Heat about 2 tablespoons of butter in a frying pan and cook the green onions on medium heat for 1 minute until translucent. Add the dill and parsley, season with the salt and pepper, and continue cooking an additional minute, until soft. Remove from the heat and combine with the spinach. In a separate bowl, beat the eggs and whisk in the cream. Add the spinach mixture and the crumbled feta cheese to the eggs. Set aside.

Preheat the oven to 375°F

Brush the bottom of an 8×8 inch baking pan with butter. Place one sheet of phyllo in the pan and brush with butter. Repeat until you have 6 layers. Place the spinach mixture on top of the phyllo and spread evenly.

Now, you have 2 options:

1)     Take the edges of the phyllo that are spilling over the pan and fold them over the top and brush with butter.

OR

2)      Trim the edges and add another 6 layers of phyllo dough, each brushed with butter.

Place the pan in the oven and bake at 375°F for 25-30 minutes or until golden brown. Serve with a simple green salad.

Share this:

  • Tweet
  • Share on Tumblr
Like Loading...

Domestic foodscapes – a reflection

25 Monday Feb 2013

Posted by julia chews the fat in The Basics

≈ 3 Comments

My relationship with my kitchen has been a complicated one. It’s a space I love to hate. True, there are certain moments when it feels really good being in it – like trolling around in wool socks and silk karate pants on weekends with an espresso and the newspaper, or on a mid-week night when I decide to make brownies or cookies or granola at 10pm so the apartment can smell of hot sugar by bedtime. And on certain levels, I feel that we understand eachother. It’s gotten used to my klutzy moves and my swearing and my need to have something blabbing away loudly while I cook – This American Life, Twin Peaks and…sweet mercy save me…Coronation Street. And I’ve gotten used to its puny cupboards and schizophrenic oven and its little surprises – like the time I came back from the cottage to find a brood of pantry moths and carpenter ants hosting a food party in my cupboard, forcing me to chuck nearly everything, scrub every nook and cranny with a vinegar-soaked toothbrush and seal all cracks with caulking. It wasn’t a very romantic moment for my kitchen and I. 

My kitchenette is not what you might call a cook’s dream – it’s the kind real-estate agents have been trained to describe as “quaint” or “cozy”, the space they show you quickly before whisking you away to a larger, more impressive room, in the hopes of whitewashing your memory of it. But something happened this weekend to give me a new-found appreciation for my kitchen space. I spent the better part of Saturday at a workshop organized by the Canadian Centre for Architecture, a sort of conversation/presentation/tasting event that addressed the theme of food in the built environment. Led by one of the founding members of Concordia University’s Food Studies Research Group, the workshop de-constructed the idea of “domestic foodscapes”, encouraging us to consider the relationship between how we feed ourselves and the space(s) in which we choose to do it.

Now, the notion of choice in our domestic environment can sometimes be a tricky one – many of us feel bound by limitations when it comes to spatial arrangements at home. I think that this even more palpable for those of us who are renters, as we generally can’t make substantial changes to our environment (I even signed a contract separate to the lease requiring me, amongst other things, to have my paint colors approved by my landlord). In arrangements like these, choices feel stifled, limited, controlled. But as leasers, we also understand that there’s not a whole lot we can do about it. Some of us accept it; some of us rail against it. When it comes to my kitchen – the place I spend most of my non-work waking hours – I fall into the railing-against-my-reality category. I bitch about its knob-less cupboards, its minuscule prep space, its tiny eating area, its bizarre placement right off the bathroom. But then I realise that I’m doing the thing we all do – complaining about what we don’t have by falling into the “if only” trap. I would make better _____ if only my kitchen had ____. The workshop at the CCA resonated with me; it helped shine a light on the things I do like about my domestic foodscape – my army of mason jars, my vintage scales and colanders, my Bialetti stovetop espresso maker, my teak table and mid-century lamp…

Kitchen – north view (p.s the thing that the wooden cutting board is sitting on was not part of the counter top. It’s a free-standing kitchen cart from Ikea. The only original counter space is what you see to the left of the sink…)
Kitchen – south view
Eating nook

Hardcore Mason-love
Cast irons & Bialetti

I’ve come to realize that if I really hated this space so much, I wouldn’t store and exhibit such precious items in it.

I’m learning to focus on the things I love about my crazy-ass kitchen. Because, despite its imperfections and idiosyncrasies, it still enables me to do what I need to…

…like, making pretty sexy boxed lunches…

duck box lunch

Share this:

  • Tweet
  • Share on Tumblr
Like Loading...
← Older posts
Newer posts →

Facebook

Facebook

Instagram

No Instagram images were found.

Recent Posts

  • Layers and Rows
  • Finding Buoyancy
  • February
  • Wednesday
  • Cross My Heart, Miso

Archives

  • May 2017
  • April 2017
  • February 2017
  • December 2016
  • November 2016
  • September 2016
  • August 2016
  • July 2016
  • June 2016
  • May 2016
  • April 2016
  • March 2016
  • February 2016
  • January 2016
  • December 2015
  • November 2015
  • October 2015
  • September 2015
  • August 2015
  • July 2015
  • June 2015
  • May 2015
  • April 2015
  • March 2015
  • February 2015
  • January 2015
  • December 2014
  • November 2014
  • October 2014
  • September 2014
  • August 2014
  • July 2014
  • June 2014
  • May 2014
  • April 2014
  • March 2014
  • February 2014
  • January 2014
  • December 2013
  • October 2013
  • September 2013
  • August 2013
  • July 2013
  • June 2013
  • May 2013
  • April 2013
  • March 2013
  • February 2013
  • January 2013
  • December 2012
  • November 2012
  • October 2012
  • September 2012
  • August 2012
  • July 2012
  • June 2012
  • May 2012
  • April 2012
  • March 2012
  • February 2012

Categories

  • Beverage
  • Breakfast & Brunch
  • Condiments
  • Cooking For Your Peeps
  • Cooking Solo
  • Cooking with Nonna
  • Food Away From Home
  • Food Writing
  • Holidays
  • Intro
  • Lunch & Dinner
  • Snacking
  • Soups
  • Sweet Tooth
  • The Basics
  • Vegetarian

Enter your email address to follow this blog and receive notifications of new posts by email.

Join 82 other subscribers

Blog at WordPress.com.

  • Subscribe Subscribed
    • julia chews the fat
    • Join 82 other subscribers
    • Already have a WordPress.com account? Log in now.
    • julia chews the fat
    • Subscribe Subscribed
    • Sign up
    • Log in
    • Report this content
    • View site in Reader
    • Manage subscriptions
    • Collapse this bar
 

Loading Comments...
 

    %d