• Home
  • About

julia chews the fat

julia chews the fat

Category Archives: Lunch & Dinner

Settling the unsettled

31 Monday Mar 2014

Posted by julia chews the fat in Lunch & Dinner, The Basics, Vegetarian

≈ Leave a comment

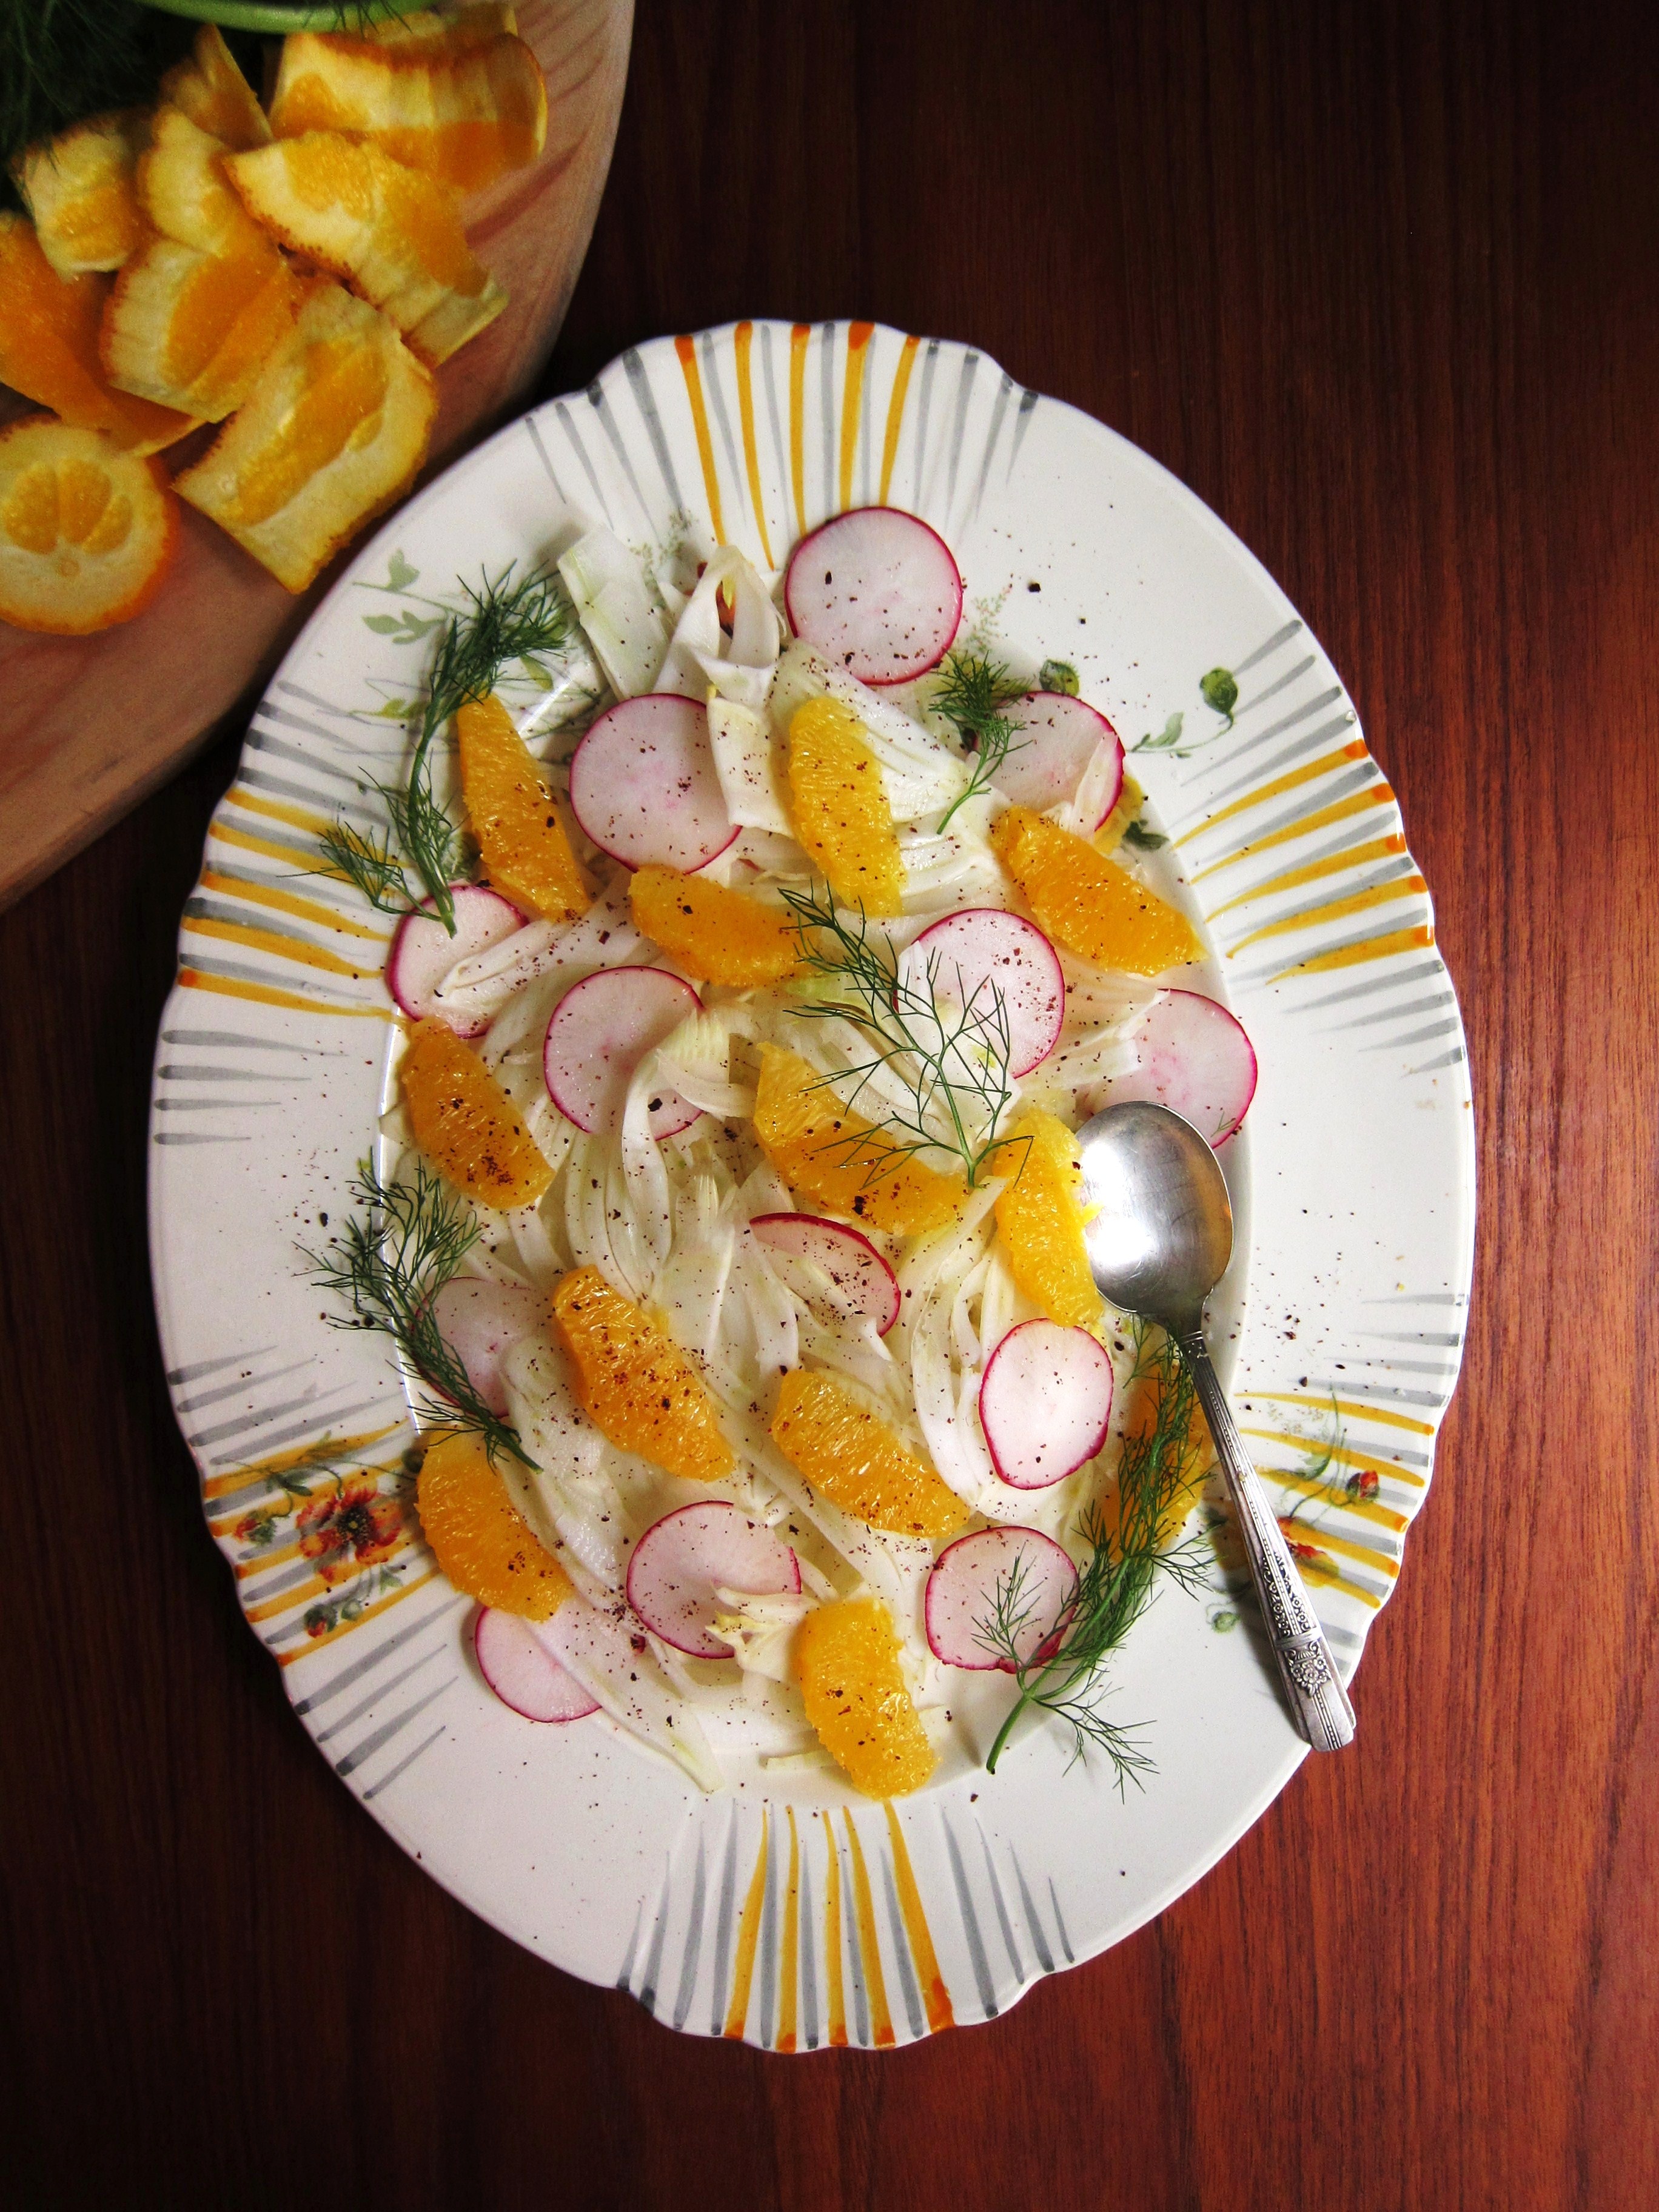
A solitary shoe in the middle of the street. An unexpected letter from the revenue agency. A ticking clock. A night bus that’s nowhere in sight. THIS.

These are all things that, to varying degrees, I find pretty unsettling. But none of them match the unsettled feeling that creeps through me when I begin apartment hunting. I’ve moved so often, you’d think I’d be a professional by now. A cool, calm, collected professional. And yet, it’s up there with the most unnerving, frustrating, disappointing, desperate experiences I’ve been through. The idea of uprooting yourself (again), competing with other searchers, and relying on some vague faith that you’ll find something better than what you’ve already got – for a price that won’t force you subsist on beans – can be quite the emotional roller-coaster. The worst part is that through the sweating and waiting and trekking to appointments, you can’t really complain – because it was your idea in the first place.

Bah.

Though it’s barely just begun, this most recent search is already starting to make me feel weary, disillusioned, mildly petrified…weepy. When you’re hoofing to different parts of the city, visiting crappy places, in this, it’s only a matter of time before you start to lose your marbles.

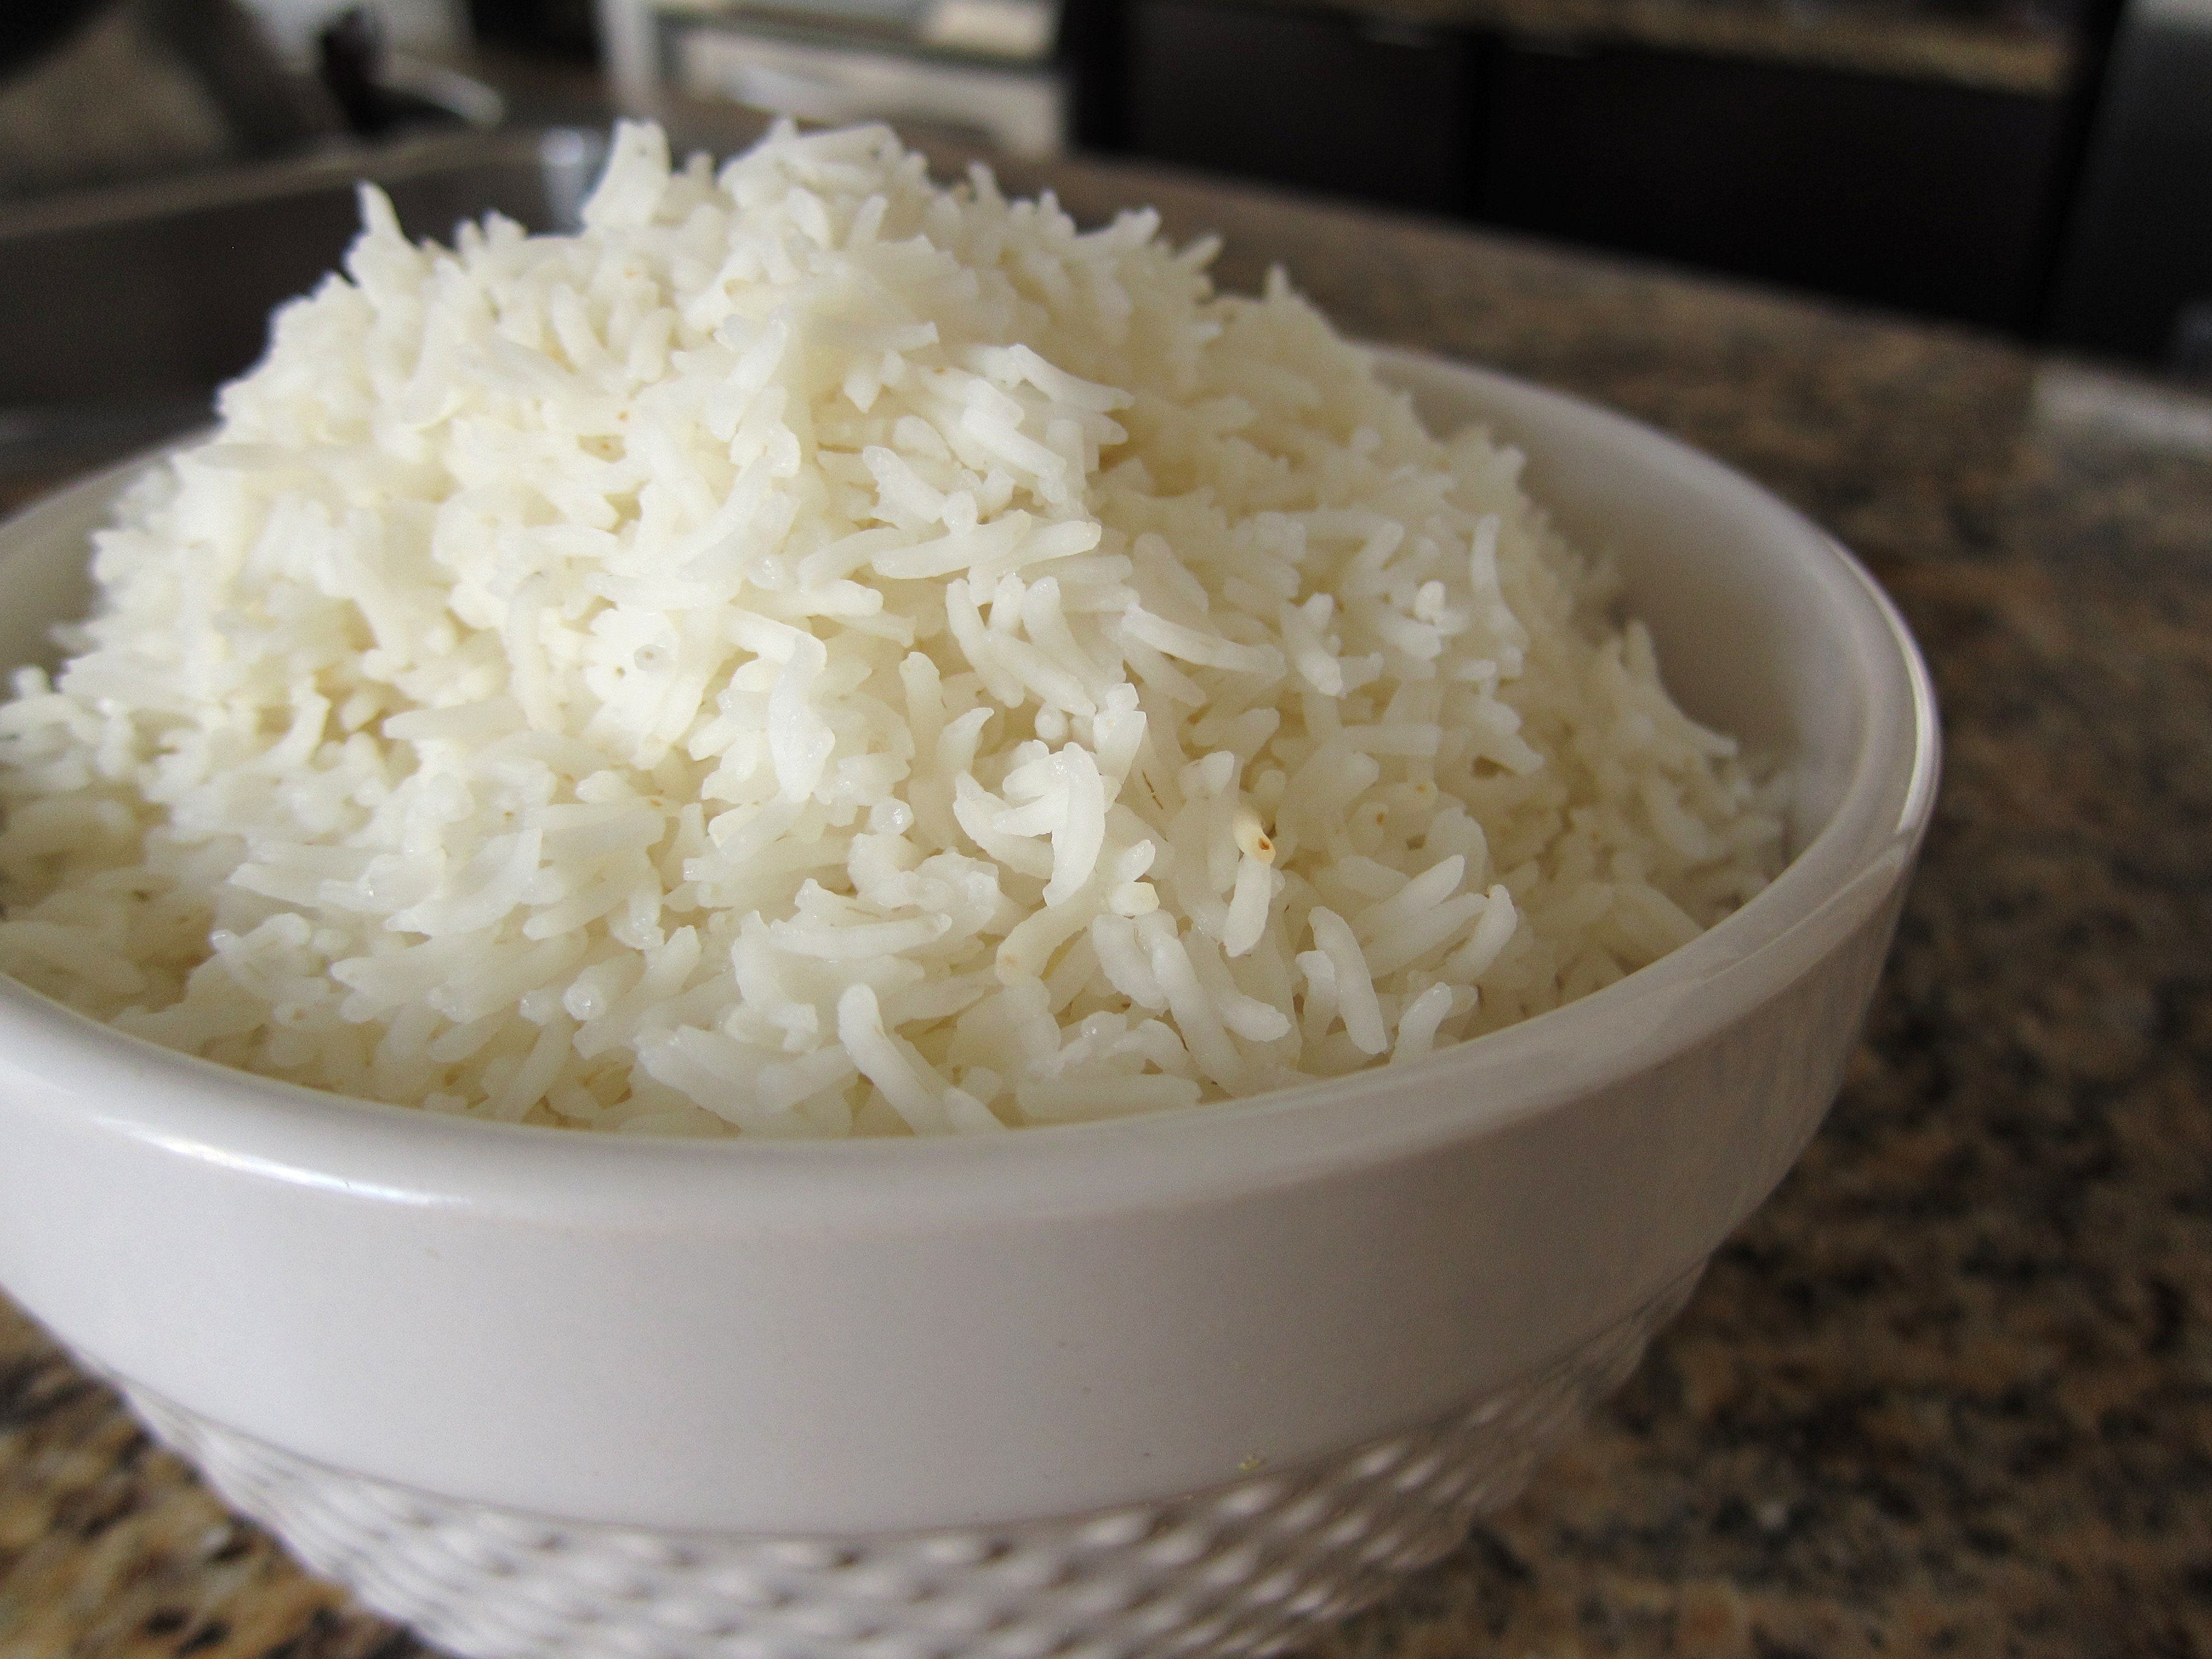
As with other moments in life when I’ve wanted to climb into a hovel and never come out, I turn to food to bring me back to earth and help me confront the not-so-fun bits of life. I’m not talking about eating fistfuls of Doritos for dinner or gorging on tubs of ice cream (though, that wouldn’t be so bad). No, I’m talking about food I can rely on – something that’s grounding and provides comfort, sustenance and just the right amount of chew. Luckily, I recently discovered a recipe that is pretty much a hug in a bowl. Not soup. Not mac & cheese. But PERSIAN SPICED RICE. Yes. I found my savior in a bowl of toasted rice, warm spices, chewy dried fruit and a healthy knob of butter – a gentle reminder that the nasty bits never last forever.

Rice prep

Persian Spiced Rice (serves 6-8 as a side) – adapted from the New York Times

  • 2 cups best-quality Basmati rice
  • salt
  • 6 tablespoons unsalted butter
  • 1 large onion, diced small
  • 1/4 teaspoon saffron threads, crumbled and soaked in 1/4 cup hot water
  • Large pinch ground cinnamon
  • Large pinch ground cardamom
  • Large pinch ground allspice
  • Large pinch ground black pepper
  • Large pinch ground cumin
  • 1/3 cup chopped dried apricots
  • 1/3 cup golden raisins
  • 1/3 cup Thomson raisins (or currants)
  • 1/3 cup blanched slivered almonds (optional)

1) Rinse the rice several times in cold water until the water runs clear. Drain. Bring a large pot of water to a boil with 2 tablespoons kosher salt. Add the rice and boil, stirring occasionally, for 5 minutes. Drain well.

cooked rice

2) Heat 1 tablespoon butter in a small skillet over medium heat. Add the onion, season lightly with salt and cook until softened and lightly colored, 4 to 5 minutes. Moisten with 1 Tbsp of the saffron water and stir in the cinnamon, cardamom, allspice, black pepper and cumin. Cook for 1 minute more. Stir in the apricots and raisins (or currants).

3) Melt 4 tablespoons butter in a heavy-bottomed enamel or nonstick Dutch oven over medium heat. Spread half the par-cooked rice over the bottom of the pot. Spoon over the onion-fruit mixture, then the remaining rice. Leave the pot on the flame, uncovered, for 5 to 8 minutes to gently brown the rice. (Do not stir or move the rice. Trust that it’s doing the right thing).

4) Drizzle the remaining saffron water over the rice and put on the lid. Adjust the heat to very low and leave undisturbed for 30 minutes. Turn off the heat and let rest at least 10 minutes.

5) Heat the remaining 1 tablespoon butter in a small skillet over medium-low heat and gently toast the almonds for a minute or so, taking care not to get them too brown. Set aside for garnish.

6) To serve, spoon the rice into a wide bowl or platter. With a spatula, carefully lift the bottom crust, placing the crisp side up. Sprinkle with the toasted nuts.

Persian rice

Share this:

  • Tweet
  • Share on Tumblr
Like Loading...

Revisiting fennel & citrus

06 Thursday Mar 2014

Posted by julia chews the fat in Breakfast & Brunch, Cooking For Your Peeps, Lunch & Dinner, Vegetarian

≈ Leave a comment

I know what you’re thinking. Really? A fennel-orange salad? Yawn. Next.

But I’m here to tell you that this one, this salad deserves acknowledgement. It’s the perfect example of how something we treated as ubiquitously blah can be re-invented, re-appropriated and newly appreciated. Like vintage fashion (no, not those high-waisted acid-wash jeans from grade eight, but more like that stunning large-brimmed sun hat your great aunt used to wear, poolside. Or your grandmother’s satin peep-toe slippers. In other words, the elegant retro fashion of a stone-cold fox).

This salad is like a great vintage piece you want to wear over and over again. There’s nothing ground-breaking or earth-shattering about it. Nothing hardcore. But it’s a good salad. A simple, and dare I say, classy salad. And one definitely worth your attention. Most of the fennel-citrus salads I’ve had in my life have been forgettable at best – in large part because either a) the whole thing wilts under the weight of a creamy dressing, or b) the fennel slices looks like they were hacked to pieces with a dull machete, or c) there is a disproportionate amount of fennel, leading you to ask, “Will this salad never END?”.

The recipe below, happily, avoids all these pitfalls. Equal parts crunchy, juicy and sweet, it’s got lemony tones from the sumac dressing, plus a peppery wink from the radish. This salad has got it going on. And if you needed another reason to make it, just look at how gosh-darn pretty it is! 

A stone-cold fox of a salad, if you ask me.

Fennel Orange Salad

Fennel-Citrus Salad with Sumac Dressing – serves 4 as a starter

3 tablespoons extra-virgin olive oil
1 tablespoon fresh lemon juice
2 teaspoons white balsamic vinegar
1 teaspoon sumac
1/2 teaspoon finely grated orange zest
Coarse salt
Freshly ground black pepper
2 medium fennel bulbs
4 radishes, trimmed
2 oranges

Important note: I fully endorse the use of a mandoline to get paper-thin fennel and radish slices. It might be masochistic of me (8 times out of 10 I will nick the end of my finger on the second-to-last slice), but I continue to use it for recipes like this, as it yields the best results.

Whisk together the olive oil, lemon juice, vinegar, and sumac, and orange zest and season with salt and pepper. Set aside.

Cut off and discard the stalks from the fennel bulbs, reserving some of the fronds for garnish. Halve the fennel bulbs lengthwise and cut out and discard the cores. Thinly slice the fennel bulbs using a mandoline (or sharp knife). Transfer to a large serving platter. Thinly slice the radishes using a mandoline (or sharp knife). Add to the fennel. Peel and cut the orange into slices, arrange on top of the fennel and radish (for an extra pretty salad, trim the orange into suprêmes. Nifty video here).

Whisk the dressing and drizzle it over the salad. Toss gently to coat.

Fennel Orange Salad - detail

Share this:

  • Tweet
  • Share on Tumblr
Like Loading...

Feed a cold, starve a fever

24 Friday Jan 2014

Posted by julia chews the fat in Lunch & Dinner, The Basics, Vegetarian

≈ 2 Comments

There’s nothing quite like a 24-hour stomach virus to annihilate your interest in food in one fell swoop. Even a day or so after the last few nauseous waves have passed through your body, you’re still sensitive to words like “pizza” and “stew”, which make your squirm uncomfortably as the mental images of oozy cheese and braised meat wade in your head.

Once that phase passes, you enter the “I’m feeling back on track holy geez I’m starving feed me now” phase of recovery, causing you to make the premature decision to eat real food again, at which point your body promptly reminds you that getting cocky le gastro will get you nowhere. It’s taken up residence in your body and, no matter how short its stay, it owns you. After a short and regretful holiday with Mr. Grilled Cheese, you begrudgingly return to your sobering diet of soda crackers and water.

You’re only truly out of the woods when food becomes appealing, enjoyable and friendly to your body again. That said, you still need to ease your way back in, with things that are light and nutritive. Nothing with too much pizazz. Nothing with jazz hands.

I found this recipe by searching “immunity food” on the Interweb. Nourishing, gingery and easy on the eyes, this soup hit all the right buttons, becoming the magical cure that made me feel human again.

Eat it hot, straight from the pot and watch as all the bad melts away…

Get-Well Soup (makes approx. 4 servings) – adapted from 101 Cookbooks

Healing Soup

  • 1 medium onion, quartered and thinly sliced
  • 3 celery stalks, thinly sliced
  • 1 medium carrot, thinly sliced
  • 8 medium garlic cloves, very thinly sliced
  • 2 tablespoons grated ginger, peeled
  • 3/4 teaspoon finely ground white pepper, plus more to taste
  • 1 1/2 cups mushrooms, trimmed (shitake or brown)
  • 8 ounces firm tofu, sliced into thin slabs
  • 2 1/2 teaspoons sea salt
  • olive oil for sautéing
  • chopped green onions, sliced radish, daikon and sprouts for serving

Heat the oil in a large soup pot over medium heat, and stir in the onion, celery, garlic, and ginger; gently sauté just until soft. Stir in the white pepper, salt and 10 cups of water. Turn up the heat and simmer for 15 minutes. Meanwhile, heat a bit more oil in a pan. Once hot, add the sliced mushrooms and brown until crispy. Remove and set aside. If the pan is dry, add a splash more oil, heat it up and add the tofu slices, cooking them about 2 minutes each side. Ladle the soup into shallow soup bowls and top with lots of green onions, pea shoots, radish and carrots slices, along with some fried mushroom and tofu.
Healing Soup

Share this:

  • Tweet
  • Share on Tumblr
Like Loading...

Taking Back Cheese

20 Friday Dec 2013

Posted by julia chews the fat in Breakfast & Brunch, Lunch & Dinner, Snacking, The Basics, Vegetarian

≈ Leave a comment

For some time now, I’ve been buying ricotta under-the-radar from someone who makes it in their converted garage. You wouldn’t guess it, but this stuff is gorgeous – it’s creamy but unbelievably light and mild in flavour, almost sweet. It’s unlike any of the preservative-heavy schlock that’s often on offer in grocery stores. It comes in a beautifully moulded shape, ready to eat on its own, spread onto toast, sprinkled over salads, or baked in the oven on top of pasta (Nonna and I have a soft spot for this dish).

However, getting fresh cheese like this on a regular basis is a tad tricky. You need to be organised. You need to submit your order in advance and get yourself to the location. While it’s always worth it, it’s definitely not convenience food.

Then it came to my attention that ricotta could quite feasibly be made at home, without any special equipment or expertise. After all, it only involved 4 ingredients and some cheesecloth. But this idea cracked open a Pandora’s box of cheese-related questions: What type of ingredients work best? Should I be using rennet? Where do I get rennet? Do I need to boil the milk? How do I ensure I don’t poison anyone with my home-made concoctions?

I didn’t want to plunge knuckle-deep into whey before knowing a few ground rules. At the same time, I was weary of the vortex of conflictual information hanging out on the Internet and, ideally, I wanted to learn these skills first-hand with someone whose experience far surpassed mine.

Enter David Asher Rotsztain. 

David is an organic farmer, goatherd and cheesemaker based in Mayne Island, B.C. Through community outreach workshops, he teaches natural cheese-making methods that can easily adopted by the home cook. In other words, this is guerilla-cheese-making – taking back something that in modern times has been (rather counter-intuitively) entrusted with people and entities that are alien to us and our day-to-day.

By sheer luck, a local non-profit was offering workshops with David right around the time I was thinking about making ricotta. In the workshop, he spoke about different types of cheese, their idiosyncrasies, their benefits, their beauty. We talked about raw milk versus pasteurized, whole milk versus low-fat, the use of lemon juice compared to rennet, and the wonders of edible mold. It was an eye-opening experience that broke down the process into manageable pieces and made cheese-making more approachable than I could have imagined. As I quickly learned, good cheese involves only a handful of ingredients, some time, and a bit of know-how.

Until I get around to making ricotta, I’m going to leave you with the step-by-step process for making your own fromage frais, which is essentially yoghurt strained at room temperature for 24-28 hours. It’s ridiculously simple, and though it takes a bit of time, your patience will be rewarded with a lovely, creamy round of fresh cheese, ready to serve with bread for breakfast or alongside crackers on a (hm holiday?) cheese platter.

Enjoy ♥

Homemade Fromage Frais – makes about 250g

8 - finished fromage frais


You will need:

– 1 container good-quality yoghurt, without any emulsifiers, stabilizers or gelatin (for this recipe, I used a full-fat buffalo yoghurt I found here)

1 - yogurt
– about 1 tsp salt
– a big stockpot or very deep bowl
– a wooden spoon (or something similar) that will sit solidly across the bowl
– some cheesecloth (this can include unbleached muslin or nylon cloth, but David recommends a Du-Rag. Yep, that’s right – a Du-Rag. Its shape and tight meshing make it perfect for straining this cheese. And it’s a breeze to wash for future use)

2- cheese cloth
1) Wash your cheesecloth and allow to air-dry.
2) Drape the cheesecloth atop a bowl and pour the yoghurt into its centre. Pull together the four corners of the cloth around the yoghurt; twist and secure with a knot.

3- yogurt in cheese cloth

5 - squeezing & tying

3) Tie to the wooden spoon (or similar implement) and hang over stockpot or deep bowl. The cheese should be able to hang freely, not touching the bottom.

6 - hanging

4) Leave it to hang overnight at room temperature. As they whey* drips into the pot, the yoghurt will slowly become cheese.
(*do not discard whey by pouring it down the drain, as it is toxic to aquatic life. Instead, keep it to make ricotta or feed your plants, dogs or compost with it.)

5) After 24 hours, this cheese will have dripped dry. To improve flavour, and to help preserve it longer, salt the cheese by opening up the cheesecloth and sprinkling a teaspoon of salt over the surface of the cheese. Close the bag, and hang it again for another 4 hours.

7 - opening & salting

9 - cheese & toast

10 - cheese & toast - detail

Titbits from David:
*don’t squeeze the cheese to force out whey (it’s sooo tempting, but resisting will avoid any mishaps…)
*make this cheese with goat’s yoghurt, and you get chèvre.
*make this cheese with extra high fat yoghurt, and you get cream cheese.

And if you still need some cheese-making inspiration, watch this video (disclaimer: it may make you want to pack your bags, move to France, and become a shepherd).

Share this:

  • Tweet
  • Share on Tumblr
Like Loading...

Hello, Winter.

01 Sunday Dec 2013

Posted by julia chews the fat in Cooking For Your Peeps, Cooking Solo, Lunch & Dinner, Vegetarian

≈ 2 Comments

Well, this is awkward. The last post I left you with involved a late-autumn frolic through the orchard and some apples. And now there’s somehow a solid layer of snow on the ground.

Hm. Funny how that happens.

If it’s any consolation, you haven’t missed much in the kitchen department – I haven’t been cooking a whole lot these days and even when I have, the results have been nothing to cry home about. And with Taste MTL happening earlier in the month, I was busy stuffing my gob here and here for my work with The Main, plus here because I was told it was fantastic (which it was).

Then health stuff made the last couple of weeks feel icky and prompted a lot of early nights, boiled artichoke dinners and zero computer screens after 7pm. It hasn’t exactly been girl-gone-wild around here.

With that unpleasantness out of the way (and with a bit more time on my hands), I’ve been catching up on winter recipe collecting, fattening up my Pinterest board and bookmarking my Ottolenghi and Bernard Clayton cookbooks, all of which has gotten me really jazzed about cooking through the colder months. There’s also the fact that there are ONLY 24 MORE SLEEPS ‘TIL CHRISTMAS, which means I’ve started to daydream about truffles, caramels, shortbreads, fig tarts, ginger cookies, pannetone, paneforte, torrone, clementines, pomegranates, almonds, chestnuts, lemons, persimmons, cinnamon, rosemary, sage, thyme, bourbon…and all the other usual suspects that I’m keen to share with friends and family and you!

While that stuff is in the works, I’d like to leave you with a recipe I made the other day that hit all the right (wintery) buttons. It’s essentially a caramelized, aromatic eggplant filled with pearly Israeli couscous, tangy yogurt and crunchy almonds. You’ll see that the recipe calls for sumac. If you haven’t already used this in your cooking, I highly encourage you to get your hands on some (barter or beg if you have to). Used mostly in Middle Eastern cuisine, it’s a fine, burgundy-coloured spice that has a lemony kick – good for sprinkling over salads, pilafs, roasted potatoes and grilled meats.

Thanks for checking in. See you here again soon, lovelies.

Spiced Eggplant with Herbed Israeli Couscous – serves 2 as a main, or 4 as a side
(adapted from Souvlaki for the Soul)

Couscous Eggplant

Ingredients

– 2 baby (Italian) eggplants, cut into 1cm slices
– ½ tsp turmeric
– ½ tsp ground coriander
– ½ tsp ground cumin
– ¼ tsp ground cinnamon
– ½ cup cooked Israeli couscous
– a handful of chopped flat-leaf parsley
– a handful chopped coriander (cilantro)
– ¼ cup slivered (or chopped) almonds, skin-on (or not)
– olive oil
– lemon juice
– salt and pepper
– Greek yogurt to serve
– sumac for garnish (optional)

Directions:

Pre-heat the oven to 350° F. Combine the ground turmeric, coriander, cinnamon and cumin in a bowl.

Drizzle the eggplants with some olive oil and and rub each with some of the spice mixture. Cook in the oven till eggplants have softened (approx 30-35 mins).

Combine the cooked couscous, herbs and almonds along with a drizzle of olive oil and a squeeze of lemon juice. Stir to combine.

Spoon the couscous mixture into each eggplant piece, adding a dollop of yogurt and a sprinkle of sumac to each. Serve straight away.

Couscous Eggplant - detail

Share this:

  • Tweet
  • Share on Tumblr
Like Loading...

Relishing the peach days

17 Saturday Aug 2013

Posted by julia chews the fat in Breakfast & Brunch, Lunch & Dinner, Vegetarian

≈ 7 Comments

Oh hello there. It’s been a while. How are you? How’s your summer been?

I’ve neglected this space lately, it having taken a back seat to some other things – namely, attending this beautiful tear-jerker in Roscommon, Ireland (that groom is my baby brother, looking swank in a white suit)…

M&C

…and soaking up this scenery:


…and visiting this rad place:


…and stuffing my face along the way:


And, well, it being summer, the idea of a picnic blanket and a book – or a beer on a patio – has been a lot more enticing than interacting with the Internet. So if I’m here, bathing in the glow of my computer screen, it’s because there’s something worth sharing.

The timing of this entry is also important, as the MVP of this recipe (the peach) is nearing the end of it’s season in Ontario, meaning that availability in Québec is becoming slimmer as we move through the month of August. If you live in the same climate zone as me, over the next few days you’ll likely be binging on the last of the berries and melons and stone-fruit before they’re all gone for another year. And if you haven’t had this impulse, remember: we’re talking A WHOLE YEAR here. Imagine how depressed you’ll feel in late November when you realize you never ate one fresh strawberry, one blueberry, one peach all summer, while you’re eating your fifth rutabaga of the week. You’ll want sort this one out before the summer’s over; you’ll need the memory of plump berries and orchard harvests fresh in your head to help get you through the icy, blustery months of November through March. The salad below will provide a nice memory you can look back to when you’re waiting for the bus in 20 inches of snow.

This recipe puts the peach up front and centre, without any frills or unnecessary distractions; its simplicity ends up being its strongest asset. The fruit is cut open and grilled, then tossed onto vinegary salad leaves with shreds of buffalo mozzarella. Bits of fresh chives and peppery onion slivers are mixed in, adding a nice hum to the whole thing.

Find a day to eat this lovely mess of a salad, sitting on a blanket in the grass. With your hands, if you prefer. Lick the bowl. Lick your fingers. But most importantly, relish the moment. Summer will appreciate the earnest send-off.

Grilled Peach Salad – serves two as a light main (adapted from Farmhouse Table)

Grilled Peach Salad

  • 3 peaches* (or 4 nectarines), cut in half and pitted
  • flaked salt (like Fleur de sel or Maldon salt)
  • 2 large handfuls of mixed greens, washed and dried
  • 1/2 small red onion (or one shallot), finely sliced
  • 2-3 oz. buffalo mozarella, torn into bite-size pieces

*Note: for the love of god, DON’T punish your peaches by putting them in the fridge. Doing so will make them hard and acidic. Leave them on the counter and consume over the next few days. If you’re worried about fruit flies, cover them with a plate or something like it.

For the dressing:

  • 2 Tbs. white balsamic vinegar (or cider vinegar)
  • 1 tsp. honey
  • 1 tsp. whole grain mustard
  • approx. 1 Tbs. minced chives
  • 1/4 cup (or 4 Tbsp) olive oil

Lightly salt the cut sides of the peaches, drizzle very lightly with olive oil and place cut side down on a hot grill*.  When the peaches are charred and have begun to soften, remove them to a platter and set aside.

To make the dressing, place vinegar, honey, mustard and chives in a small bowl. While whisking constantly, slowly drizzle in olive oil until emulsified. Toss salad leaves and onion with vinaigrette and place in a serving dish.  Spread peaches and mozzarella on top of the greens and drizzle with a little more dressing.  Serve straight away.

*If you (like me) don’t have a BBQ, you can toss the peaches into a preheated grill pan – not exactly the same result as putting it on an outdoor grill, but you still get those nifty charred marks.

Share this:

  • Tweet
  • Share on Tumblr
Like Loading...

Finding warmth in the 3rd

20 Monday May 2013

Posted by julia chews the fat in Food Away From Home, Lunch & Dinner

≈ 5 Comments

Arriving in Paris on a Wednesday afternoon after a sleepless, overnight flight and a long bus ride from Charles-de-Gaulle, I haul my luggage half-way around town, up and down metro stairs and along narrow side-walks until finding the apartment I rented on a small street in the 20th. Once inside, it’s difficult not to be seduced by the comfort of the bed, an open invitation to a (frankly, well-earned) nap. But I quickly remember the brevity of my stay and instead opt for a quick shower and change of shoes so that I can step out and start exploring.

I walk a bit. Quite a bit, actually – along the street that runs parallel to the high walls of Père-Lachaise cemetery and down the long rue du Chemin Vert, both of which are nearly deserted. As I quickly discover, today is a holiday in France. Nearly everything is closed, save a couple of supermarkets and tabacs. Shops are armored in anti-theft grates. The sidewalks feel barren; a solitude sets in as the sky becomes grey and the wind picks up. It starts to drizzle and I cling to my street-map, hesitant to admit that, even with all the pretty around me, I feel adrift and a little lonesome.

Gambetta

At some point between the 11th and 3rd arrondissement, Chemin Vert meets boulevard Beaumarchais, a wide, four-lane drag peppered with shops and restaurants and bars. Regardless of the holiday, patrons spill out of cafés and onto the sidewalk – smoking, talking. They may not know it, but to me and my crumpled little street map, they are welcomed signs of life.

A short way up Beaumarchais, I come across a boxy structure with long, industrial windows sticking out from the base of a traditional 19th century apartment. Despite it’s unassuming silhouette – sleek, monochrome, rectilinear – it’s an eye-catching extension of the building, crowned with a clean string of marquee bulbs. As I get closer, I recognize the furnishings of a restaurant. It’s packed with the hum of a dozen conversations that can be heard through the glass.

I step in and ask for a seat at the bar. In an instant, I’m led to the the far end, right next to the kitchen and its large stone pizza oven. Unlike the weather outside, the whole place bathes in a warm glow – a mixture of candlelight, soft incandescent and the phosphorescent embers of the oven. I order the house Negroni, which comes in an old-fashioned champagne coupe and is infused with walnut. This is my introduction to Grazie. And it’s a lovely one.

The place bustles like mad. A little bit of Italian hollering bounces between kitchen and waitstaff, but none of it feels frazzled. The back-and-forth is harmonious and focused. There’s also enough playful banter in the mix to remind you that they are still camarades, joshing eachother until the first one cracks a smile.

Ethiopian jazz plays; the bartenders swing from one end of the bar to the other. Everything seems to work with effortless synergy. The bottles of booze on display sit on an arrangement of wooden crates, back-lit with a few twinkle lights. A regal-looking stuffed peacock is perched at the very top, surveying the patrons below.

It’s easy to get woozy fast at Grazie – a combination of the Campari and the heat off the oven’s stones. There’s more yelling from the kitchen. The energy is intoxicating. You sweat. You sip your Negroni. You feel a warmth head to toe. Life is good.

The pizza arrives, splendid and bubbling – anchovy, escarole, grape tomato and a few shavings of parmesan on a beautifully blistered crust. The crunch of the escarole with the smoky anchovy and sweet tomato is an impeccable mix, all of it anchored by the crispy chew of the crust. It’s not complicated food, or fancy food. But it’s the kind that makes you happy to be alive.

The pizzaiolo stretches new pieces of dough and glides them into the rotating belly of the oven. They refresh your drink and chit chat with you between rushes. It’s only 8pm on a Wednesday, but you get the feeling it’s going to be a late night.

Ristorante Grazie
91 Boulevard Beaumarchais, 75003 Paris, France
+33 1 42 78 11 96
http://graziegrazie.fr/

—–

Pizza Grazie

Share this:

  • Tweet
  • Share on Tumblr
Like Loading...

Short-shorts, BBQs and kefta

05 Sunday May 2013

Posted by julia chews the fat in Cooking For Your Peeps, Lunch & Dinner

≈ 2 Comments

Five days into May and we’ve already been graced with a solid string of beautiful, hot, sunny days. I can barely remember how much of a long slog this past winter was. Now that everything’s in bloom and people have begun crawling out from their apartments, a major shift is underway in the city. Short-shorts have returned. So have post-work picnics, balcony beers and frequent visits to the ice-cream man. In the late afternoon, plumes of smoke begin billowing off of back porches and the the air takes on the deep perfume of charcoal. By 7pm, the whole city starts to smell like a Portuguese grill house.

And you know what that means.

BBQ

IS

BACK.

To celebrate the return of outdoor grilling and backyard socialising, I’d like to share the a recipe that I discovered a few weeks back, and that I suspect will be on heavy rotation during BBQ season. It’s a version of kefta where the lamb is spiced with a mixture of cumin, sumac and thyme, and studded with bright green pistachio nuts. There’s a really nice, tangy fast-pickled onion that you lay on top, along with some fresh mint and Greek yogurt, the whole thing is craddled in a warmed flatbread. It’s one of my new favourite things, especially when it’s accompanied by a cold beer.

While I don’t actually have a barbecue (details, details), I’ve made them in a cast-iron pan on the stove-top and they were delicious. If you happen to be one of those lucky bastards with a BBQ, I’m begging you to make good use of it and grill these suckers, kebab-style, on your beautiful, smoky, hunk of machinery.

No matter what heat source you’re using to make them, the important thing is to make sure your cooking surface is nicely preheated, so be patient in that regard. Also, I think these are best pink (medium) on the inside; some people will prefer them medium-rare. This should be fine as long as you’re using good quality meat and you know your butcher. Whatever you do, please please please don’t overcook them. They will get hard and weird and gross and then you’ll blame me for the crummy recipe, and then I’ll be like, “No! You cooked them too long!” and it’ll be awful because we’ll both know that I’m right.

Enjoy, friendlies. x

Grilled lamb kefta with pistachios and pickled red onion (adapted from Jamie Oliver) – serves 3-4

Kefta

  • 250g good-quality minced lamb
  • 1 Tbsp fresh thyme leaves
  • ½ Tbsp ground chilli
  • ½ Tbsp ground cumin
  • 1 Tbsp sumac
  • sea salt
  • freshly ground black pepper
  • ½ cup shelled pistachio nuts
  • ½ cucumber, sliced
  • a handful of fresh mint, leaves picked
  • a handful of flat-leaf parsley, leaves picked
  • ½ red onion, peeled and very finely sliced
  • ½ lemon (or 2 Tbsp red wine vinegar)
  • 4 large flatbreads or tortilla wraps
  • about 4 Tbsp natural yogurt

Directions

In a food processor, combine the thyme, chilli, cumin and sumac, a little salt and pepper and all the pistachios. Put the lid on and pulse until the mixture the pistachios are broken up into small pieces (but NOT ground). Add the lamb and pulse a few times until everything is combined (you may need to move the mixture around a little between each set of pulses to make sure everything mixes well).

Divide the meat into small patties (if cooking stove-top), or (if using a BBQ) separate into pieces that you will wrap and shape onto 4 metal skewers. Press little indents in the meat with your fingers as you go – the end result will have better texture.

In a small bowl, combine the sliced onion with a good pinch of salt and pepper and a squeeze of lemon juice (or a bit of red wine vinegar). Scrunch the onion in its “marinade” with your hands. Set aside.

Grill the patties (or kebabs) until nicely golden brown on all sides. When the meat is almost done, warm your flatbreads for 30 seconds on your griddle pan or under the grill, then divide between plates and top each with the and onion. When your patties (or kebabs) are cooked, slip them onto the flatbreads.

Add a few dollops of yogurt on the lamb and top with the cucumber slices, mint and parsley before rolling up and serving*.

(*in the original recipe, Jamie Oliver dresses some salad greens with some olive oil and lemon and adds it to the wrap in lieu of the cucumber. I pretty much just used what turned up in the fridge, but the addition of mixed salad would be really lovely too.)

Kefta detail

Share this:

  • Tweet
  • Share on Tumblr
Like Loading...

Lone wolf-ing it

29 Monday Apr 2013

Posted by julia chews the fat in Cooking Solo, Lunch & Dinner, The Basics, Vegetarian

≈ 4 Comments

I will admit that eating alone, and actually enjoying it, is somewhat of an acquired taste. Cooking just for yourself can be severely unmotivating because a) you know that you don’t need to impress/take care of anyone else; b) no one will reproach you for eating crackers for dinner or plucking something directly out of the jar with the fridge door wide open; and c) after a day of working, commuting, running errands, and overall hustling, it’s hard to muster the courage to dive head first into the kitchen to construct a meal. Once you get home after navigating through bursts of people and cars and buses and potholes, that popcorn and half-empty bottle of Perrier start to look like the best thing you’ve seen all day. In other words, when we’re tired and we know we’ll be dining solo, we usually gravitate towards things that are easy to grab and immediately gratifying (helloooo pickles), ultimately leading us to spoil our appetite for anything more substantial.

But I’m here to tell you that there’s is a better way. Even if you’re feeling capital “L” LAAAZY. Put down the box of Triscuits and allow me to introduce me to your new best friend: Cacio e pepe.

This is one of my go-to meals when I’m feeling completely bagged and uninspired. It takes under 10 minutes to make, it’s warm and comforting and home-made and a gentle reminder of how lone wolfing-it can be, well…nice.

Cacio e pepe (serves 1)

Cacio e pepe

¼ lb good-quality* dried spaghetti, linguini or bucatini
¼ cup (plus 1 Tbsp) very finely grated good-quality parmesan**
freshly ground black pepper
sea salt

*given the simplicity of this recipe, the quality of the ingredients is paramount. Don’t cheap out. You’ll regret it.

**for dishes like this, grating cheese on a microplane or the smallest holes of your box grater works best – that way the cheese melts as soon as it hits the hot pasta, resulting in a oozy, luscious plate of goodness.

Directions:

Cook the spaghetti in a large pot of boiling salted water until al dente.

Put a medium pot of fresh water to boil; once the water has reached a rolling boil, season with salt and add the pasta.

While the pasta is cooking, fill a deep glass or ceramic dish with hot water and submerge your favourite pasta bowl or plate in the water to warm it up before serving.

Once the pasta is cooked al dente, reserve ¼ cup of the cooking water, and then drain the pasta in a colander. Do not shake off the excess water. Transfer back to the pot, off the heat, and sprinkle with ¼ cup of the cheese and about 1 Tbsp of the cooking water. Mix to combine. Add a little more cooking water if you think the pasta looks dry.

Remove the pasta bowl from the warm water (without drying it) and place the pasta into it. Finish with some freshly ground black pepper and a sprinkling of the remaining cheese. Serve straight away with simple steamed greens or a salad (if desired).

Share this:

  • Tweet
  • Share on Tumblr
Like Loading...

A riot of pink

09 Tuesday Apr 2013

Posted by julia chews the fat in Lunch & Dinner, Soups, Vegetarian

≈ Leave a comment

If per chance, you plan on spending time with a group of 6-year-old girls (and, like me, do not have the experience of being a parent) know this:

1) Despite seeming level-headed and charming, they are complete maniacs. I don’t even feel bad about saying that. They’re mental. Especially when grouped together for an afternoon birthday party, with sustained access to sugar and chocolate. In their presence, you will bear witness to a level of shrieking that will be equal parts astounding and frightening. You will stand around with the only other adult in the room, wide-eyed and helpless, while drawing air circles with your index finger around your temple, silently mouthing the words “THIS IS FUCKING CRAZY”. Right from the start, your body will switch on to full alert, your heart will start racing and you will develop a slow, but sharp headache right between the eyes. You will seriously contemplate your ability to make it through the next three hours, possibly even the next three minutes.

…also, little girls:

2) Wear a TON of pink. They love it. They covet it. They want everything in it. They might’ve gone through a phase where they liked blue or yellow, and as they grow up, they’ll likely come to appreciate the whole spectrum of colours. But right now, their brain only acknowledges one colour: PINK. It’s a force to be reckoned with. Observe the evidence:

pink pink pink

Coincidently, these two observations found their way into the recipe below. Beets help lower your blood-pressure (to recover from little-girl-freak-outs) AND they have the magical property of turning bright magenta when blended with liquids. Ultimately, this soup will make everyone happy – the adults get to restablize, and the miniature raving lunatics get their pink soup. Win-win.

Warm beet and fennel soup (serves 4) – adapted from Bon Appétit

  • 2 Tbsp olive oil
  • 1 cup chopped onion
  • 1 cup chopped fennel bulb
  • 1 1/2 tsp fennel seeds
  • 2 large beets, peeled, cut into 1/2-inch cubes
  • 2 cups chicken broth (or vegetable stock)
  • 1 cup soup cream
  • additional sour cream for decorating (optional)
  • fennel fronds, for garnish (optional)

Beet and fennel soup

Directions:

Heat olive oil in large saucepan over medium heat. Add chopped onion, chopped fennel, and fennel seeds. Sauté until vegetables soften, about 5 minutes.

Add cubed beets and stir to coat. Add chicken broth and bring to boil. Cover; reduce heat to medium-low. Cook until beets are tender, 18 to 20 minutes.

Purée soup in batches in a blender (or with a hand blender). Return to the same saucepan season soup with salt and freshly ground black pepper. Add the sour cream* to the soup in the saucepan and rewarm gently. Ladle soup into bowls. Drizzle with additional sour cream and garnish with fennel fronds, if desired.

*If your sour cream is straight out of the fridge: place 1 cup sour cream in a bowl, then add one small ladleful of soup, stirring to combine. Repeat twice more until the sour cream is tempered – this will help avoid the curdling that can happen when cold dairy hits hot soup.

Share this:

  • Tweet
  • Share on Tumblr
Like Loading...
← Older posts
Newer posts →

Facebook

Facebook

Instagram

No Instagram images were found.

Recent Posts

  • Layers and Rows
  • Finding Buoyancy
  • February
  • Wednesday
  • Cross My Heart, Miso

Archives

  • May 2017
  • April 2017
  • February 2017
  • December 2016
  • November 2016
  • September 2016
  • August 2016
  • July 2016
  • June 2016
  • May 2016
  • April 2016
  • March 2016
  • February 2016
  • January 2016
  • December 2015
  • November 2015
  • October 2015
  • September 2015
  • August 2015
  • July 2015
  • June 2015
  • May 2015
  • April 2015
  • March 2015
  • February 2015
  • January 2015
  • December 2014
  • November 2014
  • October 2014
  • September 2014
  • August 2014
  • July 2014
  • June 2014
  • May 2014
  • April 2014
  • March 2014
  • February 2014
  • January 2014
  • December 2013
  • October 2013
  • September 2013
  • August 2013
  • July 2013
  • June 2013
  • May 2013
  • April 2013
  • March 2013
  • February 2013
  • January 2013
  • December 2012
  • November 2012
  • October 2012
  • September 2012
  • August 2012
  • July 2012
  • June 2012
  • May 2012
  • April 2012
  • March 2012
  • February 2012

Categories

  • Beverage
  • Breakfast & Brunch
  • Condiments
  • Cooking For Your Peeps
  • Cooking Solo
  • Cooking with Nonna
  • Food Away From Home
  • Food Writing
  • Holidays
  • Intro
  • Lunch & Dinner
  • Snacking
  • Soups
  • Sweet Tooth
  • The Basics
  • Vegetarian

Enter your email address to follow this blog and receive notifications of new posts by email.

Join 82 other subscribers

Blog at WordPress.com.

  • Subscribe Subscribed
    • julia chews the fat
    • Join 82 other subscribers
    • Already have a WordPress.com account? Log in now.
    • julia chews the fat
    • Subscribe Subscribed
    • Sign up
    • Log in
    • Report this content
    • View site in Reader
    • Manage subscriptions
    • Collapse this bar
 

Loading Comments...
 

    %d