• Home
  • About

julia chews the fat

julia chews the fat

Category Archives: Lunch & Dinner

As much as you can carry

18 Friday Sep 2015

Posted by julia chews the fat in Condiments, Lunch & Dinner, The Basics, Vegetarian

≈ 8 Comments

End of season visits to the outdoor food market are always a little bittersweet for me. I get goosebumps of excitement and pangs of regret in equal parts. It’s a complicated phase in our relationship – I feel nervous and happy all at once.

I suppose it’s because I’m not very good with endings – even if I know that in reality, this isn’t an ending in the classic sense. Elegant stalks of rhubarb and asparagus will come back by May; sweet peas and baby zucchini in June; baskets of gemstone-coloured berries and velvet-skinned peaches through July and August. But in that transition between summer and fall, I always get a little panicky, at a loss as to how to maximise the last real days of the food market. I end up leaving the house without a recipe or a plan, only to wander around aimlessly between the market stalls with the jittery excitement of a puppy who circles the barbecue, hoping he’ll get tossed a hot-dog. I want all the strawberries, all the cucumbers and melons, and all those gorgeous batches of red romaine and frilly frisée from the grey-haired woman at the centre of the market I call “Madame Laitue”. Because she – like the berries and all other ephemeral summer foodstuffs – will soon pull an eight-month disappearing act. And secretly, the thought of it makes me a little sad. And a little desperate.

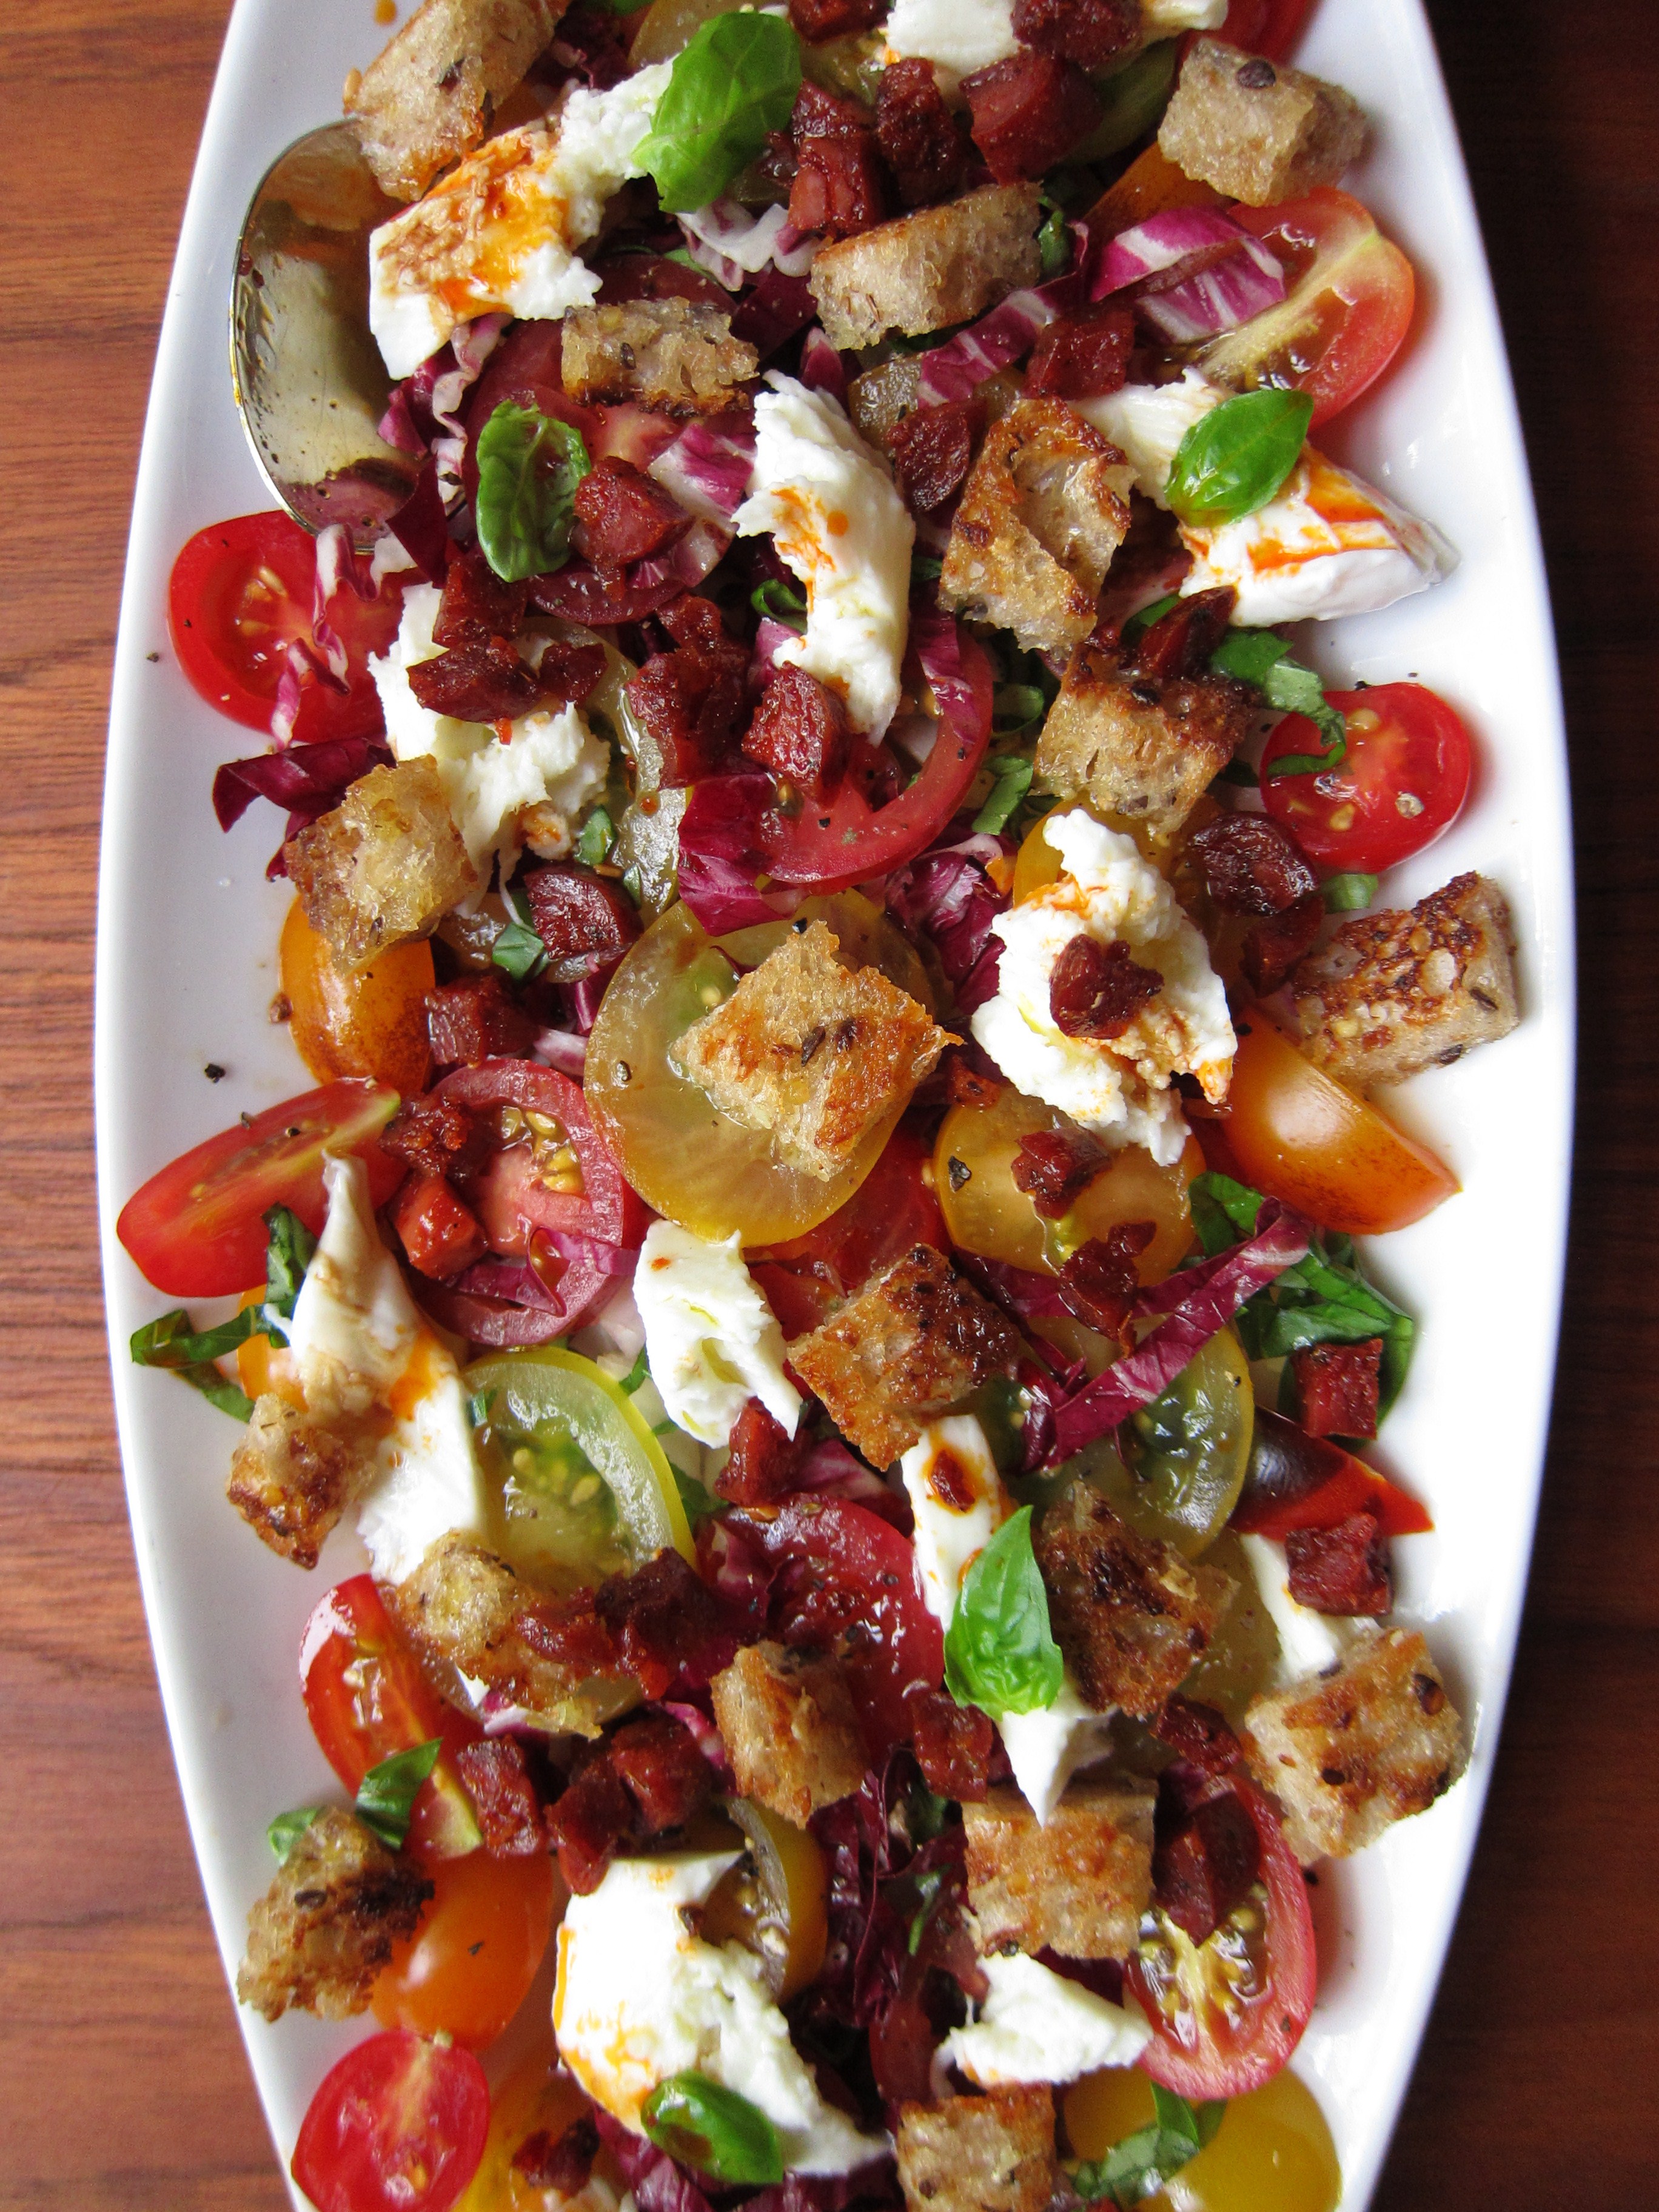
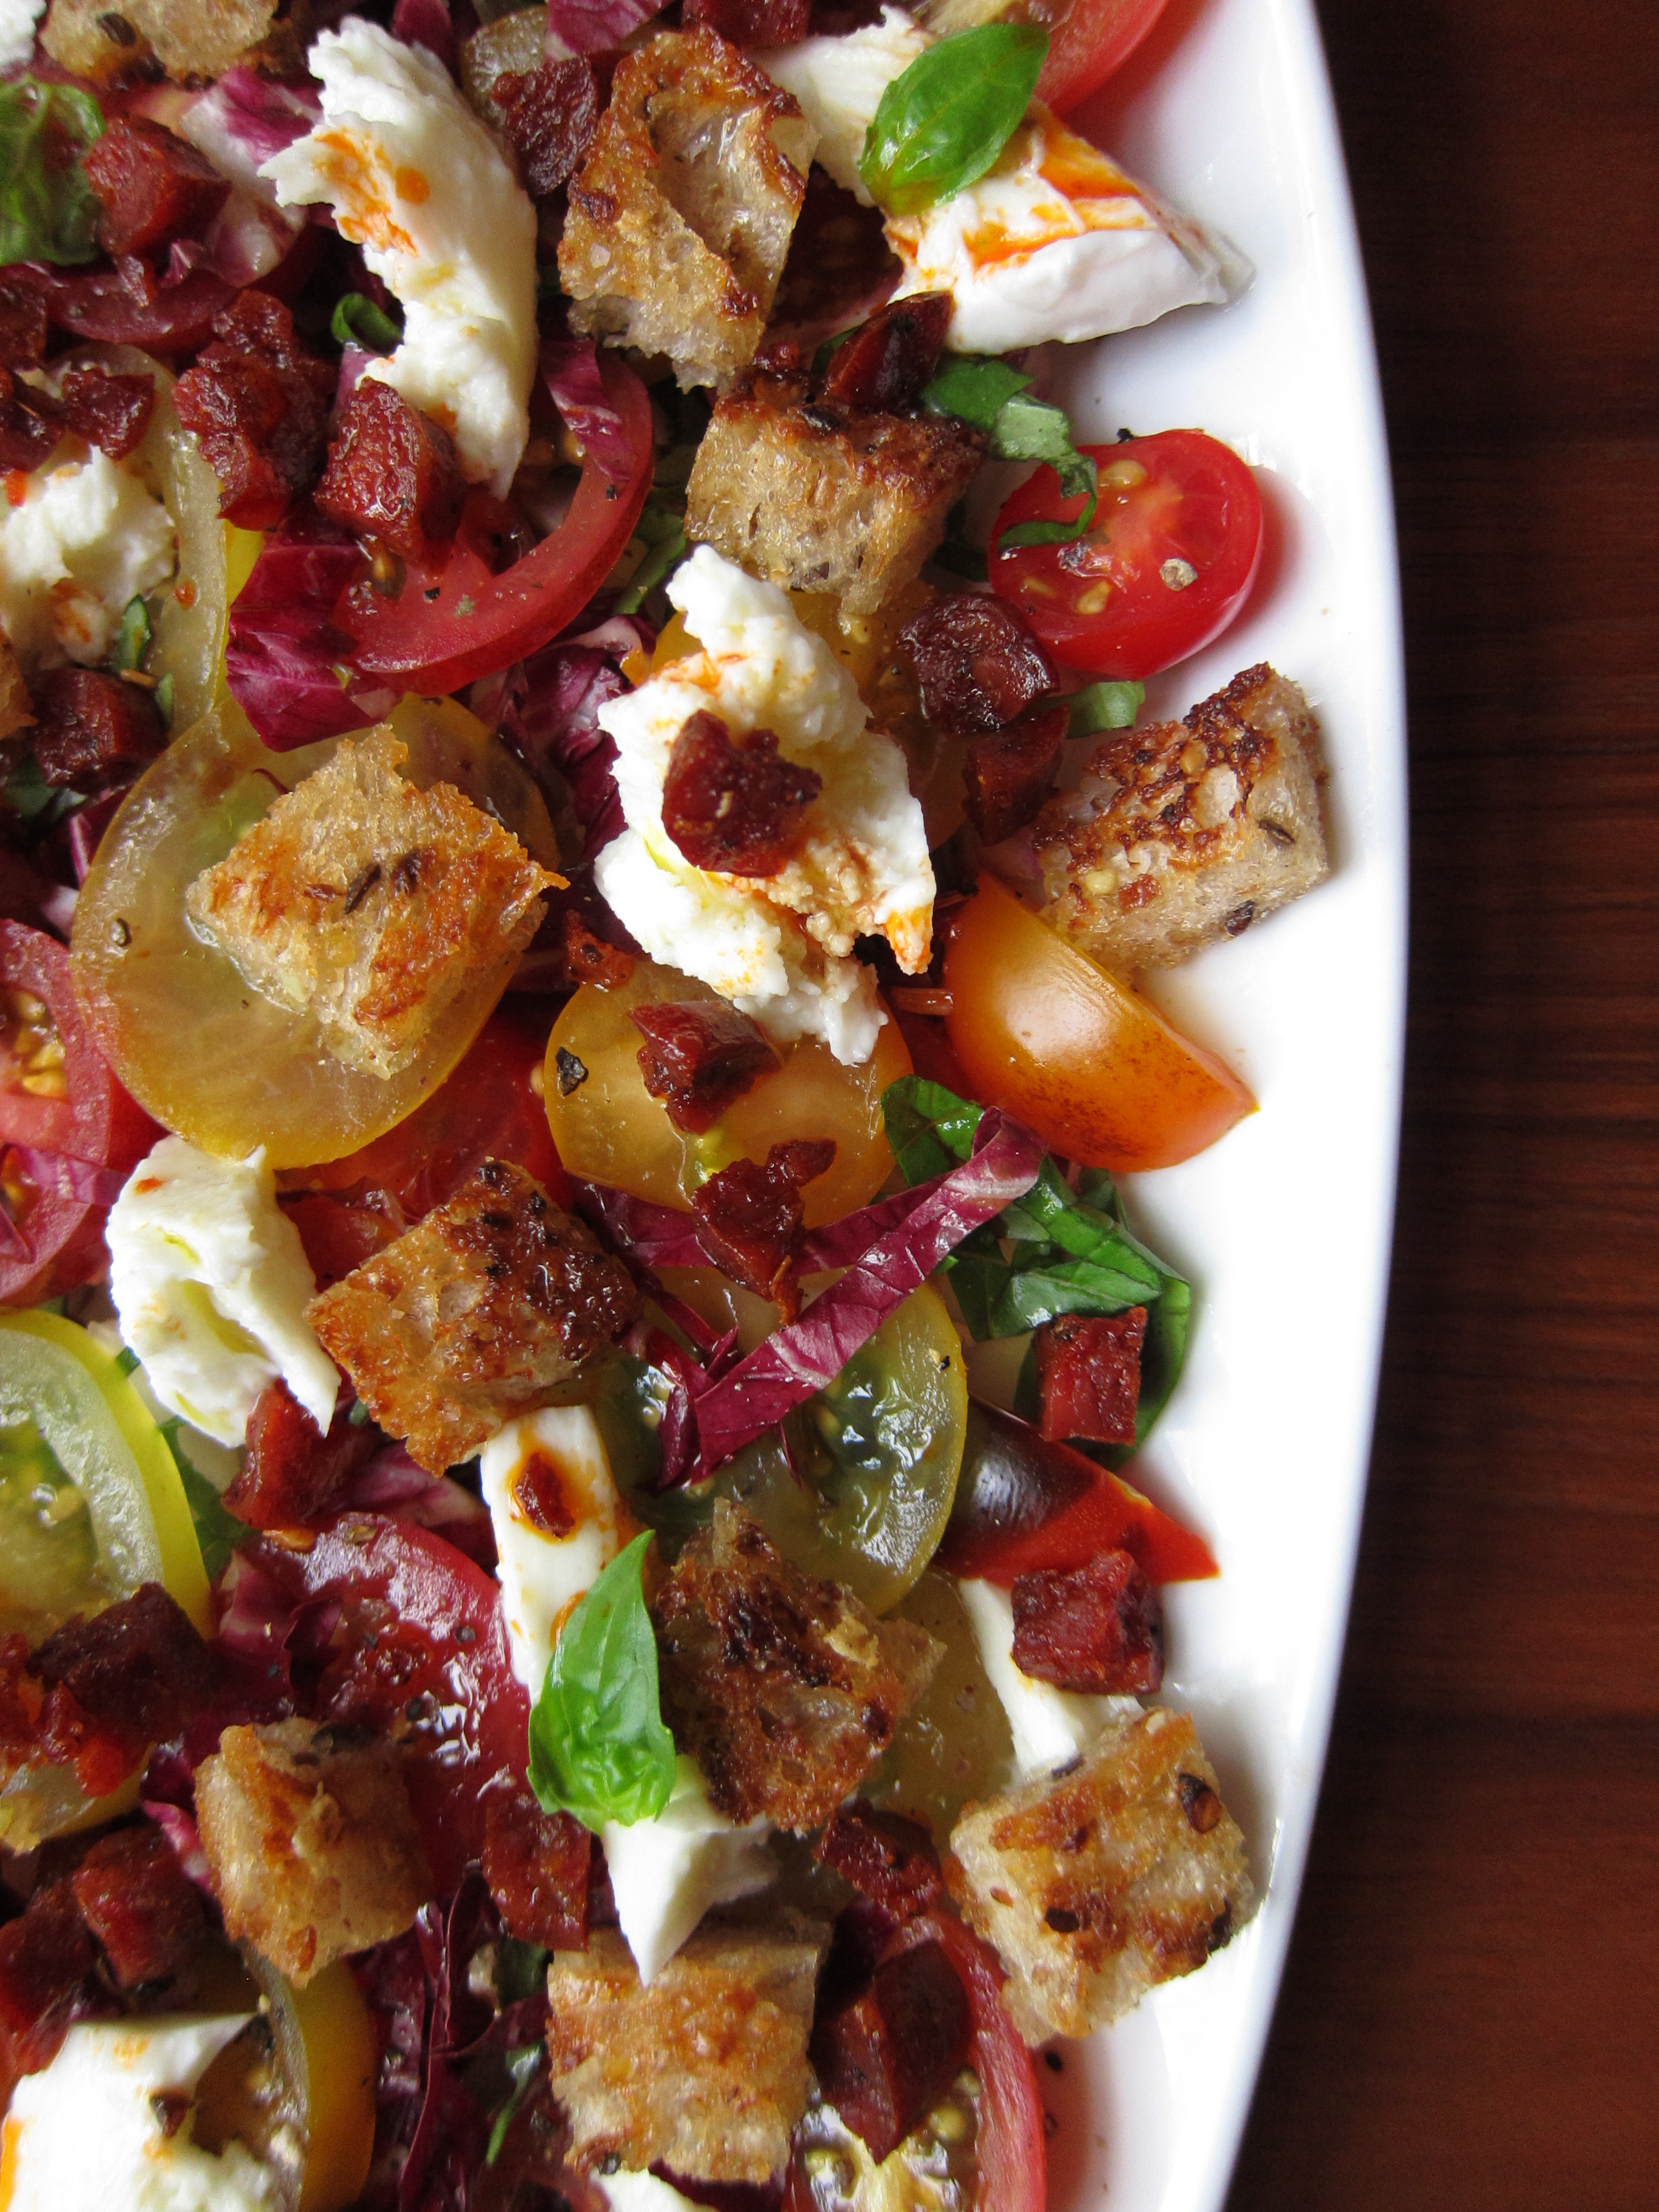
So, during my last visit, I binge-shopped my way through the last of the summer produce – pints of berries, a few long striped “snake” cucumbers, bunches of fresh herbs and French radishes, baskets of flat romano beans and cherry tomatoes, and several heads of Madame Laitue’s finest lettuce – again, with no recipe, no plan, spurred on only by a need to get it before it’s all gone.

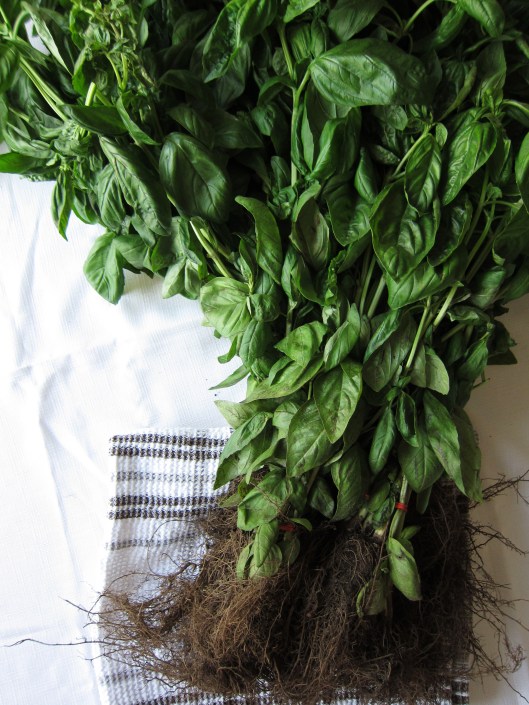
For good measure, I also picked up nothing less than an obscene amount of basil – four whole stalks worth – because when something’s as beautiful and temporary as this, you throw pragmatism out the window and buy as much as you can carry.

Basil for pesto

So that’s what I did – I bought as much as I could haul home, cradled in one arm, like an enormous pageant-sized bouquet. For $10, It was the best purchase I’d made all week. The people I passed on the street seemed to agree, flashing me smiles and “oh la las” usually reserved for hunks and babes. (Montrealers are a special breed of Canadian and don’t shy away from expressing their affinity for food.)

There was one old man, though, who seemed totally confounded by what I was holding. He took a seat next to me on the metro, stared at my leafy bouquet for a little while, then coyly asked,

“C’est un aromatique ça?”

“Oui, c’est du basilic.”

“Mais c’est très fort comme odeur, non?”

“Haha, oui, en effet! Mais c’est délicieux! Vous voulez goûter?” (I pull off a leaf for him to try; he declines)

“Qu’est-ce que vous allez faire avec tout ça?”

“Du pesto, monsieur.”

“Mais c’est quoi ça, du pesto?”

In that moment I wished I could take him back home with me and make him a batch of pesto; wished I could see the look on his face when he tried it for the first time, swirled into a bowl of warm pasta dressed with parmesan; wished I could show him why, when you see fresh basil at the market, you take home as much as you can carry.

Basil for pesto

Basil Pesto (a riff on mom’s version) – makes about 3 cups of pesto

  • 8 cups basil leaves (stripped from the stalk)
  • 1 cup flat-leaf parsley
  • 2-3 garlic cloves (adjust to taste)
  • 1 cup Parmigiano-Reggiano, grated
  • 2/3 cup olive oil
  • salt, to taste
  • 1 cup pine nuts (optional)

Notes:

  1. Pine nuts are a nice (and super traditional) addition to pesto. We don’t use them anymore because two of our in-laws have nut allergies (and, also because they’re esspennnsive). But if you can splurge on some, they add great flavour and texture. If using, just add the pinenuts into the processor with the other ingredients (1/2 cup in the first processed batch and another 1/2 cup in the second – see directions below).
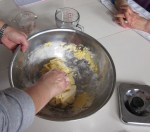
  2. In traditional pesto-making, a mortar and pestle are used to mush everything together, but a food processor will work just as well.
  3. Parsley is not something pesto purists would add in, but mom does it and it tastes amazing.
  4. Pesto, like any sauce, is about adjusting and tasting. You can use this recipe as a guide, but trust your tastebuds when it comes to the final result.

Pesto prep

Directions

1) In a food processor, chop the garlic. Add half of the basil, parsley and grated parmesan cheese (and 1/2 cup of pinenuts, if using) and pulsate for about 10 seconds.

2) With a spatula, scrape down the sides, put the top of the processor back on. Get your oil ready, turn on the processor and slowly add half the oil through the feed tube, until a paste forms. Season with salt.

3) Repeat with the remaining bail, parsley and parmesan cheese (and 1/2 cup of pinenuts, if using). You may need to remove the first batch of pesto from the processor, if there isn’t enough room; I just did one batch over the other and it worked fine. Taste it and adjust accordingly (add a bit of salt, a bit of oil…)

Pesto

Notes: to refrigerate, place pesto in a glass jar and cover with olive oil. Use within a few days. To freeze, place spoonfuls on a tray lined with parchment paper. Once frozen, wrap individually (or in pairs) in parchment paper and transfer to freezer bags. The pesto will keep for several months in the freezer.

Pesto

Share this:

  • Tweet
  • Share on Tumblr
Like Loading...

Panzanella and Cucina Povera

21 Friday Aug 2015

Posted by julia chews the fat in Lunch & Dinner, The Basics

≈ 4 Comments

Salvaging leftovers – while not the most romantic or esoteric of cooking practices – is the departure point for the better part of the cooking I do. I suspect the same applies to you.

We might not always be thrilled about cooking what’s hanging out in there, especially after a hectic day, but there is a kind of satisfaction that comes from pulling together random (and sometimes less-than-pretty) ingredients and turning them into a legitimate meal. A leftover chicken carcass; floppy celery tops; speckled bananas; a pint of yogurt hovering near the expiry date – to the salvager, these are all opportunities in disguise.

For the most part I learnt how to cook with odds and ends by watching my maternal grandparents plug away in the kitchen. (You may have already met them here. Or here. Or even here.) They left their tiny, tight-knit village in the Apennines in the 1950s, but prior to that, they’d endured their fair share of hardships (the Spanish flu, Second World War rationing, pilferage by foreign soldiers…), which meant that they’d learnt how to make do with very little. By the time they came to Canada, they’d become experts of cucina povera. It flowed through their veins. They could pull together meals from seemingly nothing, with an effortlesness that came from years of self-sufficiency. It was a waste-not-want-not approach, as dishes like pasta e fagioli, rapini aglio olio, ribolatta, and polenta were all inexpensive ways of using up pantry items, scraps and leftovers.

The term “poor man’s cooking” might come across as pejorative, but cucina povera – while born of economic necessity – is actually a treasure trove of traditions and regional customs, passed down from one generation to the next. Also, cooking with less doesn’t necessarily mean going without. Nonna often reminds me that – even in the leanest times – they always ate well, by which she means that her family not always had food on the table, but always had good food on the table. A bit of olive oil, some sliced garlic, chili flakes and spaghetti were all that was needed to make a slippery plate of pasta aglio olio; a potato, some leftover cabbage, polenta and a chunk of pancetta made a flavourful bowl of cazzarielli soup; leftover beans, fried up with thin slices of onion and swiss chard, served on a thick piece of toasted bread, and topped with a ladleful of broth made a satisfying lunch. And since all it took was a little water or an extra onion to stretch out a meal, it could feed as many hungry mouths as it needed to, with the leftovers reworked and reinvented the next day to make something altogether new. It’s a testament to how any ingredient – no matter how modest – can be transformed into something delicious and sustaining; it’s also one of truer expressions of Italian arrangiarsi (the art of making something out of nothing) which I think is the ace up the sleeve of many Italian grandparents.

Bread – and especially stale, leftover bread – is an important staple in cucina povera, in part because it can be easily reworked. The Tuscans make a type of soup with day-old bread, ripe tomatoes, garlic and basil called pappa al pomodoro, to be eaten preferably (but not exclusively) in the shade on a blistering summer’s day. There’s also pan grattato, rustic breadcrumbs made from stale bread, then toasted in oil, herbs, and seasonings (anchovies, lemon zest) and sprinkled over pasta as a replacement for its more expensive counterparts, Parmigiano and pecorino. Panzanella is another way that Italians use up stale bread. It’s essentially a bread salad made with ripe tomatoes, some cucumber, onion, olive oil, a dash of vinegar and a bit of basil. Some will tell you to toast the bread beforehand; some will have you soak the bread in a bit of water to revive it. Others might have mush up the bread and the tomato into a pappa, or pulp, before combining with the other ingredients. But most recipes, regardless of the toast or no toast principle, insist that you mix the pieces of bread with the tomato wedges and allow it all to rest at room temperature for about an hour before serving, so that the juices from the tomato can be absorbed into the bread. This is the one secret behind panzanella: the slow soak. It’s important that the ingredients have time to mellow out together, allowing that ripe, summery tomato flavour to seep into the bread’s crumb and soften it.

—–

Now, before you scroll down any further, know this: the recipe below is not panzanella autentica, but it’s something of a close cousin. Which is why we’re going to call it “panzanella-style” salad. You’ll see that there are a few non-traditional flourishes, including shredded raddichio, some fried chorizo and fresh mozzarella (these last two not being very cucina povera, I might add). But, at the very least, this salad was made in the spirit of “waste not want not”: I had a half-loaf of stale bread, a bunch of fresh basil that needed some freshening up, a nub of chorizo hanging out at the back of the fridge, and a pint of cherry tomatoes ripening on the windowsill.

The result proves that scouring the fridge can bear rich rewards.

Panzanella

Panzanella-Style Salad with Fresh Mozzarella

  • 1 pint mixed-colour cherry tomatoes, halved (or larger tomatoes cut into quarters)
  • 1 shallot, minced
  • 1 small head raddichio, thinly sliced
  • about 1 cup stale bread, cubed
  • 1 clove garlic, pressed
  • about 50g fresh mozzarella, such as mozzarella di bufala*
  • about 50g dried chorizo, diced (optional) – I used this one
  • bunch of fresh basil, thinly sliced
  • good quality olive oil
  • red wine vinegar
  • salt and freshly ground black pepper

*Montreal: there are now producers that make buffalo mozzarella in Quebec; ask your local cheesemonger about it.

Directions

1) Set a pan on medium-high heat; add a glug of olive oil. Once it’s hot (but not smoking), add the cubed bread and toast until golden. Remove from pan and set aside.

2) With the leftover oil in the pan, lightly fry the garlic (about 20 seconds), then return the bread to the man and mix to combine. Transfer the bread and garlic into a large bowl. Add the halved (or quartered) tomatoes, sliced basil, diced shallot  and toss to combine. Drizzle some olive oil over the top and add a small splash of red wine vinegar. Season with salt and pepper, give it a final toss and set aside at room temperature for 30 minutes to an hour.

3) Put the pan from before back on medium-high heat. Once hot, add the diced chorizo and fry until slightly crispy (about 3 minutes).

4) Add the sliced raddichio to the bread mixture and mix to combine. Place the mixture on a serving platter. Shread the mozzarella over top, then sprinkle the salad with the fried chorizo and some of its rendered fat. Serve immediately.

Panzanella

Panzanella

Panzanella

Share this:

  • Tweet
  • Share on Tumblr
Like Loading...

My Kind of Food

16 Tuesday Jun 2015

Posted by julia chews the fat in Lunch & Dinner, Vegetarian

≈ 8 Comments

I first heard of Yotam Ottolenghi about four years ago, at an all-ladies, vegetarian dinner party (if you needed proof of my G-rated social circles, there it is). Arriving after a long day at work and an interminable commute, I gave a few quick hellos before making a beeline for the appetizer table, zeroing in on a bowl of dip nestled in a ring of pita chips. Thinking it was baba ganoush, I was expecting something neutral, familiar, and a little inert. But after the first bite, I got sucker-punched by something altogether different – a mix of tangy and sweet, bitter and earthy, creamy and light. I never thought I could get excited about dip, but this stuff was a revelation. Omagah wha iv dis schtuff? I asked my host, mouth full, with a second chip already half-submerged in the dip. Have you heard of this cookbook called Plenty?, she asked. By Ottolenghi? I shook my head no. She found the cookbook and flipped through it until she came to the recipe for Burnt Aubergine with Tahini. This is what you’re eating. Isn’t it great?

That would mark the beginning of my love affair with Ottolenghi, now four years strong. It’s rare that I want to cook all of the recipes in a cookbook (in fact, I collect more cookbooks than I actually use), but when I flip through my copies of Jerusalem, Plenty, and Plenty More, they’re bookmarked with so many Post-Its they look like fringed piñatas, ready to burst, becoming some of my most reliable, well-thumbed kitchen companions. Recent Ottolenghi discoveries include honey-roasted carrots with tahini yogurt, grilled lettuce with farro and lemon, urad dal with coconut and cilantro, brussel sprouts with caramelised garlic and lemon peel, and alphonso mango and curried chickpea salad (which I actually just made last night and completely demolished in one sitting).

Through his cookbooks, I’ve learnt how delicate plays on flavour – like adding za’atar or sumac to roast chicken, or lime zest to a salad – can elevate a dish without overwhelming it. He strikes that tricky balance between what’s familiar and novel, what’s subtle and bold. Nothing in his cooking is explicitly for show. There are no obvious fireworks; no molecular gastronomy on display. Just well-balanced, unfussy, honest food that is delicious and gorgeous and can be made easily with your own two hands.

In short, my kind of food.

Below is one of my favourite Ottolenghi recipes to make in the spring – Herbed Rice Salad with Fava Beans and Pistachios. This salad is great on its own, but would also pair up nicely with a piece of fish. Don’t skip the lime zest – that subtle pop of citrus is what makes this salad what it is.

Be sure to make it when fava bean season is at its peak.

Fava beans

Yotam Ottolenghi’s Herbed Rice Salad with Fava Beans and Pistachios – serves 6 as a side

Ingredients:

  • ½ cup wild rice
  • salt
  • 1 cup basmati rice
  • 1 dried Iranian lime (optional)
  • 1 cup fresh shelled fava beans (from about 1 pound of pods)
  • ½ cup chopped dill
  • ½ cup chopped flat-leaf parsley
  • ½ cup unsalted, raw pistachios
  • ¼ cup olive oil
  • 2 tsp finely grated lemon zest
  • ¼ cup fresh lemon juice
  • 1 tsp finely grated lime zest

Directions:

1) Cook wild rice in a medium pot of boiling salted water until tender and grains start to split, 35–40 minutes. Drain and set aside to cool.

2) Meanwhile, combine basmati rice, lime, if using, and 1 ½ cups water in a medium saucepan, season with salt, and bring to a boil. Reduce heat, cover, and simmer 10 minutes. Remove from heat and fluff with a fork. Cover; let sit until water is absorbed, about 5 minutes. Let cool and discard lime.

3) Cook the shelled fava beans in a large saucepan of boiling salted water until tender, about 4 minutes. Drain, then transfer to a bowl of ice water. Drain again and peel them, by “pinching” the opaque, light green skins between your fingers until the bright green beans pop out.

Fava beans Fava beans Fava beans Fava beans Fava beans Fava beans

4) Toss wild rice, basmati rice, dill, parsley, pistachios, oil, lemon zest and juice, lime powder, and fava beans in a large bowl. Season with salt and serve.

Note: Fava beans can be cooked and peeled 2 days ahead; cover and chill. Wild and basmati rice can be cooked 2 days ahead; cover and chill.

fava rice salad fava rice salad

Share this:

  • Tweet
  • Share on Tumblr
Like Loading...

Breaking Bread

31 Sunday May 2015

Posted by julia chews the fat in Breakfast & Brunch, Cooking For Your Peeps, Lunch & Dinner, Snacking, The Basics, Vegetarian

≈ 5 Comments

Homemade bread.

I’m a wimp when it’s come to those two words. As much as I like cooking, I’ve carefully avoided breadmaking for years, mostly for fear that it’s a labour-intensive process requiring special types of flour, fancy fresh yeast, elaborate kneading and expensive pieces of machinery, like electric bread makers and large mixers with paddle attachments. And that would just be to get the starter dough going. After that, there’d the issue of rising: Does it have to rise in a low heat oven? What if I don’t have a bread-proof setting on my oven? What if I kill the yeast? How will I know if I’ve killed the yeast? And so on and so forth.

Despite all this, I somehow own three cookbooks on bread – including Bernard Clayton’s New Complete Book of Breads, Soups and Stews, a hefty tome that has sat on the shelf undisturbed, for four whole winters now. I have an entire Pinterest board dedicated to bread, a place where I’ve been quietly stockpiling all sorts of recipes for leavened dough – from densely-flavoured sourdough to crackly baguette to Japanese milk toast – none of which I’ve actually made. But, despite my trepidation, I’m clearly interested in bread – the traditions, the techniques, the delicate alchemy that allows a sticky mass to transform into something crispy and chewy and ethereally light, all at once. It’s a magical beast. The unicorn of food. I’ve just been too timid to get close to it.

Then one day, out of nowhere, I decided to just effing do it already. It happened when I was making lunch with my mom over a long weekend this May:

Me: So, what if I made bread today?
Mom: Yeah, sure. If you want something easy, you should try that no-knead one Mark Bitterman did for the New York Times.
Me: You mean Mark Bittman?
Mom: Yeah, yeah…him. Anyways, it’s so easy. Seriously. There’s a video too. (she finds me the video online). Here, watch it. It’s all there. It’s super simple, you’ll see.

This isn’t the first time I’ve heard of this no-knead recipe. My mom’s been a big proponent of it for years. It’s a version of the old European clay-pot method, modernised by baker Jim Lahey, of Sullivan Street Bakery in Manhattan, and then popularised by Mark Bittman when he did a piece on it for The New York Times. In the video, Lahey walks us through his recipe, step by step, starting with the introductory promise that it’s so incredibly easy, “even a six year-old” (“or a four-year old!”) can make it.

With that bold endorsement in mind, I figured that if any recipe was going to help me cross the threshold into breadmaking, this would be it. The simplicity of Lahey’s recipe is what ultimately sold me. You don’t need to muck around with special bread flour or proofing or extraneous kneading, nor do you need an expensive mixer or a professional oven. All you need is –

flour
yeast
salt
water
your two hands

That, and a screaming-hot cast-iron Dutch oven. The cast-iron is an important part of the alchemy in this bread recipe, creating just the right amount of steam to get an airy interior and a crisp exterior. The idea is you set the pot in a 500ºF oven until it reaches temp, then toss in your dough (cover on for a bit, then cover off) and bake on high heat until the bread becomes crackly and lightly caramelised on the outside. Cast-iron pots retain heat extremely well, mimicking the qualities of a stone oven and a steam-injected oven at the same time. So, whether you’re a six year-old, or a four year-old (or even a monkey), the cast-iron pot will help your first attempt at bread look like this:

baked miche

It’s seriously one of the easiest things you’ll ever make. And when you’re cracking into that first piece of freshly baked bread, straight from your oven, you’ll be so happy you made a go of it.

Happy baking, friendlies x

—–

Notes on the recipe:

  • the dough needs at least 12 hours for the first rise, then another 2 hours for the second rise. Start the night before and let it rise overnight. The longer you let the dough rise (min. 12 hours, max 24 hours), the more flavourful it will become.
  • when my mom discovered this recipe, she quickly starting making her own adaptations, one of which resulted in a drop-dead gorgeous focaccia recipe. All you need to is add a bit of olive oil to the dough and stretch it out on a pizza pan for baking. (I’ve included her recipe for a cherry tomato version below). If you decide to make both the bread and the focaccia, just double the dough recipe.

Note on Dutch ovens: if you don’t already have one, it’s an insanely useful kitchen tool have. They’re especially practical in the winter – to make soups, stews, curries – but are a must-have for this bread recipe. If you’re worried about the financial commitment, remember that you don’t need to buy the top-of-the-line models (the ones that can go for upwards of $350 a pop); I got a Lagostina version on sale at Canadian Tire for $90 and it works like a charm. They usually come with a 10 or 25-year (and sometimes, lifetime) guarantee, so they’re in it for the long haul. Just make sure that you get one with a 500ºF-resistant metal knob on the cover so that you can make your bread (the ones that come with a hard plastic knob are no bueno).

Jim Lahey’s No-knead Bread – makes one white miche

Ingredients

  • 3 cups all-purpose flour
  • ¼ tsp dry yeast (like Fleischmann’s)
  • 1 ½ tsp salt
  • 1 ½ cup water

Crucial kitchen tool: cast-iron Dutch oven

DIRECTIONS

STEP 1 – RISING

1) In a mixing bowl combine the flour, yeast and salt and blend with a whisk.

2) Pour in 1 1/2 cup of water and mix with a wooden spoon. Scrape any excess flour from the bottom and sides of the bowl, making sure the ingredients are well incorporated and form into a ball. The dough will have a stringy texture.

3) Place a piece of plastic wrap on the bowl to avoid the dough from drying out. Allow to rise in a warm dry, and draft free place for at least 12 hours and up to 24 hours. (I left mine at room-temperature on the counter-top overnight.)


STEP 2 – FOLDING & SECOND RISING

1) Dust a large piece of parchment paper, measuring about 24 inches with flour to prevent the dough from sticking during its second rising. Scrape the risen dough onto the floured parchment paper.

2) Sprinkle some flour on the dough and on your hand to prevent sticking. Lightly pat down the dough with your hands to form a piece measuring approximately 10 x 10 inches.

3) Fold one side to the centre; then fold the other side to meet the edge of the first side, like a book (see images below). Take the top edge and fold to the centre; take the bottom edge and fold to meet the top edge.

4) Turn the dough and place the folded side of the dough on the parchment paper and dust with flour to prevent sticking. Loosely wrap the dough in the parchment paper and place on a baking sheet. Cover with a tea towel. Transfer to a warm and dry place and allow to rise a second time (2 hours).


STEP 3 – BAKING

1) Place the cast iron Dutch oven with its cover, on the second rack from the bottom of the oven. Preheat the oven to 500ºF.  Dust the smooth side of the risen dough with flour to prevent it from sticking to the bottom while baking.

2) Once the oven reaches the required temperature.  Remove the pot from the oven and take the cover off. Place the dough, folded side up into the pot and cover. Bake for 30 minutes at 500ºF.

3) Remove the cover, reduce the heat to 450º F and bake for an additional 15-30 minutes until the crust becomes golden brown. To check if the bread is cooked, remove the loaf from the pot and tap the bottom with a knife – if it sounds hollow, the bread should be done. Cool on a baking rack.

baked miche

baked miche - detail

baked miche

baked miche

baked miche - section

—–

Tomato Focaccia

Mom’s Cherry Tomato Focaccia – makes one 12″ pie

  • 2 cups cherry tomatoes, cut in half
  • 1 garlic clove, finely minced
  • 1 Tbsp dried oregano
  • 3 Tbsp extra virgin olive oil (plus a little more for the topping)
  • 2 Tbsp grated Parmigiano Reggiano
  • 1/4 cup sliced bocconcini or cubed mozzarella
  • salt flakes and freshly ground pepper (to taste)

1) Follow the directions for bread in the recipe above, adding 3 Tbsp of olive oil to the dough when you add the water.

2) After the first rise (see directions above), transfer the dough to a greased and floured 12″ pizza tray. Dust the dough lightly with flour, and with your hands spread out to the edges of the pizza pan. Place in a draft-free place to allow to rise a second time (2 hours).


3) While the dough is rising, prepare the topping by adding the prepared tomatoes in a bowl and toss with a drizzle of olive oil, the Parmigiano Reggiano, bocconcini (or mozzarella), minced garlic, and oregano. Season with salt and pepper.

Tomato Focaccia

4) Once the dough has risen a second time (after 2 hours), preheat the oven to 500º F. Spread the tomato mixture gently over the focaccia dough and bake at 500º F for 15-20 minutes.

Tomato Focaccia

Tomato Focaccia - detail

Tomato Focaccia

Tomato Focaccia - detail

Share this:

  • Tweet
  • Share on Tumblr
Like Loading...

Sustenance Salads

03 Sunday May 2015

Posted by julia chews the fat in Lunch & Dinner, Vegetarian

≈ 5 Comments

In looking back at the last few recipes I’ve left you with (pasta! polenta! caaaaake!!!), you might start to think it’s been a debaucherous carb-fest 24/7 over here. It is sometimes, but not always. Like most people, we eat salads from time to time too. Even sans croutons! Imagine!

I think it’s safe to say that knowing how to assemble a good salad – or better yet, and handful of good salads – is an essential part of the home cook’s repertoire. That said, the salads most of us toss together are made without a recipe (as they probably should be), which is why I hesitate to call these ones “recipes”. Think of them more like sources of inspiration you can call upon when you find yourself stuck in a salad rut (mixed greens, olive oil, vinegar, repeat) and you’re in need of something with a little more oumf.

With winter not far behind us (lest we forget that almost exactly one week ago, a flurry of snowflakes blew through Montreal), I still haven’t entered wispy, summery salad-making mode. The salads I’ve been making lately aren’t decked out in frilly sprouts or edible flowers. At least not yet. Right now, I’m still making salads with a bit of brawn, ones that can sustain me through the afternoon without the need to reach for a bag of chips from the vending machine at 3pm. Come to think of it, these salads – real sustenance salads – are good in any season. My standby trio of ingredients includes lentils (Puy are great in salads), toasted grains and/or some vegetable that’s been roasted or tossed in raw. Every once and a while, some flaked tuna might make an appearance; sometimes there’s a little radish or arugula to lighten things up. But ultimately the bones are the same – legume (lentils, beans, chickpeas), grain (farro, quinoa, couscous, brown rice), veg (whatever is in the fridge), the whole thing tossed with an improvised vinaigrette, and wham, bam, thank you M’am, you’ve got yourself a capital-S Salad.

Below you’ll find two of my new favourites. They’re a couple of good ones to have in your back pocket for quick lunches and (soon! very soon!) picnics:

Salad #1 – brought to you by the 5lb bag of carrots and 3lb bag of beets I’ve been slowly chipping away at over the last couple of weeks. Buying produce in bulk, on sale, always seems like a good idea until it doesn’t. After a week of carrot cake and carrot curry and carrot slaw, you start running out of ideas. And then you enter into dicey territory – should I pickle the rest? Can I make a facial mask with carrots? Can I dye teatowels in beet juice? Maybe my neighbours want beets? To everyone’s benefit, this salad came along instead, helping to make a nice dent in the stockpile. Everything goes in raw – carrot, beet, citrus, herbs – then you toast some pumpkin seeds in tamari and oil and throw those on top for an earthy, salty crunch, along with a sweet and sour dressing. It’s an electric pink bowl of crunchy vegetables and juicy fruit segments, closely resembling a large bowl of confetti. If this salad were a party, it’d be the one where all the fun people were invited and there was an open bar.

Salad #2 – this one is more or less an Ottolenghi-inspired concoction: lots of crispy raw fennel, yellow beets and cucumber are combined with tender mixed greens (frisée, raddichio, watercress, mint) and topped with parsley-studded Puy lentils, pistachios and a drizzle of tahini vinaigrette. That dressing – as simple as it is – is a revelation. You’ll want to put it on everything.

Before you get started, remember that you can riff on these recipes as much as you like. Salads are extremely forgiving; there’s always a little wiggle room. Don’t have an orange? Use a grapefruit. Don’t have apple cider vinegar? Swap it for some white or red wine vinegar. Make use of whatever’s already in your fridge, pantry and garden. Salads are all about colour and contrast, texture and depth of flavour. Find a balance between those things and, man, you’re in business.

Ruby Red Beet & Carrot Salad

Ruby Red Beet and Carrot Salad with Toasted Pumpkin Seeds (adapted from The Food Federation) – serves 4-6 as a side

  • 2 carrots, grated
  • 1 beetroot, grated
  • ½ red onion, thinly sliced
  • 1 orange (or grapefruit), segmented
  • a small bunch of coriander or flat leaf parsley(or a combination)
  • 1 tsp oil
  • 1 tsp tamari (or soy sauce)
  • ½ cup pumpkin seeds

For the dressing:

  • 1 tsp olive oil
  • 1 tsp honey
  • 1 Tbsp apple cider vinegar
  • 1 tsp wholegrain mustard
  • 1 clove garlic, crushed

To assemble:

1) Combine all the dressing ingredients in a bowl and set aside.

2) Heat a frying pan over a medium heat. Toss the seeds with the oil and tamari and toast in the hot pan. Toss frequently until they are crispy and a dark brown colour. (nuts and seeds burn quickly, so keep an eye on them while they toast)

3) Place all the salad ingredients in a large bowl. Add the seeds and the dressing and toss to combine.

—–

Lentil Tahini Salad with Shaved Fennel – serves 4 as a light meal

For the lentils:

  • 2 cups cooked Puy lentils (The Kitchn has good tips on cooking lentils here)
  • small handful of parsley, washed and chopped
  • lemon juice, to taste
  • salt and pepper, to taste

For the salad:

  • 3-4 cups of mixed salad greens* (frisée, raddichio, watercress, arugula, romaine, and/or mesclun), washed and torn
  • 1 English or garden cucumber, sliced into thin long strips
  • 1 medium yellow beet, peeled and thinly sliced
  • half a fennel bulb, thinly sliced
  • ¼ cup fresh mint, washed and torn
  • ¼ cup toasted pistachios
  • nigella seeds, basil seeds, or black sesame seeds for sprinkling (optional)

For the dressing:

  • 2 cloves garlic, smashed and minced
  • juice of 2 lemons
  • 2 Tbs olive oil
  • 1 Tbs tahini paste

To assemble:

1) Combine the cooked lentils with the chopped parsley; season with salt and pepper and a squeeze of lemon juice. Mix and set aside.

2) Combine dressing ingredients; whisk together and set aside.

3) Arrange the salad ingredients on a serving platter, layering as you go along – mixed greens and mint first, then beets, cucumber, and fennel. Add the seasoned lentils on top. Sprinkle with toasted pistachios and seeds (if using). Give the dressing another whisk and drizzle on top. Serve any remaining dressing alongside.

Chopped Parsley

Ingredients - Lentil Tahini Salad

Lentils with Parsley

Lentil Tahini Salad with Fennel

Share this:

  • Tweet
  • Share on Tumblr
Like Loading...

The Real Deal

26 Sunday Apr 2015

Posted by julia chews the fat in Cooking For Your Peeps, Lunch & Dinner, The Basics

≈ 2 Comments

In the early days of university when I was dating my first boyfriend (three cheers for the late-bloomer!), we used to have our date nights at this bring-your-own wine joint called Eduardo’s. The place was – and by all accounts, still is – a frumpy little hole-in-the-wall on Duluth street, outfitted with the usual harbingers of bad Italian dining: red and white checkered tablecloths, droopy pothos plants, and a menu longer than your arm, with few dishes that would ever come close to anything from terra madre Italia (“Camberelli alla Créole” and “Surf n’ Turf alla Eduardo” are two classic gems apparently still on offer). In our defence, though, we were students without much in terms of disposable income, and the BYOB aspect guaranteed a cheap, loopy night out.

We also didn’t know a whole lot about food outside of our usual repertoire. At nineteen, I only knew how to make a half-dozen of dishes without a recipe: chicken cutlets in mustard sauce, microwave rice pilaf, tomato sauce, blueberry pancakes, minestrone, and the Moosewood Cookbook‘s banana bread, which I’d only learnt by heart after my boyfriend fell hard for its butter and espresso-laden crumb. It wasn’t a bad list of back-pocket recipes for an undergrad student, but it was still fairly limited. And the Italian food I grew up with – thanks to by mom’s side of the family – usually revolved around tomatoes, polenta, or hearty vegetable soups enriched with beans or lentils. In other words, nutritious, sustaining, paesano food from the Abrusso region. Dishes of the northern persuasion, from places like Lombardy and Emillia-Romagna, which tend to favour butter, eggs, cured meats, and abundant quantities of Parmigiano-Reggiano, were still very novel to me.

Which brings me to carbonara.

For better or for worse, I discovered carbonara (or, more accurately, its bastardised second-cousin) in that dingy dining room at Eduardo’s, sitting across from my college boyfriend, contentedly drinking 8$ table wine. It may not have been the ideal venue to have my first go at a venerated Italian classic, but as soon as I tucked into that hot mess of bacon, cream, egg and noodles, I knew I was in trouble. That dish – as far removed from the original recipe as it may have been – slayed me. In the way that a cheap grilled cheese or a good hot dog can still slay me.

—–

Little did I know, the stuff that I’d happily twirled onto my fork all those years wasn’t carbonara. At least not in the traditional sense. And when I look back on it, Eduardo’s version was nothing more than a mound of cloying, overcooked, cream-laden spaghetti littered with nubs of cheap bacon, masquerading as “spaghetti alla carbonara”. It would be enough to throw any self-respecting food purist into a total fit.

Real carbonara would only come to my attention about five years later, in an issue of Gourmet magazine. By this point, my budding interest in food and cooking meant that I was starting to pay attention to the details. I became more aware of the differences between authentic recipes and their imposters. As for carbonara, Gourmet taught me the basics, notably that the original Roman version doesn’t have one drop of cream in it (which, it turns out, is a purely Anglo-American flourish). True Roman carbonara is actually quite simpler – cured pork jowl (guanciale) is diced and then rendered in a hot pan; some eggs are whisked together with sheep’s milk cheese (pecorino), a generous amount of black pepper, and a little of the cooking water from the spaghetti. The whole lot is then tossed into freshly cooked, al dente spaghetti. The final result is a loose mess of noodles slicked in a rich, flavourful sauce dotted with crispy, salty pork belly.

It’s simplicity at its best. The kind of food that makes you happy to be alive.

I hope you think so too.

Carbonara ingredients

Spaghetti alla Carbonara – serves 4

Note 1: since guanciale if often hard to find, you can substitute it with mild pancetta (just don’t tell any Roman purists). If using pancetta, add a couple of teaspoons of olive oil to the pan before rendering it – pancetta has less fat than guanciale, so you’ll need the oil to get things going.

Note 2: In a dish this pared-down, the quality of your ingredients is crucial. Make sure to use good eggs, the best guanciale or pancetta you can find, and real pecorino or Parmigiano-Reggiano (No knock-offs! No Kraft parmesan! Don’t piss off the carbonara gods!). Freshly ground pepper is a must too. It’s also worth mentioning that this dish is one of the few that doesn’t reheat well the next day, as the eggs tend to curdle when they come into contact with too much heat. It’s definitely a dish best eaten straight away (which, I suspect, won’t be a problem).

Note 3: Given that the eggs are undercooked in this recipe, most sources would recommend that you avoid serving it to children or anyone with a compromised immune system. (apparently, if you use good-quality, fresh eggs, the risk of salmonella-poisoning is lower than in commercial eggs, which are produced in confined environments where bacteria can spread more easily among chickens.)

Ingredients:

  • 4oz. medium-sliced pancetta (or ideally guanciale), cut into 1⁄2″ pieces
  • 1¾ cups finely grated pecorino cheese (or Parmigiano-Reggiano)
  • 1 egg, plus 3 yolks
  • freshly cracked black pepper
  • sea salt
  • 1 lb. spaghetti

Eggs

Directions

1) Start by bringing a large pot of water to boil (for the pasta). Salt the water once it comes to the boil (about 1-1 1/2 Tbsp) (I eyeball it, but just remember that the guanciale is salty).

2) Whisk together the egg (1) and yolks (3). Stir in 1½ cups of the cheese and mix to combine; add a generous amount of freshly ground black pepper (about 2 tsp). Set aside.

3) Heat a medium skillet or cast-iron pan over medium heat (add oil if using pancetta). Add guanciale (or pancetta) and cook, stirring occasionally, until lightly browned (about 6–8 minutes).

4) Meanwhile, cook the pasta until al dente. Reserve 3⁄4 cup water; drain pasta and transfer to the pan with the cooked guanciale (or pancetta). Toss, then and it off the heat.

Eggs and cheese

5) In a slow, steady stream*, add the 3/4 cup of pasta water to the egg/cheese mixture. Add to the pasta and toss to coat (the residual heat from the pasta will lightly “cook” the egg, without scrambling it).  Transfer to a serving platter and season with salt and some more freshly ground black pepper; sprinkle with the remaining cheese and serve straight away.

*if you add the hot cooking water too quickly to the egg mixture, it will curdle. The slow, steady stream allows you to “temper” the egg mixture, ensuring that your sauce comes together smoothly. In other words, you want to avoid too much heat too quickly, or else you’ll end up with scrambled eggs.

Carbonara.

Share this:

  • Tweet
  • Share on Tumblr
Like Loading...

A Soup Lost in Translation

08 Wednesday Apr 2015

Posted by julia chews the fat in Cooking with Nonna, Lunch & Dinner, The Basics

≈ 10 Comments

In a recent phone conversation with my mother:

Me: Hi. What’re you up to?

Mom: Grandma and I are making cazzorelli.

Me (long pause): Wait, what? Cazzorelli? As in, cazzo?

Mom: Yeah, I guess so. That’s what grandma calls them. Hold on, let me ask her. Sono chiamati cazzorelli, no? (comes back to the receiver) Yeah, grandma says that’s it.

Me: That’s crazy. How come I’ve never heard of these? What are they?

Mom: They’re just these little polenta dumplings that you cook into a soup. They’re nothing special.

Me: Nothing special? Mom, please. THEY’RE CALLED CAZZORELLI. They’re special. Why are they called that?

Mom: I don’t know. They’re Abruzzese. I guess it’s because the dough is cut into little pieces…and so the idea is they look like…little penises? (long pause) You’ll have to ask grandma.

If you know my family, you’ll understand that this is a pretty typical conversation – about food, about dialect, about the where-what-how of my grandmother’s recipes. While Nonna holds a relatively small repertoire of recipes, each have their own backstory. Some are direct imports from her tiny village in Abruzzo, others are improvised dishes pulled together from the resources they found when they first moved to Canada. Some of them are vestiges of wartime food rationing, while others are decadent offerings served up on big platters at weddings, baptisms and religious holidays. Every single one of them – from the soft lemon cookies with the crackled tops, to the peas fried in onion and rosemary – has a story, an anecdote, a memory attached.

Up until this conversation with my mom, I thought I knew all of Nonna’s recipes. But for some reason, “cazzorelli” were never part of the rotation of dishes I grew up with. The crudeness of the name, and the casual way that mom and grandma threw around the word, were an open invitation for follow-up questions. So, you’re telling me that people just go around Abruzzo saying, “Today I’m making little penis soup?” What if you make it for your in-laws? Do you still call it the same thing? Am I the only one that thinks this is hilarious?

I felt like I’d hit the dialect jackpot.

That is, until a few days ago, when I discovered that they’re not actually called “cazzorelli”. No. It turns out they’re called “cazzarielli”. Perhaps even worse, this (subtle! So, so subtle!) orthographic error was exposed, not by Nonna, but by a standard Google search. So technically, this dish isn’t called “little penis” soup. At best, it’s called “little pieces” soup.

Trust me. I’m just as disappointed as you are.

This kind of mix-up is par for the course in dialect-speaking. Entire syllables get lobbed off; vowels at the end of one word melt into the next. Genders get jumbled. And, inevitably, bits of the message get lost in translation. This soup (the one I began to call by a name that didn’t exist) is the perfect example of how dialect speaking – based almost entirely on phonetics – has a sticky habit of transforming words and their meaning. Food customs also travel an imperfect road, which is why it shouldn’t come as a surprise that there are pieces missing by the time they get to us. But I like to think that all that shifting and travelling allows them to gather substance for new stories and, ultimately, new memories. Like the name of this soup. Cazzarielli will always be cazzorelli to me, because that small phonetic flub is something I will always look back on with a big, stupid grin on my face when I think of that conversation with my mom. It’s one of the few things that’s worth being wrong about.

—–

And now, a few notes on this soup itself:

Like any good Italian peasant food, this soup fulfills three basic tenets – it’s inexpensive, easy, and satisfying. Small polenta “gnocchi” are cooked in a thick broth made up of water, potato, Brussels sprouts, fried garlic, and some chili flakes, all of it simmered with a slab of well-marbled pancetta. I imagine this was the kind of food they’d feed soldiers, or farmers, or the pregnant women who tended the fields in their third trimester (yes, yes they did). It’s robust, no-frills fare. And it certainly doesn’t win any points in the looks department. But what it lacks in aesthetics it more than makes up for in flavour. It’s rich, garlicky and full of pleasantly chewy bits of polenta, potato and cabbage. In other words, pure comfort in a bowl.

Grab a spoon and tuck in.

ingredients

For the dough:

  • 1 ½ cups dry polenta (grade 400, extra fine)
  • 1 cup flour
  • 1 ¾ cups hot (just boiled) water

For the soup:

  • 4-5 cloves garlic, halved lengthwise
  • 2-3 yellow, waxy potatoes (like Yukon Gold)
  • 1/4 cup olive oil
  • 1 tsp chili flakes
  • 1 small slab of pancetta (about 2 oz)
  • 2 cups Brussels sprouts (or the equivalent in Savoy cabbage)
  • 7-8 cups cold water

Directions:

1) Start by making the dough: pour the polenta into a large mixing bowl and slowly whisk in the hot water until the dough comes together. Then work the dough lightly with your hands to form a loose ball. Sprinkle with flour and set aside.


2) Start making the soup: heat the olive oil in a large soup pot; fry the the halved garlic cloves with the chili flakes until garlic is golden brown. Add the Brussels sprouts, pancetta and potatoes; stir to combine and allow to cook for 1 minute. Add seven cups of water and reduce the heat to medium-low.

prep - cazzarielli pancetta Brussels sprouts potatoes

3) While the soup simmers, make the cazzarielli: cut 1″ pieces of the dough and roll lengthwise into “snakes” on a floured surface. Cut the long pieces of dough (“snakes”) into small 1/4″ pieces. Place on a parchment or towel-lined baking sheet and sprinkle with flour to avoid sticking.

4) When the cazzarielli are all made, lift them in batched in your hands to allow excess flour to “sift” through your fingers and add to the soup pot. Allow to cook about 15 minutes, or until they are tender. You may need to adjust the amount of water if the soup gets to thick (helloooo starch!). We like our soup to be somewhere between a minestrone and a chowder in terms of thickness and texture. Serve hot.

rolling dough dough "snakes" cutting the dough cutting the dough laying out the cazzarielli flouring out the cazzarielli prepared cazzarielli serving cazzarielli soup

Share this:

  • Tweet
  • Share on Tumblr
Like Loading...

Boeuf Bourguignon

23 Monday Mar 2015

Posted by julia chews the fat in Lunch & Dinner, The Basics

≈ 1 Comment

Like a lot of North American home cooks in the 1970s, my mother’s introduction to French cooking came from two of the world’s most prolific food icons: Julia Child and Jacques Pépin. She turned to Jacques and Julia for instruction and technique, but I suspect she was also drawn to their remarkable approachability – the former, with his warm smile and smooth French accent, and the latter, with her eccentric wit and contagious laugh, made them the antidote to pretentious French cuisine. As a pair, they were a force of nature. And from them both, my mom – along with half of North America – learned how to cook all things savoury and sweet, à la française.

As her French cooking skills evolved through the 80s and 90s, it became commonplace to find mom hovering over the stove, dousing chicken thighs with wine for coq au vin or caramelising onions in a slurry of butter for soupe à l’oignon without batting an eye. After years of following Jacques and Julia on PBS, these recipes had now become her own. She didn’t need to follow a list of ingredients, or look to her TV hosts for guidance. She could practically make these recipes blindfolded. She still can.

These years also coincided with our family’s acquisition of a Rival Crock-Pot, a clunky beast of a machine that occupied a large corner of our kitchen counter for the better part of our childhood. In the fall and winter, my brother and I would come home from school, to the smell of heady aromatics and braised meat. After having had a whole day to meld together, the contents of the Crock-Pot filled the whole house with a deep, rich scent that made us happy to be home and out of our snowpants.

On days like these, when it’s -20 with the windchill, I think most of us are keen for slow-cooked, full-bodied dishes that we can ladle into a bowl and eat slowly, until we’re warmed through after being outdoors. One of my favourites is boeuf bourguignon, that rich, Burgundian stew made with beef stock, mushrooms and red wine. Our mom used to serve it on a bed of buttered egg noodles, which is still the way I like it best, even if I lose points for authenticity. But the stew can be eaten on it’s own, or – in classic French style – with a piece of crusty bread, to sop up all those intensely-flavoured juices.

Régalez-vous x

Classic Boeuf Bourguignon (makes about 6 servings) – lightly adapted from Saveur and Julia Child’s Mastering the Art of French Cooking, Vol.1

      • 5 whole black peppercorns
      • 1 bay leaf
      • 1 sprig parsley
      • 1 sprig thyme
      • cheesecloth and cotton string, for tying herbs
      • 4 lb. beef chuck, cut into 2” pieces, best quality you can afford
      • 1 (750-ml) bottle Burgundy or Chianti
      • 6 oz. bacon, sliced into ¼” thick batons
      • 5 tbsp. olive oil
      • sea salt and freshly ground black pepper, to taste
      • 4 cloves garlic, roughly chopped
      • 2 medium carrots, cut crosswise into 1” pieces
      • ⅓ cup flour
      • 2 cups beef stock (if you have time to make homemade, see recipe here
      • 3 tbsp. unsalted butter
      • 1 lb. white button mushrooms, quartered
      • 12 pearl onions, peeled (or: 2 medium yellow onions, peeled and chopped)
      • crusty bread or cooked egg-noodles (like pappardelle), for serving

Note: in this recipe, the meat marinates overnight, so make sure to plan ahead.

Ingredients bourguignon

Directions:

1) Place peppercorns, bay leaf, parsley, and thyme on a piece of cheesecloth; tie into a tight package and transfer to a large bowl. Add beef and wine; cover and chill overnight.

Bouquet garni - bourguignon

Meat - bourguignon

2) The next day, remove beef from marinade with tongs, allowing the marinade to drip back into the bowl. Pat the beef completely dry using paper towels and set aside. Reserve marinade and the herb package.

3) Heat half the oil in a large Dutch oven over medium-high heat; add bacon and cook, stirring occasionally, until slightly crisp (about 8 minutes). Using a slotted spoon, transfer bacon to a bowl and set aside.

4) Season beef with salt and pepper and working in batches, cook, turning as needed, until browned (6–8 minutes). Using a slotted spoon, transfer beef to bowl with bacon and set aside. Add garlic and carrots; cook until garlic is soft (about 2 minutes). Stir in flour; cook for 3 minutes. Add reserved marinade, beef, bacon, herb package, and the stock; bring to a boil. Reduce heat to medium-low; cook, covered, until meat is very tender, about 2 hours.

5) Heat remaining oil and the butter in a 12” skillet over medium heat. Add onions; cook until golden and tender, 4 minutes. Add mushrooms and cook until golden, 7 minutes more. Stir onions and mushrooms into beef stew. Serve with crusty bread or over cooked egg-noodles.

Note: boeuf bourguignon freezes really well; if you find yourself with leftovers, just allow it to cool and then transfer it to freezer-proof containers.

Boeuf bourguignon

Share this:

  • Tweet
  • Share on Tumblr
Like Loading...

Weeknight Farro Salad

26 Thursday Feb 2015

Posted by julia chews the fat in Lunch & Dinner, Vegetarian

≈ 3 Comments

This one is for days when you trail the sleeve of your favourite, freshly-washed white sweater through a bowl of raw chicken marinating in BBQ sauce; for weeks when your laptop suddenly dies, quite unceremoniously, after six years of dutiful service; for that moment when you come home from work, cold, soaked and exhausted to find a mound of wet mail in your mail box because the flap stayed open on that one day of record-breaking snowfall.

Simply put, this recipe is for days when you have little to no patience, time, energy, or wherewithal to make something for dinner that surpasses boiling a pot of water, or turning the crank of the can opener. Because, frankly, there are days when the idea of cooking with love makes us sick to our stomach. Yes? Yes.

But you’re an able-bodied, responsible adult. So popcorn and a glass of wine for dinner – a third night in a row – feels heinously unjustifiable. You need something that won’t make you feel like the contents of a garbage bag come two hours; something that sustains you, but is enjoyable to eat. I’m here to share a preemptive coup de génie for moments like these (one I borrowed from this post on Molly Wizenberg’s blog Orangette). Earlier in the week, when you’ve got a little time on your hands, cook a batch of farro and store it in the fridge. (For the unacquainted: farro is a sturdy, nutty grain that can be eaten hot or cold, often used in recipes instead of barley or freekah or rice. I buy the Bob’s Red Mill because that’s what the Middle Eastern shop down the street stocks. But you can use any kind you like. (p.s before you have a heart-attack, that online price tag linked above – of $52.75 – is for a 25 lb bag).

Now that you’ve got a batch of pre-cooked farro hanging out in the fridge, all that’s left to do is shred some veg, make a quick dressing and open a can a chickpeas (because, let’s be real – it would’ve been nicer to soak and cook chickpeas from scratch, but it’s a weeknight).

This salad is my kitchen-sink salad – meaning I use whatever seasonal veg on I have on hand, and treat the farro, chickpeas, feta and the dressing as my anchors. In the spring and summer (when the photos below were taken), I might toss in some red endive, asparagus, or watercress. In the fall and winter, I might opt for carrots, beets, arugula or a bit of raw kale. It’s a game of mix-and-match. Use whatever’s in season and whatever you like best. The idea is to get some crunch and colour in there, and some veg that with pair up nicely with the spiky dressing and the creamy feta. This is a don’t-overthink-it salad; a work-week salad; a gift to you on the longest of days.

Enjoy.

Farro

Farro Salad with Veg and Chickpeas (makes about 4 cups) – lightly adapted from Molly Wizenberg’s recipe from Orangette

  • 1 cup farro
  • ½ tsp. salt

For the dressing:

  • 2 Tbsp. fish sauce
  • 3 Tbsp. lime juice
  • 2 Tbsp. brown sugar
  • 6-8 Tbsp. water, to taste
  • 1 garlic clove, minced or pressed

For the salad*:

  • 1 cup chickpeas, either canned (drained and rinsed) or cooked from dried
  • 1 red Belgian endive leaves (or radicchio, or escarole, or watercress, or arugula)
  • 1 carrot, julienned or cut into strips (or beets)
  • a few blanched asparagus, coarsely chopped (or green beans)
  • 1/2 cup feta, coarsely crumbled (or soft goat’s cheese)
  • handful of chopped parsley

In a medium saucepan, cover the farro with cold water and set it aside to soak for 30 minutes. Then drain the farro, put it back into the saucepan, and add 3 cups of cold water and ½ teaspoon salt. Bring to a boil; then reduce the heat to maintain a gentle simmer and cook until tender but still a little chewy (40-45 minutes). When it’s ready, drain it, and either use it while it’s warm or transfer it to a storage container for later use. (Cooked farro will keep for a few days in the fridge.)

To make the dressing, combine the fish sauce, lime juice, 1 tablespoons of the brown sugar, 6 tablespoons of the water, the garlic, and chile in a small bowl. Whisk well. Adjust the seasonings to taste. (Covered and chilled, the dressing will keep for 3-4 days.)

To assemble the salad, put the farro in a wide bowl (if the farro is cold, you might want to warm it a bit. Or you might choose to eat it cold, if that’s your jam.) Add the veg and parsley. Top with a generous amount of crumbled feta. Then drizzle over the dressing and toss to combine.

A note on mouth-breathing: if you’re having this salad at lunch at work, or before a date or at any time right before you’re about to mouth-breathe in the company of human being, do them a favour and have a breath mint or toothbrush at the ready. Armoured with all that raw garlic and fish sauce, this dressing is potent (albeit delicious) stuff.

farro

010

Share this:

  • Tweet
  • Share on Tumblr
Like Loading...

Ramen mania

03 Tuesday Feb 2015

Posted by julia chews the fat in Lunch & Dinner, Soups, The Basics

≈ 5 Comments

“30 cloves of peeled garlic”

Those words alone should have been enough to dissuade me. Or any normal human being. But instead I found myself on the subway Sunday morning, heading to my friend Michael’s, with a backpack reeking of pork braised in thirty – yes, thirty – cloves of garlic, along with a small army of mason jars filled with stock and chicken schmaltz.

So why travel 40 minutes from home with a backpack stuffed with unidentifiable, pungent edibles that, under different circumstances, would’ve gotten me swiftly escorted to airport security? Ramen, baby. That’s why.

I’ve had ramen on the brain for a few weeks now, and it turns out I’m not the only one: Lucky Peach recently compiled a Guide to the Regional Ramen of Japan. Grub Street and Rachel Khoo both featured stories on the topic last week. And just a few days ago, NOWNESS re-posted its short film, “The Eight Chapters of Ramen“, about NYC ramen chef-extraordinaire, Ivan Orkin. It’s a topic that’s been part of the zeitgeist for a couple of years now, but I get the sense that this year, 2015, will be ramen mania, full steam ahead. Consider yourselves warned.

In theory, I’m really into the idea of ramen – the salty broth, packed to the gills with umami; the melt-in-your-mouth pork belly; the slippery noodles and soft-boiled egg; the chopped scallions and squishy shiitake. The obnoxious part about food trends is that they prove you can have too much of good thing. At some point, they become so pervasive that you start to wish they’d never caught on. (Remember last year’s fetishisation of grilled cheese? The countless photos of triple-decker grilled cheese sandwiches oozing all over everyone’s social media stream? The specialty grilled cheese shops that started popping up everywhere, like a rash you couldn’t get rid of? Mac-n-cheese grilled cheese! Poutine grilled cheese! Bacon-double-cheeseburger grilled cheese. Scary, scary times.)

I think it’s fair to say that in North America, ramen is still walking that fine line between novelty and ubiquity, two extremes that often lead us down the disappointing path of sub-par food. I’ve never been to Japan, but I can tell you that some pretty ho-hum – not to mention obscenely-priced – bowls of ramen have crossed my lips in this town, with blah-tasting broth, missing pork, or a missing egg, or some other delicious thing missing that you then have to order on the side, at an extra cost. Gah! Why??

So at some point I figured, why not make my own ramen? Heck, then I could have the egg AND the pork AND all the other bits. The only problem was that I’d never actually made ramen before, and it seemed like a pretty long, laborious, intimidating process (it’s actually not so bad, but more on that later). For a first attempt, I needed to recruit someone else – a partner in crime, a compadre, a guardian angel – to bolster my confidence and see me through to the end.

Enter Michael – the man who whips up daunting recipes from the Momofuku cookbook like it’s nobody’s business, and who knows exactly where to get hard-to-find Asian cooking loot, like bonito dashi granules and togarashi. He didn’t even flinch when I suggested (with a string of exclamation marks) that we make a 5-part recipe that included 30 peeled cloves of garlic (p.s that’s just for the pork, friends), plus homemade garlic oil and homemade fried garlic powder. Most people would look at me cock-eyed if I’d proposed the same feat to them. You want to make WHAT? You’re going to PEEL all those cloves? Are you out of your mind? But not Michael. That’s one of the reasons I like him. Not only does he get that level of insanity, he actually partakes in it.

—–

The recipe we used – appropriately named “The Vampire Slayer Ramen-Express” comes from Mandy Lee’s site, Lady and Pups. She lays everything out, step-by-step, with pretty photos and her signature dry wit. For the full recipe, click here.

Now, before you get going on this one…some words of advice:

  • make components ahead – don’t try to make all of the ramen components in one day. Doing that will want to run from the kitchen and jump off a bridge. Pick a quiet day at home to make the stock (which you can then keep in the fridge or freeze). In this case, I made the stock and braised pork on the Saturday to serve on the Sunday. It was a breeze cause there was no rush – just me, the stock, the pork and a few back-to-back episodes of Broadchurch. On his side of things, my compadre made the garlic oil, garlic powder and soft-boiled eggs ahead of time, so once we got together, all that was left to do was boil the noodles, rewarm the (already soft-boiled) eggs in their shell, heat up the pork, and add the soy milk to the stock before putting it on the stove to simmer.
  • don’t worry about making noodles from scratch – we sure as hell didn’t. The dried ones (not instant!) from the Asian grocery worked out perfectly.
  • simplify your stock – you’re trying to achieve an opaque broth that is neutral-tasting (don’t go sticking a bay leaf in there, friends). Mandy Lee even suggests not adding salt, which is sound advice seeing that it allows you to adjust the seasonings according to whatever recipe you’re making with the leftover stock.
  • don’t skip the pork bones in the stock – just don’t
  • keep an eye on that braised pork – make sure that the braising liquid doesn’t dry up; baste it/turn it from time to time during the cooking process and add more liquids if necessary. I wasn’t paying attention and my braising liquid dried up in the last 20 minutes in the oven, resulting in shrivelled (albeit, tasty) shiitakes and pork that was a little less moist than it should’ve been.
  • if you can’t find a hunk of prosciutto – any dry-cured ham will do for the stock. In this case, my butcher suggested some cured (and cubed) Bayonne ham, and it worked out great.

Now go forth and make ramen, you crazy fools!

ramen prep

stock components

stock after first boil

pork + prep

so many garlics

braising the pork

ramen assembly

sliced pork

ramen noodlesbowls of ramen

bowl of ramen

bowl of ramen + Sapporo

Share this:

  • Tweet
  • Share on Tumblr
Like Loading...
← Older posts
Newer posts →

Facebook

Facebook

Instagram

No Instagram images were found.

Recent Posts

  • Layers and Rows
  • Finding Buoyancy
  • February
  • Wednesday
  • Cross My Heart, Miso

Archives

  • May 2017
  • April 2017
  • February 2017
  • December 2016
  • November 2016
  • September 2016
  • August 2016
  • July 2016
  • June 2016
  • May 2016
  • April 2016
  • March 2016
  • February 2016
  • January 2016
  • December 2015
  • November 2015
  • October 2015
  • September 2015
  • August 2015
  • July 2015
  • June 2015
  • May 2015
  • April 2015
  • March 2015
  • February 2015
  • January 2015
  • December 2014
  • November 2014
  • October 2014
  • September 2014
  • August 2014
  • July 2014
  • June 2014
  • May 2014
  • April 2014
  • March 2014
  • February 2014
  • January 2014
  • December 2013
  • October 2013
  • September 2013
  • August 2013
  • July 2013
  • June 2013
  • May 2013
  • April 2013
  • March 2013
  • February 2013
  • January 2013
  • December 2012
  • November 2012
  • October 2012
  • September 2012
  • August 2012
  • July 2012
  • June 2012
  • May 2012
  • April 2012
  • March 2012
  • February 2012

Categories

  • Beverage
  • Breakfast & Brunch
  • Condiments
  • Cooking For Your Peeps
  • Cooking Solo
  • Cooking with Nonna
  • Food Away From Home
  • Food Writing
  • Holidays
  • Intro
  • Lunch & Dinner
  • Snacking
  • Soups
  • Sweet Tooth
  • The Basics
  • Vegetarian

Enter your email address to follow this blog and receive notifications of new posts by email.

Join 82 other subscribers

Blog at WordPress.com.

  • Subscribe Subscribed
    • julia chews the fat
    • Join 82 other subscribers
    • Already have a WordPress.com account? Log in now.
    • julia chews the fat
    • Subscribe Subscribed
    • Sign up
    • Log in
    • Report this content
    • View site in Reader
    • Manage subscriptions
    • Collapse this bar
 

Loading Comments...
 

    %d