• Home
  • About

julia chews the fat

julia chews the fat

Category Archives: Lunch & Dinner

One for the pot, one for the cook

07 Thursday Apr 2016

Posted by julia chews the fat in Cooking For Your Peeps, Lunch & Dinner

≈ 3 Comments

Cooking has been fairly perfunctory these days. I’ve lacked that that little kick, that jolt of inspiration I usually get when I see something new – a recipe, an article, a video – that makes me want to roll up my sleeves and get to it. This means that my stovetop has seen a a lot of greens and beans on rotation (roma beans with kale, lima beans with rapini, black eyed peas with spinach…you get the idea), in other words, a mix-and-match troupe of dishes so simple that you could make them even if you’d been lobotomized. I can stand there, mouth-breathing over a pan of frying shallots and beans, letting my mind drift off to wherever it may go, and have a (more or less) wholesome dinner ready within 4 and half minutes. They aren’t necessarily the most satisfying of meals (creatively, spiritually, aesthetically…), but hey – they do the job.

It’s easy to fall into a cooking funk when your overall motivation feels floppy, sluggish, unharnessed. It usually starts when you catch yourself buying the identical set of groceries week in and week out, before replicating the same dishes week in and week out. My fallbacks tend to be the aformentioned beans and greens, roast chicken and white fish, usually cod or halibut, that gets tossed in the oven with a layer of seasoned breadcrumbs I keep in the freezer, and a drizzle of olive oil. They are good back-pocket dishes, but ones that get a bit dull once they’ve been on heavy rotation.

To break the slump, I went looking for new ideas and managed to lock down the two recipes below after taking stock of what I had in the booze cabinet. The first is a fragrant, anise-clementine chicken recipe from Ottolenghi that is sticky, jammy, crispy and sweet, with a subtle twang of liquorice flavour from the Pernod; the second is a lemon-scented cod dish, studded with olives and poached in white wine, then topped with fresh parsley. Both are beautiful-looking and delicious and, while definitely an upgrade from beans and greens, they too could be made post-lobotomy if you had to. For each, you just stick everything in a pan, anoint with booze* and sling into the oven. Thankfully, the rest gets figured out on its own.

(*one for the pan, one for the cook.)

Clementine Pernod Chicken

Pernod-Clementine Chicken – adapted from Ottolenghi’s Jerusalem
Serves 4-6

Ingredients

    • 5 Tbsp Pernod (or Arak, or Ouzo)
    • 1/4 cup olive oil
    • 3 Tbsp freshly squeezed orange (or clementine) juice
    • 3 Tbsp freshly squeezed lemon juice
    • 2 Tbsp grainy mustard
    • 3 Tbsp light brown sugar or honey
    • 1 tsp sea salt
    • freshly ground pepper
    • 8 bone-in, skin-on chicken pieces (thighs and drumsticks)
    • 4 clementines (washed but unpeeled) sliced thin
    • a few sprigs of thyme
    • 3 medium onions (and/or fennel bulbs) cut lengthwise and then into quarters
    • 2 tsp fennel seeds

Clementine Pernod Chicken

Directions

1) In a large mixing bowl, whisk together Pernod, oil, orange and lemon juices, mustard, brown sugar and salt. Season with pepper, to taste.

2) Place chicken skin side up in large roasting pan with clementine slices, thyme sprigs, onion pieces (and/or fennel wedges) and fennel seeds. Pour sauce over top and gently toss everything together with your hands. (alternately, you can prep in advance and marinate: place chicken with clementine slices, thyme sprigs, onion/fennel wedges, and fennel seeds in a large mixing bowl or ziplock bag. Turn several times to coat. Marinate chicken for several hours or overnight.)

3) Preheat oven to 475°F. After 30 minutes, turn the oven down to 400ºF and continue roasting until the skin is brown and crisp, about 20 to 25 minutes longer. Remove pan from the oven.

4) Transfer chicken and clementines and onion pieces with juices to a serving platter. Let rest 5 to 10 minutes before serving. Pairs well with a crisp salad and a knob of bread to soak up the juices.

Clementine Pernod Chicken

—–

Slow-Baked Cod with Lemon, Olives and White Wine – adapted from Real Simple
Serves 4

Ingredients

  • 2 lb cod fillets (or halibut)
  • ¾ cup dry white wine
  • ½ cup Kalamata olives
  • zest from 1 lemon, cut into strips
  • 1 Tbsp olive oil
  • salt and pepper, to season
  • ¼ tsp red pepper flakes
  • ¼ cup fresh flat-leaf parsley, chopped

Directions

Heat oven to 400° F.

Place the fish in a small roasting pan. Add the wine – it should reach about halfway up the sides of the fish. Scatter the olives and lemon zest around the fish. Drizzle with the oil and season with salt, pepper, and red pepper flakes.

Roast until the fish is cooked through and flakes easily with a fork, about 15-20 minutes. Remove from oven and sprinkle with the parsley. Divide the fish among individual plates and spoon the olives and wine sauce over the top.

Cod with Lemon and OlivesCod with Lemon and OlivesCod with Lemon and Olives

Share this:

  • Tweet
  • Share on Tumblr

Like this:

Like Loading...

Clandestine Food

01 Friday Apr 2016

Posted by julia chews the fat in Lunch & Dinner, The Basics, Vegetarian

≈ 6 Comments

If I play my cards right, I can sometimes get my hands on a batch of fresh ricotta, made by hand in someone’s converted garage a few neighbourhoods over from mine. It comes in the traditional moulded shape, marked with the tell-tale grooves of the straining basket. It’s not an exaggeration to say that that this is the best ricotta you’ll ever have outside of Italy – it’s pillowy and snowy white, and the flavour is so fresh, it’s almost sweet; you can eat it in its naked state by the spoonful.

Fresh Ricotta

Then there are the eggs. A couple of times a month, I get a batch of eggs from a separate supplier who, when they’re not at their day job, tend to a flock of free range chickens. The chickens are different, so their eggs are too – some are robin’s egg blue, others are deep orange or light brown with a smattering of freckles. I’ve gotten into the habit of opening the carton before I get home to catch a peek of what’s inside. There’s something about a motley crew of eggs – big next to tiny, freckled next to blue – that puts a smile on my face. It’s the kind of stuff that makes me really, dorkily, happy.

004

This ricotta and these eggs are part of a handful of familiar, clandestine foods that have made their way into my kitchen. They’re not luxury items in the classic sense; they’re not chic, or expensive, or novel, In fact they’re a lot cheaper than the fancy, artisanal products you might find at the store. But they are luxury items in the sense that it’s impossible to take them for granted. They are special by default. And I am head-over-heels in love with them.

Below you’ll find two recipes I made at Easter – both using eggs and ricotta (and lemon, in the spirit of Sicilian tradition) (and, possibly unconsciously, in the spirit of my trip to Sicily this summer). The first is a version of gnocchi that, instead of potato, is held together with egg, ricotta and a bit of flour. They’re called dunderi and are apparently an Amalfitan specialty, but I discovered them by watching this video on Tasting Table with Portland restauranteur Jenn Louis. I’d never made a non-potato gnocchi before, so I was a little apprehensive about them falling apart in the simmering water. But they turned out perfectly – soft, tender little dumplings, tossed in some browned butter with a little parmesan and lemon. They are a dream to eat. The second recipe is a simple, southern Italian-inspired cake that is perfect with coffee or tea. It’s hard to explain, but this for me is the prototypical Italian cake – no frills, not too many competing flavours, not exactly light, but not heavy either. Lots of lemon flavour. The leftovers from Easter were cut into wedges the next morning and dunked into espresso. (how any good Italian – and you – should eat your day-old cake).

Have a happy weekend everyone x

Dunderi with Lemon, Butter and Parmesan – recipe from Jenn Louis,via Tasting Table
Serves 4-6

Note: the measurements are in grams to yield more consistent results. If you don’t have one already, an electric scale is an indispensable tool when it comes to European recipes and baking. I only spend about $20 on mine and my only regret is that I didn’t get one sooner.

Dunderi with Lemon and Butter

Ingredients

For the Dunderi:

  • 480 grams whole-milk ricotta cheese
  • 6 egg yolks
  • 45 grams finely grated Parmigiano-Reggiano, using a microplane
  • Pinch freshly grated nutmeg
  • 1 teaspoon kosher salt
  • 160 grams, plus 2 tablespoons, all-purpose flour (plus more for dusting)
  • Semolina flour, for dusting

For the Sauce:

  • 110 grams (about 1 stick) butter
  • 2 teaspoons fresh lemon juice
  • Zest of 1 lemon
  • Kosher salt, to taste
  • Parmigiano-Reggiano, for serving

Directions

1) In a large bowl, mix the ricotta and egg yolks until smooth. Stir in the Parmesan, nutmeg, salt and flour until the dough just comes together.

2) Sprinkle the work surface with a generous dusting of flour. Scrape the dough onto the work surface and sprinkle with a little more flour to prevent the dough from sticking.

3) Line a rimmed baking sheet with parchment paper and dust with semolina flour.

4) Using a pastry cutter, divide the dough into 6 equal portions. With floured hands, roll each piece into a log about a ½ inch in diameter. Cut the log into ½-to-1-inch-long pieces. Place the dunderi on the prepared baking sheet and repeat with the remaining dough. Make sure the dunderi pieces are not touching, so they don’t stick together. Make ahead: The dunderi can be made, covered and chilled in the fridge for up to 2 days or frozen on the baking sheet and transferred to a resealable plastic bag. (if freezing, use within one month.)

Dunderi with Lemon and Butter

Dunderi with Lemon and ButterDunderi with Lemon and ButterDunderi with Lemon and ButterDunderi with Lemon and ButterDunderi with Lemon and ButterDunderi with Lemon and ButterDunderi with Lemon and ButterDunderi with Lemon and Butter

When ready to cook: 

1) Bring a large pot of salted water to a simmer over medium-high heat. Add the dunderi and simmer until they begin to float to the surface, 1-2 minutes.

2) Meanwhile, in a large skillet over medium heat, melt the butter until the butter becomes golden brown and toasty (6 to 8 minutes). Add the lemon juice and zest, and season with salt. Add the dumplings and toss to coat. Spoon each serving into a bowl and top with Parmesan. Serve immediately.

Dunderi with Lemon and Butter

Dunderi with Lemon and Butter

—–

Lemon-Ricotta Cake – adapted from Eat My Kitchen
Makes one 8″ cake

Ingredients

    • 80g butter, softened
    • 150g sugar
    • 80g ricotta
    • 3 eggs, separated
    • 4 Tbsp freshly squeezed lemon juice
    • zest of 1 lemon
    • 200g all-purpose flour
    • 3/4 tsp baking powder
    • pinch of salt
    • icing sugar to dust the cake

1) Set the oven to 350°F and butter the cake pan. Combine the flour and baking powder. Beat the egg whites with a pinch of salt till stiff.

2) Beat the butter and sugar till fluffy, add the ricotta and mix for a couple minutes. Add the egg yolks and continue mixing for 2 minutes. While still mixing, add the lemon juice and zest followed by the dry ingredients, mixing well for another minute. Stir a couple of tablespoons of the stiff egg whites into the dough before you carefully fold in all of the egg whites.

3) Scrape the dough into the prepared pan and bake for 30 minutes or until golden brown or when a skewer inserted into the centre comes out clean. Let the cake cool and dust with icing sugar.

Lemon-Ricotta Cake

Share this:

  • Tweet
  • Share on Tumblr

Like this:

Like Loading...

Easy Cooking – Pulses

09 Wednesday Mar 2016

Posted by julia chews the fat in Cooking For Your Peeps, Lunch & Dinner, The Basics, Vegetarian

≈ 3 Comments

I come to you today with an extension to the previous post on “easy cooking” to talk about pulses. Yes, pulses – not the ones that emanate from the heart, but rather the kind that make up that sub-set of legumes* (pronounced ley-gooms by most anglophones) which includes beans, lentils and dried peas.

(*Language note: the original French word légume(s) – pronounced ley-gyume in both the plural and singular – is used by francophones to describe vegetables. Lentils, peas, etc. are known as légumineuses.)

It’s perhaps not the sexiest of subjects, but a worthwhile one. Not only has the UN declared 2016 The International Year of the Pulses but, ever since Ottolenghi‘s books hit the mainstream and sustainable eating has nearly become a water cooler topic, the humble bean, lentil and chickpea have become de rigeur in the food world. Thankfully, they’re delicious as they are hip, and since pulses have a long history with food cultures across each continent, the recipe repertoire is vast and versatile.

I’ve slid pulses under the banner of “easy cooking”, simply because once you’ve made a few batches, it’s easy to incorporate them into different meals for the week, without too much trouble. On any given Sunday, when the kitchen becomes my workhorse, at least three of the four burners of the stove are on, cooking beans and chickpeas. I’ll soak them under cold water the night before so that they’re plump and rehydrated the next day. Then they just have to cook – usually anywhere from 30-60 minutes, depending. Beans aren’t fussy. You bring them to a boil, lower the heat, let them bubble away on low until the timer goes off. No need to hover over the stove; you can more or less ignore them and tend to other things (Skyping, reading, lip-synching…) while they cook. Lentils are the same, except they don’t need soaking and are ready in even less time (20 minutes or so).

It goes without saying that you can use always canned beans and chickpeas in your recipes (there’s a supply stationed in my cupboard right now) (because none of us are 19th-century homesteaders that make everything from scratch, all the time), but if you have a little time, cooking beans from dried is a nice alternative – they retain a nice al dente bite and their flavour is a lot more neutral/natural than the canned versions.

If you’re new to cooking pulses, here are some practical tips to keep in mind:

BEANS:

  • most require pre-soaking before cooking; however certain beans, such as mung or adzuki, and split peas don’t require pre-soaking
  • they will not cook properly if you add salt to the boiling water (reserve salt and add when they’re almost done cooking, if using)
  • when cooking, add enough water to cover them by about an inch, bring to gentle boil, then leave the lid on but slightly ajar.
  • cooking time can range between 30-60 minutes, depending on the type of bean (see more info in the links below)

LENTILS:

  • do not require pre-soaking before cooking
  • need to be picked over and rinsed before cooking
  • will not cook properly if you add salt to the boiling water (reserve salt and add when they’re almost done cooking, if using)
  • cooking ratio: 2 parts water, 1 part lentils 
  • red lentils are not the same as green, brown of Puy lentils; they cook faster and become softer (read: mushier) than other lentils. Two of my favourite recipes for red lentils are for Turkish red lentil soup and coconut dhal.

CHICKPEAS:

  • require pre-soaking before cooking
  • should be rinsed after soaking
  • will not cook properly if you add salt to the boiling water (reserve salt and add when they’re almost done cooking, if using)
  • when cooking, add enough water to cover them by about an inch, bring to gentle boil, then leave the lid on but slightly ajar
  • take about 1 hour to cook

For more information, visit these sites:

  • Pulse Canada
  • USA Dry Pea and Lentil Council
  • Taste
  • The Kitchn: beans, lentils
  • Miss Vickie – varieties + soaking (careful: cooking times re for pressure cookers)

Combinations: during the week, I like having a variety of cooked lentils, beans and grains (quinoa, farro, brown rice) in separate containers in the fridge. That way, they’re ready to be thrown into soups, stews, salads, pasta, etc.

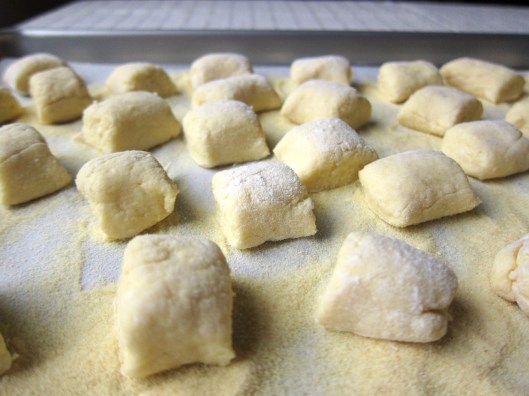
Freezing: whatever won’t get used up in the next couple of days can be packed and frozen. Lay the cooked beans flat in one layer (e.g. on a baking sheet), allow them to freeze, then transfer to freezer bags or containers before putting them back in the freezer. The pre-freezing in one layer will prevent them from sticking together (same goes for dumplings, meatballs, etc.)

Quantities: if you’re going to spend the time cooking beans, go all the way. The idea isn’t to make portions large enough to survive the apocalype (in other words, no more than you can consume within the next few weeks) (freezer burn is a real thing), but make enough to have a small stockpile in the fridge/freezer of the different pulses that you like. That way, you’ll only have to set aside that time to cook beans about once a month/month and a half.

Below are some of my favorite recipes that use pulses – one with brown lentils, one with mung beans, and the last with chickpeas. They might even become your new back-pocket recipes.

—–

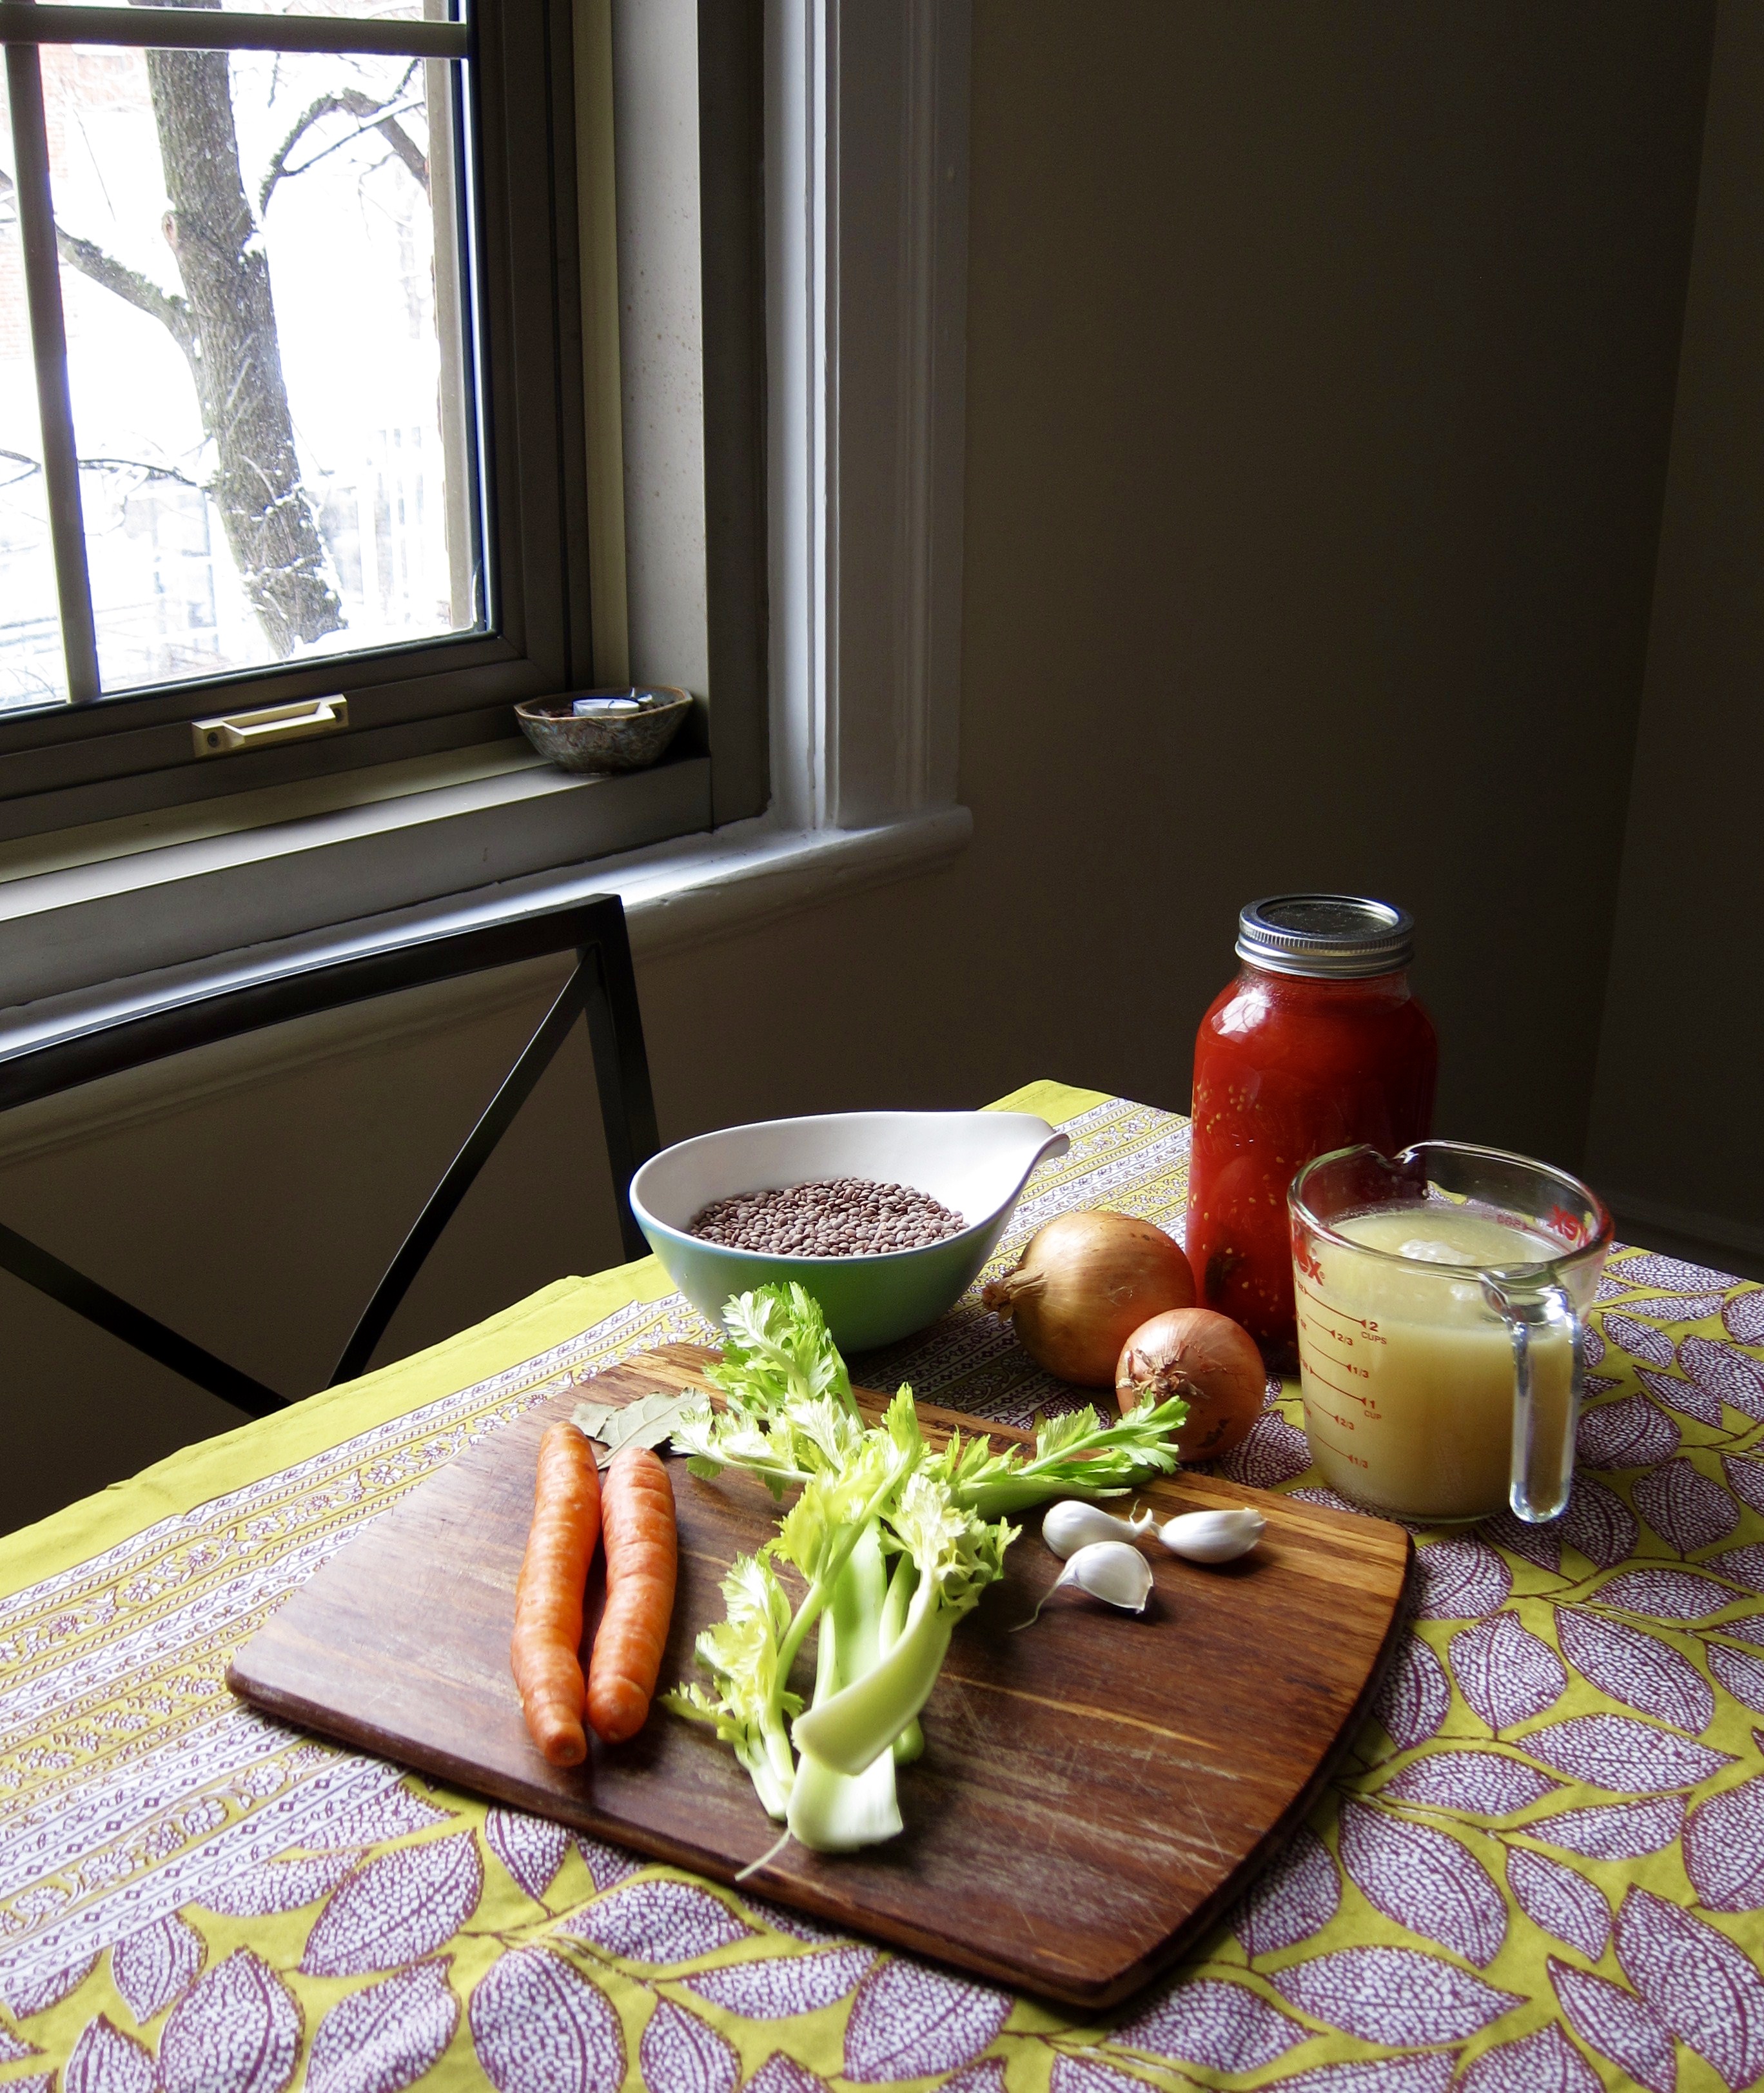
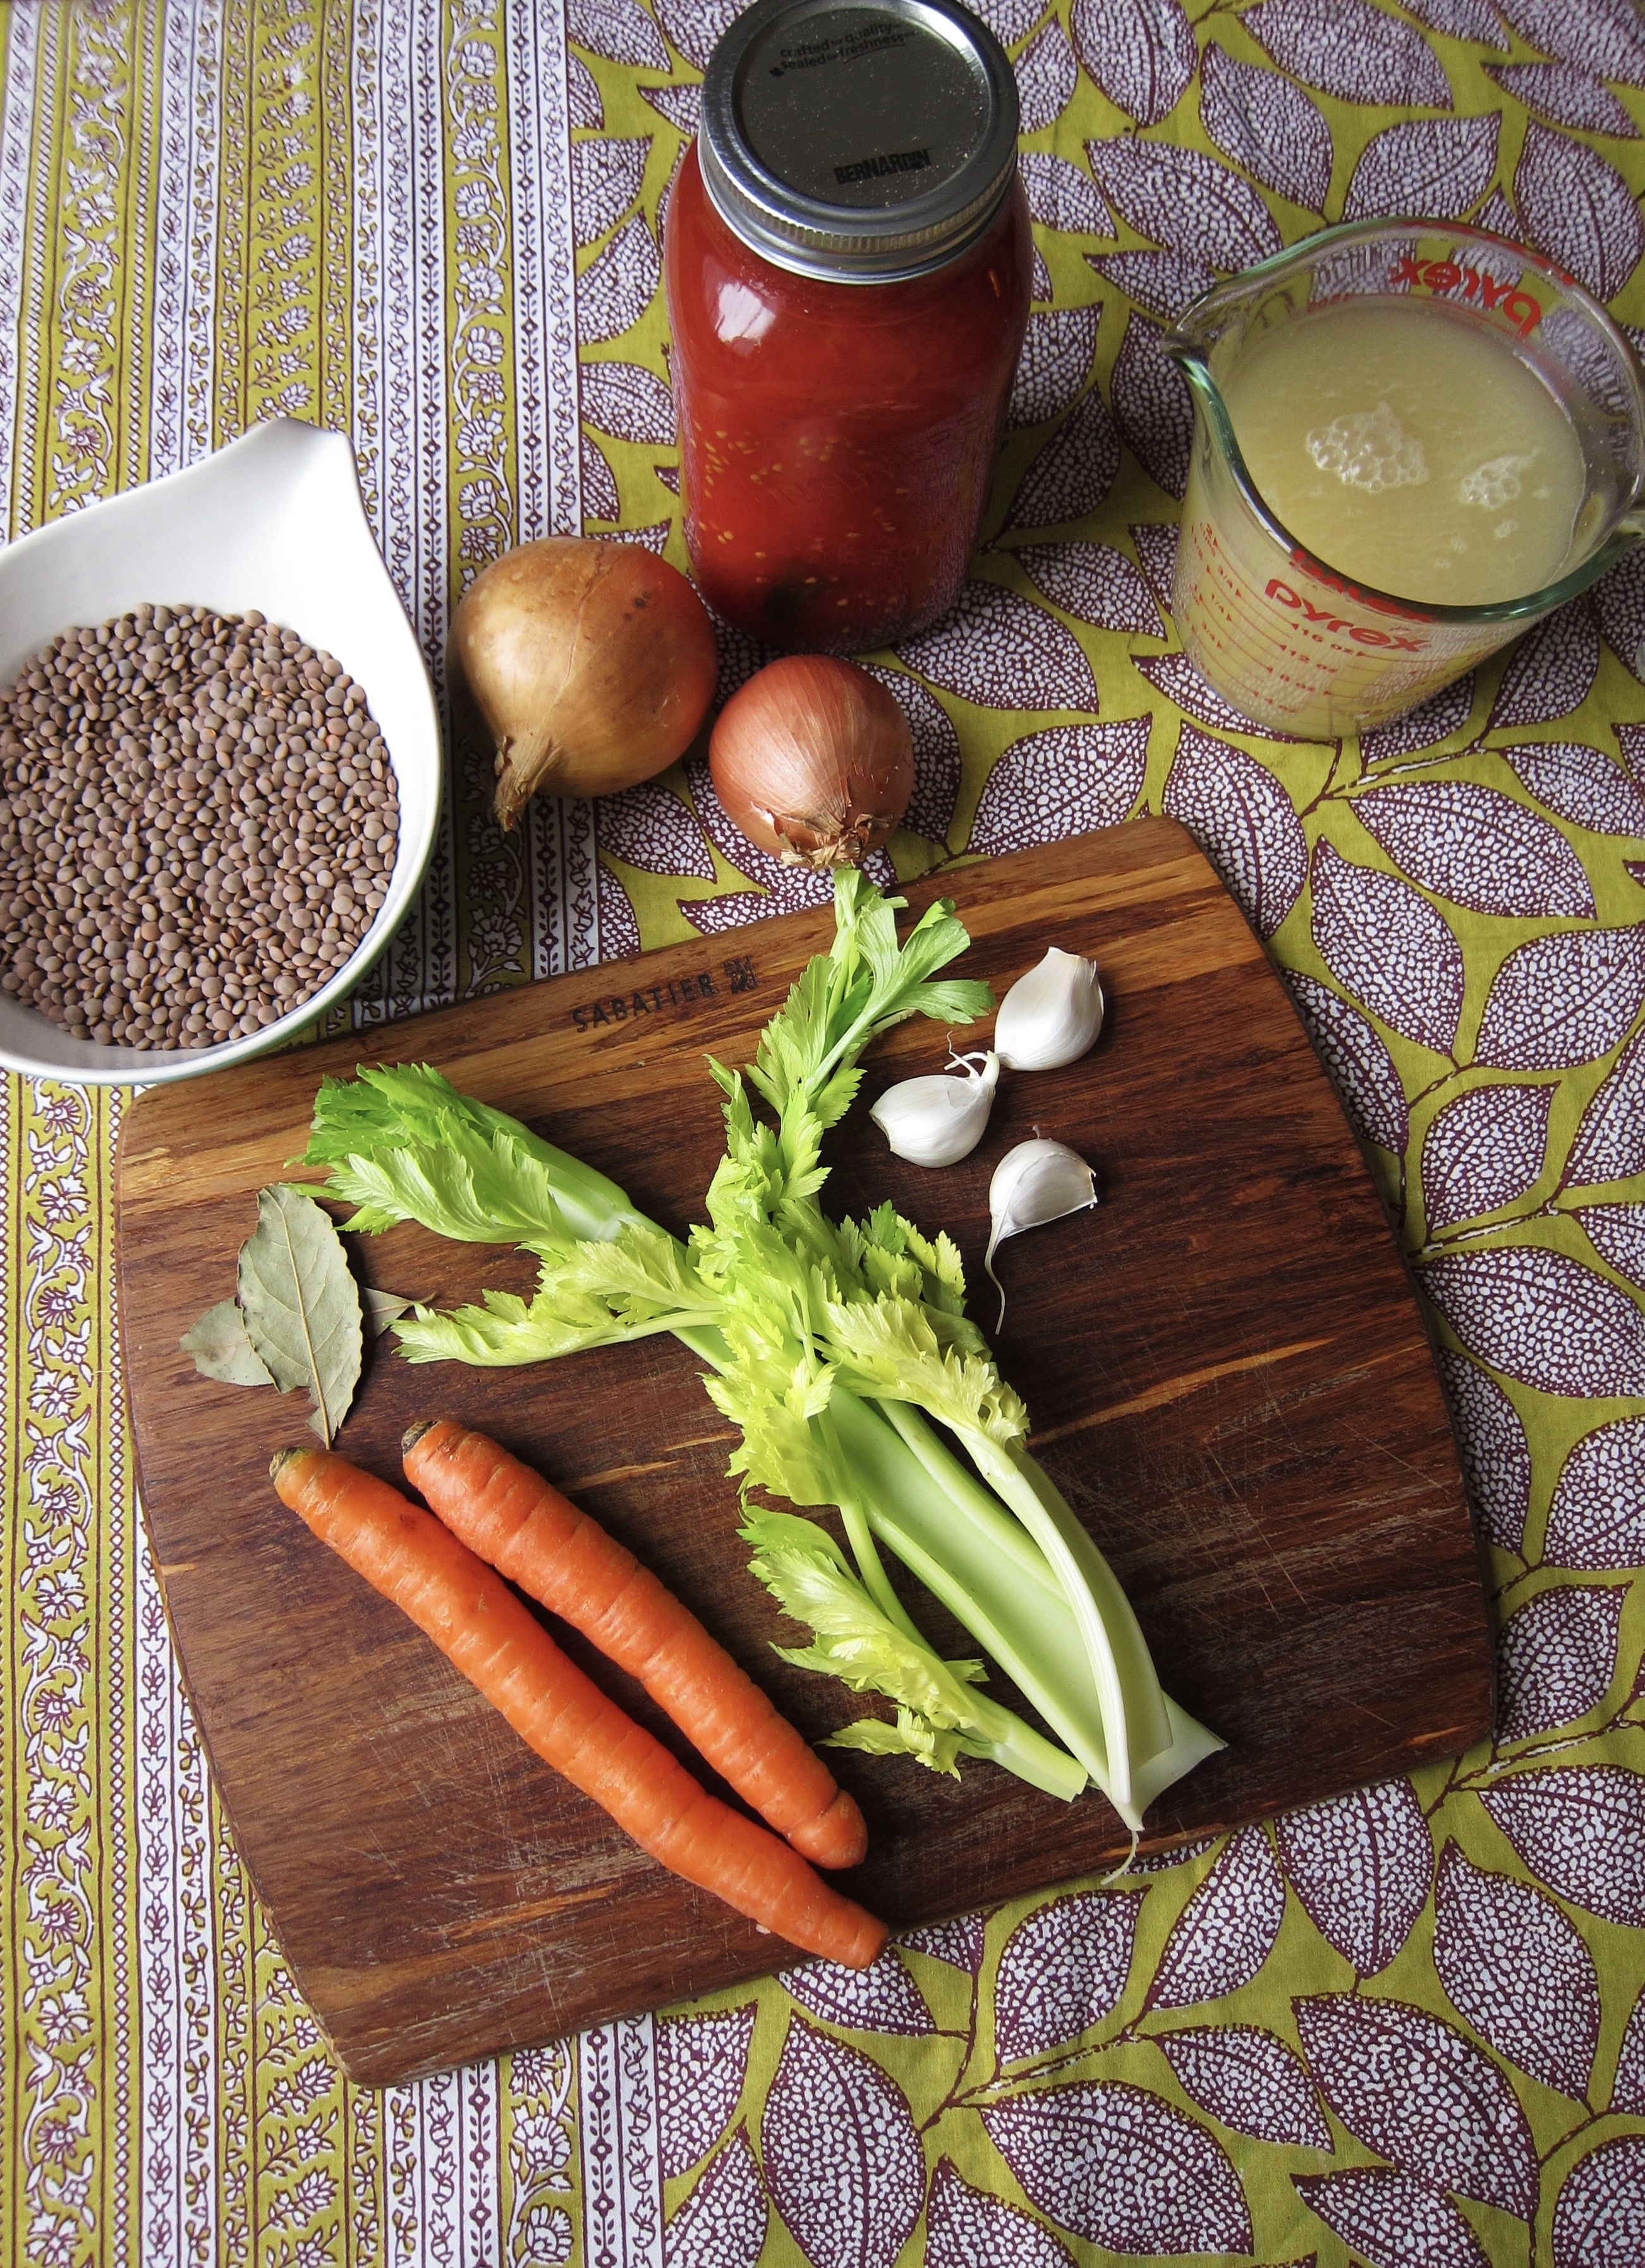
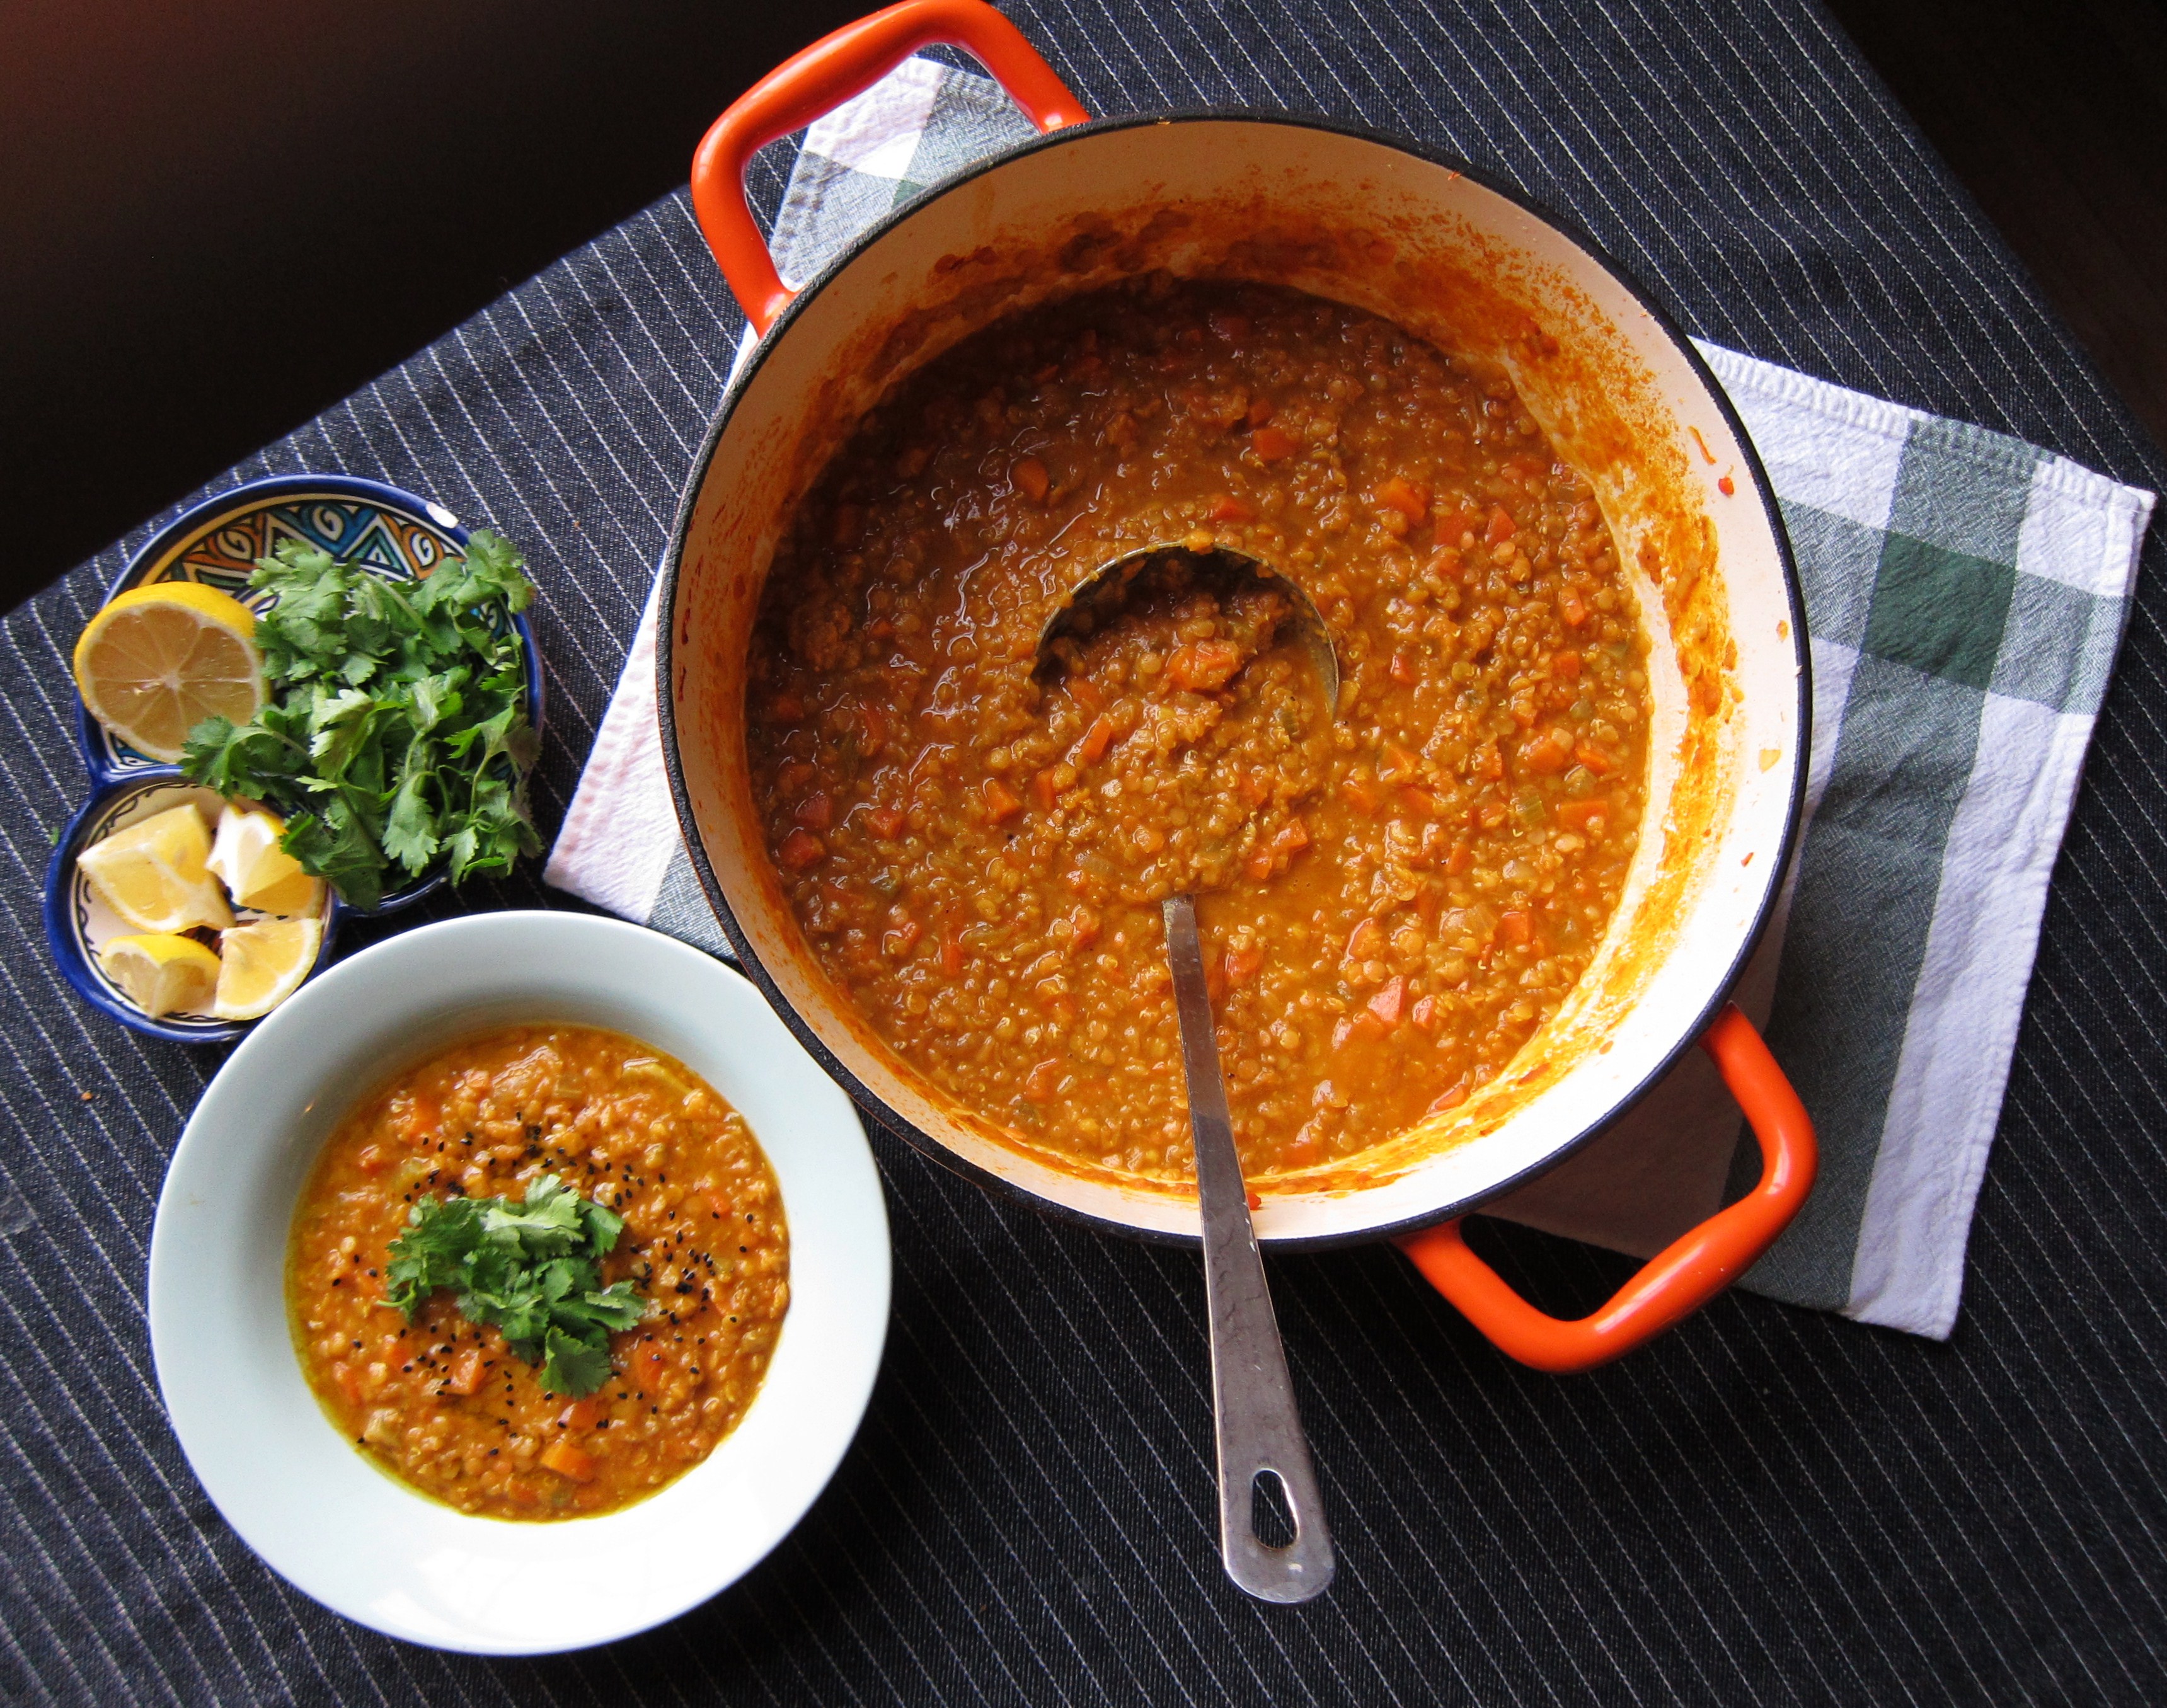
Classic Lentil Soup – makes 6 servings; freezes well

Note: this recipe does not require any pre-planning (soaking/cooking). The lentils cook in the soup.

Classic Lentil Soup

Ingredients

  • 300 grams dried brown lentils
  • 3 tablespoons olive oil
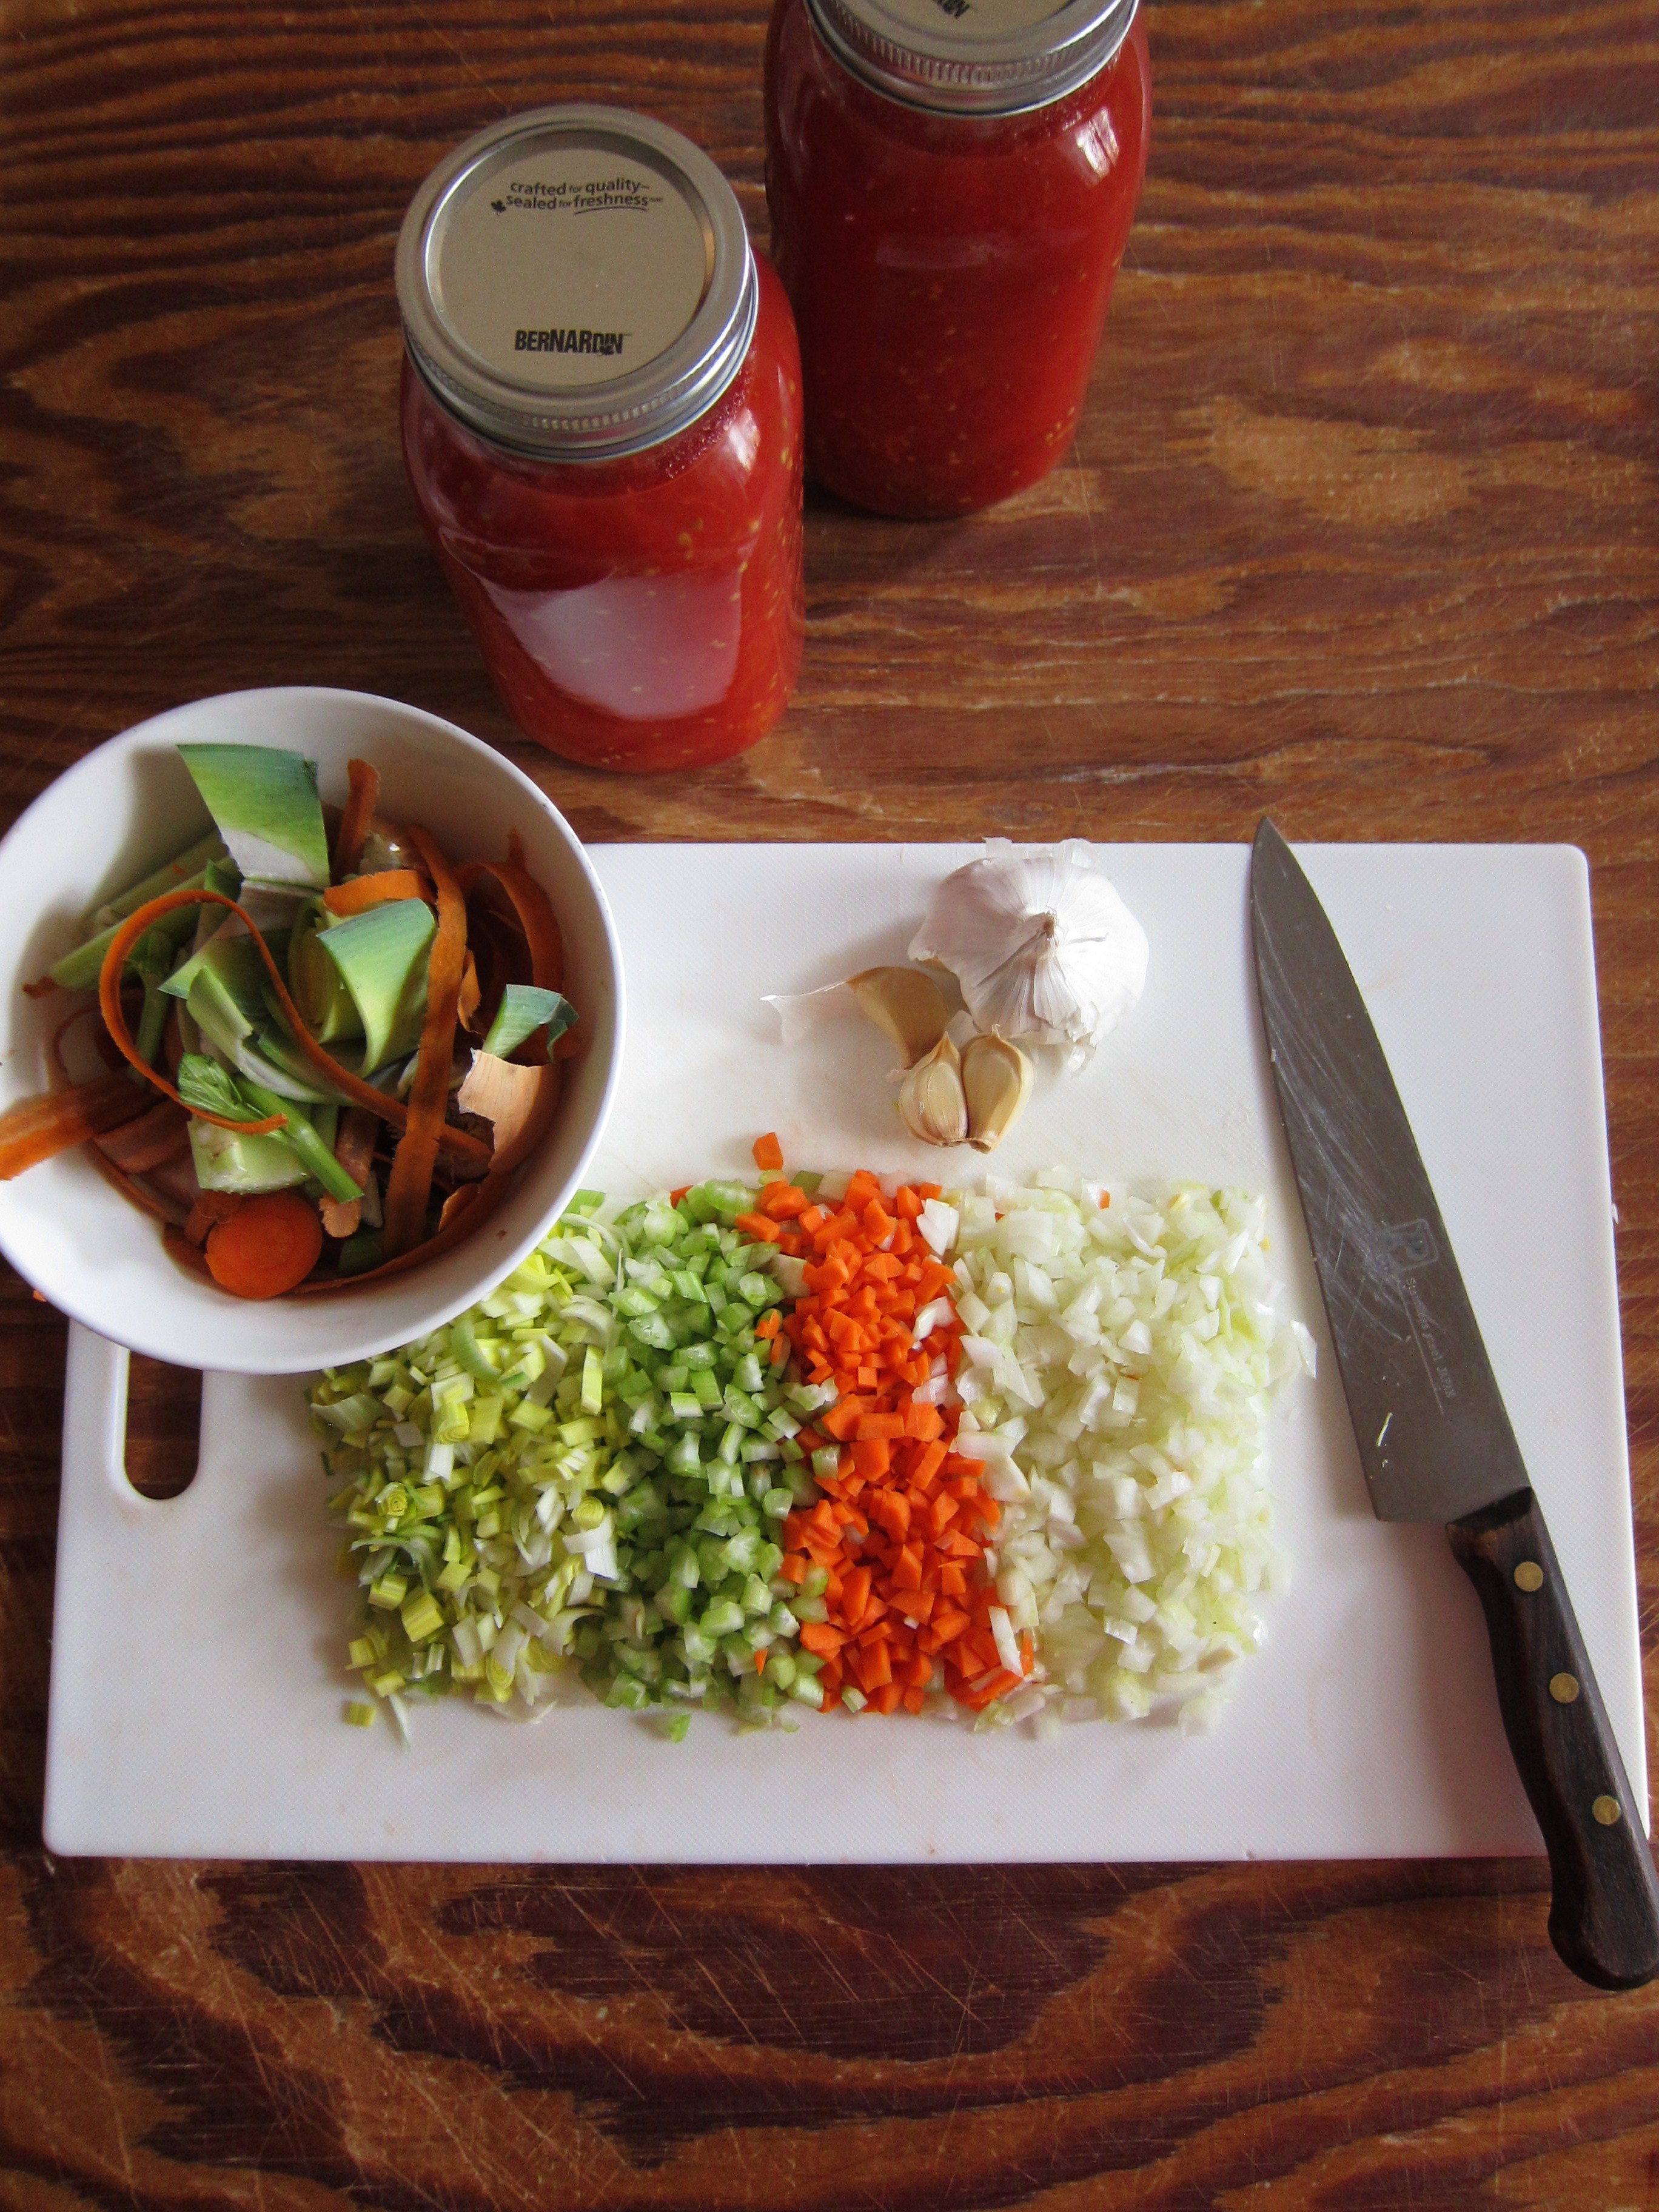
  • 1 celery stick (about 1 cup), finely chopped (reserve some celery leaves for garnish)
  • 1 medium carrot (about one cup), finely chopped
  • 1 large yellow onion (about 1 ½ cups, finely chopped)
  • 2-3 garlic cloves, peel removed and smashed
  • 14 ounces diced tomatoes in juice
  • 2 bay leaves
  • 6 cups water or vegetable broth
  • Salt to taste
  • Optional: olive oil and sherry vinegar for serving

Directions

1) Rinse and pick through the lentils (sometimes you can find tiny stones); set aside to drain.

2) Put a large casserole or soup pot on medium heat and add the 3 Tbsp olive oil. Once the oil is hot, but not smoking, add the onion, celery, carrot, and garlic and cook until soft and the onion is beginning to turn golden-brown, about 10 minutes. Add the bay leaves and cook for an additional 2 minutes. Then add the tomatoes with their juice, stir and cook for about 2 to 3 minutes.

3) Add the lentils and cover with the water (or broth). Cover and cook about 30-45 minutes over low-medium heat until the lentils are tender (check from time to time to see if you need to add a bit more water/broth). When they’re almost done cooking, add salt to taste.

4) Add salt to taste; serve with a drizzle of olive oil, a splash of sherry vinegar and some of the reserved celery leaves. When reheating any leftovers, add some water to loosen the lentils.

Classic Lentil Soup

Classic Lentil Soup

—–

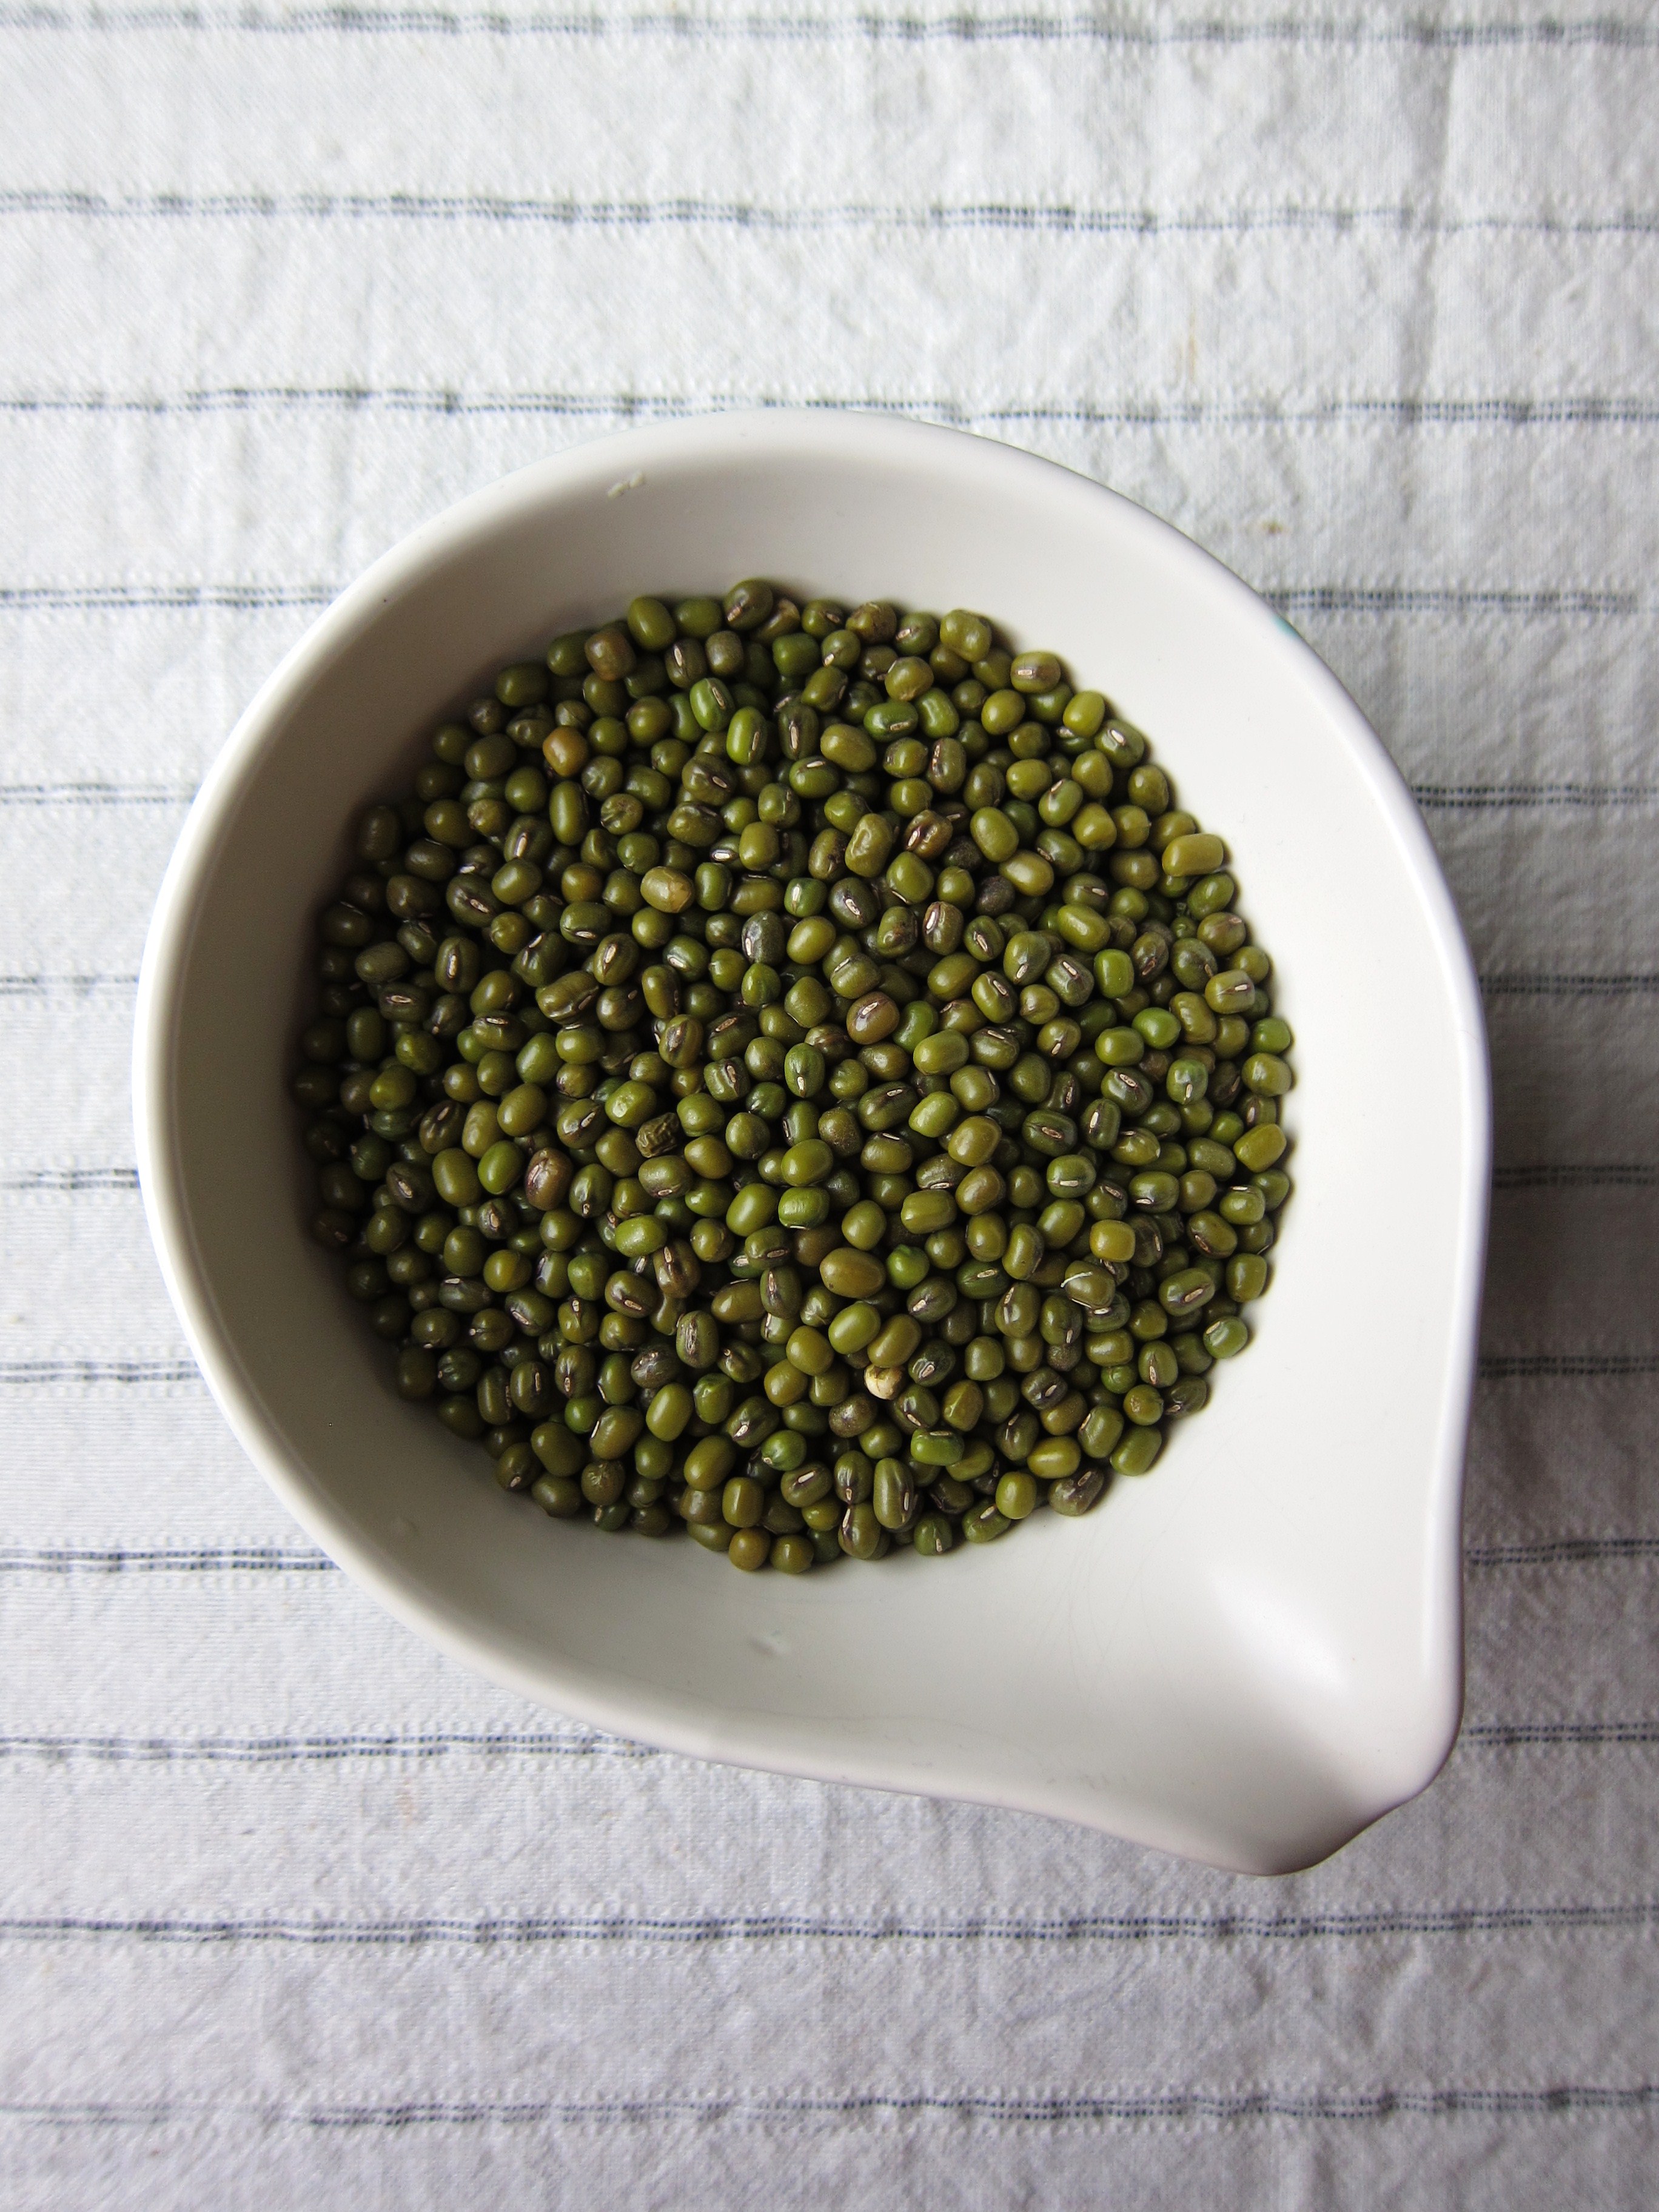
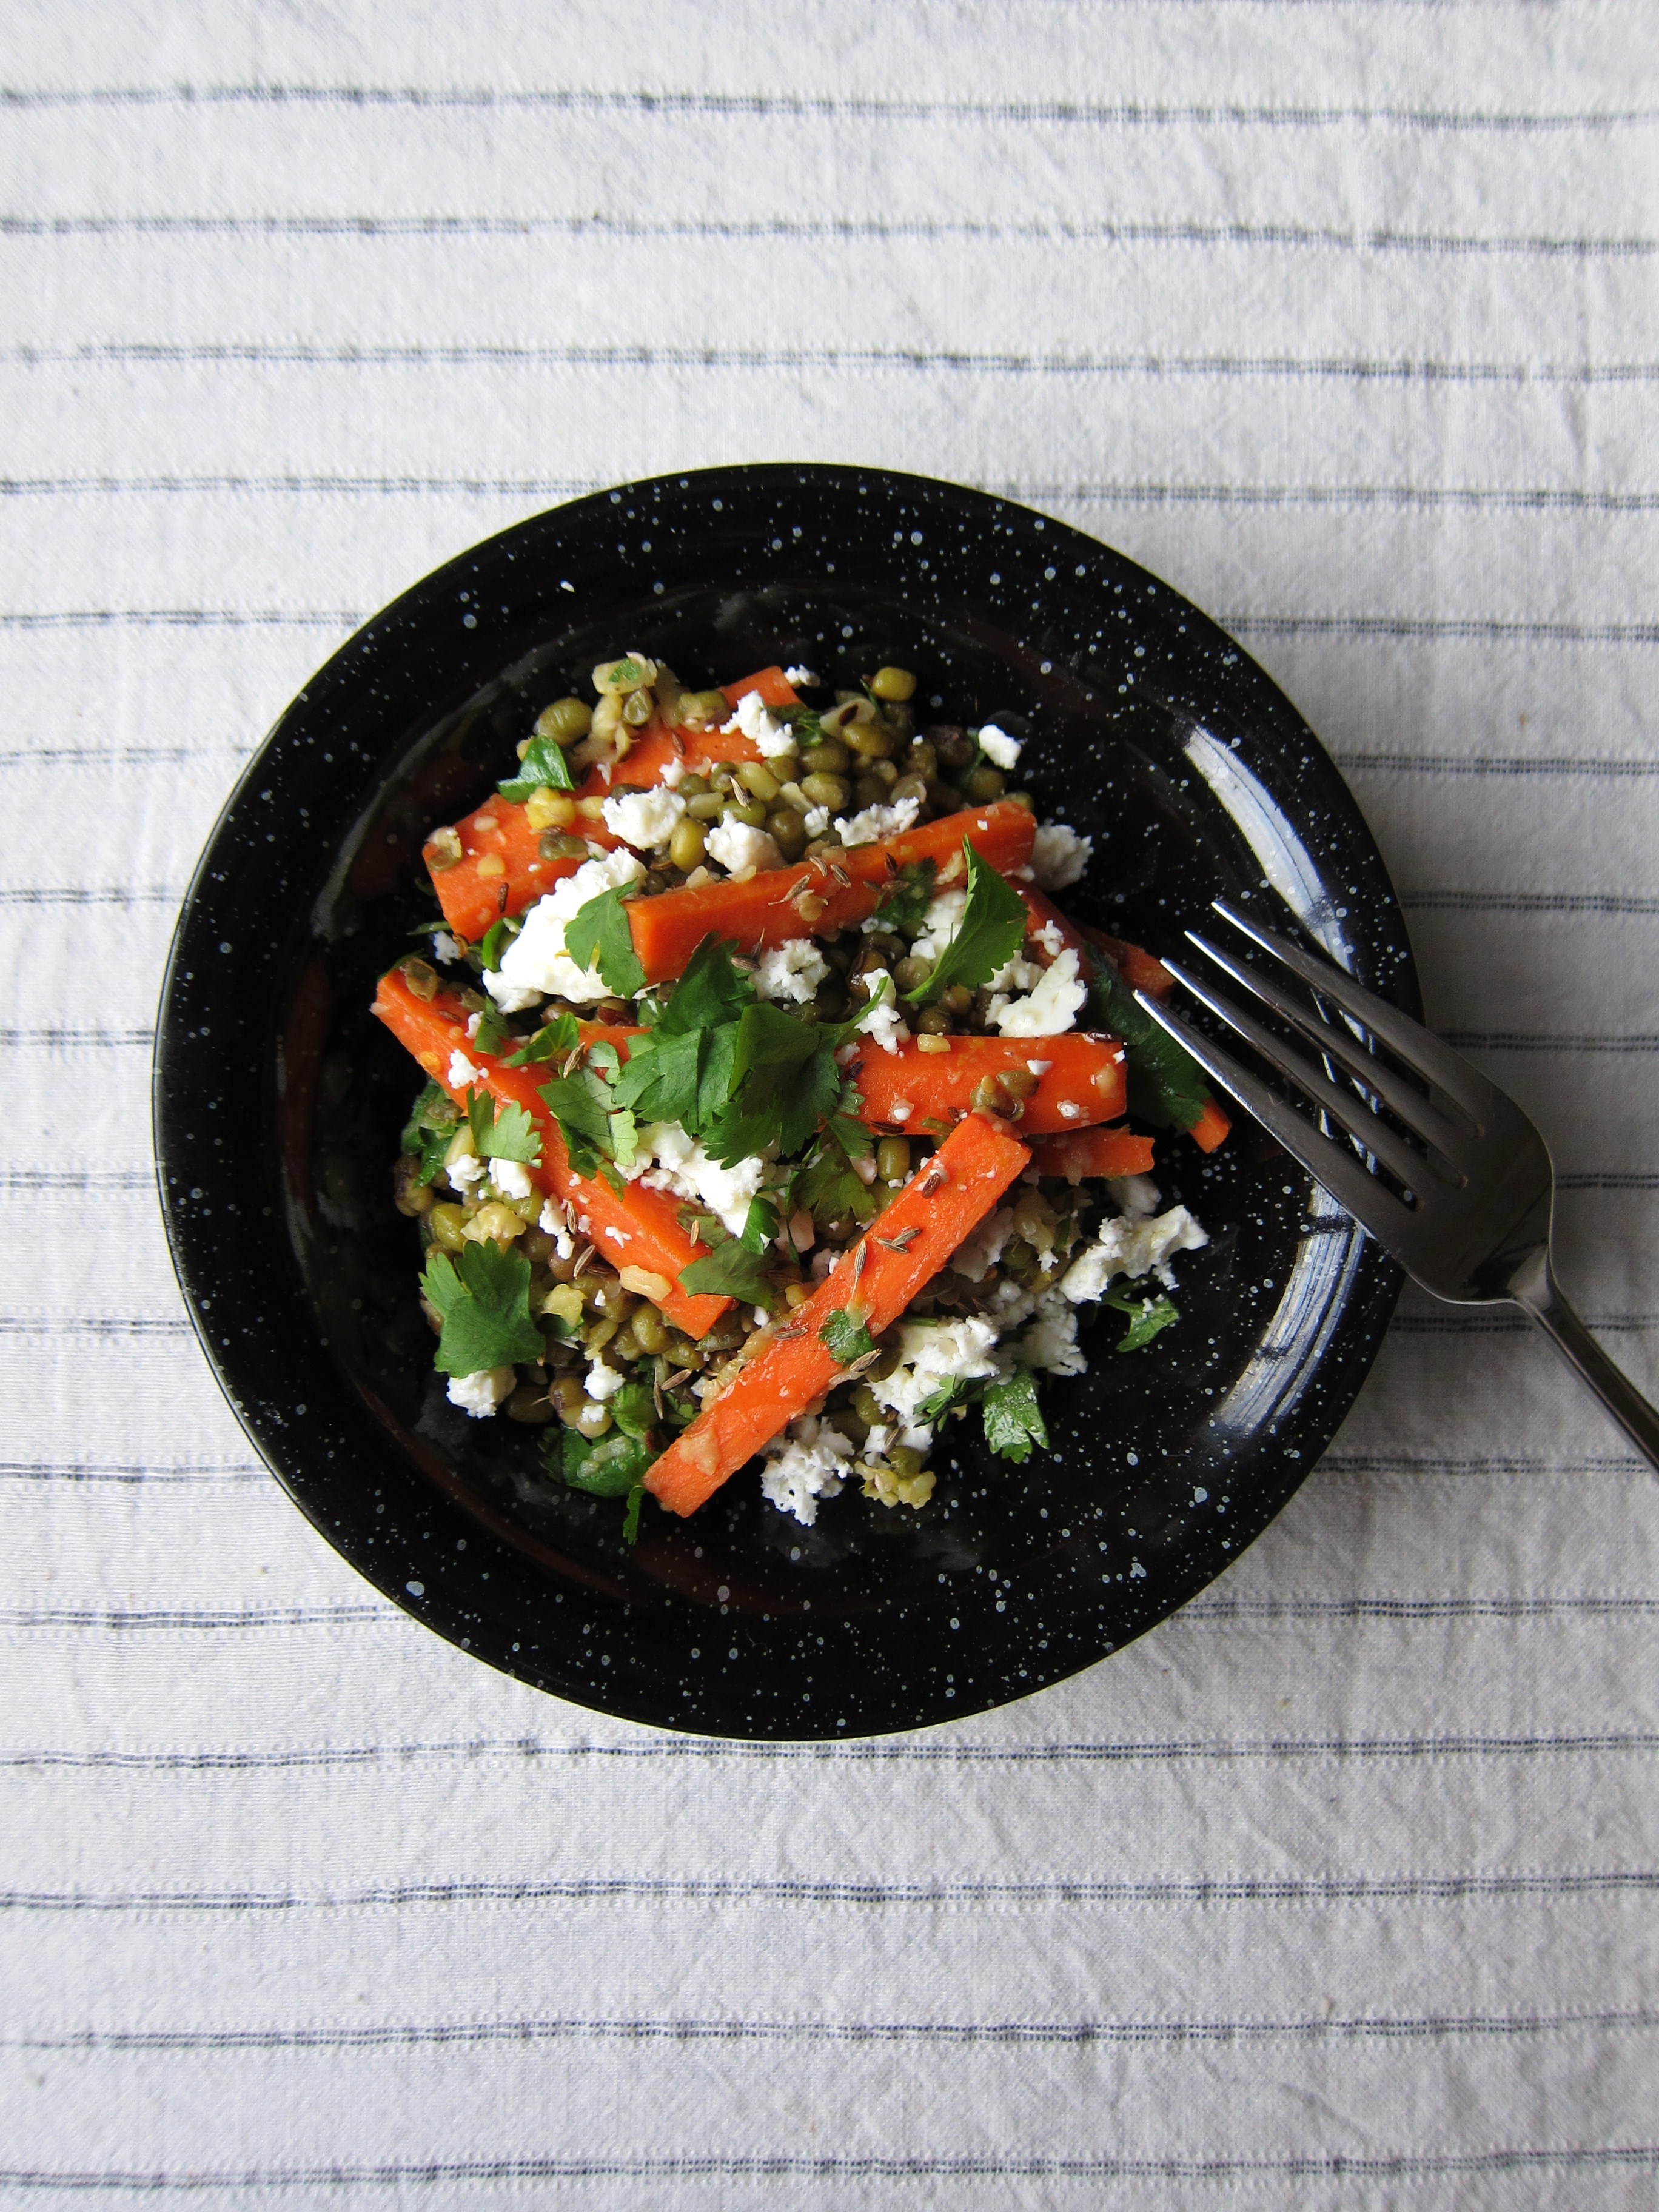
Mung Bean and Carrot Salad with Feta – lightly adapted from Yotam Ottolenghi
Serves 4

Note: this recipe does not require any pre-soaking. Mung beans are ready to be cooked from dry.

Mung Bean and Carrot Salad

Ingredients

  • 140g dried green mung beans
  • 60ml olive oil, plus extra for drizzling
  • 1 tsp cumin seeds
  • 1 tsp caraway seeds
  • 1 tsp fennel seeds
  • 2 tbsp white wine vinegar
  • 2 garlic cloves, peeled and crushed
  • ½ tsp dried chilli flakes
  • 1 tsp salt
  • 3 large carrots, peeled and cut into 1cm batons
  • ½ tsp honey
  • small handful of fresh coriander, chopped
  • grated zest of 1 lemon
  • 140g feta, crumbled

Mung Beans

Directions

1) Bring a medium saucepan of water to a boil, add the beans and simmer for 20 minutes, until they are cooked but still retain a bite. Drain, shake well and transfer to a large bowl.

2) About three minutes before the beans are done, heat two tablespoons of oil in a small frying pan and add the seeds. Cook on medium heat, stirring often, until they start to pop – about three minutes – then pour, hot oil and all, over the beans, along with the vinegar, garlic, chilli and half a teaspoon of salt.

3) While the beans are cooking, lay the carrots in a pan large enough for them to form a shallow layer on the bottom. Pour over anough water to nearly submerge them, plus two tablespoons of oil and half a teaspoon each of honey and salt. Bring to a boil and keep on a high heat for eight minutes, by which time the water should have evaporated and the carrots become slightly caramelised but still crunchy. Drain some liquid, if needed.

4) Add the carrots to the bean bowl, along with the fresh coriander, and stir gently. Transfer to a shallow serving bowl, sprinkle over lemon zest, dot with feta and drizzle with olive oil.

Mung Bean and Carrot Salad

Mung Bean and Carrot Salad

—–

Spiced Eggplant with Chickpeas and Yogurt – adapted from Molly Wizenberg
Serves 6; freezes well

  • 3 large eggplants (about 3 ½ lb)
  • 2 Tbsp. olive oil
  • 1 tsp. cumin seeds
  • 1 medium yellow onion, finely chopped
  • 1 small jalapeño, seeded (or not) and finely chopped
  • 2 garlic cloves, finely chopped
  • 1 ½ Tbsp. minced fresh ginger
  • ¼ tsp. red pepper flakes
  • 3 medium tomatoes, finely chopped
  • ½ tsp. paprika
  • 1½ tsp curry powder
  • 1 cup cooked chickpeas (or canned)
  • ¾ cup chopped cilantro
  • ½ cup whole-milk plain yogurt
  • Salt, to taste
  • Garam masala, for serving

Directions

1) Preheat the oven to 450° F. Put the eggplants on a rimmed baking sheet, and pierce them all over with a knife. Bake for about 40-45 minutes, or until the skins are blackened and the flesh feels very soft when pressed. Let cool slightly, then slice them open lengthwise and, using a spoon, scrape the flesh from the skin into a large bowl. Mash the flesh coarsely and set aside (this part can be done a day ahead and refrigerated).

2) Heat the oil over medium-high heat in a large skillet. Add the cumin seeds and cook until they begin to sizzle and pop, about 10 seconds. Add the onion, and cook, stirring occasionally, until it is soft and beginning to brown, about 8-10 minutes. Add the jalapeño, garlic, ginger, red pepper flakes, paprika, curry powder and cook, stirring constantly, for 2 minutes. Add the tomatoes, and stir well. Cook until all the liquid has evaporated, about 10 minutes.

3) Add the eggplant, stir to combine, and cook over low heat for 10 minutes. Add the cooked chickpeas, and warm through. Reduce the heat to low, and stir in the cilantro, half of the yogurt, and salt.

Serve hot or warm, with remaining yogurt and sprinkled with garam masala. Partners well with basmati rice or naan bread.

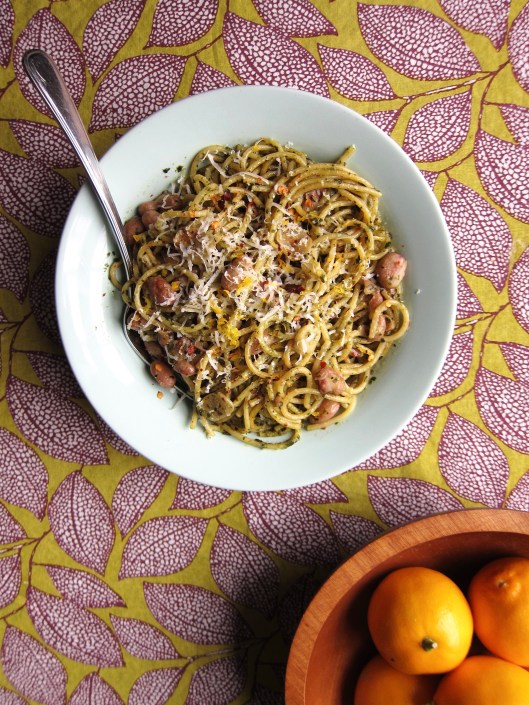
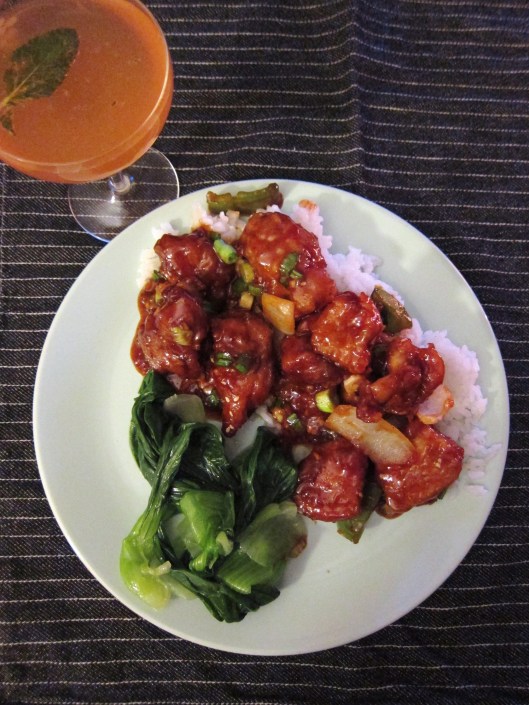
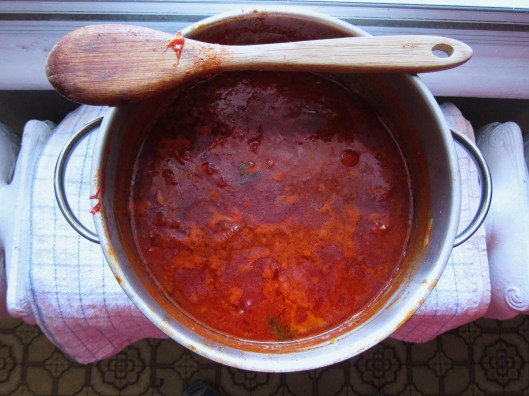
(just so you know – this photo was taken in bad lighting, under a tungsten bulb; in real life, the colour is deeper richer, and less pink.)

Spiced Eggplant with Chickpeas and Yogurt

Share this:

  • Tweet
  • Share on Tumblr

Like this:

Like Loading...

Easy Cooking – Garlic & Chili Pepper

06 Sunday Mar 2016

Posted by julia chews the fat in Cooking with Nonna, Lunch & Dinner, The Basics, Vegetarian

≈ 3 Comments

I recently came across an article by Elizabeth Dunn, published last fall in The Atlantic called The Myth of ‘Easy’ Cooking. It’s basically critique of the “easy cooking” empire that has proliferated in recent years over every media platform known to man (newspapers, magazines, TV, online tutorials, books, blogs, vlogs…), touting super simple! stress-free! meals made faster than you can say Rachel Ray. Reading it from the perspective of someone who likes making things from scratch – to the point of actually seeking it out – I felt conflicted. On one hand, it felt transgressive to agree with someone that cast such a critical light on home cooking. (It is, after all, the backbone of this blog and the thing I’m most enthusiastic about when it comes to food); on the other hand, I felt that she had a point – one that not many food enthusiasts or people working in the field of food media (like herself) would be eager to lay bare so candidly.

She’s calling bullshit, and I like it.

Because I think that the crux of what she’s saying is true – “fast and easy” recipes in the world of modern home cookery are often presented as more straightforward and simple than they actually are. It’s become very fashionable to sell the idea that an entire meal – from starter to dessert – can be effortlessly whipped up in under twenty minutes. And this, after a heavy day at work, bookended by two frenzied commutes, plus the discovery that, while you were away, your bathroom flooded, or the fridge broke down, or that your child has inexplicably lodged a Lego block deep into their nasal cavity. (I don’t speak from parental experience, but I have it on good authority that kids do these kinds of things. Bless them.) All this to say that on a run-of-the-mill Tuesday night – even without anything out of the ordinary happening – you’re likely not jazzed about the idea of assembling Piri Piri chicken, with two-type mashed potatoes, arugula salad, and natas tarts for dessert (as boldly suggested on page 120 of Jamie Oliver’s Meals in Minutes).

Elizabeth Dunn has, very articulately and succinctly, hit the nail on the head about how today’s cooking empire (the books, the shows, the magazine articles and all the rest of it) has hijacked the principle of “simple cooking”. Simple cooking isn’t tossing some iceberg lettuce with oil and vinegar anymore – it’s topping it with freshly roasted chicken, toasted nuts, homemade croutons and some esoteric dressing that requires three different oils. (Don’t get me wrong, I love the idea of that salad; it’s just that on most weekdays, who’s making that whole thing from scratch?). So, in that sense, I agree with her – in making cooking a fashionable commodity, we’ve built this unrealistic, unattainable image of what simple cooking is supposed to represent; in falling under the spell of pretty pictures in gauzy magazines, we’ve lost sight of what real, simple, day-to-day cooking actually looks like.

In all this, it’s worth mentioning that “easy” cooking means something different for everyone. My time, energy, and money constraints are not identical to yours; same goes for our interest in cooking, which not only varies from person to person, but also from day to day. There are days when I’m full of vim and vigour and have no qualms about making a 3-course dinner from beginning to end. But then there are days when stove-top popcorn and a glass of fizzy water sounds like a reasonable dinner. (to the chagrin of every nutritionist out there.)

All that said, I still really do believe in the importance in making food at home – in whatever way, shape or form that comes to be. And so, in defense of home cooking, I will say this: easy can still stay easy. On days when I don’t feel like pulling together a meal, often I’ll give myself a little nudge, and – after thinking about how much that hip, third-wave, stone-oven pizza next door is going to cost me after tax and tip – I’m usually able to scrounge together something decent, without much time and effort.

In many ways, I have Nonna to thanks for this. She’s taught me a lot about simple cooking, including the holy trinity of olive oil, garlic, and peperoncini (red chili flakes). When combined with care, these three ingredients can elevate more or less anything in your fridge. Toss in an anchovy, and you’re well on your way to gold standard of peasant food.

Below you’ll find three recipes that incorporate olive oil, garlic and peperoncini (red chili flakes)- one for sautéed rapini, another for braised Savoy cabbage and the last, an improvised pasta dish with Romano beans. This is true easy cooking – no fireworks or esoteric ingredients. Just a couple of things from the crisper or freezer that you can toss together in between the time you get home and your child decides to see how far a Lego will go up their nose.

—–

RAPINI SAUTÉED IN GARLIC AND DRIED CHILI
(Rapini aglio e olio con peperoncini)

Having a little stockpile of cooked rapini in the freezer is one of the best gifts your past self can give your present self, on those days when all you can do is stare into the depths of fridge, mouth-breathing.These are some of my favourite ways to use this rapini:

• as-is, with a chunk of crusty bread to soak up the garlic oil
• swirled into pasta, with a generous dusting of Parmigiano-Reggiano
• on top of polenta
• on top of pizza
• alongside roasted chicken, spicy sausage, or meatballs
• in a curry

Rapini

Makes about 3 cups

  • 1 bunch of rapini (broccoli rabe)
  • 3-4 large garlic cloves, sliced
  • 1 tsp dried chili flakes (peperoncini)
  • 3 Tbsp good quality olive oil (or 1-2 Tbsp more, if you’re adding this rapini to pasta)
  • sea salt (or flaked salt, such as Maldon)

Directions

1) Put a large pot of water on to boil. Rinse the rapini under cold running water and pat dry with a dish towel.

Rapini

2) Trim the stems (if they look a little rough), then run a paring knife along the inside of the stem to make a cross-section at the bottom, like so (this will help the stems to cook evenly, along with the more delicate leaves):

Rapini
Rapini

3) Once the water has boiled, add the rapini and blanch for about 3 minutes. Remove from the boiling water and drain in a colander. Once cool enough to handle, gently squeeze out as much water as possible, then roughly chop the rapini into pieces (manageable enough the eat). (note: at this point you can freeze portions of the rapini that you aren’t using right away – just make sure to drain really well, then transfer to small freezer bags)

Rapini

4) Meanwhile, heat up the olive oil in a pan on medium heat. Once hot, add the sliced garlic and fry until just beginning to turn golden. Add the pepperoncini as fry for 10 seconds further. Add the blanched, chopped rapini and a good pinch of salt and cook for about another 5 minutes, stirring every so often. Check the seasoning, then serve as desired.

Rapini

—–

BRAISED CABBAGE WITH GARLIC AND DRIED CHILI
(Cavolo stufato)

Makes about 4 cups

  • 1/2 head of Savoy cabbage, centre rib removed and cut into 1″ slices
  • 3-4 large garlic cloves, sliced
  • 1/2 tsp dried chili flakes (pepperoncini)
  • 3 Tbsp good quality olive oil
  • 1 cup water or chicken stock
  • sea salt (or flaked salt, such as Maldon)

Garlic-Braised Cabbage

Directions:

1) Heat the olive oil in a pan on medium-high heat. Once hot, add the garlic and cook until golden (almost golden-brown). Add the chili flakes and stir, allowing them to flavour the oil (about 10 seconds).

2) Add the sliced cabbage and stir to combine. Season with salt. Cook for about 2 minutes, then add the water or stock.

3) Bring to a boil, then reduce the heat to low, cover and allow the cabbage to cook and break down (about 20-30 minutes). Serve with crusty bread, on pasta or with fish.

Garlic-Braised Cabbage

Garlic-Braised Cabbage

—–

SPAGHETTI WITH GARLIC & DRIED CHILI WITH ROMANO BEANS
(Spaghetti aglio e olio con fagioli)

Makes 2 servings

I like to cook big batches of beans and lentils all at one time, then either refrigerate them for the week, or freeze them (more on prepping pulses and legumes in an upcoming post). If freezing, lay the cooked beans in one layer on a baking sheet, freeze, then transfer to containers of freezer-proof bags (this prevents them from sticking together). They’ll keep for a couple of months. If you’re short on time, just used canned.

  • 200g spaghetti
  • 1/4 cup good quality olive oil
  • 3-4 large garlic cloves, sliced
  • 1/2 tsp dried chili flakes (peperoncini)
  • 1/2 cup cooked romano beans (or canned)
  • 1 anchovy filet
  • 1/4 cup breadcrumbs (I used panko)
  • 1/3 cup Parmagiano-Reggiano, plus more for serving
  • zest from 1/2 lemon
  • optional: pesto (I try to make some in the summer/early fall and freeze them in individual portions. More on that here.)

Spaghetti with garlic, dried chillis and romano beans

Directions

1) Boil the water for the spaghetti. Meanwhile, heat the olive oil in a pan on medium-high heat. Once hot, add the garlic and cook until golden (almost golden-brown). Add the chili flakes and stir, allowing them to flavour the oil (about 10 seconds).

2) Add the whole anchovy and stir; it will melt on its own. Add the beans, stir,and allow to cook for couple of minutes. Then add about 1/4 cup of water to help them break down a bit and form a sauce.

3) When the water comes to a rolling boil, add a small handful of coarse salt and then add the spaghetti; cook until al dente. (If the bean mixture looks a little dry, add some of the pasta water. The starch will help bring the it together.

4) While the beans are warming through and the pasta is cooking, set a dry pan on medium heat and toast the breadcrumbs, shaking the pan every so often to avoid burning them (2-3 minutes). Set aside.

5) Strain the pasta and then return to the pot. Add the garlic and bean mixture and stir to coat. Add the Parmigiano and stir to combine; serve in bowls, adding a little lemon zest, the toasted breadcrumbs and some additional Parmigiano to taste.

Spaghetti with garlic, dried chillis and romano beans

Share this:

  • Tweet
  • Share on Tumblr

Like this:

Like Loading...

Party Patties

01 Tuesday Mar 2016

Posted by julia chews the fat in Cooking For Your Peeps, Cooking Solo, Lunch & Dinner, Snacking, Vegetarian

≈ 4 Comments

It feels strange to be writing a post about sandwiches, considering that I’m not what you’d call a “sandwich enthusiast”. Sandwiches are fine and all, but for me they usually function as a perfunctory filler – the thing I pick up at an airport before a flight, or at the work cafeteria when I’ve forgotten my lunch and the hot meal du jour looks dodgy. I don’t know about you, but it’s hard for me to get exited about ham on rye or a floppy veggie wrap. Sandwiches have just never been my jam.

That said, I’m a big advocate of the falafel sandwich. In fact, I don’t think I’ve ever come across a falafel sandwich I didn’t like, even the cheap ones I used to inhale during my undergrad days (usually between classes or after late-night drinking excursions), that we’d buy from the dingy Lebanese take-out places around the downtown campus. The best ones had a crunchy exterior that gave way to a soft, crumbling chickpea interior. The ones slathered in garlicky tahini sauce, fresh parsley, bright pink pickled turnip, and wrapped in soft flatbread. Compared to what else was on offer around school – 99¢ pizza, McDonald’s, dubious-looking panini at the Coffee Depot – these falafel sandwiches were often a student’s best option for a cheap, quick, tasty bite.

Since then, and after a few attempts of my own, I’ve come to realize that while falafels are great take-out food, they can be tricky to make well at home. I suspect that it’s because the best ones are made with a deep-fryer (surprise, surprise…) and since I don’t actually have a deep fryer – which, for my overall health, not to mention exposed extremities, is probably a good thing – it means that I don’t ever really find myself trying to make falafel from scratch. Instead, I usually end up picking up one from that well-loved vegan spot in my neighbourhood, because it’s good and close-by and they can have that thing ordered, dressed and wrapped up in five minutes flat. But since I’m not made of money and can’t take on the role of La Panthère verte’s most valuable patron, I’ve been looking for alternatives I can make at home – where my pocketbook can stay clear from any cash registers and 8$ organic sandwiches.

In scouring the Internet for ways to use up the zucchini that were starting to wither away in the crisper drawer, I came across this recipe from Martha Stewart, which reminded me a little of falafel sandwiches (because of the chickpeas and the pita), but looked more home-kitchen friendly. (in truth, my eagerness to try the recipe may be chalked up to the fact that I mistakenly read it as “Zucchini Party Sandwiches” and my curiosity got the best of me. They weren’t in fact “party” sandwiches, but patty sandwiches – though, since making them, I would have no qualms calling them “party” sandwiches, given how colourful and flavourful they are.) (like a party in your mouth, har har…).

They’re something of a cross between a zucchini latke and a falafel – more toothsome than the former, less complicated than the latter. I tweaked Martha’s recipe slightly, using canola oil to fry them in (because, again – unlike Martha – I’m not made of money) and incorporating some curry powder, cayenne and a small amount of olive oil to the mixture for some added oumf. I highly recommend that you do the same, as the flavours mingle really well together; like people do, when the party goes from good to dancing-on-the-tables (!) great.

Have a good week, everybody x

Curried Zucchini-Chickpea Patty Sandwiches

Curried Zucchini-Chickpea Pa(r)tty Sandwiches – adapted from Martha Stewart
Serves 8 (a half-pita each)

Ingredients

  • 1 15.5-oz can chickpeas, drained and rinsed
  • 1 cup plain breadcrumbs (I used panko)
  • 1 medium zucchini, grated
  • 1 small red onion, grated
  • 1 egg, beaten
  • 1 Tbsp curry powder
  • ¼ tsp cayenne
  • 1 teaspoon coarse salt
  • freshly ground black pepper to taste
  • 1 Tbsp olive oil – for flavour
  • ¼ cup canola oil (or sunflower oil) – for frying

To serve:

  • 4 whole-wheat pitas, halved
  • 1 cup Greek yogurt
  • 1 cup fresh mint leaves
  • ½ cucumber, thinly sliced
  • A handful of lettuce leaves, and/or arugula and/or radicchio

Directions

1) Mash chickpeas in a bowl until more or less smooth (with a few nubs left in-tact). Stir in breadcrumbs, grated zucchini, onion, egg, curry, cayenne, salt and pepper. Form into eight 4-by-1/2-inch patties and set aside.

2) Put a pan on medium-high heat and warm the canola oil until hot, but not smoking. Fry the patties until golden and crisp, about 2 to 3 minutes per side.

3) Meanwhile, warm the halved pitas in the toaster on in a dry pan, just to warm through.

4) Stuff the pita halves with the cooked patties, some cucumber, lettuce, mint and yogurt.

Curried Zucchini-Chickpea Patty Sandwiches

Curried Zucchini-Chickpea Patty Sandwiches

Share this:

  • Tweet
  • Share on Tumblr

Like this:

Like Loading...

Boyfriend’s General Tao

30 Saturday Jan 2016

Posted by julia chews the fat in Cooking For Your Peeps, Lunch & Dinner, The Basics

≈ 2 Comments

General Tao Chicken

What you see in this (badly-lit, somewhat blurry) photo is the pinkish glow from the Netflix “Fireplace For Your Home” radiating from the TV, in the company of a very boozy El Presidente cocktail and a plate of homemade General Tao that my man made for us on New Year’s Eve, while Aretha‘s Ten Years of Gold and the “Best of Neil Diamond” took turns on the LP player. Thankfully, what you don’t see in this photo is the oblong coffee stain that has taken up permanent residence on our living room rug, as well as my woeful attempt to sing along to Red Red Wine, swaying back and forth, like moms do when they listen to Gordon Lightfoot, or Percy Sledge’s When a Man Loves a Woman, with their eyes closed, thinking back to the days of their high school dances.

Mom-jeans, here I come.

Obviously, this wasn’t the kind of blow-out NYE party that you see in movies, or in digital newsfeeds. There wasn’t any glittery confetti or streamers, party hats or noise makers; nor were there five dozen people crammed into a sweaty apartment, wailing the midnight countdown at the top of their lungs, while someone was being sick on the balcony.

But we did have prosecco. And there was some dressing up – I found a pair of dark suede heels and that black jumpsuit with the sheer neckline that I’d been saving. For good measure, I did my nails in something that goes by the name “Champagne Dream” and excavated my MAC lipstick called “Diva”. It was New Year’s after all. Party of two, notwithstanding.

We didn’t have anything planned except dinner – which we agreed should be something special. Or, at the very least, a step up from the Christmas leftovers we’d been stretching for a week. We thought about doing a roast, or cornish hens, but neither of those stuck. Then, my man suggested that he make General Tao Chicken from scratch (ding ding ding – we have a winner!). I was pleased in knowing that I would soon have a plate of that glossy, sticky, sweet concoction happily balanced on my knees, all without the effort of actually cooking, or ordering a disappointing hunk of lukewarm take-out, clad in its Styrofoam shell.

I can’t claim to know much about General Tao chicken. Is it Tao? Or Tso? Does it really have Chinese roots? Hunanese roots? Was it invented in Taiwan? Or New York? None of the above? I can only tell you that the sauce from this version comes to you courtesy of the 100% non-Chinese, Québécois-caucasian cooking personality, Ricardo Larrivée, with some adaptations from my 100% non-Chinese, Ontarian-caucasian boyfriend.

I can also tell you that it’s the Chinese-Canadian delicacy of your dreams. It’s exactly like the General Tao you order can off the menu at your local Szechuan restaurant, except better; since you’re choosing the chicken, the final result is worlds apart from the sub-par meat on offer for $7.95 at the local take-out place.

While I’m usually not a huge fan of making fried food at home (the trouble, the injury, the mess…), this is one of the few dishes involving frying whose homemade version is better than any other ones I’ve had in restaurants. Plus, it’s not like I was making it. He was. My job was to sip my cocktail, gaze at our (fake) fireplace and serenade him with Neil Diamond sing-alongs from the couch.

♫  Red, red wiiiiine… ♫

General Tao Chicken – sauce adapted from Ricardo Cuisine; batter from Food Retro; made with love by the boyfriend
Serves 4

Ingredients

Sauce + main ingredients:

  • 6 Tbsp soy sauce
  • 6 Tbsp chicken broth (or water)
  • 6 Tbsp rice vinegar
  • 2 Tbsp fresh ginger, finely chopped
  • 4 cloves garlic, finely chopped
  • 4 tsp cornstarch
  • 2 tsp paprika
  • 2 tsp sambal oelek
  • 1 tsp toasted sesame oil
  • 1 cup sugar
  • 3 Tbsp water
  • 2 lbs skinless and boneless chicken thighs, cut into large cubes
  • one green pepper, de-seeded and cut into thick slices (halved, then cut in three)
  • 1 Tbsp canola oil (to sauté the pepper)

Batter:

  • 1/2 cup all purpose flour
  • 1/2 cup cornstarch
  • 1 tsp baking soda
  • 1 tsp baking powder
  • 1/2 tsp salt
  • 1/4 tsp black pepper
  • 1 tsp white sugar
  • 1/2 cup + 2.5 Tbsp water

For Frying:

  • 1 litre canola oil
  • deep, heavy-bottomed pot (Dutch oven or wok)
  • frying/candy thermometer
  • paper towels

To serve:

  • 2 green onions, thinly sliced
  • cooked white rice (see note below)
  • steamed greens (bok choy, broccoli)

—–

Directions

1) Make soy mixture: in a small bowl, combine soy sauce, broth, vinegar, ginger, garlic, cornstarch, paprika, sambal oelek and sesame oil. Set aside.

2) Make the sauce: in a small saucepan, combine sugar and water. Bring to a boil and simmer until mixture is slightly caramelized, about 5 minutes. Add soy mixture. Bring to a boil, whisking constantly. Keep sauce aside, off the heat.

3) Make the batter: In a bowl, season chicken pieces with salt and pepper. In a separate bowl, mix all the batter ingredients in a medium size bowl.  Add the cubed chicken and toss to coat.

4) Fry the chicken: Heat your cooking oil to a temperature of 37oF (use a frying/candy thermometer). Drop battered meat into the hot oil a few pieces at a time and fry in batches for 4-5 minutes, or until a deep golden brown and cooked through, making sure to always have about 3/4-inch of oil to fry the chicken (add oil as necessary). Break up pieces that stick together as soon as possible (chopsticks work well for this).  Drain on paper towels. Repeat with remaining chicken. Discard oil.

Note: try to drop the meat into the oil one piece at a time, taking care not to overcrowd the pan.  If all the meat is tossed in at once, they could stick together, cook improperly, or the batter could become very greasy, as the temperature of the cooking oil would drop.

5) Pull everything together: warm 1 tablespoon of canola oil on medium heat. When the oil is hot, add the peppers and soften for about 3 minutes. Set aside on a plate. In the same skillet, heat the sauce. Then add the chicken and toss well to coat. Sprinkle with green onions and serve with white rice and steamed greens.

Note from boyfriend on rice:  THIS was the rice.  White.  And I rinsed like crazy.  Like Crazy. Until water runs clear.  It’s super important.

Share this:

  • Tweet
  • Share on Tumblr

Like this:

Like Loading...

100th

04 Monday Jan 2016

Posted by julia chews the fat in Cooking For Your Peeps, Food Away From Home, Lunch & Dinner, The Basics

≈ 10 Comments

We began the New Year by discovering a smattering of mold, a constellation of green and black across a metre of bubbled paint, on our living room wall, right behind the couch.

Yey, a new year! A fresh start! With some health-compromising fungus! Cool!

I’m trying not to see it as a bad omen, a bad start to the year; trying not to think about the fact that this nagging cough from my cold has hung on longer than usual; trying not to think about the cost of a dehumidifier in the days after the financial haemorrhage that is Christmas; trying not to be annoyed that our landlady’s solution to the humidity is to Pfft, just turn up the heat!, which only makes things worse by turning our place into a sauna any time we cook, hang laundry and shower within the same 48 hours (partly because our apartment wasn’t outfitted with a bathroom fan, nor a kitchen fan.)

But I’m trying – really hard – not to think about any of that, right after my man bleaches down the wall and sets up the rotating space heater, and I recount the time someone I knew had to be operated on because he had fungus growing under his cheeks, in his sinus cavity. La la la.

To distract myself, I’m writing this post, which WordPress tells me is my 100th. They even sent me a notification with an image of a miniature trophy and an exclamation mark. So I guess that means we should celebrate? You, me and this 100th batch of words? Let’s forget about fungus. Let’s instead turn our attention to tacos. Because in an ideal world, I think most celebrations would start with tacos. Don’t you?

I’ve actually been hanging onto this recipe for a few weeks now, from early December, when we had a bunch of people over for a two-cake, Planter’s punch, tacos-with-all-the-fixings-fiesta for my man’s birthday. It seemed fitting seeing that at the same time last year, we were in Tulum, beach combing, laying under palm trees, speaking broken (very broken) Spanish, and eating our weight in tacos.

We were partial to one thatch-roofed taqueria/bar right off the beach called La Eufemia; what they offered was straightforward, cheap, and more authentic than the Italian and Asian-fusion stuff the guys down the road were shilling. So it became a bit of a daily ritual – 2 Coronas and three or four tacos each, then a walk on the beach, or along the tiki torch-lined road. Simple, but perfect.

Tulum

TulumTulum

The fish tacos (pictured above) might have been La Eufemia‘s crowning glory, but their al pastor were pretty great too – pork shoulder rubbed in a mix of chiles, then slowly grilled until tender, served on tortillas with chopped onion, pineapple, and cilantro. We wanted to re-create something at home along the same lines, but without a grill or rotisserie, char-grilling the meat didn’t seem feasible. The other option was to slice the meat, then grill it, but seemed like a sure-fire way to dry it out. So instead, we left the pork shoulder intact, marinated it overnight (in the traditional al pastor spices), slow-cooked it, then once it was out of the oven, pulled the whole thing apart with two forks, and served it with fresh cilantro, onion and the pineapple it had been cooked with. The whole thing was smoky and sweet, tender and caramelised. We had leftovers for the better part of the week, but we didn’t complain because each time we put one together, it was like a little party, a fiesta, a miniature escape…

(…like the one this blog post gave me from that fuzzy, fungal surprise we found behind the couch. Thanks for bearing with me. Now you will be rewarded with tacos.)

Slow-Cooked Pork Tacos – marinade from Food & Wine
Serves 8

Notes:
1- this recipe easily doubles if you’re cooking for a crowd
2- the pork needs to marinate overnight, so plan accordingly

011

Ingredients

  • 1 tablespoon vegetable oil, plus more for brushing
  • 3 garlic cloves
  • 1 teaspoon dried oregano
  • 1/2 teaspoon ground cumin
  • 1/2 teaspoon pepper
  • 1/4 teaspoon ground cloves
  • 4 fresh guajillo chiles—stemmed, seeded and cut into 2-inch pieces
  • 1/3 cup pineapple juice
  • 1/4 cup white vinegar
  • 2 tablespoons chipotle in adobo, chopped (original recipe calls for achiote paste, but I wasn’t able to find any)
  • Sea salt
  • 2 pounds boneless, whole pork shoulder
  • 1/2 medium pineapple, peeled and sliced 1/2 inch thick
  • 1 medium red onion, sliced crosswise 1/2 inch thick
  • Warm corn tortillas, chopped cilantro, thinly sliced red onion, lime wedges for serving*

*Other (possibly inauthentic al pastor toppings): queso (or feta), shredded red cabbage, quick-pickled radishes, chipotle powder

DIRECTIONS

1) Preheat the oven to 325°F

2) In a medium saucepan, heat the 1 tablespoon of oil. Add the garlic and cook over moderately high heat, turning occasionally, until lightly browned, about 1 minute. Stir in the oregano, cumin, pepper and cloves and cook until fragrant, about 1 minute. Add the chiles and cook, stirring, until blistered in spots, about 30 seconds. Add the pineapple juice, vinegar and achiote paste and bring to a boil. Remove from the heat and let stand for 5 minutes.

3) Transfer the chile mixture to a blender and purée until smooth. Season with salt. Scrape the marinade into a large, sturdy plastic bag. Add the pork and turn to coat. Set the bag in a small baking dish and refrigerate overnight.

4) Preheat a grill pan. Brush the pineapple and onion with oil. Grill over medium-high heat, turning once, until lightly charred and softened, 3 to 5 minutes. Transfer to a roasting pan.

5) Remove the pork from the marinade. In the same pan used for the pineapple, grill the whole pork shoulder over medium-high heat until browned on all sides. Transfer to the roasting pan, nestling it among the pineapple and onion wedges. Pour remaining marinade from bag on top. Cover loosely with foil and bake in the preheated oven for approximately 3 hours (let the pork cook undisturbed for 2 hours, then begin checking it every half hour. The pork is done when it is fork-tender, in other words, when it easily falls apart.)

6) Shred pork with two forks; season with salt. Serve with warm corn tortillas, chopped cilantro, sliced red onion and lime wedges (and/or any other toppings of your choice).

Tacos al Pastor

Tacos al Pastor

Tacos al Pastor

Share this:

  • Tweet
  • Share on Tumblr

Like this:

Like Loading...

Sugo di pomodoro

15 Tuesday Dec 2015

Posted by julia chews the fat in Cooking For Your Peeps, Cooking with Nonna, Lunch & Dinner, The Basics, Vegetarian

≈ 1 Comment

In the kitchen, there aren’t many things for which grandma, Nonna, has any steadfast rules. Tomato sauce, however, is one noteworthy exception. Here is an abridged, translated version of a recent conversation we had over the phone:

“Nonna, I made your sauce yesterday. Era buonissimo.”
“Did you put in the leek? And a bit of carrot? And celery?”
“Sì. Of course. Certo.”
“But not too much of each?”
“No, not too much of each.”
“And the butter? Il burro. Did you remember to put it in?”
“Yes, Nonna.”
“Ok, hai fatto bene. Brava. Good girl.”

I’ve made Nonna’s tomato sauce a hundred times over. Maybe even more, considering it was one of the very first things I learned to cook. Like all her recipes, the ones that I’ve been able to replicate with ease are like badges, tangible mementos of a culinary heritage – hers, mine, ours. It turns out that when you have Italian roots – even if it only makes up half of you – tomato sauce isn’t really just tomato sauce. It’s a birthright. You have to take special care to preserve it; to share it, but to safeguard it too.

Variations of sugo di pomodoro differ across Italy and across families – some might add aromatics, like basil; others sometimes add salt or a bit of sugar. It’s one of those great backbone recipes that’s slightly different from household to household. I think the key to Nonna’s recipe is poco poco, or “just a little bit”. You want just a little bit of leek, of onion, of carrot, of celery. These ingredients make up your base, your sofrito (or mirepoix in French); if you go overboard with any of them, the flavour won’t be balanced. That said, trust your judgement and your tastebuds – if you feel it needs more or less of anything, adjust it. As simple as it may be, this recipe gets better with practice. Keep making it, over and over, until you love it and think Nonna would too.

Nonna’s Tomato Sauce (sugo di pomodoro della Nonna)

Tomato Sauce

Ingredients

  • 1 medium onion, chopped (about 1/2 cup)
  • 1 small carrot, chopped (about 1/4 cup)
  • 1 small celery stalk, chopped (about 1/4 cup)
  • 1/2 small leek (white part only), chopped (about 1/3 cup)
  • 2 cloves of garlic, minced
  • 1 heaped Tbsp tomato paste
  • 800ml-1 L* canned or jarred tomatoes (preferably San Marzano)
  • olive oil (about 1/4 cup)
  • a knob of butter

*a large standard can of tomatoes is usually 796ml; we use homemade jarred tomatoes, each Mason jar containing 1L.

Notes! 

  1. Unlike a lot of recipes out there, Nonna doesn’t add salt, sugar, pepper, chili flakes or aromatics to her tomato sauce. This isn’t bolognese, so no meat either.
  2. You might have leftover chopped vegetables (i.e one small carrot be a little more that 1/4 cup); you can freeze any leftovers for stock or double the recipe.
  3. The sauce will be more flavourful if you allow it to simmer for an hour or so. (Grandpa used to start his sauce at about 10am to serve at lunchtime, but he was hardcore about sauce-making.)
  4. You can also use this sauce to cook meatballs the old-fashioned way; see recipe here.

Tomato Sauce

Directions

1) Heat olive oil and butter in a large saucepan or Dutch oven, on medium-high heat. Once the oil is hot (but not smoking), add the onion and sauté until softened. Reduce the heat to medium. Add the garlic and sauté for another minute. Then add the leek, carrot, celery and sauté together until everything is softened and the onion and garlic are golden to golden-brown. Add the tomato paste and sauté for another minute or so.

2) Add the tomatoes and stir to combine; reduce the heat to medium-low and allow to simmer, half-covered, for 30 minutes to an hour (depending on how much time you have). Remember to stir occasionally.

3) Remove sauce from the heat; blitz with a hand-blender until smooth, or leave as-is if you prefer a more rustic sauce. Serve on pasta, gnocchi, polenta, or pizza with a good sprinkling of parmesan. Alternately, you can freeze the sauce for up to 4 months.

Tomato Sauce

Tomato Sauce


Share this:

  • Tweet
  • Share on Tumblr

Like this:

Like Loading...

Care Package

27 Friday Nov 2015

Posted by julia chews the fat in Breakfast & Brunch, Cooking For Your Peeps, Lunch & Dinner, Soups, Sweet Tooth, Vegetarian

≈ 1 Comment

A friend of mine had a little boy just a over two weeks ago now – a beautiful little chicken of a baby, with soft cheeks, delicate fingers and the requisite new-baby smell. He is definitely a sight to behold, with his miniature yawns and peach-fuzz hair. Regardless of a few nicks from his sharp newborn nails – and a few surprise vibrations from his diaper – he charmed me through and through, in that way that babies are preternaturally good at, without even trying.

With the mini baby boom happening in my circle of friends right now, the one thing I’ve come to understand is just how precious the resources of time and energy are to new moms and dads. Squeezing in a shower or running an errand are rare opportunities that are seized with an acute sense appreciation, if not urgency. Other activities, namely, making a full meal, are easily relegated to the back-burner (sorry for the pun). I’ve heard that a banana and a box of crackers will suffice when you’ve been on four-hour sleep cycles – at best! – and have a little person who needs you in a way that no one else has before.

Knowing that my friend and her husband were busy acclimatising to their new unit of three (diapers, feedings, and all the rest of it), I thought I should come equipped with couple of homemade treats – things that could be frozen or eaten as-is, without any prep, aside from a quick re-heating. In fact, it’s also the kind of food any non-parent would want in the fridge or freezer on those frantically busy days when they don’t have one more ounce to give.

Parent or non-parent, this soup and this cake are my virtual gifts to you. Enjoy xx

Turkish Lentil Soup – makes 4-6 servings

Turkish Red Lentil Soup

  • 225 grams red lentils (approx 1 1/8 cups)
  • 1 medium onion, finely chopped
  • 1 stalk celery, finely chopped
  • 1 carrot, finely chopped
  • 3-4 cloves garlic, peeled and sliced in half lengthwise
  • 2 Tbsp tomato paste
  • 1-2 Tbsp extra virgin olive oil
  • 1.5 litres vegetable stock (plus 1-2 cups more, as needed)
  • 1 small piece ginger, grated
  • 2 tsp ground cumin
  • 2 tsp curry powder
  • 1-2 tsp paprika
  • 1 tsp mustard seeds
  • Fresh mint (or cilantro) and lemon to serve
  • Salt and pepper

Directions

1) Set the vegetable stock in a pot on medium heat to warm up.

2) Heat the olive oil in a large pot, and sauté the vegetables with the garlic cloves, for about 10 minutes. Add tomato paste, spices and grated ginger, and cook for a few more minutes. Add lentils, washed and drained, and cover with hot vegetable stock.

3) Bring to a boil, reduce heat and simmer with the lid on for about 30 or 40 minutes, until the lentils begin to fall apart. Add more stock if they look a bit dry (just remember it should be a soup-like consistency). Season with salt and pepper, to taste.

4) Set aside two or three ladles of soup, and puree the rest in a blender (optional).

5) Serve with chopped fresh mint (or cilantro) and lemon juice. Do not skip this – it’s what makes all the difference!

Turkish Red Lentil Soup

—–

Date-Walnut Banana Cake with Coconut
Lightly adapted from Lunch Lady’s Black Gold Banana Cake
Makes one 9x5x3″ loaf

  • 4 medium overripe bananas
  • 1 1/2 cups all-purpose flour (I used 1 cup white +1/2 cup whole-wheat)
  • 1 1/2 tsp baking powder
  • 1/2 tsp baking soda
  • pinch of salt
  • 1/2 cup raw caster sugar
  • 2/3 cup coconut oil, melted
  • 1 tsp pure vanilla extract
  • 1/2 cup Medjool dates, chopped
  • 1/4 cup walnuts, chopped
  • 1/4 cup unsweetened shredded coconut

Date-Walnut Banana Cake

Directions

1) Preheat the oven to 350˚F.
2) Place the overripe bananas into a mixing bowl and beat until puréed. Add the vanilla, coconut oil, and sugar, and beat again until combined.
3) Fold in the flour, raising agents, salt, and walnuts until thoroughly combined.
4) Fold in the chopped Medjool dates and shredded coconut; pour the batter into a loaf tin lined with parchment paper.
5) Bake for 45 mins to an hour, or until skewer comes out clean, cool on wire rack.

Date-Walnut Banana Cake

Date-Walnut Banana Cake

Date-Walnut Banana Cake

Date-Walnut Banana Cake

Share this:

  • Tweet
  • Share on Tumblr

Like this:

Like Loading...

An Invitation

20 Friday Nov 2015

Posted by julia chews the fat in Condiments, Lunch & Dinner, Snacking, Vegetarian

≈ 11 Comments

The weight of this week hasn’t made me want to write about food. In light of recent events, it feels frivolous – and almost obscene – to blather on about cooking. It isn’t just Paris. It’s all of it. It’s Beirut. It’s Bamako. It’s the unconscionable rhetoric surrounding the Syrian refugee crisis. It’s the pundits who dissect every single detail of a horrifying event to spread their bigotry and fearmongering. It’s the fact that – amid all the pain and suffering – our impulse is to turn against eachother, to become wary and suspicious; to slam doors on the most vulnerable.

This post, in contrast, is an invitation. An invitation to gather, to extend a loving gesture, to bring people in close. Breaking bread with others can be a unifying force – it can foster greater acceptance and understanding of others; it can quell intolerance. Most of all, though, it is a tangible expression of unadulterated love.

World peace might not be a realistic expectation. But we can, at the very least, try to love one another a little more. So, at least for a little while, turn off the radio, shut off your computer, your phone. Silence the hot-air pundits. Bring together friends, family, and new faces too – to share, to love, to eat, with a heart that’s open and filled with gratitude.

Eat well, be well, dear readers. See you here again soon x

Traditional Muhammara (red pepper walnut dip from Turkey, via Syria)
Adapted from Olga Irez’s Delicious Istanbul
Serves 10 as appetizer/meze

Muhammara

  • 6-7 large (about 1 kg) red bell peppers
  • 1 large (about 60g) slice wholewheat bread, torn
  • 1/2 packed cup finely ground walnuts
  • 2 tbsp tomato paste
  • 2 tbsp extra virgin olive oil and more for serving
  • 1/2 tbsp pomegranate molasses*
  • 1 clove garlic
  • 1/2 tsp fresh mint
  • 1/4 tsp ground cumin
  • 1/4 tsp ground coriander
  • 1/4 tsp hot red pepper flakes and more for serving
  • 1/2 tsp fine sea salt

*I was able to find pomegranate molasses at my local Middle Eastern shop, but it can also be found in some regular grocery stores (PA in Montreal stocks it). Otherwise, you can replace it with lemon juice (though, you won’t get that nice sweetness that pomegranate molasses adds to the dip). Note: don’t buy the stuff that’s used as a syrup to add to carbonated water; the stuff you want is thick (like traditional molasses) and also goes by the name “pomegranate concentrated juice”.

Directions

1) Preheat the oven to 400F. Wash the peppers and arange them on a large baking tray and let roast, skin-on, for about 30 min, or until the peppers puff up and start to get charred spots. Set aside to cool while you are gathering the rest of the ingredients.

Muhammara Muhammara

2) When the peppers are cool enough to handle, remove the stems along with the seeds and peel off the skins. Place the peeled red peppers in a colander and let the juices drain into a bowl below (Olga Irez suggests reserving the juice to add to soups or stews and cook your grains in. You can even freeze the juice for future use).

Muhammara

3) Place the drained red peppers and garlic in the food processor and pulse into a purée. Soak the bread slice in water, then squeeze out the liquid. Toss the wet crumb in the blender and pulse into a smooth purée. Add the rest of the ingredients and mix with a spoon until combined. Taste and adjust the seasoning, if necessary.

Muhammara

4) To serve, transfer to a wide bowl and with the back of a spoon, make a light impression in the centre of the dip. Drizzle a bit of olive oil into the centre and sprinkle with red pepper flakes. Serve with flat bread.
Note: Muhammara can be refrigerated for up to 2-3 days.

Muhammara

Share this:

  • Tweet
  • Share on Tumblr

Like this:

Like Loading...
← Older posts
Newer posts →

Facebook

Facebook

Instagram

No Instagram images were found.

Recent Posts

  • Layers and Rows
  • Finding Buoyancy
  • February
  • Wednesday
  • Cross My Heart, Miso

Archives

  • May 2017
  • April 2017
  • February 2017
  • December 2016
  • November 2016
  • September 2016
  • August 2016
  • July 2016
  • June 2016
  • May 2016
  • April 2016
  • March 2016
  • February 2016
  • January 2016
  • December 2015
  • November 2015
  • October 2015
  • September 2015
  • August 2015
  • July 2015
  • June 2015
  • May 2015
  • April 2015
  • March 2015
  • February 2015
  • January 2015
  • December 2014
  • November 2014
  • October 2014
  • September 2014
  • August 2014
  • July 2014
  • June 2014
  • May 2014
  • April 2014
  • March 2014
  • February 2014
  • January 2014
  • December 2013
  • October 2013
  • September 2013
  • August 2013
  • July 2013
  • June 2013
  • May 2013
  • April 2013
  • March 2013
  • February 2013
  • January 2013
  • December 2012
  • November 2012
  • October 2012
  • September 2012
  • August 2012
  • July 2012
  • June 2012
  • May 2012
  • April 2012
  • March 2012
  • February 2012

Categories

  • Beverage
  • Breakfast & Brunch
  • Condiments
  • Cooking For Your Peeps
  • Cooking Solo
  • Cooking with Nonna
  • Food Away From Home
  • Food Writing
  • Holidays
  • Intro
  • Lunch & Dinner
  • Snacking
  • Soups
  • Sweet Tooth
  • The Basics
  • Vegetarian

Enter your email address to follow this blog and receive notifications of new posts by email.

Join 80 other subscribers

Blog at WordPress.com.

  • Follow Following
    • julia chews the fat
    • Join 80 other followers
    • Already have a WordPress.com account? Log in now.
    • julia chews the fat
    • Customize
    • Follow Following
    • Sign up
    • Log in
    • Report this content
    • View site in Reader
    • Manage subscriptions
    • Collapse this bar
 

Loading Comments...
 

    %d bloggers like this: