• Home
  • About

julia chews the fat

julia chews the fat

Category Archives: Cooking For Your Peeps

Red Velvet Valentine

11 Tuesday Feb 2014

Posted by julia chews the fat in Cooking For Your Peeps, Holidays, Sweet Tooth, Vegetarian

≈ 2 Comments

Valentine’s is those days on the calendar when it’s socially acceptable to be a loopy, romantic nutbar; the one day of the year when you can crank up the cheeseball dial and no one will fault you for it. You can send love notes, litter your desk with bowls of cinnamon-candy hearts and promise your office mates bright red, fluffy cupcakes with hand-whipped frosting…

…or so you thought.

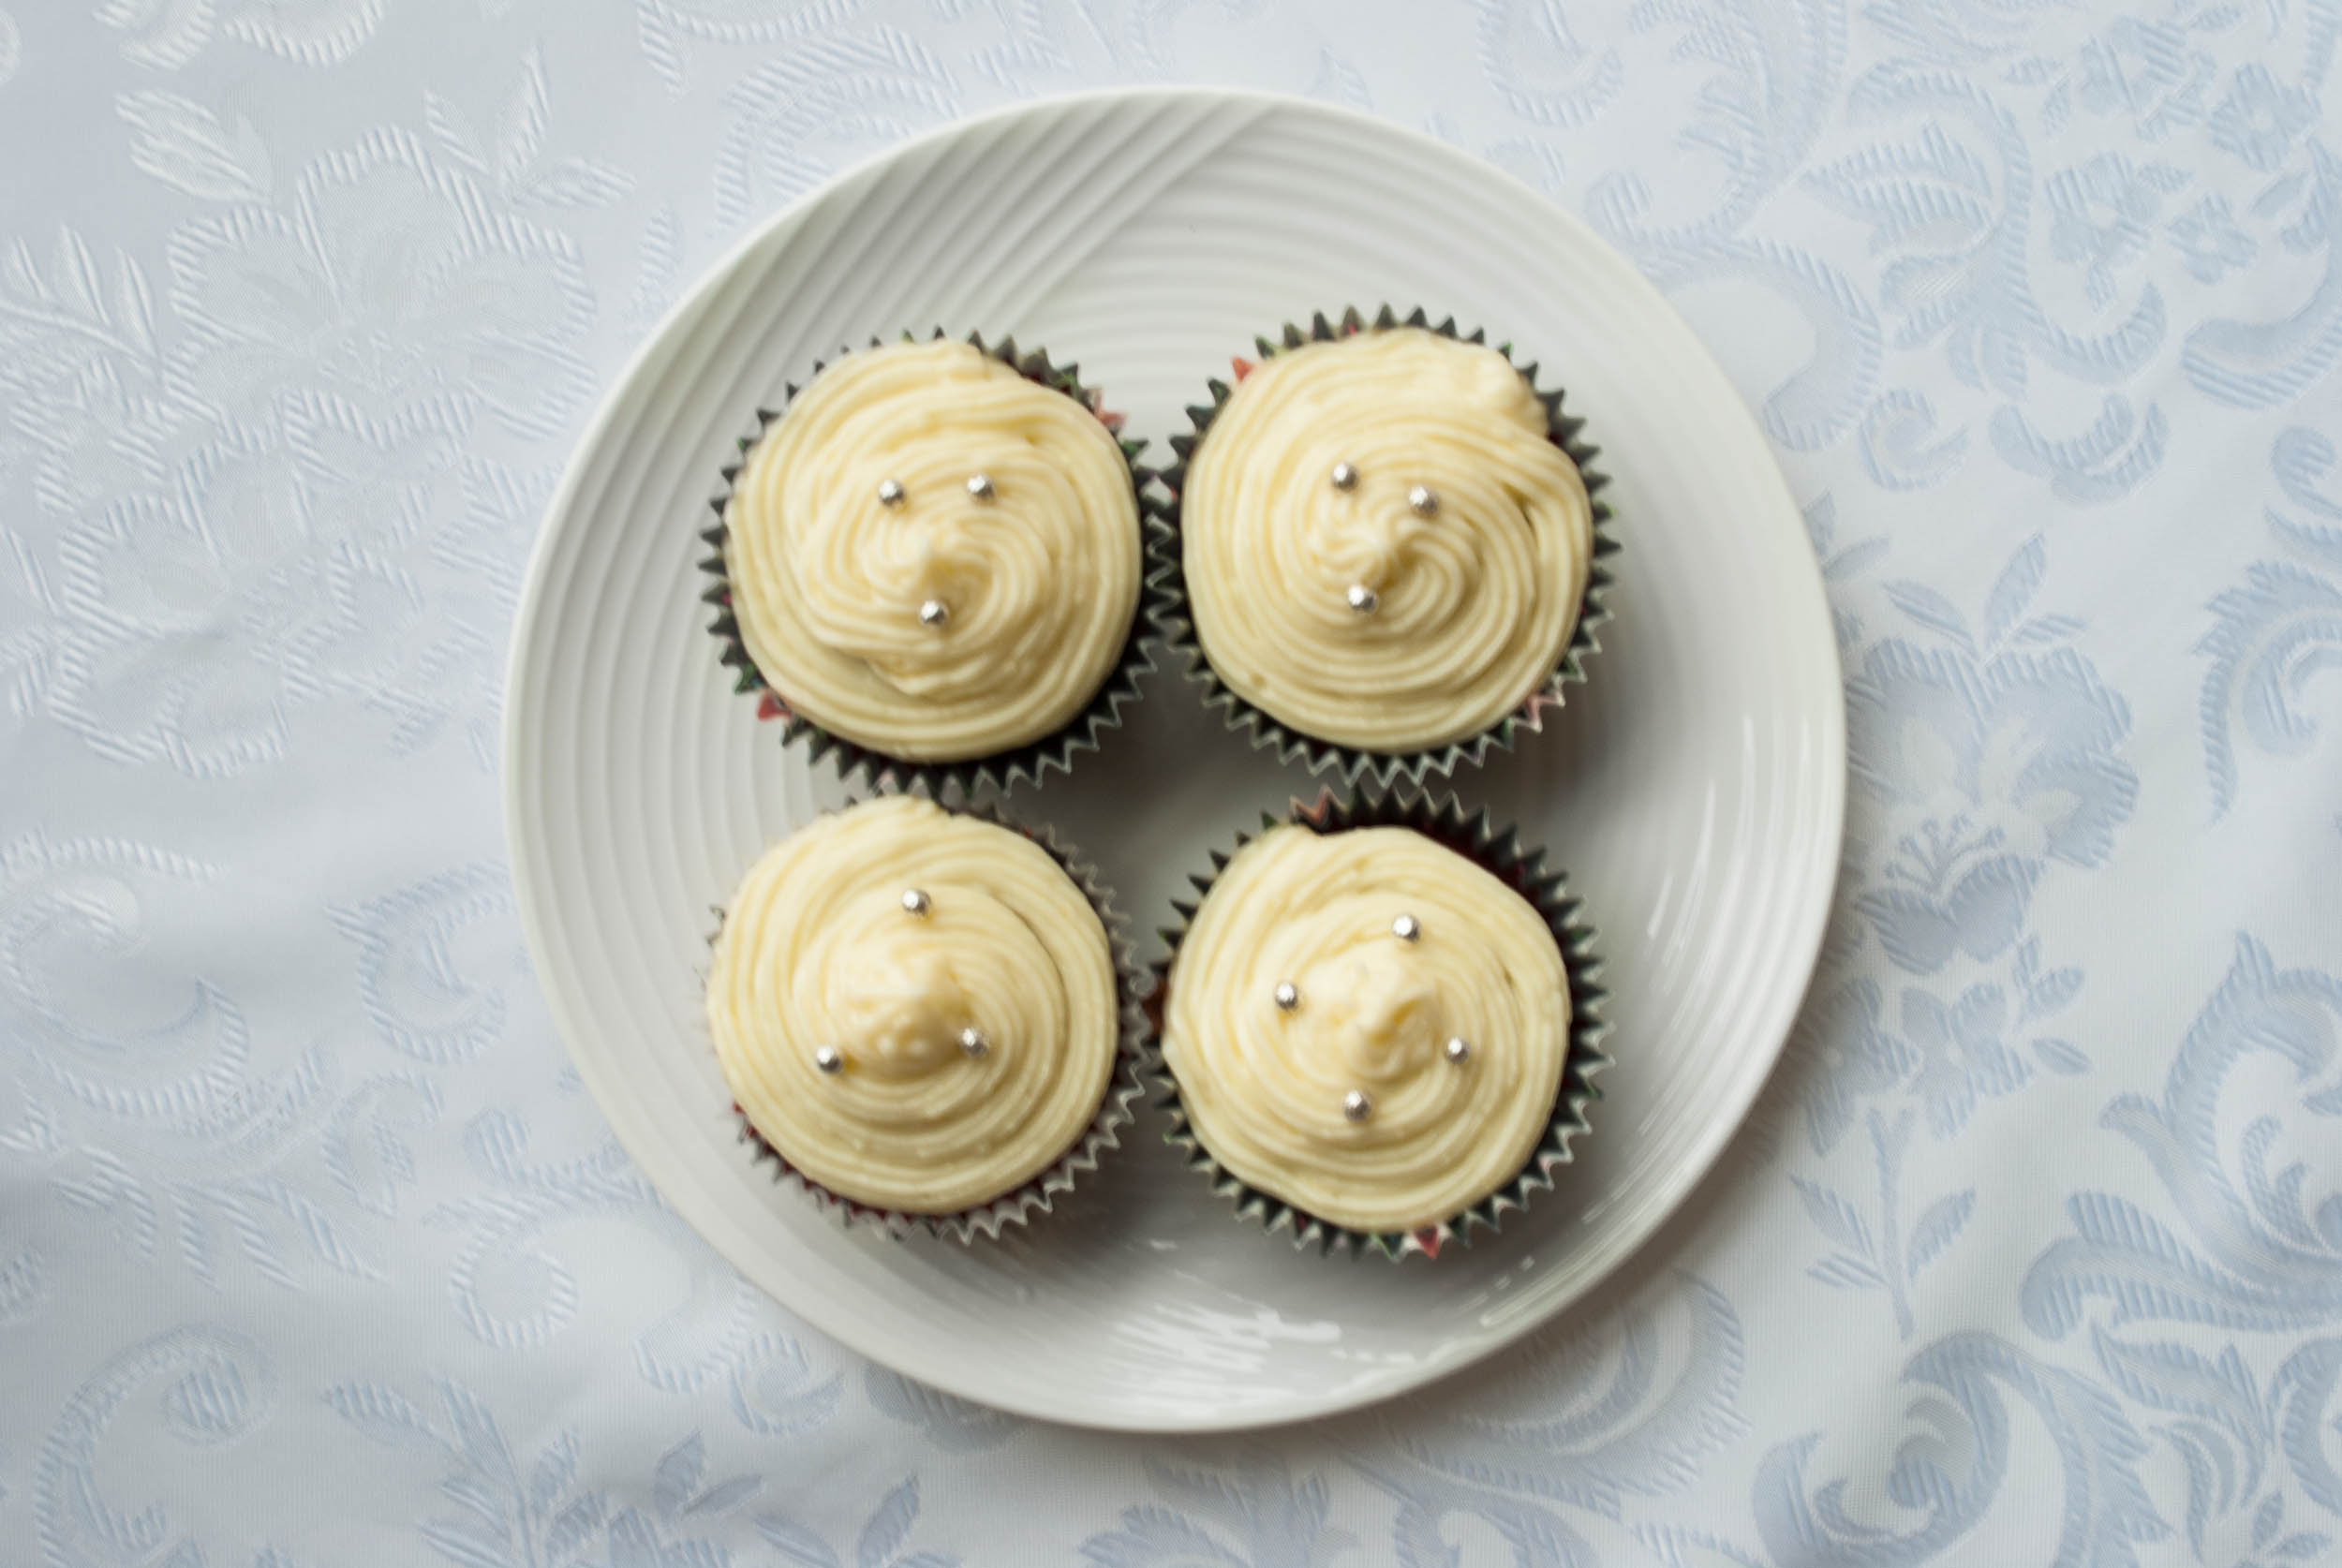
I was so excited to make these cupcakes. Excited about trying the old technique of using beets make the batter electric pink. Excited about using a pastry bag to add an artful slick of cream cheese frosting on top. Excited about the beautiful Swedish paper cups that I’d found months prior and that I’d purposely saved for this day (yes, yes I did). But most of all, I was excited about finally redeeming myself since the last Valentine’s cupcake failure.

Expectations were high, people. Valentine-in-a-bow-tie high.

Despite my well-laid plan (I was rested! I had plenty of time! I had prepped all the ingredients!), lady fortune had a different one in store – one involving me forgetting to add the butter, then having to scrape the batter out of the pretty paper cups and back into the bowl…only to remove from the oven, 18 minutes later, twelve flat, dense cylinders in greasy-bottomed paper cups. The icing flipped me the bird too, as it initially resisted its extrusion from the pastry bag, then shifted in consistency to seep out in a nondescript, gooey mass.

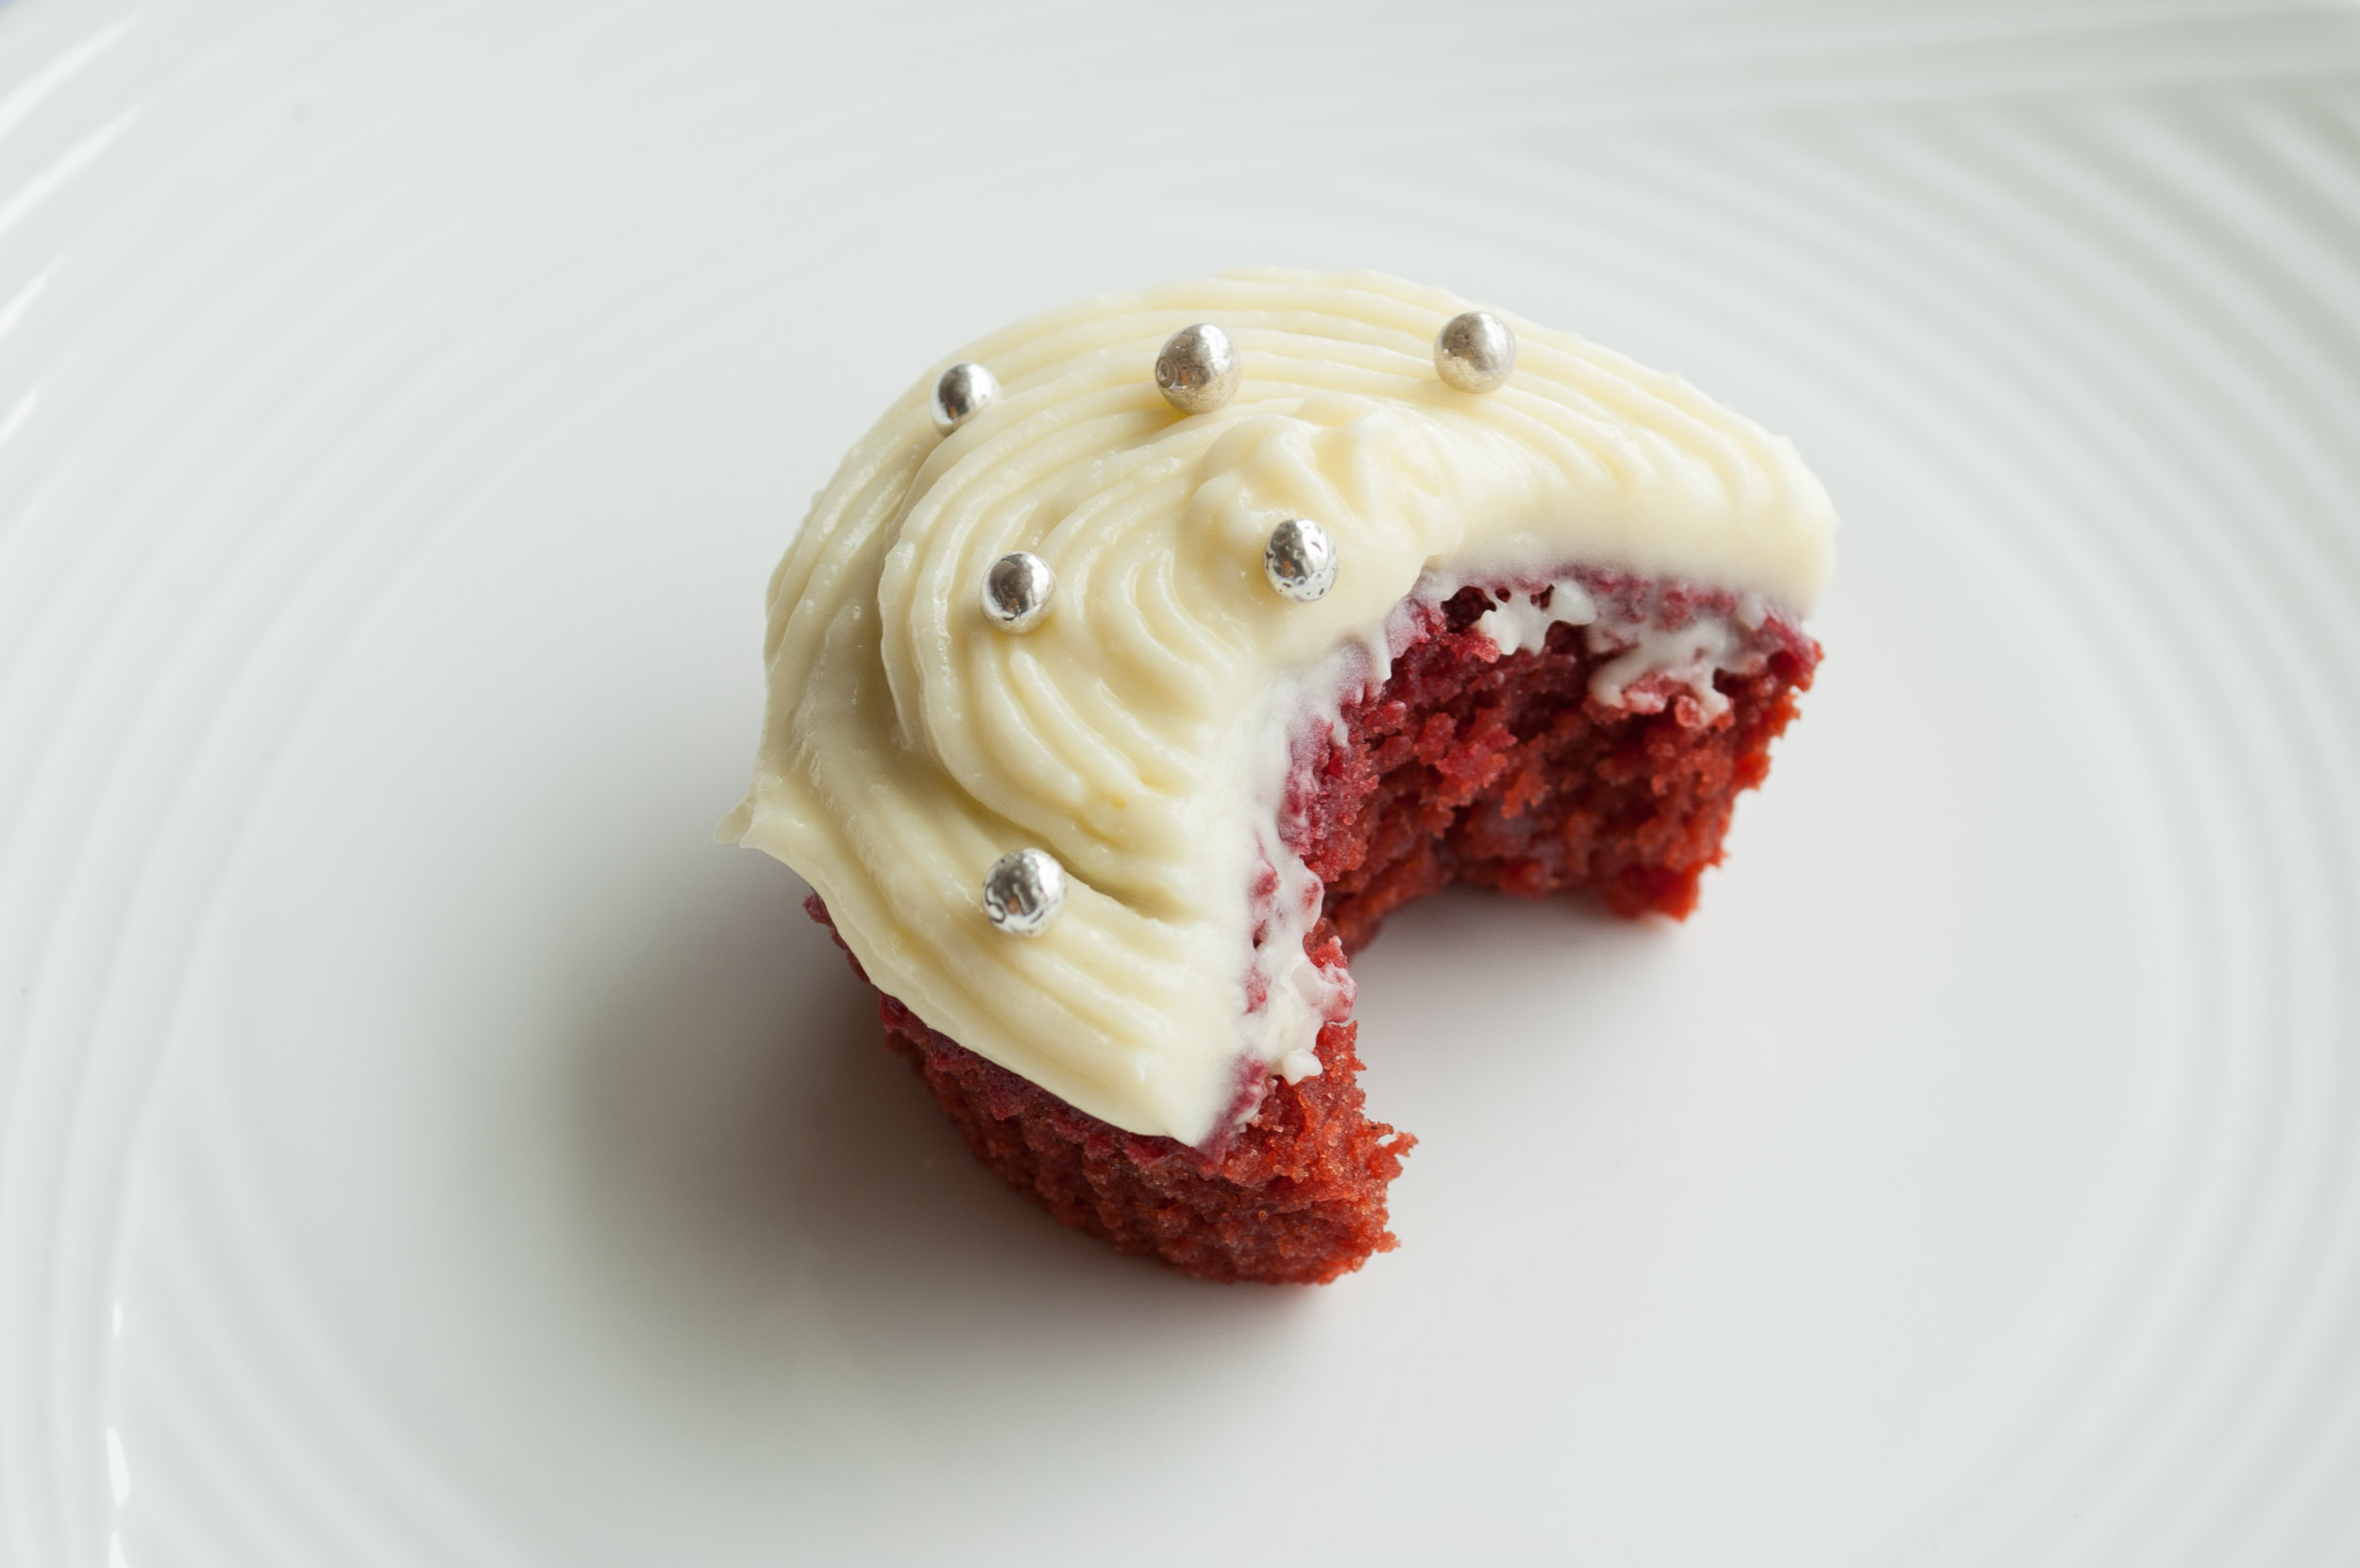
While the icing improved after a bit of chilling in the fridge, there was no saving the cake. Dense, chewy, beety (undercooked?), they hovered somewhere between expired vegan health cake and a 4th grade science experiment. These were not lovely, fluffy, cherubs-singing-from-the-heavens cupcakes. These were fists-shaking-at-the-heavens cupcakes. These were “I hate you” cupcakes.

As it so happens, this was also the day my friend Matthew was showing me how to use a DSLR. And thank GOD for that, because without him, I’m not sure I could’ve made these things look half as edible. With his keen eye, he managed to help me make these cupcakes look delicious and elegant and lovely – everything they most definitely were not.

Here’s to faking it! Happy Valentine’s xx

4 cupcakes

cupcake with bite

cupcake with bite - detail

(IF YOU DARE, HERE’S THE RECIPE)

All Natural Red Velvet Cupcakes (makes approx 12) – adapted from this recipe

3/4 cup beet purée (directions follow)
1 tablespoon freshly squeezed lemon juice
1 1/2 teaspoons rice vinegar
1 cup sugar
1 stick butter (8 tablespoons), at room temperature
3/4 teaspoon pure vanilla extract
3/4 teaspoon kosher salt
3/4 teaspoon baking powder
1 1/4 cups unbleached all-purpose flour (not bleached flour)
2 eggs
1/2 cup buttermilk
1 tablespoon natural cocoa powder (not Dutch Process, or dark cocoa powder)

Beet purée: 2 medium beets, or 1 large beet, scrubbed and rinsed

Fill a saucepan with water, add the beets and bring to a boil. Allow the beets to cook until very tender (approx. 30 mins).

When beets are cooled completely, peel, and cut into large chunks. Place in a food processor fitted with the steel blade. Process for 2 minutes, or until extremely smooth. Empty the food processor of the beet purée. Measure out 3/4 cup and set aside (save any extra purée for another use).

Preheat oven to 350ºF. In a large bowl, sift the dry ingredients. In a separate bowl, cream the butter and sugar, then add the eggs, vanilla, buttermilk, vinegar and lemon juice. Beat or whisk until combined. Add the beet purée. Mix some more until the mixture is uniform.

Line a standard muffin tin with paper cupcake liners. Scoop mixture evenly into cupcake liners.

Bake for 18 minutes, or until the cupcakes in the center spring back up when touched. Remove cupcakes from the pan and place on a wire rack to cool completely.

Cream Cheese Frosting

1 8oz package cream cheese, at room temperature
1 stick (8 tablespoons) unsalted butter, at room temperature
2 cups confectioner’s (powdered) sugar
1-2 tablespoons heavy cream
1/2 teaspoon pure vanilla extract

Beat all ingredients together with an electric mixer until smooth and fluffy. Frost cooled cupcakes.

Share this:

  • Tweet
  • Share on Tumblr
Like Loading...

A Better Kind of Fruitcake

31 Tuesday Dec 2013

Posted by julia chews the fat in Breakfast & Brunch, Cooking For Your Peeps, Holidays, Sweet Tooth, The Basics, Vegetarian

≈ 4 Comments

Almost twenty years ago, at Christmastime, my dad bought a loaf of stollen for the first time. He brought it home, cut it up and plated it. We were eager to try something so foreign and – for kids growing up in the burbs in the 90s – so exotic-sounding. But, one bite in, our excitement quickly unravelled, being replaced with the uneasy feeling of being duped. Not unlike a lot of the holiday fruitcakes I’ve reluctantly tasted over the years, this store-bought stollen was dry and lacklustre – a pasty-coloured loaf studded with nondescript dried fruit that rolled out off the sides with each bite.

It was miserable.

Unlike the rest of us, my dad saw the potential of this German-style fruitcake and shortly thereafter, set out to make his own. He sourced different recipes, even quizzing our German neighbour, Mrs. Nack, for secret stollen-making tips. And then, nearly every year since, he’s gone into full stollen-production mode – drenching the fruit several days ahead, making the dough, cutting the loaves, baking them, dusting them with sugar and wrapping them attentively. For someone who doesn’t bake (or have a Teutonic bone in his body), dad’s got this German sweet bread down to an art. The final result is a beautifully dense, yeasty bread, brimming with sliced almonds and a boozy mixture of currants, raisins and citrus peel. The longer it sits, the better it gets, as the brandy further permeates the crumb and the almonds slowly transform into marzipan. There isn’t a trace of neon-coloured maraschino or stale walnut in this fruitcake. Not if dad has anything to do with it. And that’s the way we like it.

Wishing a very happy birthday to my dad ♥ and a Happy New Year to all of you, dear readers! Looking forward to sharing more tasty edibles with you in 2014.

Dresden Stollen – makes 4 medium loaves or 6 small ones stollen 21

  • 1⅓ cups currants
  • 1 cup orange zest
  • 1 cup lemon zest
  • 3 cups raisins (Thompson or sultanas)
  • 4 ⅓ cups sliced, blanched almonds
  • 6½ cups (1 kilo) sifted flour
  • 6 packets yeast (8 gr each)
  • 2 cups icing sugar
  • ½ tsp ground cardamom
  • tsp cinnamon
  • 2 pinches mace
  • 2 pinches allspice
  • ½ tsp salt
  • 1 cup brandy
  • 2 cups lukewarm milk (reserve 1 cup for proofing the yeast)
  • 1⅓ lbs butter, room-temperature

Pour the brandy over the mixture of currants, raisins, almonds & citrus zest. Mix and cover, allowing to soak overnight (or over several days). stollen 2 Proof the yeast by sprinkling it over 1 cup of the lukewarm milk (about 100ºF) to which has been added a tablespoon of sugar. Set aside in a warm place for about 10 minutes. The yeast is active if it forms a creamy foam on top of the milk. Sift the flour into a large mixing bowl. Add the room-temp butter, icing sugar, the remainder of lukewarm milk, spices and the proofed yeast mixture and mix. Transfer to a slightly floured work surface and knead thoroughly. stollen 3 stollen 4 stollen 5 Cover the dough and allow to rise for approx. 30 minutes in a warm place. Add the prepared fruit mixture. Knead the fruit mixture thoroughly into the dough. The dough should be smooth and elastic. stollen 12 
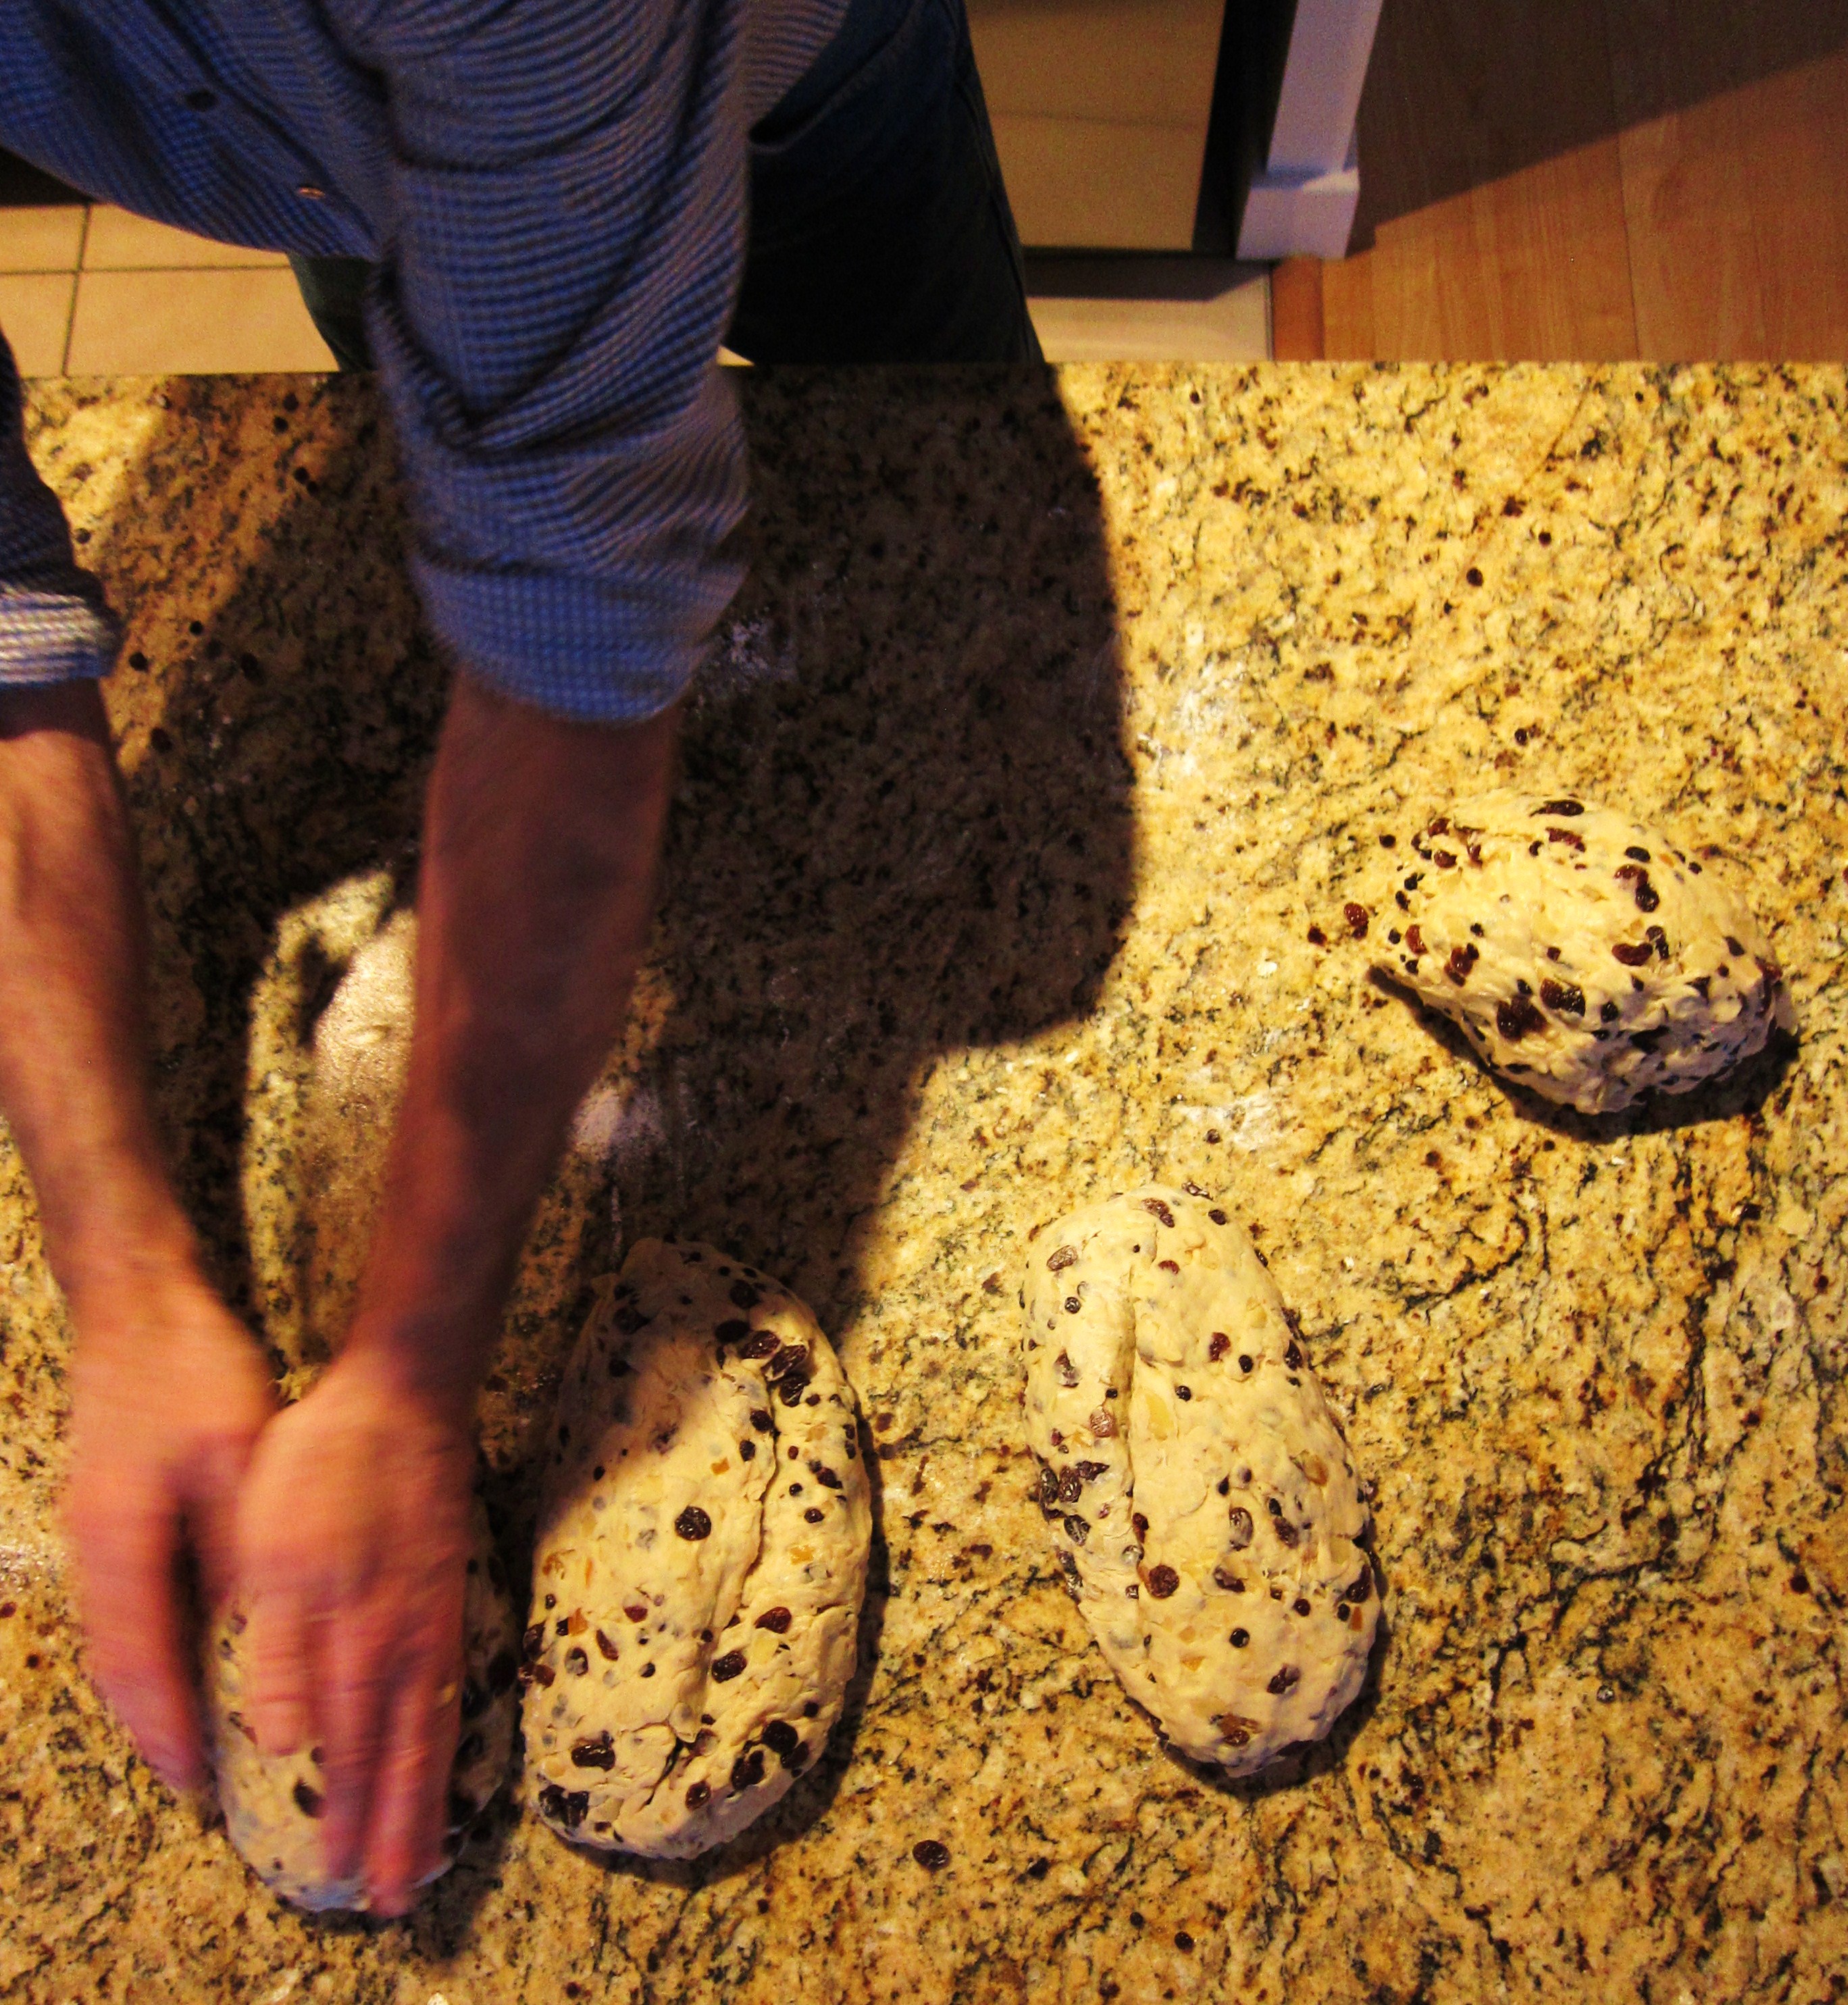
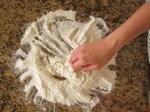
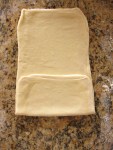
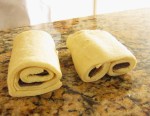
Roll the dough into a long thick cylinder shape and cut into 4-6 pieces. Form into loaves. stollen 15 Transfer to a greased and floured baking tray, cover with a clean dish towel and leave to rise for 20-30 minutes in a warm, draft-free place. Preheat the oven to 350º F and bake for 50 minutes. stollen 17 stollen 18While the stollen is still warm, brush with melted butter and dust with icing sugar. Drizzle a little brandy over-top. Wrap well in muslin cloth or aluminium foil and store in a cool place. stollen 19 stollen 20 stollen 22 Note: Dad likes to douse his stollen every couple of days with brandy to keep it moist (and, let’s be honest, make it more delicious and boozy). Just re-dust the whole loaf with a bit of powdered sugar before serving.

Share this:

  • Tweet
  • Share on Tumblr
Like Loading...

Holiday Eating

27 Friday Dec 2013

Posted by julia chews the fat in Cooking For Your Peeps, Holidays, Sweet Tooth, Vegetarian

≈ 5 Comments

“I’ve decided. I’m having stuffing for breakfast.” – Mom (Boxing Day, 10:34am)

These are the kinds of assertions that make Christmas the beautiful thing that it is. A nip of bourbon in your morning coffee; shortbread cookies for breakfast. It’s unrestricted, backwards-eating at it’s best. Because really, who’s going to say that you can’t? There’s a unspoken understanding that from December 24th to January 6th, it’s the Wild West of eating and imbibing – there are no rules, and each is left to their own devices with the cornucopia of leftovers in the fridge. (And, yes, your head’s always in the fridge, because you’re constantly hungry. Even though you just ate.) For some reason, you also find yourself wanting to drink filtered coffee all day…or at least before you hit the mimosas, cocktails, red wine and hot toddies (usually in that order, but not always).

Christmas cookies are an important part of the no-rules, bacchanal feasting that goes on in our house at this time of year. Highly versatile, they can be eaten as an pre-breakfast “appetite-opener”, a “light” dessert after a holiday meal, or as a post-nap snack. They are glad to be whatever you want them to be, whenever you want them.

Like every year, I began amassing Christmas cookie recipes in mid-November, with the unrealistic hope that I’d be able to make all two dozen of them. Then, by the time December 23rd rolled around, I had widdled the list down to a more reasonable five or six, in addition to the “untouchables” (i.e. the ones firmly cemented in the italo-anglo traditions of my family, and which we do not mess with – anise pizzelle, fennel-seed doughnuts, chocolate chichinotti, shortbread cut-outs and ginger snaps).

This year, I locked down three new favourites, one with molasses, one with chocolate and one dusted with powdered sugar. They are each very different, but all equally addictive. Dunk them in a hot cup of coffee after a long walk in the snow. Or while sipping champagne in the bathtub. Whichever scenario suits you best.

Warmest of holidays to you and yours ♥

ginger-molasses cookies

Smoky Ginger-Molasses Cookies – from Reclaiming Provincial
(makes around 2 dozen cookies)

  • 5 black cardamom pods
  • 1 cup of sugar + 1/2 cup of sugar, divided
  • 3/4 cup of unsalted butter (12 tbsp / 1.5 sticks)
  • 1/4 cup molasses
  • 1 egg
  • 1 cup of bread flour
  • 1 cup of all-purpose flour
  • 2 tsp baking soda
  • 1/2 tsp salt
  • 1 tsp cinnamon
  • 1/2 tsp ginger
  • 1/2 tsp nutmeg
  • 1/2 tsp ground cloves
  • 1/8 tsp black pepper

3 days in advance:
Combine whole cardamom pods and 1/2 cup of sugar in a jar. Cover and let sit.

ginger-molasses cookies

To make the cookies:
Remove cardamom pods from the rolling sugar. Crack open pods, remove seeds and crush them with a mortar and pestle. Set aside.

Melt butter in a saucepan over medium-low heat. Add the cardamom pods and let simmer until the butter begins to foam. Remove from heat and let rest for 15 minutes, then remove pods and discard. Let butter cool to room temperature.

Sift together flour, baking soda, salt, spices, crushed cardamom seeds, and pepper.

In another bowl, cream together butter and the cup of sugar. Beat in molasses, then the egg. Gradually beat in dry ingredients until just combined. Cover and chill in the fridge for at least 2 hours, or up to 2 days.

Preheat the oven to 375°F and line a baking sheet with parchment or a Silpat.

Form heaping tablespoons of batter into balls; roll in the 1/2 cup of infused sugar. Place on a baking sheet two inches apart.

Bake cookies for 8–10 minutes. Let cool on the baking sheet for 2 minutes, then transfer to a cooling rack.

ginger-molasses cookies

—–

Almond Crescents
(makes about 2 dozen)

almond crescents

  • 1/2 lb unsalted butter
  • 3/4 cup powdered sugar
  • 2 egg yolks, well beaten
  • 1 cup ground almonds (blanched)
  • 1 tsp vanilla extract
  • 2 cups flour

Beat the egg yolks at high speed until light in colour.

Cream butter in a bowl; add sugar and beat with electric beaters for 1 minute. Add egg yolks, beating to blend. Add almonds and vanilla, then mix with a wooden spoon. Fold in flour a little at a time with the wooden spoon until just blended.

Refrigerate dough for 30 minutes (and up to 2 days)

Divide dough into 4 potions and roll out each portion on a floured work surface into a log shape. Cut segments (about the length of your index finger)and shape them into crescents.

almond crescents

Preheat the oven to 400°F. Bake on a parchment-lined baking sheet for 7-10 minutes. Allow to cool for a few minutes, then roll in powdered sugar while warm.

almond crescents

—–

Chocolate Crackle Cookies – from Martha Stewart

Chocolate Crackle

(makes about 3 dozen)

  • 8 ounces dark chocolate (such as 70 percent cacao), finely chopped
  • 1 cup blanched almonds, toasted
  • 1/2 cup all-purpose flour
  • 1 teaspoon baking powder
  • 1/2 tsp salt
  • 1 stick unsalted butter, room temperature
  • 1 cup packed light-brown sugar
  • 2 large eggs
  • 1 teaspoon pure vanilla extract
  • 1 cup granulated sugar
  • 1 cup confectioners’ (powdered) sugar

Melt chocolate in a double boiler or a heatproof bowl set over a pan of simmering water, stirring. Let cool. Pulse almonds in a food processor until very finely chopped. Transfer to a medium bowl, and stir in flour, baking powder, and 1/2 teaspoon salt.

Beat butter and brown sugar with a mixer on medium-high speed until fluffy, 2 to 3 minutes. Mix in eggs and vanilla. Mix in chocolate. Reduce speed to low, and mix in almond-flour mixture. Refrigerate dough until firm, about 1 hour (note: the batter will not seem like a regular cookie dough, but more like a cross between cake batter and ganache to make truffles. It’s ok – roll with it. After some time in the fridge, it’ll firm up and you’ll be able to scoop it out).

Preheat oven to 350°F. Form dough into 1-inch balls. Roll in granulated sugar to coat, then in confectioners’ sugar to coat. Arrange on parchment-lined baking sheets, spacing about 1 inch apart. Bake, rotating sheets halfway through, until surfaces crack, about 14 minutes. Transfer sheets to wire racks; let cool.

Chocolate Crackle

Share this:

  • Tweet
  • Share on Tumblr
Like Loading...

Hello, Winter.

01 Sunday Dec 2013

Posted by julia chews the fat in Cooking For Your Peeps, Cooking Solo, Lunch & Dinner, Vegetarian

≈ 2 Comments

Well, this is awkward. The last post I left you with involved a late-autumn frolic through the orchard and some apples. And now there’s somehow a solid layer of snow on the ground.

Hm. Funny how that happens.

If it’s any consolation, you haven’t missed much in the kitchen department – I haven’t been cooking a whole lot these days and even when I have, the results have been nothing to cry home about. And with Taste MTL happening earlier in the month, I was busy stuffing my gob here and here for my work with The Main, plus here because I was told it was fantastic (which it was).

Then health stuff made the last couple of weeks feel icky and prompted a lot of early nights, boiled artichoke dinners and zero computer screens after 7pm. It hasn’t exactly been girl-gone-wild around here.

With that unpleasantness out of the way (and with a bit more time on my hands), I’ve been catching up on winter recipe collecting, fattening up my Pinterest board and bookmarking my Ottolenghi and Bernard Clayton cookbooks, all of which has gotten me really jazzed about cooking through the colder months. There’s also the fact that there are ONLY 24 MORE SLEEPS ‘TIL CHRISTMAS, which means I’ve started to daydream about truffles, caramels, shortbreads, fig tarts, ginger cookies, pannetone, paneforte, torrone, clementines, pomegranates, almonds, chestnuts, lemons, persimmons, cinnamon, rosemary, sage, thyme, bourbon…and all the other usual suspects that I’m keen to share with friends and family and you!

While that stuff is in the works, I’d like to leave you with a recipe I made the other day that hit all the right (wintery) buttons. It’s essentially a caramelized, aromatic eggplant filled with pearly Israeli couscous, tangy yogurt and crunchy almonds. You’ll see that the recipe calls for sumac. If you haven’t already used this in your cooking, I highly encourage you to get your hands on some (barter or beg if you have to). Used mostly in Middle Eastern cuisine, it’s a fine, burgundy-coloured spice that has a lemony kick – good for sprinkling over salads, pilafs, roasted potatoes and grilled meats.

Thanks for checking in. See you here again soon, lovelies.

Spiced Eggplant with Herbed Israeli Couscous – serves 2 as a main, or 4 as a side
(adapted from Souvlaki for the Soul)

Couscous Eggplant

Ingredients

– 2 baby (Italian) eggplants, cut into 1cm slices
– ½ tsp turmeric
– ½ tsp ground coriander
– ½ tsp ground cumin
– ¼ tsp ground cinnamon
– ½ cup cooked Israeli couscous
– a handful of chopped flat-leaf parsley
– a handful chopped coriander (cilantro)
– ¼ cup slivered (or chopped) almonds, skin-on (or not)
– olive oil
– lemon juice
– salt and pepper
– Greek yogurt to serve
– sumac for garnish (optional)

Directions:

Pre-heat the oven to 350° F. Combine the ground turmeric, coriander, cinnamon and cumin in a bowl.

Drizzle the eggplants with some olive oil and and rub each with some of the spice mixture. Cook in the oven till eggplants have softened (approx 30-35 mins).

Combine the cooked couscous, herbs and almonds along with a drizzle of olive oil and a squeeze of lemon juice. Stir to combine.

Spoon the couscous mixture into each eggplant piece, adding a dollop of yogurt and a sprinkle of sumac to each. Serve straight away.

Couscous Eggplant - detail

Share this:

  • Tweet
  • Share on Tumblr
Like Loading...

Orchard tale, apple tart

26 Saturday Oct 2013

Posted by julia chews the fat in Breakfast & Brunch, Cooking For Your Peeps, Food Away From Home, Sweet Tooth, Vegetarian

≈ 4 Comments

It was mid-October when Shane, Margaux and I went apple picking in Oka. We walked through dewy grass, relishing the cool, fresh air that smelled of earth and leaves. Everything was misty and moody and gorgeously still.

1 - raspberry field

view from the belvedere

It being late in the season, and drizzling, meant that we were the only three people in a large, rolling orchard surrounded by flame-coloured trees. We wandered through the rows, plucking apples, some as dark as plums and others as large as grapefruit. From time to time, geese flew overhead in squawking, V-shaped strings.

empire

4 - autumnal orchard

We carried our bounty back to the house to be weighed, where our host served hot cups of carrot-apple soup. Our plans to go for a short hike were overheard. “You can reach the National Park through the orchard, you know.”

6 - lunch break

Grateful for the advice, we followed the long path through the orchard to the point where it met the Park, stepping into a tree-filled landscape dotted with yellow leaves that fell to the forest floor like snowflakes.

7 - Oka National Park

On the edge of the forest came a clearing, leading us to a look-out over the River of Two Mountains. In a miraculous change of weather, the cloudy mist had given way to full sunshine, beaming and hot.

8 - view Lake of Two Mountains

view from the chapel lookout

—–

The only consolation for leaving this enchanting place was the batch of round, red beauties we got to take home with us – four kinds, each with a personality of their own.

10 - freshly picked

While all were delicious, I had a soft spot for the crunchy, plum-coloured Empire, which were used in this tart. I wasn’t sure they would survive the heat of the oven, but they held their shape, fanning out elegantly along the crust and bejewelling the top of the custard with their beautiful, dark skins. It sounds chic, but it’s actually very simple. And a nice way to pay homage to the familiar flavours of apple, vanilla and butter. If you close your eyes, you can almost smell the orchard.

11 - French apple tart

12 - French apple tart detail

French Apple Tart  – makes enough for one large tart + one small

Shortbread pastry – adapted from a Laura Calder recipe

  • 2 ¼ cups flour
  • ½ tsp salt
  • 2 Tbsp sugar
  • 1 cup butter, cut into pieces
  • ‎ ⅓ cup ice-cold water

Put the flour, salt and sugar in the bowl of a food processor; then add the pieces of butter. Pulse until you reach a coarse crumb texture. Keep pulsing while slowly adding the cold water through the feed tube until the dough starts to come together (if you don’t have a food processor, you can also do this with your hands.)

Turn out the dough onto a floured work space and work it gently until it comes together, being careful not to overwork it. Flatten into a disc and refrigerate for about 20 minutes.

Filling – adapted from The Encyclopedia of French Cooking, 1982

  • juice of one lemon
  • 1 ½ lbs crisp apples
  • ⅓ cup milk
  • ⅓ cup heavy cream
  • 2 eggs, beaten
  • ¼ cup sugar
  • 1 tsp vanilla extract (or ½ tsp fresh vanilla, from the pod)

Pour the lemon juice into a large bowl. Cut and core the apples one by one, slicing them thinly (about 1 cm thick) and adding them to the bowl of lemon juice, stirring to prevent discoloration.

Preheat the oven to 450°F.

Remove the dough from the fridge and roll it out on a floured surface into a circle large enough to line the base and sides of a tart pan (preferably with a removable base). Roll the rolling pin over the top to remove the access dough off the sides.

Arrange the apple slices in a tart pan in a circular pattern, working from the edge of the dish inwards, and overlapping the slices slightly. Bake in the preheated oven for 10 minutes.

Meanwhile, put the remaining filling ingredients in a bowl and whisk together.

After the 10 minutes, remove the tart pan from the oven and reduce the oven to 375ºF.  Pour the egg mixture over the apple slices. Return to the oven and continue baking for an additional 30 minutes at 375º F. Serve warm.

13 - French apple tart slice

Verger écologique d’Oka
445 Rang de l’Annonciation
Oka, QC J0N 1E0
(450) 479-6464
www.vergerbrabantvincent.wordpress.com

(Orchard photos by Shane, Margaux and me)

Share this:

  • Tweet
  • Share on Tumblr
Like Loading...

Recipes in absentia – almonds and artichokes

07 Monday Oct 2013

Posted by julia chews the fat in Cooking For Your Peeps, Snacking, Vegetarian

≈ 2 Comments

Those of you who don’t see me in my day-to-day have politely inquired if I’m still alive, if I’ve been suffering from a physical ailment or if I’ve escaped to a cabin in the woods without access to electricity or other humans.

While these are all very inventive deductions, none of them (fortunately?) reflect reality. I didn’t fall into a bottomless pit or knock my head and get amnesia. The truth is much more boring. The truth is, I’ve just been…

busy.

There are times when things hit you full throttle, all at once, and you end up spreading yourself a little too thin. This isn’t necessarily a bad thing (except for the spreading too thin part – that, as it happens, leads to migraines). It just means you have to reassess your free time so that you don’t completely lose your marbles. In my case, that means evenings and week-ends have been gobbled up by a variety of commitments, most of them in the realm of food – some involving menu-planning and cooking, some involving writing and research, and some involving an intersection of both – and all of which (unlike this blog) have been tightly connected to other people’s scheduling, all of it having to be done outside of the hours of my full-time day job. (which itself has a lovely by-product in the form of a 2-hour daily commute.) (bless all you people who do this with children. You are forces of nature.)

In the few sporadic lulls, I haven’t had the juice (nor physical, nor mental) to put down words on this page, opting instead for some catch up of these and these and reading this and listening to this, usually during those 20 gorgeous minutes before bed, or the relentless commute to and from work (I like my job, but that bus+subway+bus commute is a total soul-sucker). In the few quiet moments, I’ve stuck to things I know will be a guaranteed good time and, most importantly, far, far, far, faaaar removed from anything having to do with food.

—–

The first two weeks in October are stacking up to be a bit bonkers too, but I’m taking advantage of this Monday night respite to bring to you two recipes, both of which were made for a cocktail gathering organised by a photographer friend for a low-key shoot. I think you’ll like them – the almonds are smoky, salty and sweet, and partner up well with a pre-dinner drink (beer! bourbon! vermouth!); the artichoke bites come from a recipe I stole from my mom, who stole it from my grandma (thieves, the lot of us…). Mom’s is a much lighter version, as it uses panko instead of traditional breadcrumbs, which tend to get heavy and bit stodgy. I like to serve them warm with a lemon aïoli and some raw veg, like fennel or radish. Both recipes are highly addictive and tend to make a splash at parties – make them for friends and/or anyone you are trying to seduce. You’re bound to make the right impression.

—–

A final note: if I disappear again for a little bit, know that I’m likely still kicking around somewhere – perhaps invisible, but not far – and thinking about the next tasty concoction I’m eager to share with you.

Until next time, be well. Eat well.

spiced almonds

Spiced Almonds – adapted from Laura Calder (makes about 3 cups)

  • 1 cup whole, unsalted almonds (with their skins)
  • 1/2 teaspoon ground cumin
  • 1/2 teaspoon cumin seeds
  • 1 teaspoon hot paprika
  • 2 teaspoons chopped fresh rosemary
  • 2 teaspoons brown sugar
  • 2 teaspoons olive oil
  • fleur de sel (or sea salt)

Directions

Heat the oven to 400°F. Spread the almonds on a baking sheet and toast until darkened and fragrant (about 8 minutes). Remove and spill into a sauté pan, placed on medium heat. Add the cumin, cumin seeds, hot paprika, rosemary, and sugar. Drizzle with the oil and toss over the heat to coat (shaking the pan to coat them evenly works best). Add the fleur de sel and spill onto a baking sheet to cool. Once cooled, serve or store in a jar.

spiced almonds - detail

—–

Breaded Artichoke Bites – makes approx. 30

breaded artichokes - detail

    • 2 cans (about 13oz each) artichoke hearts – in water, not oil
    • 4 eggs, beaten
    • 1/2 cup flour
    • 1 cup panko breadcrumbs
    • 1 clove garlic, minced
    • 1 tsp salt
    • 2 tsp parsley, finely chopped
    • 1/3 cup grated parmesan
    • 1/2 cup sunflower or vegetable oil

(*Note: the flavourings can be adjusted to suit your taste, so feel free to play around with the quantities of garlic, parsley, cheese and salt by tasting the breadcrumb mixture as you go)

Directions

1) Strain artichokes and cut into 3-4 pieces (depending on the size you want); place on paper-towel or dish-towel and set aside.

2) Mix together panko breadcrumbs, garlic, salt, parsley and parmesan.

3) Set up the flour, beaten egg and panko mixture in separate bowls.

breading ingredients

4) Working in batches, place a few artichoke pieces in the flour and, working with two forks, dip into the beaten egg mixture, then the breadcrumbs, tossing lightly to coat.

5) Place finished pieces on a plate while you finish up the others.

6) Place a frying pan on medium-high heat and add the oil to the pan.

7) Once the oil is hot (but not smoking), reduce the heat to medium and fry the artichokes in batches, turning them once the bottoms are barely-golden and cooking them until the coating is evenly golden. Repeat in batches (try not to overcrowd the pan)*.

8) Transfer cooked artichokes to a paper towel-lined tray.

9) Serve warm or refrigerate (2 days max) and reheat on a parchment-lined baking sheet at 350°F for 8-10 minutes, turning once halfway through.

(*Note: if at some point the oil seems to be “dirty” with lots of darkened bits of breadcrumb, discard the hot oil in a tin and start the next few batches with fresh oil).

breaded artichokes

Lemon Aïoli – makes about 1 cup

  • 1 large egg yolk (the best you can afford)
  • 1/2 teaspoon Dijon mustard
  • 3/4 cup olive oil (the best you can afford)
  • lemon zest from 1/2 lemon
  • lemon juice from 1/2 lemon
  • 1/4 tsp salt

Directions

In a small bowl, whisk together the egg yolk and mustard. Whisking constantly, add the oil in a slow, steady stream. The aïoli should be quite thick. Whisk in the lemon juice and salt. Serve chilled, alongside artichoke bites.

—–

Share this:

  • Tweet
  • Share on Tumblr
Like Loading...

Cookies with Nonna

11 Tuesday Jun 2013

Posted by julia chews the fat in Cooking For Your Peeps, Cooking with Nonna, Sweet Tooth

≈ Leave a comment

On a few separate occasions, I’ve asked Nonna to teach me how to make cookies. Not just any cookies. The cookies – the ones from that tattered notebook she keeps tucked away in the top drawer of the china cabinet, next to the silverware and the birthday candles; the book that only comes out at Christmas, baby showers and weddings, when the recipes are tripled and quadrupled to suit the occasion.

It’s the kind of thing that is ubiquitous in the world of grandmas – the mythical recipe book that is beaten, bruised, smeared with grease-marks and filled with barely legible handwriting. The recipes are often a blend of tried-and-true methods and weirdly incongruous instructions. My grandmother’s notebook is no exception: in the recipe for “chichinotti”, tartlet-cookies made with chocolate and almonds, Nonna refers to “Crisco” shortening as “Grisco”, forgets to add the flour to the list of ingredients for the pastry, and does that annoying thing that cooking matriarchs often do, by mentioning “un po” (“a little bit”) as a baking quantity. Is that a pinch? A teaspoon? HOW MUCH IS “A LITTLE BIT”?!?

Oh and there are no assembly or baking directions, so good luck with that.

Despite all this, it’s still a disarming specimen of love and care and ancestry, which more than makes up for its shortcomings. The handwriting alone is a solid heart-melter…

The recipe

The recipe

Early on a Saturday morning, I get a phone call from Nonna, telling me that today is the day. Having only banked 4 hours of sleep prior to her calling, I didn’t exactly jump for joy at the prospect of shaping trayfuls of cookies. But I knew that this was a rare opportunity, so I rolled out of bed, grabbed a coffee, and with eyes at half-mast, hauled myself to the other end of town to her house.

When I got there, she was sitting at the kitchen table with all the ingredients laid out in front of her, ready to be measured and blended. The woman was clearly on a mission. First order of the day: she insisted that we take out her old mixing machine, the “Oster Kitchen Center”, a brutal-looking thing from the early 70s that weighed about as much as a toddler and was enrobed in a slick of greasy dust, thanks to a long hibernation in the kitchen cupboard. And yes, I would have the honour of restoring it to its original state.

In the midst of scrubbing it down with a soapy toothbrush, I began to have questions for Nonna. Are you sure we need to use this? Can’t we just use a whisk? Nonna shook her head. No, we would not be using a whisk. We would be using The Oster. Period.

Right around the time we were almost done cleaning it, I turned to my mom and joked, “Imagine after all this, we plug it in and it doesn’t work?”. Mom glared. “Julia, that isn’t funny.” At that moment, we both realised that testing it before spending so much time and energy cleaning it may have been the more intelligent way of doing things. I sheepishly plugged it in and prayed under my breath before pressing the button. Omigod, please please please – *click*.

Nothing.

No sound, no action.

Our hearts sank for a moment. Nonna shrugged her shoulders. Refusing to accept this state of affairs, I stubbornly disassembled and reassembled it – clicking all the bits into place – then took a deep breath and plugged it back in.

And lord have mercy, the thing came to life. It produced such an astonishing amount of noise and vigor, that we all took a step back. Nonna clapped and the rest of us laughed nervously as the monstrosity that monopolized half our counter space whirred and whizzed, deafening us with each turn of the beaters. It was like watching a robot come to life, or a horse giving birth – terrifying, yet oddly mesmerizing. We were so transfixed, you’d think we’d just discovered electricity.

Oster machine

Oster machine

Yes, my family is a cheap date.

—–

In the end, the machine felt like an integral part of the process, or at least of the experience. That said, you by no means need to use one. A handheld beater or whisk will do just fine (just don’t tell Nonna). The only special equipment you may need to purchase are the tin moulds, which should be available at most kitchen stores.

One last thing – promise me you’ll try one straight out of the oven. Well don’t, like, burn the roof of your mouth or anything….but once it’s had a minute to cool down, go for it. There are very few pleasures in life that will compare.

Chichinotti – makes about 3 dozen

For the filling:
• 14 oz skinless almonds (toasted, then ground)
• 10 egg whites (the yolks will be used later – see below)
• 4 oz cocoa powder
• 12 oz sugar
• 4 pieces of Baker’s bitter-sweet chocolate, finely ground
• finely grated rind of one lemon
• about 2 tsp cinnamon

For the pastry:
• 10 egg yolks
• 7 oz vegetable shortening* (such as Crisco), room temperature
• 10 oz sugar
• 16 oz all-purpose flour
• finely grated rind of one lemon

*shortening is not one of those products that I like to endorse, but to stay true to Nonna’s recipe, I use it here. You’ll probably be able to replace it with butter by tinkering with the quantities a little bit. If you try it, let me know how it works out!

Directions:

Preheat the oven to 350°F

1) Roast the almonds at 350°F for about 10-15 minutes until golden, turning once halfway through. Allow to cool, then grind them finely in a food processor. Set aside.

2) Prepare the filling: combine all the ingredients listed in the “filling” section above (except the ground almonds) in a medium-sized bowl. Use a stand mixer, hand mixer or whisk to combine the ingredients until uniform in colour and texture. Add the ground almonds, mixing with a wooden spoon to combine.

3) Prepare the pastry: combine all the ingredients listed in the “pastry” section (except the flour) in a medium-sized bowl. Begin to mix with a whisk, increasing speed as the mixture starts to come together. Once the mixture is smooth and creamy in colour, begin to slowly add the flour in batches, whisking between each addition. Once it reaches the consistency of a dough, knead it gently into a rough ball.

4) Prepare 2 baking sheets with parchment paper. With your hands, take a small quantity of pastry dough and press it into the mould, making sure that the bottom is completely covered and the sides as well. There are no exact measurements behind this, but you’re going for a medium-thickness – meaning that you don’t want it so thick that it would be un-enjoyable to eat, but not so thin that it burns and hardens. Try to reach a happy medium. Practice is key to getting this part right.

5) Fill each pastry shell with some of the chocolate mixture, nearly filling to the brim. Place filled tins on the prepared baking sheets.

6) Bake at 350°F for about 20 minutes, or until the filling is puffy and the pastry is golden.

7) Allow the tins to cool enough for you to handle; gently pry each cookie from the tins. Dust with powdered sugar once cooled and serve.

This slideshow requires JavaScript.

Share this:

  • Tweet
  • Share on Tumblr
Like Loading...

Learning to grin and bear it

30 Thursday May 2013

Posted by julia chews the fat in Cooking For Your Peeps, Food Away From Home, Sweet Tooth, The Basics, Vegetarian

≈ 11 Comments

“One of the secrets, and pleasures, of cooking is to learn to correct something if it goes awry; and one of the lessons is to grin and bear it if it cannot be fixed.” – Julia Child

A couple of weeks back, I took a short viennoiserie class with the lovely people at La Cuisine Paris, where pastry chef Guillemette guided half a dozen of us through the different techniques and steps required to make croissants, amandines and chocolatines. It was a bit of a surreal experience (pastry class, in Paris, in the springtime – pinch me), and despite not really being in my element, I ploughed away and left the class with a palpable sense of accomplishment. However minimal that accomplishment may actually be in grand scheme of things…still…I MADE CROISSANT. High five.

Arriving back in Montreal, I knew that if the information was left to hang out in the dusty recesses of my brain, I was sure to forget the details and subtleties that Guillemette had imparted to us. Not wanting to waste the potential of the experience, I stocked up on supplies and found the first available weekend to make a go of it. To my surprise, I also had volunteers willing to roll up their sleeves and do it with me – which was perfect, because not only would I have additional man-power, but I’d also have (other) inexperienced people to blame if it all went to hell.

Just kidding ♥

—–

The start was promising – I had my yeast from the baker, my electronic scale, my mise en place. The whole set-up was disturbingly perfect. Even the starter dough, the thing I was most worried about, seemed to look and feel like it should when I tucked it into the fridge to rest overnight. I began to feel a little like Maria in that scene from the Sound of Music.

But soon, I was brought back to the reality of my amateurism. And things got ugly. Fast.

On the second turn (folding) of my puff pastry dough, the underside was showing signs of tearing. At first, it was just one tear, which I quickly (sloppily) patched up. But then the more I rolled, the more the dough started to look like it was suffering from third degree burns. The butter began to ooze out from air pockets that had formed during rolling, resulting in a pot-marked dough that looked nothing like the one I had made in class. Family was in the room, so I restrained from swearing aloud, but in my head there was a foul-mouthed sailor blaspheming on repeat.

Distracted by my ugly, ugly dough, I forgot to add a slick of egg wash to the first batch of croissants, which may explain why they turned out more like overcooked dinner rolls. My guinea pigs taste-testers assured me they were good, but I’m pretty sure I heard someone compare them to the kind that come in the blue tube – you know, the one with that freakishly upbeat, miniature weirdo made of dough. With that as the barometer, I can’t say the croissants came close to the real deal. But while you wouldn’t pay good money for them, you’d probably eat them if they were hanging out on your aunt’s brunch table…and you were bored.

Then came the amandines, which looked promising before going into the oven, but then for some reason, decided to get their freak on: as they baked, the almond paste flowed liberally off the pastry, causing these pretty little “baskets” and “pinwheels” to morph into nondescript blobs, some of them binding together and making Siamese twins (I blame this not on the recipe, but rather my decision to make the almond flour from scratch. Bad move…).

The saving grace in this whole process were the chocolatines. They (miraculously) turned out flaky and delicious and even looked normal. Not perfect, not the best…but good. The taste-testers even took seconds, which is usually a good sign. Right at the moment when my faith in this experiment was sinking, the chocolatines bolstered my confidence and gave me hope that it is possible to make good croissant at home.

Phew.


—–

I suppose the bigger lesson in all this is that sometimes our expectations in the kitchen are shot down; sometimes the bread hasn’t risen or the cake has stuck to the tin or, in the words of Ms.Child, “the cat has fallen into the stew”. C’est la vie, mes amis. What would be more tragic is if these kinds of experiences turned us off from ever trying these things in the first place…

…ultimately causing us to miss out on moments like these:

Because, let’s be honest – an afternoon in the company of apron-clad men is time well spent.

On that note, I whole-heartedly encourage you to try making your own croissant. Here are a few things I learned (the hard way) and that you might want to keep in mind:

1) Give yourself plenty of time. No matter what recipe you end up using, all of them will require you to rest the starter dough (minimum 6 hours for mine) and the rolled dough between “turns” (folds).

2) If the dough seems warm or sticky or springs back a lot when rolling, put it back in the fridge. Along the lines of the point above, you’re better to err on the side of caution and rest your dough, even if it’s for a longer period of time than the recipe suggests.

3) When rolling the dough, be firm but gentle. The final result you’re aiming for is a light, flaky croissant that has several airy layers. It won’t reach it’s potential if you start getting rough with it – you’ll end up tearing the dough and making holes in the layers. NO BUENO.

4) Chill out. You are not a pastry chef, nor trying to be one. If things start to look scary, step away for a minute and take a deep breath. The Earth will not stop turning if your croissants aren’t perfect. Even if they’re inedible, you get a gajillion food-nerd points just for trying.

—-

One last thing: Guillemette has kindly allowed me to share her almond cream recipe with you (merci Guillemette!). It’s traditionally used as a filling for almond croissant (amandines), but it’s also wicked in coffee cake and probably most places you would normally use marzipan.

Almond Cream (makes about 2 cups) – from La Cuisine Paris

  • 55g sugar
  • 55g softened butter
  • 1 egg (also about 55g)
  • 55g almond flour
  • 15 g all-purpose flour
  • almond extract or rhum (to taste)

Combine butter and sugar in mixing bowl and mixwith a wooden spoon until creamy. Add egg and mix until completely combined. Add the almond flour and all-purpose flour and mix well. Add flavoring and stir to combine. Cover and place in fridge 10-15 minutes before adding to amandines (can be kept in the fridge for up to 4 days or frozen and defrosted in the fridge).

Share this:

  • Tweet
  • Share on Tumblr
Like Loading...

Short-shorts, BBQs and kefta

05 Sunday May 2013

Posted by julia chews the fat in Cooking For Your Peeps, Lunch & Dinner

≈ 2 Comments

Five days into May and we’ve already been graced with a solid string of beautiful, hot, sunny days. I can barely remember how much of a long slog this past winter was. Now that everything’s in bloom and people have begun crawling out from their apartments, a major shift is underway in the city. Short-shorts have returned. So have post-work picnics, balcony beers and frequent visits to the ice-cream man. In the late afternoon, plumes of smoke begin billowing off of back porches and the the air takes on the deep perfume of charcoal. By 7pm, the whole city starts to smell like a Portuguese grill house.

And you know what that means.

BBQ

IS

BACK.

To celebrate the return of outdoor grilling and backyard socialising, I’d like to share the a recipe that I discovered a few weeks back, and that I suspect will be on heavy rotation during BBQ season. It’s a version of kefta where the lamb is spiced with a mixture of cumin, sumac and thyme, and studded with bright green pistachio nuts. There’s a really nice, tangy fast-pickled onion that you lay on top, along with some fresh mint and Greek yogurt, the whole thing is craddled in a warmed flatbread. It’s one of my new favourite things, especially when it’s accompanied by a cold beer.

While I don’t actually have a barbecue (details, details), I’ve made them in a cast-iron pan on the stove-top and they were delicious. If you happen to be one of those lucky bastards with a BBQ, I’m begging you to make good use of it and grill these suckers, kebab-style, on your beautiful, smoky, hunk of machinery.

No matter what heat source you’re using to make them, the important thing is to make sure your cooking surface is nicely preheated, so be patient in that regard. Also, I think these are best pink (medium) on the inside; some people will prefer them medium-rare. This should be fine as long as you’re using good quality meat and you know your butcher. Whatever you do, please please please don’t overcook them. They will get hard and weird and gross and then you’ll blame me for the crummy recipe, and then I’ll be like, “No! You cooked them too long!” and it’ll be awful because we’ll both know that I’m right.

Enjoy, friendlies. x

Grilled lamb kefta with pistachios and pickled red onion (adapted from Jamie Oliver) – serves 3-4

Kefta

  • 250g good-quality minced lamb
  • 1 Tbsp fresh thyme leaves
  • ½ Tbsp ground chilli
  • ½ Tbsp ground cumin
  • 1 Tbsp sumac
  • sea salt
  • freshly ground black pepper
  • ½ cup shelled pistachio nuts
  • ½ cucumber, sliced
  • a handful of fresh mint, leaves picked
  • a handful of flat-leaf parsley, leaves picked
  • ½ red onion, peeled and very finely sliced
  • ½ lemon (or 2 Tbsp red wine vinegar)
  • 4 large flatbreads or tortilla wraps
  • about 4 Tbsp natural yogurt

Directions

In a food processor, combine the thyme, chilli, cumin and sumac, a little salt and pepper and all the pistachios. Put the lid on and pulse until the mixture the pistachios are broken up into small pieces (but NOT ground). Add the lamb and pulse a few times until everything is combined (you may need to move the mixture around a little between each set of pulses to make sure everything mixes well).

Divide the meat into small patties (if cooking stove-top), or (if using a BBQ) separate into pieces that you will wrap and shape onto 4 metal skewers. Press little indents in the meat with your fingers as you go – the end result will have better texture.

In a small bowl, combine the sliced onion with a good pinch of salt and pepper and a squeeze of lemon juice (or a bit of red wine vinegar). Scrunch the onion in its “marinade” with your hands. Set aside.

Grill the patties (or kebabs) until nicely golden brown on all sides. When the meat is almost done, warm your flatbreads for 30 seconds on your griddle pan or under the grill, then divide between plates and top each with the and onion. When your patties (or kebabs) are cooked, slip them onto the flatbreads.

Add a few dollops of yogurt on the lamb and top with the cucumber slices, mint and parsley before rolling up and serving*.

(*in the original recipe, Jamie Oliver dresses some salad greens with some olive oil and lemon and adds it to the wrap in lieu of the cucumber. I pretty much just used what turned up in the fridge, but the addition of mixed salad would be really lovely too.)

Kefta detail

Share this:

  • Tweet
  • Share on Tumblr
Like Loading...

Breakfast for the Unstoppable Woman

28 Thursday Mar 2013

Posted by julia chews the fat in Breakfast & Brunch, Cooking For Your Peeps, Lunch & Dinner, The Basics

≈ 4 Comments

Nonna turned 90 this month. Which means, amongst other things, that she has witnessed the world transform itself over a span of 9 decades. NINE! How do you celebrate the birthday of someone who has been around for the rise and fall of 42 Italian Prime-ministers, the inauguration of 8 popes, 1 World War and the birth of their first great-grandchild?

Well, it seems only right to give her exactly what she asks for. “Brakfaste. Con il pannecake.”

She uses the word thoughtfully and with intention. While there is a term for “breakfast” in Italian (prima colazione), the two are hardly interchangeable. Traditional colazione in Italy usually consists of nothing more than a dry biscuit and a caffè latte, if that. When I stayed with a second-cousin in Florence a few years ago, she took great care to stock the pantry with what she thought would cater to my North American sensibilities – sugary cereal, pre-packaged “croissants” and individually-wrapped crostate – each specimen coated with the faint aroma of factory plastic. At some point in our co-habitation, she came to understand that I’d much rather have the traditional “S” biscuit and coffee than ready-to-eat factory pastries. (There’s a handful of processed foods that have a special place in my heart – probably quite literally – but this stuff? No grazie.) I imagine that most contemporary Italian families have things like yogurt and toast in the morning. But for the older batch, breakfast still isn’t emphasized as a meal. Not even on weekends.

Here, however, we’ll get together on occasion for a familial Canadian-style breakfast, with scrambled eggs and pancakes and bacon and filtered coffee. And despite it not being something my grandmother grew up with, she has come to fully embrace its merits, amongst them, baked beans – ones made Québec-style, with brown sugar, a healthy dose of molasses and a few sizeable chunks of lardon. Sure, it’s not a skinny dish. But it’s not like you’re eating it everyday. It’s for special occasions, hearty gatherings…like 90th birthday parties.

—–

The recipe below has been swiped from my mom’s collection. It’s based on the traditional fèves au lard (a.k.a “bines“) that you can find on most breakfast menus in Québec. It may not be the most delicate-looking, but it is a thing of beauty, I assure you. Through the beans simmer quite a long time, they are still toothsome; the sauce is pleasantly sticky, sweet and tangy. Everything a good baked bean should be.

Baked beans

Mom’s Baked Beans (Fèves au lard)

Serves 8-10 as a side

*Note: give yourself several hours for these – they are not hard to make, but it takes time to make good ones (see details below)

  • 1 pound dried navy beans, soaked overnight
  • 5 cups cold water
  • 1/2 pound salted pork belly cut into 1″ pieces
  • 1 onion, chopped
  • 2 tsp cider vinegar
  • 1/2 cup ketchup
  • 1/2 cup dark molasses
  • 1/4 cup brown sugar
  • 1 tsp dry mustard
  • 1 tsp salt

Cover the beans in cold water and soak the beans overnight. The next morning, strain and rinse the beans. Add the beans to a pot with 5 cups of fresh cold water. Boil for 30 minutes. Do not add salt to the water as this hinders the cooking process. Transfer the beans and water to an ovenproof casserole. Stir in the remaining ingredients. Cover and bake in a 250ºF oven for 7-8 hours.

Share this:

  • Tweet
  • Share on Tumblr
Like Loading...
← Older posts
Newer posts →

Facebook

Facebook

Instagram

No Instagram images were found.

Recent Posts

  • Layers and Rows
  • Finding Buoyancy
  • February
  • Wednesday
  • Cross My Heart, Miso

Archives

  • May 2017
  • April 2017
  • February 2017
  • December 2016
  • November 2016
  • September 2016
  • August 2016
  • July 2016
  • June 2016
  • May 2016
  • April 2016
  • March 2016
  • February 2016
  • January 2016
  • December 2015
  • November 2015
  • October 2015
  • September 2015
  • August 2015
  • July 2015
  • June 2015
  • May 2015
  • April 2015
  • March 2015
  • February 2015
  • January 2015
  • December 2014
  • November 2014
  • October 2014
  • September 2014
  • August 2014
  • July 2014
  • June 2014
  • May 2014
  • April 2014
  • March 2014
  • February 2014
  • January 2014
  • December 2013
  • October 2013
  • September 2013
  • August 2013
  • July 2013
  • June 2013
  • May 2013
  • April 2013
  • March 2013
  • February 2013
  • January 2013
  • December 2012
  • November 2012
  • October 2012
  • September 2012
  • August 2012
  • July 2012
  • June 2012
  • May 2012
  • April 2012
  • March 2012
  • February 2012

Categories

  • Beverage
  • Breakfast & Brunch
  • Condiments
  • Cooking For Your Peeps
  • Cooking Solo
  • Cooking with Nonna
  • Food Away From Home
  • Food Writing
  • Holidays
  • Intro
  • Lunch & Dinner
  • Snacking
  • Soups
  • Sweet Tooth
  • The Basics
  • Vegetarian

Enter your email address to follow this blog and receive notifications of new posts by email.

Join 82 other subscribers

Blog at WordPress.com.

  • Subscribe Subscribed
    • julia chews the fat
    • Join 82 other subscribers
    • Already have a WordPress.com account? Log in now.
    • julia chews the fat
    • Subscribe Subscribed
    • Sign up
    • Log in
    • Report this content
    • View site in Reader
    • Manage subscriptions
    • Collapse this bar
 

Loading Comments...
 

    %d