• Home
  • About

julia chews the fat

julia chews the fat

Category Archives: Breakfast & Brunch

Overnight Oatmeal for Late (and Early) Risers

21 Monday Jul 2014

Posted by julia chews the fat in Breakfast & Brunch, Food Away From Home, The Basics, Vegetarian

≈ 5 Comments

Can you see that, dear readers? That cool, steely blue daylight stretching out onto the tablecloth above? That means it’s 6am on a weekday. 6am on a weekday, and I’m up. That’s a WHOLE HOUR AND A QUARTER EARLIER than my alarm.

It’s is a Monday-morning miracle.

When you’re not in the habit of being up this early, there’s this overwhelming sense that you’re the only person on the Earth who’s awake. You’re not quite used to the quiet because living in the city means you’ve become acclimatised to a morning soundtrack of cars honking, people yelling, toddlers crying and two-ton delivery trucks rumbling perilously down potholed streets. Admittedly, it’s a soundtrack that mimics the chaos of my morning routine. I fiddle with the snooze button far too much; I tumble over power cords on my way to the shower and almost systematically end up putting on one item of clothing inside out (yesterday it was a shirt, maybe tomorrow it’ll be underwear! Only Lady Fortuna knows!).

But early mornings like this one are different. I walked slowly to the kitchen. Casually, even. Right now, the only thing within earshot is the muffled sound of coffee brewing in the percolator, punctuated not by the shrill screech of a construction drill, but by the bright chirps of sparrows perched outside. It’s like a scene out of an old Folgers commercial. And it turns out I could live inside a Folgers commercial forever.

Sitting here, sipping coffee between bites of oatmeal, I decide I’ve got a little time to do some computer clean-up. I soon come across a folder of photos marked “Ireland/Berlin 2013” and it dawns on me that one year ago, almost exactly to the day, I was on a plane heading to Ireland for my brother’s wedding. I can hardly believe that it was a whole year ago. The details of those memories are still so vivid.

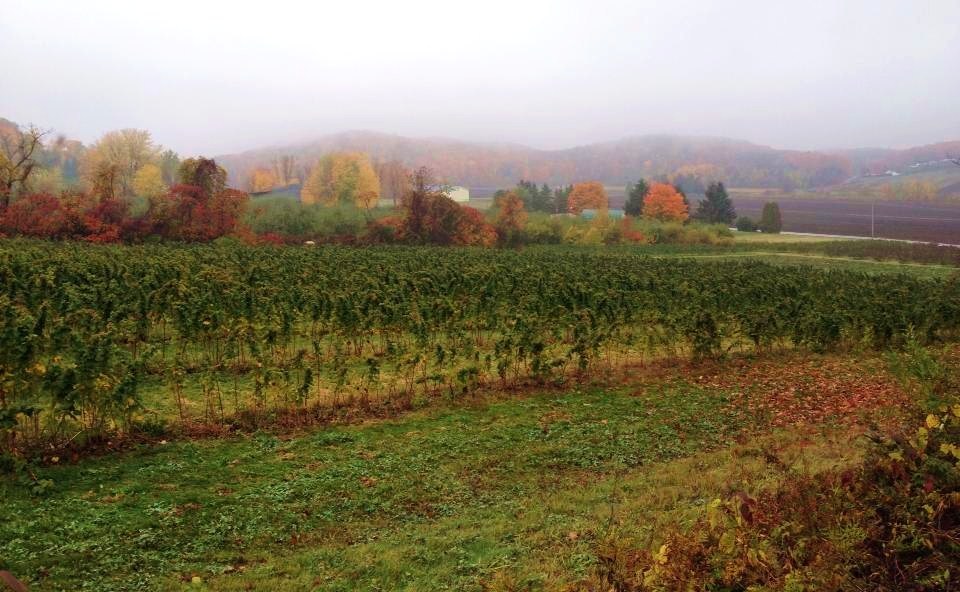
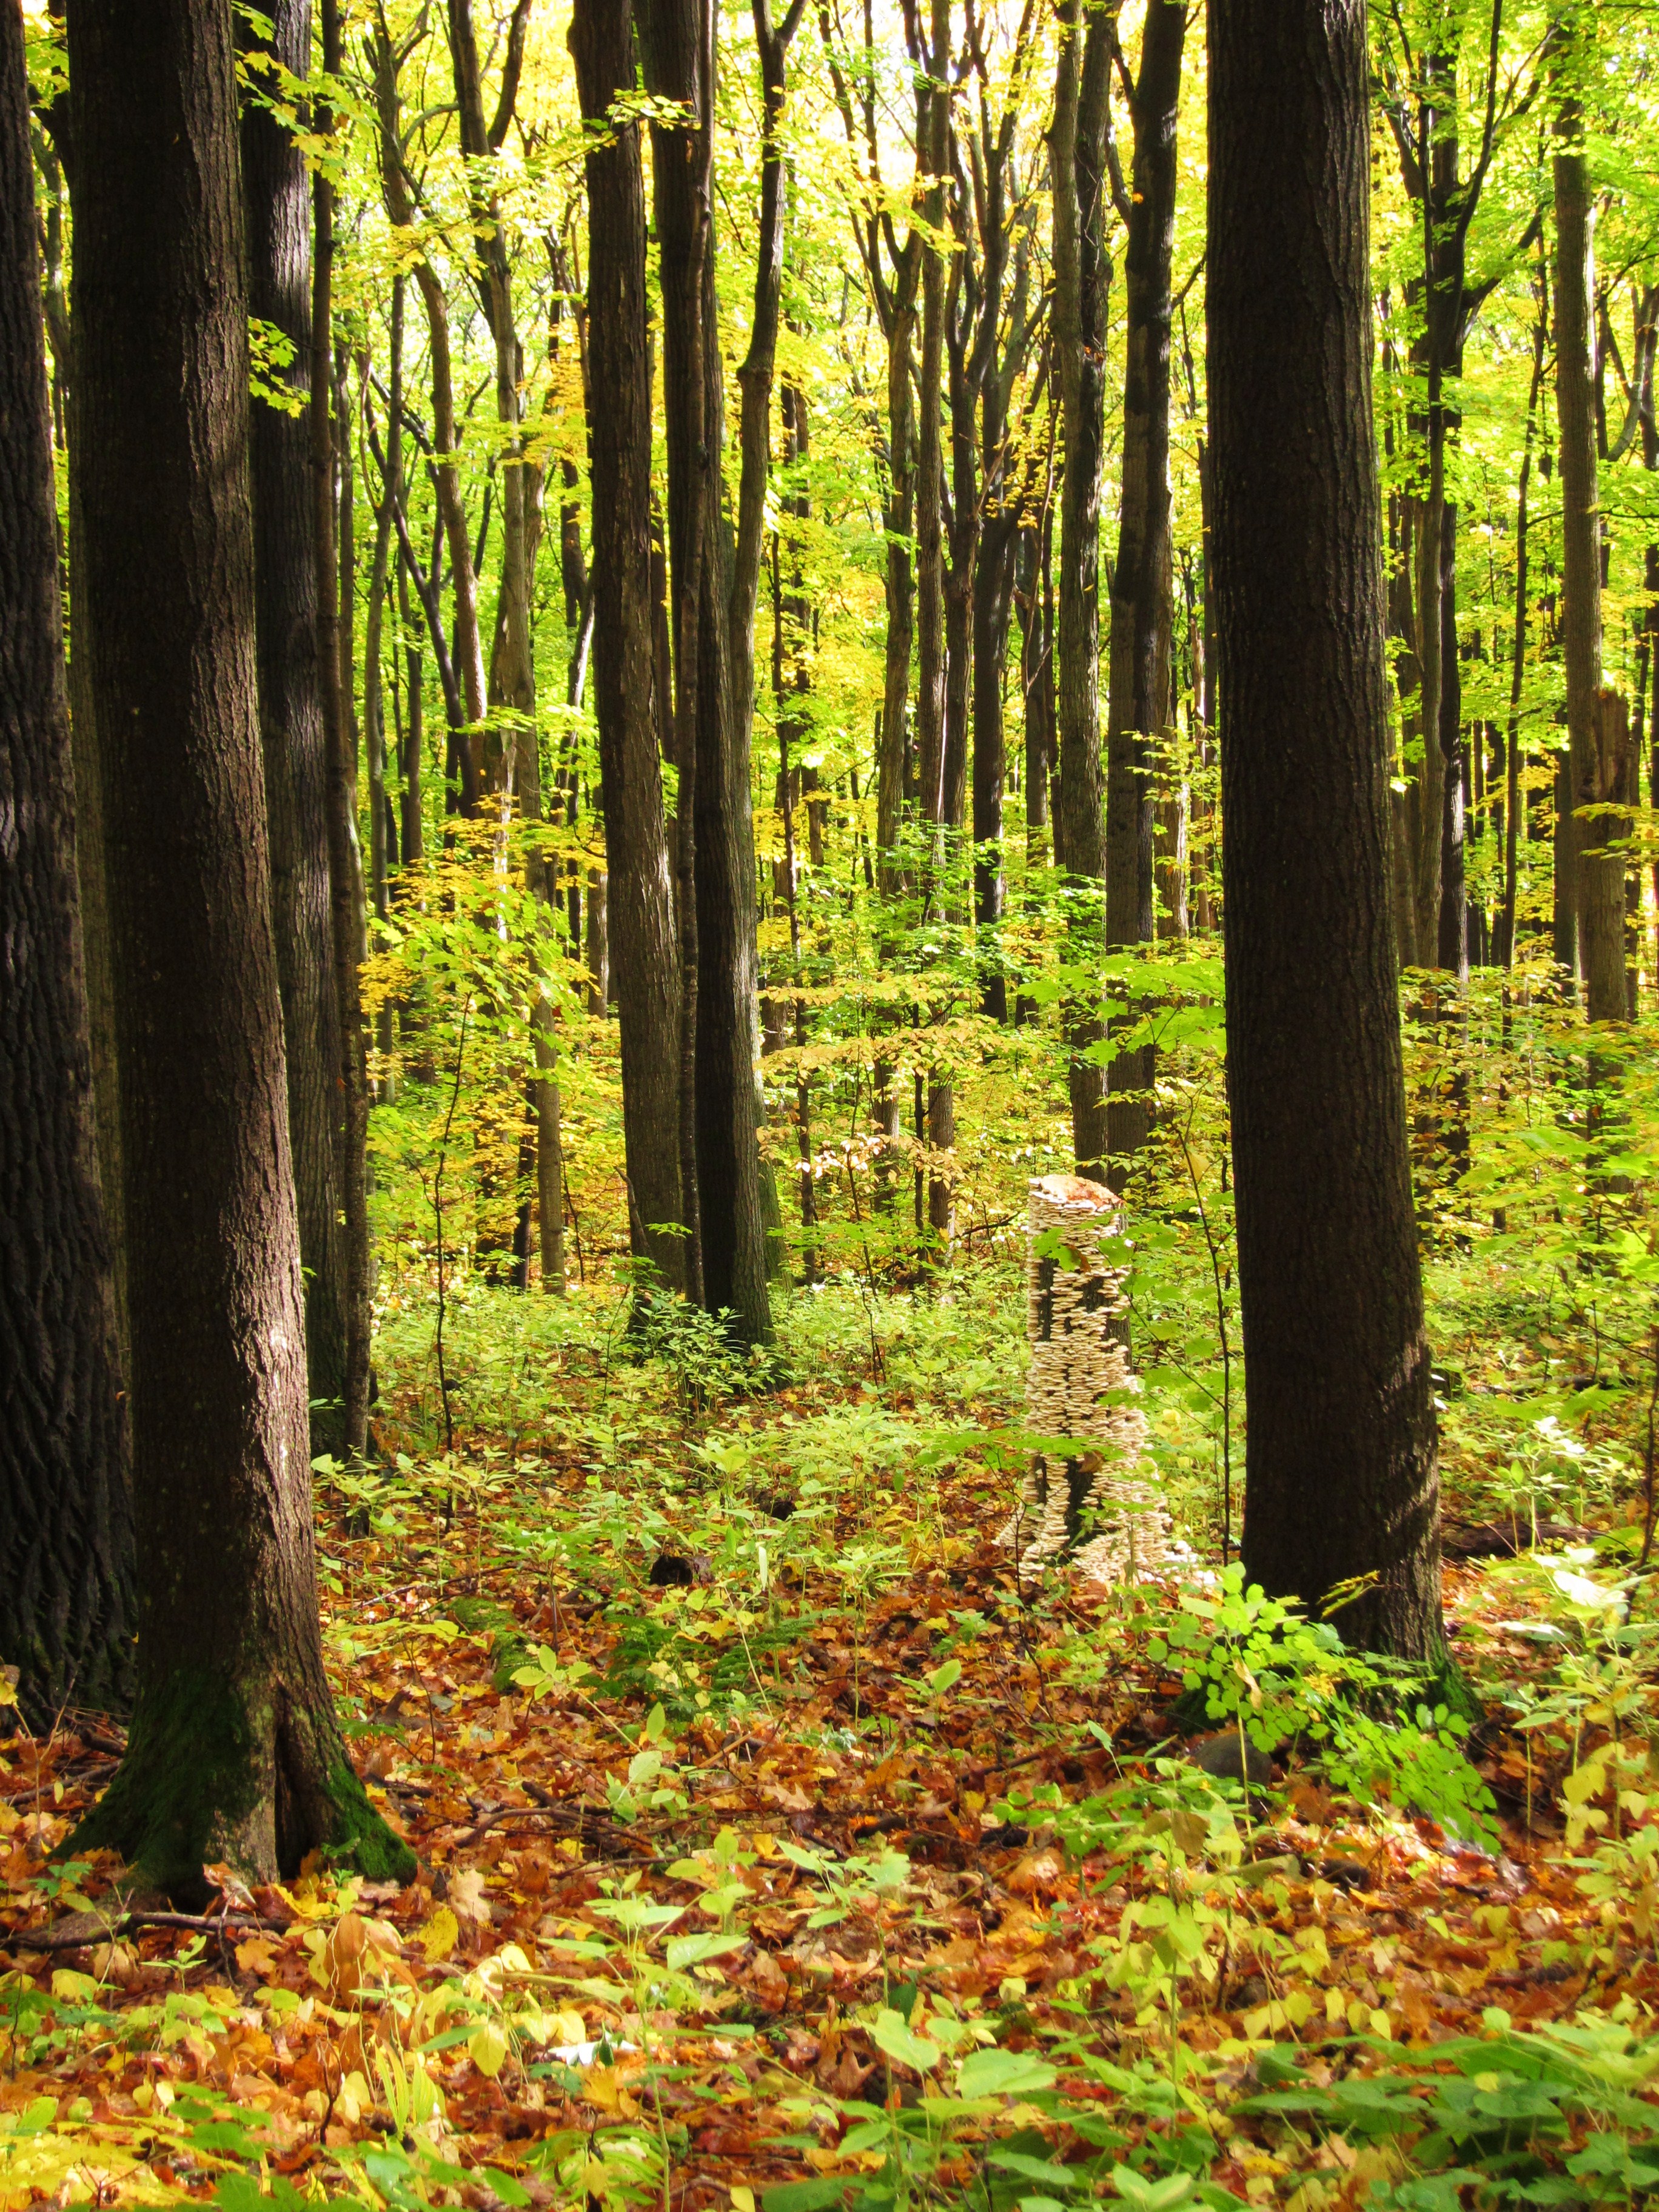
In the days leading up to the wedding, we stayed on a 17th-century estate owned by the bride’s family – an astonishingly beautiful and meticulously preserved cluster of buildings with guest houses that looked out onto a floral courtyard and green acreage, all of it surrounded by a hand-built stone wall and dense forest. You’d wake up to the sound of starlings and water trickling down the courtyard’s fountain. Afternoons were spent navigating the twisting paths of the forest. Wild deer would come out to graze at dusk. Over dinner, the bride’s uncle would regale us with the estate’s ghost stories and we’d all head to our beds with goosebumps, secretly hoping we’d have our own otherworldly encounter to share at the breakfast table the next morning.

The wedding itself was so fairytale-like, it would put any Martha Stewart magazine to shame. There was a heartfelt ceremony under a big willowy tree; bouquets made with wild flowers from the fields; Celtic dancing and a Viennese waltz; late-night fireworks in the yard and (because my sister-in-law is from Hamburg) elegant, well-dressed Germans everywhere.

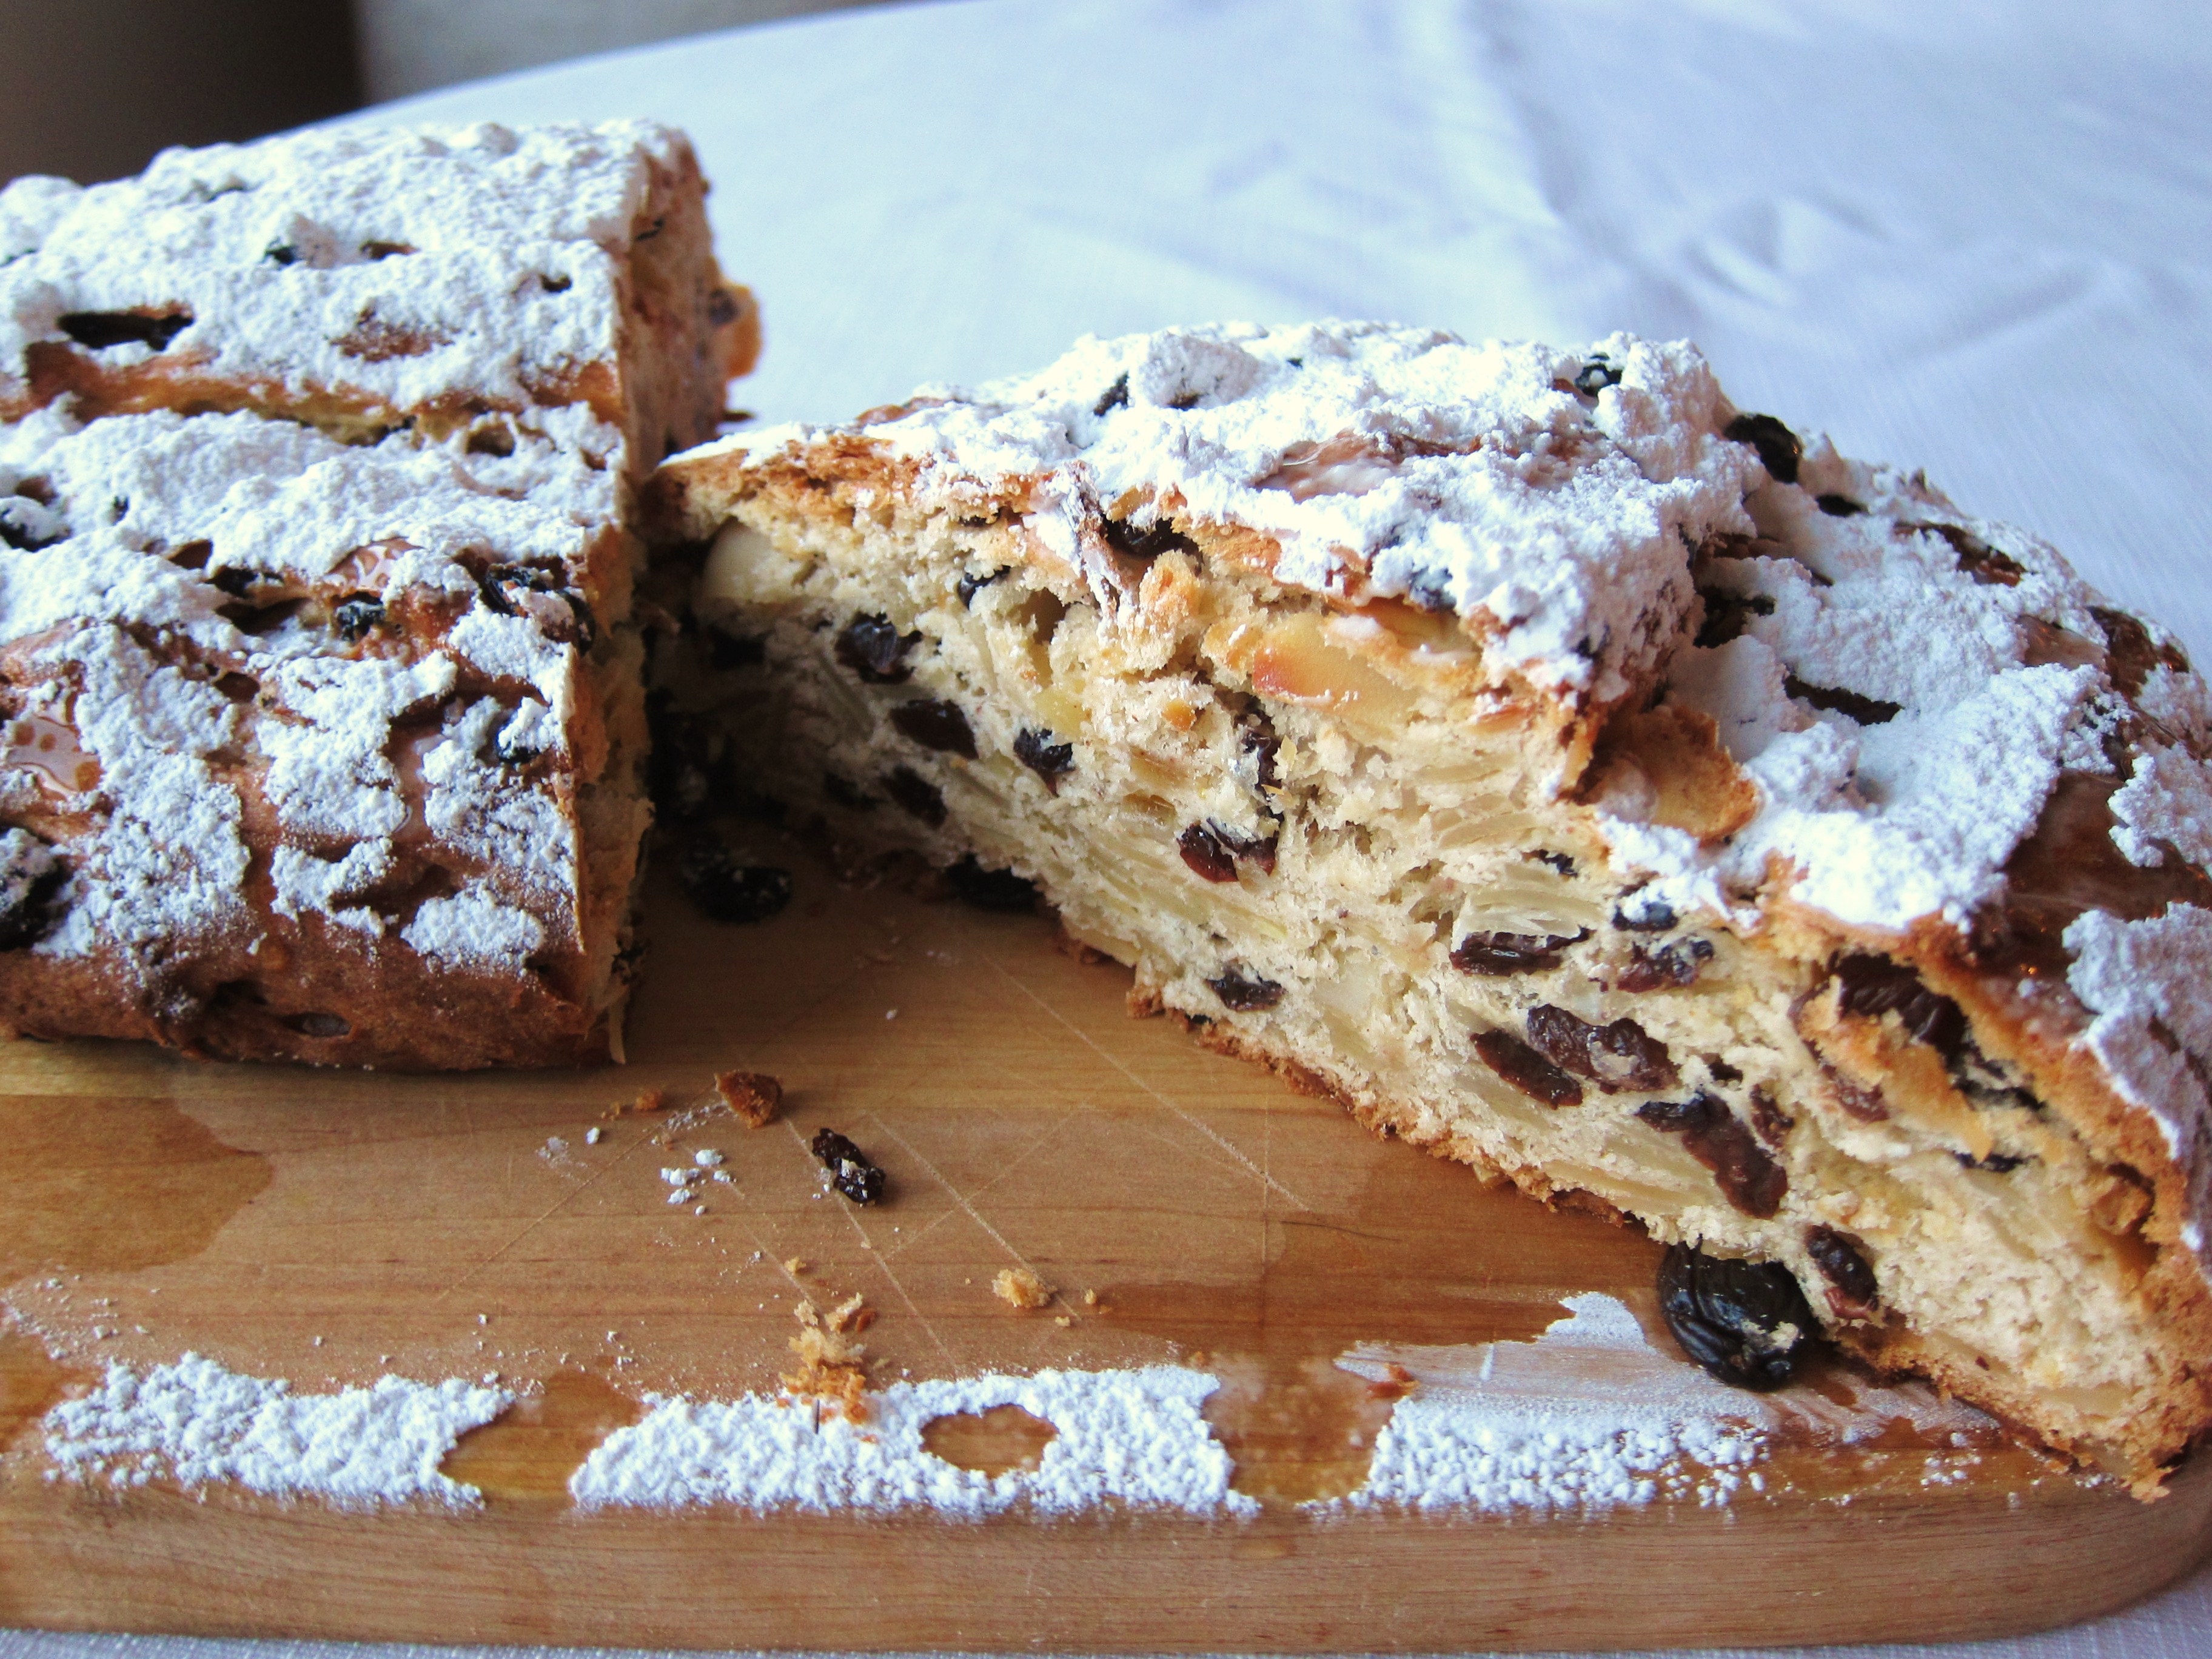
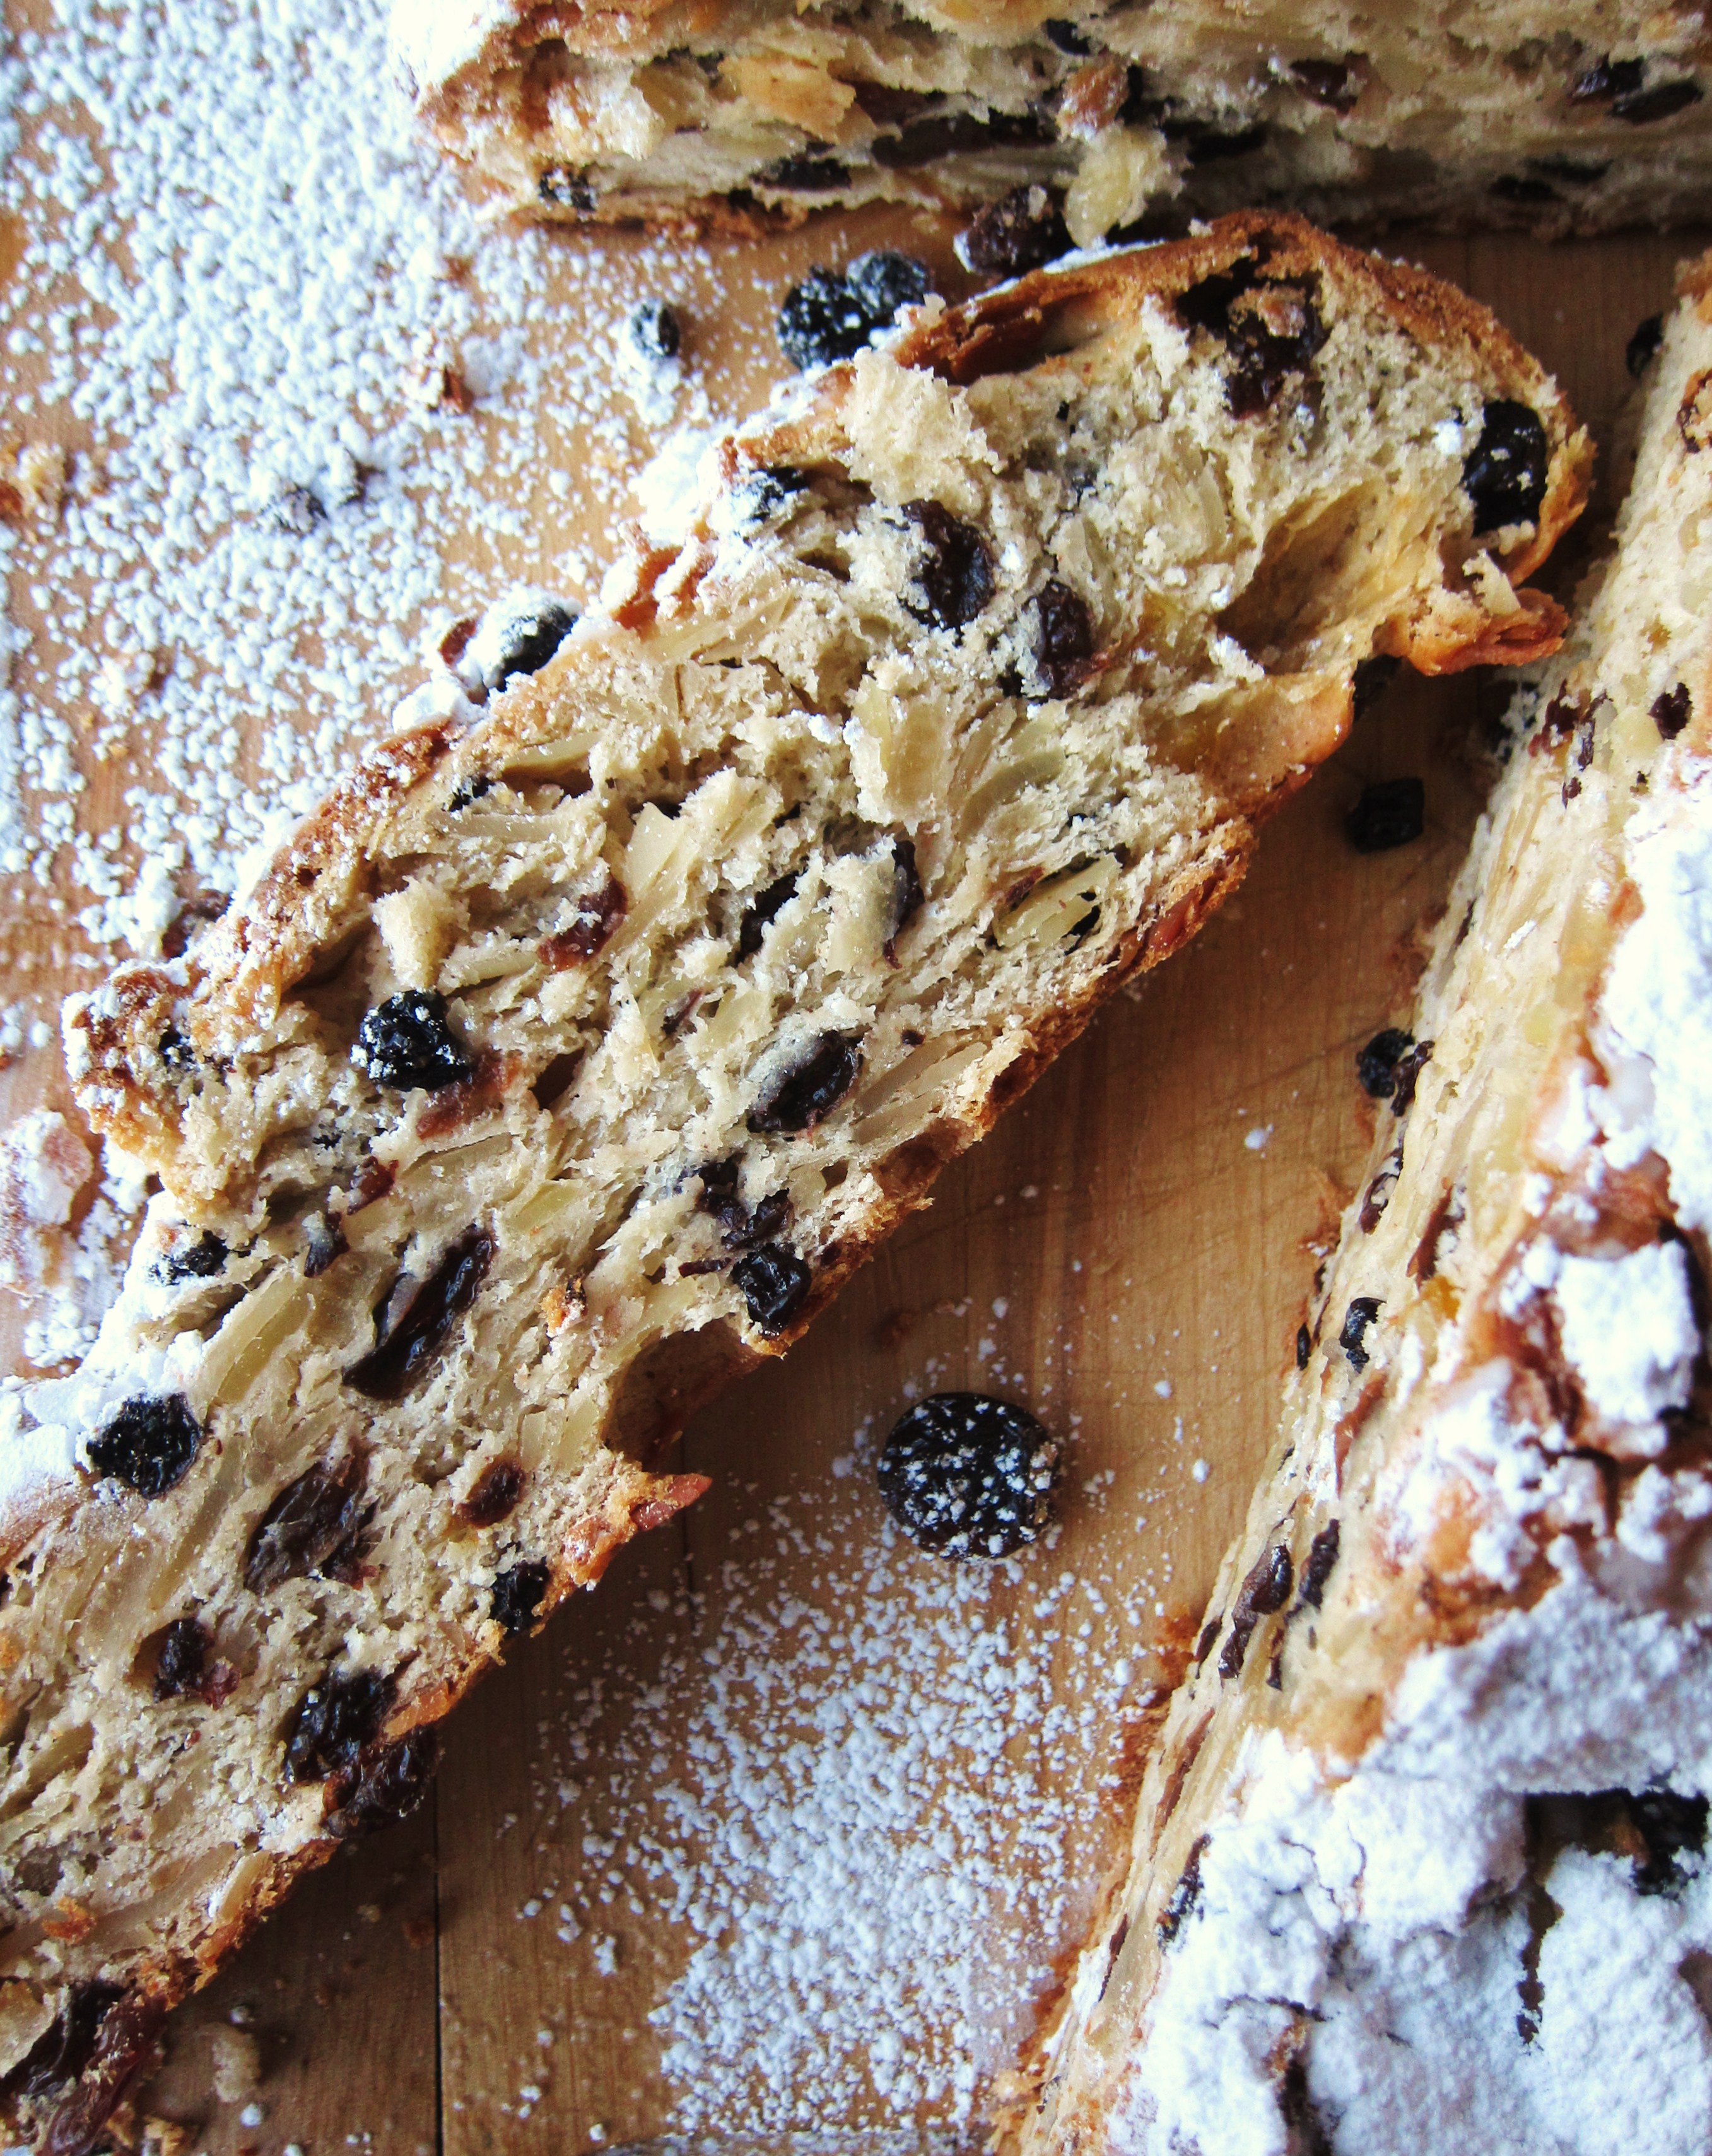
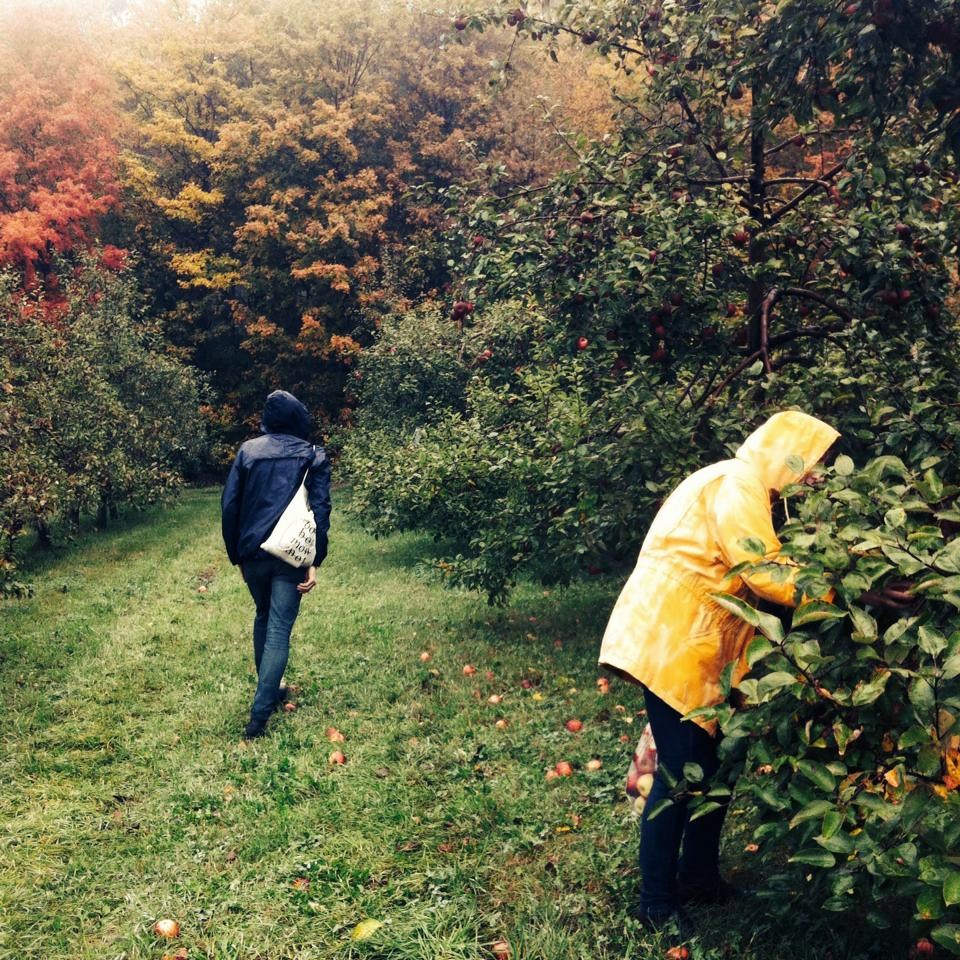
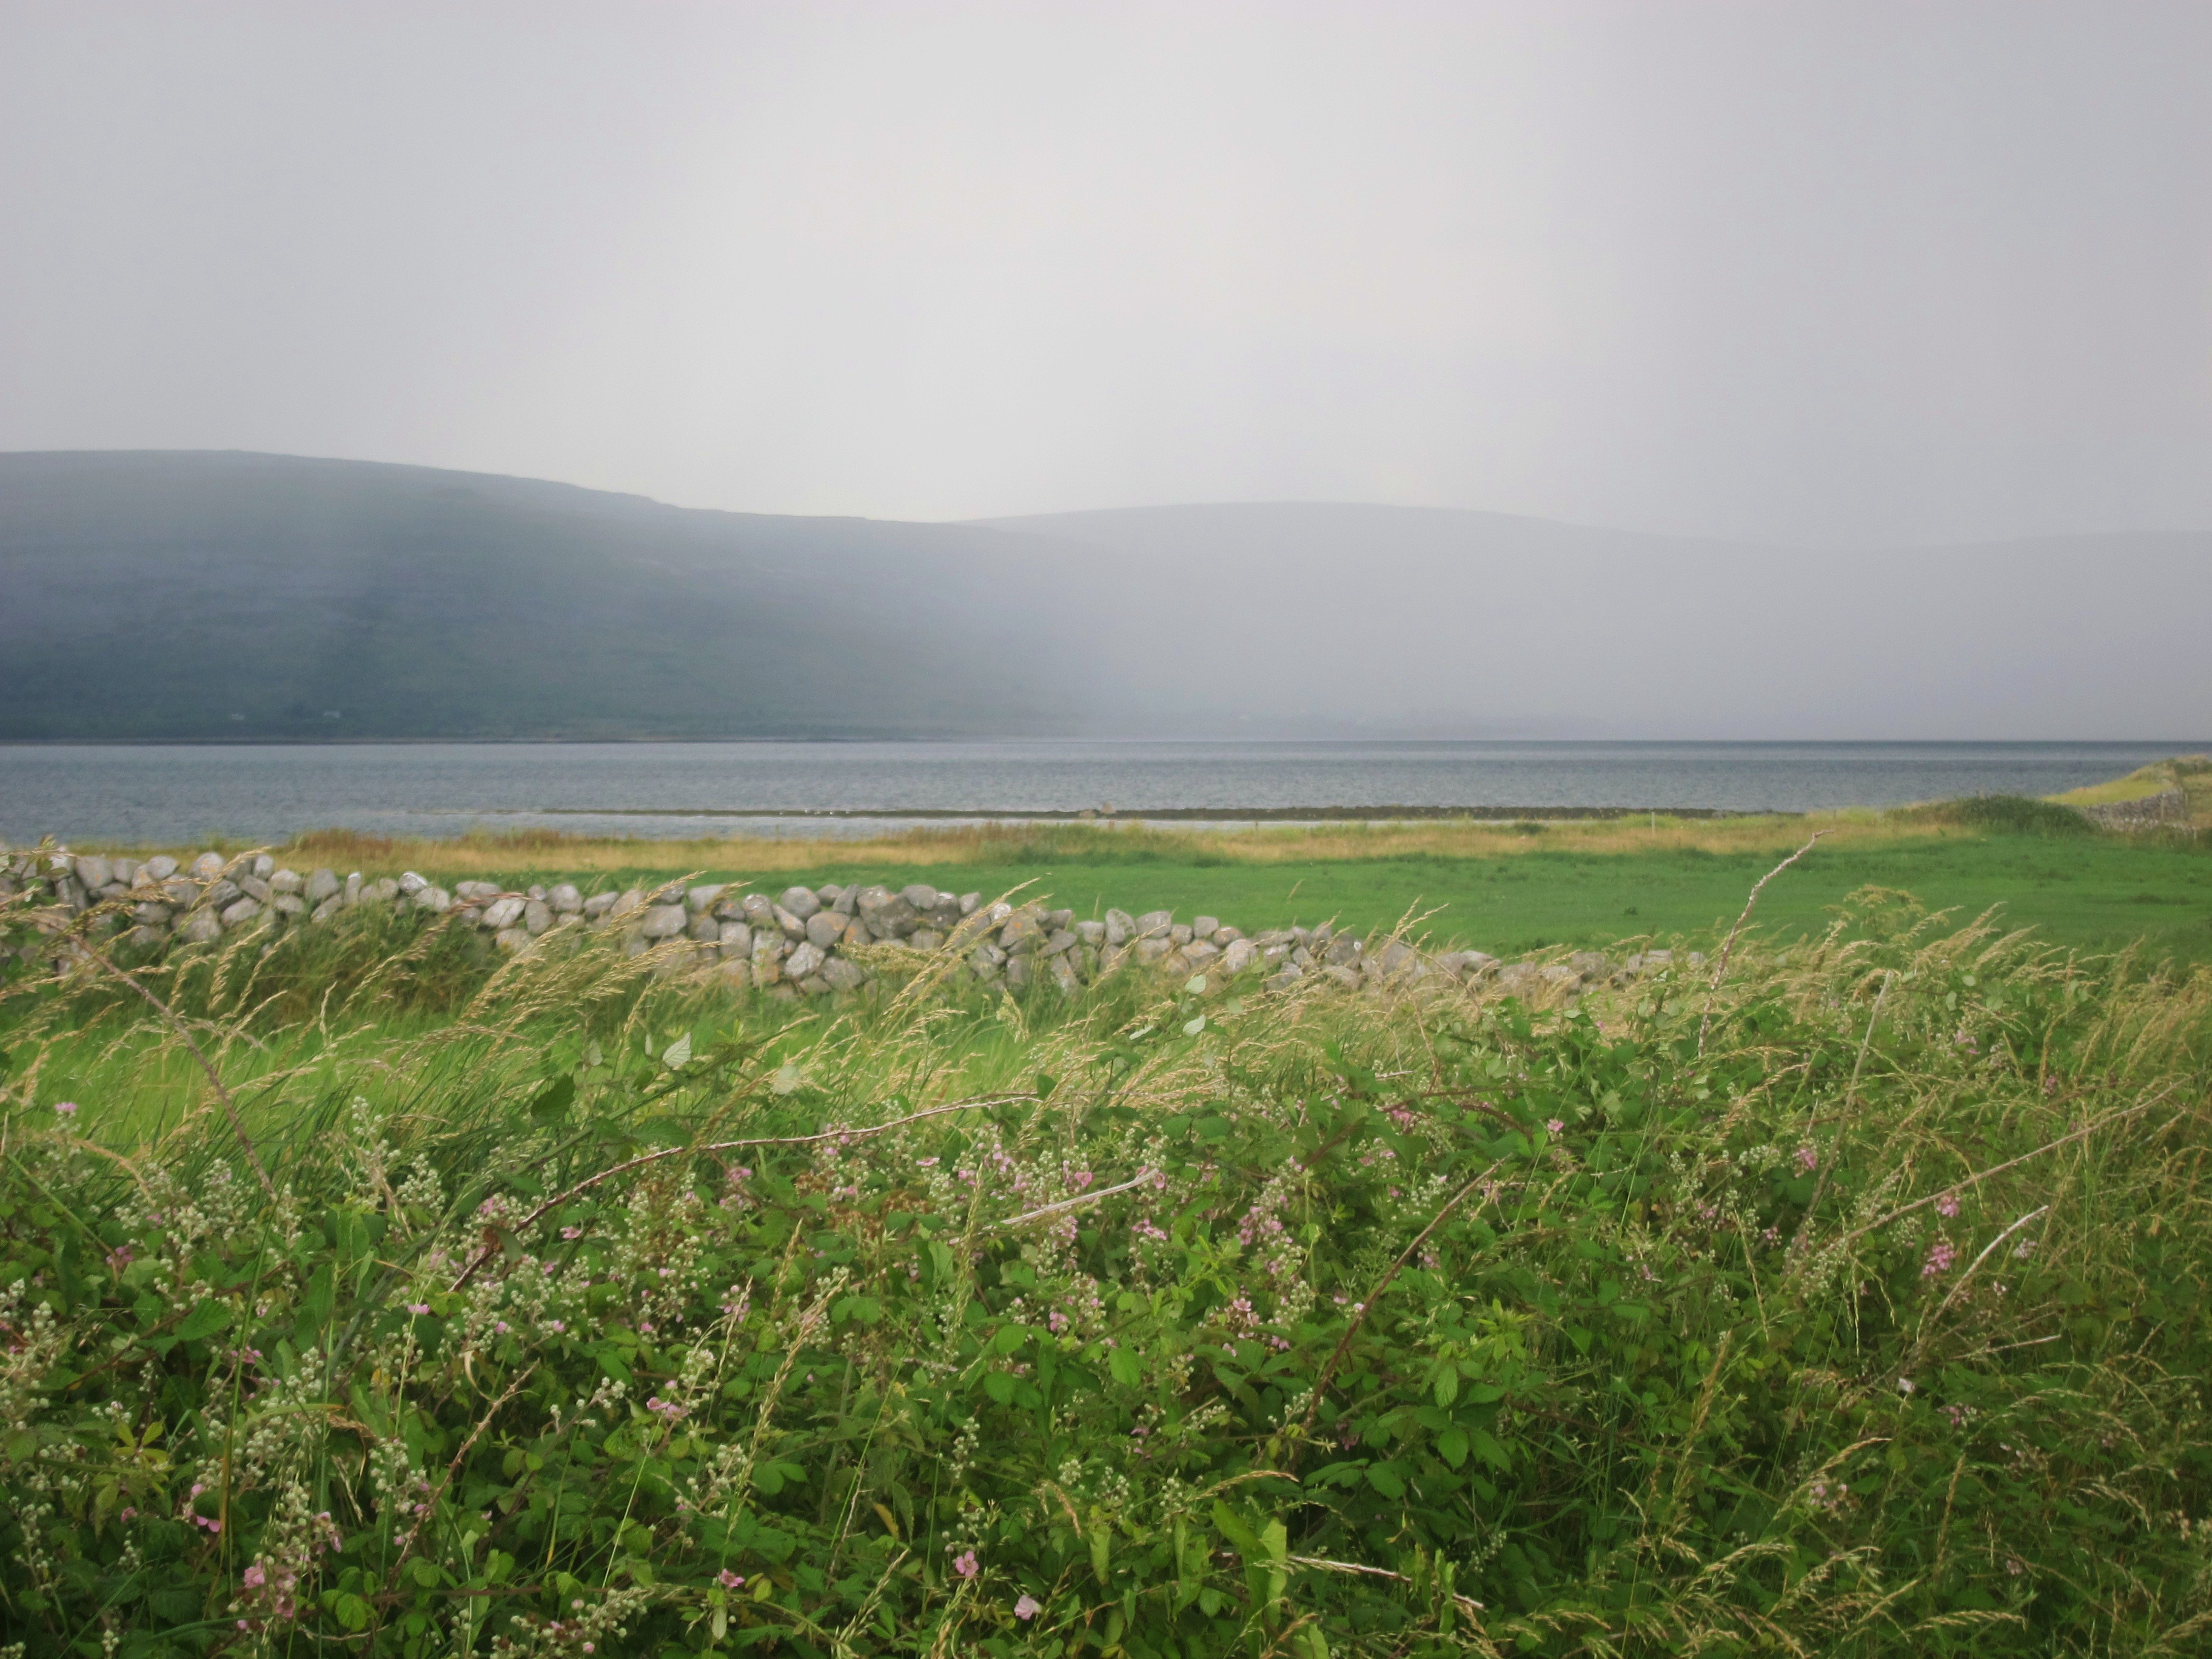
The day after the event, my parents and I set out on coastline road-trip that took us from Sligo, to Dingle, down to the Ring of Kerry and Cork, up to Drogheda, through Belfast and all the way the northern-most tip of Ballycastle. We made ascents up treacherously thin, coastline roads that led to the most beautiful vistas – endless stretches of rocky beach, verdant hills dotted with sheep, vibrant pink sunsets, and strings of ancient stone castles that sat soulfully along the landscape. In the mornings, we walked through dewy fields and cobblestoned paths, before heading inside our B&Bs for breakfasts of black tea, Irish soda-bread, freshly-churned butter (oh, the butter), marmalade and warm oatmeal. Sometimes there’d even be a full Irish breakfast waiting for us, complete with fried eggs, bacon rashers, black pudding, a grilled tomato and toasted bread, each slice neatly arranged in a silver toast rack.

Mornings there were quiet and tranquil; they made me feel happy, hopeful, serene and, perhaps more than anything else, settled. All of it was like a dream – the mist, the smell of earth and grass, the mellow baying of barnyard animals.

I wanted to stay forever.

Sneem

—–

Today, on this early Monday morning – without the usual clamour of the city – the gentle magic the Irish countryside doesn’t seem so far away. It’s in the wind and the leaves. And in a quiet breakfast that doesn’t need to be rushed.

Happy (One-Year!) Anniversary to my brother and his bride. Hearts to infinity, plus one. ♥

Hot Oatmeal

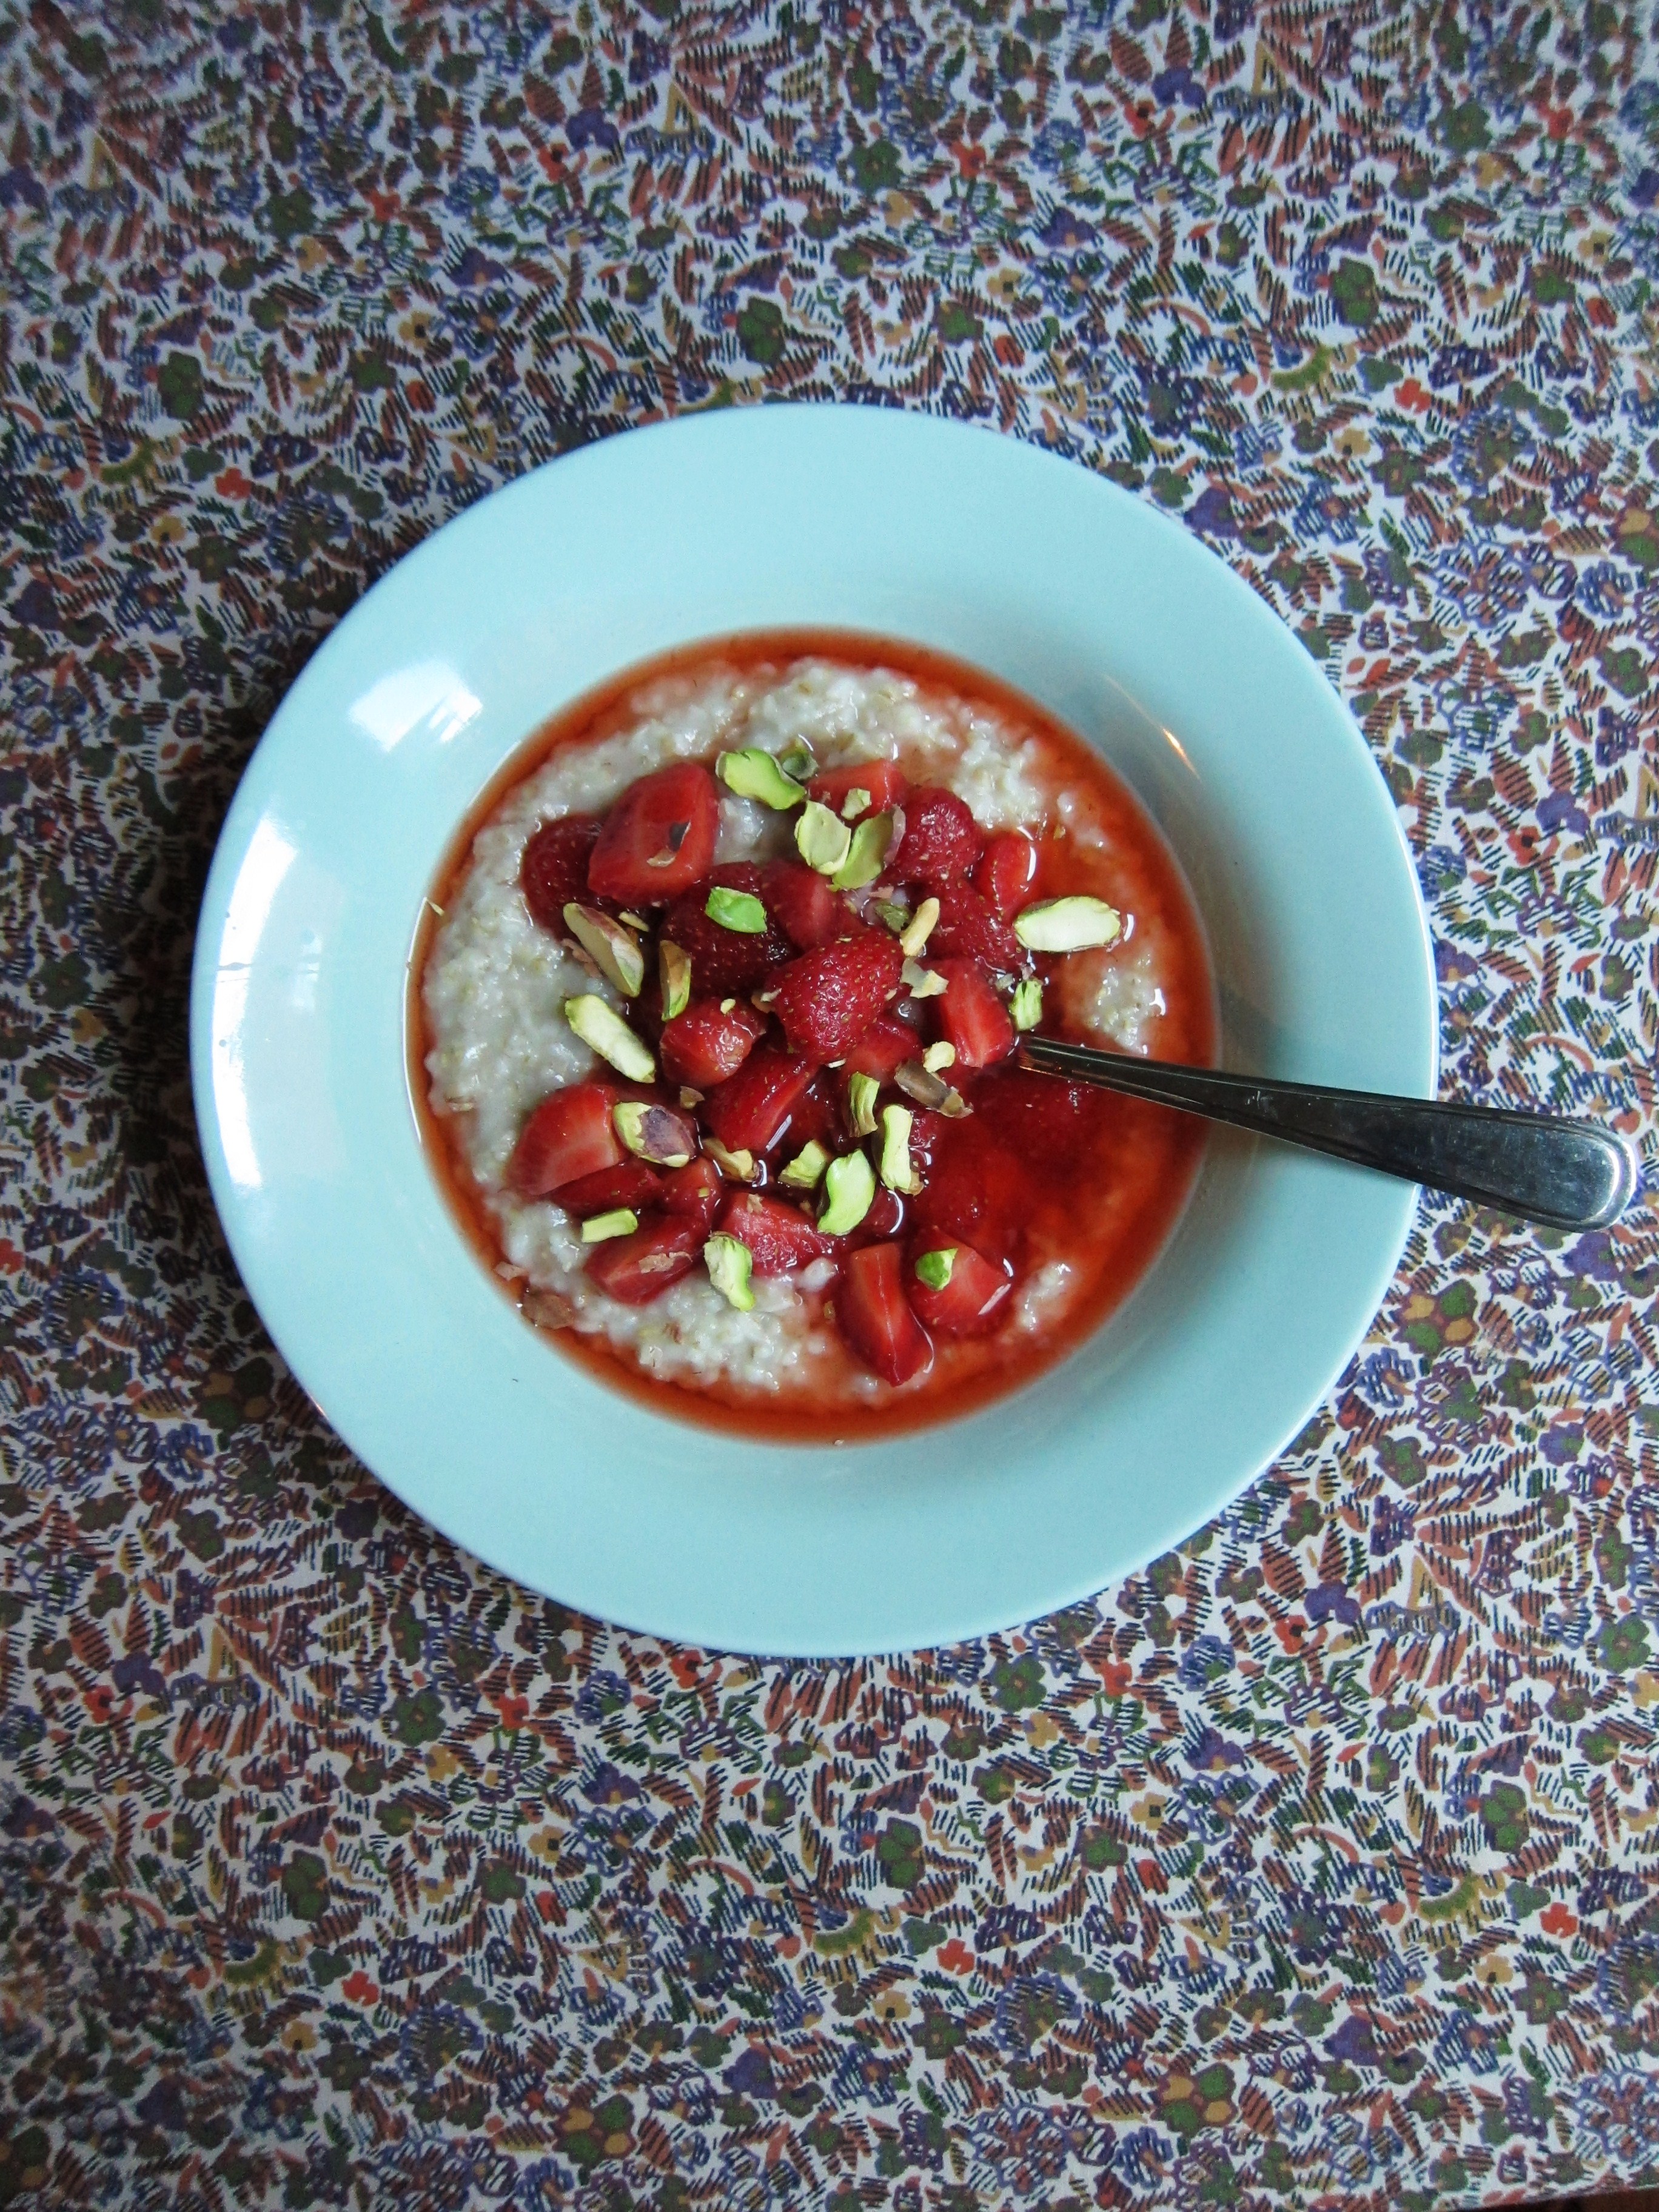
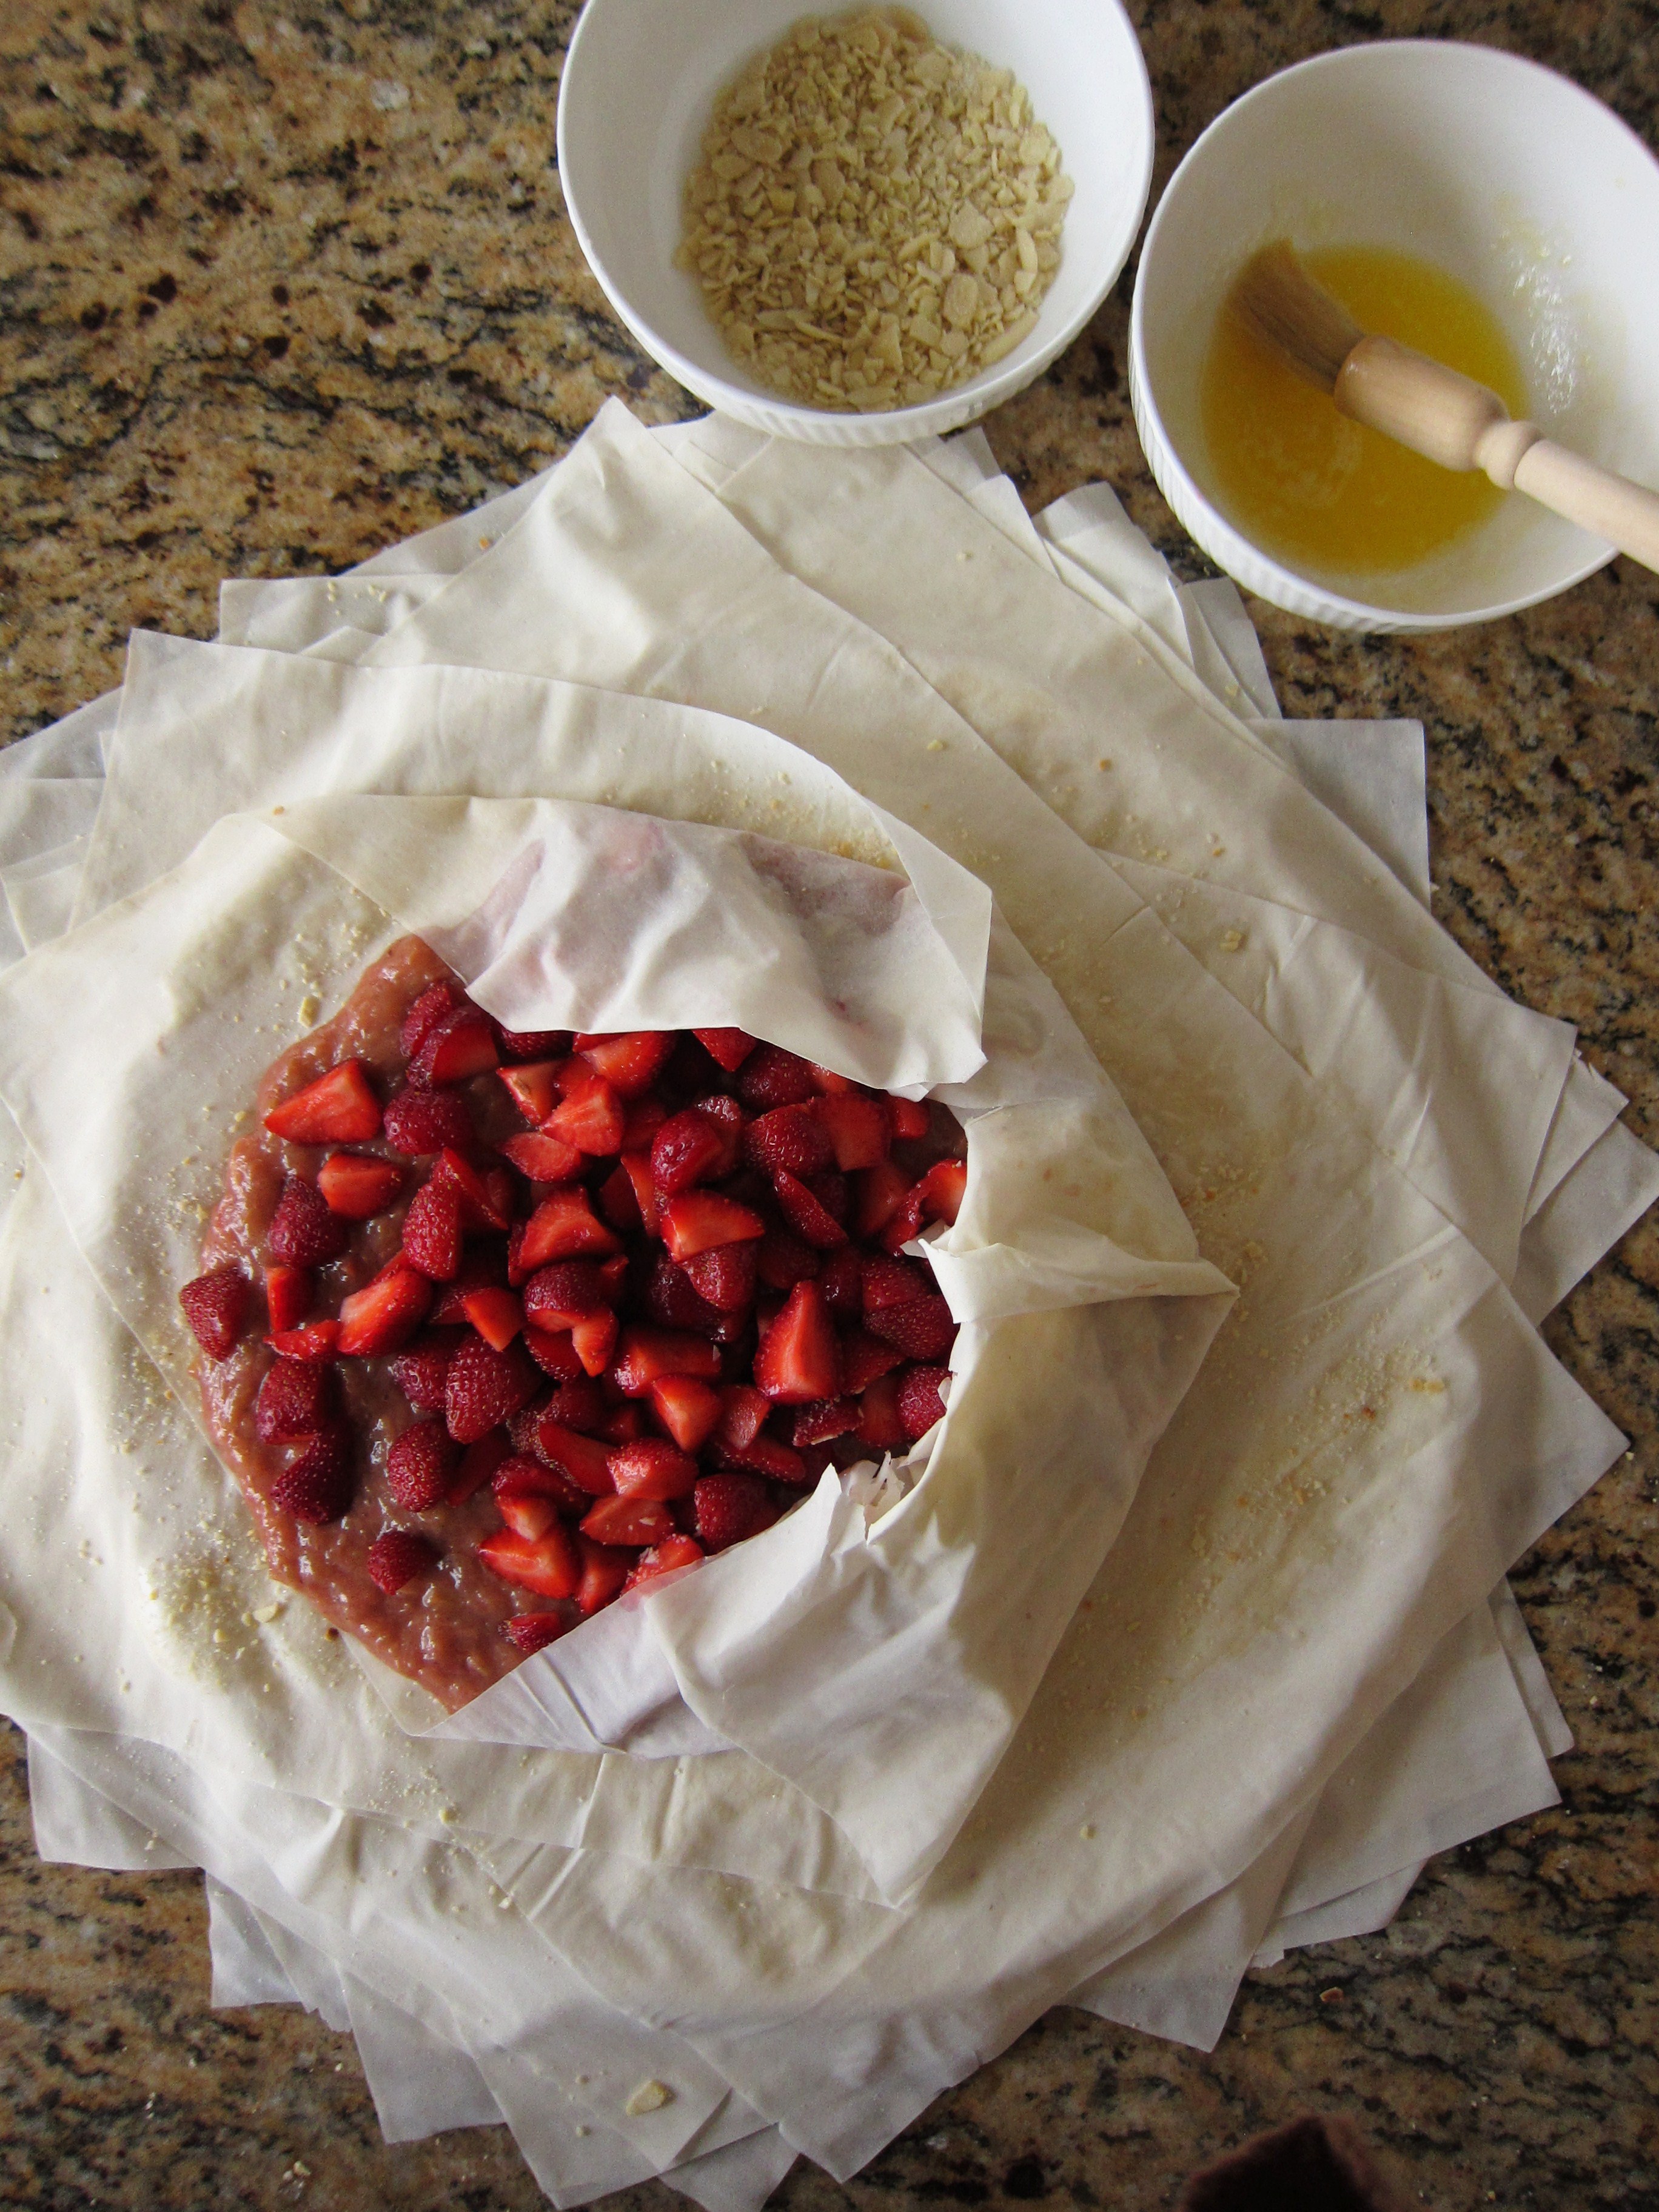
A note on the recipe: knowing how my mornings usually devolve into complete bedlam, I made myself a pot of overnight oatmeal. It’s a nice thing to wake up to, particularly if you feel like a chicken with its head cut off between the hours of 7:00 and 9:00. Cold pizza for breakfast can be fun, but trust me, homemade oatmeal is better. One caveat: you MUST MUST MUST use steel-cut oats, nothing else. Otherwise, you’ll end up with nondescript sludge, instead of nice, toothsome, nutty bits of oats. Steel-cut oats are normally a bit of a nuisance as they take 45 minutes to cook (I know, yikes) – but if you use this overnight method you can avoid waiting around for breakfast because it cooks while you sleep. *Poof* Magic!

Overnight Steel-Cut Oats (3-4 servings)

  • 4 cups filtered water
  • 1 cup steel-cut oats
  • 1/4 teaspoon sea salt

Topping option:

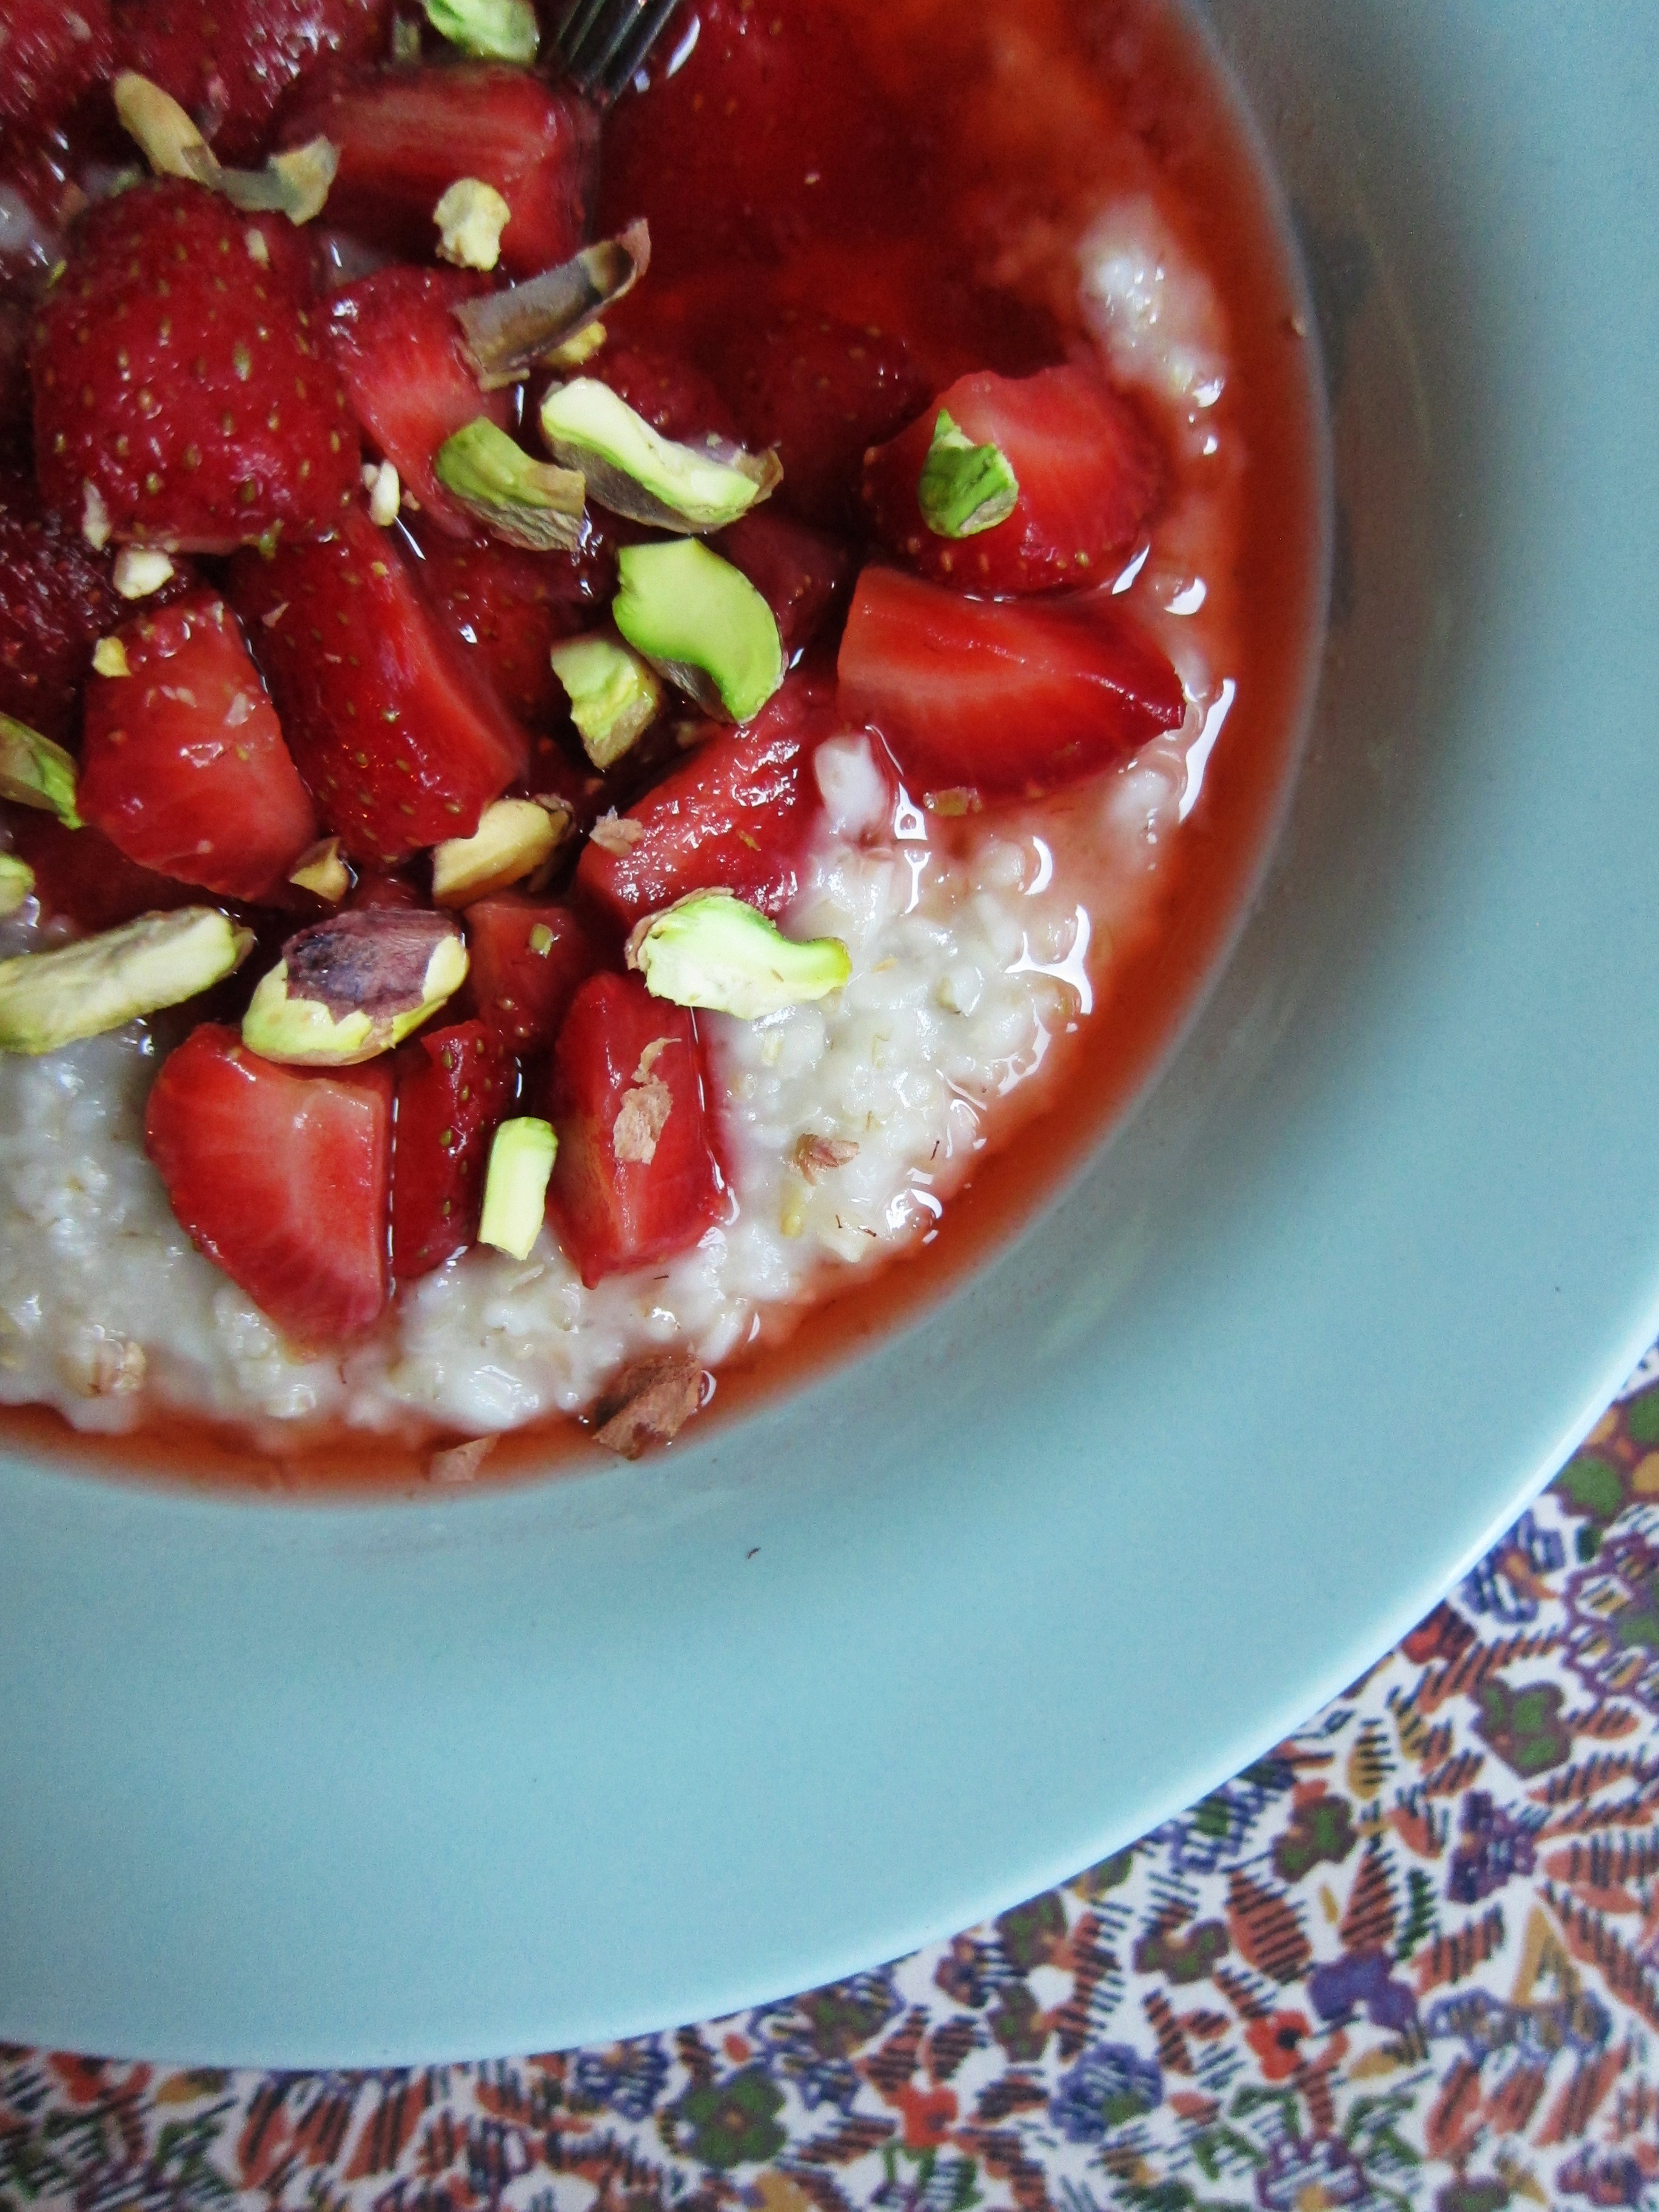
  • a handful of quartered strawberries, macerated in maple syrup overnight
  • a handful of smashed pistachios

Directions:
1) In a medium saucepan or Dutch oven, bring the 4 cups of water to a rapid boil.
2) When the water comes to a full boil, pour in the steel cut oats and salt.
3) Give a quick stir and let the oats cook for 1 minute.
4) After one minute, turn off the heat, give the oats a quick stir, cover and then let them sit on the stove overnight. Go catch some well needed zzzz.

The next morning: open the lid and observe the magic of perfectly cooked overnight oatmeal. Oooh ahhh. Bring the oatmeal back up to a simmer, stirring occasionally, until warmed through. There will be a bit of water in the mixture still, but the oats will thicken up as they sit (but if you feel it needs to be thinned out some more, add a little bit of milk or water to the pot). Ladle the oats into a bowl and spoon over the mascerated strawberries and pistachios.

Oatmeal with Strawberries

Oatmeal with Strawberries - detail

Share this:

  • Tweet
  • Share on Tumblr

Like this:

Like Loading...

Rhubarb Fever

28 Saturday Jun 2014

Posted by julia chews the fat in Breakfast & Brunch, Cooking For Your Peeps, Sweet Tooth, The Basics

≈ Leave a comment

I was supposed to be sharing a cashew dipping sauce with you today. A really good one, at that. But rhubarb stole the limelight this week, showing up all over the place with its shockingly pink stems and massive, lush leaves fanning out like the feathers on a cabaret dancer. You can’t possibly say no to a vegetable that reminds you of a cabaret dancer, can you? I certainly can’t. Pretty rhubarb makes me go weak in the knees.

Rhubarb - naked

Like most things that only appear seasonally, rhubarb is one of those precious items you need to swipe up when you can, for however long you can. It’s appearance is sudden and ephemeral, only lasting a few weeks at the market in early summer. Then, the show’s over. The cabaret dancer goes home to rest until next year. It’s a fleeting affair, but all that more rewarding because of it. Knowing that you only have a small window of opportunity to enjoy rhubarb makes it a special, if not coveted, ingredient. This summer, I’ve been able to lay my hands on a considerable amount of home-grown rhubarb – some from the garden of my mom’s friend (hellooo, Lynn!) and some extracted from the little courtyard that sits between my building and the next one over. None of my neighbours seemed interested in it, so I helped myself to a few stalks. We’ll call it minimal urban landscaping.

Rhubarb plant I did the first thing we all do with fresh rhubarb and made a crisp, one complete with the requisite strawberries, oats, walnuts and brown sugar. Nothing spectacular or exciting, but the fruit got nice and jammy after a long slow bake in the oven, blistering at the edges and spilling out at the sides. Crisps aren’t generally the most interesting of desserts, but I still make them from time to time. And when I get that first, still-warm mouthful of sweet-tart fruit with those crunchy, buttery oats, I’m reminded of how good crisps really are. Good in that wholesome, familiar, tuck-you-into-bed kind of way.

Rhubarb crisp

But because you’ve likely made a million crisps in your lifetime, and because I ate all of mine and forgot the measurements, there won’t be a crisp recipe here. Sorry. You’ll have to wing that one. There are, however, two other rhubarb recipes I can share with you, simply for the fact that I took notes and didn’t shove the whole thing in my face before taking photos. The first is a riff on a free-form crostata, where a quick rhubarb compote is topped with fresh strawberries, then wrapped in several layers of phyllo dough that have been sprinkled with crushed almonds and brushed with melted butter. There’s a bit of cinnamon, nutmeg and orange zest in there too, giving it both a bit of warmth (from the spices) and brightness (from the zest). And just when you start to think the whole thing is going taste like Christmas, there are those glorious, lightly cooked strawberries that crown the top, reminding you it’s summer. While there’s nothing groundbreaking about putting together strawberry and rhubarb, they do hum along quite nicely together and kick into peak season around the same time, making them a solid pair for balmy summer days. The use of phyllo here is nice too – it’s light and crispy and helps you avoid getting your hands mangled in a big wad of dough on a hot summer night.

The second is a savoury dish, where rhubarb is stewed on the stove top, then used as a braising base for chicken pieces. When the whole thing’s cooked, the stewed rhubarb mixture becomes the serving sauce. It’s from a New York Times recipe that I bookmarked and went digging for once I realized I’d barely made a dent in that stockpile of fresh rhubarb in my fridge. It’s a surprising recipe and one that hits the right notes – the tartness of rhubarb works well with the neutral flavours of the chicken and the addition of shallots, thyme and white wine give the sauce a very French-countryside vibe, which is always lovely. It’s definitely worth trying, especially if you’re bored with the idea of using rhubarb for something sweet. Remember, though, that since stewed rhubarb loses its pinkish hue and turns a colour closer to beige, it’s a good idea to sprinkle some vibrant garnishes (fresh thyme, sliced scallions) over top. Dress up the cabaret dancer, so to speak. Whatever you end up doing, go get yourself some rhubarb already! GO! Do it before it’s all gone and you find yourself on the kitchen floor crying big fat tears of regret. (Ok, I’m exaggerating. But still, go!)

Note to rhubarb virgins: here’s a nifty site I found covering all aspects of rhubarb, including rhubarb poison information (don’t eat the leaves!):

http://www.rhubarbinfo.com/

062

Strawberry Rhubarb Phyllo Crostata (serves 8-10) – adapted from Canadian Living

Ingredients:

  • 1/2 cup finely chopped toasted almonds
  • 1/3 cup dry breadcrumbs (panko works well too)
  • 2 tbsp granulated sugar
  • 14 sheets phyllo pastry
  • 3/4 cup butter, melted

For the Filling:

  • 6 cups chopped rhubarb
  • 1 tsp vanilla extract
  • 1/2 tsp grated orange rind
  • 1/2 tsp cinnamon
  • 1/4 tsp ground nutmeg
  • 1/4 tsp ground cloves
  • 1/2 cup granulated sugar
  • 2 tbsp all-purpose flour
  • 2 cups quartered (or halved) strawberries

Rhubarb and strawberries Strawberries - detail Chopped rhubarb - detail Chopped rhubarb and strawberries Directions: To prepare the filling: Place rhubarb, vanilla, orange rind, cinnamon, nutmeg and cloves in a pot to simmer over medium heat. Stir sugar with flour; stir into rhubarb mixture and cook, stirring often, until thickened (about 5 minutes). Let cool completely. (Can be made ahead and refrigerated for up to 3 days.)

Stewing rhubarb and spices

In small bowl, combine almonds, bread crumbs and sugar; set aside. Keeping remainder covered with damp towel to prevent drying out, lay 1 sheet of phyllo on greased 12-inch (30 cm) pizza pan, aligning 1 short end with inside edge of pan and letting other short end extend over opposite side. Brush entire sheet with some of the butter; sprinkle with 1 tbsp (15 mL) of the almond mixture. Lay second sheet at angle on top of first, overlapping by about 3 inches (8 cm); brush with butter and sprinkle with 1 tbsp (15 mL) more almond mixture. Repeat with remaining phyllo, overlapping and sprinkling with almond mixture between each and leaving equal overhang all around pan.

phyllo 1 phyllo 2 phyllo 3

Spoon filling onto centre of phyllo; sprinkle with strawberries.

rhubarb in phyllo strawberries in phyllo

Starting with last sheet, fold phyllo sheets over, 1 at a time, folding ends back to create 4-inch (10 cm) gap in centre. Crumple ends into loose cluster around gap, brushing tops of each lightly with butter and sprinkling with almond mixture.

phyllo wrapping phyllo wrapped phyllo wrapped - detail

Bake in centre of 375°F. oven until phyllo is crisp and golden, about 35 minutes. Let cool on rack. Cut into wedges with a serrated knife.

Baked crostata Baked crostata Baked crostata - detail

Rhubarb-Braised Chicken (serves 4) – adapted from The New York Times

  • 8 pieces of chicken, mixture of thighs and drumsticks
  • 5 sprigs thyme
  • 2 tablespoons olive oil
  • 1 bunch spring onions or scallions, white and light green stalks thinly sliced (slice and reserve greens for garnish)
  • 2 garlic cloves, minced
  • 1/2 cup dry white wine
  • 3/4 pound fresh rhubarb, diced (3 cups*)
  • 1 tablespoon honey
  • 2 tablespoons unsalted butter
  • salt and freshly ground pepper

*I tried a 2 cup rhubarb/1 cup celery ratio, which also works really well.

Chicken with rhubarb sauce

Directions:

1) Pat chicken dry and season with salt and pepper. Place in a bowl with the thyme sprigs and cover. Refrigerate at least 1 hour or overnight.

2) Heat olive oil in a large skillet (or Dutch oven) over medium-high heat. Remove thyme from bowl with chicken and reserve the thyme. Add chicken pieces to skillet and sear, turning occasionally, until golden brown all over (about 10 minutes). Transfer pieces to a platter.

3) Reduce heat to medium. Stir in onion (white and light green parts) and cook until softened, about 5 minutes. Add garlic and reserved thyme; cook 1 minute more. Stir in wine and bring to a simmer, scraping up any browned bits in the bottom of pan. Add rhubarb, honey, 1/2 teaspoon salt and a few grinds of pepper. Return chicken pieces to pot in a single layer. Cover and reduce heat to medium-low. Simmer until chicken is cooked through (about 25 minutes) transferring chicken pieces to a platter as they finish cooking (the juices should run clear to indicate cooked chicken).

4) Whisk butter into rhubarb sauce. Taste and adjust seasoning if necessary. Spoon sauce over chicken and garnish with sliced onion greens and thyme sprigs.

…and why not serve some roasted purple potatoes on the side!

  • 1/2 pound small, purple potatoes (skin on), washed and halved
  • 3 cloves garlic, crushed
  • a few sprigs of rosemary
  • olive oil
  • salt and freshly ground pepper

Preheat the oven to 400°F. Parboil the potatoes on the stove top unitl they’re almost cooked through. Drain and transfer to a baking tray. Add crushed garlic, rosemary and oil; toss until combined. Roast for about 10-15 minutes, or until the edges of the potatoes are crispy.

Purple potatoes uncooked Purple potatoes cooked

Share this:

  • Tweet
  • Share on Tumblr

Like this:

Like Loading...

Dream Waffles, Come Rescue Me

11 Wednesday Jun 2014

Posted by julia chews the fat in Breakfast & Brunch, Cooking For Your Peeps, Sweet Tooth, The Basics, Vegetarian

≈ Leave a comment

Of all the things I could have predicted about my young adult life, having recurring dreams about waffles would not have been one of the things on my radar. And yet, this is where I find myself, at 32, dreaming (literally, not figuratively) about breakfast food.

I guess things could be worse.

It all began about three months ago, when I had a dream I was making waffles on a beach. Then, a week later, there was another about waffles at my old high school; a few days after that, I dreamt I was eating them in Paris, curbside, with friends (because apparently I have Parisian friends now?). I woke up from that last one bleary-eyed, thinking why can’t dreams be real life??, then rolled over, closed my eyes and hoped that I could somehow lucid-dream myself into eating more waffles by the Seine.

According to the Interweb (where, of course, all accurate, reliable, trustworthy information resides) having recurring dreams about waffles is not exactly a good thing. But because I believe that dreams have a more visceral connection to what’s going on in our minds and bodies (because not only do I have imaginary Parisian friends, I’m also a hippie now?), I came to the conclusion that I probably just really wanted waffles – stacked high, with a generous slick of maple syrup across the top. So, the next available weekend, I made a point of honouring my demented breakfast dreams by scouring the neighbourhood for the perfect waffle.

After looking through the menus of a few places, I soon discovered that finding some standard, no frills waffles in this town is capital H Hard. Today’s brunch venues (complete with the requisite distressed-wood tables, exposed light bulbs and waiters with perfectly groomed handlebar moustaches) serve waffles that tend to be a bit too, er, hip…including varieties that are egg-less (oh boy this should be fun), Red Velvet-flavoured (ick), or lacquered in a weird, lavender-infused syrup (double ick).

It seems that the basic, trad waffle has been comically adulterated by the bourgeois bohemian crowd well-intentioned entrepreneurs of this city. All I wanted was a simple, straight-forward waffle. No fancy distractions. Just a really good, crispy, golden syrup-receptacle. After coming up empty, I spent the next couple of weeks asking myself – and anyone who would listen – where are all the freaking real-deal waffles at? 

All that whining turned out to be beneficial, because on my birthday – lo and behold – I was gifted a WAFFLE MAKER. Yes – a machine with which I can make waffles WHENEVER I WANT. It seems like an insane prospect. And I will, without a doubt, become a hazard to myself in the process. But HOLY MACKEREL. WAFFLES. SORRY, BUT I FEEL THAT CAPS LOCKS ARE THE ONLY WAY TO FULLY CONVEY MY EXCITEMENT. That, and exclamation marks. Because…WAFFLES !!!!!!

Without an ounce of shame, I willl proudly admit that I’ve had waffles every single weekend since. The novelty having not fully worn off, I still get stupid-excited about pouring the batter onto the iron, closing down the top and waiting for the indicator light to turn green. It’s totally magical, even if they’re super easy to make. It’s the kind of food that makes you want to wear a feathered boa to breakfast and sing this Mariah classic at the top of your lungs, replacing the lyric “lover” with “waffle”.

Or, that just might be me.

waffle - detail

A quick note: These are not to be mistaken for belgian-style gaufres. These are decidedly US of A-style waffles – reminiscent of the thin, crispy, golden waffles of your Eggo youth. Only better, because they didn’t come out of a sad box from the freezer.

Epic Buttermilk Waffles (makes 6) – recipe from the Aretha Frankensteins restaurant in Chattanooga, TN

3/4 cup all-purpose flour
1/4 cup cornstarch
1/2 teaspoon baking powder
1/4 teaspoon baking soda
1/2 teaspoon salt
1 cup buttermilk*
1/3 cup vegetable oil
1 egg
1 1/2 teaspoons sugar
3/4 teaspoon pure (natural) vanilla extract
Maple syrup, for serving

* genius trick for making quick buttermilk (courtesy of my mom): add about 1 tsp of white vinegar to nearly 1 cup of milk. Ta da!

Directions

In a medium bowl, combine the flour, cornstarch, baking powder, baking soda, and salt; mix well. Add the milk, vegetable oil, egg, sugar and vanilla and mix well. Let the batter sit for about 30 minutes.

Preheat a waffle iron. No need to grease it – the oil in the batter will allow the waffle to release easily. Follow the machine’s cooking directions. Serve immediately with syrup and any other accompaniments you see fit.

waffle - pure
waffle - berries

Share this:

  • Tweet
  • Share on Tumblr

Like this:

Like Loading...

Revisiting fennel & citrus

06 Thursday Mar 2014

Posted by julia chews the fat in Breakfast & Brunch, Cooking For Your Peeps, Lunch & Dinner, Vegetarian

≈ Leave a comment

I know what you’re thinking. Really? A fennel-orange salad? Yawn. Next.

But I’m here to tell you that this one, this salad deserves acknowledgement. It’s the perfect example of how something we treated as ubiquitously blah can be re-invented, re-appropriated and newly appreciated. Like vintage fashion (no, not those high-waisted acid-wash jeans from grade eight, but more like that stunning large-brimmed sun hat your great aunt used to wear, poolside. Or your grandmother’s satin peep-toe slippers. In other words, the elegant retro fashion of a stone-cold fox).

This salad is like a great vintage piece you want to wear over and over again. There’s nothing ground-breaking or earth-shattering about it. Nothing hardcore. But it’s a good salad. A simple, and dare I say, classy salad. And one definitely worth your attention. Most of the fennel-citrus salads I’ve had in my life have been forgettable at best – in large part because either a) the whole thing wilts under the weight of a creamy dressing, or b) the fennel slices looks like they were hacked to pieces with a dull machete, or c) there is a disproportionate amount of fennel, leading you to ask, “Will this salad never END?”.

The recipe below, happily, avoids all these pitfalls. Equal parts crunchy, juicy and sweet, it’s got lemony tones from the sumac dressing, plus a peppery wink from the radish. This salad has got it going on. And if you needed another reason to make it, just look at how gosh-darn pretty it is! 

A stone-cold fox of a salad, if you ask me.

Fennel Orange Salad

Fennel-Citrus Salad with Sumac Dressing – serves 4 as a starter

3 tablespoons extra-virgin olive oil
1 tablespoon fresh lemon juice
2 teaspoons white balsamic vinegar
1 teaspoon sumac
1/2 teaspoon finely grated orange zest
Coarse salt
Freshly ground black pepper
2 medium fennel bulbs
4 radishes, trimmed
2 oranges

Important note: I fully endorse the use of a mandoline to get paper-thin fennel and radish slices. It might be masochistic of me (8 times out of 10 I will nick the end of my finger on the second-to-last slice), but I continue to use it for recipes like this, as it yields the best results.

Whisk together the olive oil, lemon juice, vinegar, and sumac, and orange zest and season with salt and pepper. Set aside.

Cut off and discard the stalks from the fennel bulbs, reserving some of the fronds for garnish. Halve the fennel bulbs lengthwise and cut out and discard the cores. Thinly slice the fennel bulbs using a mandoline (or sharp knife). Transfer to a large serving platter. Thinly slice the radishes using a mandoline (or sharp knife). Add to the fennel. Peel and cut the orange into slices, arrange on top of the fennel and radish (for an extra pretty salad, trim the orange into suprêmes. Nifty video here).

Whisk the dressing and drizzle it over the salad. Toss gently to coat.

Fennel Orange Salad - detail

Share this:

  • Tweet
  • Share on Tumblr

Like this:

Like Loading...

A Better Kind of Fruitcake

31 Tuesday Dec 2013

Posted by julia chews the fat in Breakfast & Brunch, Cooking For Your Peeps, Holidays, Sweet Tooth, The Basics, Vegetarian

≈ 4 Comments

Almost twenty years ago, at Christmastime, my dad bought a loaf of stollen for the first time. He brought it home, cut it up and plated it. We were eager to try something so foreign and – for kids growing up in the burbs in the 90s – so exotic-sounding. But, one bite in, our excitement quickly unravelled, being replaced with the uneasy feeling of being duped. Not unlike a lot of the holiday fruitcakes I’ve reluctantly tasted over the years, this store-bought stollen was dry and lacklustre – a pasty-coloured loaf studded with nondescript dried fruit that rolled out off the sides with each bite.

It was miserable.

Unlike the rest of us, my dad saw the potential of this German-style fruitcake and shortly thereafter, set out to make his own. He sourced different recipes, even quizzing our German neighbour, Mrs. Nack, for secret stollen-making tips. And then, nearly every year since, he’s gone into full stollen-production mode – drenching the fruit several days ahead, making the dough, cutting the loaves, baking them, dusting them with sugar and wrapping them attentively. For someone who doesn’t bake (or have a Teutonic bone in his body), dad’s got this German sweet bread down to an art. The final result is a beautifully dense, yeasty bread, brimming with sliced almonds and a boozy mixture of currants, raisins and citrus peel. The longer it sits, the better it gets, as the brandy further permeates the crumb and the almonds slowly transform into marzipan. There isn’t a trace of neon-coloured maraschino or stale walnut in this fruitcake. Not if dad has anything to do with it. And that’s the way we like it.

Wishing a very happy birthday to my dad ♥ and a Happy New Year to all of you, dear readers! Looking forward to sharing more tasty edibles with you in 2014.

Dresden Stollen – makes 4 medium loaves or 6 small ones stollen 21

  • 1⅓ cups currants
  • 1 cup orange zest
  • 1 cup lemon zest
  • 3 cups raisins (Thompson or sultanas)
  • 4 ⅓ cups sliced, blanched almonds
  • 6½ cups (1 kilo) sifted flour
  • 6 packets yeast (8 gr each)
  • 2 cups icing sugar
  • ½ tsp ground cardamom
  • tsp cinnamon
  • 2 pinches mace
  • 2 pinches allspice
  • ½ tsp salt
  • 1 cup brandy
  • 2 cups lukewarm milk (reserve 1 cup for proofing the yeast)
  • 1⅓ lbs butter, room-temperature

Pour the brandy over the mixture of currants, raisins, almonds & citrus zest. Mix and cover, allowing to soak overnight (or over several days). stollen 2 Proof the yeast by sprinkling it over 1 cup of the lukewarm milk (about 100ºF) to which has been added a tablespoon of sugar. Set aside in a warm place for about 10 minutes. The yeast is active if it forms a creamy foam on top of the milk. Sift the flour into a large mixing bowl. Add the room-temp butter, icing sugar, the remainder of lukewarm milk, spices and the proofed yeast mixture and mix. Transfer to a slightly floured work surface and knead thoroughly. stollen 3 stollen 4 stollen 5 Cover the dough and allow to rise for approx. 30 minutes in a warm place. Add the prepared fruit mixture. Knead the fruit mixture thoroughly into the dough. The dough should be smooth and elastic. stollen 12 
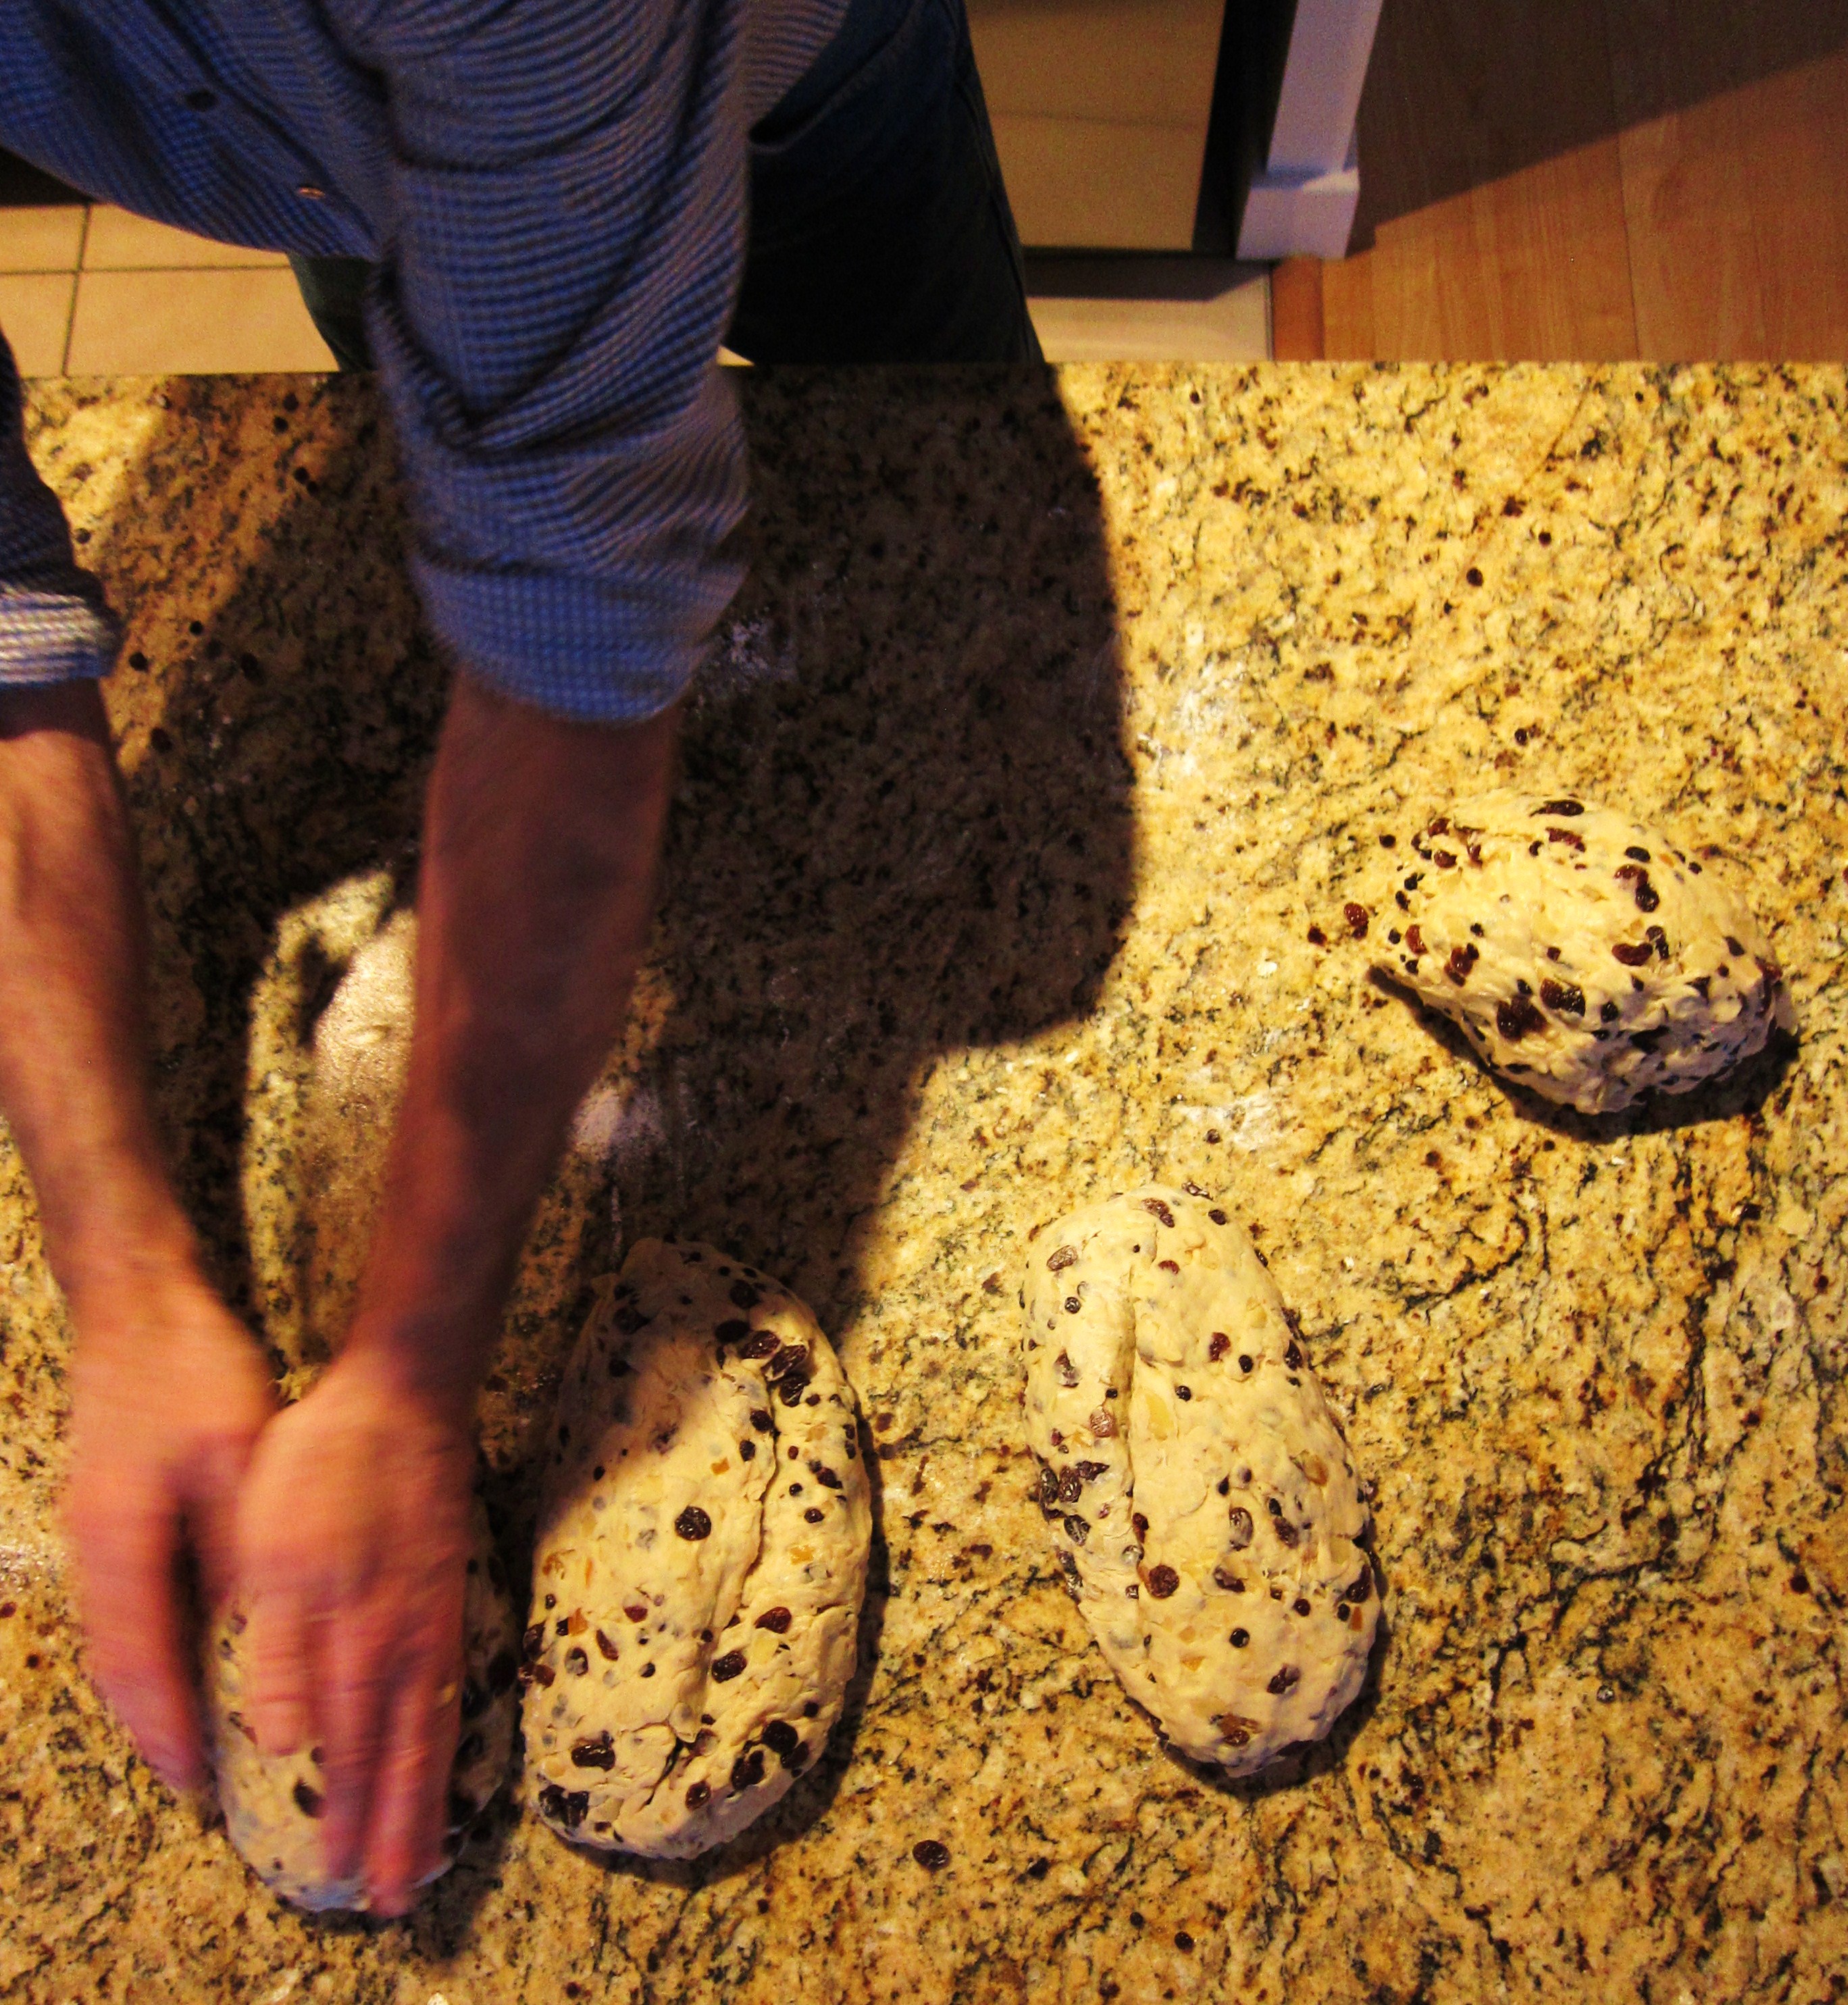
Roll the dough into a long thick cylinder shape and cut into 4-6 pieces. Form into loaves. stollen 15 Transfer to a greased and floured baking tray, cover with a clean dish towel and leave to rise for 20-30 minutes in a warm, draft-free place. Preheat the oven to 350º F and bake for 50 minutes. stollen 17 stollen 18While the stollen is still warm, brush with melted butter and dust with icing sugar. Drizzle a little brandy over-top. Wrap well in muslin cloth or aluminium foil and store in a cool place. stollen 19 stollen 20 stollen 22 Note: Dad likes to douse his stollen every couple of days with brandy to keep it moist (and, let’s be honest, make it more delicious and boozy). Just re-dust the whole loaf with a bit of powdered sugar before serving.

Share this:

  • Tweet
  • Share on Tumblr

Like this:

Like Loading...

Taking Back Cheese

20 Friday Dec 2013

Posted by julia chews the fat in Breakfast & Brunch, Lunch & Dinner, Snacking, The Basics, Vegetarian

≈ Leave a comment

For some time now, I’ve been buying ricotta under-the-radar from someone who makes it in their converted garage. You wouldn’t guess it, but this stuff is gorgeous – it’s creamy but unbelievably light and mild in flavour, almost sweet. It’s unlike any of the preservative-heavy schlock that’s often on offer in grocery stores. It comes in a beautifully moulded shape, ready to eat on its own, spread onto toast, sprinkled over salads, or baked in the oven on top of pasta (Nonna and I have a soft spot for this dish).

However, getting fresh cheese like this on a regular basis is a tad tricky. You need to be organised. You need to submit your order in advance and get yourself to the location. While it’s always worth it, it’s definitely not convenience food.

Then it came to my attention that ricotta could quite feasibly be made at home, without any special equipment or expertise. After all, it only involved 4 ingredients and some cheesecloth. But this idea cracked open a Pandora’s box of cheese-related questions: What type of ingredients work best? Should I be using rennet? Where do I get rennet? Do I need to boil the milk? How do I ensure I don’t poison anyone with my home-made concoctions?

I didn’t want to plunge knuckle-deep into whey before knowing a few ground rules. At the same time, I was weary of the vortex of conflictual information hanging out on the Internet and, ideally, I wanted to learn these skills first-hand with someone whose experience far surpassed mine.

Enter David Asher Rotsztain. 

David is an organic farmer, goatherd and cheesemaker based in Mayne Island, B.C. Through community outreach workshops, he teaches natural cheese-making methods that can easily adopted by the home cook. In other words, this is guerilla-cheese-making – taking back something that in modern times has been (rather counter-intuitively) entrusted with people and entities that are alien to us and our day-to-day.

By sheer luck, a local non-profit was offering workshops with David right around the time I was thinking about making ricotta. In the workshop, he spoke about different types of cheese, their idiosyncrasies, their benefits, their beauty. We talked about raw milk versus pasteurized, whole milk versus low-fat, the use of lemon juice compared to rennet, and the wonders of edible mold. It was an eye-opening experience that broke down the process into manageable pieces and made cheese-making more approachable than I could have imagined. As I quickly learned, good cheese involves only a handful of ingredients, some time, and a bit of know-how.

Until I get around to making ricotta, I’m going to leave you with the step-by-step process for making your own fromage frais, which is essentially yoghurt strained at room temperature for 24-28 hours. It’s ridiculously simple, and though it takes a bit of time, your patience will be rewarded with a lovely, creamy round of fresh cheese, ready to serve with bread for breakfast or alongside crackers on a (hm holiday?) cheese platter.

Enjoy ♥

Homemade Fromage Frais – makes about 250g

8 - finished fromage frais


You will need:

– 1 container good-quality yoghurt, without any emulsifiers, stabilizers or gelatin (for this recipe, I used a full-fat buffalo yoghurt I found here)

1 - yogurt
– about 1 tsp salt
– a big stockpot or very deep bowl
– a wooden spoon (or something similar) that will sit solidly across the bowl
– some cheesecloth (this can include unbleached muslin or nylon cloth, but David recommends a Du-Rag. Yep, that’s right – a Du-Rag. Its shape and tight meshing make it perfect for straining this cheese. And it’s a breeze to wash for future use)

2- cheese cloth
1) Wash your cheesecloth and allow to air-dry.
2) Drape the cheesecloth atop a bowl and pour the yoghurt into its centre. Pull together the four corners of the cloth around the yoghurt; twist and secure with a knot.

3- yogurt in cheese cloth

5 - squeezing & tying

3) Tie to the wooden spoon (or similar implement) and hang over stockpot or deep bowl. The cheese should be able to hang freely, not touching the bottom.

6 - hanging

4) Leave it to hang overnight at room temperature. As they whey* drips into the pot, the yoghurt will slowly become cheese.
(*do not discard whey by pouring it down the drain, as it is toxic to aquatic life. Instead, keep it to make ricotta or feed your plants, dogs or compost with it.)

5) After 24 hours, this cheese will have dripped dry. To improve flavour, and to help preserve it longer, salt the cheese by opening up the cheesecloth and sprinkling a teaspoon of salt over the surface of the cheese. Close the bag, and hang it again for another 4 hours.

7 - opening & salting

9 - cheese & toast

10 - cheese & toast - detail

Titbits from David:
*don’t squeeze the cheese to force out whey (it’s sooo tempting, but resisting will avoid any mishaps…)
*make this cheese with goat’s yoghurt, and you get chèvre.
*make this cheese with extra high fat yoghurt, and you get cream cheese.

And if you still need some cheese-making inspiration, watch this video (disclaimer: it may make you want to pack your bags, move to France, and become a shepherd).

Share this:

  • Tweet
  • Share on Tumblr

Like this:

Like Loading...

Orchard tale, apple tart

26 Saturday Oct 2013

Posted by julia chews the fat in Breakfast & Brunch, Cooking For Your Peeps, Food Away From Home, Sweet Tooth, Vegetarian

≈ 4 Comments

It was mid-October when Shane, Margaux and I went apple picking in Oka. We walked through dewy grass, relishing the cool, fresh air that smelled of earth and leaves. Everything was misty and moody and gorgeously still.

1 - raspberry field

view from the belvedere

It being late in the season, and drizzling, meant that we were the only three people in a large, rolling orchard surrounded by flame-coloured trees. We wandered through the rows, plucking apples, some as dark as plums and others as large as grapefruit. From time to time, geese flew overhead in squawking, V-shaped strings.

empire

4 - autumnal orchard

We carried our bounty back to the house to be weighed, where our host served hot cups of carrot-apple soup. Our plans to go for a short hike were overheard. “You can reach the National Park through the orchard, you know.”

6 - lunch break

Grateful for the advice, we followed the long path through the orchard to the point where it met the Park, stepping into a tree-filled landscape dotted with yellow leaves that fell to the forest floor like snowflakes.

7 - Oka National Park

On the edge of the forest came a clearing, leading us to a look-out over the River of Two Mountains. In a miraculous change of weather, the cloudy mist had given way to full sunshine, beaming and hot.

8 - view Lake of Two Mountains

view from the chapel lookout

—–

The only consolation for leaving this enchanting place was the batch of round, red beauties we got to take home with us – four kinds, each with a personality of their own.

10 - freshly picked

While all were delicious, I had a soft spot for the crunchy, plum-coloured Empire, which were used in this tart. I wasn’t sure they would survive the heat of the oven, but they held their shape, fanning out elegantly along the crust and bejewelling the top of the custard with their beautiful, dark skins. It sounds chic, but it’s actually very simple. And a nice way to pay homage to the familiar flavours of apple, vanilla and butter. If you close your eyes, you can almost smell the orchard.

11 - French apple tart

12 - French apple tart detail

French Apple Tart  – makes enough for one large tart + one small

Shortbread pastry – adapted from a Laura Calder recipe

  • 2 ¼ cups flour
  • ½ tsp salt
  • 2 Tbsp sugar
  • 1 cup butter, cut into pieces
  • ‎ ⅓ cup ice-cold water

Put the flour, salt and sugar in the bowl of a food processor; then add the pieces of butter. Pulse until you reach a coarse crumb texture. Keep pulsing while slowly adding the cold water through the feed tube until the dough starts to come together (if you don’t have a food processor, you can also do this with your hands.)

Turn out the dough onto a floured work space and work it gently until it comes together, being careful not to overwork it. Flatten into a disc and refrigerate for about 20 minutes.

Filling – adapted from The Encyclopedia of French Cooking, 1982

  • juice of one lemon
  • 1 ½ lbs crisp apples
  • ⅓ cup milk
  • ⅓ cup heavy cream
  • 2 eggs, beaten
  • ¼ cup sugar
  • 1 tsp vanilla extract (or ½ tsp fresh vanilla, from the pod)

Pour the lemon juice into a large bowl. Cut and core the apples one by one, slicing them thinly (about 1 cm thick) and adding them to the bowl of lemon juice, stirring to prevent discoloration.

Preheat the oven to 450°F.

Remove the dough from the fridge and roll it out on a floured surface into a circle large enough to line the base and sides of a tart pan (preferably with a removable base). Roll the rolling pin over the top to remove the access dough off the sides.

Arrange the apple slices in a tart pan in a circular pattern, working from the edge of the dish inwards, and overlapping the slices slightly. Bake in the preheated oven for 10 minutes.

Meanwhile, put the remaining filling ingredients in a bowl and whisk together.

After the 10 minutes, remove the tart pan from the oven and reduce the oven to 375ºF.  Pour the egg mixture over the apple slices. Return to the oven and continue baking for an additional 30 minutes at 375º F. Serve warm.

13 - French apple tart slice

Verger écologique d’Oka
445 Rang de l’Annonciation
Oka, QC J0N 1E0
(450) 479-6464
www.vergerbrabantvincent.wordpress.com

(Orchard photos by Shane, Margaux and me)

Share this:

  • Tweet
  • Share on Tumblr

Like this:

Like Loading...

How to survive a tomato massacre

08 Sunday Sep 2013

Posted by julia chews the fat in Breakfast & Brunch, Vegetarian

≈ 1 Comment

Nine hours of my day yesterday were spent hauling, sorting, washing, blanching, peeling, squeezing, cutting and stirring tomatoes, then ladling their hot flesh into Mason jars, all while giving and taking instructions in a bastardized mix of three languages within the confines of a steamy kitchen splattered with tomato juice.

I do this every year. And every year it feels like the trading floor of the New York Stock Exchange. I wouldn’t change it for the world, but sometimes it’s enough to make you want to scream into a well-feathered cushion.

So here we are, the morning after, and I’m still not running on all cylinders (one major clue being that I washed my face with hair conditioner). I’m hoping this cup of coffee will be the miracle cure, to avoid any other bleary-eyed mix ups and to help me regain some sense of focus. Fingers crossed – very tightly.

Since things are not making much sense this morning, I won’t attempt to write a poetically long piece here. I’d rather just get straight to the point – which is this:

CRISPY SALT AND PEPPER FRENCH TOAST

I bring it up here and now as a small ode to the hearty, carb-filled breakfast that got me through yesterday’s 9-hour tomato massacre. This is the humble food I am always grateful for. And I suspect that, no matter what your day has in store, you will be grateful for it too.

Savoury French Toast

CRISPY SALT & PEPPER FRENCH TOAST – serves 2 (adapted from Food 52)

– 2-3 eggs
– a splash of milk (or cream)
– 1/8 tsp salt
– 1/2 tsp freshly ground black pepper
– 1/2 green onion, finely chopped
– a few sprigs of cilantro, finely chopped
– butter
– 4 slices day-old bread

In a bowl, beat together eggs, salt, pepper, green onion, cilantro and a splash of milk (or cream).

Heat a frying pan over medium-high heat. Melt a knob of butter over the surface until it’s thoroughly covered.

Dip the bread into the egg batter, drain off any excess, and place straight into the hot pan. Fry for 2 to 3 minutes on each side, until golden-brown and crispy. Serve warm with a drizzle of maple syrup or something tangy/spicy like sriracha sauce.

Savoury French Toast

Share this:

  • Tweet
  • Share on Tumblr

Like this:

Like Loading...

Relishing the peach days

17 Saturday Aug 2013

Posted by julia chews the fat in Breakfast & Brunch, Lunch & Dinner, Vegetarian

≈ 7 Comments

Oh hello there. It’s been a while. How are you? How’s your summer been?

I’ve neglected this space lately, it having taken a back seat to some other things – namely, attending this beautiful tear-jerker in Roscommon, Ireland (that groom is my baby brother, looking swank in a white suit)…

M&C

…and soaking up this scenery:


…and visiting this rad place:


…and stuffing my face along the way:


And, well, it being summer, the idea of a picnic blanket and a book – or a beer on a patio – has been a lot more enticing than interacting with the Internet. So if I’m here, bathing in the glow of my computer screen, it’s because there’s something worth sharing.

The timing of this entry is also important, as the MVP of this recipe (the peach) is nearing the end of it’s season in Ontario, meaning that availability in Québec is becoming slimmer as we move through the month of August. If you live in the same climate zone as me, over the next few days you’ll likely be binging on the last of the berries and melons and stone-fruit before they’re all gone for another year. And if you haven’t had this impulse, remember: we’re talking A WHOLE YEAR here. Imagine how depressed you’ll feel in late November when you realize you never ate one fresh strawberry, one blueberry, one peach all summer, while you’re eating your fifth rutabaga of the week. You’ll want sort this one out before the summer’s over; you’ll need the memory of plump berries and orchard harvests fresh in your head to help get you through the icy, blustery months of November through March. The salad below will provide a nice memory you can look back to when you’re waiting for the bus in 20 inches of snow.

This recipe puts the peach up front and centre, without any frills or unnecessary distractions; its simplicity ends up being its strongest asset. The fruit is cut open and grilled, then tossed onto vinegary salad leaves with shreds of buffalo mozzarella. Bits of fresh chives and peppery onion slivers are mixed in, adding a nice hum to the whole thing.

Find a day to eat this lovely mess of a salad, sitting on a blanket in the grass. With your hands, if you prefer. Lick the bowl. Lick your fingers. But most importantly, relish the moment. Summer will appreciate the earnest send-off.

Grilled Peach Salad – serves two as a light main (adapted from Farmhouse Table)

Grilled Peach Salad

  • 3 peaches* (or 4 nectarines), cut in half and pitted
  • flaked salt (like Fleur de sel or Maldon salt)
  • 2 large handfuls of mixed greens, washed and dried
  • 1/2 small red onion (or one shallot), finely sliced
  • 2-3 oz. buffalo mozarella, torn into bite-size pieces

*Note: for the love of god, DON’T punish your peaches by putting them in the fridge. Doing so will make them hard and acidic. Leave them on the counter and consume over the next few days. If you’re worried about fruit flies, cover them with a plate or something like it.

For the dressing:

  • 2 Tbs. white balsamic vinegar (or cider vinegar)
  • 1 tsp. honey
  • 1 tsp. whole grain mustard
  • approx. 1 Tbs. minced chives
  • 1/4 cup (or 4 Tbsp) olive oil

Lightly salt the cut sides of the peaches, drizzle very lightly with olive oil and place cut side down on a hot grill*.  When the peaches are charred and have begun to soften, remove them to a platter and set aside.

To make the dressing, place vinegar, honey, mustard and chives in a small bowl. While whisking constantly, slowly drizzle in olive oil until emulsified. Toss salad leaves and onion with vinaigrette and place in a serving dish.  Spread peaches and mozzarella on top of the greens and drizzle with a little more dressing.  Serve straight away.

*If you (like me) don’t have a BBQ, you can toss the peaches into a preheated grill pan – not exactly the same result as putting it on an outdoor grill, but you still get those nifty charred marks.

Share this:

  • Tweet
  • Share on Tumblr

Like this:

Like Loading...

Croissant speed-dating

21 Sunday Apr 2013

Posted by julia chews the fat in Breakfast & Brunch, Snacking, The Basics, Vegetarian

≈ 6 Comments

As I sit here and write these words, the scent of butter is emanating from by being. This is not a metaphor, or a poetic musing. I just straight up smell like butter. It might seem like an odd thing to confess, but these days, smelling like butter makes me feel like I’m doing something right.

Here’s why.

In 2 weeks and 2 days I’ll be heading to Paris (!) for the first time (!!). While I’ve already mapped out the standard Paris virgin’s itinerary (one that includes that little tower and little museum), I’ve also made room for a few other things, including a viennoiserie class in the 4th arrondissement where I’ll be learning how to make croissants, amandines and chocolatines. With a French pastry chef. BY THE SEINE.

Pinch me.

By total coincidence, April 20th happened to be “La Fête du croissant” in Montreal, which means that over a dozen bakeries in the city were showcasing their version of the iconic French crescent and offering them at reduced prices. Under the guise of “research” for my upcoming class, I thought this was the perfect opportunity to eat an obscene amount of pastry take some notes. I enlisted a few friends to do some bakery-hopping with me to help determine what made a good croissant, and what made a not-so-good croissant, assessments based on the holy Parisian tenets of:

  • appearance
  • layers/texture
  • sound/smell
  • taste

4 friends, 4 bakeries, all within a 4-block radius of my apartment. Voici les observations:

9:25am – with Julie at Monsieur Pinchot’s

M.PinchotOverall look: flat; floppy; not really crescent-shaped; the way someone’s eyes look after a long cry
Layers/texture: layers? what layers?; cakey interior; greasy
Sound/smell: no crunch (thus no sound); sweet, buttery smell
Taste: surprisingly nice taste…if it wasn’t pretending to be a croissant (Julie says, “Oueh…pas les meilleurs.”)

—–

9:50am – with Simon at Co’Pains d’abord

(*Note: due to large demand, they were out of regular croissant, hence the chocolatine)

Co'pains d'abordOverall look: pleasantly plump; toasty-coloured exterior
Layers/texture: visible layers; airy; rises back up after you bite into it
Sound/smell: crispy shell that crackles nicely; scent of butter
Taste: pleasantly buttery; lightly yeasty (in a good way) (N.B I discovered that Simon likes to eat the crispy exterior in its entirety before the soft interior. He gets points for adorability.)

—–

10:30am – with Marko & Marie-Lou, breakfast with croissants from Le Grain de blé

Grain de bléOverall look: perfect crescent shape (Marie-Lou says, “It looks like a crab.”)
Layers/texture: uniformly toasted exterior; heavier than they appear; dense; overcooked ends
Sound/smell: slight crunch when squeezed; no memorable scent
Taste: underwhelming; we ended up making ham & cheese sandwiches with them (Marko says, “Yeah, these suck.”)

—–

11:55am – Fous Desserts, with yours truly

Fous Desserts 1

Overall look: relaxed crescent shape; golden exterior; lightly glossy; sexy
Layers/texture: visible, delicate layers; easy to pull apart; crispy exterior; airy, soft interior
Sound/smell: exterior had a satisfying crunch; scent of wheat and butter
Taste: rich butter taste that hits the tongue and melts; very lightly yeasty; nicely balanced in sugar and salt

Look...at...those...ayers (!)

—-

Of the four, Fous Desserts knocked it out of the park. Their croissant is epic. From now on, there is no need for me to go anywhere else in my neighborhood. This is croissant that slays all others.

If you live in Montreal, or are visiting, here’s where you can find them:

Fous Desserts
809 Av. Laurier Est
Montréal H2J 1J2 [Qc] Canada
Tel: +1.514.273.9335
http://www.fousdesserts.com/acceuil.html

Thanks again to Julie, Simon, Marko & Marie-Lou  xx

Share this:

  • Tweet
  • Share on Tumblr

Like this:

Like Loading...
← Older posts
Newer posts →

Facebook

Facebook

Instagram

No Instagram images were found.

Recent Posts

  • Layers and Rows
  • Finding Buoyancy
  • February
  • Wednesday
  • Cross My Heart, Miso

Archives

  • May 2017
  • April 2017
  • February 2017
  • December 2016
  • November 2016
  • September 2016
  • August 2016
  • July 2016
  • June 2016
  • May 2016
  • April 2016
  • March 2016
  • February 2016
  • January 2016
  • December 2015
  • November 2015
  • October 2015
  • September 2015
  • August 2015
  • July 2015
  • June 2015
  • May 2015
  • April 2015
  • March 2015
  • February 2015
  • January 2015
  • December 2014
  • November 2014
  • October 2014
  • September 2014
  • August 2014
  • July 2014
  • June 2014
  • May 2014
  • April 2014
  • March 2014
  • February 2014
  • January 2014
  • December 2013
  • October 2013
  • September 2013
  • August 2013
  • July 2013
  • June 2013
  • May 2013
  • April 2013
  • March 2013
  • February 2013
  • January 2013
  • December 2012
  • November 2012
  • October 2012
  • September 2012
  • August 2012
  • July 2012
  • June 2012
  • May 2012
  • April 2012
  • March 2012
  • February 2012

Categories

  • Beverage
  • Breakfast & Brunch
  • Condiments
  • Cooking For Your Peeps
  • Cooking Solo
  • Cooking with Nonna
  • Food Away From Home
  • Food Writing
  • Holidays
  • Intro
  • Lunch & Dinner
  • Snacking
  • Soups
  • Sweet Tooth
  • The Basics
  • Vegetarian

Enter your email address to follow this blog and receive notifications of new posts by email.

Join 80 other followers

Blog at WordPress.com.

Cancel

 
Loading Comments...
Comment
    ×
    %d bloggers like this: