You’re having friends over for dinner and you want to make something nice. But it’s a work night, a Thursday, so you’re already a bit bagged, and a little unmotivated, thinking about the Jenga tower of dishes that will invariably pile up in the sink if you start making something quote-unquote fancy.
This is when you need to pull a rabbit (or two) out of your hat to successfully fake your way to a meal fit for dinner guests – a meal that will involve minimal amounts of messing around in the kitchen, but will look and taste a little more special than the everday.
There are, of course, different ways you can do this. For starters, if you’re committed to the idea of using the oven, you can choose recipes that compliment eachother’s cooking time and temperature; that way, you can cook a couple of things at the same time, and even bake dessert at the end, with that still-warm oven. The other advantage is that you can slide whatever you’re making into the oven, let it work its magic, and go back to the things you were doing beforehand, like the multi-tasking mavrick you are.
We all have different shortcuts in the kitchen, which is nice, because it means that we can learn from eachother’s acumen – that mental Roladex of tips and tricks we’ve stockpiled over the years. Below you’ll find a few of my own back-pocket recipes (the rabbits up my sleeve, if you will) for when I’m having people over, but don’t want to fuss. It’s a simple potato and roast chicken dinner that can be served with a green salad or some steamed vegetables. The potatoes can be slipped into the oven about 30-40 minutes after the chicken. The dessert is easy too – no need to wrangle dough or batter, just toss some sugared apples onto some prepared puff pastry and watch it pouf up in the oven after the potatoes and chicken have come out.
All of it gives you more time to be with your guests, which, let’s be honest, is the most important part.
FAKING FANCY TIP NO.1 – RE-VAMPING THE HUMBLE POTATO
Potatoes, simply prepared, often come in two forms – boiled, or diced and roasted. Both of these options have virtues of their own, but there’s another variation on the potato that should be on everyone’s radar, and that, dear people, is the smashed potato. I first learned about smashed potatoes during a period in the mid-2000s when I binge-watched Laura Calder‘s French Food at Home, before food blogging and celebrity chef-dom had exploded and you could actually rely on The Food Network for quality programming (wow, can you hear the octogenarian coming through? Don’t get her started on styrofoam food packaging). The Food Network aside, Laura Calder is known in her own right for her pared-down, no-nonsense – and très, très français – approach to food, where the most important elements are quality of ingredients and method, as opposed to flashy additions or lengthy processes. Her smashed potatoes (she calls them “squished” potatoes) are simplicity incarnate, but the nice thing is that they are just the slightest bit different than a boiled or a roasted potato, because they’re in fact BOTH: you take some nice, small, waxy potatoes, skin-on, and let them cook in boiling water until just tender. Then you drain them, set them on a work surface and gently press each one with whatever sturdy kitchen equipment you have on hand (I like using the bottom of a cast iron pan), dress them with olive oil, a sprinkle of salt (I add fresh rosemary too), then lay them on a baking sheet and toss them into a hot oven for 30-40 minutes, turning once halway though. The beauty of the smashed potato is that you get a tender interior and these lacy, crispy edges. They also look more interesting than a in-tact boiled potato, sort of more lived-in and wild. And they are a treat to eat.
SMASHED BABY POTATOES WITH ROSEMARY – from Laura Calder
- 2 lb baby potatoes
- olive oil
- flaky salt (such as Maldon)
- freshly ground pepper
- a couple spring of fresh rosemary
1) Scrub the potatoes and cook, unpeeled, in boiling salted water until tender. Drain. When cool enough to touch, gently squish them flat with whatever kitchen tool you see fit. Don’t let them explode, just flatten until the edges break a bit, but they are still in one piece. Toss with some olive oil, the rosemary sprigs, and season with salt and pepper.
2) Heat the oven to 400°F. Spread the potatoes on a baking sheet and bake for about 30-40 minutes, or until crisp outside, turning once halfway through.
(*I didn’t get a chance to capture the finished result, so you’ll have to use your imagination – but they come out crackly, crispy, dark golden on the outside. A bit knarly, but beautiful.)


—–
FAKING FANCY TIP no.2 – ELEVATING ROAST CHICKEN
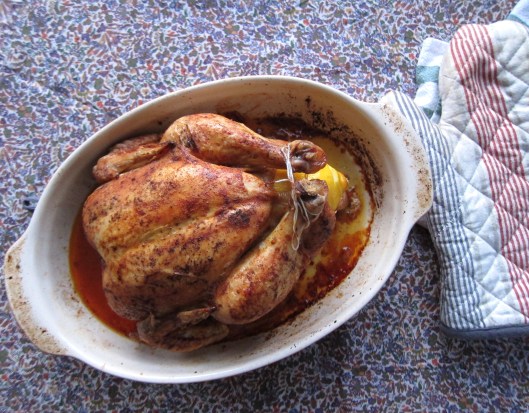
Let’s be honest, there’s nothing particularly spectacular about roast chicken in and of itself. But if done right, roast chicken can be one of the most delicious things you’ll put on the table, especially if you employ a good, healthy dose of butter. Here too, you have different options. Molly Wizenburg has a recipe for Thomas Keller’s roast chicken where you slather it with melted butter after it’s cooked and serve it with Dijon mustard (which, though I’ve never tried it, actually sounds pretty wicked). My usual fall-back is smearing butter under the skin, along the breastbone, before cooking. For added flavour, I like to use compound butter – in other words, softened, unsalted butter that you mix with herbs, or zest, or other seasonings. The butter “insulates” the breast meat (which tends to get dry) from the heat of the oven, while permeating it with rich flavour. You don’t want to be using butter like this everyday (you’d be well on your way to a heart attack), but for occasions that are out of the ordinary – say, having friends over on a Thursday night – it’s a lovely way to make roast chicken a little more frilly.

WHOLE ROASTED CHICKEN WITH HERBED BUTTER
Ingredients
- 1 whole, 1.5 kg (3-3.5 lbs) good-quality chicken (I like to get mine here when I can)
- 1 lemon, pierced all over
- 3-4 cloves of garlic, smashed, skin-on
- a handful of fresh herbs – thyme, rosemary, tarragon, etc. – chopped
- about 3 oz. butter, softened
- salt and freshly ground pepper
- 1/4 tsp paprika (for colour; optional)
- kitchen twine
Directions
1) Take your chicken out of the fridge about 30 minutes before it goes into the oven.
2) Preheat the oven to 400ºF. Mix the chopped herbs with the softened butter, season with salt and pepper and stir to combine; set aside. In a small dish, mix some salt, freshly ground pepper and the paprika (if using). Prepare two lengths of kitchen twine to wrap the legs and the thighs.
3) Set aside a roasting pan big enough for your chicken. Blot the outside of the chicken with paper towel (removing excess moisture will help ensure a crispy skin). Season the chicken with the prepared salt, pepper and paprika. With the cavity of the chicken facing you, gently run your fingers under the skin along the breastbone, separating the skin from the meat. Then, gently stuff portions of herbed butter under the skin, spreading it evenly over the breast meat. Put the garlic cloves and lemon in the cavity of the chicken.
4) Tie the legs together snugly (this prevents the bird from drying out). If the lower half of the chicken looks like it’s still pretty loose, I sometimes tie a second piece of twine around the top of the thighs. Place the chicken in the preheated oven and roast for an hour to an hour and fifteen minutes (see note below*), basting a couple of times during cooking. Once the chicken is cooked, remove from the oven and let rest for about 15 minutes before carving. Serve with the pan juices.
A note on cooking whole chicken: total cooking time will vary, depending on the actual size of your chicken, as well as the intensity of your oven. A good rule of thumb is to calculate 15 mins per pound at 400ºF, but I use a meat thermometer just to be sure – it should read 165ºF* when inserted into the thickest part of the thigh but not touching bone. (*A lot of thermometers and government sources will give 180ºF as the ideal internal tempertaure, but they are usually overly-cautious (resulting in over-cooked, dry meat). If you pull it out when it reaches 165ºF and then let it rest, covered, for about 10-15 minutes, you’ll be good to go. The juices should run clear, not pink, when you cut into it.)
—–
FAKING FANCY TIP no.3 – USING FROZEN PUFF PASTRY
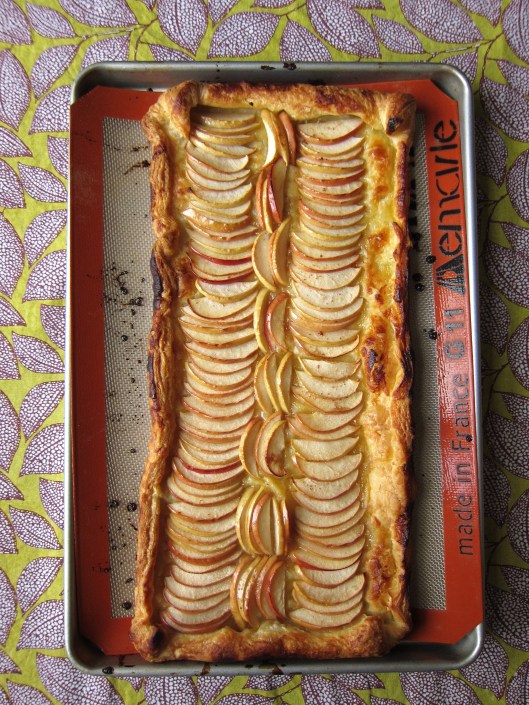
When you’re having people over, it’s sometimes nice to have something sweet at the end of dinner, but making a cake or a pie or something along those lines can be more work than it’s worth – the careful combining, the chilling, the rolling, the aforementioned sink full of dishes. This is when frozen puff pastry becomes a trusty pal – once thawed, it’s at your service and ready to use. The best part is that the free-form styling of the outer edges means that you can very easily get away with calling it “rustic”. Adding a quick dusting of powdered sugar to your finished tart (or any dessert for that matter) will make it look like a snowy, Scandanavian dream. I highly recommend it.


SIMPLE APPLE TART
- 1 sheet all-butter puff pastry* (about 450 g), thawed
- 2-3 firm, medium apples (such as Empire or Gala) – cored, halved and thinly sliced
- 1 Tbsp granulated sugar
- 2 Tbsp brown sugar
- 3 Tbsp butter, melted
- 1 Tbsp rum
- squeeze of lemon
- 2 Tbsp powdered sugar, for dusting (optional)
*one of the luxuries of living in Montreal is that many of us are within a stone’s throw of a bakery, many of which sell prepared puff pastry. If you don’t have a bakery close-by, you should be able to find puff pastry in the frozen foods section of most grocery stores.)
Directions
1) Preheat the oven to 400ºF. Line a baking sheet with parchment paper or a Silpat. In a bowl, add a sqeeze of lemon juice to the apple slices, then add both sugars, the melted butter, the rum, and gently combine; set aside.
2) On a lightly floured surface, unfold the puff pastry sheet. Roll it out a little bit (to about 1/2 inch thick). You should have a long rectangle about as long as a standard baking sheet (I don’t measure). Roll about 1 inch of the edges inward to form a border (or, if you prefer, you can lightly score a border along the inside of the rectangle, as this video demonstrates). Poke the inner rectangle all over with a fork to prevent air bubbles from forming while baking.
3) Layer the apple slices, overlapping them slightly. Bake for 25 minutes, until crust is golden brown, then transfer the pan to a wire rack. Once cool, dust with powdered sugar, the transfer tart to a cutting board for serving. Pairs well with vanilla ice cream (obviously).


Well, even yer ham-fisted male parental unit could swing this one!! I’ll send the invitation soon….. good one kiddo! Bet ya can’t wait to get to Sicily!
cheers,
Dad
Glad to hear it, ham-fisted parental unit! And yeah – Sicily can’t come fast enough. x
Yep, I’ve been there… Great tips though! 😉