• Home
  • About

julia chews the fat

julia chews the fat

Category Archives: Vegetarian

Breakfast tofu

12 Saturday May 2012

Posted by julia chews the fat in Breakfast & Brunch, Vegetarian

≈ 9 Comments

It has become quite apparent in the last few months that I am a compulsive food shopper. Not in the way you might imagine, though. Despite being a food nerd, I’m not particularly interested in obtaining obscure ingredients like pink salt from the Himalayas or white alba truffles, or pretty much anything that’s sold with the promise that it’s been aged in a dragon’s den or transported across the desert by galloping unicorns.

No, my compulsive food shopping does not revolve around sourcing exotic products. Instead, it involves hoarding things that go on sale. It goes something like this: “Ooh, tomato paste is on sale. I should buy 10 cans.” Then weeks later, when I tidy up the pantry, I come upon those same 10 tins of tomato paste, plus an inordinate amount of canned beans, dried mushrooms, baking powder, and a sedentary army of Asian sauce enhancers that I barely know how to use. More and more, my food-shopping M.O has become: “It’s on sale – get it.”

Aside from amassing ridiculous quantities of canned goods and hoisin sauce, there are also a few items picked up during a binge-shopping spree that end up residing in my fridge for a longer period of time than expected. Without fail, tofu consistently wins the prize for “item-neglected-the-longest”. It’s the one thing that I stare at blankly when I open the fridge door; the one item I have a hard time getting excited about. And once I’m distracted by something more immediately gratifying, say, a chunk of Gruyère or a bowl of leftover noodles, I catch myself making the same guilt-ridden promise to poor ol’ tofu: “Tomorrow. I will make you tomorrow.” The problem is that eventually “tomorrow” becomes the expiration date and, whether you like it or not, you have to deal with that chunk of soy bean curd sitting in the lonely spot on the top shelf next to the jam.

I don’t really know why I neglect the tofu in my fridge. I like tofu. It’s texturally interesting, it’s substantial, and it helps to balance out the omnivore’s diet. But I suppose what throws me off is how anaemic it looks, especially under that thin film of plastic that it comes in. To me, tofu straight out of the package is the aesthetic equivalent of bare legs that haven’t seen a lick of sun all winter – not the ugliest thing you’ve seen in your life, but also not the prettiest. And not the most inspiring thing to look at when you’re hungry after a long day and just want to tuck into a plate of something handsome.

But today it was me, the tofu and the expiration date. It also happened to be 8am on a Saturday. This is when not being finicky about strict definitions of “breakfast food” can be a blessing. If, however, you find the idea of having tofu before 11am a little unsettling, you can always toss in a few of the usuals (i.e. an egg, some toast and a little fruit) and Bob’s your uncle.

Breakfast tofu (serves 2-3)

Marinade:

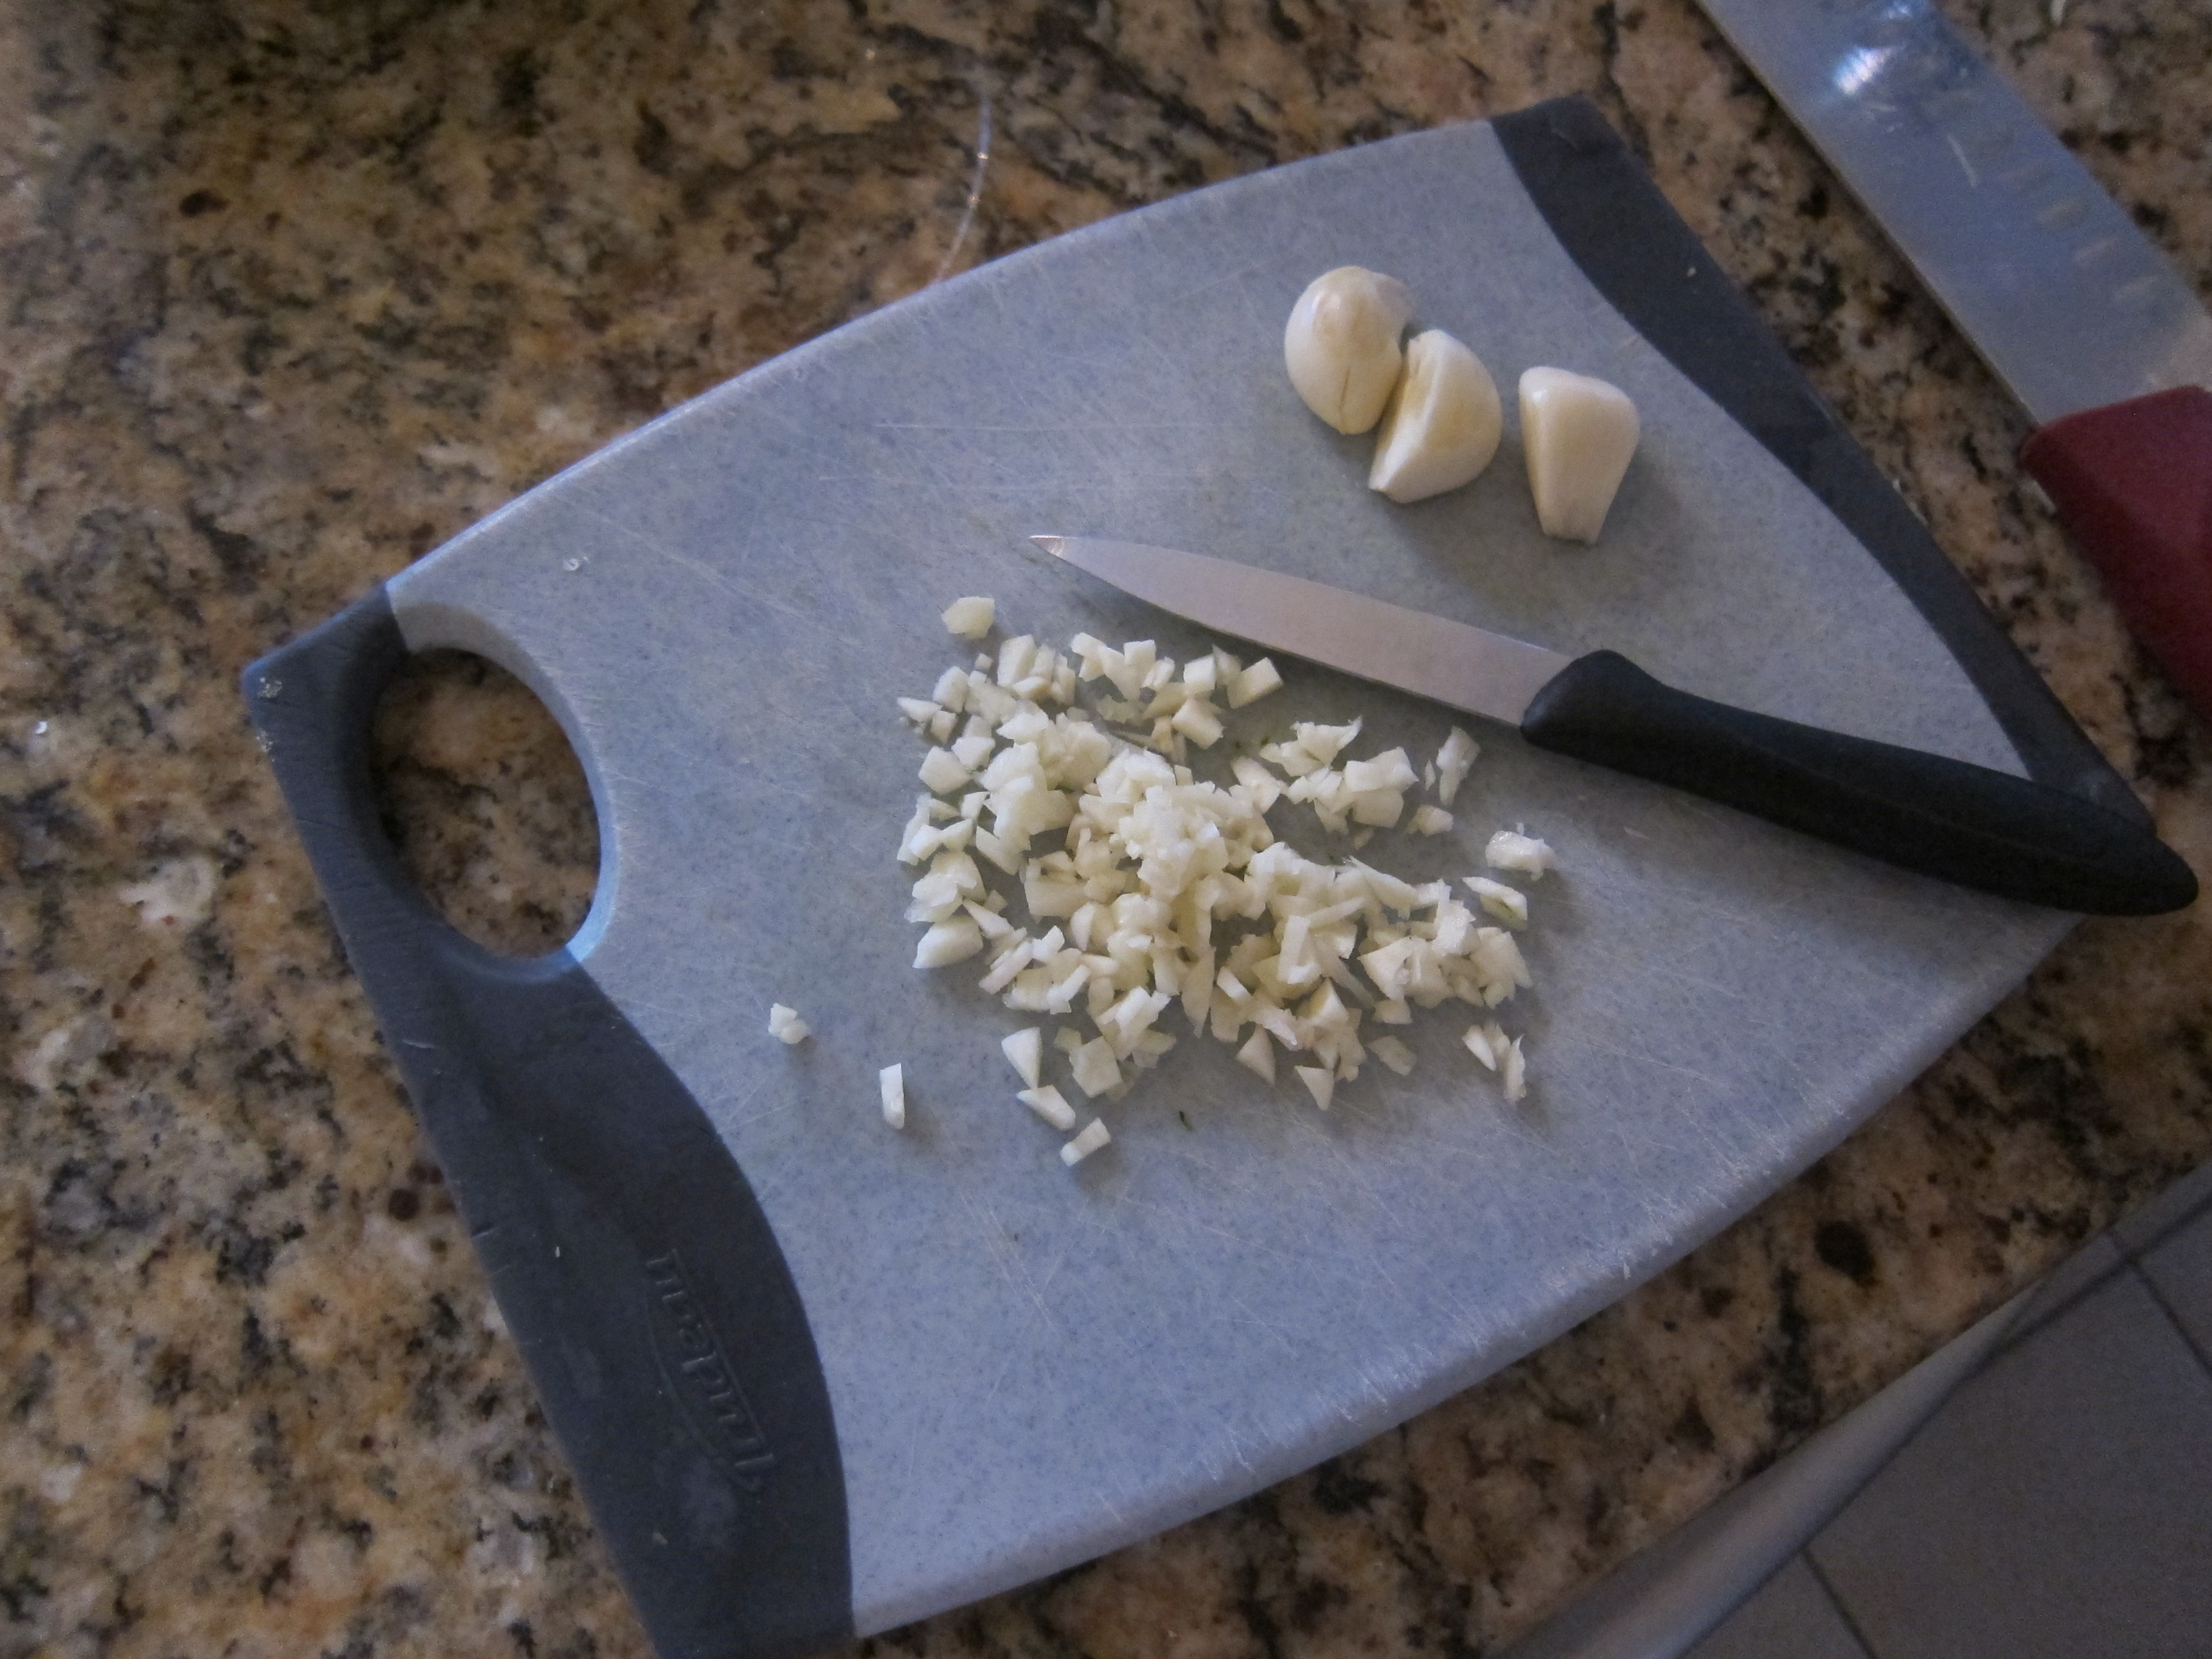
  • 2 cloves garlic, minced
  • a thumb-sized piece of ginger, minced
  • 4 tbsp canola oil
  • 1 tbsp sesame oil
  • 1 tbsp tamari sauce
  • 1 tbsp mirin sauce
  • 1/2 tbsp rice vinegar

—-

  • 1 package firm tofu, drained
  • Wafu sauce (to serve)

Mix all the marinade ingredients in a bowl. Adjust quantities to your liking. Slice the tofu into uniform rectangles, each about 1/4″ thick. Place slices in a casserole dish and pour the marinade over the tofu. Let it bathe in the fridge for about 30 mins to an hour, turning once. (you can also let marinate overnight).

Remove from the fridge and allow the tofu to come to room temperature. Remove the garlic and ginger pieces. Put a grill pan on medium-high heat; when hot, place a few slices of tofu in the pan. Working in batches, continue to grill all the pieces, 2 minutes on each side, keeping the previous ones warm in the oven. For an improvised breakfast, this version was served with Wafu sauce, a scrambled egg, toast with cashew butter and some broiled mango.

Share this:

  • Tweet
  • Share on Tumblr
Like Loading...

Back-to-it Minestrone

04 Wednesday Apr 2012

Posted by julia chews the fat in Lunch & Dinner, Soups, Vegetarian

≈ 3 Comments

Three weeks ago to the day, an orthopedic surgeon made three small incisions in my right shoulder to fix a recurring dislocation problem. Since then, there have been things that I’ve temporarily had to bid adieu to, including pantihose, chopsticks, bras, clothes-folding, bed-making, hair-styling, hugging people with both arms and sleeping in any other position than corpse-pose. It’s bewildering that I’ve managed to look remotely presentable this last little while – barring those first few days at the beginning when I looked like something you might find in the recesses of your couch cushions. Luckily, the people in my day-to-day didn’t seem to notice. That, or they’re magnificent liars. I can appreciate either.

Despite feeling like a gimpy three-legged dog over the last couple of weeks, it hasn’t been all bad. In fact, I’ve taught myself some pretty neat tricks, like putting on socks with one hand, applying liquid eye-liner like a lefty and resisting the urge to catch things when I drop them (anthropological note: watching passively as your most beloved piece of porcelain escapes your grip and shatters into a gazillion pieces on the floor is an interesting testament to the strength of human willpower). Equally interesting is the realisation that you will not be able to sweep said shards of porcelain into a dust pan in order to discard them. Human ingenuity dictates that a quick sweep with one’s sock to hide the evidence in the corner of the room will do the trick. That is, until your mother visits with food and casually asks if you need help “tidying up”.

Having relied almost exclusively on the care-packages of a lovingly doting mother and take-out sushi from down the street, the extent of my kitchen activity has involved reheating leftovers and pouring the contents of plastic containers onto plates, which, as you might have guessed, is as enchanting as it sounds.

I recognise that things could have been worse (on all sorts of accounts). But I missed my pots and pans and various kitchen implements. It felt like I hadn’t used them in so long that on any given day they might mobilize and walk out the front door, bereaved and weepy. But this past weekend I reached a recovery milestone: being able to wield a knife and chop things. Hallelujah.

Below, I bring to you the first real thing I’ve made in the last 3 weeks – from beginning to end – in my kitchen, WITH MY OWN TWO HANDS. I may not yet be able to shave my right armpit, but it looks like I can still make a mean minestrone – gimpy arm and all.

Minestrone (serves 4)

  • 1 small onion
  • 1/2 leek, finely chopped (white part only)
  • 2 cloves garlic, finely chopped
  • 1 carrot, diced
  • 1 celery stalk, diced
  • 1 stalk of swiss chard, finely chopped (spinach or kale could be used instead)
  • 1/2 cup white vermouth
  • 1 litre home-made chicken stock
  • 1/2 can crushed tomatoes (or better: 1/2 jar of Nonna’s tomatoes)
  • 1 can cannelli beans (or better: dried beans, soaked overnight & cooked)
  • 1/2 cup small pasta, preferably ditalini (“little thimbles”)
  • a few sprigs of parsley, chopped (fresh basil or thyme also work – just go easy on the thyme)
  • olive oil
  • salt to taste

Optional: fried garlic and pine nuts (to serve)

Directions

Prepare a dutch oven with some olive oil and set on the stove at medium-high. Once the oil starts to get warm, add the onions, leek and garlic sauté until translucent.

Add the carrot and cook for about 2 minutes. Then add the celery and swiss chard and cook for another minute. Pour in the vermouth and stir. Add the crushed tomatoes, parsley, broth and some salt. Give a good stir and reduce the heat to low.

Allow to simmer for about 10 minutes then add the beans and the pasta (cook until al dente). Feel free to add more broth or water if you think it looks too thick (note: you can extend the cooking time to let the flavours settle in a bit more – but don’t add the pasta until the end and be sure to start with more liquid).

Serve with fried garlic and pine nuts and a generous shaving of parmesan.

Share this:

  • Tweet
  • Share on Tumblr
Like Loading...

A morning sans toast

03 Saturday Mar 2012

Posted by julia chews the fat in Breakfast & Brunch, Cooking Solo, Vegetarian

≈ 5 Comments

Baby, I am a toast girl, through and through. Make me toast with marmalade, and I’ll be yours forever.

Something magical happens to a piece of bread that’s been browned by radiant heat – it becomes something that taps into basic feelings of comfort and contentment. For me, toast also represents a history of experiences, all from different times and places: Grandpa used to make us whole-wheat toast with his sugar-free blueberry jam (for diabetics)- always cut straight through the middle, with the jam spread right to the edges. Two years of my adult life was spent getting up early on Sunday mornings to watch Coronation Street in the company of black tea and buttered toast. In the wee hours of the morning after a night out, almond butter on toast was a common go-to snack in my early 20s. And today, toast and cheese is pretty much the first thing on my mind once I’m up and out of bed.

It’s nothing less than a love affair, dear readers. Which is why on mornings when there’s not a single piece of bread in the house, it’s not uncommon to hear a low rumble of swear words slip out of my mouth. Anyone trying to convince me of the merits of cereal will be wasting their breath; a piece of hot, buttered sour-dough far surpasses a bowl of cold, soggy muesli. Every. Single. Time.

So what’s happens when there’s no bread in the house? Once the grumbling is out of the way, I usually weigh the following options: 1) get dressed and presentable and go buy some; 2) get dressed and (more) presentable and go have breakfast somewhere. But this morning, neither of these options were the least bit enticing. You couldn’t PAY me to wrestle with winter boots, a scarf, mitts and a set of unshoveled steps at 8am on a weekend to go out for a bread-run or a trek to the breakfast place. Winter 1, Julia 0.

—–

In cases like these, laziness can be beneficial as it forces you to be creative. It will test your ability to scrounge up the contents of your fridge and turn seemingly disparate food items into something edible: there are eggs, some leftover baby greens. And – oh well, hello there, Mr.Risotto. Care to join me for breakfast?

Risotto hash, scrambled egg and mesclun salad (Serves 1)

  • 1 egg
  • splash of milk
  • leftover risotto
  • baby greens
  • vinaigrette: olive oil, juice of 1/2 an orange, splash of red wine vinegar, 1/4 tsp whole-grain mustard, touch of honey
  • butter
  • olive oil
  • salt & pepper

Get 2 skillets ready: a small one for your egg and another for your risotto. In one skillet, heat about a tbsp of oil. Add your risotto and flatten it out all the way to the edges of the pan. Allow to crisp up on medium-high heat, turning once the bottom has turned toasty-brown. You don’t need to be gentle with it – you’re making a hash.

While the rest of the hash is browning, melt a small knob of butter in the other skillet. Beat the egg with a splash of milk and some salt and pepper. When the butter starts to get foamy, add your egg, removing it immediately off the burner – you should be able to cook the egg with the residual heat of the pan by gently pushing it to and fro.

Toss the salad with the vinaigrette and serve with the eggs and hash, remembering that you can always have toast tomorrow.

Getting it all in one forkful. Happy times.

Share this:

  • Tweet
  • Share on Tumblr
Like Loading...

Zucchini puffs

20 Monday Feb 2012

Posted by julia chews the fat in Cooking with Nonna, Vegetarian

≈ 3 Comments

Italians love their zucchini. Fried, steamed, stuffed – you name it. They’ve found savvy ways of transforming this standard (and virtually flavourless) squash into a variety of dishes, both savoury and sweet. The zucchini puff, mind you, remains a bit of an enigma. I’ve never seen it on a menu or in a cookbook. Not once in my 6-week stay in Italy did I come across one. And if you try looking it up on the Internet, you’ll often stumble upon an Americanized version that looks like a potato latke suffering from an identity crisis.

The zucchini puffs that Nonna makes are light and pillowy and charmingly goofy-looking. The ultimate in minimalist cooking, they are made by mixing a handful of ingredients to make a batter, which is then fried in batches. They can be served hot or cold and while they are generally eaten as an antipasti, can very easily become part of the breakfast rotation.

As this is your standard no-nonsense recipe, it involves few ingredients and requires barely any kitchen gear. Your best friend right now will be a small, sharp paring knife. It will allow you to cut and trim and dice rather efficiently, and if you’re feeling extra dexterous, could even eliminate the use of a cutting board. Your second-best friend will be a potato ricer. If you don’t already have one, I highly recommend taking a trip to your local kitchen supply store and getting one. They are ace.

You will need:

  • 4 eggs
  • 4 cloves of garlic
  • 4 small zucchini (skin on = more vitamins)
  • 1 cup flour + 1/2 teaspoon baking powder
  • 1/4 cup finely chopped parsley
  • 1 tsp salt
  • 1/4 tsp pepper
  • canola oil for frying

You will need to do the following:

Slice zucchini length-wise to make “lingue” (“tongues”)
Julienne the slices

Dice the julienned slices
Put diced zucchini into a bowl and add the salt; mix and let sit for a few minutes

Chop the garlic
Chop a handful of fresh Italian parsley

Reserve the tips of the parsley and use them to add character to your homemade stock
One spoonful at a time, fill the potato ricer with the salted zucchini

Squeeze! No need to be gentle here – you want to extract as much water as possible
Return the zucchini to the bowl and add the chopped garlic and parsley

Crack the eggs into the mixture
Add the flour, baking powder, and pepper to the batter

Mix with a fork to combine
Spoon batter into oil that has been heated in a heavy-set pan (to check oil temp: if the batter sizzles and puffs up, the oil is good to go).

Fry batter in batches, flipping once and removing from the pan once golden brown
Lay hot zucchini puffs on a couple of paper towels to absorb excess oil. Eat at least one or two piping hot.

*Note: these can be made ahead and re-heated in the oven at 375°F.

Share this:

  • Tweet
  • Share on Tumblr
Like Loading...

Oeuf Cocotte

10 Friday Feb 2012

Posted by julia chews the fat in Breakfast & Brunch, Cooking Solo, The Basics, Vegetarian

≈ 5 Comments

It’s not everyday that your health-practitioner offers you foodstuffs. Especially the home-grown kind. But it just so happens that my chiropractor has started keeping a few chickens in her backyard so, naturally, she’s become my no.1 egg supplier.

This, friends, is a very good thing.

One of her “girls” roaming the garden

There’s really nothing like a free-range egg – the yolks are generally thicker and darker and they just have this overall oumf about them. But free-range, organic eggs don’t come cheap and so I’m doubly grateful for the fortuitous circumstances that led me to getting my back fixed and getting free eggs.

This weekend, that small, mismatched batch in my fridge led to the recipe below. Aside from being super simple to put together, oeuf cocotte is arguably the lsweetest breakfast item you will ever lay your eyes on – one egg, baked in a ramekin with tangy crème fraîche, green onion, and a few diced vegetables. The ingredients you choose to include in your cocotte need not be the same every time – use whatever you have handy in the fridge that might go well with eggs. Pair it up with a little toast and a spicy Bloody Mary and you’re off to a very good day.

Oeuf  Cocotte

  • 1 egg
  • 1 tbsp crème fraîche (or fresh soft cheese, thick yogurt)
  • 1/4 of a green onion, sliced
  • small handful of diced vegetables, sautéed (zucchini, mushrooms, etc)
  • a few cherry tomatoes and/or sundried tomatoes
  • small knob of butter
  • a small handful of grated cheese
  • a smattering of fresh herbs (basil, cilantro, tarragon, parsley…preferably not all together)
  • one ramequin
  • one small ceramic, oven proof dish

Preheat your oven to 430°F. Rub the butter along the bottom and sides of ramekin. Lay your veg at the bottom, add a dollop of crème fraîche and then crack the egg on top. Season with salt and pepper. Sprinkle on the green onion and herbs. Finish with a layer of grated cheese.

Place the ramekin in a gratin dish and pour hot water into the dish until it reaches half-way up the sides of the ramekin. This is your bain-marie. Put in the oven for 10-12 minutes, depending on how oozy you like your eggs and serve with toast, etc.

blog 022

Share this:

  • Tweet
  • Share on Tumblr
Like Loading...

Image

Tomato canning

07 Tuesday Feb 2012

My half-Italian upbringing has led me to believe that certain things are normal: buying an entire prosciutto, pitting 15 pounds of olives in one sitting, knowing all the nicknames of the numbers in Tombola and all the lyrics to “Volare”. Never having to use canned tomatoes from the supermarket is another one of those things that I’ve always accepted as normal; it’s only as I’ve gotten older that I’ve come to appreciate how special this is.

If you’ve tried your hand at tomato canning, you are well aware that it is a laborious endeavour – nothing glamorous here. But it’s dead simple and really rewarding. Our family does it around mid-September, when the tomatoes are at their very handsomest. One big batch (100 jars or so) will last us for the year.

If you decide to take this on as a project in the near future, here are a few steps to keep you in check:

Start with 2 bushels of San Marzano tomatoes.

Pick out the funny-looking ones and make jokes about how they look like people you know.

Blanch the tomatoes in boiling water for a couple of minutes.

Diligently remove the “occhi” (eyes) of each tomato and peel them with your favorite Nonna.

Reserve the peel. You will use it later.

Halve each tomato, then cut into thirds.

Dump tomato chunks into the biggest (sterilized) vat you can find.

Press the reserved peel through a grinder to make tomato paste (alternately, use your hands to squeeze the peel and extract the leftover pulp). I have no idea where you would buy this device in Canada. All I know is that this one came from someone named Pina in Italy and cost 5000 lira (about 5 bucks). Obviously it’s old – the price was given to me in lira.

Add the tomato paste to your big vat of tomatoes.

Find the biggest & deepest stove-top saucepan you have. Fill it with tomatoes, leaving about 2 inches from the top. Add a good handful of coarse salt.

Stir them lovingly. The rules of stirring resemble the 101 of relationships: don’t be neglectful (they will stick to the bottom), but don’t be too clingy (they won’t reach the right temperature). Either extreme will compel your tomatoes to cheat on you with your best friend.

Once the tomatoes have reached a boil, let them go for about 10 minutes. Be sure to stir every so often (see “the rules of stirring”).

Prepare your army of sterilized jars & lids.

Check to make sure there are no leftover water droplets from the sterilization process. You want dry jars.

Add a few leaves of fresh basil to each jar. Every second or third jar, take in a deep breath. You’ll remember why basil is so rad.

When discussing how much basil to add to the jars with Nonna, remember that no matter what, she is always right. Using Italian gestures to reinforce your point will not help.

Get your jars near a sink & prepare one with a funnel.

Carefully ladle hot tomato mixture into each jar, leaving some space at the top.

Quickly screw on each lid. Not too tight though – screw band down evenly and firmly, just until resistance is met (“fingertip tight”).

Always keep a glass of vino handy for when things get a little tense in the kitchen.

Find old blankets or towels to line the boxes in which you will put your finished jars. You may run into old items such as sheets you turned into protest banners. Use them – they will make Nonna laugh.

Place finished jars in your blanket/towel-lined boxes. Move to an area that will not experience severe fluctuations in temperature. You want these babies cooling down slowly.

Pour a drink for you & Nonna. You’re done.

***Note: months after this was originally posted, I took a workshop offered by a former pastry chef, turned entrepreneur/canner-extraordinaire who instructed us to process the jars after they were filled, as you would do when making pickles and jams (i.e putting them in a pot of simmering water and allowing them to boil for 30-40 minutes). Though our family has never done this (and no one has ever died, or been sick from botulism), it’s an option that you may choose to incorporate in your canning project. Search the web for more detailed info.

Share this:

  • Tweet
  • Share on Tumblr
Like Loading...

Posted by julia chews the fat | Filed under Cooking with Nonna, The Basics, Vegetarian

≈ 8 Comments

Newer posts →

Facebook

Facebook

Instagram

No Instagram images were found.

Recent Posts

  • Layers and Rows
  • Finding Buoyancy
  • February
  • Wednesday
  • Cross My Heart, Miso

Archives

  • May 2017
  • April 2017
  • February 2017
  • December 2016
  • November 2016
  • September 2016
  • August 2016
  • July 2016
  • June 2016
  • May 2016
  • April 2016
  • March 2016
  • February 2016
  • January 2016
  • December 2015
  • November 2015
  • October 2015
  • September 2015
  • August 2015
  • July 2015
  • June 2015
  • May 2015
  • April 2015
  • March 2015
  • February 2015
  • January 2015
  • December 2014
  • November 2014
  • October 2014
  • September 2014
  • August 2014
  • July 2014
  • June 2014
  • May 2014
  • April 2014
  • March 2014
  • February 2014
  • January 2014
  • December 2013
  • October 2013
  • September 2013
  • August 2013
  • July 2013
  • June 2013
  • May 2013
  • April 2013
  • March 2013
  • February 2013
  • January 2013
  • December 2012
  • November 2012
  • October 2012
  • September 2012
  • August 2012
  • July 2012
  • June 2012
  • May 2012
  • April 2012
  • March 2012
  • February 2012

Categories

  • Beverage
  • Breakfast & Brunch
  • Condiments
  • Cooking For Your Peeps
  • Cooking Solo
  • Cooking with Nonna
  • Food Away From Home
  • Food Writing
  • Holidays
  • Intro
  • Lunch & Dinner
  • Snacking
  • Soups
  • Sweet Tooth
  • The Basics
  • Vegetarian

Enter your email address to follow this blog and receive notifications of new posts by email.

Join 82 other subscribers

Blog at WordPress.com.

  • Subscribe Subscribed
    • julia chews the fat
    • Join 82 other subscribers
    • Already have a WordPress.com account? Log in now.
    • julia chews the fat
    • Subscribe Subscribed
    • Sign up
    • Log in
    • Report this content
    • View site in Reader
    • Manage subscriptions
    • Collapse this bar
 

Loading Comments...
 

    %d