• Home
  • About

julia chews the fat

julia chews the fat

Category Archives: Lunch & Dinner

End-of-days Bolognese

17 Saturday Jan 2015

Posted by julia chews the fat in Lunch & Dinner, The Basics

≈ Leave a comment

A little while ago, I made a promise to myself. Not a resolution, per se, but a promise. I vowed to make the bleakest, most inhospitable months of the year – January, February and March – slightly more bearable by turning my freezer into a well-organised cache of provisions. It sounds very end-of-days, I know. But from where I’m sitting, the weather feels very end-of-days right now. My nostril hairs froze while waiting for the bus to the dentist the other day; if I don’t wear tights under my pants on my commute to work, I lose sensation in my thighs; I drag a space heater around my apartment, moving from kitchen to living room to bedroom, and, on the most frigid of nights, you can sometimes find me nestled up to a hot-water bottle.

It’s unsexy, it’s exhausting, it’s an exercise in endurance and patience, not to mention mental fortitude. This is winter in Quebec. Bienvenue, les amis.

winter in Qc winter gear

Even when you’ve lived through winters like this your whole life, you never quite get used to them (in other words, you never quite get accustomed to the sensation of frozen nostril hairs) (speaking of unsexy). However, you do become a little more saavy, a little more wise, in prepping for the deep freeze. For one, you buy boots. Good boots, with a polar bear on the logo and a guarantee that says “Waterproof, -40°”. You outfit your bed with flannel sheets (the best purchase of the year, hands down). You run errands strategically – mentally plotting out your excursions in advance to minimize the amount of time spent outdoors. You layer your clothing; you pack extra socks; you do things your younger self never thought you’d do. Like wearing those aforementioned tights, under your pants. Or wrapping your head in a hefty piece of cloth that you can barely breathe through, making you not only look like a terrifying urban yeti, but also severely impairing both your peripheral vision and your hearing when navigating those busy city streets.

Making it alive through winter comes with a well-earned sense of accomplishment, as my fellow Quebecers can attest (We didn’t slip on any ice! We didn’t fracture any limbs! We didn’t lose any exposed skin to frostbite! We made it! High five!). This explains why you’ll find us lounging on beer patios as early as mid-March, when the first few warm rays of sunshine pierce through. It’s still cold; we’re still in winter parkas. But we’re that eager for the faintest glow of warmth after winter’s put us through the wringer.

—–

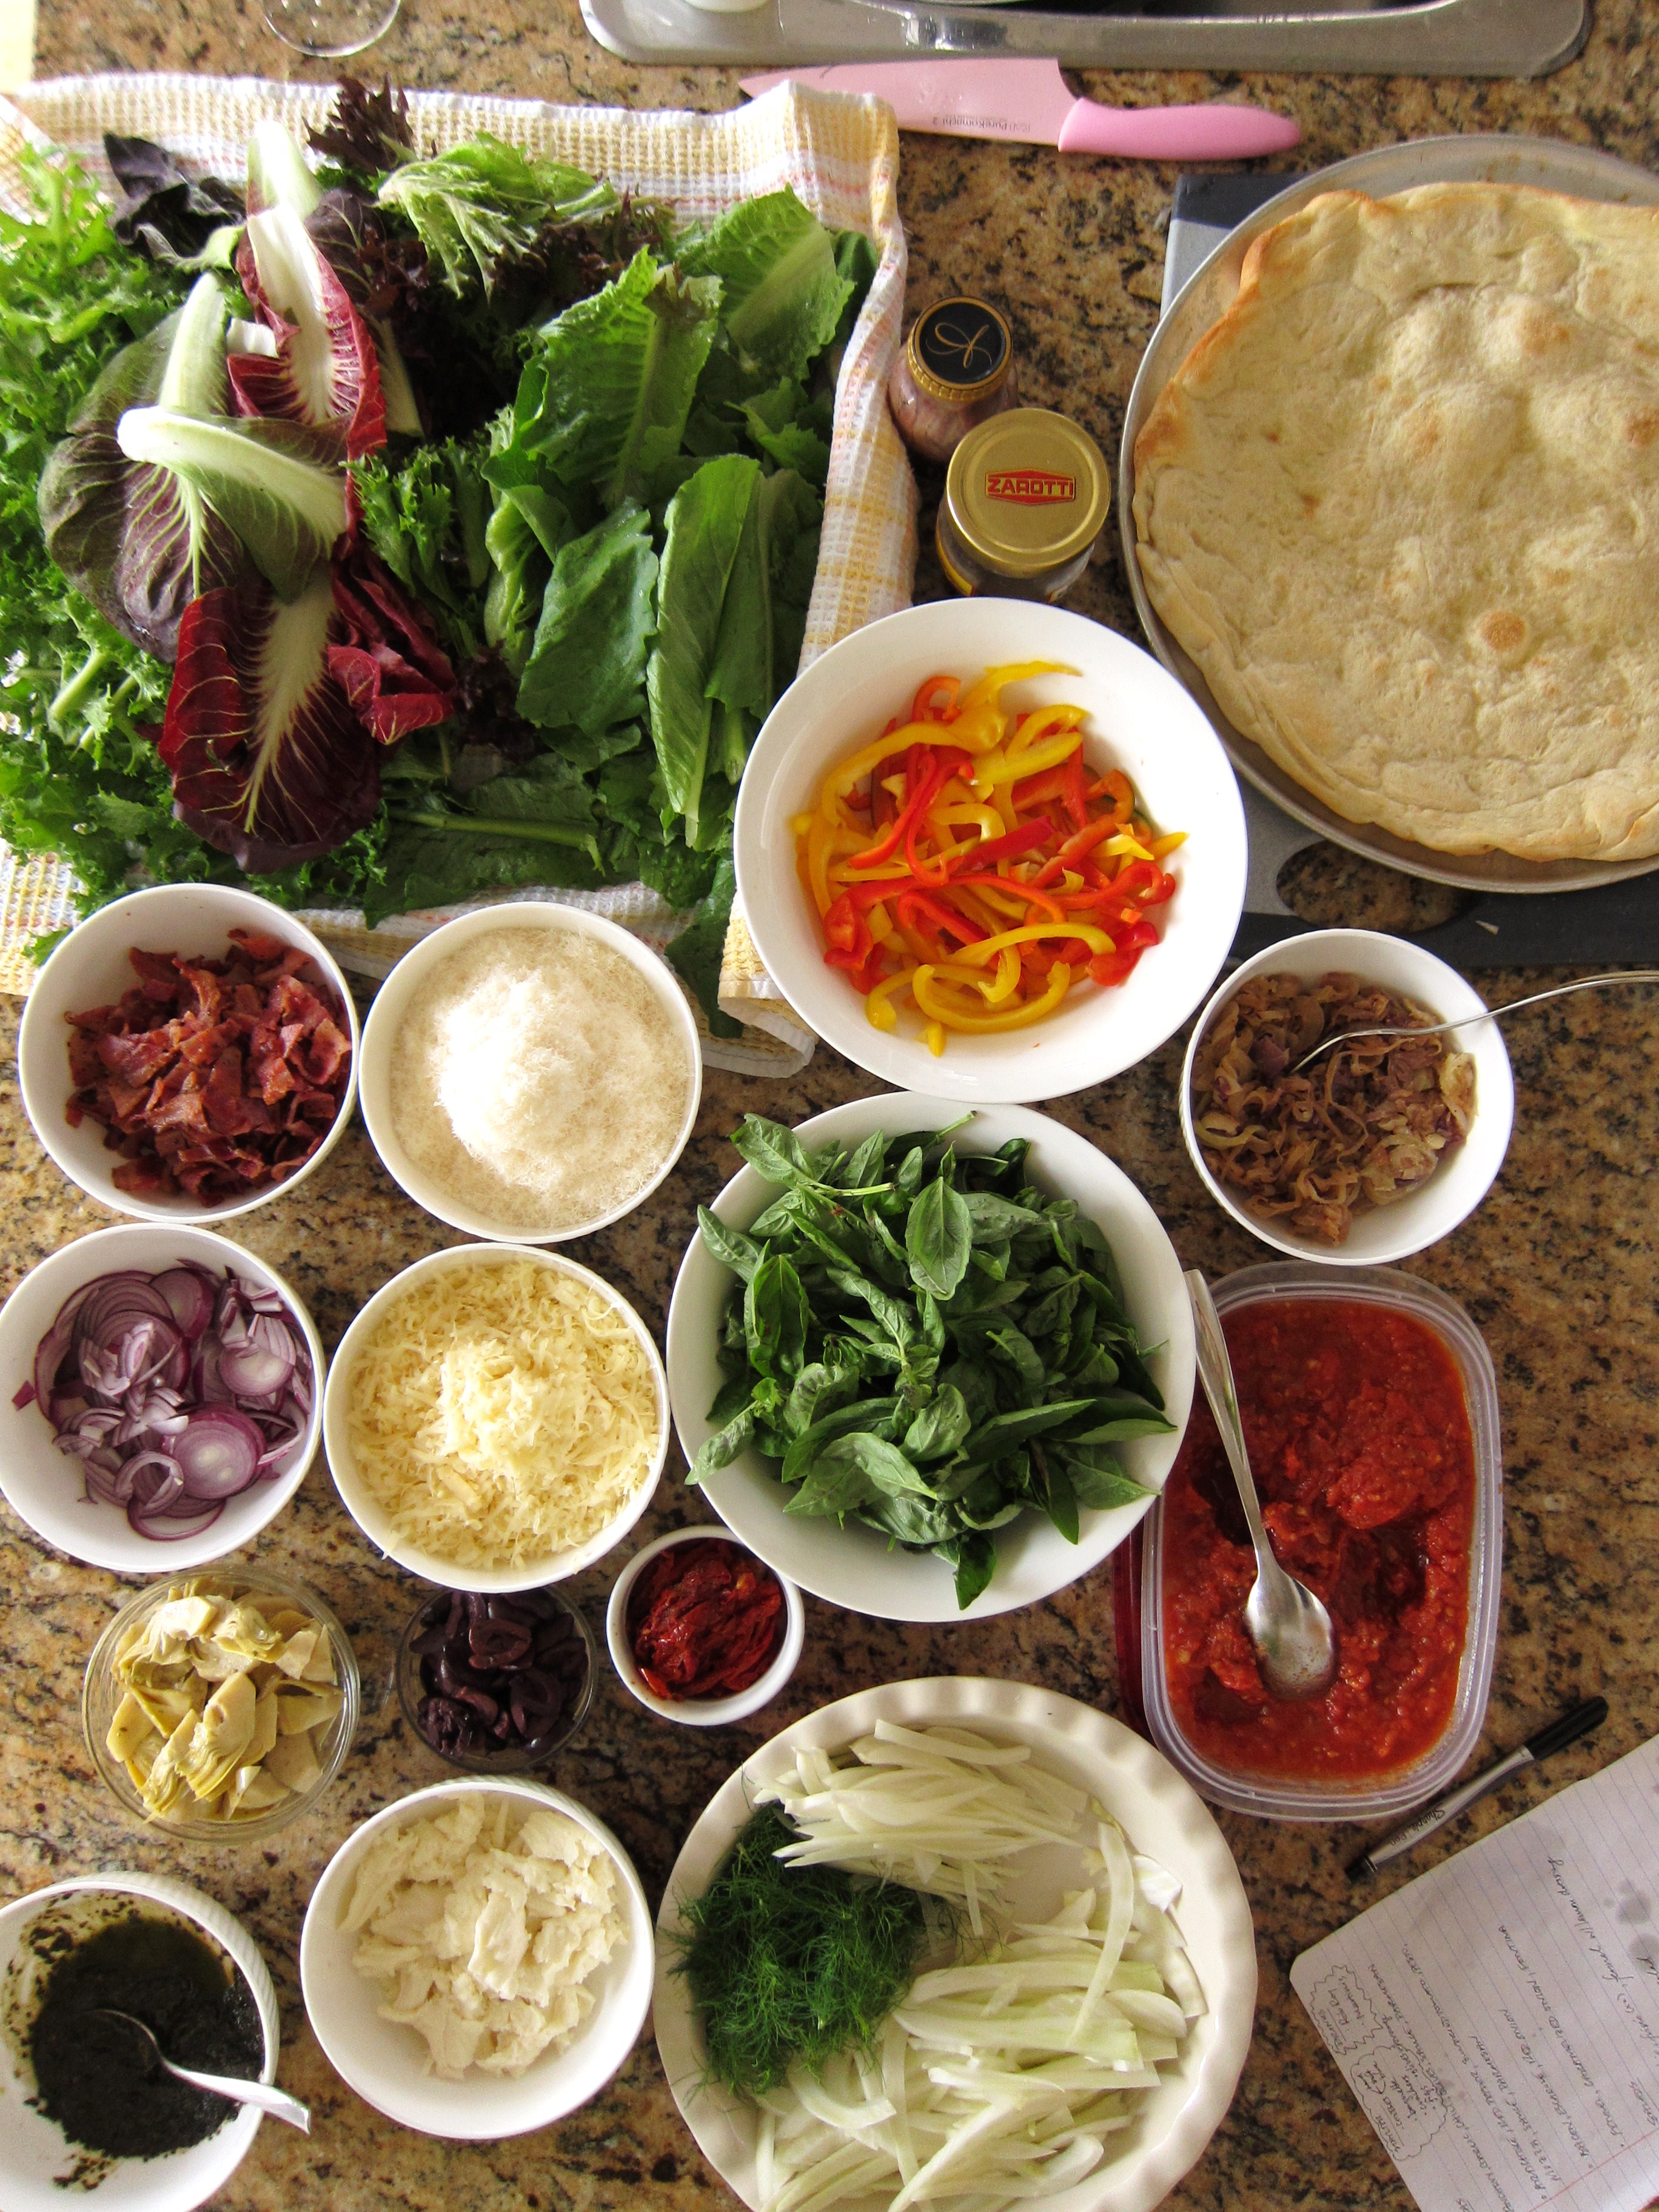
I’ve come to realise that a large part of surviving the deep freeze is, ironically, using your freezer to its fullest potential. Making large batches of food ahead, then freezing them into smaller portions is one of those winter-savvy moves that your older, wizened self has come to appreciate. Which is why you don’t think twice about holing yourself up in the kitchen for a whole weekend, to cook and bake, bag and freeze. Let the rest of them skate around awkwardly in their stilettos on their way to the club this Saturday night. You, my friend, have got a hot date with the Dutch oven.

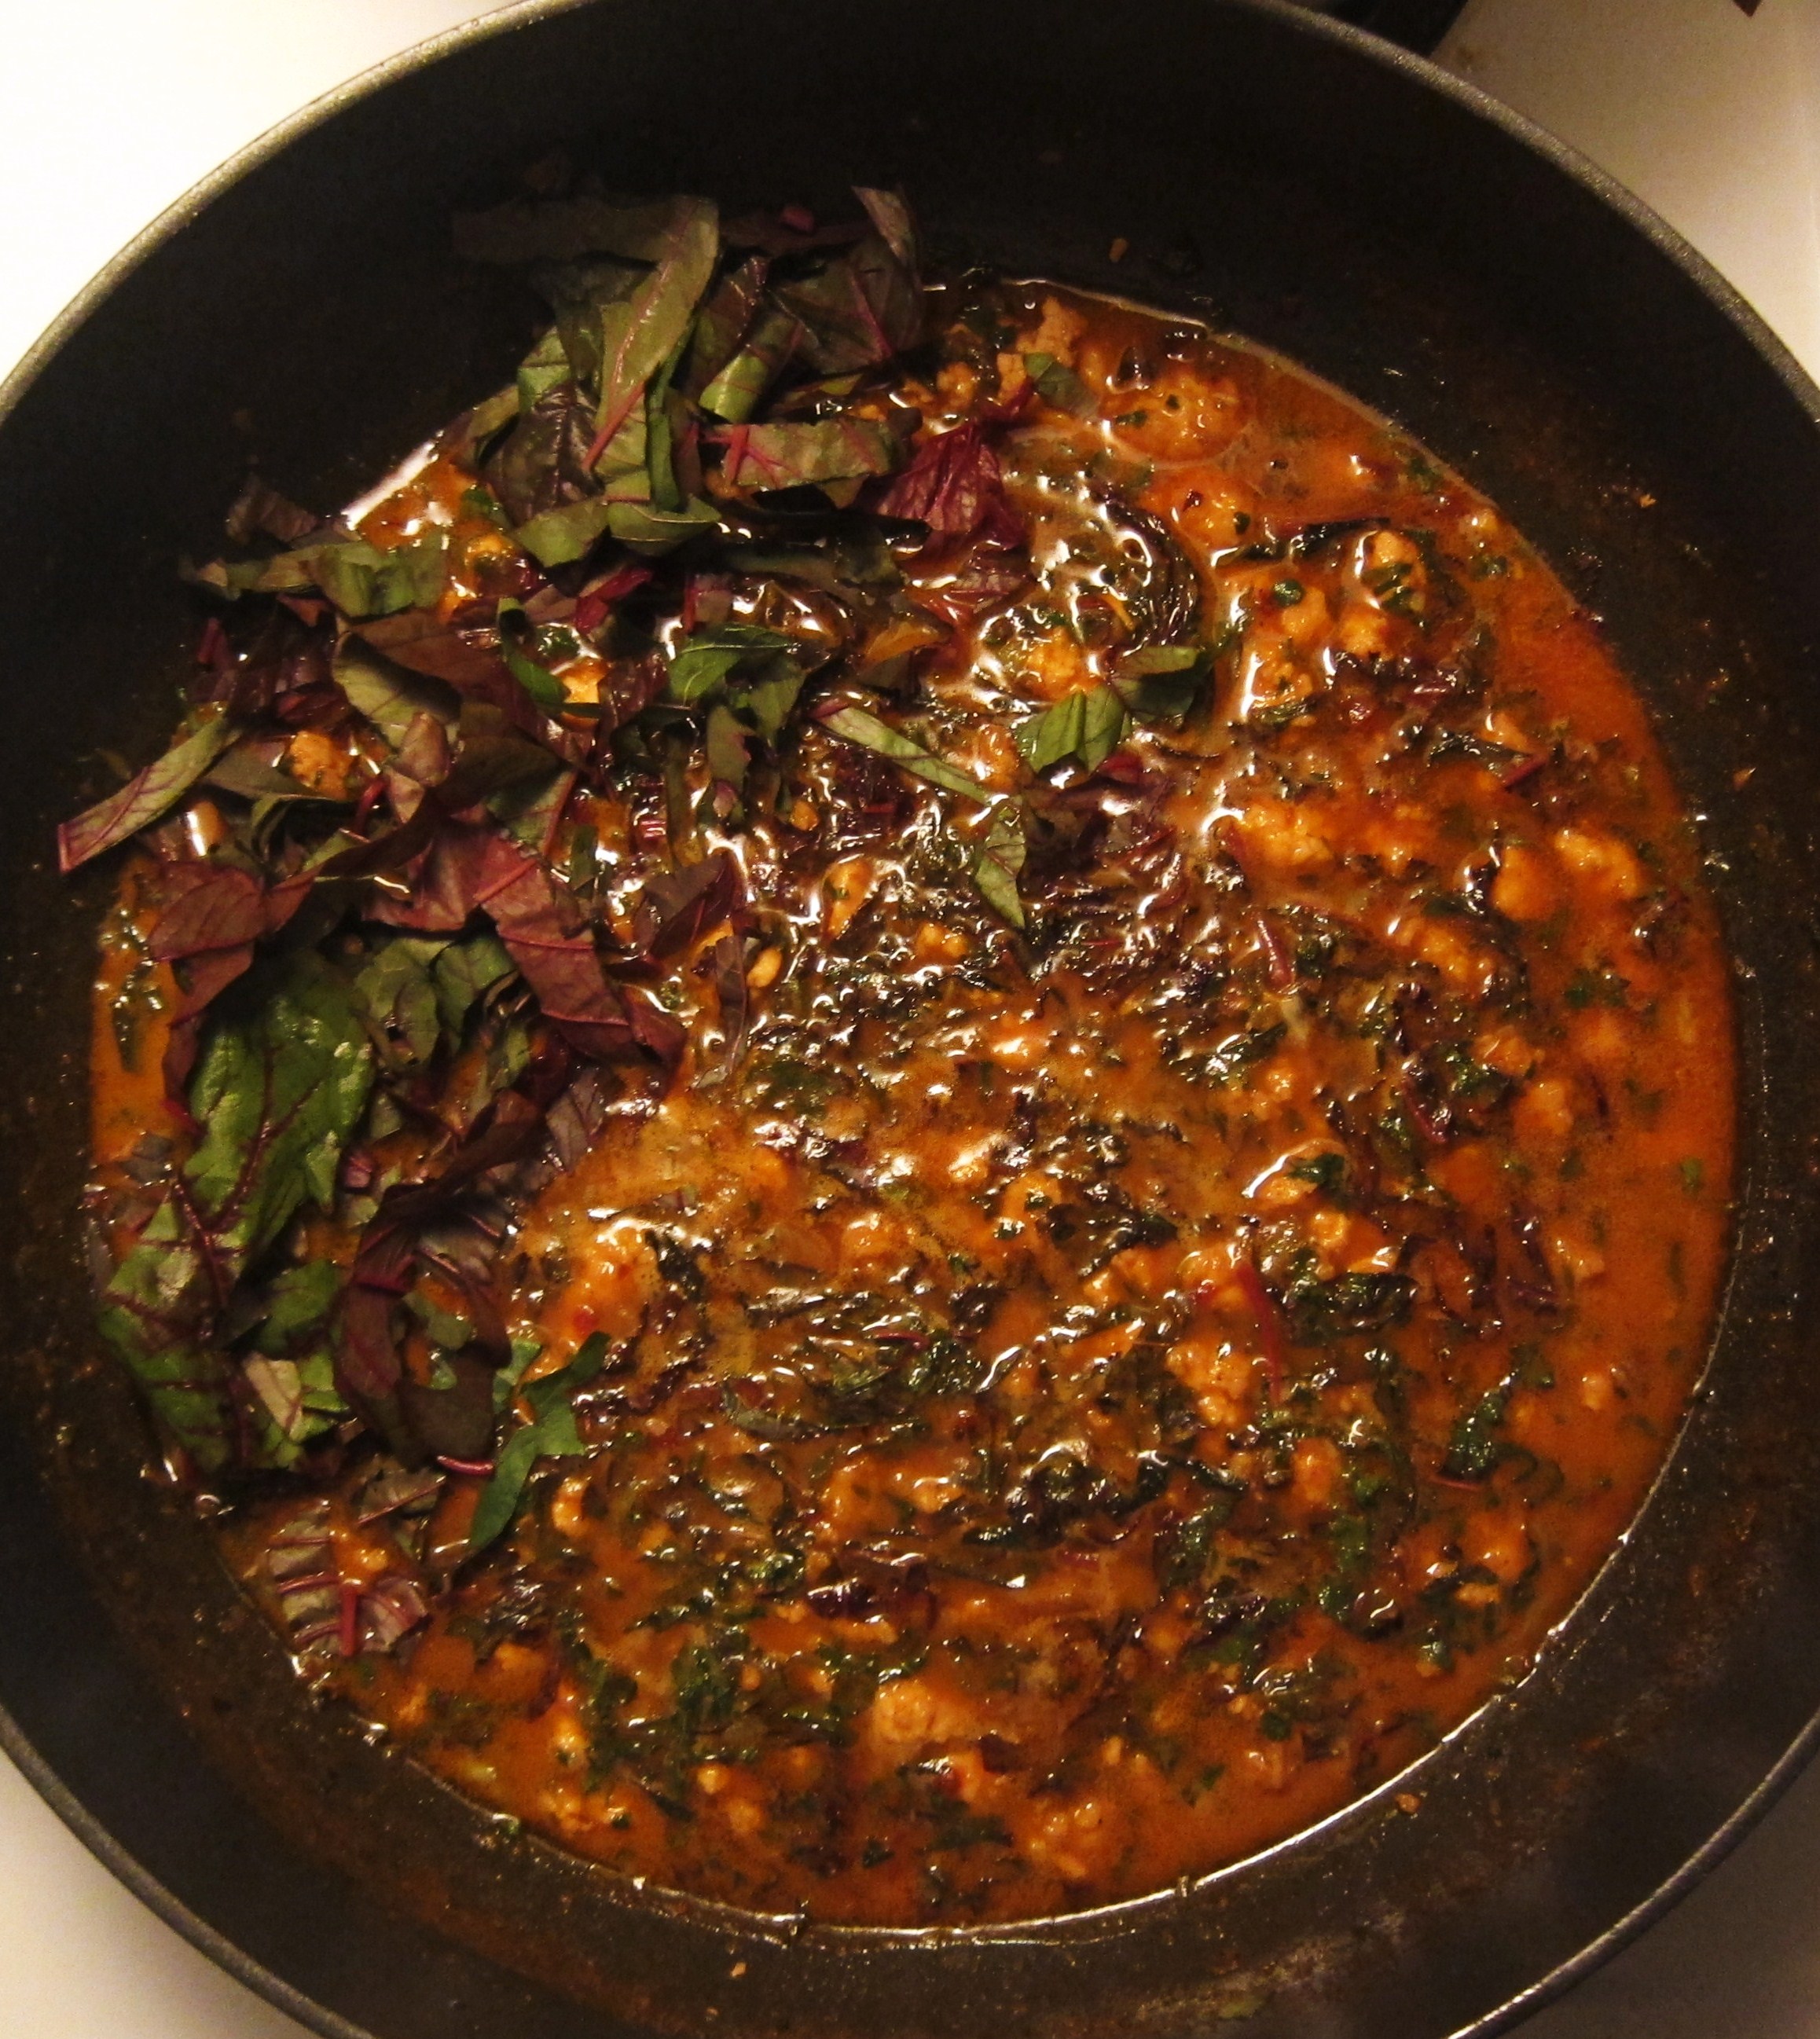
The foods you choose to make are entirely up to you. There’s no real magical equation. This time around, I tried a couple of new recipes that I thought would freeze well – a curried red lentil stew with coconut, and a fennel-leek soup with turmeric – but I also stuck to a couple of classic, rib-sticking recipes, like coq au vin, brisket chili, and ragù bolognese. Foods that are familiar, comforting, and that fill the house with the heady, wintery aromatics of butter, onion, red wine and bay leaf. Perfect for those nights when you shuffle home from work, snotty, zonked and cold.

Stay warm, be well, and eat well. x

Ragù Bolognese (makes 4-6 servings) – adapted from Bon Appétit and La Cucina Italiana

*Note on the recipe: this is a reconstructed version of a classic bolognese. You’ll note that there’s no tomato (just a little tomato paste), which might seem weird if you’re used to adding it. But trust me on this one. Bolognese made in modo tradizionale is beyond compare.

    • 1 Tbsp. olive oil
    • a knob of butter
    • 2 cloves garlic, finely chopped
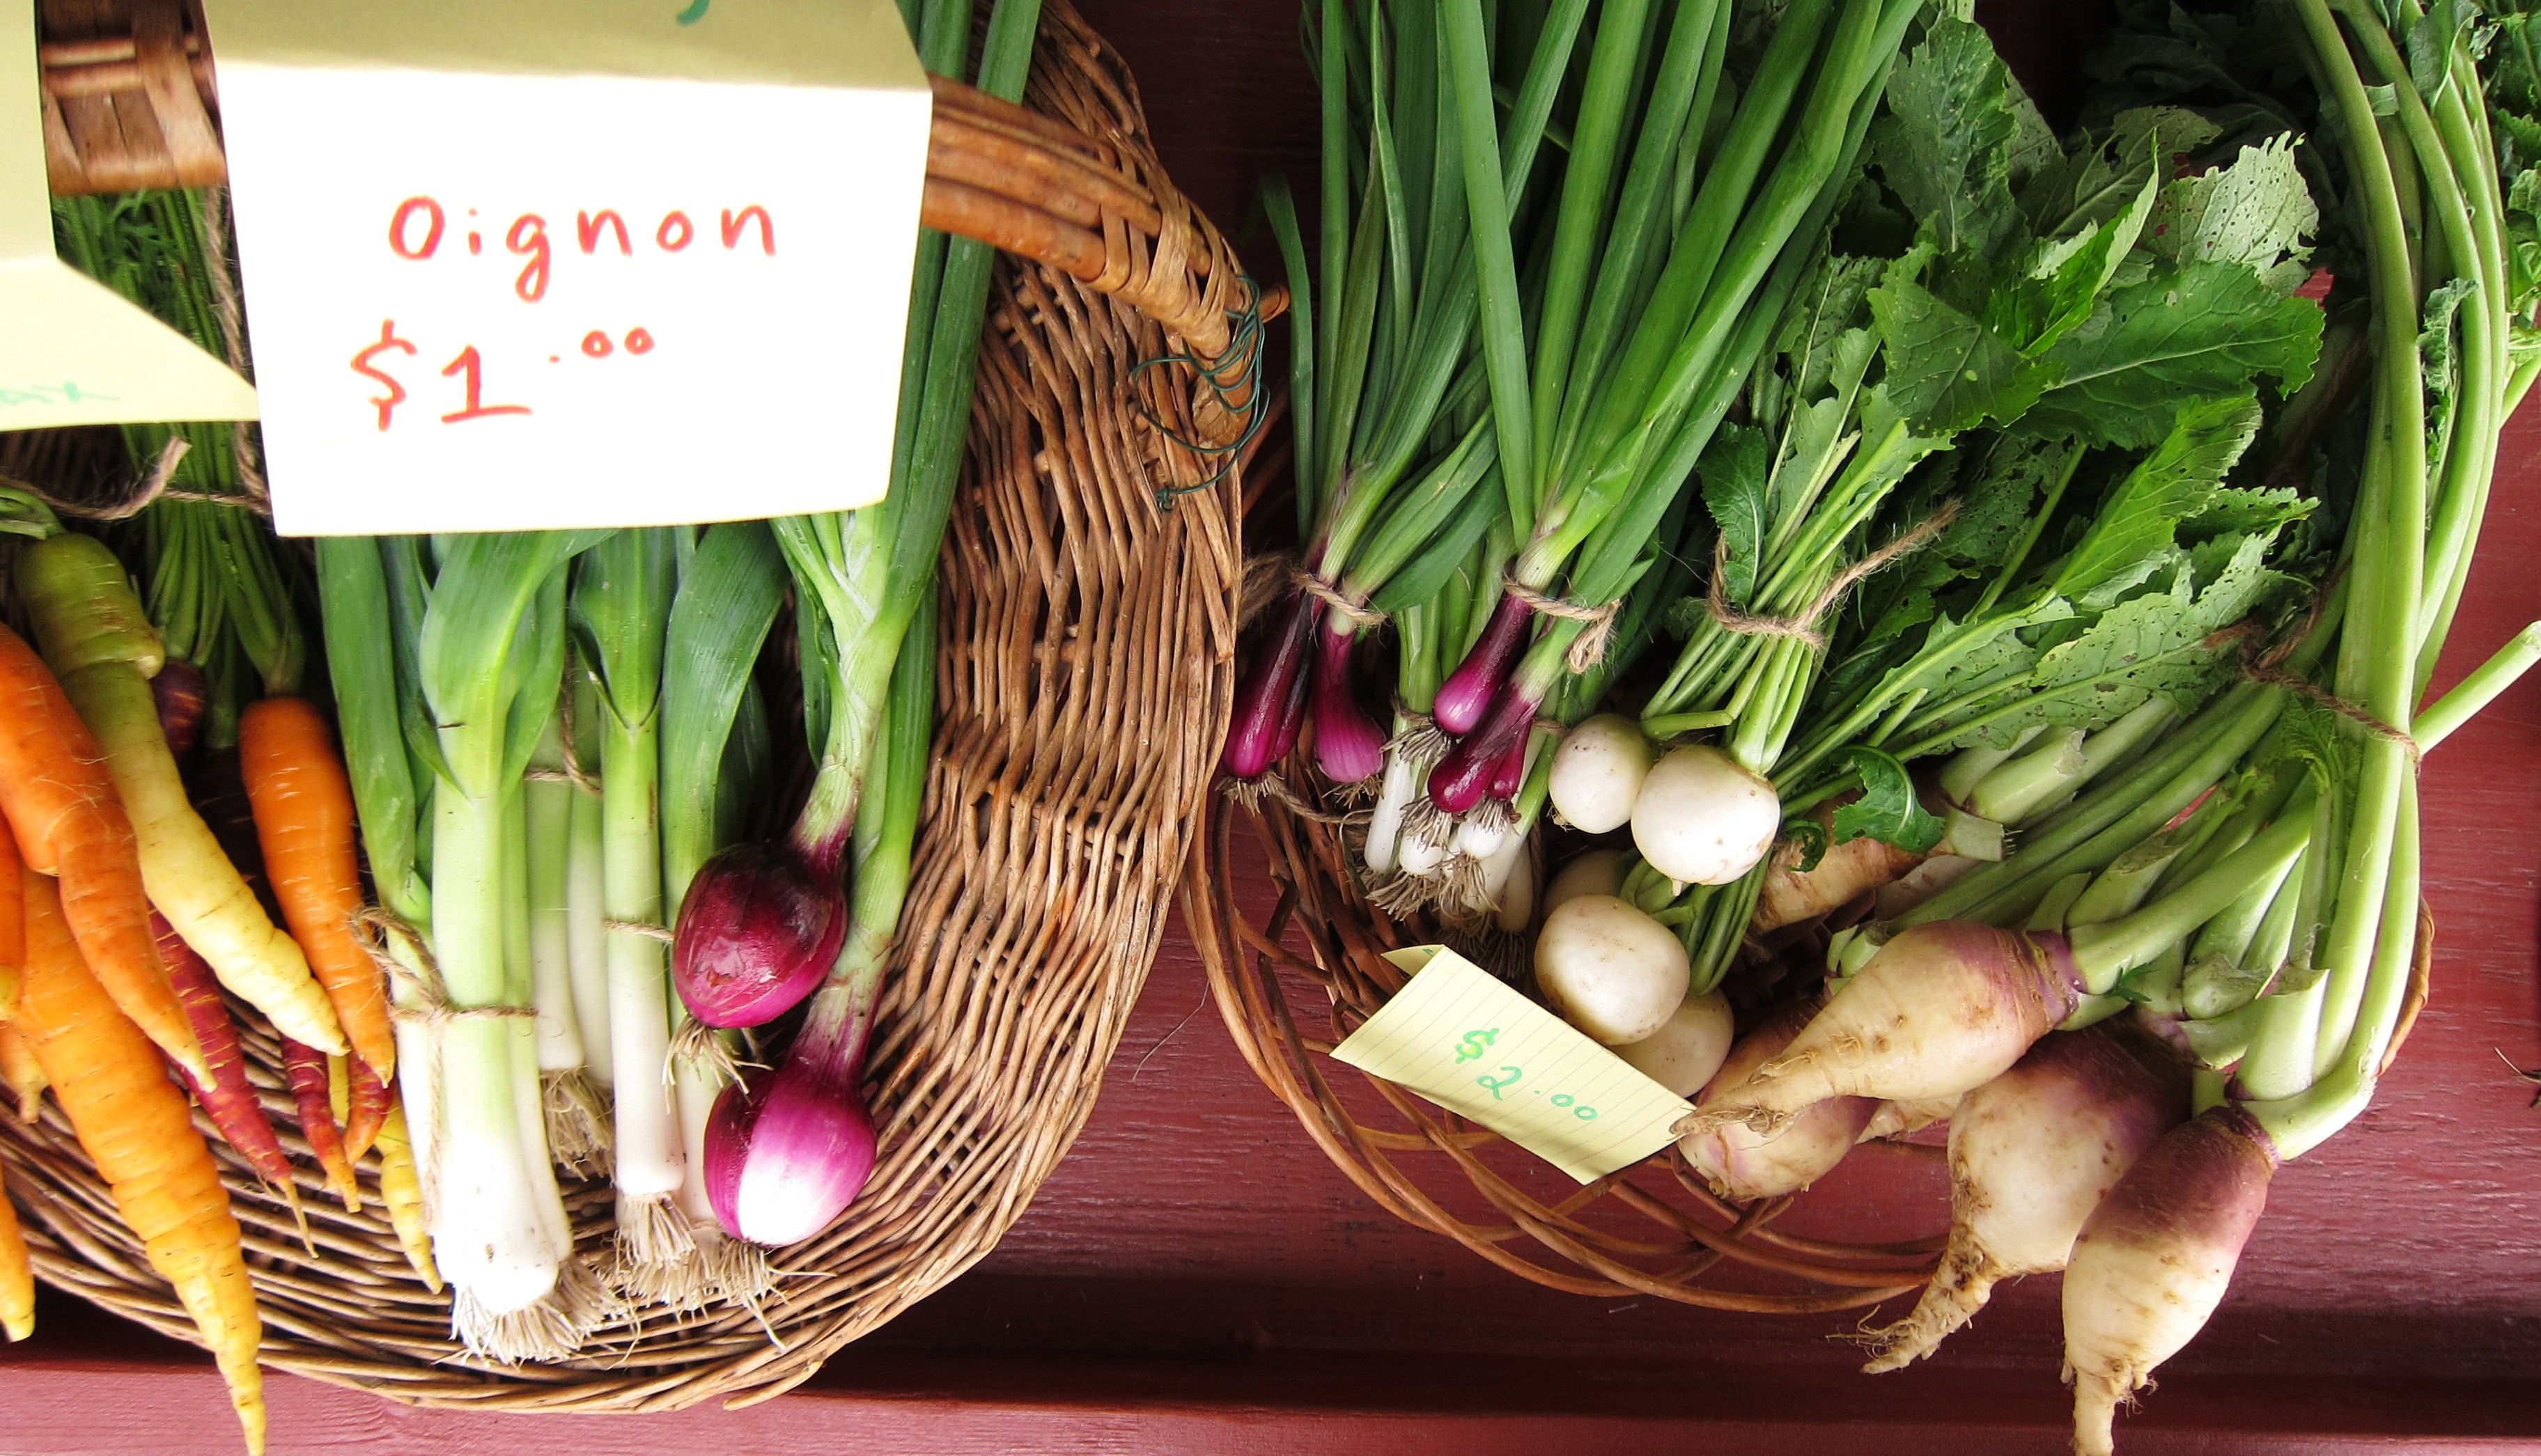
    • 2 medium onions, finely chopped
    • 2 celery stalks, finely chopped (about 1 cup)
    • 2 carrots, peeled, finely chopped (about 3/4 cup)
    • 2 oz. thinly sliced pancetta, finely chopped (use unsmoked, mild pancetta)
    • 6 oz. ground beef
    • 6 oz. ground veal
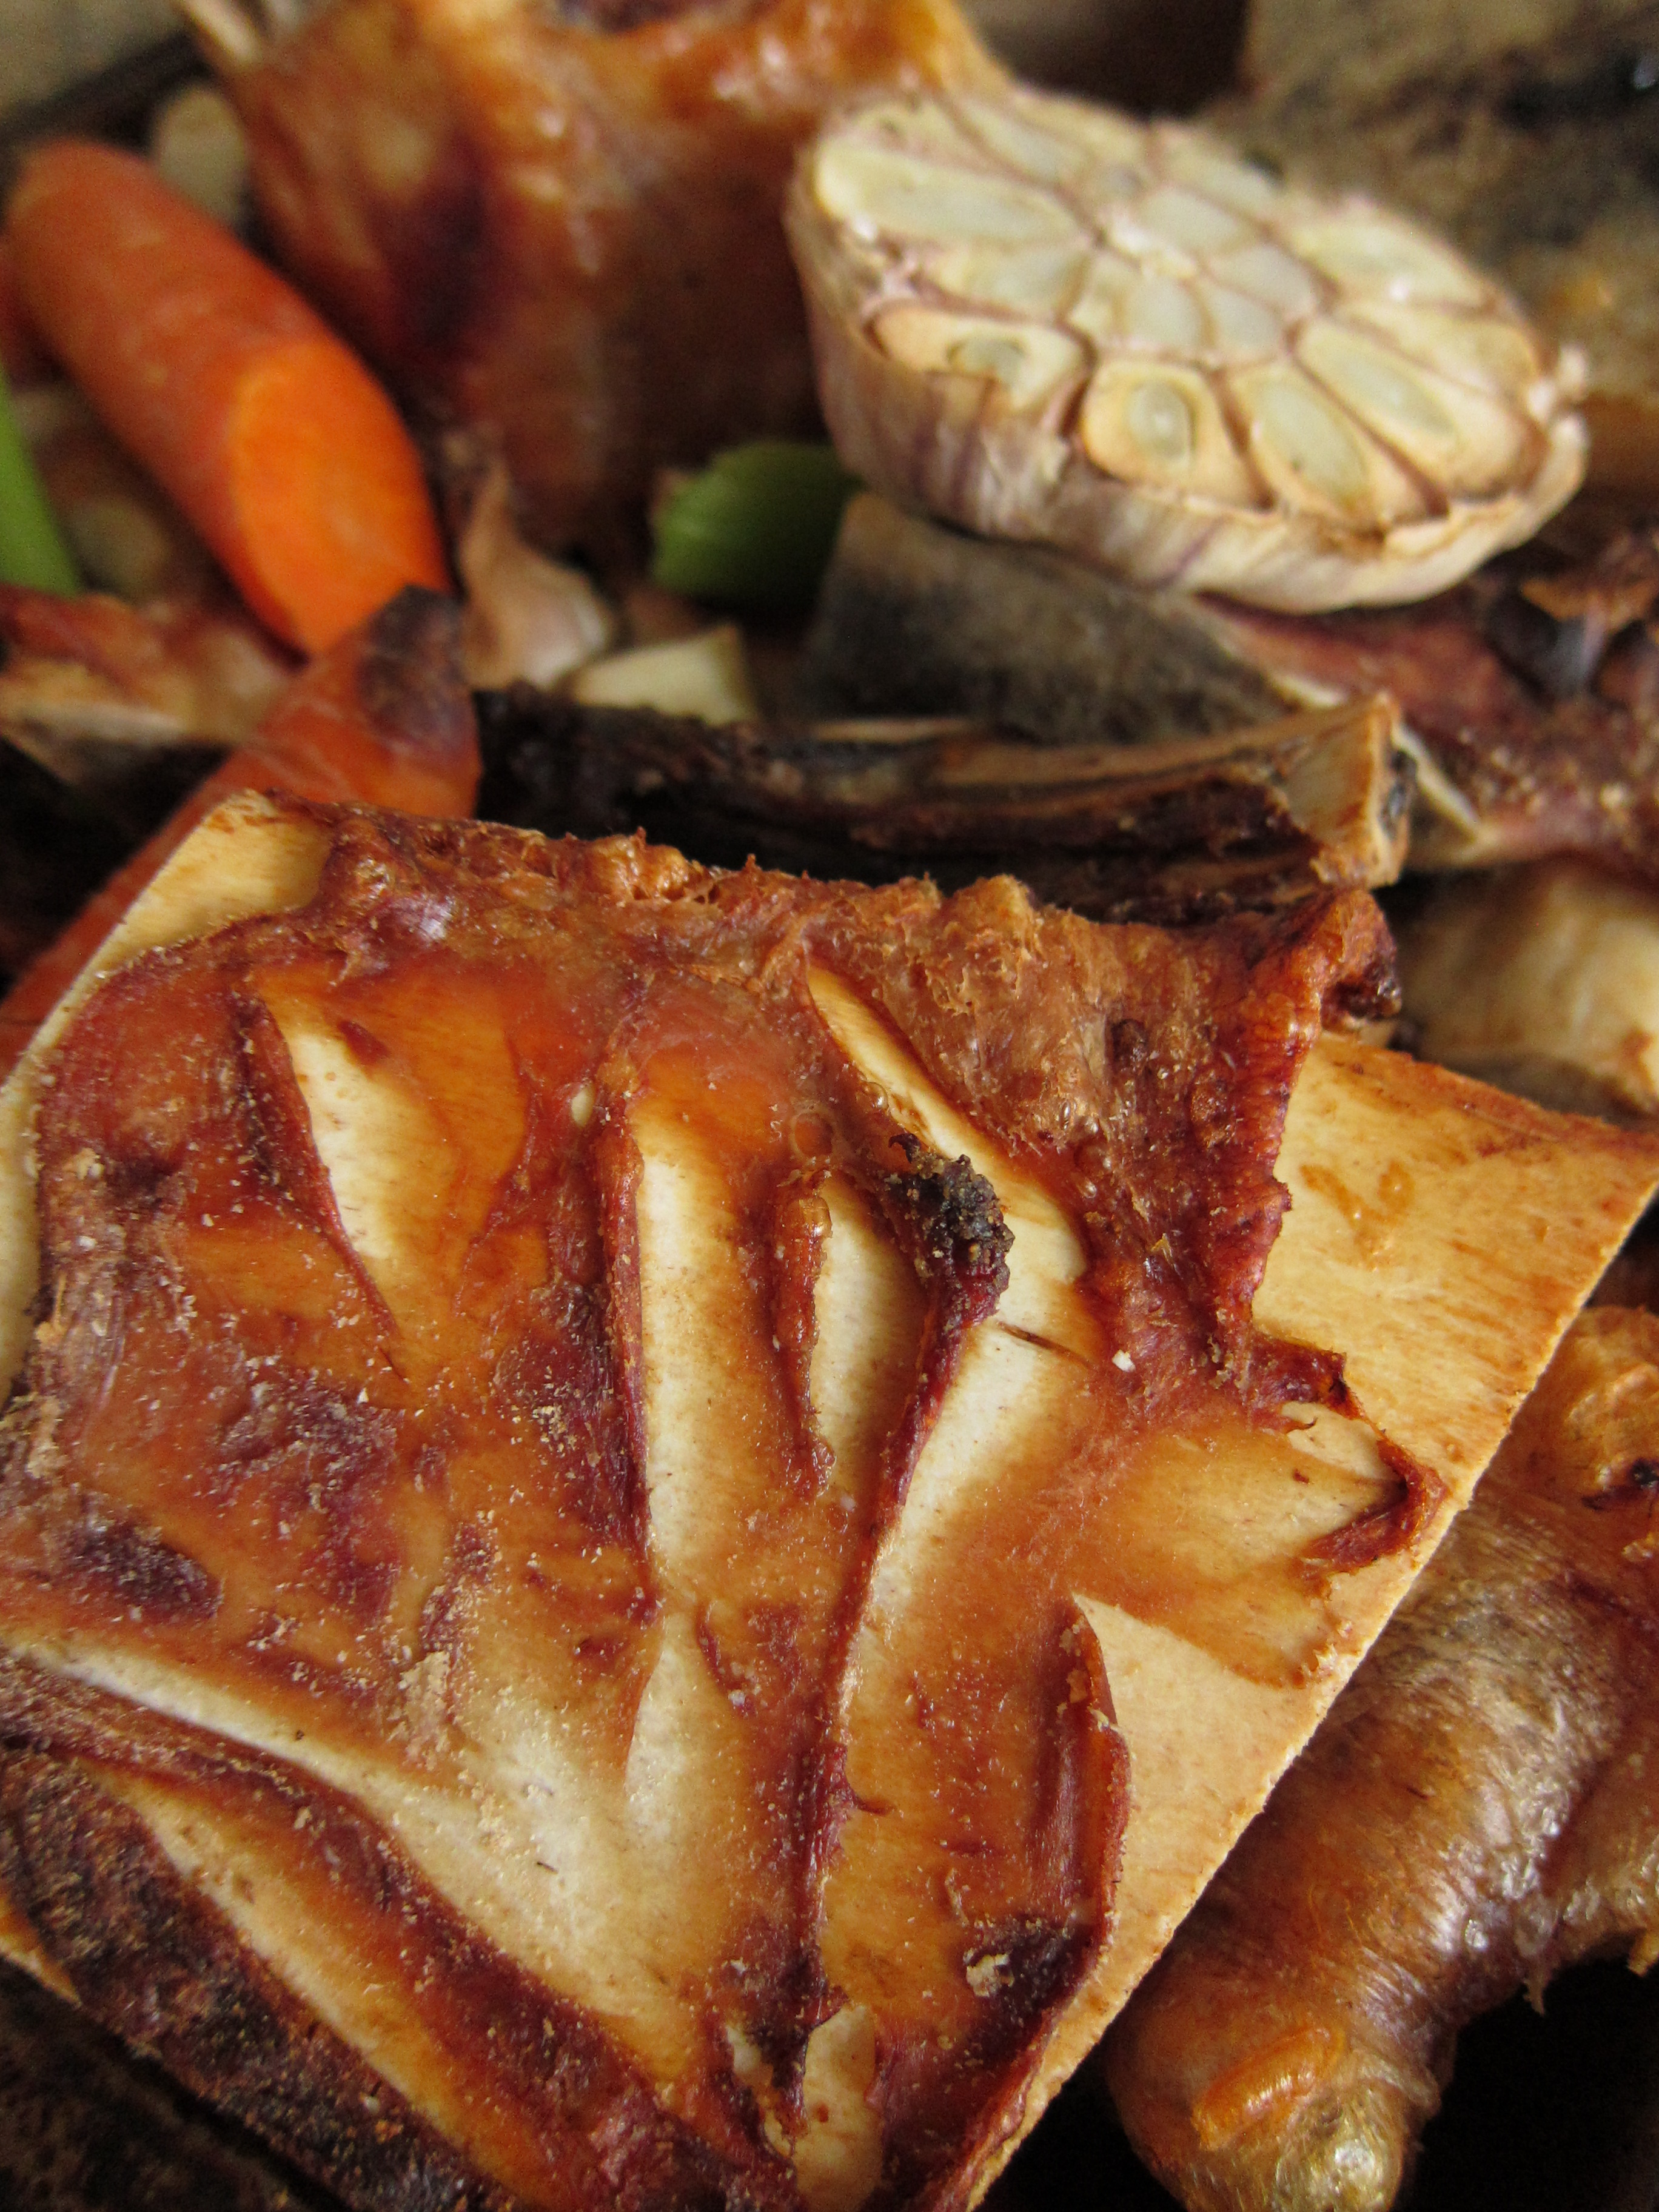
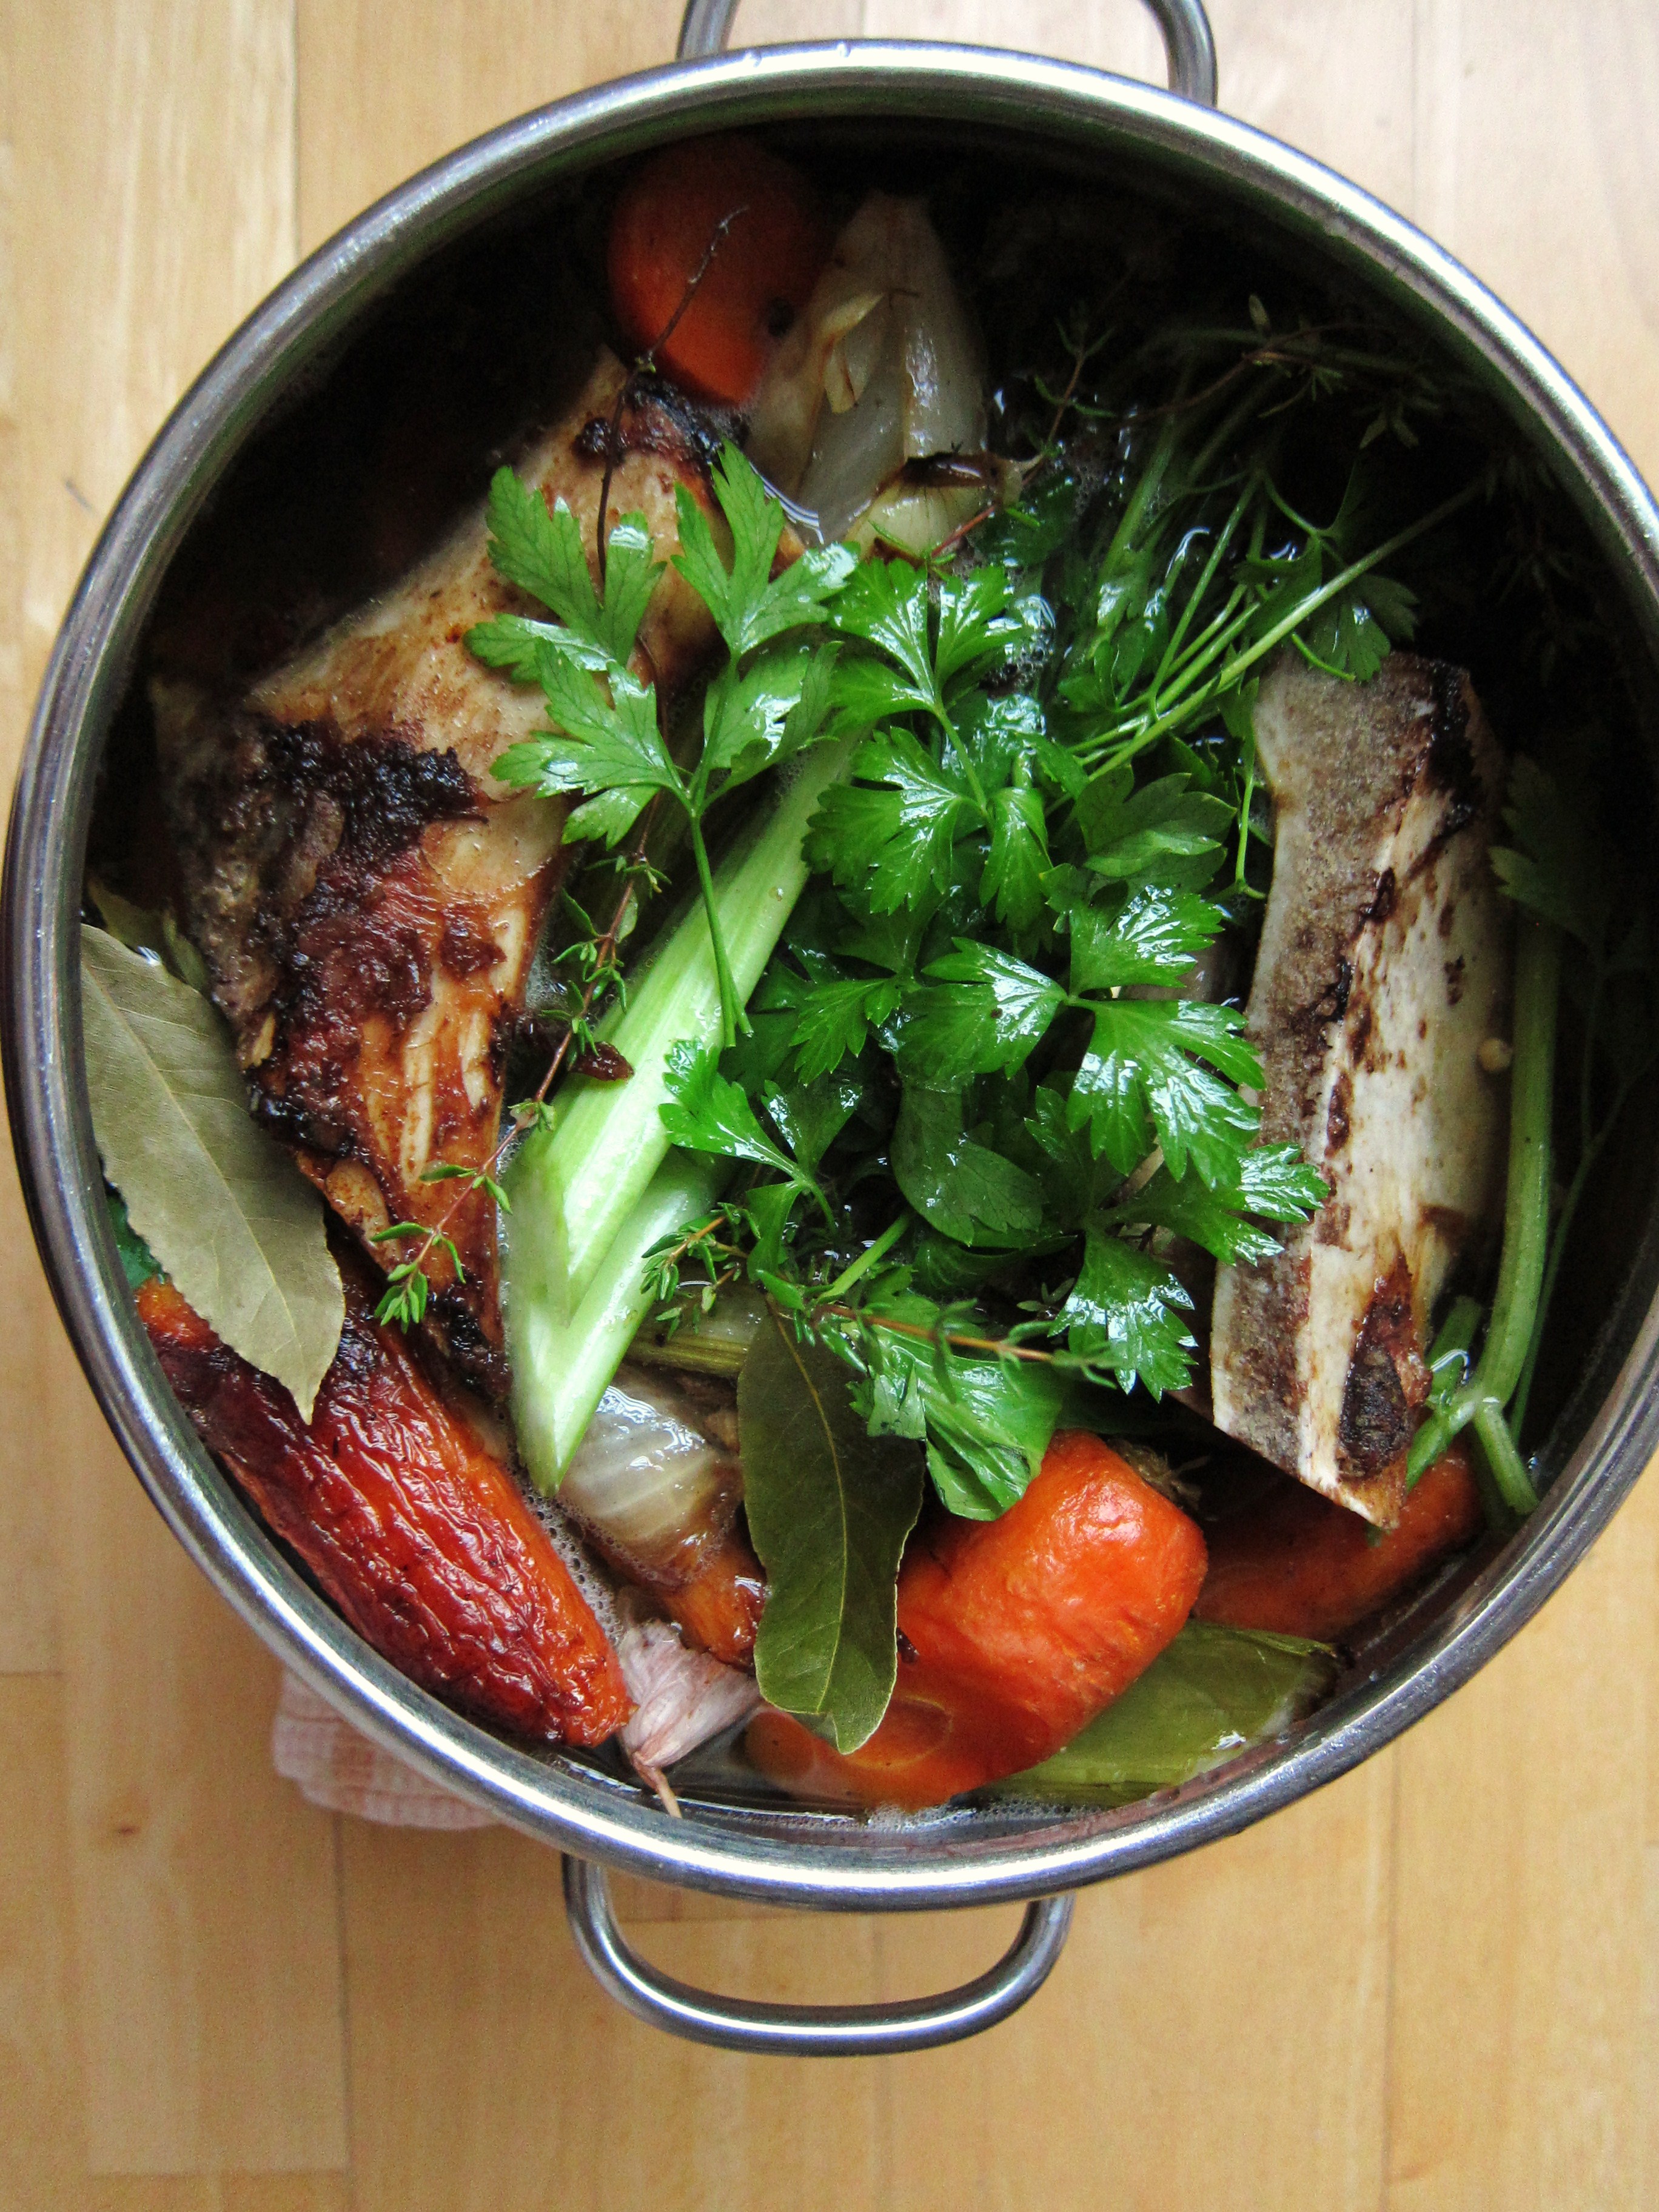
    • 3 cups beef stock, divided
    • 3 Tbsp. tomato paste
    • 1 cup whole milk
    • 1/2cup dry red wine
    • 1 bay leaf
    • salt and freshly ground black pepper

To serve: swirl warm sauce into cooked egg noodles, fresh or dried (such as pappardelle, tagliatelle or fettuccine) and top with grated parmigiano reggiano bolognese prep

Directions

1) Heat oil and the knob of butter in a large heavy pot over medium-high heat. Add onions, celery, carrots, and garlic. Sauté until soft, but not browned (about 8 minutes).

2) Add the pancetta and allow it to fry a minute or so before adding the beef and veal. Sauté, breaking up with the back of a spoon, until browned (about 15 minutes). Add wine and boil 1 minute, stirring often and scraping up browned bits. Add 2 1/2 cups stock, tomato paste and the bay leaf; stir to blend. Reduce heat to very low and gently simmer, stirring occasionally, until flavours meld, 1 1/2 hours. Season with salt and pepper.

3) Bring milk to a simmer in a small saucepan; gradually add to sauce. Cover sauce with lid slightly ajar and simmer over low heat, stirring occasionally, until milk is absorbed (about 40 minutes). Adding more stock by the ladleful to thin if needed.

Notes:
If you’re freezing the ragù: Allow it to cool completely, then transfer it to freezer-proof containers.
If you’re not freezing the ragù: Allow it to cool completely, cover and keep chilled until ready to use (I use Mason jars). Can be kept for up to 2 days in the fridge.

pasta bolognese with cheese

Share this:

  • Tweet
  • Share on Tumblr
Like Loading...

Farewell nights

01 Thursday Jan 2015

Posted by julia chews the fat in Lunch & Dinner, Vegetarian

≈ 1 Comment

What do you do the night before New Year’s Eve, a mere few hours before your man catches his flight for a two-month contract across the country? You settle into the evening with a pair of gin gimlets, some Peter, Paul & Mary and a bowl of feel-good food. (plus a few choice scenes from The Canyons for good measure.)

Hope you’re spending this New Year’s Day with the people you love and the things that make you happiest. See you back here soon, dear readers. xx

Tofu Bowl Prep

Tofu Bowls

Coconut Tofu Bowls (serves 2, plus leftovers) – adapted from Sprouted Kitchen

  • 1 cup brown rice
  • 12 oz. package firm tofu, drained
  • 2 tsp. red chili paste (such as sambal oelek)
  • 1 Tbsp. lime juice
  • 2 tsp. rice wine vinegar
  • 1 tsp. soy sauce
  • 1 Tbsp. fresh grated ginger
  • 3 garlic cloves, pressed
  • 1 piece of lemongrass, minced
  • 1 Tbsp. coconut oil
  • 2 Tbsp. sesame oil
  • 2 cups broccoli, florets and stems sliced thin
  • 2 large carrots, julienned
  • 1/2 cup chopped green onions
  • 1/4 cup chopped fresh cilantro
  • 3/4 cup coconut milk
  • 2 Tbsp. soy sauce, to taste
  • sesame seeds, for garnish
  • 1 avocado, for garnish

Directions
Rinse the rice and cook it (Saveur’s method is my favourite). While the rice is cooking, cut the tofu into cubes and set it on a clean dish towel to drain. In a large bowl, combine sesame oil, chile paste, lime juice, vinegar, ginger, garlic, lemongrass, soy sauce and stir to mix. Add the tofu and stir everything to coat. Set aside to marinate for 20-30 minutes.

Warm the coconut oil in a large skillet over medium high heat. Use a large spoon to scoop out the tofu – leaving some of the marinade behind – and toss into the hot pan, sautéing for about 5 minutes, until lightly browned. Remove tofu from the pan and set aside. Add the remaining marinade to the pan, then add the broccoli and carrot until the broccoli gets a little crisp around the edges; add the coconut milk and cook until bubbling. Stir in the greens onions, cilantro, tofu and toss to combine.

Serve each bowl with a scoop of brown rice, a sprinkling of sesame seeds and a few avocado slices.

Share this:

  • Tweet
  • Share on Tumblr
Like Loading...

Brisket Chili of the Gods

01 Monday Dec 2014

Posted by julia chews the fat in Cooking For Your Peeps, Lunch & Dinner, The Basics

≈ 3 Comments

Is there something that you’ve made over and over again, only to one day realise that there was a far superior version hanging out there, waiting on the sidelines to be discovered? Allow me to introduce you to brisket chili, friends – the chili recipe to end all chili recipes.

I think it’s safe to say that most of us north of the Mexican border think of chili con carne as a simmered concoction of minced beef, red kidney beans, tomatoes, some veg (usually onion, carrot, celery, bell pepper), Mexican chili powder (which isn’t really Mexican at all), topped with sour cream and grated cheddar. Now, I want you to rid all of that from your mind. Throw it away. You don’t need it anymore. You don’t need chili with little nubs of overcooked minced meat bobbing around in a non-descript bath of tomatoey vegetables. Because now you have brisket chili – lovely, smoky, spicy, silky brisket chili – and by Jove, there is no turning back.

Beef brisket

Brisket Chili (serves 6) – adapted from Jamie Oliver

Note: the chili needs to simmer for a good 4-4.5 hours, so make sure to plan accordingly.

  • 1.5 kg best-quality beef brisket
  • 250g grams cooked Romano beans (or 1 x 19oz can)
  • 1 large cinnamon stick
  • 1 Tbsp ground cumin
  • 1 Tbsp smoked paprika
  • 1 heaped Tbsp dried oregano
  • 2 fresh bay leaves
  • 2 red peppers
  • 2 yellow peppers
  • 1 x 28oz can chopped tomatoes
  • about 1/2 L beef stock
  • 2-3 red chipotle chiles in adobo, chopped
  • 1-2 chile peppers (jalapeño or habañero), de-seeded and chopped
  • 2 red onions, finely sliced
  • 1 Tbsp tomato paste
  • coarse salt and black pepper
  • olive oil
  • Red wine vinegar
  • ½ bunch coriander, chopped
  • Soft tortillas, Greek-style yoghurt, avocado* and/or green salad, to serve

*you can also make a quick guacamole to serve on top, by mashing up a couple of ripe avocados, and adding some finely grated red onion, the juice of a lime and some chopped coriander, along with a pinch of salt. **the chili freezes really well, so don’t bother cutting down the recipe if you’re less than 6 people. Make a whole batch and freeze the rest.

Directions:

Place the beef on a board and score one side. Combine the cumin, paprika and oregano and rub into the cuts in the beef. Season well with coarse salt and black pepper, drizzle over a little olive oil and brown the brisket well in a large pot or Dutch oven over a high heat.

021 Brisket with spicesOnce the outside is browned, remove the brisket from the pot and set aside. There should still be some residual oils at the bottom of the pot, which you’ll use to sautée the onion, etc, so keep it. But discard any bits of seasoning that looks like it’ll burn if cooked further (I use a slotted spoon to fish them out).

Reduce the heat to medium high and add the onion and garlic, sautéeing them in the leftover pan fats until translucent. Place the bay leaves, cinnamon stick, red and yellow peppers, tomatoes, beef stock, beans and tomato paste into the pot and bring to the boil. Then add the chiles and the brisket to the pot; cover and leave to simmer for 4–4½ hours.

Gently pull the beef apart using 2 forks. Remove the bay leaves and cinnamon stick; add a little vinegar to brighten up the flavour, add the coriander and adjust the seasoning. Serve with avocado (or guacamole), tortillas, yoghurt and/or a green salad.

Brisket chili Brisket chili with avocado

Share this:

  • Tweet
  • Share on Tumblr
Like Loading...

Pizza Party

06 Thursday Nov 2014

Posted by julia chews the fat in Cooking For Your Peeps, Lunch & Dinner

≈ 7 Comments

It feels weird typing the word party, seeing as I’ve spent the better part of the last five days wrapped in a comforter giving myself sinus massages (as sexy as it sounds) and mouth-breathing my way through a string of bad nights’ sleep. It smells of menthol throat lozenges and tiger balm, and the windows have steamed up from all the bathing, de-congesting and water-boiling going on. It’s a real mess over here. And let me tell you – just in case there was any doubt – there’s

no

party

in sight.

On the up side, I got to have popcorn for dinner last night. And between my migrations from the bed to the couch and back, I’ve made a considerable dent in that book my brother gave me, alongside a handful of Toast of London episodes. The perks of being sick are slim, but if popcorn for dinner and a moustached Matt Berry are included in the deal, I’ll certainly take them.

But let’s return to the title of this post, which makes no sense now that I’ve written two paragraphs about being indisposed, laying on the couch. Here’s what you need to know:  prior to feeling like total hell, I’d planned on sharing couple of pizza recipes with you. I’d like to make good on that plan. Because I like you. And I think you would agree that having more pizza in your life can’t possibly be a bad thing. The three you see below were made for a small pizza party we threw for my mom on her birthday. Contrary to our regular family get-togethers, where, without fail, we end up soiling every pot and pan in the cupboard, my aim was to do something simple and pared-down. In other words, with minimal use of kitchen tools and involving tasks that I could easily delegate to my close of kin. (except mom – she shouldn’t have to lift a finger on her birthday, unless she’s lifting her pinky to sip a martini. I think she would agree.)

Below you’ll find two pizza recipes – one veggie, one not. While both use onions, their flavours are worlds apart – in one recipe they’re caramelised beforehand and in the other, they’re thrown on raw. The recipe for the crust is not included because, to preserve my sanity, I bought the dough. (if you live in Quebec, Au pain doré sells good quality dough in little, round, frozen portions.) Since there are very few players involved in these pies, I must emphasise – as your resident food snob – that the quality of the ingredients is paramount. If you’re at the store, hovering over the cheese counter, hesitating between Parmigiano-Reggiano and a cheaper knock-off, allow me to be the voice of reason to shake you out of your stupor: QUIT BEING A DOLT AND BUY THE GOOD STUFF. When it comes to Parmesan, it’s just not worth screwing around. Besides, it’s not that much more expensive when you think about it. And a thin dusting of the good stuff will make all the difference in terms of flavour. Your pizza will return the favour by being drop-dead delicious.

One thing before you scroll down to the recipes: they might seem long and daunting, but they really aren’t. I promise. There’s a good dose of slicing, chopping and grating involved, but nothing that your assigned delegates (an unsuspecting brother or sister-in-law) can’t handle. Supply them with a glass of wine ahead of time and they’ll most certainly oblige. Also – the caramelised onions and tomato sauce can be made in advance, so keep that in mind.

Ok, now go channel your inner pizzaiolo and start spinning out some pizza pies, lovely readers. (and repeat after me: Parmigiano-Reggiano, Parmigiano-Reggiano, Parmigiano-Reggiano…)

mise en place pizza pizza + salad

Prepping pizza dough: if you’re using frozen dough, it will generally need about 8 hours to defrost/rise. It’s not a big deal, just remember to pull the dough out of the freezer ahead of time to let it thaw and rise. To ensure a crisp crust all the way through, my mom’s trick is to par-bake the dough. Here are the steps:

1) Preheat the oven to 400°F and lightly oil & flour a circular, 14″ pizza tray.

2) Lift up the dough and work it a little around your fists. No need to work the dough as ferociously as these guys, just enough to form a small, flat disc.

3) Put the disc of dough at the centre of the baking tray and work it outwards, until it reaches the edges. Try to make the edges a little thicker than the centre.

4) Place the pizza tray in the oven and bake the dough until golden, flipping once halfway through (10 mins total).

Fontina, Fennel and Onion Pizza – makes ones 14” pie

– about 1 lb pizza dough, thawed if frozen
– 1/2 bulb of fennel, finely sliced (reserve some of the fronds for garnish)
– 4 oz. fontina cheese, grated (about 1/2 cup)
– about 1/4 cup finely grated Parmigiano-Reggiano (I like to use a microplane)
– good quality olive oil (i.e the best you can afford)
– balsamic vinegar to serve (optional)

For the caramelised onions:
– 1 medium yellow onion, finely sliced
– 1 red onion, finely sliced
– knob of butter
– splash of olive oil
– pinch of sugar
– pinch of salt
– splash of vermouth (optional)

To make the onions (this can be done up to 2 days ahead): set a large pan on medium-high heat. Add the butter and oil. Once the butter gets nice and foamy, add the onions and stir to coat. Sweat the onions; once they start to become soft and transluscent (about 2 minutes), turn down the heat to medium, add the pinch of sugar and salt. Stir and allow to caramelise slowly, stirring occasionally (about 20-30 minutes). Once the onions are dark and caramelised, add a splash of vermouth and allow the liquid to evaporate completely. Store at room temperature if serving soon after, or store in the refrigerator for up to 2 days (p.s this stuff is great on pasta, crostini, in sandwiches, on eggs…so go nuts with the leftovers.)

Making the pizza:

Spread a layer of the caramelised onions on the pre-baked pizza crust (which is still on its baking tray); add the parmesan, fennel and fontina; drizzle with a little bit of olive oil. Bake in a 400°F oven for about 20 minutes, or until the cheese is golden and bubbling. Remove from the oven and finish with a thin drizzle of balsamic vinegar. Garnish with reserved fennel fronds and serve.

Escarole Bacon Pizza – makes ones 14” pie

– about 1 lb pizza dough, thawed if frozen
– 3/4 cup-1 cup homemade tomato sauce (click here a quick one)
– 1 red onion, finely sliced
– 1 clove garlic, pressed or finely chopped
– 3 cups escarole, roughly chopped
– 6 slices bacon, cooked until just crisp and roughly chopped
– about 1/2 cup finely grated Parmigiano-Reggiano (I like to use a microplane)
– good quality olive oil (i.e the best you can afford)

Making the pizza:

Spread a layer of the tomato sauce on the pre-baked crust (which is still on its baking tray) and half of the parmesan; add the garlic, red onion slices, bacon, escarole and the other half of the parmesan; drizzle with a little bit of olive oil. Bake in a 400°F oven for about 20 minutes, or until the escarole has wilted and the cheese is toasty. Serve straight away.

Share this:

  • Tweet
  • Share on Tumblr
Like Loading...

Humble Bones

20 Monday Oct 2014

Posted by julia chews the fat in Lunch & Dinner, The Basics

≈ 2 Comments

They sat there in the baking pan, as naked as they came – a geometrical mass of bone and flesh; a macabre still life in white and pink, waiting to be transformed.

It may not be obvious at first glance, but what rests in that pan is the beginning of something beautiful. It marks the first step of a slow transformation – an alchemy, really – that starts with an ingredient so basic, understated, stripped down, that you can barely believe it will become much of anything at all.

002

Bones. They are the very definition of unpretentious, no-frills food and a cornerstone of cooking traditions the world over. As mundane as they seem, they are the key to making the richest, most flavourful stock, used in everything from French onion soup to Vietnamese pho to Japanese tonkotsu. While traditions vary, the method is essentially the same across the board: roast, season, simmer. In this version of beef stock, the bones are roasted bare in a hot oven, then some aromatics are added and the pan returns to the oven until the whole lot is dark & caramelised. It all then goes into a stockpot, is covered with water and left to simmer for an afternoon.

That’s. It.

What emerges is a densely-coloured, heady, mineral-rich broth, ready to cure what ails you.

Next time you visit the butcher, ask for a few bones to be added to your order. They might even give them to you for free (one of the many perks of being on a first-name basis with your butcher). With that, you’ll have the makings of a delicious, fortifying stock to warm you through the colder months ahead.

Basic Beef Stock (makes about 4 cups) – adapted from Bon Appétit

  • 5 pounds veal and/or beef marrow bones*
  • 4 peeled carrots
  • 4 celery stalks
  • 2 halved peeled onions
  • 1 halved head of garlic
  • ½ bunch flat-leaf parsley
  • 4 sprigs thyme
  • 2 bay leaves
  • ¼ teaspoon black peppercorns
  • cold water

Optional: to achieve a darker colour, you can brush the bones with a bit of tomato paste right before putting them in the oven to roast.

(If you’re asking yourself what the heck is the difference between broth and stock?, you’re not alone. I didn’t really know the answer until I stumbled upon this run-down by Nourished Kitchen, which, in addition to explaining the difference between the two, discusses bone broth, a close cousin of stock, but requiring a longer, 24-hour simmer.)

Directions

Preheat oven to 450°. Roast marrow bones (have your butcher saw them into pieces) in a roasting pan, turning occasionally, until browned, about 30 minutes. Chop carrots and celery into large, 3” pieces; add to pan along with onions and garlic. Roast, turning occasionally, until vegetables are brown, 25–30 minutes.

roasted bones

024Transfer to a large stockpot; add cold water to cover. Pour off fat from pan, add ½ cup water, and stir, scraping up browned bits; add liquid to pot along with parsley, thyme, bay leaves, and black peppercorns. Bring to a boil, reduce heat, and simmer 4 hours, occasionally skimming foam and fat from surface and adding water as needed.

Strain. Let cool and then transfer to a glass bowl or Mason jars. Cover and chill for up to 3 days. Use as a base for soups, stews, sauces and gravies.

Note 1: Once the stock has been chilled, any remaining fat will have risen to the top and solidified, forming a protective layer against bacteria while the stock is in the refrigerator. If you plan to freeze the stock, simply remove and discard the fat and pour the liquid into a freezer-proof container. Frozen stock will keep for about 3-4 months.

Note 2: there are different schools of thought about salting stock. Some sources will say to salt the bones before roasting, or once everything’s covered in water. Other sources will recommend not salting the stock at all, due to the fact that the stock’s natural salinity will increase as it reduces. In this case, you can add the unsalted stock to any soup, stew or sauce and adjust the saltiness accordingly.

027

Share this:

  • Tweet
  • Share on Tumblr
Like Loading...

City Reprieve

12 Sunday Oct 2014

Posted by julia chews the fat in Food Away From Home, Lunch & Dinner, Vegetarian

≈ Leave a comment

My bus stop to and from work is positioned right off one of Montreal’s busiest highways, the 40. It’s a strip of steel and pavement that moves all day long in inexhaustible waves of blaring horns, blaspheming drivers, exhaust pipes spewing gasoline fumes, and every so often, the crunch of metal-on-metal resulting from a driver eyeing their cell phone instead of the road. It’s a purgatorial feast for the senses, to say the least. But it’s also a daily necessity, getting me to and from my place of work. I try to remember that with convenience comes sacrifice, sticking my nose in a book to distract me from the highway and its noxious offerings. Sometimes, though, it’s a hard beast to ignore.

Not unlike the man behind Whole Larder Love and others of his ilk, I’ve become more sensitive to the drawbacks of city-living. This isn’t say that I intend on becoming a tree-dwelling hermit, or have what it takes to walk around in cold cow muck each morning at the crack of dawn, in a uniform of denim overalls and wellies. But there are days when those things sound much more appealing than ingesting smog and hurrying around with commuters who’ll toss you to the curb if it means getting to the bus faster. Frankly, on those days, real cow muck sounds like the better kind of bullshit.

Since I will likely never become a farmer, or goat-herder, or cultivator, I rely on intermittent opportunities to take a break from the city. Like the one that presented itself out of the blue in late August, when my friend Rose asked if I wanted to spend a three-day weekend on a farm in the Eastern Townships. A three-day escape to the country? Man o man,

sign

me

UP.

It just so happens that Rose’s mum (the lovely and talented, Gwynne Basen) operates a small-scale farm in the hamlet of Dunkin, near Mansonville, Quebec. True to its name, every inch of Abbondanza is plentifully bestrewn with plants and produce – from the keyhole garden overflowing with squash and the colossal heads of cabbage lining the garden path, to the long tendrils of heirloom tomatoes, greenhouse peppers and bright patches of nasturtium flowers, it is a sight to behold. A plant nirvana.

If there was ever an antidote to city-fatigue, this would be it.

garlic

The Friday we arrived, Rose and I busied ourselves prepping produce for the Saturday farmers market. At the kitchen table, we took turns sorting, packing and weighing fresh leaves of kale, spinach, mesclun, as well as different types of Romano, fava, and string beans in a spectrum of colours, ranging from iridescent-purple ones, to slender, aubergine-coloured ones that magically turn green when they’re cooked. Every so often, for, ahem, “quality-control” purposes, we’d sample the mustard and mizuna leaves, letting them warm our mouths with their peppery bite, as we continued to make our way through the mounds of greens laid out on the table.

Once all the produce had been sorted and tucked away for the night, we all sat down with some wine and a pre-dinner plateful of crisp, tempura-battered zucchini blossoms, inspired by Ottolenghi’s recipe and served alongside his (totally brilliant) spicy-sour lime dipping sauce. After dinner, and a couple more glasses of wine, we each sauntered off to bed, falling asleep to the sound of crickets.

The next morning, we packed up the car and headed to the market with Gwynne. Alongside the beans and greens, Rose and I arranged pint-size baskets of heirloom tomatoes and fingerling potatoes, a few heads of lettuce, and twine-bound bundles of carrots, onions and turnips. Local residents came by in batches, chatting with Gwynne and selecting produce to take home. By noon, there was nary a piece of produce left on the table.

Clearly, the locals have good taste.

Back at the farm, I helped with lunch by assembling a quick salad of Gwynne’s heirloom tomatoes, layered with shreds of milky Buffala mozzarella, basil, dill, nasturtium flowers, and sprinkled with crunchy salt flakes and a thin drizzle of olive oil.

We ate it on the porch steps, between two willowy hydrangea bushes fluttering with honeybees. After soaking up the last of the tomato juices from my plate with a heel of crusty bread, I sat there, toes in the sun, my heart filled with gratitude.

It was a weekend of perfect, quiet moments; a weekend of deep, clear breaths and introspective calm; a respite from the smog and the concrete, and an introduction to true farm-to-table living. Gwynne’s gardens and greenhouse are not only stunning, but also a testament to her commitment to real food. It’s thanks to dedicated people like her that we’re reminded of what food should look and taste like, and how something so seemingly simple – the flavour of a perfectly ripe tomato, for instance – can be profoundly enriching.

—–

If you’re interested in visiting the farm, Gwynne offers a variety of workshops – from sustainable gardening practices to stone-wall building. For details, you can visit the site here.

I hope autumn has been good to you, lovely readers. Be well, eat well xx

Stuffed Harvest Squash – serves 2 as a light main, with a side salad

    • 2 medium-sized squash (pattypan work quite well)
    • 1 small onion, finely chopped
    • 1 stalk celery, finely chopped (or 1/4 bulb of fennel)
    • 4-5 leaves of Swiss chard (stems on), finely chopped
    • 2-3 cloves garlic, minced
    • 1 can (or 1 ½ cups cooked) white cannellini beans, rinsed and drained
    • 1 tsp. fresh thyme (stems removed), chopped
    • 1/4 tsp. fresh sage, chopped
    • 1/4 tsp. chili flakes
    • salt and freshly ground pepper to taste

Directions:

1) Place the squash flat side down in a large pot. Add about 1 inch of water, cover, and bring to a boil. Cook for about 8 minutes, until a fork easily pierces the top of the squash. Remove from the pot and set aside to cool.

2) Preheat oven to 375° F. When cool enough to handle, slice off the top of the squash and scoop out the flesh (leaving a wall of about a 1/4-inch of flesh on all sides of the squash). Chop the scooped out flesh coarsely, and set aside.

3) Heat a glug of olive oil in a large skillet on medium-high heat and sauté the onions and celery for about 5 minutes until softened (but not browned); add garlic, diced squash, and remaining seasonings and cook for another 2 minutes. Add the white beans and cook on low heat for about 5 minutes, stirring from time to time.

4) Place the squash in an baking pan or dish. Spoon the stuffing into each shell, packing tightly (don’t worry about over-stuffing). Return the “caps” of the squash back on top and bake for about 20 minutes in the preheated (375° F) oven. Allow to cool for a couple of minutes before serving.

Note: if you have additional stuffing, let it cool, then pop it into the refrigerator. It’ll last a few days and might come in handy for weeknight dinners – reheated with a bit of oil and parmesan, tossed into pasta, or heated up and lightly mashed as a topping for toast.

stuffed squash

stuffed squash

stuffed squash

Share this:

  • Tweet
  • Share on Tumblr
Like Loading...

Mr. Van De’s Amaranth Leaves & Some Stupidly Delicious Noodles

20 Wednesday Aug 2014

Posted by julia chews the fat in Cooking For Your Peeps, Cooking Solo, Lunch & Dinner

≈ 4 Comments

Amaranth leavesIn case you’re wondering, these are amaranth leaves. They’re cultivated from a bushy, wild-looking super plant that grows grains, flowers and leafy greens. Until a couple of weekends ago, this would’ve looked like nothing more than a tousled mess of purple and green to me. But then I met a man by the name of Van De, who, amongst other things, taught me a thing or two about amaranth.

I’d like you to meet him.

Mr. Van De operates a small kiosk – two flip-out tables worth – at the Atwater food market. For the record, I’ll be quick to say that Atwater is not my go-to hunting ground for food. Demographic shifts have caused its products to become more expensive, fancier, chi chi. You can buy overpriced chutneys from England or artisanal squid-ink noodles from Sardinia or pineapples shipped all the way from Costa Rica. I’d much rather have rows of produce, piled high in front of ruddy vendors with dirt under their fingernails hawking their wares, and usually gravitate towards markets that are raucous and a little rough around the edges – places where you can hear belly-laughs and vendors yelling and old ladies bargaining; places where people of different colours, sizes and tax brackets mingle in the same space.

Ultimately, I’m there for the show as much as I’m there for the food.

In an ideal world, markets are places where you can also have a chat with the producers – the ones who’ve had their hands in the muck, so to speak. It might sound clichéed, but in my romantic ideals of what a good food market should be, its shining star is the producer who knows their product inside and out and is eager to cut you off a slice.

And this brings us back to Mr.Van De, because Van De is that kind of producer. It’s what makes him the MVP of Produce at the Atwater market – a place I rarely visit, until a few Sundays ago, when I had to pick up bread for a family get-together and Atwater was the closest spot. While I carefully dodged the droves of manicured ladies, I came across Van De’s little kiosk – his tables were laid out in front of a beat-up van with its doors flung open, exposing large vats of leafy produce. He’s literally selling stuff out of the back of his truck. Who IS this guy? I’d never seen him before, but I liked him already.

As it turns out, Van De specialises in Asian vegetables and sprouts, which he grows, without the use of pesticides, just 25 km outside the city. Stacks of bitter melon, pennywort, amaranth leaves, Vietnamese celery and watercress are laid out beside eachother in self-serve bins. It was like being at a candy store for grown-ups. When he saw me eyeing some bright green sprouts, he picked some out of the bin for me to try. Tenez, madame, essayez. Intensely bitter, but also nicely acidic and grassy, I later found out that out that they were rau đắng, an herb that looks like sunflower sprouts and is used mainly in Vietnamese soups and sautées. When I ask for small bag, he’s quick to inform me that they’re to be eaten in small quantities, preferably in the evening. This is a bit of a wink-wink, nod-nod moment, where he’s hoping I’ll catch his drift. But I don’t, and ask him why I have to be so careful. The word escapes him, so instead he begins gesticulating around his abdomen in a downward motion that can only be interpreted to mean that these tiny sprouts have powerful laxative properties. He looks me square in the eye, and with a wide grin asks, “Vous comprenez?” (Do you understand?). I nod appreciatively.

Mr. Van De – he looks out for you.

One additional advantage to Van De’s produce – the cherry on the sundae – is that it’s dirt cheap. I don’t remember exactly how much I paid for my sprouts and greens, but if I think it was something like 1$/100g. And when he saw how excited I was with all my new loot, he went to the back of his truck and returned with two generous handful of amaranth leaves, adding them into my bag free of charge. He didn’t say a word about it; he just smiled.

—–

That extra handful of amaranth leaves ended up in the recipe below, even if I knew nothing about amaranth before this chance meeting with Van De. I just thought they looked interesting (which, because I’m nuts, always seems like reason enough to buy a food item. Ask me about that time I bought that bulb of jicama that sat on my counter for two weeks). So once I got home, I wasn’t really sure what to do with them, aside from spending an inordinate amount of time ogling their purply-green complexion. Mr. Van De suggested adding them to a broth for a simple Vietnamese soup, or blanching them in salted water to serve as a side dish along with rice and meat, which sounded nice. But I remembered a Thai-style noodle recipe I’d had my eye on from Mandy Lee’s Lady and Pups. It’s basically a saucy, spicy noodle dish made with rendered pork fat, crispy pork belly, bits of browned chicken, fried shallots and a bunch of curry seasonings, bound together with coconut milk to create a flavourful, salty-sweet slurry. The recipe itself doesn’t call for amaranth leaves, but after tasting them and finding that they were a little like spinach (with a slightly deeper flavour), I figured it couldn’t hurt to toss in a few chopped leaves into the sauce.

This is the kind of food that makes you go back for seconds (or thirds…) even when you feel you’re about to burst at the midriff. It’s saucy, slurpy, addictive, diet-annihilating food. Don’t be surprised if you make involuntary grunting noises while shovelling every last bite into your gob. I suspect Mr. Van De would approve.

Khao-Soi-Style Noodles with Mr. Van De’s Amaranth Leaves – adapted from Lady and Pups

The rendered pork fat (makes for 2-3 servings – you can freeze any leftovers):

  • 130 grams of pork fat-slab (ask your butcher)
  • 4-5 shallots, finely sliced
  • 1 head of garlic, finely minced
  • 1/2 tsp of salt
  • 1/2 tsp of ground white pepper

The curry + noodles (for 1 large serving):

  • 1 large handfuls of dried rice vermicelli (thick-cut)
  • 2 tbsp of the reserved pork fat
  • 80 grams of ground chicken
  • 1 tbsp of Thai yellow curry paste
  • 3/4 cup of coconut milk
  • 1/4 cup of chicken stock
  • 1 tbsp of fish sauce
  • 2 tsp of soy sauce
  • 1 tsp of grated ginger
  • 1/2 tsp of sugar
  • 1/2 tsp of curry powder
  • 1/4 tsp of freshly ground black pepper
  • 1 tbsp of finely chopped cilantro
  • 1 handful of amaranth leaves, chopped (can be substituted with spinach)

The garnishes:

    • pork crackling + fried shallots/garlic (see recipe above)
    • handful of Thai basil, torn into pieces
    • lime wedges
    • sambal olek

Making the pork crackling + rendering the fat:  Freeze the pork fat-slab until hardened (2 hours +). Cut into small diced pieces. Set a non-stick skillet or wok over medium heat and cook the diced pork fat until it has rendered out all its fat and becomes crispy and golden browned. Drain it through a fine sieve over a bowl, collecting the rendered fat. Season the pork crackling with salt and white pepper.

Rendered bacon

Return the pork fat to the skillet (about 1/2 cup) over medium-low heat, and add the sliced shallots.  Stir frequently and fry the shallots slowly until they are dehydrated, and turn medium-golden browned (about 10 mins). Drain them through a fine sieve, over a bowl, again collecting the rendered fat.  Season the fried shallots with salt and white pepper.

Return the pork fat to the skillet over medium-low heat.  Now add the minced garlic and repeat the same process. Drain the garlic as soon as they turn lightly-golden browned (3 mins). Season with salt and white pepper, and mix the seasoned pork crackling, fried shallots and garlic together.  Reserve the pork fat.

To make the noodles:  Bring a large pot of water to boil for the vermicelli.

Heat 2 tbsp of the reserved pork fat in a pot over medium-high heat.  Brown the ground chicken, then add the Thai yellow curry paste and cook for about 30 seconds.  Add all the seasonings and turn the heat down to medium-low, and cook until the mixture has reduced a little and thickened slightly (about 5 mins).  Add the amaranth leaves (or spinach) and cook 1-2 minutes or until just wilted (they will reduce substantially in size). Add the chopped cilantro and stir to combine.

Curry

Cook the vermicelli according to package-instructions. Rinse the noodles under cold water and drain well. Transfer to the pan with the curry mixture (which is still on medium-low heat). Toss to coat the noodles with the sauce and heat through.

Cooking noodles

Top with 3 tbsp of the pork crackling + fried shallots/garlic and torn Thai basil leaves.  Squeeze lime over all of it, stir, and shove generous forkfuls (or chopstickfuls) into your mouth.

Spicy noodles

Share this:

  • Tweet
  • Share on Tumblr
Like Loading...

Spring Rolls for Heat Waves

02 Wednesday Jul 2014

Posted by julia chews the fat in Lunch & Dinner, The Basics, Vegetarian

≈ Leave a comment

I’m currently sitting at my dining room table, curtains drawn, lights out, with a large jug of iced water by my side and a rotating fan positioned a few short inches from my face. I’ve had three cold showers today and I’m already contemplating a fourth. With the sweltering, muggy heat comes headaches, waves of nausea and the pungent stench of street garbage wafting through the nearest open window. Summer in this city takes no prisoners. No pool? No air-conditioning? You can kiss your good night’s sleep goodbye, along with your desire to do anything else other than spreading out like a starfish on top of your bedsheets with an ice-cold wash cloth draped across your face.

Underwear, of course, is totally optional.

Since there’s no possible way I’m turning on the oven, or boiling or braising anything on a day like today, dinner options will have to be cold and raw, light and fast. Salads can often do the trick, but they can get boring fast and sometimes don’t feel substantial enough. Which brings me to –

SPRING

ROLLS.

Composed of paper-thin rice wrappers filled with crunchy vegetables and cool rice noodles, spring rolls only require very minimal cooking – the vermicelli cook in under three minutes and the rice paper wrappers can be softened with tepid water. All the remaining ingredients can go in raw. The only exception is the sauce, which requires some minor sautéeing. But let me tell you, this sauce is well worth the two minutes you’ll spend next to the stove top. In other words, you can fill your spring rolls with whatever you like, but DO NOT SKIP THE SAUCE. Trust me on this one. You can thank me later when you find yourself using your index finger like a spatula to collect every last drop at the bottom of the bowl.

Spring Rolls with Spicy Cashew Dipping Sauce (serves 4 as a light dinner) – adapted from Sprouted Kitchen

Spring roll filling options:

    • 2 carrots, julienned
    • 1 cucumber, julienned
    • 1 avocado, sliced
    • 1 cup sliced red cabbage
    • cooked vermicelli noodles or sticky rice
    • rice paper wrappers (16 small or 8 large)
    • handful of lettuce and/or sunflower sprouts
    • handful of cilantro and/or mint and/or Thai basil leaves

For the dipping sauce:

      • 1 clove garlic, minced
      • 1/3 cup unsweetened cashew butter
      • 1/2 tbsp mirin sauce (can be substituted with agave nectar)
      • 1/2 tsp tamari or soy sauce
      • 1/4 tsp chili flakes
      • juice of one lime
      • vegetable oil
      • water, as needed

Note: these are just guidelines; feel free to adjust the seasonings to suit your taste

Assembly

Boil about 2 cups of water in a tea kettle. While the water cools, start laying all the fillings on a platter.

To make the sauce: begin by heating a glug of vegetable oil to a frying pan on medium-high heat. Once the oil is hot (but not smoking) add the garlic and fry until fragrant (about 30 seconds). Add the chili flakes and fry another 20 seconds or so, taking care not to burn the garlic and chili. Reduce heat to medium-low and add the cashew butter, mirin, tamari and whisk together, adding water one tablespoon at a time until it is thin enough to be used as a dipping sauce. Add the lime juice and whisk to combine. Adjust seasonings if needed. Serve warm with the rolls.

To assemble: pour the water from the kettle (it should be tepid now) into a large, flat bowl. Lay one rice paper wrapper at a time in the water and allow to soak for about 20 seconds to soften. Transfer to a clean, damp dish towel and begin layering the ingredients in the centre of the wrapper, starting with the lettuce, then the noodles or rice, then the veg, then the herbs. Leave a bit of room at the bottom for wrapping, but feel free to allow the veg to stick out at the top. Fold the bottom of the wrapper upwards, toward the centre, roll the left flap snugly over all the filling an continue rolling until you’ve arrived at something that resembles a spring roll. Repeat with remaining wrappers and fillings.

fillings

assembly

assembly

finished spring rolls

Share this:

  • Tweet
  • Share on Tumblr
Like Loading...

Existentialist Salad (with Avocado)

29 Thursday May 2014

Posted by julia chews the fat in Cooking For Your Peeps, Lunch & Dinner, Vegetarian

≈ 6 Comments

This is officially my fifth attempt at writing this post. One of those included a few scribbles in a notepad on a shaky bus ride to work and another on a 7-hour train ride from Toronto. On my way to Toronto, I happened to be sitting next to stranger who took the opportunity to regale me with stories of her physical ailments and the personal details of her extended family, all while four babies (yes, I counted) under the age of one melted into a vortex of ear-splitting cries.

It was far from the ideal environment to write anything, save a desperate prayer or a haiku of swear words. But on the way back from Toronto, I had no excuse – there were no talkative strangers, or babies to contend with. Just me and a large train window from which to gaze at grassy fields, cows and a slow-burning sunset. You’d think this would’ve been the perfect setting to spill words onto a page. And yet. And yet.

I brought a pen and a notepad, with the specific intention of writing this post. But both sat undisturbed on my lap for the entire ride. Somehow the farm animals and dewy hillsides invited a stream of thoughts – BIG thoughts – about authenticity, purpose, love, change, the absurdity of things. The usual existential merry-go-round. At some point in time, I’m sure you’ve had (or will have!) the pleasure of whirling around on that ride too. As you can imagine, none of this led to me wanting to write about food. It did, somehow, make me want to eat an entire bag of Party Mix from the refreshment trolley somewhere between Brockville and Cornwall. Which I did. Because I’m not Gwyneth Paltrow.

Truthfully, there’s been a lot on my mind lately, and by 9pm on most nights, I feel like my skull is bathing in molasses. Before I turn off the computer and shuffle toward the bedroom door, there’s a little something I’d like to leave you with, involving some black rice and a technicolor dreamcoat of vegetables. There’s no particular story behind it. No rhyme or reason for why it was made or for whom. It was last-minute, unplanned and delicious. It may actually one of the best things I’ve made in the last little while, which is why I’m here sharing it with you. Times like these, it feels nice to put a little food-love out there. I hope you’ll catch it with both hands.

xx

(Existentialist) Black Rice Salad with Avocado and Spring Vegetables – adapted from Heartbeet Kitchen

Ingredients

Serves 5-6 as a side

1 cup dry black rice (about 3 cups of cooked rice)
3 1/2 cups of water
½ teaspoon kosher salt
1 heaping cup of asparagus, cup on the diagonal
1 cup thinly sliced purple cabbage
¾ cup radishes, thinly slices
1 large avocado, sliced

Dressing:
1 1/2 tablespoons white wine (or white balsamic) vinegar
1 tablespoon honey
1 teaspoon Dijon mustard
1 clove garlic, minced
a few chives, minced
1/2 teaspoon salt
1/3 cup extra virgin olive oil

Ingredients - detail

radishcabbage

chivesTo make the dressing: whisk together all of the ingredients in a small bowl (alternately, put all the ingredients in a jar and shake until emulsified). Set aside.

To make the rice: bring water to a boil in a medium sized pot. Rinse rice thoroughly, then empty into boiling water with ½ teaspoon of salt. Turn heat down to a simmer, cover pot, and cook for about 30 minutes, stirring occasionally until grains are al dente.

To prep the asparagus: prepare an ice bath – fill a medium-sized bowl with cold water and several ice cubes. Set aside. Fill a pan with a bit of water (about an inch). Bring to a boil and toss in the asparagus. Allow to blanch for about 1 minute, remove the asparagus from the water and place them to cool in the ice bath.

asparagus - detail

chilling asparagusPlace the rice, cabbage, radish and asparagus in a large bowl. Stir in the dressing to coat. Spoon out onto a serving platter and top with avocado slices and a sprinkle of salt flakes and freshly ground black pepper.

salad

salad - detail

Share this:

  • Tweet
  • Share on Tumblr
Like Loading...

Spring Cleaning

30 Wednesday Apr 2014

Posted by julia chews the fat in Lunch & Dinner, Vegetarian

≈ Leave a comment

The first few clusters of crocus flowers have appeared. The geese are back. So are the overly-eager short-wearers. Which, by default, means that it’s officially spring around here. Eschewing the cautionary proverb, “En avril ne te découvre pas d’un fil“, the population of this town have started to appear in droves on outdoor terrasses – drinking beer, eating brunch, or whatever else they can get their hands on, so long as it’s outside, tabarnak. Some wear tank tops, others wear jackets. At this time of year, it’s a bit of a free-for-all. Vestimentary choices are varied and incongruous, providing a reliable source of entertainment for onlookers. I might still have the heat on in my apartment, but there was a girl at the bus stop this morning in booty shorts.

Oui, un vrai free-for-all.

As annual tradition dictates, we might be a bit early in peeling off the layers, but having been deprived of heat and daylight for an infernally long winter, we’ve gotten antsy. Pants-on-fire antsy. Everyone wants to lay claim to spring (it’s mine, it’s mine…and you can’t take it awaaaay!) and for some of us, that means wearing booty shorts the first day the mercury hits the double digits. For others, it means kicking back on a patio, despite frosty extremities. And for the rest of us boring people, it means that it’s time for some serious spring cleaning – that kind of no-turning-back deep clean that requires gloves, scrub brushes, elbow grease and dogged commitment.

It might not sound like fun to you, but I’m actually really into spring cleaning. It gives me a chance to start from scratch and shed the winter cocoon. Of specific interest to me is (surprise, surprise) the kitchen, where I’m liable to tear apart the fridge, freezer and pantry in one fell swoop. It’s a full-day endeavour that I usually tackle in the (ultra-sexy) uniform of baggy leggings and an old t-shirt, with some Harry Belafonte playing in the background. The part I most look forward to – aside from the Belafonte – is going through my pantry: cleaning it out, doing the triage, making a list of new things to buy, and re-stocking it. I’ve always been a sucker for a well-stocked pantry, which is why I relish opportunities like these. Spending a breezy Sunday drinking coffee, listening to some tunes, all while excavating and reorganizing the contents of my cupboard like a game of dried-goods Tetris? Sign me up.

It’s amazing (er, terrifying?) how much this seemingly mundane activity brings me so much joy. In rediscovering the items I have stowed away (I have tamarind paste??) and in anticipating the new things I’ll soon acquire (miso! buckwheat flour! Valrhona chocolate!), I get really, really, stupidly excited. (For this – and, other reasons – I’m fairly certain I have an octogenarian living inside me. But that’s ok, because at least we both like marmalade. And I’ve usually got a jar hanging out at the back of the pantry.)

When it’s all said and done, I think the most important offshoot of re-stocking the pantry is that it renews my interest in cooking. This is especially true when things seem to have fallen in a slump (a failed attempt at a “healthy” banana bread and a tasteless celeriac soup are two of the latest hapless items to come out of my kitchen. Just be glad you weren’t around for those). Refreshing the spice rack is a central part of the pantry renaissance, as most dried herbs and spices tend to lose their potency within 6 months of purchase, if not before. If you’re into cooking, it’s crucial to keep things moving in your spice rack by switching out the old for the new every few months. Because, let’s be honest, the last thing you want is to spend all that time prepping an elaborate curry, only to discover that tastes like sawdust.

I’m partial to buying spices in bulk, rather than the stuff in the little bags or jars at the supermarket, because a) the spices are usually fresher; b) they’re usually cheaper; c) it allows me to buy the quantity I want, which in turn means I can buy in small quantities, often; and d) I get to peruse the Middle-Eastern shop around the corner and talk to my Iraqi spice guy, who is a total pro when it comes to this kind of stuff.

Below you’ll find two recipes made with a recently acquired batch of spices – cumin, coriander, turmeric, cinnamon, paprika, cayenne and ground ginger. They might seem like wintery recipes, but given that I’m less optimistic about the weather than my fellow booty-shorts-wearing commuter, I’m banking on a few more cool, rainy days ahead. Days for when sweet potato soup and cumin-spiced salad might just fit the bill.

Happy spring to you all.

Sweet Potato Soup

Sweet Potato Soup with Curried Chickpeas (4-5 servings) – inspired from My New Roots

For the soup:

  • 2 large sweet potatoes
  • 1 large yellow onion
  • 8 cloves garlic
  • 2 tsp. coconut oil, plus olive oil for garnish
  • 1 tsp. both sea salt and cracked black pepper
  • 3-4 cups vegetable broth
  • 2 tsp. ground turmeric
  • leaves of a couple sprigs of thyme, chopped

1) Preheat oven to 400°F.

2) Peel and cube the sweet potatoes and place on a baking sheet. Peel and cut onions into quarters, add to baking sheet. Peel whole cloves of garlic and add to baking sheet. Drizzle with melted coconut oil and toss well to coat. Sprinkle with sea salt and freshly ground black pepper. Place in oven and roast for approximately 30 minutes until the sweet potato is tender and the garlic is golden.

3) Put the roasted vegetables in a large soup pot. Add the vegetable broth, turmeric and add the finely chopped thyme. Carefully add the roasted vegetables and blend on high until completely smooth (let blender run for a minute or so). If the soup is too thick, add more broth to thin to desired consistency. Season to taste.

4) Pour soup into bowls and serve with a sprinkling of chickpea croutons and a drizzle of olive oil. If necessary, pour into a large pot to reheat if necessary. Keeps for 3 days in the fridge. Freezes well.

For the Chickpeas:

  • 3 cups (2 cans) cooked chickpeas – drained and rinsed
  • 3 Tbsp. coconut oil
  • 1 tsp. coarse sea salt
  • 1 tsp. freshly ground black pepper
  • 2 tsp. ground cumin
  • 2 tsp. smoked paprika

1) Preheat oven to 400°F

2) Spread chickpeas out on a clean tea towel and rub them dry, discarding any loose skins. Place the chickpeas in a medium bowl and toss with coconut oil, seasoning and spices until coated.

3) Spread the chickpeas on a large rimmed baking sheet lined with parchment paper and roast, stirring occasionally, until golden and crisp. This takes about 25-35 minutes. Please note that the chickpeas will crisp up outside of the oven quite a bit, so if they are still a little soft when you take them out of the oven, that is okay.

4) Remove from the oven. Let cool, and serve at room temperature. Store in an airtight glass container for up to one week.

Sweet potato soup - detail

Cumin-Spiced Carrot Salad with Black Beluga Lentils (serves 4) – adapted from Sarah Britton on Whole Living

Ingredients:

  • 1 cup black (beluga) lentils
  • 2-3 large carrots
  • 1 shallot, minced
  • 6 prunes, chopped
  • ½ cup cilantro, chopped

Dressing:

  • 1 Tbsp. cumin seeds
  • ¼ tsp. cinnamon
  • ¼ tsp. ground ginger
  • ¼ tsp. smoked paprika
  • ¼ tsp. ground coriander
  • pinch of cayenne or chili flakes
  • 1 Tbsp. freshly-squeezed lemon juice
  • 1 tsp. honey
  • 3 Tbsp olive oil
  • pinch of sea salt

Carrot Marinade:

  • 1 Tbsp. freshly squeezed lemon juice
  • 2 Tbsp. freshly squeezed orange juice
  • pinch of salt
  • bay leaf (optional)
  • smashed clove of garlic

Carrot Salad

Directions:

1) Whisk the carrot marinade together in large bowl.  Wash the carrots and using a peeler, peel long strips and place in the bowl with the marinade. Set aside and allow to marinate while preparing the other ingredients for the salad.

2) Since lentils don’t require soaking, you can cook them straight away. First, rinse the lentils in a colander, swishing them around with your fingers, then put them in a pot and cover with 2 cups of water (you may want to add more water, just check in from time to time as they cook). Add the bay leaf and garlic. Add a pinch of salt (this will slow the cooking process, but they’ll be more flavourful).

3) Cover the lentils and bring them to a simmer. Continue to cook them over low heat, stirring occasionally just until al dente (about 20 minutes). Drain and lightly rinse.

4) While the lentils are cooking, make the dressing: toast the cumin seeds in a dry skillet over medium-high heat until fragrant. Remove from heat and using a mortar and pestle, give the seeds a rough grind. Add all remaining dressing ingredients and whisk together.

5) Add the warm lentils and marinated carrots, including any leftover marinade.  Add the sliced prunes, shallot and cilantro. Season to taste and serve.

Carrot Salad - detail

Share this:

  • Tweet
  • Share on Tumblr
Like Loading...
← Older posts
Newer posts →

Facebook

Facebook

Instagram

No Instagram images were found.

Recent Posts

  • Layers and Rows
  • Finding Buoyancy
  • February
  • Wednesday
  • Cross My Heart, Miso

Archives

  • May 2017
  • April 2017
  • February 2017
  • December 2016
  • November 2016
  • September 2016
  • August 2016
  • July 2016
  • June 2016
  • May 2016
  • April 2016
  • March 2016
  • February 2016
  • January 2016
  • December 2015
  • November 2015
  • October 2015
  • September 2015
  • August 2015
  • July 2015
  • June 2015
  • May 2015
  • April 2015
  • March 2015
  • February 2015
  • January 2015
  • December 2014
  • November 2014
  • October 2014
  • September 2014
  • August 2014
  • July 2014
  • June 2014
  • May 2014
  • April 2014
  • March 2014
  • February 2014
  • January 2014
  • December 2013
  • October 2013
  • September 2013
  • August 2013
  • July 2013
  • June 2013
  • May 2013
  • April 2013
  • March 2013
  • February 2013
  • January 2013
  • December 2012
  • November 2012
  • October 2012
  • September 2012
  • August 2012
  • July 2012
  • June 2012
  • May 2012
  • April 2012
  • March 2012
  • February 2012

Categories

  • Beverage
  • Breakfast & Brunch
  • Condiments
  • Cooking For Your Peeps
  • Cooking Solo
  • Cooking with Nonna
  • Food Away From Home
  • Food Writing
  • Holidays
  • Intro
  • Lunch & Dinner
  • Snacking
  • Soups
  • Sweet Tooth
  • The Basics
  • Vegetarian

Enter your email address to follow this blog and receive notifications of new posts by email.

Join 82 other subscribers

Blog at WordPress.com.

  • Subscribe Subscribed
    • julia chews the fat
    • Join 82 other subscribers
    • Already have a WordPress.com account? Log in now.
    • julia chews the fat
    • Subscribe Subscribed
    • Sign up
    • Log in
    • Report this content
    • View site in Reader
    • Manage subscriptions
    • Collapse this bar
 

Loading Comments...
 

    %d